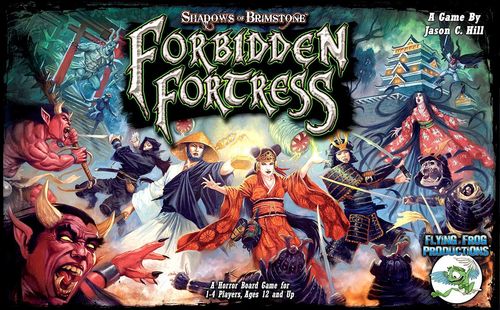
Shadows of Brimstone: Forbidden Fortress
Shadows of Brimstone: Forbidden Fortress Rulebook
Table of Contents
Table of Contents
Game Overview
Shadows of Brimstone: Forbidden Fortress is a fast-paced, Cooperative, dungeon-crawl boardgame set in war-torn Feudal Japan, and mixed with Unspeakable Horror! Each player creates a character, taking on the role of a classic Japanese Archetype, such as a Samurai Warrior, Traveling Monk, ninja Assassin, or Sorceress. Forming a party of Heroes, the players take their characters deep into the castles and temples that have been demonically overrun by creatures of myth and legend. The Heroes can embark on a variety of different missions, from finding and sealing a gateway to another world, to rescuing a local Warlord's son who was hauled off in the night by a horrible creature. The Heroes explore a dynamically generated fortress, overcoming dangerous encounters and fighting savage creatures, while collecting up useful Gear and ancient Artifacts to help them during their adventures. Heroes can even find portals to other worlds, stepping through to continue their adventure on the other side.
Hero characters can be kept from game to game in a campaign system, earning experience and going up in levels to increase their skills and gain new abilities. The Heroes can also visit local Feudal Villages between adventures, spending their hard-earned loot and re-supplying for the next mission.
So draw your swords, strap on your Samurai Armor, and gather the party, the Darkness is coming, and the gates of hell are about to break... in the Forbidden Fortress!
Players
Shadows of Brimstone: Forbidden Fortress is a fully cooperative game for 1-4 players. If combining this Core Set with another Core Set or the Temple of Shadows Expansion, this can be increased to 5-6 players. All of the players work together against the game itself and the difficulty is scaled based on the number of Heroes taking part in an adventure.
Game Contents
- 1 Rulebook (40 pages)
- 1 Adventure Book (64 pages)
- 8 Small White Dice
- 8 Small Red Dice
- 1 Eight-Sided Die
- 1 Peril Die
- 1 Entrance Map Tile
- 8 Unique Room Map Tiles
- 4 Standard Room Map Tiles
- 9 Passage Map Tiles
- 14 End Cap Map Tiles
- 4 Gate End Cap Map Tiles
- 4 Plastic Hero Figures
- 6 Plastic Acidic Tentacles
- 6 Plastic Dishonored Dead
- 6 Plastic Tengu
- 3 Large Plastic Oni
- 1 Large Plastic Harionago
- 1 XL Plastic Living Statue
- 4 Hero Character Sheets
- 7 Enemy Record Sheets
- 9 Extra Large Reference Cards
- 18 Fortress Map Cards
- 24 Gear Cards
- 18 Fortress Artifact Cards
- 20 Fortress Encounter Cards
- 6 Low Threat Cards
- 7 Med Threat Cards
- 7 High Threat Cards
Game Components
Dice
The game comes with 16 standard six-sided dice (8 White and 8 Red) that should be divided amongst the players. There are two colors of dice included with the intent that the Red dice can be used for Enemy attacks and the White dice for the Heroes' rolls. Often cards will refer to the terms D6 and D3. D6 is just another name for a six-sided die. D3 means to roll a six-sided die and consult the following chart:
| D6 Roll | Result |
|---|---|
| 1–2 | 1 |
| 3–4 | 2 |
| 5–6 | 3 |
Re-rolls
There are many things in the game that let you Re-roll one or more dice. It is important to note though that:
You may not Re-roll the same die more than once.
8-Sided Die
The game also comes with an 8-sided die which is used for some special rolls. This die is often referred to as a D8.
The Peril Die
There is also a larger, special six-sided die included called the Peril Die. This die is marked with the numbers 3, 3, 4, 4, 5, 6. It is most often used for determining the quantity of Enemies during an attack, and is represented on cards as a peril die symbol.
Wounds and Sanity Damage
Red Wound Markers are placed on Heroes and Enemies to keep track of how much damage they have taken during the game, while blue Sanity markers are placed on Heroes to show how much Sanity Damage they have taken. There are individual Wound/Sanity Markers as well as larger markers representing 5 Wounds/Sanity each.
Ability Tokens
Some Heroes use special Ability Tokens to trigger their more powerful abilities like casting Elemental Magik or using Samurai Battle Tactics.
Dark Stone
These markers are used to keep track of Dark Stone shards that Heroes find on their adventures.
Grit
Grit is a resource that Heroes have that can be used for Re-rolling dice, activating special abilities, or adding a burst of speed to your movement.
Corruption
During the game, Heroes can gain Corruption Points, slowly pushing them down the path of evil and mutation.
Bleeding Markers
These markers represent the ongoing effect of being badly injured and bleeding. They are placed on a model, reducing its total Health by 3, until removed by spending a Grit.
Poison Markers
These markers represent the ongoing effects of being poisoned.
Exploration Tokens
These markers are placed face down in new rooms discovered as the Heroes explore and, when revealed, tell the number of exits a room has as well as if there are any Encounters or Enemies to be overcome there. Some also have a Clue Icon.
Side Bag Tokens
Each Hero has a Side Bag that can carry helpful Tokens for them such as Bandages, Sake, or Bombs.
Scavenged Markers
These markers are used to show when a Map Tile has been successfully Scavenged by the Heroes for anything of value.
Revive Tokens
These tokens are occasionally used to give Heroes an extra chance at survival, allowing a Hero that was just KO'd to get back up without long-lasting effects.
Corpse Tokens
These tokens are used to mark undead bodies on the board that can rise back up to fight the Heroes.
Acid Blobs
Acid Blobs are a type of Enemy that can be found inside the Belly of the Beast OtherWorld.
Depth Track
The Depth Track is used to show how far into the fortress the Heroes have ventured as well as showing the progression of the Darkness as it grows in power and gets closer to escaping the fortress, causing defeat for the Heroes.
Darkness Marker
This marks the current position of the Darkness on the Depth Track and moves up the track over the course of the game, as the Darkness tries to escape the fortress!
Hero Party Marker
This marks the current position of the Heroes on the Depth Track and moves down the track as the Heroes explore the fortress.
Additional Counters
Several additional counters have been provided. Most of these are not needed for the main game but can be used for house rules or future official content.
XP and Gold
XP and Gold are only needed when keeping Heroes from one Adventure to the next, and are gathered in large quantities, so no counters are included for them. Instead, it is recommended that players track their XP and Gold by keeping a running total of each on a piece of paper.
Figures and Bases
Forbidden Fortress comes with a variety of miniatures to represent the Heroes and Enemies for the game, as well as plastic bases to mount them on. A full listing of the figures, which size base they should be on, and how to assemble them can be found on the large assembly sheet in the box.
Forbidden Fortress CD Soundtrack
Shadows of Brimstone: Forbidden Fortress comes with its own CD Soundtrack of original music to listen to while you play the game. It does not affect gameplay, but enhances the experience by setting the mood and immersing the players in the game.
Cards
There are many different decks of cards in the game that are used for everything from dynamically generating the fortress as you explore it, to the Enemies you encounter, to the cool Gear and Artifacts you find along the way.
Keywords
Most cards have Keywords associated with them, listed just below the title of the card. The Keywords usually do not have any inherent meaning, but are occasionally referenced by other cards and rules.
Icons
Many cards contain icons that represent various aspects of the card. A full list of these icons can be found on the Reference Summary at the back of this Rulebook.
Remains in Play
Some cards are listed as Remains in Play. As it sounds, these cards stay in play and continue to affect the game until they are canceled in some way.
Discard Piles
For each deck of cards in the game there will also be a discard pile. The discard pile should be formed face up next to the deck and is where cards from that deck go when they have been used and are no longer in play. Any player may look through any discard pile at any time. If any deck ever runs out of cards, shuffle the discard pile thoroughly and reform the deck face down.
Some of the card decks (such as Loot and Scavenge cards) do not have discard piles, but rather are fully shuffled every time one or more cards need to be drawn.
Card Types
Gear and Artifacts
Gear and Artifact cards are special equipment and relics that the Heroes can find while exploring a fortress. They represent everything from common items like hats or bandages to ancient alien artifacts and occult books of lore! When found, these cards stay with the Hero and give them the bonuses listed on the card.
Starting Gear and Personal Items
Every Hero Class starts with specific Starting Gear cards listed on their Hero Character Sheet. They also draw a single Personal Item to give them an extra bonus and help define their personality and backstory a bit more.
Hero Starting Upgrades
Each Hero Class also has a set of three unique Starting Upgrades that they get to choose from. This helps players to start customizing their Hero character right from the beginning.
Map Cards
The Map Deck is used to randomly generate the Fortress as the Heroes explore. This allows every Fortress layout to be different. There is one Map card to represent each Map Tile in the game.
Darkness Cards
Powerful bonuses for the Darkness, these cards cause surprise Attacks and boost the power level of the Enemies over the course of the game. Many Darkness cards are marked as Remains in Play, staying on the table and having a long-lasting effect.
Encounters
These cards represent all manner of situations that the Heroes can find themselves in while exploring a fortress. They include everything from massive statues or broken barricades to having a run-in with a dying guard or ghostly apparition.
Threat Cards
When the Heroes are attacked, drawing a Threat card tells you what types of Enemies and how many are involved. There are 3 different Threat Decks that are scaled for the number of Heroes playing, as well as Epic Threats for major Fights.
Loot
Loot cards are used to generate the rewards that Heroes get for winning a Fight or overcoming certain Encounters. Unlike most decks, the Loot Deck has no discard pile and is fully shuffled before each draw.
Growing Dread
These cards are a representation of the unspeakable horrors that await the Heroes as the Darkness grows in power. They are usually collected over the course of the game, but not revealed until the final Fight.
World Cards
These cards are used as reference for the global effects of the world the Heroes are currently in as well as to draw a random World when the Heroes find a Gate.
Scavenge
Scavenge cards are used to determine what a Hero finds when they Scavenge a Map Tile for anything useful. Much like the Loot Deck, the Scavenge Deck has no discard pile and is fully shuffled before each draw.
OtherWorld Decks
The Forbidden Fortress Core Set has all of the cards needed for venturing into the Belly of the Beast OtherWorld. There are Other World specific decks for Artifacts, Encounters, Passage Encounters, Map Cards, and Threats only found while exploring the living environment.
Special Decks
There are several small card decks that are used for particular Hero Classes or Enemy Types. These include decks like Elemental Magik, Samurai Battle Tactics, Ninja Clans, and more.
Reference Charts
These large Charts show the information for Feudal Villages you can travel to between adventures, including the various Town Locations you can visit, as well as an overhead Town Map, and charts for Depth Events, Injuries, and Madness.
Large Cards
In addition to the regular-sized card decks, there are several large Charts and Record Sheets, displaying the Hero Classes players can choose from, Enemies that you will face, and various charts for use on your adventures and while visiting Feudal Villages between missions.
Hero Character Sheets
There are four large Hero Character Sheets, each detailing the stats and abilities of a Hero Class that a player can choose to play. These Character Sheets have a Male portrait on one side and a Female portrait on the other, so players can choose the gender of their Hero.
Enemy Record Sheets
There are also several double-sided Enemy Record Sheets showing the stats and abilities of the various Enemies that the Heroes might run into on their Adventures. These Record Sheets have the normal version of the Enemy on one side (green) and the higher level, Brutal version of that Enemy on the back (red).
Map Tiles
The game board is made up of a collection of Map Tiles that hook together with puzzle style connections. There are two main types of Map Tiles, Rooms and Passages (corridors that connect the Rooms). There are also small End Cap pieces for blocking off Room exits that are not Doors and Gate End Caps for when the Heroes find a portal to another world! End Caps and Gates are not considered full Map Tiles, they simply cap off the Map Tile they are attached to.
All Map Tiles are double-sided and have the Fortress on one side and an OtherWorld on the other side.
A Grid of squares is printed on the Map Tiles and this is used for the placement and moving of models during gameplay. Note that at every puzzle connection on a Map Tile, there are two half spaces. When another Map Tile (or End Cap) is connected, this adds the other half of the two spaces, creating complete grid spaces, with half on each of the two Map Tiles.
For game purposes, a model that occupies one of these half-and-half grid spaces on a puzzle connection counts as being on BOTH Map Tiles.
Hero Characters
Each player must choose what type of classic Feudal Japanese Hero they want to play. These different Hero 'types' are called Classes. There are four different Hero Classes to choose from included in this Core Set, and each Hero Class has a unique Character Sheet with all of its basic Skills, Abilities, and Starting Gear listed on it. Each specific Hero Class is covered in greater detail on pages 8 and 9. Below is a list of the different elements of a Hero Character Sheet.
A) Hero Class — A character's Hero Class is the Feudal Japanese archetype that the character falls into and is the main thematic defining factor for their Skills and Abilities.
B) Keywords — A Hero's Keywords are traits of that character. They do not have any inherent meaning, but are referenced by other cards and Abilities (often as restrictions for certain Items).
C) 'To Hit' Values — What the Hero needs to roll on their dice to hit Enemies when making an Attack. There are two different To Hit values, one for Ranged Attacks and one for Melee Attacks.
D) Combat — The base number of dice that the Hero gets to roll when making a Melee Attack, even if they have no weapons.
E) Max Grit — The max number of Grit the Hero can have at one time.
F) Skill Attributes — There are 6 different Skills that every Hero has, Agility, Cunning, Spirit, Strength, Lore, and Luck. These Skills are used for making tests during the game.
G) Initiative — Initiative determines how quick a character is and how early in the turn they get to Activate. Each turn models are Activated in Initiative order, from highest to lowest.
H) Abilities — Every Hero Class has one or more special Abilities that are an important part of being that Hero Class. These Abilities are not always beneficial, but fundamentally effect how the Hero plays.
I) Starting Items — Gear that any character of that Hero Class always starts their adventuring career with.
J) Health — A representation of the Hero's physical well being. Health is reduced by taking Wounds. If your Health is ever reduced to 0, you are KO'd.
K) Defense — Any time the Hero takes one or more Hits, they may use their Defense as a saving roll against each Hit to prevent taking Wounds.
L) Sanity — Sanity is just like Health, but for the Hero's mental well being. Sanity is reduced by taking Sanity Damage. Just like Health, if your Sanity ever reaches 0, you are KO'd.
M) Willpower — Just like Defense is to Health, Willpower is a saving roll for Sanity to prevent taking Sanity Damage or Corruption.
Grit
Grit is a resource that represents a Hero's ability to tough out difficult situations and pull off amazing feats; dodging a fatal blow at the last minute, scoring a particularly difficult hit, or activating a powerful special ability to save the day. In short, it allows Heroes to be heroic! Every Hero has Grit (they wouldn't be much of a Hero without it).
Using Grit
A Hero may use a Grit to do one of three things:
- Use 1 Grit to Re-roll any number of dice that your Hero just rolled.
- Use 1 Grit to add an extra D6 to your Hero's Movement.
- Use Grit to activate a Special Ability or Item that requires it.
Re-roll Limits
Grit can be very useful for Re-rolling dice when you need to, but it is important to remember that no single die may ever be Re-rolled more than once. So, for example, you CANNOT Re-roll all of your misses with a Grit, and then use an ability or spend another Grit to Re-roll the ones that still missed.
Grit may only be used to Re-roll dice that have been rolled for your Hero (not other Heroes, Enemies, etc).
In Addition, Grit may not be used on any roll on a Chart or the roll to Hold Back the Darkness (more on that later).
Recovering Grit
Grit is a very powerful resource, but is limited. Each Hero starts every Mission with 1 Grit, but more can be gained throughout the Adventure. The most common way to Recover a Grit is by rolling a 1 for your Move roll. This is covered in greater detail later in the section on Hero Activation.
Max Grit
Every Hero Class has a Max Grit listed on their Character Sheet. This is generally Max Grit 2 for most new Heroes. Max Grit is simply the most Grit your Hero can have at one time.
If you are already at your Max Grit and you would get to Recover a Grit, though you can't hold onto it, you are allowed to immediately spend that new Grit instead of just losing it. This is most often used to activate an ability that costs Grit or to gain the extra D6 to your Move for the turn.
Ability Tokens
The term Ability Token is used to refer to any of the various special tokens used by Hero Classes to trigger their unique abilities. This includes Tokens such as Fury, Ki, or Mana. The specific use of each type of Ability Token is covered in the special rules for the individual Hero Class that uses them.
Creating a New Hero
Creating a new Hero is fast and easy. It is often just as fun to start a fresh new Hero as it is to keep one Hero from game to game, over a series of Adventures. To create a new Hero, just follow these simple steps:
Choose Hero Class
The most important choice for a new Hero is what Hero Class you want to play. Each Hero Class has its own unique stats and Abilities, and a fairly different play style. Choose which Hero Class your new Hero will be. If you are new to the game, each different Hero Class in this Core Set is described below on pages 8 and 9.
Get Starting Items
Every Hero Class has a small list of Starting Items printed on their Character Sheet that they get for free. Find these Items for your Hero amongst the Starting Gear cards. It is important to note that, in many ways, the Starting Gear of a Hero is just as important a factor as their Abilities and stats. Note that Heroes may NOT trade or give their Starting Items to other Heroes.
Draw a Personal Item
Every Hero starts their adventuring career with one Personal Item that not only gives them a powerful bonus, but can help to define the backstory of that Hero. Draw one Personal Item card for your Hero.
Choose Your Starting Upgrade
When creating a brand new Hero you get to choose one of the three Hero Starting Upgrades available to your Hero Class. This is one of three unique abilities that helps to define your Hero right from the beginning. Choose wisely though as the two Upgrades you don't pick will not be available later.
Select Any Class Specific Cards
Some Hero Classes allow you to draw special cards that are unique to that Class, as noted on the Hero Character Sheet (such as Spells or Battle Tactics). The Core Set Hero Classes are covered in greater detail below.
Get a Side Bag and Free Token
Take a Side Bag card for your Hero. Every Hero has a Side Bag that can hold up to 5 Tokens in it. A New Hero also gets to choose one Token to start with for free. Choose from Sake, Bandages, Bomb, or Tonic.
Name Your Hero
Lastly, you should choose a fitting name for your Hero. And pick something good, you never know if that name will become legendary throughout the world!
Forbidden Fortress Hero Classes
There are 4 unique Hero Classes to play in the Forbidden Fortress Core Set - the Samurai Warrior, Assassin, Traveling Monk, and Sorceress. Each Class of Hero has their own set of abilities and equipment, as well as their own strengths and weaknesses. This section provides an overview of each of these Hero Classes as well as the rules needed to use any special Class-specific abilities, such as weilding Samurai Battle Tactics or casting Elemental Magik spells!
Samurai Warrior
A stoic and honorable soldier, the Samurai Warrior has mastered the art of the sword! Wearing ornate armor and following a bushido code, the Samurai is a force to be reckoned with.
Protected by his armor, the Samurai Warrior is unafraid to wade into hordes of Enemies, drawing their attention and building his Fury to unleash.
Fury (Ability Token) — Fury Tokens are a resource used by the Samurai to activate his Battle Tactics cards, allowing him to unleash special abilities during the game.
Fire Sake (Side Bag Token) — When creating a new Samurai Warrior Hero, you may choose your starting Side Bag Token from any of the normal options, or you may instead choose to start with a Fire Sake Token.
Fire Sake - Discard to gain D3 Fury Tokens.
Gaining Fury — The Samurai starts each adventure with no Fury Tokens, but gains a Fury Token for each wounding Combat Hit he does to an Enemy (a Combat Hit that causes at least 1 Wound marker to be placed on that Enemy). Note that the Samurai does NOT gain Fury for Wounding Hits he does that are not specifically Combat Hits, such as with a Bow or a Bomb.
Max Fury — The Samurai has a Max Fury value listed on his Hero Character Sheet. This value is the total number of Fury Tokens the Samurai can hold at any time. Max Fury may be modified by abilities and items that the Hero carries.
Battle Tactics — Battle Tactics cards represent the special abilities and maneuvers employed by a Samurai during a battle. The Samurai Warrior starts with 2 Battle Tactics (getting to draw 3 and choose 2 to keep) when creating his Hero, and may gain more Battle Tactics through Leveling Up. The Samurai Warrior uses Battle Tactics cards marked with the Warrior Icon (all of the Battle Tactics in this set have the Warrior Icon).
Using Battle Tactics — Each Battle Tactic card has a Fury cost listed in the upper right corner, as well as Keywords and text describing the benefit of using that Tactic.
Each Battle Tactic may only be used Once per Turn.
Battle Tactics may only be used during the Samurai's Activation (unless noted otherwise on the specific card).
To use a Battle Tactic, discard Fury Tokens equal to the Fury Cost listed on the card. Then resolve the game text of that card.
Note that most Battle Tactics that do Damage to Enemies are not considered Combat Hits (unless noted as such), and therefore most often do not generate additional Fury Tokens.
Battle Tactics and Hero Level — Several Battle Tactics have an extra benefit listed at the bottom of the card, based on the Samurai's current Hero Level. A Battle Tactic's extra benefits are cumulative as you go up in Level.
Gaining New Battle Tactics — Whenever the Samurai gains a new Battle Tactics card, he may draw two cards and then choose one to keep (returning the other to the deck).
Assassin
The ninja Assassin is a silent and deadly killer! Trained to use stealth and agility as weapons, the Assassin uses her speed to strike at the heart of her Enemies, while dodging the worst of their attacks.
While the Assassin has a high damage potential, she can be fragile if cornered by Enemies.
Nimble — As a ninja, the Assassin is fast and agile. The Nimble ability lets you move 1 extra space each turn, and allows you to move through other models, ignoring Escape tests from Enemies (this prevents Enemies from pinning you in place).
Deadly — One of the main features of the Assassin is the ability to assassinate things! The Deadly ability lets you bypass any special Armor ability an Enemy has (this is different than an Enemy's standard Defense value), and also gives you a Damage bonus against an Enemy if there are no other Enemies adjacent to you at the time (they never see it coming).
Shuriken — The Shuriken Starting Item gives the Assassin an extra Free Attack that can be used once per Fight. It is a Ranged Attack, allowing you to hit Enemies at a distance, and has a special option to be thrown at any time during your move (outside of the normal Attack sequence).
Ninja Clan — When creating your Assassin Hero, you also get to choose one of the Ninja Clans to be from. Each Ninja Clan card describes the special bonuses that an Assassin from that Clan gains.
Only one Ninja Clan card can be selected for your Hero, and remains with you for the duration of your Hero's adventuring career.
Traveling Monk
The Traveling Monk is part of a sacred order of Yamabushi monks dedicated to stopping the great Dragon King, Sho Riu and his minions.
The monk can be a powerful healer to the group, but is also no stranger to combat.
Ki (Ability Token) — A Traveling Monk channels his life energy, known as Ki, into his actions to enhance their power! As noted on the Hero Character sheet, Ki tokens may be spent to increase any form of Healing the Traveling Monk uses (for Wounds or Sanity Damage), or to increase the Monk's Damage on one of his Combat Hits. The Traveling Monk starts each Adventure with 0 Ki, but gains 1 Ki at the start of each turn. He also has a Max Ki value which is the most Ki tokens he may have at any one time.
The Sacred Bell — The Traveling Monk's Sacred Bell may be rung once per Adventure to give all Heroes on your Map Tile (including yourself) Cover 3+ until the end of the turn against all Damage sources. Cover is an extra chance to prevent incoming Damage. When used, any time an affected Hero would take a Hit from an Attack or direct Damage from an event for the rest of the turn, they may roll a D6. On the roll of 3 or higher, ignore that Hit/Damage.
Sorceress
A master of the occult arts, the Sorceress wields powerful Elemental Magik to smite her foes!
Each Element of Magik (Fire, Wind, Water, and Earth) has a different theme, allowing you to decide what style of Sorceress you would like to play based on which combination of Spells you choose.
Elemental Blast — Elemental Blast is an extra Starting Upgrade that all Sorceress Heroes get for free. It is a Spell that requires no roll to cast (it is always successful) and is considered to be the same Magik Element as your Elemental Focus (see below). The Elemental Blast gives the Sorceress a built in Ranged Attack that can be used each turn, if you spend the Mana on it.
Spells and Elemental Focus — The Spells that a Sorceress has access to are represented by Elemental Magik Spell cards. Spell cards come in four types - Fire, Wind, Water, and Earth. As noted on her Hero Character Sheet, the Sorceress starts out with 2 Spells (in addition to her Elemental Blast).
Whenever the Sorceress gets to draw a Spell (usually during character creation and sometimes when going up in Hero Level), you must select the Element of Magik the Spell will be from (Fire, Wind, Water, or Earth). Then draw 2 Spells from that Elemental Magik deck and choose which one to keep. Shuffle the other card back into the deck.
When creating a Sorceress Hero, you must also choose one of the Elements of Magik (Fire, Wind, Water, or Earth) to be your Hero's Focus. When casting a Spell that is the same Element as your Focus, you are +1 to your Casting Total for Spells of that Element (more on Casting below).
Mana (Ability Token) — Mana is the resource that a Sorceress uses to cast her Elemental Magik. She has a pool of Mana Tokens used to pay the cost to Cast Spells. The amount of Mana that the Sorceress has available directly determines how many Spells they can Cast in a turn as well as how likely they are for those Spells to be successful.
All Mana Tokens spent are Recovered by the Sorceress at the start of each turn, returning her to her full Mana level.
Casting Spells — A Sorceress may Cast any number of Spells during the turn, but each individual Spell may only be Cast once per turn. Spells may be Cast at any time during the turn; they do NOT have to be Cast during the Sorceress's Activation, unless the Spell specifically lists when it may be Cast (replacing Move, or in the case of Spells that are Ranged Attacks for instance).
Some Spells have an XP value listed at the bottom of the card. This XP is earned by the Sorceress whenever that Spell is successfully Cast (though some Spells only generate XP the first time they are Cast per Adventure). A Spell may only be Cast, if it will have a game effect (for instance a Spell that Heals Wounds may only be Cast if there are Wounds to Heal).
Mana Cost — Every Spell has a Mana Cost toward the top of the card. To Cast a Spell, the Sorceress must pay an amount of Mana Tokens equal to the Mana Cost of that Spell. It can be helpful to place the spent Mana Tokens on the Spell card itself to show that they have been spent as well as to show that that particular Spell has been Cast this turn.
Casting Roll — Once the Mana Cost has been paid, the Sorceress makes a Casting Roll. Roll 2D6. If the total rolled is equal to or higher than the Casting Number listed in the upper right corner of the Spell card, the Spell is successfully Cast and its card text immediately takes effect. If the total rolled is less than the Casting Number, the Spell is failed; the Mana Tokens are wasted and the Spell may not be attempted again this turn.
Additional Mana Tokens may be spent to add 1 extra die each to the Casting Roll, even after the dice have been rolled. Only 2 of the dice rolled may be used to determine the final Casting Roll though (usually the highest 2 dice).
Dangerous Spells — Some Spells are marked with the Dangerous Icon, on the upper left side of the card. These Spells are especially powerful, but also a bit dangerous to use. Whenever a Sorceress makes a Casting Roll to Cast a Dangerous Spell, and rolls doubles on any of the dice, the Spell still succeeds or fails as normal, but the Sorceress also takes 1 Corruption Hit.
Spell Boosts for Hero Level — Some Spells have boosts to their effectiveness listed at the bottom of the card, based on the Hero Level of the Sorceress that is Casting it. These are free bonuses that a Sorceress gets as they go up in Hero Level, making their existing Spells more powerful along the way.
Arcane Powder — One of the Starting Items for the Sorceress is the Roku Demon Bag. This Item starts each Adventure with D6 Arcane Powder Tokens on it (discarding any that were left over from the previous Adventure).
Arcane Powder Tokens may be used when casting a Spell to add +1 to the Casting Total for each Arcane Powder Token discarded.
Arcane Powder may be used after the Casting Roll has already been made to help successfully cast a Spell that would have otherwise failed.
Game Set Up
To Set Up for an Adventure, complete the following steps in the order listed. This covers everything needed to start the basic Mission 'Lost Contact', and includes preparing the card decks, shuffling up the Exploration Tokens, placing the Fortress Entrance, and getting the Heroes ready to go. Some later Missions have a slightly different Set Up as noted in their entry in the Adventure Book.
1) Number of Players/Heroes — Decide on the number of Heroes that will be taking part in the Adventure. Usually this is one Hero per player, but sometimes it is fun to play a game controlling two Heroes each, for a fewer number of players.
2) Shuffle Card Decks — Thoroughly shuffle all of the card decks and place them around the table as shown above.
3) Prepare Exploration Tokens — Shuffle up all 12 Exploration Tokens and create a stack of them face down that players can draw from when they find a new room.
4) Ready Heroes — Prepare each Hero that will be taking part. If these are new Heroes, make sure each of them is ready to go using the steps of Creating a New Hero, as detailed on page 7.
One Hero gets the Old Lantern card in addition to his other Gear. The players may choose who will take it at the start of each Adventure.
5) Select Mission — Select a Mission to play. For your first game, this will be the 'Lost Contact' Mission described below. For future games, you can choose a Mission from those listed in the Adventure Book. Note that some Missions have special Set Up instructions.
6) Prepare Depth Track — Place the Depth Track where all players can see it, and position the Darkness marker on the Darkness Start space and the Hero Party marker on the Fortress Entrance space.
7) Place Entrance Map Tile — Set the Entrance Map Tile in the center of the table, where all players can reach it.
8) Place Heroes — Lastly, each Hero model is placed on the Entrance Map Tile in one of the 8 Starting Area spaces (as shown below).
The Starting Area on the Entrance Map Tile includes all 8 spaces in the back two rows (marked here in blue). The Heroes can be positioned in any of these eight spaces, and should be placed on the board in Initiative order, from highest to lowest.
Number of Heroes
The number of Heroes taking part in an Adventure determines the difficulty and quantity of Enemies you will be facing. This is scaled in two ways - with Low, Med, and High Threat Decks for Enemies as well as with Revive Tokens to help fewer Heroes survive a little longer.
Difficulty Scaling
The chart below shows the Threat Deck that will be used as well as how many Revive Tokens the Heroes have available to them, based on the number of Heroes playing.
| Heroes | Scaling |
|---|---|
| 1 | Low Threats, 2 Revive Tokens |
| 2 | Low Threats, 1 Revive Token |
| 3 | Med Threats, 1 Revive Token |
| 4 | Med Threats |
| 5 | High Threats, 1 Revive Token |
| 6 | High Threats |
Both Threat Decks and Revive Tokens are covered in greater detail a little later.
Your First Game
Basic Game
For your first game, a couple of the slightly more advanced elements will be left out to make it easier to get the hang of the things. Epic Threat boss Fights and Gates to Other Worlds will not be used. Note, it may be tempting to just use everything right away, but there is enough to wrap your mind around with getting the basics down that it really is worth playing a game or two before diving into the deep end.
'Lost Contact'
The introductory Mission is called 'Lost Contact'. The Heroes have lost all contact with a local fortress belonging to an allied Samurai Clan. Fearing the worst, they have set out in search of survivors, or at least to discover the fate of their brothers in arms.
Mission Goals — To discover the fate of the allied Clan, the Heroes must explore the fortress and find 2 Exploration Tokens with Clue Icons on them. The first Clue lets them know they are on the right track, while the second Clue represents the location of any survivors.
The Objective Room — When the second Clue Icon is revealed, ignore any Encounter or Attack on the token, as well as any Door Icons. The Objective Room has no exits. Instead, the Heroes must draw a High Threat card (Red) to fight, representing the bulk of the creatures that have overrun the castle.
Reward — If all of the Enemies in the final room are defeated, the Heroes have completed the Mission, rescuing any survivors still alive! Each Hero gains 25 XP and D3 Dark Stone, recovered from the fallen fortress.
The Depth Track
The Depth Track represents the general path of the fortress and tracks how deep the Hero Party has journeyed and how close the Darkness is to escaping the fortress and wreaking havoc on the countryside (resulting in failure for the Heroes). At the start of the game, the Hero Party marker is placed at the Fortress Entrance space on the far left of the track, while the Darkness marker is placed on the Darkness Start space on the far right.
During the course of the game, the Hero Party marker moves down the track every time a new Map Tile is placed, as the Heroes travel deeper and deeper into the tunnels. The Darkness marker moves the opposite direction, up the track, as the Heroes fail to hold the Darkness at bay.
Stages of the Track
The Depth Track is broken into 3 Stages, and each Stage has a value printed at the bottom (7+, 8+, 9+). As the Hero Party marker moves down the track, it passes through these different Stages, making it progressively harder for the Heroes to Hold Back the Darkness. Generally these Stages only matter for the current position of the Hero Party marker, not the Darkness marker.
Holding Back the Darkness
At the start of each turn, the Hero with the Old Lantern must roll the Hold Back the Darkness test. The Hero rolls 2D6 and adds them together. If the number is equal to or greater than the value needed (listed at the bottom of the Stage that the Hero Party marker is currently in), the Darkness has been held and the marker does not move this turn. If the roll is less than the value needed, the Darkness moves one step forward on the track (closer to the Fortress Entrance).
Grit may NOT be used to Re-roll a Hold Back the Darkness test.
Blood Spatter and Growing Dread Spaces on the Track
There are two special types of spaces on the Depth Track, Blood Spatter spaces and Growing Dread spaces.
Blood Spatter spaces - When the Darkness marker moves onto a Blood Spatter space, the Heroes must immediately draw a Darkness card as the Darkness has grown stronger.
Growing Dread spaces - When the Darkness marker moves onto a Growing Dread space, the Heroes must draw a Growing Dread card as the deadly nature of the Hero's mission sinks in (see Growing Dread cards on page 16 for more on this later).
These special types of spaces on the Depth Track only matter for the Darkness marker, NOT the Hero Party marker.
Depth Events
Any time the Hero with the Old Lantern rolls natural doubles for the Hold Back the Darkness test, a Depth Event has occurred! Even if the roll would normally have failed, instead of moving the Darkness marker, consult the Depth Event Chart to see what has happened (the Depth Event Chart can be found on one of the large reference cards).
There are 6 possible results on the chart, and the Event that has occurred is the one listed for the double number that was rolled (double 1s = 1 on the chart, double 2s = 2 on the chart, etc). This is usually something bad that has happened.
The Game Turn
Each Game Turn has four steps that are completed in the following order:
- Hold Back the Darkness
- Models Activate in Initiative Order
- Room Exploration
- End of the Turn
Once all four steps are complete, a new Game Turn begins.
Hold Back the Darkness
As noted above, at the start of each turn, the Hero that has the Old Lantern must roll the Hold Back the Darkness test to prevent the Darkness marker from moving forward on the Depth Track. This test occurs at the start of every turn (even during a Fight), and the longer the Adventure goes, the harder it is to hold the Darkness back.
Models Activate in Initiative Order
After the Hold Back the Darkness test is complete, each model is Activated in order of Initiative, from highest to lowest. A model's Initiative can be found in the upper right corner of their Hero Character Sheet or Enemy Record Sheet.
During most turns of the game, only Heroes will be on the board as they explore the fortress. During a Fight however, Activations will often be intermixed between Heroes and Enemies, based on their relative Initiative scores (more on Enemies and Fights later).
Heroes that are tied for Initiative may decide between them who will go first, and this may be changed from turn to turn.
Room Exploration
When the Heroes discover a new Room Map Tile, it has an Exploration Token placed on it. Exploration Tokens like this are revealed and resolved during the Room Exploration step.
End of the Turn
After all models have been Activated and any new Rooms have been explored, anything that occurs at the End of the Turn happens. If there are multiple effects that trigger at the End of the Turn, the Heroes may decide what order to do them in.
Hero Activation
When a Hero is Activated, they may Move and then either Search or make an Attack. Searching may NOT be done during a Fight (as the Hero is a little busy).
Hero Movement
At the start of a Hero's Activation, the first thing they should do is to roll a single die for Movement. The Hero may Move a number of spaces up to the amount rolled on the die.
Models have no facing and may move forward, back, side to side, and even diagonally. Models may NOT move through other models or through Walls, and may only move into valid spaces on the board (it must be at least 50% of a full space, to be considered a valid space).
The two half-spaces of an open-ended puzzle connection on a Map Tile are considered to be Doorways and models MAY move into these half-spaces. (For players that do not like Roll for Movement style games, an optional rule for Fixed Hero Movement can be found on page 38).
If a Hero rolls a 1 on their Move roll, they are allowed to Recover one Grit. This is the main method for Heroes getting Grit during the game. If a Hero is already at their Max Grit, they may immediately use the new Grit on the spot, usually to add an extra D6 to their Movement.
Note that using Grit to add an extra D6 to your movement does not let you Recover another Grit if you roll a 1 on that D6, as it is simply extra movement, not a Move roll.
Map Tile Puzzle Connections
It is important to note that a Hero standing in a puzzle connection space (between two Map Tiles) counts as being on both of those Map Tiles. This can be important for Abilities or effects that target every model on a specific Map Tile.
Barriers
Some spaces on the board have one or more edges with a thick, white line. These are called Barriers and usually represent elevation changes or obstacles that prevent movement but can be seen through, such as cliffs or low walls.
Only models that have an ability allowing them to 'Move through other models' may cross these Barrier space edges during their move. This usually includes models that can fly, such as Tengu, models that have the ability to leap or climb over obstacles, such as Assassin Heroes, or XL-sized Enemies that can smash through them.
When a Barrier extends slightly beyond the cross point of multiple spaces (as shown here), it prevents normal diagonal movement that would cross this extended end of the Barrier as well.
Barriers have NO EFFECT on Line of Sight for Ranged Attacks, adjacency for Escape tests, or Melee Attacks; they ONLY affect movement. Bombs may be thrown over a Barrier, just like any Ranged Attack, and may Bounce through Barriers as well.
Walls Blocking Diagonal Movement
As noted above, models may not move or see through Walls (the thick black border around every Map Tile). Sometimes a Wall will extend into a Map Tile, covering over the grid cross point between spaces (as shown below).
Walls like this prevent models from moving diagonally across that Wall. In addition, because the Wall extends between these diagonal spaces (covering the cross point of the spaces), the two spaces are NOT considered to be adjacent to one another. Walls like this block Line of Sight for Ranged Attacks, prevent diagonal Melee Attacks across them, and prevent other things like Fear or Bomb explosions affecting models diagonally across the Wall.
The Old Lantern and Voices in the Dark
The light from the Old Lantern is the only safety from the shadows. It illuminates the entire Map Tile that the Hero carrying it is currently on, as well as every adjacent Map Tile.
Any Hero starting their Activation on a Map Tile that is not within the Old Lantern's light (on the same or adjacent Map Tile as the Lantern) begins hearing 'Voices in the Dark', slowly driving them mad. That Hero immediately takes D6 Horror Hits (see Horror Hits and Sanity on page 17).
Searching
There are two different types of Searching a Hero can do at the end of their Movement, when not in a Fight - Scavenging or Looking through a Door. Note that you may do either of these things, not both.
A Hero may not Search on a Map Tile (Scavenge or Look Through a Door) while there is an unrevealed Exploration Token on that Tile (more on Exploration Tokens later).
Scavenging
Any Hero that ends their Move on a Map Tile (Room, Passage, or the Entrance) that has not yet been fully Scavenged may attempt to search the area for anything of value.
To Scavenge a Map Tile, roll 3 dice. If any of the dice roll a 6, you have successfully Scavenged the area and found something! Place a Scavenged marker on the Map Tile. Then draw one card from the Scavenge Deck for each 6 rolled.
As noted before, there is no discard pile for the Scavenge Deck. Each time a Hero needs to draw one or more Scavenge cards, shuffle the entire Scavenge Deck to draw the number of cards needed. Note that the Scavenge Deck is approximately 1/3 good, 1/3 bad, and 1/3 nothing, so Scavenging may not always end up being a benefit to your Hero (but it's usually fun to try).
Each Map Tile may be Scavenged a number of times, based on how many Heroes are in the Hero Party, before it is considered fully Scavenged (and may not be Scavenged again).
| Heroes | Scavenge |
|---|---|
| 1-2 Heroes | 1 Scavenge |
| 3-4 Heroes | 2 Scavenge |
| 5-6 Heroes | 3 Scavenge |
Looking Through a Door
Open-ended puzzle connections on a Map Tile (not blocked off with an End Cap) are considered to be Doors. A Hero that ends their Move on one of these open-ended puzzle connection half-spaces may Search by Looking Through the Door, seeing into the next Map Tile.
Draw a Map Card and place the Map Tile shown as the next piece of the board, connected to the Door that the Hero is looking through. The green arrow on the card shows the 'entrance' to the new Map Tile that should be connected to the Door. If the new Map Tile cannot be placed because it would overlap an existing Map Tile (if it doesn't fit), discard it and draw a new Map Card. If no Map Tile would fit, this exit is not a valid Door and should not be counted when determining which exits from the Room are Doors (as described in the section on Exploration below).
Whenever a new Map Tile is placed, move the Hero Party marker one step forward on the Depth Track, showing their progression deeper into the fortress.
Any time a Hero Looks Through a Door and places a new Map Tile, that Hero gains 5 XP for exploring.
The Hero Party marker will no longer move if it ever reaches the Darkness Start space of the Depth Track.
Note that Heroes may not look through Doors while there are Enemies on the board as Searching cannot be performed during a Fight.
Hero Attacks
During their Activation, after moving, a Hero is allowed to make one Attack. This is covered later in the section on Fights.
Exploration
Exploration is a big part of Shadows of Brimstone, and allows the Heroes an element of discovery as they pick their way through the dark halls and rooms of the haunted fortress.
Rooms and Exploration Tokens
There are two types of Map Tiles, Passages and Rooms. Passages are short pathways that simply connect different areas of the fortress. Rooms, on the other hand, often hold Encounters or Enemies that the Heroes must face.
Whenever a Room Map Tile is placed, draw an Exploration Token without looking at it and place it face down on that Map Tile. Passages do not contain Exploration Tokens and are labeled as such on their individual Map Cards.
Once the Map Tile is placed, the Hero that looked through the Door will be standing in a puzzle connection space that is half on each Map Tile. As noted above, a Hero on a puzzle connection space like this is considered to be on BOTH Map Tiles. This means that during the Room Exploration step of the turn (after all Heroes have Activated), this Exploration Token will be revealed as there will be at least one Hero on the Map Tile with it.
Revealing Exploration Tokens
When an Exploration Token is revealed, flip it over so that all players can see what has been discovered! An Exploration Token has three important pieces of information – Door/Gate Icons (showing the Number of exits the Room has), Encounters or Attacks!, and if there are any Clues for the Heroes' current Mission. There is also one particularly evil Exploration Token that adds a Growing Dread card to the stack (more on Growing Dread later).
Door/Gate Icons
At the top of the Exploration Token you will find one or more Door Icons. Each Icon represents an exit from the Room. So if there are 2 Door Icons on the Token, there will be 2 Random puzzle connection 'Doors' left open on the Room. On the Map Card for the Room, each potential exit is marked with a set of numbers to help randomly determine where the Doors are to be left open. For each Door Icon, roll a die and consult the Map Card to determine where that Door will be (roll again if there is already a Door there). Each puzzle connection exit that is not a Door should be closed off using an End Cap piece.
Note that some Exploration Tokens have a Gate Icon amongst the Door Icons. In the Basic Game, treat these as normal Doors in every way. In the Advanced Game, these Gate Icons represent a portal to an Other World that has opened and the Heroes can step through and continue to explore on the other side!
Encounters and Attack!
Exploration Tokens will always lead to Encounters or an Attack, both of which are covered a little later on.
Growing Dread Exploration Token
There is one Exploration Token that is particularly nasty, adding a Growing Dread card to the stack in addition to being an Encounter.
Clue Icons
Many of the Exploration Tokens have Clue Icons on them, representing important bits of information that help the Heroes on their Mission. Clue Icons have different meanings based on the particular Mission being played, as described in the Mission entry of the Adventure Book (some Missions do not use Clue Icons at all).
Finding the Objective
When the final Clue Icon needed is found (or whatever the particular Mission calls for is discovered), the Heroes have found their Objective!
This usually means that the Heroes ignore any Door Icons and Encounters/Attacks on the final Exploration Token (Note that the Growing Dread Exploration Token still adds a Growing Dread card). Instead, the Heroes have reached their goal and must face a final fight with a larger or meaner group of Enemies. In the Advanced Game, this comes in the form of an Epic Threat boss fight. In the introductory Mission, 'Lost Contact', it means fighting a High Threat card (Red) of Enemies.
Winning and Losing
To Win a Mission, the Heroes must find the Objective and defeat any Enemies guarding it, as detailed in the particular Mission being played. For the basic 'Lost Contact' Mission, the Heroes simply need to find the Objective room at the second Clue Icon and defeat a High Threat card of Enemies.
There are two main ways for the Heroes to Fail any Mission - if all of the Heroes are KO'd or if the Darkness Escapes the Fortress.
All Heroes KO'd
If all of the Heroes are ever KO'd at the same time, the Mission immediately ends in failure. The Heroes are considered to escape, but must all still roll for Injury/Madness.
Darkness Escapes
If the Darkness marker ever reaches the Fortress Entrance space on the Depth Track, the Darkness escapes the fortress and lays waste to the countryside. The Mission is failed and the Heroes must head home in defeat.
Running Away
Sometimes things look pretty grim. If all of the Heroes agree (at least all those that are not yet KO'd), at the start of any turn, the Hero Party may elect to Flee from the Fortress! This must be done before anything else in the turn happens. All of the Heroes (including those that are KO'd) escape the Fortress and the Mission is considered to have been failed. Any Heroes that were KO'd still need to roll for Injury/Madness.