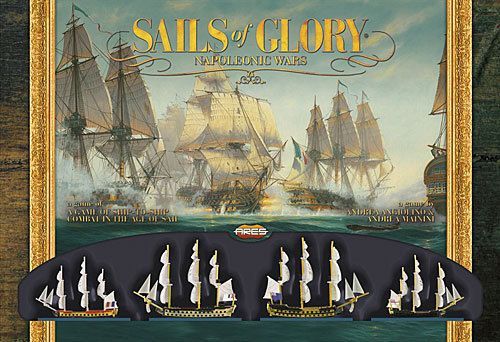
Sails of Glory
Sails of Glory Rulebook
Table of Contents
Table of Contents
- Components
- Basic Rules
- Standard Rules
- Advanced Rules
- Optional Rules
- Rules for Solitaire Play
- Scenarios
- Ready-to-Play Scenarios
- Enemy in Sight! — Two Small Fleets Attack Each Other in the Open Sea
- In Shallow Waters — Battle Is Engaged Near the Coast, Close to Dangerous Reefs
- Force the Blockade — Two Ships Try to Force a Blockade to Reach Harbor
- Against the Outpost — A Small British Squadron Is Sent to Force an Enemy Outpost to Surrender
- Supplies Are Coming — A French Ship of the Line Escorts a Frigate Bringing Supplies to a Besieged Island
- Sitting Ducks (Solitaire Scenario) — Two Ships Attack Two Enemies at Anchor
- Inventing New Scenarios
- Ready-to-Play Scenarios
- Summary of Markers, Tokens and Counters
- Expanding the Game
Components
Miniatures and Bases: This Starter Set includes 4 pre-assembled and pre-painted ship miniatures: Courageuse / Unité, Généreux / Aquilon, HMS Terpsichore / HMS Meleager, and HMS Defence / HMS Vanguard.
Ship Cards and Base Cards: Each ship has a double-sided Ship Card and a double-sided Base Card. Ship Cards show the ship's name, nationality, burden (size), maneuver deck letter, veer (maneuverability), colored borders (attitude of the ship), firing arcs, number of guns, number of crewmen, and class/type. The indicated year is the launch or capture year; the year in brackets (if present) indicates when the ship assumes the characteristics (and/or the name) it has in the game.
Markers, Tokens, Counters: 390 Damage Counters and 210 Markers, Tokens, Counters are included.
Terrain Elements: 10 Terrain Elements (4 Islands, 6 Reefs).
Maneuver Cards: Four maneuver decks, lettered A through D, matching the maneuverability letter of each ship (Deck A: 37 cards, Deck B: 29 cards, Deck C: 37 cards, Deck D: 29 cards).
Other Components: 4 Ship Mats, 4 Sail Status Counters, 1 Wind Gauge, 1 Wind Strength Counter, 2 Attitude Indicators, 4 Ship Logs, and 2 Combat Rulers.
Explanation of the Ship Card and Base Card
- Ship's Name
- Nationality
- Burden (Size)
- Maneuver Deck
- Veer (Maneuverability)
- Colored Borders (Attitude of the Ship)
- Firing Arcs
- Number of Guns
- Number of Crewmen
- Class / Type
Some components and optional rules only apply when playing Basic, Standard or Advanced Rules. This is indicated by symbols marking Basic Rules, Standard Rules, and Advanced Rules respectively.
Explanation of the Maneuver Card
- Normal Maneuver Card (blue border)
- Taken Aback Maneuver Card (red border)
- Broken Mast Maneuver Card (dark gray border) — Advanced Rules only
- Movement lines:
- Full sails — Advanced Rules only
- Battle sails
- Backing sails — Standard Rules only
- Veer value — Standard Rules only
Explanation of the Ship Log and Ship Mat
- Ship's Name and Year
- Burden (Size)
- Veer (Maneuverability) — Standard Rules only
- Top Row: Artillery Firepower / Ship Damage track
- Artillery Firepower: Stem (Forward), Full Broadside, Stern (Rear)
- Number of Crew Actions — Advanced Rules only
- Bottom Row: Musketry Firepower / Crew Damage track
- "0" Tokens Box / Special Damage Box — Advanced Rules only
- Broadside (Left/Right)
- Ammunition Storage (Left/Right)
- Sail Settings — Advanced Rules only
- Full
- Battle
- Backing
- Struck Sails
- Planned Actions — Advanced Rules only
- Unused Actions — Advanced Rules only
Basic Rules
In Sails of Glory, players control one or more ships, taking to the sea to engage their opponents in naval duels or to accomplish a specific mission (such as forcing a blockade, attacking coastal targets, and so on).
We recommend you start playing with the first scenario (Enemy in Sight! page 21). This is a straightforward action where each player is trying to force both enemy ships to surrender. The winner is the player (or team of players) who eliminates his opponent's ships before being forced to surrender his own.
When you are comfortable with the game mechanics, you can either play one of the other scenarios presented at the end of this booklet or start inventing scenarios of your own!
Number of Players and Ships
Sails of Glory requires at least two players, each controlling one or more ships.
The setup instructions in the next page assume you will be playing a two-player game, with each player controlling two ships.
Each player plots maneuvers, actions, and takes damage separately for each ship he controls.
If you are playing with more than two players, divide the players as evenly as possible into two teams. This package supports up to four players, but you can easily play with more people, if you have enough space and you purchase additional Ship Packs.
Setup
To play Sails of Glory, you need a flat surface at least 90 x 70 cm (≈36 in. x 26 in.) to play on. A table, carpet, or floor section will all work as long as the boundaries are well defined. Before playing, you need to choose which scenario you want to play (see Scenarios, page 50). Follow the instructions provided by the scenario to select and setup the required ships. We recommend you use the simple Enemy in Sight! scenario (page 21) for your first game.
For each ship he controls, a player must insert the appropriate base card into the ship's base, then close it with the transparent lid and fix the ship's model on top. Base cards are double-sided: Choose the side matching the name of the ship you want to use.
A player also takes a ship mat, the appropriate ship log and ship card for each ship, and the set of maneuver cards matching the maneuverability letter indicated by the ship card. Separate the cards with a blue or red border from the cards with a dark gray border; the dark gray border cards are only used when playing with the Advanced Rules (see page 28).
Place the ship log in the appropriate area of a ship mat with the ship card next to it, to help players remember which ship is being controlled with that ship mat.
Divide the 5 groups of damage counters according to the letter on the back. In the basic game you just need the A, B, and E counters. Place them into three different cups or groups, facedown on the table.
Place the C and D counters back in the box. You only need them when playing with the Standard Rules (see page 22) or Advanced Rules (see page 28).
Separate the crew loss special damage markers from the other markers. They are the only special damage markers used when playing with the Basic Rules.
For each ship, take two ball ammunition counters. Place them on the left broadside and right broadside spaces of the ship mat, facedown, to indicate the cannons on both sides are loaded and ready to fire.
In the basic game, the wind always comes from the right of the British side of the table (see Enemy in Sight! scenario, page 21). To show the wind direction, place the wind gauge on the gaming field, with its arrow parallel to the starting lines, pointing toward the right of the English fleet.
The Game Turn
Each turn is composed of four phases:
- Planning
- Movement
- Combat
- Reloading
All players perform each of these phases simultaneously. Conclude each phase before proceeding to the next one. After the Reloading phase is completed, start a new turn with a new Planning phase.
Planning
During the Planning phase, all players select the maneuver cards used to move their ships.
The Ship and the Wind. Before a player plans a ship's movement, it is important to understand the position of that ship with respect to the wind (the attitude to wind).
- Red: Taken Aback
- Orange: Beating
- Green: Reaching
- Orange: Running
To read the wind, the player places an attitude indicator beside the ship, in the same direction shown by the wind gauge, so the tip of the indicator points toward the main mast of the ship. The player notes the color of the edge on the ship's base where it crosses the attitude indicator. The color determines whether the ship is beating/running (orange), reaching (green), or taken aback (red).
Planning the Maneuver. The player secretly chooses a maneuver card from his maneuver deck.
- If the ship is beating, running, or reaching (orange or green), the player may select any normal maneuver card (with a blue border) to plan the ship's movement.
- If the ship is taken aback (red), the player may only select a maneuver card with a red border to plan movement.
If the attitude indicator passes exactly between two different colors, the player always chooses the most favorable (fastest) color of the two:
- If it passes between red and orange, he chooses orange.
- If it crosses between orange and green, he chooses green.
Each player places the selected card, facedown, in the first space of the corresponding ship mat. The maneuver indicated by the card will be performed in the movement phase of this turn.
It is forbidden to take measurements of any kind (for example, to check firing range) before planning. The only measurement allowed is to check the ship's wind attitude.
Movement
After all players have planned their maneuvers, reveal the maneuver cards at the same time, and move the ships. To move a ship, each player takes the corresponding maneuver card and places it on the table.
To facilitate movement, every ship base has two indents which must match the movement line, at the start and the end of the movement.
Movement with a Normal Maneuver Card. Normal (blue border) maneuver cards are placed in the front of the ship, so the black line at the base of the ship overlaps one of the two arrow tips (green or orange), depending on the attitude to wind of the ship. (To facilitate alignment after movement, the indent at the rear of the base must match the movement line, and the base of the ship must be aligned with the horizontal line at the bottom of the arrowhead.)
Normal maneuver cards have three different movement lines – representing the ship's movement under full sails, battle sails or backing sails. Only the blue movement line (the middle one), representing battle sails, is used in the basic game.
Each movement line has two movement arrows on it – an orange movement arrow, for beating/running ships, and a green movement arrow, for reaching ships.
To move his ship, the player simply takes the base of his ship and moves it onto the maneuver card, so the black line behind the ship overlaps one of the two arrow tips (green or orange), depending on the attitude to wind of the ship.
After the ship has been moved, the maneuver card is removed from the table and placed back in the maneuver deck.
Movement with a Red Border Maneuver Card. When the ship is taken aback (the attitude indicator crosses a red portion of the base), the player must use a movement card with a red border. Each red maneuver card has two movement lines – one with one sandglass and one with two sandglasses.
In the basic game, only the movement line with two sandglasses is used. The maneuver card is placed with the arrow to the rear of the ship base, rather than to the front, showing the backing action of the wind.
Then, the player moves the ship onto the maneuver card, matching the rear of the ship with the movement arrow in the same way as when using a normal maneuver card. When movement is completed, remove the maneuver card from the table and return it back to the maneuver deck.
Leaving the Game Field. If any part of a ship base exits the game field after a movement, the ship is eliminated and counts as surrendered.
Overlapping during Movement. If, due to their chosen maneuver, two or more ships would move so that, at the end of the movement, their bases overlap, movement is not executed in the normal way.
Return all the ships involved in the overlapping to their original positions or leave them where they are at the start of the phase. Complete movement of all the ships not involved as normal. Then, move the overlapping ships using the following rules.
Note: A special situation may arise when two ships are heading toward each other. If each of them may complete its maneuver so that, at the end of the movement, the two bases do not overlap, there is no collision, and the maneuver is resolved normally.
-
Determining Order of Movement. When there is an overlapping, ships are not moved simultaneously. The overlapping ships move, one at a time, according to the following rules:
- Select the ship with the highest burden among the ones that would overlap. That ship moves first.
- If two or more ships have the same burden, first move the one with the best attitude (first green, then orange, and then red).
- Among ships with the same burden and same attitude, determine the movement order at random.
- After you determine the order, move the ships, one at a time.
Note: The burden is the number close to the symbol of a hull section, both on the model base and on the ship log.
-
Moving and Resolving Collisions. During the sequence of movements described above, it may be impossible for a ship to normally complete its movement, because another ship is in the way. (It does not matter if the obstructing ship has already moved or not.) In this case, there is a collision. The player must slide the ship along the movement line, as far as possible, with the following rules:
- Place the maneuver card in front of the moving ship.
- Check if it is possible to place the ship on top of the maneuver card:
- If yes, then do so. Then, slide the ship on the table so the black line on the rear of the base follows the path of the movement line on the card.
- If no, just slide the ship so that the top of the line on the front of the ship's base follows the path of the arrow on the card.
Stop movement as soon as the moving ship's base touches another ship's base. Then, proceed with the next ship involved in the collision, until all colliding ships have moved.
Combat
After the movement phase is completed, players may check if any of their ships can attack. There are two types of attacks: artillery and musketry. After players have announced their attacks (in no specific order), all attacks are resolved simultaneously. Effects are applied at the same time, no matter the type of attack.
Artillery Fire. A ship has two sets of guns, one on each side, called broadsides. These are indicated by two boxes on the ship mat.
Firing Arcs. Each of the two broadsides has 3 different firing arcs, each indicated by a red dot and two white lines bordering a colored angle.
- When there is a good alignment between the ship and the potential target, the central firing arc may be used. This represents the ship firing against the target with its full broadside, so the attack has maximum firepower (see Firepower and Range, below).
- If the alignment between the ship and its target is not as good, it may still be possible to use either the forward (stem) or rear (stern) firing arc. The attack has a reduced firepower, because only a portion of the guns may effectively fire against the target.
To check if a target can be fired upon, the player takes the combat ruler and, after determining the firing arc, places the end of the combat ruler marked with the gun symbol on the red dot of that arc.
If the combat ruler can reach any portion of the base of the target ship, while staying within the firing arc of that dot, the ship can shoot with the guns of that side's arc.
Note: Sometimes, the target ship may be fired upon both from the central arc and the forward or rear arc. In this case, the player may choose which arc to use (in most cases, it's more convenient to use the central arc).
Shooting is never mandatory: A player may decide not to fire at a target – or to fire only one broadside even if both sides have a target in range.
Line of Sight. A ship may not fire through the base of another ship, enemy or friendly. If it is impossible to reach a point of the target without the combat ruler crossing the base of another ship, the line of sight is blocked. The ship may choose another firing arc – or another target, if available.
Ammunition. A ship may only fire a broadside if the guns on that side are loaded.
At the start of the game, both broadsides of a ship are loaded. This is indicated by placing one ammunition counter, facedown, in each of the two broadside boxes.
After a player fires from either side of a ship, he turns the ammunition counter faceup in the broadside box of that side, as a reminder that the ammunition is used. The guns of that side are now considered to be unloaded and cannot fire again until they are reloaded (see Reloading).
Choosing a Target. A ship may fire once on each side. If the guns on a ship's side have more than one target in sight (either in the same arc or in different arcs of that side), the controlling player must choose one of them.
If a ship has targets on both sides, it may attack one target on each side, shooting with both broadsides.
Firepower and Range. When a ship fires, the player must determine its firepower and range. The firepower determines how many damage counters the target must draw, while the range indicates the type of damage counters drawn.
Firepower depends on the firing arc used and by damage suffered by the firing ship. Fire is simultaneous, so any damage a ship receives in the current turn will not modify its current firepower.
The leftmost empty box on the top row of the ship log (with the "Ship" symbol) indicates the current firepower of that ship. There are three numbers in the box – the number in the middle is used when firing a full broadside (central arc), the number on the left is used when firing the forward broadside, and the number on the right is used when firing the rear broadside.
Example: At the start of the game, a ship has a firepower of 3 with a full broadside and 2 with either the forward or rear broadside. Later in the game, the same ship has taken some damage. Its firepower is reduced to 1 for the forward and rear broadside and to 2 for the full broadside.
Important: If a ship may be targeted within more than one arc, only the firepower of the chosen arc of fire is used, not the sum of the numbers in multiple arcs.
Range is determined using the combat ruler, measuring from the dot on the firing arc to anywhere on the target's base:
- If the target's base is reached by the first half of the combat ruler (indicated by the red/purple or orange color), the range is short and the target takes as many damage counters as indicated by the firepower of the attacking ship.
- If the target's base is reached by the second half of the combat ruler (indicated by the yellow color), the range is long and the target takes as many damage counters as indicated by the firepower of the attacking ship.
Note: It is possible the attack is at short range when measured within one fire arc and at long range when measured from a different arc. Remember that the attacker may choose which firing arc to use in the attack.
Musketry Fire. If the ship base is at a distance from an enemy ship's base equal to the width of the combat ruler or less (in any direction), it is possible to attack with musketry fire.
Musketry is in addition to artillery fire and is not mandatory. A ship may only attack a single target with musketry fire each turn.
Players may select a different musketry target from the target of the artillery attack, if more targets are available.
Musketry firepower is indicated by the bottom row of boxes on the ship log (with the "Crew" symbol). The number in the leftmost empty box on that row indicates the current musketry firepower of that ship. The target takes as many damage counters as indicated by the number.
Musketry fire is always available and does not need reloading.
Example: At the start of the game, a ship has a musketry firepower of 2. Later in the game, the same ship has taken damage to its crew. Its musketry firepower is reduced to 1.
Damage. When a ship is the target of one or more attacks, the owner of the ship randomly draws the damage counters caused by the attacks (as determined above), and then shows them to his opponents.
After all attacks are resolved and all players have drawn the damage counters for their ships, the counters are placed on the ship log of each damaged ship, according to the following rules.
- If a counter is a "0," the player places it in the appropriate space of the ship log (rather than in the top row).
- All the other numbered counters are placed in the boxes of the Ship Damage track (the top row of the ship log, with the "Ship" symbol). These counters represent damage to the ship itself.
- If a counter shows a Crew Loss symbol, it is placed in the boxes of the Crew Damage track (the bottom row of the ship log, with the "Crew" symbol). These counters represent losses inflicted to the crew of the ship.
- If a counter shows both a number and a Crew Loss symbol, it is placed in the Ship Damage track. Then, the player takes a Crew Loss special damage marker and places it in the Crew Damage track.
- All other symbols on damage counters are ignored and are treated as numeric counters. The special damage represented by these symbols is not used with the Basic Rules.
When placing damage counters, the player starts from the leftmost box of the appropriate track which is not full (see below).
Damage to the Ship. Numbered counters represent damage to the ship and are placed in the Ship Damage track (top row) of the ship log. When a player places numbered counters, he must always place them in order of their value, from the highest to the lowest.
Each box of the Ship Damage track can hold one or more counters, until their total value matches or exceeds the burden of the ship.
When the sum of the values of the counters in a box equals or exceeds the burden, that box is full. Turn the counters facedown to indicate the box is full. No additional counters may be placed in that box. The player must now start placing counters in the next box to the right.
When a single counter has a value equal to, or higher than, the burden, the counter is placed directly in the leftmost completely empty box. This box is immediately considered full, and the counter is immediately turned facedown to indicate the fact. Further damage may still be added normally to a previous box, if it is not full yet.
Damage to the Crew. Damage to the crew is tracked in the Crew Damage track (bottom row) of the ship log. When a Crew Loss damage counter is drawn, the player must place it in a box on that row. Each box can hold only one counter.
If the player draws a counter showing both a numeric and a Crew Loss, he must use a Crew Loss marker to keep track of the loss on the Crew Damage track and place the numbered counter on the Ship Damage track, following the normal rules.
Surrendering of a Ship. If, at any time, all the boxes of either the Ship Damage track or the Crew Damage track are covered by a counter, the ship surrenders and is removed from the gaming table.
All the damage counters on the ship log and ship mat, including the "0"s, are reshuffled together with the unused damage counters of the same type.
Remember, as damage is resolved simultaneously, a ship that surrenders is still able to shoot in the phase in which it is eliminated.
Assigning Damage – Example: The Courageuse (Burden of 3) is hit for the first time and receives a total of seven damage counters in the turn. Once drawn, they are revealed as two "0"s, two Crew Loss counters, a "6," a "4," and a "2." The "0"s are immediately placed in the "0 damage" box of the ship mat. The two Crew Loss counters are placed on the first two boxes of the Crew Damage track. The musketry firepower remains 2, as indicated by the third box, the first empty one. Then, assign damage to the ship. Since the burden is 3, the "6" counter goes alone into the first box of the Ship Damage track, facedown as the box is now full. The "4" is placed into the second box, which also becomes full, so the counter is also turned facedown. The "2" goes into the third box. From now the artillery firepower is 2/2/2, as indicated by the fourth box – the first empty one.
During the following turn, the Courageuse suffers six more damage counters: a "0," two Crew Loss counters, a "3," a "2," and two "1"s. The "0" goes into the "0 damage" box on the ship mat. Two Crew Loss counters (the drawn counter, and one special damage marker because of the Crew Loss symbol on the "2" counter) go into the third and fourth boxes of the Crew Damage track: The musketry firepower is still 2. Damage to the ship is then assigned. Being equal to the burden, the "3" counter goes into a new box, the fourth, facedown. The "2" goes with the "2" in the third box (the burden is 3, so the box was not filled by the first "2" counter), and then these two counters are turned facedown since the box is now full. The two "1"s go into the fifth box, together, and remain faceup, since the box is not full yet. Now the ship shoots at 1/2/1, the value in the sixth box. A Damage counter in a later turn will go directly to fill the sixth box if its value is 3 (the burden) or more; but it will be placed together with the two "1"s in the fifth box if it is a 1 or 2, filling it.
Reloading
Guns of a broadside may be reloaded only during the turn following the one in which they fired, or any turn thereafter (so a broadside can, at most, fire every other turn).
During the reloading phase, each player may move a facedown counter from an ammunition storage box to the corresponding empty broadside box (that is, one fired in a previous turn), keeping it facedown. This ammunition may be used to fire the corresponding broadside on that side, on the next turn.
Then, players must move any faceup counter in a broadside box (that is, one fired in the current turn) to the corresponding ammunition storage box, flipping it facedown. This ammunition may be reloaded at the end of the next turn.
Note: In a turn, the ship can reload both sides in a single turn, if both started the current turn unloaded.
Example: a) In turn 1, the HMS Defence fires the right broadside. The ammunition counter is flipped face-up in the broadside box. b) During the reloading phase at the end of turn 1, the counter is moved to the ammunition storage box, and flipped facedown. c) In turn 2, during the reloading phase, the counter is moved from the ammunition storage box to the broadside box: The guns are ready to fire again in the next turn. d) In the combat phase of turn 3, the ship may shoot the right broadside again.
Winning the Game
Victory conditions are indicated by the scenario you decide to play.
You now know the basic rules for Sails of Glory. We recommend playing the first scenario (Enemy In Sight, page 21) at least one time before proceeding to the Standard Rules. If you want, you may add some of the Optional Rules (page 34) to make the game more detailed and realistic.
Basic Scenario – Enemy in Sight!
Two small fleets attack each other in the open sea.
Players: 2–4, divided evenly into two teams. With 3 players, one player controls both the ships from one side, and each of the opponents takes one ship from the opposite side.
Gaming Surface: Length: 90 cm (≈36 in.), width: 90 cm. (≈36 in.) or one game mat.
French Player(s): Courageuse and Généreux, within half-ruler distance from the French side.
British Player(s): HMS Terpsichore and HMS Defence, within half-ruler distance from the British side.
Winning Conditions: The winner is the side with ships in play when all enemy ships exit the playing area or surrender.
Standard Rules
After players are familiar with the Basic Rules, the rules in this chapter may be added to make the game more detailed and challenging. These rules are a set and they are meant to be added all together.
The Standard Rules introduce Time to React, Veer, Raking, special types of Ammunition, and additional rules about Overlapping.
Any previous rule that is not explicitly changed remains valid when playing with the Standard Rules.
Setup
In the Standard Rules, players may select different types of ammunition to load: ball, chain, and grapeshot (the double shot counters are used only with the Double Shot optional rule, see page 36).
For each of his ships, a player takes two ammunition counters of each different kind and places one counter of each type, facedown, in both ammunition storage boxes of the ship mat.
Each player then secretly moves one counter of his choice to each broadside box of the mat, facedown. This indicates the type of ammunition loaded into the guns. The type of ammunition is freely chosen for each broadside, and may differ between the left and right broadside.
Finally, each player chooses and places one blue border maneuver card in the first space of the ship mat of each of his ships. This card is the maneuver that the ship will perform during the first turn.
The Game Turn
Planning
When playing with Standard Rules, players have to plan their maneuvers in advance (Time to React rule, see below) and to take into account the maneuverability of their ships (Veer rule, below).
Time to React. The game starts with a maneuver card already planned.
During the planning phase of each turn (including the first), players secretly choose an unused card with a blue border from the maneuver deck of each ship. This card is the maneuver the ship will perform during the next turn, after the maneuver already planned.
Each player places the selected card, facedown, in the second space of the corresponding ship mat.
The maneuver in the first space will be performed this turn; the card in the second space, which has just been placed, will be used next turn.
Planning and Movement – Example: 1) One maneuver card is planned from the previous turn. 2) You plan a second maneuver, and place it in the second space of the ship log. 3) The card planned in the previous turn is revealed. 4) The current maneuver card is placed. 5) The current maneuver card is executed. 6) The second maneuver card becomes the first, to be executed next turn.
Players may not check the attitude to the wind before choosing the maneuver card. They are only allowed to check the attitude during the movement phase.
Veer. Each ship has a Veer (maneuverability) rating, indicated by the number beside the steering wheel symbol on the ship base, ship card, and ship log.
Each maneuver card also has a veer value, in one of the upper corners, beside the steering wheel symbol.
During the planning phase, a player may not select a maneuver card whose veer value is different (higher or lower) from the previous maneuver card by more than the ship's Veer rating.
Example: The Généreux has a Veer of 5. If the last planned card has a value of 2, the next card must have a value from 2 (the lowest in the deck) to 7. It is not possible to play an 8, because the difference is 6 (8-2), more than the Veer rating.
If an illegal maneuver is revealed, replace it with a straight maneuver (a maneuver with a veer value of 5 and a straight movement line).
Movement
After all players have planned their maneuvers, they reveal the maneuver card in the first space (placed in the previous turn), and move the ships.
Each player checks the current attitude to wind of his ship (see The Ship and the Wind, page 9).
-
If the ship is beating, running, or reaching (orange or green), the maneuver is performed normally, that is, in the same way as in the basic rules.
-
If the ship is taken aback (red), the revealed maneuver card must be replaced by a maneuver card with a red border. The player must choose the red border card appropriate to the veer value of the replaced maneuver: 4 or less, exactly 5, 6 or more.
Example: The selected maneuver card has a veer value of 7. It is replaced by the red border card "6 or more."
- On the first turn that the ship is taken aback, the line marked with one sandglass is used to move the ship. This movement is performed in the same way as the movement with a normal maneuver card, placing the card in front of the ship.
- If the ship is taken aback for two or more consecutive turns, the line marked with two sandglasses is used to move the ship. In this case, the maneuver card is placed with the arrow to the rear of the ship base, rather than to the front, showing the backing action of the wind (same as in the Basic Rules).
When movement with a red border card is completed, the card is left faceup on the maneuver deck, as a reminder that the ship was taken aback in this turn.
After movement is completed, the facedown card in the second space of the ship mat is moved to the first space.
Collision between Friendly Ships. If there is a collision (see Overlapping during Movement, page 12) between friendly ships (for example, two French ships), the involved ships take damage.
Each ship takes a number of damage tokens matching the total burden of all other ships overlapping it.
Combat
Raking Shots. A raking shot is a shot that travels down the length of a ship, rather than taking it in the more protected sides.
The attacking player must trace a line of sight from the dot of the central firing arc to the main mast of the target ship.
If the line passes through one of the short sides of the target base, the ship may fire a raking shot from its central firing arc – the broadside sweeps the deck of the target ship along its full length, dealing out additional damage.
- If the raking shot enters through the front side of the base, the target takes one additional damage counter for every three (rounding up) counters it should take.
- If the raking shot enters through the rear side of the base, the target takes one additional damage counter for every two (rounding up) counters it should take (since the stern is the most fragile part of the ship).
Example: HMS Defence is hit by a raking shot across the front side of her base by the Courageuse (Firepower 3), at long range. Normally HMS Defence should draw 3 damage counters. However, a raking shot through the front inflicts 1 more damage counter, for a total of 4. A similar raking shot across the rear side of the HMS Defence would inflict 2 more damage counters (3 divided by 2 and rounded up), for a total of 5 damage counters.
A raking shot across the front side of HMS Defence from the Généreux (Firepower 7) would inflict 3 additional counters (7 divided by 3 and rounded up), for a total of 10 counters. Across the rear side, a similar shot would inflict 4 additional counters (7 divided by 2 and rounded up), for a total of 11 damage counters.
Firing with Special Ammunition. Three different kinds of ammunition may be used in the Standard Rules. The type of ammunition counter loaded is revealed when a ship fires a broadside, and its effect is applied, as indicated below.
Ball is the "normal" ammunition. Ball has a longer range and normally causes more damage to the target ship's hull than to its crew or sails. As in the Basic Rules, if the target's base is reached by the first half of the combat ruler, the range is short and the target takes as many damage counters as indicated by the firepower of the attacking ship. If the target's base is reached by the second half of the combat ruler, the range is long and the target takes as many damage counters as indicated by the firepower of the attacking ship.
Chain is a special ammunition consisting of balls linked by a chain, which spins when fired. Chain has a shorter range than ball, and is used to wreak damage across the deck, masts, and sails of the target ship. When firing with chain ammunition, if the target's base is reached by the red/purple part of the combat ruler (marked with C/D), the target takes as many damage counters as indicated by the firepower of the attacking ship. Beyond this range, the target is missed and takes no damage.
Grapeshot is a mass of small balls and pieces of metal that scatter to inflict more damage to the crew than to the ship hull. It also has a shorter range than ball, and causes less damage to the ship's hull. When firing with grapeshot ammunition, if the target's base is reached by the red/purple part of the combat ruler (marked with C/D), the target takes as many damage counters as indicated by the firepower of the attacking ship. Beyond this range, the target is missed and takes no damage.
When a ship fires a broadside, leave the used ammunition counter faceup in the broadside box, until the next reloading phase (when it will be moved to the ammunition box).
Reloading
Reloading is similar to Basic Rules, except that each time a broadside is reloaded, the player must decide whether he wants to load ball, chain, or grapeshot.
During the reloading phase, each player may secretly choose one facedown ammunition counter from an ammunition storage box and move it to the corresponding empty broadside box (that is, one that fired in a previous turn), keeping it facedown. This ammunition may be used to fire the corresponding broadside on that side, on the next turn.
Then, players must move any faceup counter in a broadside box (that is, one that was fired in the current turn) to the ammunition storage box, flipping it facedown. The broadside may be reloaded at the end of the next turn, with the same kind of ammunition or a different one.
When ammunition is loaded, it cannot be changed. It is permitted to shoot even if there is no target in range, to empty the guns and then be able to reload them with different ammunition in a later turn.
Example: At the start of the game, the British player secretly loaded the ammunition counters of his ships. In the combat phase of turn 1, the HMS Defence fires the right broadside. The counter is revealed to be ball: it is flipped faceup and left in the broadside box. During the reloading phase at the end of turn 1, the counter is moved to the ammunition storage box, and flipped facedown. In turn 2, during the reloading phase, the British player decides to load grapeshot, as the enemy ships are now closer. The grapeshot counter is chosen secretly, and moved from the ammunition storage box to the broadside box: The guns are ready to fire again, from turn 3 onward, with the new type of ammunition.
You now know the standard rules for Sails of Glory. We recommend you play at least once with these rules before proceeding to the Advanced Rules.
Advanced Rules
After players are familiar with the Standard Rules, they may wish to make the game more realistic by adding the set of rules in this section.
The Advanced Rules introduce Crew Actions, Special Damages, and their effects.
Any previous rule that is not explicitly changed remains valid when playing with the Advanced Rules.
Setup
In addition to the components introduced in the previous sections, each player must take a full set of action counters for each ship and place them in the unused action box of the ship mat.
The action counters are: Reload the left broadside, Reload the right broadside, Fire the left broadside, Fire the right broadside, Musketry fire, Increase sails, Decrease sails, Pump water, Extinguish fire, and Repair damage. The other action counters (Boarding, Blank, and Grog) are only used when playing with the appropriate optional rules.
In addition, each player takes a sails status counter and places it on a position of his choice on the ship mat: full sails, battle sails or backing sails.
In this example, the sails status counter indicates the ship is using battle sails.
The Game Turn
When playing with Advanced Rules, the turn sequence is extended by adding a new phase, the Action phase, to handle the resolution of actions:
- Planning
- Action phase
- Movement
- Combat
- Reloading
Planning
When playing with Advanced Rules, the planning phase is modified by the planning of crew actions and by the possibility that a ship has struck sails.
Planning Crew Actions. Each ship log shows the number of crew actions for that ship, indicated by the number beside the "Hand" symbol.
In addition to the choice of maneuvers, the player places as many action counters as he wants, facedown, in the planned action boxes of the ship mat, up to the number of crew actions for that ship.
When a ship is damaged, use the leftmost symbol still uncovered by damage counters in both the Ship Damage and Crew Damage track.
Planning Crew Actions – Example: The ship has three boxes filled in the Ship Damage track and four boxes filled in the Crew Damage track. The number of crew actions is reduced to 3. The player may plan up to three actions, placing the action counters facedown on the ship mat.
Struck Sails. Any ship with struck sails (see Movement, page 32) may not plan a new maneuver card.
If an illegal action is planned (shoot with unloaded guns, extinguish non-existing fires and so on), it has no effect, and the action counter is returned to the pool of available action counters for the next turn.
Action Phase
When all players have finished planning maneuvers and actions, all the actions planned are revealed at the same time, with the effects indicated below. Resolving the effect of an action is mandatory, unless indicated otherwise.
Standard Actions. These actions take effect during the Action phase, immediately after they are revealed, and are returned to the unused action box.
Increase sails: This action modifies the setting of the sails, to increase the speed of the ship. If a ship has struck sails they become backing sails; if it has backing sails they become battle sails; if it has battle sails they become full sails. There is no effect if the ship already has full sails. The player adjusts the sails status counter accordingly, moving it to the left.
Decrease sails: This action modifies the setting of the sails, to decrease the speed of the ship. If a ship has full sails they become battle sails; if it has battle sails they become backing sails; if it has backing sails they become struck sails. There is no effect if the ship already has struck sails. The player adjusts the sails status counter accordingly, moving it to the right.
Pump water: If the ship has any water damage tokens (see Special Damages, below), the player removes one. If the box occupied by the token is not the rightmost one with damage counters, all the counters shift to the left so that no damage box is left empty.
Example (Pump Water): 1) The frigate has taken water damage, fire damage and normal damage. 2) With the Pump water action, the water damage is removed. 3) The remaining damage counters shift to the left, so no damage box is left empty.
Combat Actions. These actions take effect during the Combat phase of the same turn they are revealed.
Fire the left (or right) broadside: A player may only plan this action if the appropriate broadside box is loaded. When this action is planned, the ship may fire the appropriate broadside once, following the normal rules (see Artillery Fire, page 14). Firing is not mandatory, even if the action is planned. After a player fires a broadside, he turns the ammunition counter faceup in the appropriate broadside box, as a reminder that the ammunition is used. The player returns the counter to the unused action box at the end of the combat phase, even if the ship does not fire the broadside.
Musketry fire: When this action is planned, the ship may attack once with musketry fire, following the normal rules (see Musketry Fire, page 17). Firing muskets is not mandatory. The player returns the counter to the unused action box at the end of the combat phase, even if the ship does not fire muskets.
Reloading Actions. These actions take effect during the Reloading phase of the same turn they are revealed.
Reload the right (or left) broadside: A player may only plan this action if the broadside box is empty. When this action is planned, the player may move one ammunition counter of his choice, facedown, from the ammunition storage box to the broadside box. The player returns the counter to the unused action box at the end of the reloading phase.
Delayed Actions. These actions, when revealed, are left, faceup, in the planned action box, until the Action phase of the next turn. They still count as planned actions in the next turn, so the player can plan fewer actions than those allowed by the crew action number.
Extinguish fire: If there is a fire on board (see Special Damages, below), the player leaves the action counter, faceup, in the planned action box, until the Action phase of the next turn. During the Action phase of the next turn, the action is resolved. The action counter is moved to the Special Damage box of the ship mat, to indicate the action is in progress. The action is completed at the end of the turn. The action counter and one fire on board marker are removed from the Special Damage box — the fire is extinguished, and the action becomes available again. Fire damage on the Ship Damage track is not removed. If there is more than one fire on board counter, the Extinguish fire action removes only one of them. The player must plan additional actions to extinguish the other fires.
Example: During the third turn, HMS Defence is hit and a fire on board special damage is drawn. A fire damage counter is placed in the Special Damage box to indicate that a fire is spreading on board. In the Planning phase of the fourth turn, the British player plans an Extinguish fire action. In the Action phase, the counter is revealed and left faceup. The ship takes damage from the fire this turn. In the Action phase of the fifth turn, the Extinguish fire action counter is moved to the Special Damage box. The ship still takes damage from the fire this turn. At the end of the fifth turn, the fire is extinguished. Both the action counter and the fire counter are removed from the Special Damage box.
Repair damage: The player leaves the action counter, faceup, in the planned action box, until the Action phase of the next turn. During the Action phase of the next turn, the action is resolved. At this point the player can decide to:
- repair normal damage
- repair a leak
- repair a damaged rudder
- repair a broken mast.
Repairing Normal Damage: The player immediately moves all the counters in one damage box of the ship log to the "0 damage" box of the ship mat. If the damage box is not the last one, all the groups of counters shift to the left, so there are no gaps in the ship log. The player cannot remove water or fire damage counters using this action.
Note: Any special damage caused by the removed damage counters continues to have effect, as before.
Limitation to Repairs: During the game, a ship may use the Repair damage action to repair as many leaks and rudder damages as desired. However, normal damage and broken masts may only be repaired once per game. The removed damage counters or the broken mast marker must be left in the "0 damage" box as a reminder the action has been already used once for the stated purpose.
Example (Repairing Normal Damage): 1) The frigate has taken damage in 4 boxes, including both normal damage and fire damage. 2) The player repairs damage, and decides to remove the counters from the second damage box, which is completely full (fire damage cannot be removed). 3) The counters are shifted to the left, so no damage box is left empty.
Repairing a Leak: If the ship has a leak, the player may decide to repair it: he moves the action counter to the Special Damage box. The action is completed at the end of this turn: the action counter and one leak marker are removed from the Special Damage box – the leak is repaired, and the action counter becomes available again. Water damage on the Ship Damage track is not removed.
Repairing a Damaged Rudder: If the ship has a damaged rudder, the player may decide to repair it: he moves the action counter to the Special Damage box. The action is completed at the end of this turn: the action counter and one rudder damage marker are removed from the Special Damage box – the rudder is repaired, and the action counter becomes available again.
Repairing a Broken Mast: If the ship has a broken mast, the player may decide to repair it: he moves the action counter to the Special Damage box. The action is completed at the end of this turn: the action counter and one broken mast damage marker are removed from the Special Damage box – the mast is repaired, and the action counter becomes available again.
Movement
As soon as both the maneuver card spaces on the ship mat are filled, the ship starts to move again normally.
If a ship has only one programmed maneuver in a turn when it goes from backing sails to struck sails (because the ship went in a sequence from struck sails, to backing sails, then to struck again), the maneuver is not executed, and it is placed back in the maneuver deck instead.
Sail Setting and Movement. When playing with Advanced Rules, each ship has a variable sail setting, as indicated by the sail status marker on the ship mat: full sails, battle sails, backing sails or struck sails.
When a blue border maneuver card is used, the movement line used to move is different depending on the sail setting.
Note: When a red border or dark gray border maneuver card is used, the sail setting does not modify the movement of the ship.
Sail setting positions: 1) Full Sails; 2) Battle Sails; 3) Backing Sails; 4) Struck Sails. Movement lines: 1) Full sails movement line; 2) Battle Sails; 3) Backing Sails.
Struck Sails. When a ship has struck sails, maneuver cards are not planned anymore. Any maneuver card previously planned is executed using the backing sails movement line, then the ship stops where it is.
The ship cannot use the increase sails action until it comes to a full stop.
If, in a later turn, the ship uses the increase sails action, the sail status returns to backing sails.
Starting in the Planning phase of the following turn, the ship may plan maneuver cards again, one per turn.
Combat
When playing with Advanced Rules, the Combat phase is modified by the need to plan and use crew actions to fire a broadside or muskets, and by the introduction of several types of special damage effect.
Special Damages. Some damage counters have, in addition or instead of a number, a symbol indicating they inflict special damage to the target ship.
Crew Loss symbol: Counters with this symbol indicate the hit inflicts a crew loss to the ship. As in the Basic Rules, when a crew loss damage counter is drawn, the player must place it in a box in the Crew Damage track. Each box can hold only one counter. If the player draws a counter which shows both a numeric and a crew loss, he must use a crew loss marker to keep track of the loss in the Crew Damage track, and place the numbered counter in the Ship Damage track, following the normal rules.
Fire symbol: Counters with this symbol indicate the hit starts a fire on board. The player must place a fire marker in the Special Damage section of the ship mat as a reminder there is fire on board. At the beginning of each turn, before the planning phase, the ship takes one fire damage marker for each fire on board marker in the Special Damage box, and places it on an empty box of the Ship Damage track. The box is considered full and no other damage counters of any kind can be added to it. The fire on board ends its effect when the fire is extinguished (see Special Actions, Extinguish fire, above).
Leak symbol: Counters with this symbol indicate the hit opens a leak in the hull. The player must place a water marker in the Special Damage section of the ship mat as a reminder there is a leak in the hull. At the beginning of each turn, before the planning phase, the ship takes a water damage marker for each leak marker in the Special Damage box and places it on an empty box in the Ship Damage track. The box is considered full and no other damage counters of any kind can be added to it. The leak ends its effect when it is repaired (see Special Actions, Repair damage, above). The Pump water action (see above) counters the effect of a leak, but does not repair it.
Broken Mast symbol: Counters with this symbol indicate the hit breaks one of the ship's masts. Starting with the next turn, the ship can only plan dark gray-border maneuver cards with one or two broken mast symbols. Any maneuver already planned is executed normally. Use the appropriate movement arrow (green or orange) depending on the attitude of the ship. If the ship is taken aback, the card is replaced randomly by one of the three red border cards.
If a second mast is broken, only maneuver cards with the two broken mast symbol may be planned. If a third mast is broken, the ship surrenders. Masts may be repaired using the Repair damage action (see above) once per game.
Sail Damage symbol: Counters with this symbol indicate the hit inflicts sail damage. The player must place a sail damage marker in the Special Damage section of the ship mat as a reminder.
The first damage of this kind has no effect. When the ship takes a second sail damage marker, it may no longer use full sails. If the sails are full, they are immediately changed to battle sails. When the ship takes the fourth sail damage marker, the ship may only have backing sails. If the sails are battle sails, they are immediately changed to backing sails. When the ship takes the sixth sail damage marker, the ship is considered to have a broken mast (see above), which cannot be repaired. Further damage of this kind after the sixth does not have any additional effect.
Rudder Damage symbol: Counters with this symbol indicate the hit inflicts rudder damage. The player must place a rudder damage marker in the Special Damage section of the ship mat as a reminder. The veer rating of the ship is decreased by 1.
Further damage of this kind is considered as a broken mast: The player must place one broken mast marker in the Special Damage box for each rudder damage beyond the first.
Note: Remember the choice of maneuver is limited by the veer rating of the ship, and players must check if a maneuver is allowed when they reveal it. So a maneuver which was legal before the rudder is damaged might become prohibited when revealed because the rudder is damaged. A maneuver which was prohibited when planned, might become legal because, in the meantime, the rudder is repaired.
Optional Rules
This section contains rules which add more details to the games. Players should agree on which optional rules they want to use before the game starts.
If you are playing with the Basic Rules, you can only choose between the options marked for Basic Rules. With the Standard Rules, you can also use options marked for Standard Rules. With the Advanced Rules, you can also choose to use options marked for Advanced Rules. The same code marks different effects an option may have when a different set of rules is in use.
Several optional rules require players to determine randomly if an event happens. In these cases, a damage counter is drawn and used as a randomizer. If the counter has a Crew Loss symbol, the event happens (the counter does not inflict any damage). If the counter has a "0," the event does not happen. In either case, the counter is reshuffled together with the unused counters.
Planning
Let the Men Drink! In the historical period covered by this game, the distribution of alcoholic beverages to the ship's crew to raise morale was a common practice. To represent this, each ship receives a Grog counter. This action can be used only once in a game, during the Planning phase, and only if there are no enemy ships within the first half of the ruler. When it is used, the player moves one crew damage token from the Crew Damage track of the ship to the "0 damage" box.
With Advanced Rules, the Grog counter is planned and used as a normal action. The effect is applied as soon as the action is revealed. The action can only be used once per game.
Lacking Training. Crews may have different levels of training, as indicated by the scenario or by players' choice. If this rule is in use in a scenario, one or more ships can be handled by a crew lacking training.
With Basic or Standard Rules, players may use the Gunners Lacking Training rule.
With Advanced Rules, players may use the Gunners Lacking Training rule, the Sailors Lacking Training rule, or both.
Gunners Lacking Training: Gunners lacking training require one additional turn to fully load a broadside.
During the Reloading phase after a broadside is fired, the ammunition counter is returned to the ammunition storage box, but is left faceup as a reminder the gunners take more time to reload.
In the Reloading phase of the next turn, the faceup ammunition counter in the ammunition storage box is flipped facedown. The guns are still being reloaded and are not ready to fire yet.
When playing with Standard Rules, no other ammunition counter which is facedown in the storage box may be reloaded from this storage box in this turn.
In the Reloading phase of the following turn (the second one after firing), the player may reload the ammunition counter normally, moving it from the ammunition storage box to the corresponding broadside box. In the next turn, the broadside will be able to shoot again.
If the Continuous Fire optional rule is in use, the drawn tokens are one third of the normal amount (round fractions down), instead of half.
When playing with Advanced Rules, ignore the above procedure. Use the normal rules for reloading, except Reload Broadside actions are considered delayed actions. When the Reload Broadside action is revealed, the player leaves the action counter, faceup, in the planned action box, until the Action phase of the next turn. During the Action phase of the next turn, move the action counter to the corresponding ammunition storage box. During the Reloading phase, the broadside can be reloaded and the action counter is returned to the unused action box.
Sailors Lacking Training: Sailors lacking training are not as good at executing orders as more experienced sailors, and can miss the execution of one of the planned actions.
Before revealing the actions planned for the ship, the player must draw one action counter at random among the ones planned this turn (do not include any delayed action planned in the previous turn). The player then shuffles the drawn action counter together with a Blank action counter, and randomly draws one of the two.
If the action counter is drawn, the action is executed normally. If the Blank counter is drawn, the action is not executed and the action counter is returned to the unused action box.
Movement
Entanglement. When two ships are at close distance, it is possible for their yards and rigging to become entangled, impeding further movement.
Entanglement and disentanglement are determined at the beginning of the Planning phase, before maneuver cards are planned.
When the bases of two ships are in contact, the players must draw a damage counter. If the counter has a Crew Loss symbol, the ships become entangled. If the counter is a "0," nothing happens.
Place an entanglement counter between the two ship models as a reminder.
The two ships cannot move again until they are disentangled.
If playing with Basic Rules, do not plan any maneuver card until the ships are disentangled.
If playing with Standard or Advanced Rules, discard the planned maneuver card of each ship: The ships will not move in this turn. Players can still plan a maneuver card to be executed next turn, in case the ships become disentangled in the meantime.
Note: If multiple ships are in contact with each other, check for entanglement between each pair of ships separately.
To disentangle, draw a damage counter, at the beginning of each following Planning phase, for each pair of entangled ships.
If the counter has a Crew Loss symbol, the two ships are disentangled and they start to plan and move again normally. If the counter is a "0," the ships remain entangled, with the same effect indicated above.
Combat
Continuous Fire. If this optional rule is in use, a broadside can shoot even when it is not loaded. In this case, the damage counters the target takes are halved, rounding fractions down. The broadside cannot be reloaded in the same turn it shoots with continuous fire.
When playing with Standard Rules, in addition to the rules above:
- The raking modifier (if applicable) is added before halving the damage.
- Before resolving any fire, all players secretly choose the type of ammunition to use for each broadside shooting with continuous fire. The chosen ammunition counters are revealed simultaneously and fire is then resolved.
- Double shot cannot be used with continuous fire.
When playing with Advanced Rules, in addition to the Standard Rules listed above:
- A player must plan a Fire Broadside action to use continuous fire (even if the broadside is not loaded).
- A player may not plan a Reload Broadside action on the same broadside he planned a Fire Broadside action.
First Broadside. The first broadside shot in battle was often more efficient, as the guns were carefully prepared for shooting before the heat of combat started.
At the start of the game, place a Reload Broadside action counter in each broadside box of the mat, together with the chosen ammunition counter, as a reminder the first broadside has not been fired yet.
The first time the ship shoots a broadside, the target takes one more damage token for every three (rounding up) that it should take.
Then, move the Reload Broadside action counter to the available actions (or just discard the counter if playing with Basic or Standard Rules) as a reminder that the ship will now fire normally from that broadside.
Example: When HMS Terpsichore shoots for the first time, it has a firepower of 6 for the first broadside, instead of the normal full broadside firepower of 4.
When playing with Standard Rules, calculate the effect of the Raking rule and the First Broadside rule independently.
Example: HMS Terpsichore (full broadside firepower of 4) shoots for the first time, and it is a raking shot through the front of the target ship. Two more damage counters are added for the First Broadside rule (4/3 rounded up), and two more for the Raking rule (4/3 rounded up), for a total firepower of 8.
Forced Aim. If this optional rule is in use, when a ship shoots with a broadside, it must shoot at the nearest target on that side (considering all the three firing arcs of the ship). The markings on the back of the combat ruler may be used to determine distance if necessary.
If the nearest ship is a friendly one, that broadside cannot fire.
Double Shot. During setup, add two double shot ammunition counters (one for each broadside) with the possible ammunition types to choose.
When a double shot is prepared, loading takes longer: it is not possible to shoot in the turn immediately after reloading, as usual, but in the following one (2 turns to load double shot).
As a reminder, flip the double shot counter faceup in the ammunition storage box during the first turn it is reloaded. In the next turn, the counter is moved normally, and flipped facedown, to the broadside box.
If a ship shoots with a double shot within half the ruler (red/purple or orange), the target takes double damage tokens (for example, if the firepower is 3 it takes 3 tokens and 3 tokens). If the ship shoots at a longer distance, the target does not take any damage.
Aiming High. If this optional rule is in use, a player may decide to aim high, to inflict more damage to the masts and sails of the target ship, but less damage to the hull.
Only a player shooting with ball (or double shot, if the Double Shot optional rule is in use) may decide to aim high.
When a player aims high, he resolves artillery fire normally, except for the following change. All the damage counters drawn that have an underlined number (that is, those with a leak or rudder special damage, or 6 points of damage), and all the crew damage tokens without a number, are placed in the "0" damage box, and replaced with the same amount of damage tokens. Take the appropriate damage marker for the additional special damage taken.
In addition to the effects of the new counters drawn:
- If the original replaced counter was a leak special damage, the target also takes a damage to the sails.
- If the original replaced counter was a rudder special damage, the target also takes a damage to the mast.
Aiming High – Example: The Courageuse is shooting a full broadside at short range against HMS Terpsichore, and the French player decides to aim high. Three damage counters are drawn: one of them is a 2/Crew damage, one is Crew damage only, and one is a 3/Leak damage. One damage is inflicted to the sails due to the leak counter, and a sail damage marker is taken by the Terpsichore. Then, the Crew damage and the 3/Leak are replaced with two damage counters. The total damage inflicted to the Terpsichore is calculated from these replacement counters.
Boarding
When the bases of two enemy ships are in contact at the beginning of the Planning phase, players must decide whether or not they want to board the enemy ship.
Boarding in Basic and Standard Rules
Declaring a Boarding. Before planning maneuver cards, each player must take a Boarding action counter and a Blank action counter for each ship involved, to determine if ships are grappled and boarding is possible.
The players secretly choose one of the two counters and place it, facedown, on the ship mat. Then, the players show the chosen counter.
- If both counters are Blank, no boarding takes place and the turn proceeds normally.
- If both counters are Boarding counters, a boarding takes place. The ships are grappled and cannot move. Place a counter (for example, a crew loss special damage counter) between the two ship models as a reminder.
- If one counter is a Boarding counter and the other one is a Blank, shuffle them, and draw one at random.
- If the Blank is drawn, no boarding takes place and the turn proceeds normally.
- If the Boarding is drawn, a boarding takes place. The ships are grappled and cannot move. Place a counter (for example, a crew loss special damage counter) between the two ship models as a reminder of their status.
During a grappling:
- If playing with Basic Rules, players may not plan a movement action for any ship involved in a boarding.
- If playing with Standard or Advanced Rules, the currently planned maneuver cards are discarded without effect. The ships will not move in this turn. Players must still normally plan the maneuver for the next turn, which will be executed in case grappling ends.
Resolving the Boarding. Boarding is resolved after artillery and musketry fire are completed. If neither of the two involved ships surrendered because of artillery fire or musketry, players execute a boarding attack.
Grappling is determined independently for each pair of ships, based on their choices:
- If both ships declare to grapple each other, they are grappled.
- If a ship declares to grapple a ship not grappling her, draw a damage counter. If the counter has a Crew Loss symbol, the two ships are grappled. If the counter is a "0," grappling does not take place.
- If neither ship tries to grapple, no grappling takes place.
Mark each pair of grappled ships by placing a counter (for example, a crew loss special damage counter) between them.
If a ship ends up grappled with more than one opponent, the boarding attacks of all ships are resolved together.
Before drawing each counter, the ship grappled with multiple opponents must declare a target, then one counter is drawn for each ship involved. A ship may only inflict damage to the chosen opponent, but can receive damage from multiple opponents. If necessary, declarations are done in the same order indicated above (the ship with the smaller crew declares first).
Each ship inflicts a number of damage counters equal to the Burden of the ship.
Draw the counters one by one, drawing one counter for each ship and applying the effect of both counters at the same time.
If one ship has a higher Burden than the other, all remaining counters are drawn at the end.
As soon as one ship surrenders, the boarding attack stops: any remaining counters are not drawn.
Example: Courageuse, with a Burden of 3, is boarding HMS Terpsichore, with a Burden of 2. Each of the two ships draws one damage counter. If either ship surrenders, no further counters are drawn. If neither ship surrenders, both ships draw a second counter. If, after the second counter, neither of the two ships surrendered, the Courageuse inflicts the third damage counter against the Terpsichore, then the boarding ends for the turn.
A boarding cannot end with two ships eliminating each other. If the counters drawn would inflict the last crew damage to each of them (and both ships would surrender), randomly choose one of the two ships to surrender.
Ending a Boarding. If no ship surrenders because of the boarding, the ships remain grappled until the next turn.
At the beginning of the Planning phase of the next turn, repeat the procedure to see if the boarding continues or not.
Multiple Boardings. If a ship's base is in contact with more than one enemy ship, grappling is determined independently for each pair of ships, based on their choice of counters.
When a ship's base is in contact with more than one enemy ship, players must first secretly decide for each ship (as explained above), if that ship tries to grapple one opponent, by choosing an appropriate counter (Boarding or Blank). Even if a ship is in contact with multiple enemy ships, only one counter is selected.
Then, any player who chose a boarding counter declares which enemy ship he decides to grapple. Grapple declarations start with the ship with the lowest crew (use the number indicated on the ship card). In case of a tie, the ship with more crew losses declares first. If there is still a tie, determine randomly.
Boarding in Advanced Rules
When playing with Advanced Rules, the Boarding action represents preparing offensive or defensive boarding parties.
Boarding between two ships in base contact is determined and resolved as indicated above, except the Boarding action must be planned just as any other action, and is revealed together with the other actions.
Grappling and boarding are resolved in the same way as in the Basic and Standard Rules, with the following exceptions:
- Boarding and grappling attempts are determined at the end of the Action phase, after actions are revealed, and are influenced by the choice of actions. The boarding attack is still resolved at the end of the Combat phase.
- Only a ship that planned a Boarding action may declare a boarding. It is not mandatory to do so – for example, a ship may plan a Boarding action, and then declare a Blank counter against the boarding attempt of an opponent.
- If a ship succeeds in grappling and boarding an opponent, and the opponent does not have a boarding action planned, the boarding ship has an advantage over its opponent: Before starting the boarding attack, the ship that did not choose the Boarding action receives a damage counter. During the boarding, the effect of the damage counters drawn is not simultaneous. The damage inflicted by each counter drawn by the ship that planned the boarding action is applied first, then the damage inflicted by the other ship is applied.
Example: Courageuse with a Burden of 3 is boarding HMS Terpsichore, which has a Burden of 2. Courageuse planned a Boarding action, while the crew of the Terpsichore, which is busy trying to extinguish a fire on board, did not. First of all, one damage counter is inflicted against the Terpsichore. Then, one counter is drawn for Courageuse and applied against the Terpsichore. The British ship does not surrender, so a damage counter is also drawn and applied against the Courageuse. The Courageuse then draws a second damage counter: the last crew damage is inflicted against the Terpsichore, who surrenders, so no more damage is drawn against the Courageuse.
Boarding and Entanglement. If the Entanglement optional rule (see above) is in use, first resolve the entanglement, then declare boardings. It is possible that two ships become both entangled (by coincidence) and grappled (by choice of at least one ship). In this case, the ships must become both disentangled and ungrappled before they can move again.
Other Rules
Flagship. One of the ships of each player may be designated as the flagship, as indicated by the scenario or by players' choice.
If the flagship surrenders, sinks, explodes, or is anyway eliminated from the game, all the other ships of that side take two crew special damage markers and place them on the Crew Damage track, representing the effect of the loss on the morale of the crew.
All the ships of the opposing side remove a crew damage marker from their crew loss boxes (if they have any) and move it to the "0" damage box, representing the improvement in their morale. Any ship that shot artillery or musketry in the current turn against the eliminated flagship removes two markers, instead.
If the flagship exits the gaming area, the effects are the same, unless the scenario rules indicate otherwise.
Ammunition Explosion. If a ship has a fire on board and it has already received two or more fire damage markers, the ammunition storage might explode.
Each time the ship takes a new fire damage marker beyond the second, the player must shuffle three fire markers and one explosion marker together, and then randomly draw one of them.
- If a fire damage marker is drawn, apply the fire damage normally.
- If an explosion marker is drawn, fire reaches the ammunition storage and explodes. The ship is eliminated.
Each ship in contact with the base of an exploding ship may be damaged and set on fire. Each ship in base contact must draw and apply a damage counter.
- If the counter is not a "0," in addition to the damage indicated, a fire starts on the ship. Place a fire on board marker in the special damage box, to indicate the ship now has a fire on board.
- If the counter already indicates a fire special damage, place two fire on board markers in the special damage box instead of one.
Sinking Ships. If a ship has a leak and it has already received two or more water damage markers, the hull might collapse and the ship may suddenly sink.
Each time the ship takes a new water damage marker beyond the second, the player must shuffle three water damage markers and one sinking marker together, and then randomly draw one of them.
- If a water damage marker is drawn, apply the water damage normally.
- If a sinking marker is drawn, the hull gives way and the ship sinks. The ship is eliminated.
Spreading Fires. If a ship fires a broadside against an enemy ship while their bases are in contact, and a fire starts on the enemy ship because of a fire on board special damage counter received, a fire starts on board of the firing ship, too.
To avoid fire spreading to their own ship, crew sometimes alternated shooting guns with throwing buckets of water onto the enemy ship. To represent this, the firing ship may plan an Extinguish fire action, declaring, when the action is revealed, it is performing the action on the enemy ship. In this case, if the damage she inflicts on the target indicates a fire, the fire does not start on either ship.
Fires caused by other ships firing or fires already started in the previous turns are ignored for the purpose of this rule.
Surrendered Ships. If this optional rule is in use, when a ship surrenders, it is not removed from the game. The model remains on the gaming area as an obstacle to other ships.
The ship executes the last planned maneuvers normally (if any), without planning new ones. Then it stops and is considered to be a wreck. The wreck remains still, without moving or taking any other action for the rest of the game.
Damage tokens from the ship log are reshuffled together with the unused damage counters of the same type, as usual.
Note: if the Boarding rules are in use, a surrendered ship cannot be grappled and boarded.
After a ship surrenders, it still inflicts collision damage to friendly ships when it moves. When it stops and becomes a wreck, it inflicts collision damage to both friendly and enemy ships that collide with her.
If a ship surrenders as the result of the Ammunition Explosion or Sinking Ships optional rules — or if it has an open leak or a fire on board when it surrenders — remove the ship model from the game instead of leaving it on the gaming area.
In either case, reshuffle both counters with the unused direction change counters.
Variable Wind Direction. During a battle, the direction or strength of the wind may change. This possibility is handled by the rules in this section.
The direction of the wind at the start of the game may be indicated by the scenario, mutually agreed between the players, or determined randomly using the Wind Direction counters.
Players place the Wind Gauge on the gaming table (aligned so that it is parallel to the side of the table), then rotate the wind arrow to point toward the determined direction.
Shuffle all the direction change counters together and place them in an opaque cup or other container, or facedown in a stack.
Change of Direction. At the beginning of the Planning phase of each turn, draw one wind direction change counter.
The wind direction changes only after the wind rotates twice in the same direction.
Look at the wind direction change counter drawn:
- The first time the counter indicates a wind direction change, place it on the wind gauge. The direction of the wind does not change yet, but might change in the future.
- If the counter does not show any symbol, the wind remains the same. Reshuffle the counter with the unused wind direction change counters. If there is a wind direction change counter on the wind gauge from a previous turn, that counter stays there.
- If a counter indicating a wind direction change is drawn, while another counter is already on the wind gauge, compare the two counters: a) If the two counters indicate the same direction (either clockwise or counter-clockwise), the wind changes: Rotate the arrow on the Wind Gauge 45° clockwise (for example, North to North-East) or counter clockwise (for example, North to North-West). b) If the two counters indicate opposite directions, the wind does not change. In either case, reshuffle both counters with the unused direction change counters.
If the direction of the wind changes, it influences the attitude of the ships immediately, with the Movement phase of the current turn.
Example: At the beginning of the game the wind direction is West. During turn 1, a clockwise direction change is drawn. It is placed on the wind gauge, but the wind does not change. During turn 2, a Blank is drawn. The Blank is returned to the container, the clockwise counter remains on the gauge, and the wind does not change. During turn 3, a second clockwise direction change is drawn. The wind rotates to North-West, then both counters are returned to the container.
Variable Wind Strength. When playing with the Variable Wind Direction rule and with Advanced Rules, the wind may have different strengths, indicated on the strength track of the wind gauge.
The intensity of the wind is normally medium (see Strength of the Wind, below) at the start of the game.
A scenario may indicate a different initial strength.
During setup, place the wind strength counter on the middle square of the track on the gauge, to indicate a medium strength.
Then, shuffle all the strength change counters together and place them in an opaque cup or other container, or facedown in a stack.
Strength of the Wind. The position of the strength counter on the wind gauge indicates the current strength of the wind:
- If the wind strength is low, the sail setting of all ships is considered to be one step lower. Each ship with full sails uses the battle sails movement line; each ship with battle sails uses the backing sails movement line; each ship with backing sails is considered to have struck sails.
- If the wind strength is medium, ships move normally.
- If the wind strength is high, the sail setting of all ships is considered to be one step higher. Each ship with backing sails uses the battle sails movement line; each ship with battle sails uses the full sails movement line; each ship with struck sails is still considered to have struck sails. Each ship at full sails still uses the full sails movement arrow, but each time it moves, the player must draw a damage counter. If the counter has a Crew Loss symbol, the ship takes sail damage (see Special Damages, above). If the counter is a "0," nothing happens.
Change of Strength. At the beginning of the Planning phase of each turn, draw one wind strength change counter. The wind strength may change, depending on the counter drawn.
- The first time that the counter indicates a wind strength change (either an increase or a decrease), place it on the wind gauge. The strength of the wind does not change yet, but might change in the future.
- If a counter is already on the wind gauge, and a counter that indicates the opposite wind strength change is drawn, the wind does not change. Reshuffle both counters on the wind gauge with the unused wind strength change counters.
- If the wind strength counter drawn does not show any symbol, there are two possibilities: a) If there is not a wind strength counter on the wind gauge, the wind remains the same. Reshuffle the counter with the unused wind strength change counters. b) If there is a strength change counter on the wind gauge from a previous turn (either an increase or a decrease), the wind strength changes. If the strength decreases, move the wind strength counter on the gauge one step to the left (from medium to low, or from high to medium; if the wind is already at low strength, the strength does not change). If the strength increases, move the wind strength counter on the gauge one step to the right (from low to medium, or from medium to high; if the wind is already at high strength, the strength does not change). Reshuffle both counters on the wind gauge with the unused strength change counters.
If the strength of the wind changes, it influences the movement of the ships immediately, with the Movement phase of the current turn.
Terrain Elements
While many naval battles were fought on the open sea, often they took place near the coast or close to an island.
The rules in this section introduce different types of terrain elements, which may be placed on the gaming field, to make the battle more interesting, or to create the setting for a specific scenario.
Each terrain element is defined by a cardboard shape, indicating the part of the gaming area to which its effect applies.
A few terrain elements (small reefs and islands) are provided in this Starter Set. Additional terrain elements are sold separately as Terrain Packs.
Reefs. A reef terrain element represents rocks, coral reefs, and other hard obstacles that emerge from the water or are submerged just beneath the surface.
If, due to its chosen maneuver, a ship would move so that, at the end of the movement, its base overlaps a reef terrain element, movement is not executed in the normal way.
Return the ship to its original position, and move it in the same way you move a ship when resolving an overlap with another ship (see Overlapping during Movement, page 12).
Note: If necessary, because of the risk of overlapping with another ship, resolve this movement with the sequence of movements of overlapping ships (see page 12).
The movement of the ship ends as soon as the moving ship's base touches the reef element. The ship takes a number of damage tokens equal to its Burden.
If, in a single turn, a ship takes more damage points from reefs than its Burden, it runs aground. A ship that ran aground cannot move again for the rest of the game (when playing with the Standard and Advanced Rules, any planned maneuver card is discarded). If the ship has a leak (see Special Damages, above), it does not take any more water damage because of the leak.
When a ship collides with a reef element, all special damage symbols (except leak and rudder damage) on the damage counters drawn because of the collision are ignored — only the damage number is applied.
Reefs do not have any effect on combat.
Shoals. A shoal terrain element represents sandbanks, sandbars and similar obstacles that, because of the shallow waters, are a hazard for navigation.
If, due to its chosen maneuver, a ship would move so that, at the end of the movement, its base overlaps a shoal terrain element, the ship runs aground.
A ship that runs aground cannot move again for the rest of the game (when playing with the Standard and Advanced Rules, any planned maneuver card is discarded).
If the ship has a leak (see Special Damages, above) it does not take any more water damage because of the leak.
If the Sinking Ships optional rule (see above) or the Surrendered Ships optional rule (see above) are in use, ships cannot sink on a shoal.
Shoals do not have any effect on combat.
Note: Shoal terrain elements are not included in this set, but are included in Terrain Packs.
Coast and Islands. A scenario may indicate the presence of coasts or islands.
Coast terrain elements are designed to place them at the edge of the gaming area and/or adjacent to another coast element. Islands are designed to be surrounded by water on all sides. Apart from this difference in the design, coast and islands use the same rules.
Note: Coast terrain elements are not included in this set, but are included in Terrain Packs.
Effects on Movement. The scenario indicates whether a coast (or island) element has a sandy coastline, rocky coastline, or neither of them. The scenario may also indicate the distance from the coastline which is dangerous to navigate: Equal to the width of the ruler; Equal to the red/purple part of the ruler; or None.
A coast or island element may be designated as a harbor or be considered safe for navigation for other reasons. In this case, the rules above do not apply, and the ship may get close to the element without any negative effect. However, if the ship overlaps the terrain element, it still takes damage and runs aground.
If, due to its chosen maneuver, a ship would move so that, at the end of the movement, its base is too close to the coastline (closer than the indicated distance), it may suffer damage or run aground.
- If any part of the ship's base is within the indicated distance from a sandy coastline, treat it as if it is overlapping a shoal.
- If any part of the ship's base is within the indicated distance from a rocky coastline or island, treat it as if it is overlapping a reef.
- If both of the conditions above apply (for example, because a ship ends its movement between a sandy coast and a rocky island), apply both effects.
- If any part of the ship's base overlaps the coast or island element, treat it as overlapping a reef, but the ship receives twice as many damage tokens as the Burden and the ship always runs aground, no matter how many damage points it takes.
Effects on Combat. The presence of a coast or island element blocks the line of sight.
A ship cannot fire through these terrain elements, if the line of sight for all firing arcs are blocked.
When firing from or to a coast or island element, line of sight is not blocked by parts the element itself — a ship can shoot any target on a terrain element, unless there is a different element in-between (or there is another ship blocking the line of sight).
Ships and coast batteries at sea and on land may shoot at each other, so may batteries on the same coast. The only exception is that it is forbidden to shoot if the ruler used to measure the distance goes across sea, then land and then sea again: if it is not possible to reach any part of the target, staying in the firing arc and without going across the sequence of sea, land, and sea, the aim is blocked and the ship must choose another target, if there is any available.
Coastal Batteries. A coast or island terrain element may feature a coastal battery, indicated by the presence of one or more red dots and one or more firing arcs originating from them.
Note: Coastal batteries are not included in this set, but are included in Terrain Packs.
Each battery has different characteristics, indicated by its battery log.
Explanation of the Battery Log:
- Fortification Rating
- Top Row: Artillery Firepower / Battery Damage track
- Artillery Firepower
- Number of Crew Actions — Advanced Rules only
- Bottom Row: Musketry Firepower / Crew Damage track
- "0" Tokens Box / Special Damage Box — Advanced Rules only
- Gun box
- Ammunition Storage box
- Planned Actions — Advanced Rules only
- Unused Actions — Advanced Rules only
The top row of the log is the Battery Damage track, and works similarly to the Ship Damage track of a ship log. This track indicates the firepower for all of its firing arcs. The damage capacity of each box is based on the Fortification Rating of the battery, which follows similar rules to the Burden of a ship.
The bottom row of the battery log is the Crew Damage track, and works similarly to the Crew Damage track of a ship log.
A coastal battery never moves or turns, so planning is never required (except planning actions when playing with Advanced Rules, see Actions of a Battery, below).
When using Standard Rules, a battery inflicts raking damage against a ship when at least one of its firing arcs fulfills the requirements for raking.
When using Advanced Rules, batteries ignore all special damages, except crew and fire special damages (if the Ammunition Explosion optional rule, above, is in use, it applies to batteries as well as to ships).
It is possible for a battery to fire at an enemy target on a coast (such a situation may arise, for example, in a scenario simulating a siege). In this case, the line of sight is blocked only by a terrain element different from the attacker's and the target's element (or by an intervening ship).
Batteries in Combat. In combat, batteries follow similar rules to ships: they shoot, reload and receive damage in exactly the same way.
The leftmost empty box in the top row of the battery log (with the "Guns" symbol) indicates the current firepower of that battery. There are as many numbers in the box as there are arcs in the battery.
A battery is handled in a similar way to one of the broadsides of a ship.
- A battery may have one or more firing arcs, each indicated by a red dot and two white lines bordering a colored angle.
- The battery may fire against a single target each turn.
- The line of sight for the battery is determined in the same way as for ships: it may be blocked by a ship, or by an intervening terrain element different from the element where the battery is located.
- If the target may be fired upon by more than one arc, the player may choose which arc to use (in case they have a variable firepower).
- As the battery does not have a base like a ship, combat ranges are always measured to and from the red dot. If a target's base is reached by the red/purple part of the combat ruler from one of the red dots, the battery can also attack it with musketry fire.
Example: The battery may fire against a target on one island, but cannot fire against a target on another island, due to a peninsula in-between.
Actions of a Battery. The player controlling a battery must plan actions for it just as he does for a ship, but the choice of actions is limited: Fire the guns, Reload the guns, Musketry fire, Extinguish fire, and Repair damage.
The effect of each action is similar to the equivalent ship action (see Action Phase, above), except that Repair damage repairs only normal damage.
Eliminating a Battery. If, at any time, all the boxes of the Battery Damage track are covered by a counter, the battery is destroyed. If all boxes of Crew Damage track are covered by a counter, the battery surrenders. In either case, the effect is the same, the battery is eliminated from the game. (Scenario rules may indicate different effects for victory conditions.)
When a battery is eliminated, all of the damage counters on the battery, including the "0"s, are reshuffled together with the unused damage counters of the same type.
Remember, as damage is resolved simultaneously, an eliminated battery is still able to fire in the phase in which it is destroyed or surrenders.
Rules for Solitaire Play
Historically, several battles were fought against fleets in harbors and ships at anchor. A scenario suitable for solitaire play may use one or more enemy ships at anchor as active targets.
A solitaire scenario may also involve one or more enemy ships moving across the table in a random way, while the player moves the ships sent to stop them.
For example, enemy ships enter from one side of the table. Their goal is to exit on the opposite side of the table, fleeing from you. You might enter at their back in a chase, or from another point of the table to intercept them.
Automatic Movement
For each ship that moves randomly, prepare its maneuver deck by selecting the cards with a veer rating between 3 and 7, and shuffling them. Return the removed cards to the box since they will not be used in the game.
During the Movement phase, take the top card from the deck of each ship moving randomly. Used maneuver cards are placed in a discard pile for each ship, beside its maneuver deck.
Any time the discard pile contains one sideslip (a maneuver with a veer of 5 which is not a straight line) to the right and one sideslip to the left, shuffle both cards back into the maneuver deck, together with any straights. If there is a third sideslip or if there are turns in the discard pile, leave them in the discard pile.
Any time the discard pile contains one turn to the right and one to the left, whose values exactly equal 10, shuffle them back into the maneuver deck together with any straights, leaving the sideslips in the discard pile. If there are other turns in the discard pile, leave them there.
When playing with Standard or Advanced Rules, ships that move randomly do not plan their movements one turn in advance.
Automatic Movement – Example: 1) HMS Defence is sailing with automatic movement. The following cards are drawn in the first 5 turns, and form the discard pile: 5, 5, 6, 7, 4. 2) At this point, the "6" and the "4" (totaling 10) must be reshuffled into the maneuver deck, together with the straight "5." The discard pile becomes: 5, 7. 3) If, in the next turn, a left sideslip is drawn, both sideslips would be returned to the maneuver deck, and the "7" turn would remain in the discard pile.
Combat and Actions
When playing with Basic or Standard Rules, the ships not controlled by the player fire using the following rules:
They fire a broadside every time they are loaded with a target in range. They reload immediately as soon as they can, using the normal rules.
If several targets are available, they always choose the target according to the Forced Aim rule (see above).
If the Continuous Fire rule is in use, they fire if a target is available and reload only if no target is available.
When playing with Standard or Advanced Rules, the ships not controlled by the player will shoot using the following rules: They do not choose the type of ammunition when the guns are loaded. If a broadside shoots within the red/purple part of the ruler, the target takes damage counters. If it shoots at a longer distance, but within the first half of the ruler, the target takes damage counters. If the distance is longer, but within the ruler, the target takes damage counters.
When playing with Advanced Rules, the actions of a ship are chosen following these priorities until the number of available actions is reached, or all the possibilities are finished.
- Fire musketry, if there is a target in range.
- Extinguish fire, if there is one.
- Repair a leak, if there is one.
- Fire a broadside, if it is loaded and there is a target in range (even when unloaded, if the Continuous Fire rule is in use).
- Reload a broadside, if it is unloaded.
- Repair damages, in this order:
- Damage points, if at least one damage box is completely filled by repairable damages, and the action has not been used in this game by that ship.
- A damaged mast, if one is broken and one has not been repaired before.
- A damaged rudder, if it is broken.
Coastal Batteries in Solitaire Scenarios
Coastal batteries are very suitable for use in solitaire scenarios, in which the player maneuvers one or more ships against coastal batteries shooting against the ship in an automatic way.
Coastal batteries do not move. In combat, they are handled in the same way ships not controlled by the player are handled, except, when playing with Advanced Rules, their action priorities are different:
- Extinguish fire, if there is one;
- Fire the guns, if they are loaded and there is a target in range (when unloaded, if the Continuous Fire rule is in use).
- Fire musketry, if there is a target in range.
- Reload the guns, if they are unloaded.
- Repair damage, if at least one damage box is completely filled by repairable damages, and the action has not been used in this game by that battery.
Scenarios
Ready-to-Play Scenarios
The following pages introduce several different situations, called scenarios, you can play using the models included in this box and the ones available as Ship Packs.
The lengths and widths listed in the description are suggested minimums for the playing area, but you can always adapt the playing area to your available table size.
In alternative, if you use the official Sails of Glory Game Mat to play, each scenario indicates how many mats to use.
When terrain elements are used in a scenario, an example of their placement is shown.
Every scenario also states which additional rules are required. Other optional rules may be added if all the players agree to do so before the game begins.
Enemy in Sight! — Two Small Fleets Attack Each Other in the Open Sea
Players: 2–4, divided evenly into two teams. With 3 players, one player controls both the ships from one side, and each of the opponents takes one ship from the opposite side.
Gaming Surface: Length: 90 cm (≈36 in.), width: 90 cm. (≈36 in.) or one game mat. French side is opposite to British side.
French Player(s): Courageuse and Généreux, within half-ruler distance from the French side.
British Player(s): HMS Terpsichore and HMS Defence, within half-ruler distance from the British side.
Additional Rules Needed: None.
Winning Conditions: The winner is the side with ships in play when all enemy ships exit the playing area or surrender.
Variants:
- You may vary the starting positions. For example, place the teams on adjacent sides or place one ship of each player on the same side of the table.
- You may replace one or more ships with the ones on the back of the same ship card.
- You may add one or more ships to each side, as long as the ships are balanced (for example, adding one 74-gun ship-of-the-line to both sides).
- You may decide that French ships have Lacking Training (see above), and the wind comes from the French side.
In Shallow Waters — Battle Is Engaged Near the Coast, Close to Dangerous Reefs
Players: 2–4, divided evenly into two teams. With 3 players, one player controls both the ships from one side, and each of the opponents takes one ship from the opposite side.
Gaming Surface: Length: 90 cm (≈36 in.), width: 90 cm. (≈36 in.) or one game mat.
First, place an island at the center of the table. Consider it an island with a rocky coastline, dangerous within the width of a ruler.
Then, players alternate placing one reef each, at least half a ruler from any other reef or island, until six reefs are placed.
Finally determine at random which side of the table is British and which (different) side is French. If the two sides are opposite to each other, the wind comes from the right of the British player. If they are not opposite, randomly determine if the wind comes from the British side or the French side.
French Player(s): Unité and Aquilon, within half-ruler distance from the French side.
British Player(s): HMS Meleager and HMS Vanguard, within half-ruler distance from the British side.
Additional Rules Needed: Reefs, Coast and Islands.
Winning Conditions: The winner is the side with ships in play when all enemy ships exit the playing area or surrender.
If ships from both sides run aground and the goal becomes impossible to reach, the winner is the player with more surviving ships, or with a surviving ship of the line if the opponent's surviving ship is a frigate. If a ship survives from each side and they are of the same class, the game is a draw.
Variants: Same as for Enemy In Sight! (above).
Force the Blockade — Two Ships Try to Force a Blockade to Reach Harbor
Players: 1–4. If 2 or 4 players, divide them evenly into two teams. With 3 players, one player controls both the ships from one side, and each of the opponents takes one ship from the opposite side. For solitaire play, see Variants, below.
Gaming Surface: Length: 120 cm (≈48 in.), width: 90 cm (≈36 in.) or two game mats. The British side is one of the two short sides of the table, the French is the opposite side. Wind comes from the right of the British side.
French Player(s): Courageuse and Généreux are placed first, within half-ruler distance from the British side and at least one ruler distance from both adjacent sides.
British Player(s): HMS Terpsichore and HMS Defence are placed after, within half-ruler distance from the center of the table.
Additional Rules Needed: None.
Winning Conditions: The French win if both his ships exit on the French side. The British win if at least one of the French ships is eliminated or exits on the wrong side.
Variants:
- Swap sides: the British start from the French side and must go across the table without losses, while the French start from the center of the table and must stop them.
- Play the game twice, swapping sides. The winner is the player who, in the fleeing role, exits more ships off the table on his own side. If it is a tie, the winner is the one with the most total undamaged boxes (hull and crew) on the ships he exited off of the table when in the fleeing role. If it still is a tie, the winner is the one who sunk more chasing ships. If it still is a tie, the winner is the one who inflicted more boxes of damage to the enemy chasing ships.
Solo variant: The French ships move with automatic movement (see above). They start with the rear of the ship against the British side, front toward the French side, at one ruler of distance from each other, at the center of the British side of the table.
Against the Outpost — A Small British Squadron Is Sent to Force an Enemy Outpost to Surrender
Players: 2–4, divided evenly into two teams. With 3 players, one player controls both the ships from one side, and each of the opponents takes one ship from the opposite side.
Gaming Surface: Length: 120 cm (≈48 in.), width: 90 cm (≈36 in.) or two game mats. British side is one of the two short sides of the table, French side is the opposite one. Wind comes from the right of the British side.
French Player(s): The French player places an island (the one in the figure), at half-ruler distance from the French side of the table and at least one ruler from both adjacent sides. Consider it an island with a rocky coastline, dangerous within the width of a ruler. Then, he places two reefs, at half-ruler distance from the island, and at least half-ruler distance from each other and from the table sides. Courageuse and Généreux are placed, after the British ships, within half-ruler distance from the center of the table.
British Player(s): HMS Terpsichore and HMS Defence are placed after the island and reefs, but before the French ships, anywhere within half-ruler distance from the British side.
Additional Rules Needed: Reefs, Islands.
Special Rules: The British can fire upon the brown building on the island aiming at any part of its drawing. The building surrenders if it suffers 8 points of damage, 4 crew damages, or the French fleet is defeated (that is, both French ships surrender or exit the table while there are still British ships on the table), unless all remaining British ships are aground.
Winning Conditions: The game ends when all British ships surrender or run aground, or when the building surrenders and both French ships surrender or run aground. The British player scores 8 points if the building surrenders; 4 points if the building is damaged with at least 1 point of damage or 1 crew damage but it does not surrender, -4 points if the building is undamaged at the end of the battle. Each player also scores 5 points for each enemy frigate surrendered or exited from the table; 9 points for each enemy ship of the line surrendered or exited from the table; 3 points for each enemy frigate run aground, and 5 points for each enemy ship of the line run aground. British ships may exit from the British side of the table with no penalty if the building surrenders. The player with most points wins.
Variants:
- Play the game twice, swapping sides. The winner is the player who scores the most total points.
- The British player places another island with a rocky coastline at half-ruler distance from the British side and at least one ruler from both adjacent sides; and two more reefs at half-ruler distance from the island, and at least half-ruler distance from each other and from the table sides. Both players start with their ships at one ruler of distance from their side. Both sides have an enemy building to force to surrender and score accordingly. Every ship leaving the table gives points to the enemy.
Supplies Are Coming — A French Ship of the Line Escorts a Frigate Bringing Supplies to a Besieged Island
Players: 2–4, divided evenly into two teams. With 3 players, one player controls both the ships from one side, and each of the opponents takes one ship from the opposite side.
Gaming Surface: Length: 120 cm (≈48 in.), width: 90 cm (≈36 in.) or two game mats. British side is one of the two short sides of the table, French side is the opposite one. Wind comes from the right of the British side.
French Player(s): Courageuse and Généreux are placed first within half-ruler distance from the British side and at least one ruler from both adjacent sides. The French player places an island at half-ruler distance from the French side of the table and three reefs at half-ruler distance from the island, and at least half-ruler distance from each other and from the table sides. The island is considered a harbor.
British Player(s): HMS Terpsichore and HMS Defence are placed after the French ships, at half-ruler distance from the center of the table.
Additional Rules Needed: Advanced Rules, Reefs, Islands.
Winning Conditions: The game ends when all ships on either side surrender or run aground. The French scores 2 points for each turn the Courageuse stands still with struck sails within the red/purple part of the ruler, from the edge of the island, up to a maximum of 6 points. If the French player scores 6 points in this way, his ships may exit from the French side of the table without penalty. If the French does not score points in this way, the British player scores 3 points. Each player also scores 5 points for each enemy frigate surrendered or exited from the table; 9 points for each enemy ship of the line surrendered or exited from the table, 3 points for each enemy frigate run aground; and 5 for each enemy ship of the line run aground. The player with most points wins.
Variants: Play the game twice, swapping sides. The player with most points wins.
Sitting Ducks (Solitaire Scenario) — Two Ships Attack Two Enemies at Anchor
Players: 1.
Gaming Surface: Length: 90 cm (≈36 in.), width: 90 cm. (≈36 in.) or one game mat. Two islands and three reefs as shown. Wind comes from the right of the French side. The islands have a rocky coastline, dangerous within the width of a ruler.
French Player: Unité and Aquilon at half-ruler distance from the French side.
British Player (automatic): HMS Terpsichore and HMS Defence, anchored as shown.
Additional Rules Needed: Reefs, Islands, Rules for Solitaire Play. Anchored ships are simply ships that never move.
Winning Conditions: The French player wins if none of his ships ran aground, both British ships are eliminated and both French ships have less than half of the damage boxes filled at the end of the game.
Variants:
- You can replace one or more ships with the ones on the back of the same ship card.
- Swap sides and ship positions. The player controls the British ships, placed at half-ruler distance from the upper side of the playing area. British ships are attacking. French ships, at anchor, are automatic.
Inventing New Scenarios
After you are familiar with the game, feel free to invent your own scenarios, using the ones presented here as examples. If you own multiple sets and Ship Packs, you can design far richer gaming situations.
To create a balanced scenario, you can use the downloadable tournament rules and point system available for free from www.aresgames.eu.
You may also create an unbalanced scenario. In this case you should take the uneven situation into consideration when designing the victory conditions.
Summary of Markers, Tokens and Counters
Damage Counters: A Damage Counters (90), B Damage Counters (90), C Damage Counters (60), D Damage Counters (60), E Damage Counters (90).
Special Damage Markers: Crew Damage Markers (39), Fire/Fire Damage Markers (16), Leak/Water Markers (13), Sail Damage Markers (12), Sinking Markers (2), Explosion Markers (2), Entanglement Markers (5), Damaged Rudder Markers (6), Broken Mast Markers (8).
Wind Counters: Wind Direction Counters (8), Wind Direction Change Counters (3), Clockwise Wind Direction Change Counters (3), Counter-Clockwise Wind Direction Change Counters (3), Unchanged Wind Direction Counters (4), Wind Strength Counters, Increasing Wind Strength Counter (1), Decreasing Wind Strength Counter (1), Unchanged Wind Strength Counters (3).
Ammunition Counters: Ball Counters (8), Chain Counters (8), Grapeshot Counters (8), Double Shot Counters (8).
Shooting Action Counters: Loading Left Guns Counters (4), Loading Right Guns Counters (4), Musketry Fire Counters (4), Shooting Left Guns Counters (4), Shooting Right Guns Counters (4).
Other Action Counters: Decrease Sails Counters (4), Increase Sails Counters (4), Repair Damage Counters (4), Extinguish Fire Counters (4), Pump Water Counters (4), Boarding Counters (4), Blank Counters (4), Grog Counters (4).
Expanding the Game
You may expand your game adding more ships, available for purchase as Ship Packs. To play with more than four ships at one time you need the Additional Ship Mats accessory.