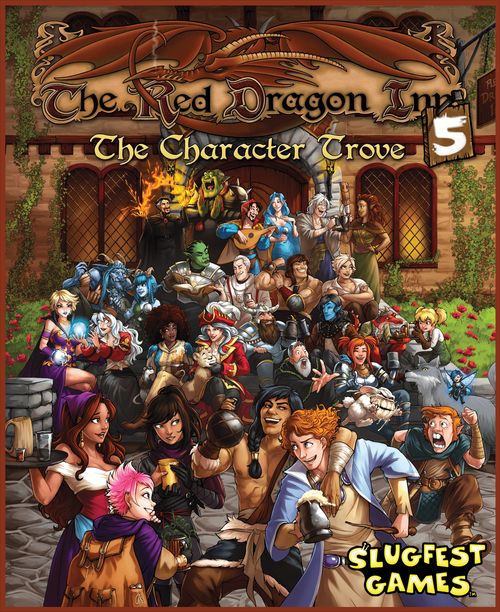
The Red Dragon Inn 5: The Character Trove
The Red Dragon Inn 5: The Character Trove Rulebook
Table of Contents
Table of Contents
Components
But wait, there's more! The Red Dragon Inn 5: The Character Trove is also a massive storage solution for all previous sets (with room for more). You get a massive storage box plus dividers, new play mats for all previously released characters, updated tokens and more! Check it out:
- 6 Unique Decks (4 40-card Character Decks, 1 18-card Item Deck, 1 30-card Drink Deck)
- 29 Character-specific Player Mats (with replacements for all previous sets!)
- 35 Cardboard Deck Dividers
- 1 Cardboard Chi Marker
- 4 Glass Fortitude Markers
- 4 Glass Alcohol Content Markers
- 9 Remastered Cardboard Fortitude Markers
- 9 Remastered Cardboard Alcohol Content Markers
- 55 Remastered Gold Coin Tokens
- 9 New Platinum Coin Tokens
- 10 Foam Spacer Blocks
- 2 Cloth Drawstring Bags
- Ziptop Baggies
- Rules for playing The Red Dragon Inn
The Characters
Sera the Fleetfooted
Sera is a stealthy rogue whose speed and agility allow her to take down roomfuls of bad guys before they even know what's happening. The dungeon's beefiest monsters are no match for her flying daggers! She didn't get so skilled by slacking off, though. Even while she's partying, she continues training to make sure she's always at the top of her game.
- The Good: She hones her skills by sparring with her friends.
- The Bad: Sometimes she does this without warning them first...
Lizwick the Collector
Lizwick is a consummate problem solver with an unrivaled collection of gear. Her wondrous Bag of Holding contains rare and peculiar items of all descriptions. She is always on the lookout for the next amazing whatchamacallit to add to her collection. Lizwick has gotten The Party out of many a jam with the clever application of the wrong tool at the right time.
- The Good: Lizwick's collection is the envy of academies, guilds and hoarders alike!
- The Bad: ...and they'd like their stuff back.
Joran the Trickster
Joran's penchant for pranks earned him a student "sabbatical" from the Mage's Collegium. Fortunately, Zot saw some potential in the boy, and decided to take him adventuring for some valuable field experience. The young mage's humor has proven to be mostly harmless to his new friends. He puts his clever brain to good use by pulling fast ones on the bad guys.
- The Good: Joran's talent for misdirection makes him the perfect weapon against enemy spell-casters.
- The Bad: It also makes him the perfect weapon against his friends' gold, their sobriety, their patience...
Zakhan the Drunken Master
Zakhan's father is a solemn elven noble and a guru of meditative martial combat techniques. His mother was a rowdy barbarian warchief with a penchant for throwing wild parties. This unique heritage has allowed Zakhan to hone a seemingly reckless hybrid fighting style of his own. His opponents who underestimate his "drunken" martial arts do so at their own peril!
- The Good: Zakhan's drunken fighting techniques make him a formidable foe.
- The Bad: Sometimes he's actually just drunk.
Character-Specific Rules
Lizwick the Collector
Setup: Shuffle your Item Deck and place it near your Player Mat.
Bag of Holding: Some cards in Lizwick's deck have a Bag of Holding icon in the bottom right. When one of these cards resolves, reveal the top card from your Item Deck after all other effects on the card have been carried out.
Items: Some Items have the subtype Immediate. If you reveal an Immediate Item, follow the instructions on the card, then put the card into your Item discard pile. No player may play cards until after the Immediate effect is resolved unless the Item specifically says otherwise.
If the Item you reveal does not have the subtype Immediate, place it above the next available Item slot at the top of your Player Mat. (Place your Items from left to right.) If you already have three Items in play, you must choose one to discard first. An Item in play like this is equipped.
Some Items do nothing. Most, however, have a subtype such as Cheating or Sometimes. While an Item is equipped, you may play it as though it were a card in your hand of that type. After playing an Item card, place it in your Item discard pile and, if necessary, move your other equipped Items to the left so that they fill your leftmost Item slots.
Hand Size: As you accumulate Items in front of you, your hand size is reduced. If you have up to one Item in play, your hand size is seven, as normal. If you have two Items in play, your hand size is six, and if you have three Items in play, your hand size is five. Your hand size only matters during your Discard and Draw Phase - it determines how many cards you draw to fill your hand.
Example: Lizwick has two equipped Items: Extra Cards and Portable Hole. Her hand size is six, so during her Discard and Draw Phase, she refills her hand to six cards rather than the usual seven.
If a card effect causes you to draw cards that exceed your hand size, you may still draw those cards. If, during your Discard and Draw Phase, you have cards in excess of your hand size, you may choose to keep them all and not draw any new ones.
During your Discard and Draw Phase, you may discard any or all of your Items as you discard cards from your hand.
If a card effect tells you to discard a card, you must discard a card from your hand (not an Item) unless the effect causing you to discard specifically says otherwise.
If your Item deck runs out, shuffle the Item discard pile and use that as the new deck.
Card-Specific Notes
Needle of Sleeping: This Immediate Item, if it is revealed on Lizwick's turn, will end her turn. If her turn ends in this way:
- Players may not play any more cards this turn.
- Any cards that have been played but have not yet resolved are discarded and do not take effect.
- The current Phase ends and all future Phases in that turn are skipped. (So, for example, if Lizwick reveals Needle of Sleeping during her Action Phase, she does not Order a Drink or Drink.)
- If a Round of Gambling is underway, the anted Gold goes to the Inn.
Zakhan the Drunken Master
Setup: Take the wine jug token and place it next to your Player Mat. This token will be used to track your Drunken Chi. As Zakhan drinks, he may choose to increase his Drunken Chi, causing some of his cards to become stronger! This is risky, though, since his Drunken Chi causes him to have a higher effective Alcohol Content.
Drunken Chi and Total Drunkenness: You start the game with no Drunken Chi. The sum of your Alcohol Content and your Drunken Chi is called your Total Drunkenness. As your Drunken Chi increases, your wine jug token should be placed on your Total Drunkenness. If your Total Drunkenness meets or crosses your Fortitude, you pass out and lose the game!
Whenever Zakhan's Alcohol Content changes, his Total Drunkenness changes by the same amount, so you will generally need to move both your Alcohol Content bead and your wine jug token when you gain Alcohol Content.
Example: Zakhan has 4 Alcohol Content and 2 Drunken Chi, for a Total Drunkenness of 6. His Alcohol Content marker is on 4 and his wine jug token is on 6. On his Drink Phase, he reveals Pot of Tea, so he sobers up by 1 point. His Alcohol Content goes to 3. Since his Drunken Chi is still 2, his Total Drunkenness goes down to 5.
Increasing Drunken Chi: Whenever you gain 1 or more Alcohol Content from a Drink, you may optionally choose to increase your Drunken Chi by 1. You make this choice after the Drink is completely done resolving.
Example: Zakhan has 0 Alcohol Content and 0 Drunken Chi. On his Drink Phase, he reveals Wine. He drinks the Wine, gaining 2 Alcohol Content. He then chooses to increase his Drunken Chi by 1, so he puts his wine jug token on 3. His Drunken Chi is now 1, and his Total Drunkenness is 3.
Some of Zakhan's cards include "Gain 1 Drunken Chi" as part of their effect. In this case, gaining Drunken Chi is not optional.
Reducing Drunken Chi: At any time, Zakhan may discard two cards from his hand to reduce his Drunken Chi by 1. This helps Zakhan stay conscious when the party gets rowdy! His Drunken Chi can never go below 0, so his wine jug token can never go below his Alcohol Content marker.
Chasers: Since a Drink with Chasers counts as a single drink, you may choose to increase your Drunken Chi by 1 after drinking such a Drink - not 1 per Drink Card consumed.
Example: Zakhan has 5 Alcohol Content and 3 Drunken Chi, for a Total Drunkenness of 8 (his markers are on 5 and 8). On his Drink Phase, he reveals Light Ale with a Chaser of Dark Ale. He gains 2 Alcohol Content, moving his markers to 7 and 10. He then chooses to gain 1 Drunken Chi, so he moves the wine jug token from 10 to 11.
Drunken Chi from Drinks Only: If you gain Alcohol Content by any means other than drinking a Drink, you may not choose to increase your Drunken Chi.
Example: Zakhan is at 4 Alcohol Content and 1 Drunken Chi (so his markers are on 4 and 5). Eve (from RDI 2) plays "Look into my eyes - you're getting drunker!" to make Zakhan gain 2 Alcohol Content. Zakhan's Alcohol Content goes to 6 and his Total Drunkenness goes to 7. He may not choose to increase his Drunken Chi.
Spending Drunken Chi: Some of Zakhan's cards have a better effect if you spend Drunken Chi. When spending Drunken Chi in this way, you spend it as you play the card. You may not wait to see whether other players wish to respond. If you spend Drunken Chi in this way and your card is Negated, Ignored, etc., you do not get a refund of the Drunken Chi you spent.
Sera the Fleetfooted
Card-Specific Notes
You can't block what you can't see!: This Action Card allows you to hit someone for 1 Fortitude, then draw a card and play another Action Card. You may play multiple copies of this card to keep playing Action Cards. If you play this card outside of your Action Phase (for example, in response to the Sea Event "Leviathan" from RDI 4), you may not play another Action Card.
A true rogue gets the job done undetected!: As the card says, the Fortitude loss may not be reduced, Negated or Ignored. It may be redirected to another player. In addition, after losing Fortitude to this card, a player may retaliate against Sera with one of the many hit-back cards in the game.
I should warn you. I'm pretty good at this game.: This is a Cheating Card, so if it gets Negated with one of the many anti-cheat cards in the game, you don't draw the two cards.
Joran the Trickster
Card-Specific Notes
Are you sure?: This useful card allows you to Negate any card that would Negate or Ignore another card. Remember that "I don't think so!" and "The Wench thinks you should stop playing with the drinks" can only be affected by "I don't think so!", so "Are you sure?" won't work on them!
Playing with portals: See "Redirecting Damage" on page 4 of the core rules.
I'm heading up to the bar. Let me get you something!: You must first give out your normal Drink Card for your Order a Drink Phase. You then look at the next three Drinks in the Drink Deck. You must give yourself exactly one of these three Drinks (so you will most likely drink it during your Drink Phase). The other two Drinks may go to the same player or to different players.