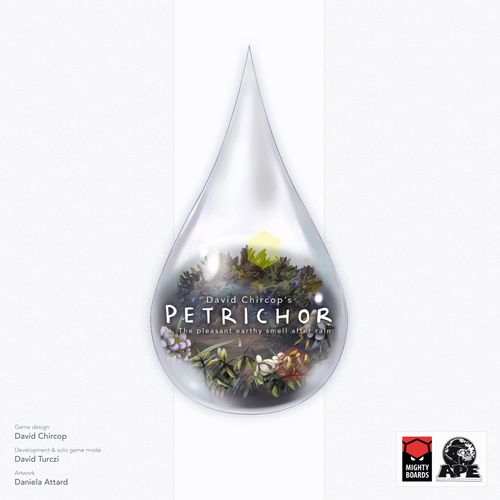
Petrichor
Petrichor Rulebook
Table of Contents
Table of Contents
- Components
- Setup
- Goal of the Game
- Game Flow
- Phase 1: Action Phase
- Merging and Overflowing
- Card Actions Explained
- Phase 2: Weather Phase
- Weather Effects Explained
- Winning the Weather Vote
- Growing Crops
- Phase 3: Harvest Phase
- Phase 4: Clean-up Phase
- Game End & Victory
- Official Drafting Variant
- Southern Winds - the Solo Game
- Petrichor: Kickstarter Promos
- Southern Winds Card Reference
Components
- Game board
- 16 crop tiles — 7/9/12 of these will form the Fields (for 2/3/4 players), the main player area
- 12 clouds — these must be assembled before your first play
- 12 Wheat tokens
- 12 thundercloud tokens
- 16 Growing tokens — they have two sides: sprouting and developed
- 4 x +50/+100 tokens — track points of the players who complete a lap on the Victory Point track
- 40 cards — 10 sets of Frost, Sun, Wind, and Rain
- 4 Player Aid cards
- Player pieces, per player: 20 translucent water drops in the player's color; 14 markers in the player's color (12 are used to vote — these will be referred to as "votes" in the rules; 2 taller ones are used to track points)
- 3 Harvest dice (six-sided) — each side shows 1-4 votes and two harvest icons
- Wooden markers: First Player marker, Round marker
- Solo Play Components: 9 Southern Wind cards, 1 normal six-sided die
Setup
-
Place the tiles face-up forming the Fields according to the number of players.
- 4 player game: shuffle all 16 tiles, place 12 of them in a 3 x 4 grid.
- 3 player game: shuffle all 16 tiles, place 9 of them in a 3 x 3 grid.
- 2 player game: first remove both Corn tiles, then shuffle the remaining 14 tiles, and place 7 of them in a 3 x 3 grid, leaving two opposing corners empty.
Note: some tiles have a compass icon in the corner - ignore these icons, as they only matter in solo play.
If you are playing Petrichor for the first time, we suggest using one of the layouts shown in the rulebook instead of a random setup.
-
Each player takes the following:
- 20 water drops of their color,
- 12 voting discs (referred to as votes from here on) of their color,
- 2 scoring markers of their color,
- 1 Player Aid card.
-
Set the board next to the Fields.
-
Decide whether you will be playing the short form or the long form game (4 or 6 rounds) and flip the board to the side with the appropriate number of rounds.
-
Give the First Player marker to the poor soul who was most recently caught in the rain. Alternatively, use any method to determine the First Player as you see fit.
-
Each player places one of their scoring markers on the 0 spot of the Victory Point track and the other one on the 0 spot of the Voting Wins track.
-
Shuffle the 40 cards and deal each player a number of them according to the number of players:
- 2 player game: 7 cards to the player with the First Player marker, 8 cards to the other player.
- 3 player game: 7 cards to each player.
- 4 player game: 6 cards to each player.
Note: if playing with the Drafting variant, use the rules outlined in the Official Drafting Variant section instead.
-
The rest of the cards form the draw deck, which will be used in the Clean-up Phase.
-
Place the Growing tokens, the Wheat tokens, the +50/+100 tokens, the clouds, and the thundercloud tokens next to the Fields as a general supply.
-
Roll the three Harvest dice and place them in the Harvest area of the board without changing the side they are showing.
-
Put the round marker on the "1" space of the Rounds track. Return all unused tiles and other components (including the ones used only for solo play) to the box.
Now, you are ready to begin your new life as a cloud.
Goal of the Game
Players are trying to score the most Victory Points. Points will be awarded during Harvest, when manipulating the Harvest Dice, and at the end of the game for Voting Wins and Wheat tokens. These concepts will be detailed throughout this rulebook.
Whenever a player scores Victory Points, advance their scoring marker on the board's outer track. If a player exceeds 50 or 100 points, use the provided +50/+100 tokens to remind them of their progress.
Game Flow
Gameplay takes place over 4 or 6 rounds, depending on whether you play the short or the long form. We recommend playing the short form the first few times you play, and the long form once you know how to plan effective, multi-round strategies. When the rulebook refers to the final round, we mean the 4th or the 6th round, for short and long form respectively.
Each round has 4 phases:
- Action Phase
- Weather Phase
- Harvest Phase
- Clean-up Phase
Phase 1: Action Phase
In each Action Phase, players take turns until one player passes, after which all other players take one more turn and then the phase ends. Play begins with the First Player and proceeds clockwise.
On their turn a player must do one of the two following options:
- play cards from their hand,
- pass.
Note: a player may not pass on their first turn of the round.
Playing Cards
If a player chooses to play cards, they must:
-
Play and discard one card from their hand to:
- a. Perform the corresponding card action.
AND
- b. Vote on a weather effect or Harvest.
-
(Optional) If no players have passed yet, the active player may repeat step 1 (both 1a and 1b). To do so, the player must discard two matching cards of the action that they would like to perform (instead of just one).
When performing the action of a card, it must be resolved if possible. However, it is allowed to play a card that cannot be resolved; in this case, the action of the card is skipped.
Also, note that Voting (Step 1b) is mandatory.
A player may play any two cards (same or different) as one other card. For example, a player may discard a Sun and a Frost card to perform a Rain action, just as if they played a Rain card. This rule may also be applied to a player's optional action: for example a player attempting an optional Sun action may discard any four cards, or a Sun and any two other cards to satisfy the requirements of the action. Playing different cards does not change how voting is performed, it counts as the action resolved, not as the actual cards played.
Example: a player wants to play both a Wind and a Sun action on their turn, but only has one of each cards. So they play the Wind card as the first action, and a Sun and two other cards (for example a Frost and a Rain card) to substitute for the 2nd Sun card needed for the optional action. Thus the player can take a Wind and a Sun action (and vote for both).
Voting
To vote, the player must choose one of the following three options, summarized in the top corner of the cards:
- a. Place a vote on the Weather space corresponding to the card they played.
- b. Place a vote on the Weather space that is the next one clockwise in the weather sequence: Frost, Sun, Wind, Rain, Frost.
- c. Decrease one Harvest die by one vote and gain 1 Victory Point. When decreasing a Harvest die showing 1 vote it is turned to the Harvest icon side and gains the player an additional 1 Victory Point (for a total of 2). Dice already showing a Harvest icon cannot be decreased. If all three Harvest dice show Harvest icons this option cannot be chosen.
If the player has no votes left in their personal supply and needs to place another, the player may take one of their votes from any Weather space on the board and place it on another Weather space instead.
Passing - 3 and 4 player games
In a 3 and 4 player game, the first player to pass will trigger the end of the Action Phase and do the following:
- Discard all remaining cards (if any) from their hand.
- Immediately take the First Player marker. The First Player marker must move; if the passing player already has it, pass it anti-clockwise (to the right) instead so the passing player becomes the second in turn order. The change of the First Player takes effect immediately (for privileges relating to tie-breaks and turn order during the Weather Phase).
- All other players take one more turn. If they choose to play cards, they may not take an optional second action.
Any other player passing (after the first) simply does nothing, just chooses to take no action.
Passing - 2 player games
There is no special procedure for passing in a 2 player game, and the first player to pass does not discard any cards. Once a player passes, the other player takes one more turn. They may not take the optional action if they choose to play cards.
Hand limit
Any player holding 5 or more cards, must discard down to 4 cards at the end of the Action Phase, before proceeding to the Weather Phase.
Merging and Overflowing
There are two types of clouds in Petrichor: light clouds and thunderclouds. All new clouds start their life as a light cloud. When a light cloud becomes a thundercloud, add a thundercloud token to the cloud. Any abilities that affect clouds affect both cloud types.
Throughout the game, clouds may be blown around above the Fields and will occasionally collide with each other. If any two clouds (light or thunder) are ever in the same space, they merge and become one thundercloud. The water drops are poured into the resulting merged thundercloud. Return the emptied cloud back to the general supply.
A light cloud may also become a thundercloud on its own, as more water drops are added to it. If any light cloud holds 4 or more water drops, it grows into a thundercloud.
Note: if a thundercloud holds less than 4 water drops it does not convert back into a light cloud; it stays a thundercloud.
If a thundercloud holds 8 or more water drops, it overflows. All water drops are poured from inside the cloud onto the tile below it. The empty cloud is then removed. It is possible that an overflow occurs immediately after a merge: if two clouds merge and the resulting cloud would hold 8 or more drops, perform the overflow as usual.
These checks are performed at the end of an effect. One effect is one player resolving one card action or their turn during a Sun Weather resolution.
Example: if an effect was to place 3 water drops into a thundercloud with 7 drops, then the cloud would overflow once all 3 water drops are placed. All 10 water drops will thus be placed on the tile below.
Note: if a player takes two actions on their turn, they count as separate effects. Clouds will merge, grow, and overflow after each action if possible.
Empty clouds are always removed from the Fields.
Card Actions Explained
Frost action
When a player performs a Frost action, take a light Cloud from the general supply, place one of the water drops from their personal supply into it, and place it on any tile on the Fields which does not already have a cloud on it. If all the tiles contain a cloud, then resolving the Frost action does nothing other than placing a vote. If the player has no water drops left in their supply, they may optionally take one of their water drops from a tile (not another cloud) and place it into the new Cloud.
Sun action
When a player performs a Sun action, take exactly two water drops from their personal supply and add them to an existing cloud where they already have at least one of their own drops. This may cause that cloud to grow or overflow. If there are no clouds with at least one of their water drops in it, then resolving the Sun action does nothing other than placing a vote. If the player has one or no water drops left in their supply, they may optionally take water drops the player has from tiles until they have the necessary two water drops to perform the Sun action. A player may not perform a Sun action to place only one water drop, it has to be two or none.
Rain action
When a player performs a Rain action, choose up to two clouds in which they have at least one water drop each, and place one water drop from each of the chosen clouds on the tile below them. The drops do not have to be their drops. If the rain action results in a cloud becoming empty, remove that cloud from the tile. If there are no clouds with at least one of the player's water drops in it, resolving the Rain action does nothing other than placing a vote.
Note: unlike the Sun action, with the Rain action it is legal to choose only one cloud; it does not have to be two.
Wind action
When a player performs a Wind action, pick a cloud in which they have at least one water drop and move the cloud to an orthogonally adjacent tile. This may cause two clouds to merge and even to overflow. If there are no clouds with at least one of their water drops in it, then resolving the Wind action does nothing other than placing a vote.
Phase 2: Weather Phase
Resolving Weather Spaces
The Weather affects the state of the Fields and affects every player, regardless of whether they voted for that Weather or not.
Exactly two Weather spaces with the most total votes (between all players) are now resolved. The two selected Weather spaces are resolved in clockwise order starting with Frost (i.e. Frost, Sun, Wind, Rain).
If two or more Weather spaces received an equal amount of votes, the First Player breaks the tie between them. In the extremely unlikely scenario of only one Weather space receiving votes, all other Weather spaces are considered tied for second place.
Example 1: Sun received a total of 7 votes, Frost and Rain received a total of 5 votes each, and Wind received a total of 4 votes. Sun will definitely be resolved as it has the most votes. The First Player then chooses whether Frost or Rain will also be resolved. If Frost is chosen, the order in which they are resolved is Frost and then Sun. If Rain was chosen, the order would be Sun and then Rain.
Example 2: Sun and Wind received 6 votes each, Frost and Rain received 4 votes each. There is no need for the First Player to decide, as Sun and Wind will be resolved (in that order).
Exception: in the final round every Weather space with at least one vote on it is resolved.
Weather Effects Explained
Frost Weather
All light clouds on the Fields become thunderclouds, regardless of how many drops are inside.
Sun Weather
Starting with the First Player and going clockwise, each player takes a turn to choose one cloud with at least one of their drops present and doubles the number of their drops in it.
If a player has no drops in any cloud, the Sun weather does not affect them. Otherwise it is mandatory to choose one cloud to double. If the player has fewer drops left in their supply than necessary, they may take drops from tiles (not from another cloud) to then perform the Sun weather's effect. The Sun Weather's effect may not be used to place fewer drops than required; it has to be double or none.
Sunny weather may cause clouds to grow and overflow.
After resolving all changes in the clouds, develop any sprouting Coffee, even Coffee that started growing thanks to an overflow during this Sun weather (see Scoring, Coffee tile).
Wind Weather
Each player, starting from the player to the right of the First Player (i.e. the last player) and going anti-clockwise (opposite of normal play), must choose a drop on any of the tiles (not inside a cloud) and move it to an orthogonally adjacent tile (not diagonal). A player does not need to have a drop of their own on either affected tile to move a drop, and the moved drop may belong to any player. Note that this may also cause tiles to become marked as growing (see Growing Crops), or lose their growing status. If there are no drops directly on tiles, this Weather has no effect.
Rain Weather
Pour all drops of all thunderclouds (not light clouds) onto the tiles they are on, then remove the empty thunderclouds from the Fields. Once done, develop any sprouting Rice, even Rice that started growing thanks to this Rain weather (see Scoring, Rice tile).
Winning the Weather Vote
The winner(s) for each of the resolved spaces are decided separately. The player or players who have the most votes on each of the resolved Weather spaces are declared the winner of that vote. The winner of each vote advances their scoring marker on the Voting Wins track by one space. Exception: in the final round all Weather spaces with votes are resolved, but only the winners of the 2 Weather spaces with the most total votes can advance their scoring markers.
If there is a tie between players for most votes in a 2 player game, neither player advances. If there is a tie between players in a 3 or more player game, all of the tied players advance.
Provided they win (or tie in a 3-4 player game) in each of the resolved Weather spaces, the same player can advance up to twice in a round.
Example: in this round the Sun and Wind Weather spaces will be resolved. This means that all three players except Red will get a voting win, as they all have the most (or tied) votes on one of the resolved Weather spaces. If Blue had one more vote on Sun, it would cause another tie, scoring a second Voting Win for blue. Even though Red has the most votes on the Frost Weather space, it does not give them anything, as Frost is not resolved this round.
At the end of the game, players will score points based on their position on the Voting Wins track.
After a Weather space is resolved, return the votes on that space to their respective owners. Leave votes on Weather spaces that did not resolve this turn where they are.
Changing the First Player - 2 player games
In a 2 player game, the First Player marker changes hands after the last step of the Weather Phase. Look at the total remaining votes on the board.
- If the current First Player has more votes on the board than their opponent, they retain the First Player marker.
- Otherwise, the First Player marker is moved to the other player.
Growing Crops
Each Crop Tile has a water drop icon on it with a number inside; this shows the total number of water drops required to cause that tile's crop to start growing. Once that number is met or exceeded, a Growing token is placed onto the tile and the crop now counts as growing. Rice and Coffee have two lines: one for sprouting, one for developed. On those tiles place the token on the sprouting side first, and only flip it to the developed side when the second condition is met (see Weather Phase). On all other tiles, use the developed side of the token only. Only Growing tiles (whether sprouting or developed) are harvested during a Harvest Phase.
If the number of water drops ever falls below that number, remove the Growing token (regardless of which side is showing); the crop has dried out and no longer counts as growing.
Phase 3: Harvest Phase
The Harvest Phase occurs if one or both of the following is true:
- It is the final round (4th for short form, 6th for long form).
- All three Harvest dice show the Harvest icon.
If neither condition is true, skip Harvest this round and proceed directly to the Clean-up Phase.
Scoring
When the Harvest Phase happens, all growing crops are harvested. Players score Victory Points based on who has more water drops on the tile being harvested.
Score all tiles with a Growing token in any order. Once scored, remove the Growing token from the tile and return all water drops on it to their owner's pool. Do not remove drops from tiles that are not growing, and thus not harvested.
Each crop in Petrichor is scored slightly differently. See the differences explained below.
Ties
If two or more players are tied for a position on a tile, they and everyone below them in scoring order, score a lower rank.
Example: Two players are tied for first place, and a third player has fewer drops than them, the first two players score points according to the second place score on that tile, while the third player scores points according to the third place score on that tile. If three players are tied for first place, they all score points according to the third place on that tile, etc.
Wheat
When harvested, the player with the most drops on the tile gains 2 points and a Wheat token. Every other player with drops on it gain 3 points.
The player with the highest number of Wheat tokens at the end of the game will score 12 bonus points. In the case of a tie, all tied players score the 12 points.
Cotton, Grass, Potato
Cotton, Grass, and Potato all score according to simple majority scoring. The player with the most drops scores the first number, the player with second most the second number, and so on. Note that the Potato's second place scores higher than the first!
Example: Grass is growing since there is a total of 5 drops on it. If a Harvest comes, Green would score 4 points (for being first on Grass), and Yellow and Red would score 2 points each (for being tied for second). Potato wouldn't score anything, as there are only 2 drops on it, and 3 is needed to make Potato growing.
Coffee
Coffee scores the same as the above three crop types, but it needs more sun to develop. If a Coffee tile has a Growing token on it showing the sprouting icon at the end of a Sun Weather effect (regardless whether it was placed there during the Sun Weather or earlier, even in a different round), that Coffee tile immediately develops: flip the Growing token to the other side, to show the developed icon. Use the top, lower-value scoring numbers when awarding points for a sprouting, and the bottom, higher-value when scoring for a developed Coffee.
Example: Blue has 3 drops in a cloud above a Coffee tile. The weather for the round is Sun and Rain. When the Sun weather is resolved, Blue places 3 more drops into the cloud, turning the cloud into a thundercloud. Then, when the Rain weather is resolved, all 6 drops are poured onto the tile. This is enough to cause the Coffee to sprout. Although it was Sunny this round, the Sun has already been resolved, so the crop does not develop. If there were a Harvest this round, Blue would score 5 points.
Note: if Blue initially had 4 drops on it, doubling it during Sun weather would have made it overflow during Sun - thus it would have developed for a potential 10 point score!
Rice
Rice works somewhat similarly to Coffee, as it sprouts first before it develops - which it does following a Rain Weather. However, a sprouting Rice scores no points (the drops on it are still removed when harvested). A developed Rice, however, scores a player 1 point for each of their own drops on it, regardless of how many drops other players have on there.
Corn
When Corn is harvested, players score points according to the number of players that have at least 1 drop on the tile. If there is only one player who has drops on the Corn, that player scores the first number. If two players have at least one drop on the Corn then both players score the second number, and so on.
Phase 4: Clean-up Phase
Skip this Phase if this is the final round (4th for short form, 6th for long form) and proceed to Game End. If it is not the final round do all of the following before proceeding to the next round:
-
Move the round marker one space forward.
-
If there was a Harvest this round (all of the dice are showing the Harvest Icon), re-roll the all the Harvest dice. If not, re-roll only the dice not showing the Harvest Icon.
Note: as a result, some or all of the rolled dice may show the Harvest icon, and that is completely okay.
-
Deal all players a new hand of cards:
- 2 and 3 player game: 7 cards to each player.
- 4 player game: 6 cards to each player.
If players had cards left in hand from the previous round (up to 4), they get the new cards in addition to the cards already in hand.
Note: if playing with the Drafting variant, see that section for the rules instead.
If the draw deck runs out while dealing, reshuffle all previously discarded cards to form a new draw deck, and then continue.
Game End & Victory
The game end triggers when the final round is over: round 4 when playing short form, round 6 when playing long form.
- Each player gains points equal to the number depicted on their current location on the Voting Wins track.
- The player or players with the most Wheat tokens also gain 12 bonus Victory Points (as noted at the Wheat scoring rules). In the case of a tie, each tying player scores 12 Victory Points.
The player with the most total points wins. In the case of a tie, the player who is highest on the Voting Wins track wins. If there is still a tie, then the first person to run to the nearest field and harvest a crop wins - or they can just enjoy a shared victory.
Official Drafting Variant
Every time cards are dealt (at setup and between rounds), instead of dealing each player a number of cards, do a draft. If players have cards kept from the previous round, those cards do not participate in the draft. Set them aside before dealing the cards, and add them back to the players' hand once drafting is finished.
The steps of the draft are the following:
-
For a 4 player game:
- Deal each player 6 cards.
- Each player keeps 1 card, passing the rest to the next player clockwise.
- Each player keeps 2 cards from the 5 passed to them, passing the rest clockwise.
- Each player keeps these last 3 cards.
-
For a 2 and 3 player games:
- Deal each player 7 cards.
- Each player keeps 1 card, passing the rest to the next player clockwise.
- Each player keeps 2 cards from the 6 passed to them, passing the rest clockwise.
- Each player keeps 2 cards from the 4 passed to them, passing the remaining 2 clockwise.
- Each player keeps these 2 cards.
-
For 2 players only:
- If this is the drafting during setup: deal one additional card to the player who is not the First Player.
Note: using this variant will give players more control over the cards they get for each round and allow for another level of tactics. It will, however, increase the playtime.
Southern Winds - the Solo Game
In the solo game, the lone player will try to do the same as you would in a multiplayer game: water the fields and win votes to gain points. For simplicity, we will be referring to that player as "you". But there is a strong, southern wind coming, trying to push you away from the most valuable fields, while also depositing strange water from lands unknown - represented by neutral drops.
Solo Setup
Perform the same setup as in the multiplayer game with the following changes:
-
Flip the board to the side with the 4 rounds.
-
Remove any tiles that do not have a Southern Wind icon in the corner. Shuffle the remaining ones and choose 6 at random.
-
Lay out the chosen tiles in 3 rows of 2 tiles each, in ascending numeric order of their priority left-to-right, then top-to-bottom (with the top-left tile being the lowest number, the top-right being the next one, etc.). Tiles will be referred to by their position: the top-left one is P1, the one to the right of it is P2, the left one of the second row is P3, etc. When using the numeric die to determine position a rolled "1" means P1, etc.
-
Roll the numeric die twice, and place a cloud with a neutral drop in both of the rolled positions. (If the second number is the same as the first, re-roll it until a different number comes up.)
-
Roll the die again, and place a cloud with 1 of your drops in the rolled position. (If that position is taken, re-roll until a free one is rolled.) This is done instead of the cloud you would normally place in step 12 of setup.
-
Shuffle the 9 Southern Wind cards, and place them next to the play area, forming the solo deck.
-
Shuffle the playing cards as normal, and deal 8 cards to yourself.
Note: the First Player marker is not used in the solo game, as the neutral player always starts a round. You break ties when selecting the Weather.
One Round of Play
- Play one neutral turn (explained below).
- Play one player turn (either playing using the same rules and resolution as in the multiplayer game, or passing and discarding all your cards).
- If you did not pass, repeat from step 1.
Neutral Turn
Reveal the top card of the Southern Winds deck.
If it is the "Reshuffle" card, shuffle all 9 Southern Winds cards together (including all the discarded ones and the Reshuffle card itself), and draw another one.
Then:
-
Perform the card's ability (see the Southern Winds Card Reference).
Each action affects a tile in a particular position. Roll the numeric die to select a tile to target. A target is valid if the result of the action causes anything to happen on the Fields. If the selected tile is not a valid target for that action, apply the action to the tile in the next position, circling around if necessary.
Example: if 4 was rolled, and the valid targets for that particular action are P2 and P3, check P4, P5, P6, P1, P2, thus P2 will be the target tile.
If there are no valid targets, do nothing on the Fields, and advance the neutral player by 1 on the Victory Point track instead. If an action requires the neutral player to place water when it has none, then consider it as if there are no valid targets.
-
Check the icons at the bottom of the card (it will have either 1 or 2 icons). Place that many neutral votes on the matching Weather space. If the neutral player does not have enough votes to place, place as many as possible, then advance the neutral player by 1 per missing vote on the Victory Point track instead.
-
If a Harvest icon is shown and there are at least one die showing a non-Harvest icon: decrease a Harvest die and score 1 or 2 points the same as a player would. If there are multiple dice that can be decreased, the neutral player prefers to decrease a die to a Harvest icon (to gain 2 points). If that is not possible, it decreases the die with the highest number of votes shown. (So full priority order is: first decrease a die showing 1, 4, 3, 2 votes).
Solo Round End
At the end of the round, proceed to the Weather phase, Harvest phase, and Clean-up phase in the same way as in the multiplayer game (with a few differences noted below).
Note: do not shuffle the Southern Wind cards between rounds. They are only reshuffled when the "Reshuffle" card comes up.
Solo Game End
Play a total of 4 rounds (dealing 8 cards to yourself in each). After the 4th and final round, score for Voting wins and Wheat tokens as in the multiplayer game (including a final round Harvest). If you do not have more points than the neutral player, you lose. Otherwise the plants bloom happily, and you win.
Weather phase differences
You do the same things during the resolution of the Weather spaces as in the multiplayer game. You break all ties when selecting which Weather spaces to resolve. If there is a tie on who wins a specific vote, neither you nor the neutral player moves up the Voting Wins track for that weather action.
Changes in the resolution of the different weather effects:
- Frost: no change, as all light clouds are automatically converted to thunderclouds.
- Wind: after resolving your Wind weather effect (which is still moving any one drop to an adjacent tile), check each of the tiles P3 to P6 in order. On each checked tile, if there is at least 1 of your drops on it, move 1 of your drops from the tile to the adjacent tile to the North (a drop on P3 would move to P1 for example).
- Sun: the neutral player first doubles its presence in all clouds. Then, you double your drops in one of them. If the neutral player does not have enough water drops to double all clouds, it doubles the ones in higher numbered positions first (so starting from P6 and working backward).
- Rain: no change, as all thunderclouds automatically pour out their contents.
Solo Harvest Phase
The Harvest Phase occurs if one or more of the following is true:
- The three Harvest dice show a Harvest icon (same as multiplayer game).
- It is the end of the 4th (final) round.
- The neutral player has no water drops left in its pool in the beginning of the Harvest phase.
Increasing the Difficulty
For a more challenging solo game, there are three variants to increase the difficulty. They can be combined for an even greater challenge:
-
Double card variant: on the neutral player's turn, draw and resolve one card (but ignore any voting icons). Then draw and resolve another card (this time resolve any voting icons on this card as well).
-
Non-random targeting variant: when selecting a tile for the action's target, instead of rolling a die, use the following three criteria:
- If an action moves a cloud or creates a new cloud (cards 4, 7, or 8), perform that action on the highest-numbered legally available tile (i.e. check P6 first, then P5, etc.)
- If an action adds drops to a cloud (cards 5 or 6), pick the highest-numbered available target. If possible, pick a tile where the neutral player has fewer drops than you, counting drops both on the crop tile and on the cloud on it. Example: if the neutral player is already leading in P6, but is behind in P5, then pick P5. But if the neutral player is leading in both (and the other tiles do not have a cloud), pick P6.
- If an action affects the tile directly (cards 1, 2, or 3), pick the highest-numbered available target, ignoring anywhere the neutral player has 2 or more drops more on the tile than you. (Ignore the drops in the clouds when counting for this condition.)
-
"No More Tricks" variant: the neutral player fails to grasp the tricks of scoring high on Wheat and Potato. If you want to deny yourself the help coming from exploiting that, remove those tiles from the pile before randomly selecting the 6 tiles to play with.
-
"One More Turn" variant: after you actually pass, the neutral player takes one more turn.
Petrichor: Kickstarter Promos
You might have two additional punch boards' worth of components not listed in the components section if you backed this game through Kickstarter or otherwise acquired them separately. They are designed to provide additional variability and replayability. The game is fully playable without them.
Fertilizer tokens
When playing with the Fertilizer tokens, first lay out the tiles face down during setup, then each player places a Fertilizer token on tiles in a way that no two of them are orthogonally adjacent. Repeat this until all three Fertilizer tokens are on the board. Then flip the tiles face up, keeping the Fertilizer tokens on those tiles until the end of the game.
During Harvest, all scoring values on a tile with a Fertilizer token on it are increased by 1 Victory Point. If a Fertilizer token is placed on a Primrose tile (from the Flowers expansion), score one additional Victory Point for it every time the Primrose is scored upon a change of control.
Example: first place on a developed Coffee would score 11 points, two players sharing a Corn would score 9 points each, and the third place on Cotton would score 1 point instead of 0.
New tiles
Shuffle the new tiles in with the others before creating the Fields.
The Maltese Cactus
The Cactus develops if there are at least 2 drops on it. If however it reaches 4 or more drops, it drowns due to overwatering and scores lower points for the two players with the most drops on it. Use the special growing token's backside to track that the Cactus has been overwatered.
Note: the Maltese Cactus has a solo priority of 5.5, that is higher than the Potato's but lower than one of the Wheats'.
The Lake
The Lake is obviously not a plant, therefore it cannot grow and it cannot be harvested. Any drop that lands on the Lake tile is immediately returned to its owner's personal supply. If an existing cloud is moved onto the Lake via a Wind card action, the player performing the Wind action must immediately add 3 of their own drops into the cloud - signifying the water the breeze evaporates from the Lake's surface. If a cloud is moved off from the Lake tile via a Wind card action, it can be moved any number of times (even changing directions). The cloud must stop moving if merged with another cloud, and cannot re-enter the Lake during the same Wind card action it left it.
Note: the Lake is not used in solo play.
Southern Winds Card Reference
1 - Place 1 drop on a tile
Take 1 neutral drop from the supply and put it directly onto the selected tile. Then check to see if the crop is now growing.
2 - Place 2 drops on a tile
Take 2 neutral drops from the supply and put them directly onto the selected tile. Then check to see if the crop is now growing.
3 - Remove 1 player drop from a tile
Remove 1 of your drops from the selected tile and return it to your supply. Then check for the crop drying out. If you have no drops on a tile, it is not a valid target.
4 - Create a new cloud with 2 drops
Add a new cloud with 2 neutral raindrops onto the selected tile. If the tile already has a cloud, it is not a valid target.
5 - Place 1 drop on a cloud
Add a neutral drop to the cloud on the selected tile. Then check for cloud growth/overflow. If there is no cloud on the tile, it is not a valid target.
6 - Place 1 drop on a cloud
Add a neutral drop to the cloud on the selected tile. Then check for cloud growth/overflow. If there is no cloud on the tile, it is not a valid target.
7 - Move a mixed cloud NW
Move a cloud that has both neutral drops and your drops, from the selected tile, directly to the tile north-west of it (P4 to P1 for example). Do not move it through any of the orthogonally adjacent tiles on the way. If the cloud is already in the first column, move it only north (P3 to P1 for example). If the cloud is already on P2, move it only west to P1. If the cloud is on P1, it is not a valid target.
8 - Move a pure cloud SE
Move a cloud with only neutral raindrops from the selected tile, directly to the tile south-east of it (P3 to P6 for example). Do not move it through any of the orthogonally adjacent tiles on the way. If the cloud is already in the second column, move it only south (P2 to P4 for example). If the cloud is already on P5, move it only east to P6. If the cloud is on P6, it is not a valid target.
9 - Reshuffle & Redraw
Take all the Southern Wind cards (the discards, the remaining deck, and this card), shuffle them together to form a new deck, draw a new card, and perform its action. If Reshuffle & Redraw comes up again, repeat this process as many times as needed until a different action is drawn.