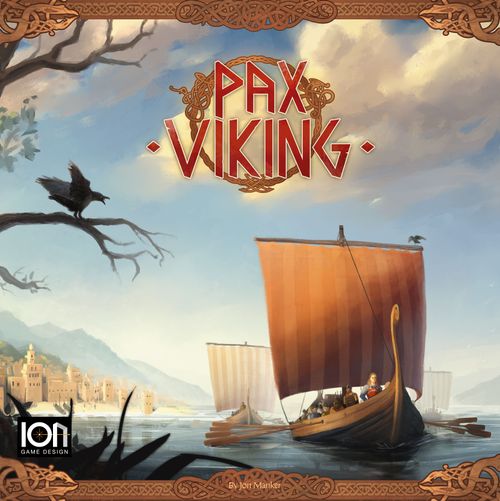
Pax Viking
Pax Viking Rulebook
Table of Contents
Table of Contents
How to Win
First of all, how do you win Pax Viking? You are trying to achieve one of the revealed Victory Condition Cards. Novice Victory Conditions are checked at the end of each player's turn. Every other Victory Condition is checked each time an event is resolved. The game ends when someone has met at least one Victory Condition during a check. The game also ends if no Tiles remain in the saga track, at which point you check the Victory Conditions one last time. If no player or more than one player has met a Victory Condition the game ends. The player that has met the most Victory Conditions wins. If there is a tie, whoever amongst the tied players that has the most established Followers wins. If there is still a tie, whoever amongst the tied players that has the most Silfr wins. If there is still a tie, those players share the victory.
Pax Viking rules in a nutshell: In Pax Viking you take 4 actions each turn, selected from the ones available to you. Unused actions are not saved for future turns. You find all actions at the bottom of your Jarlboard. The goal is to complete 1 of the Victory Conditions found at the top right of the map, using these actions. The path to doing so is in short to get Tiles from the saga track to your hand (invest action), bring a Longship to the post mentioned on the Tiles (journey action), to be able to play it (play action) as an event (a one time effect), or to a post on the map (ventures) or to your Jarlboard (gods or advocates). You get to place Followers on ventures, gods and advocates, which is useful since most Victory Conditions concerns Followers. In addition, gods and advocates have persistent positive effects and ventures have effects that you can activate (activate action) with a Longship. Finally existing posts on the map, either uncontrolled or controlled by other players can be taken (parley action). The player with the most Followers placed of a certain kind (sweden, rus, jarldom or theocracy) gets access to stronger influence actions.
Sequence of Play
Each time it is your turn, you follow the sequence of play found at the bottom right of each Jarlboard.
- Influence Phase (a short check)
- Action Phase (your 4 actions)
- Winter Solstice (end of turn effects)
Turns go clockwise from the starting player until someone wins. As long as potential requirements are met, you may take any actions in any order during the Action Phase. You may take the same action several times.
By Jon Manker
Components
- 1 Game board
- 220 Saga Tiles — the starter deck of 72 Tiles are found in their own shrink wrap when the game is new. You can use it during your first plays. For quicker setup of future plays keep the Tiles sorted by type in the box.
- 88 Venture Tiles
- 22 God Tiles
- 66 Event Tiles
- 44 Advocate Tiles
- 20 Victory Condition Cards — 5 Novice, 5 Standard, 5 Hard, 5 Legendary
- Powerful Ally Longships — 3 Dublin Longships, 2 Faroe Longships, 2 Iceland Longships
- Map Markers — 4 Influence Action Markers, 7 Trade Center Markers, 2 Rosetta Stone boards
- Player Components:
- 9 Jarlboards
- Jarlboard Markers — sort these by color into 6 provided ziplock bags
- 36 Sweden Followers
- 36 Rus Followers
- 36 Jarldom Followers
- 36 Theocracy Followers
- 36 Longships
- 80 Coins — 60 Silfr, 20 Gull (1 Gull = 5 Silfr)
- 70+ Home Markers
- 24 Action Markers
Setup
If this is your first time playing and you want to try a rules tutorial, also read the setup modifications on page 4 (see the Rules Teaching Tutorial below). The letters below refer to the setup paragraphs.
A. Put the Gameboard on the table. (You journey with your Longships on this).
B. Put the powerful ally Longships on the Gameboard on their starting locations, just outside Dublin (3 Black), Faroe (2 Gray) and Iceland (2 White).
C. Put the 4 influence action markers on their matching spots on the top of Gameboard. (The player with the most of one Follower type grabs the corresponding marker to mark that they have access to a stronger action).
D. Separate the Victory Condition Cards into the 4 Difficulty Levels and choose the level you want to play.
- Novice: For beginners and casual play.
- Standard: Recommended Difficulty Level after your first game.
- Hard: For experienced players.
- Legendary: For players looking for the ultimate Pax Viking challenge.
Randomly select 4 cards from your chosen level and put them faceup on the Victory Condition Card area.
Handicap Variant: As a handicap system you may optionally use Victory Condition Cards from different categories (for example two Novice and two Hard Cards). Less experienced players may reach any of the conditions to win, while more experienced players have to reach the more difficult conditions.
Bragi's Variant: You can start the game with the Victory Condition Cards facedown, revealing 1 card each time a player plays an event, until all cards are revealed.
E. Randomly select 12 Saga Tiles per player. Shuffle the selected saga Tiles and put them facedown on the saga pile space. Fill the saga track below it with faceup Tiles from the saga pile. (These are the Tiles you invest in to play from your hand to the map or Jarlboard when you have journeyed to the Tile's location).
Starter Deck Variant: If you want a less luck-based saga Tile distribution, use the starter deck as your saga pile. These Tiles are delivered in a separate shrink wrap and are marked 2p, 3p, 4p, 5p and 6p to the right of the Tile's title. Use only the 2p Tiles for a 2 player game, the 2p and 3p Tiles for a 3 player game and so forth.
Custom Starter Deck Variant: If you want to create a less luck-based deck from all 220 Tiles, separate the saga Tiles into ventures, events, gods and advocates. Randomly draw 4 ventures, 3 events, 2 gods and 3 advocates per player, then shuffle them all facedown into a saga pile.
F. From the saga Tiles not in the saga pile, randomly select venture Tiles, 6 minus the number of players (see the chart). Each venture selected must have a unique region. Add them faceup as posts on their respective regions on the Gameboard.
| Players | 2 | 3 | 4 | 5 | 6 |
|---|---|---|---|---|---|
| Starting Venture Posts | 4 | 3 | 2 | 1 | 0 |
G. Put the 7 trade center markers on the trade center they represent.
H. Randomly assign each player a Jarlboard and all components of their chosen color. The Jarlboard is a detailed view of your home, so that Longships on your Jarlboard is actually located on any of your home markers on the board. On your Jarlboard you put the following components: a. 24 Followers in each of the designated spaces of the 4 Follower types: jarldom, sweden, theocracy, rus. b. 6 Longships in the designated spaces at the top center of your Jarlboard. c. 4 Action markers next to your Jarlboard. d. 12 home markers next to your Jarlboard. Locate your Jarl's symbol on the Gameboard and put one of your home markers on it and on the icon on the Jarlboard. The color of the name plate on your Jarlboard indicates the color of the wind where your home is located. The home markers are used to mark your home, your duchies, and powerful ally Longships you control.
I. Randomly determine the starting player. If you want, use Grandmother Lill's technique to randomize this: Shake 1 Longship belonging to each player in your hands and gently toss them in one direction. The Longship that lands the furthest away is the starting player. The player order is clockwise.
J. Collect your starting Silfr. The amount is based on player order, see chart below. Add potential extra Silfr if listed on your Jarl's special ability.
| Player order | 1 | 2 | 3 | 4 | 5 | 6 |
|---|---|---|---|---|---|---|
| Silfr | 3 | 4 | 5 | 6 | 7 | 8 |
Rules Teaching Tutorial
Before learning the rules using the Tutorial below, you may want to watch a short how-to-play video found on: https://link.iongamedesign.com/PaxViking_HowToPlay (found as a QR-code on back of the box).
The tutorial shows the first 3 turns of a 2 player game. Playing through these 3 turns as you read serves as a live illustration of the rules. Do a setup for 2 players using the Starter deck. Tweak the setup in the following ways:
a. Search in the starting deck for 4 specific Tiles and put them on cost 2, 4, 6 and 8 on the saga track: "The Radimichs" on cost 2, "Ibn Khordadbeh" on cost 4, "The Great schism" on cost 6 and "Freyr" on cost 8. They are at the top of the deck in a brand new copy of Pax Viking. Then shuffle 20 random Tiles from the rest of the Starter Deck to a saga pile and reveal Tiles from it to fill the remaining saga track.
b. Use the Jarlboards for Sigrid the Haughty and Styrbjörn the Strong, with Sigrid as the starting player, giving her 3 Silfr and Styrbjörn 7 Silfr (4 for being the second player + 3 from his special ability).
c. As Victory Conditions, use 4 of the Novice cards, excluding the "Dominance Victory" card.
There is no winner in the tutorial, it is just for learning. After the 3 turns are done you can reset the game. Pax Viking's rules explanations are intertwined in the tutorial's turns, explaining what is being performed. The headers tell you what is covered in a specific turn.
While you step through the tutorial game, the Anatomies chapter later on in these rules may be useful, telling you what different parts of the components are called, and the Rosetta Stone player aids will tell you the rules for each of the different terms in the game. All terms in the Rosetta stone are written in small caps throughout Tiles, boards and rules.
Turn 1: Invest, Journey, Exhaust, Trade, Play, Establish & Winter Solstice
Sigrid's 1st Influence Phase (Turn 1)
During the influence phase you check if you are entitled to an influence action marker. No Followers are established, so nothing happens during influence on a player's 1st turn.
Sigrid's 1st Action Phase (Turn 1)
When you take an Action you put 1 of your Action markers on the corresponding Action slot on your Jarlboard. There are two groups of actions, 5 Standard Actions found at the bottom center of the Jarlboard, and 4 influence Actions, found to the left of the Standard Actions. The influence Actions require you to have the corresponding influence action marker. Sigrid has none (as mentioned above) so only the 5 Standard actions are available for her this turn.
-
INVEST: Requires you to transfer the listed Silfr amount printed next to the Tile on the saga track to add the Tile to your hand. Decide together beforehand if you play with hand cards open (for more strategy and negotiation) or hidden (for a bit faster gameplay).
Sigrid takes the INVEST action and uses her Special Ability to buy Freyr for 0 Silfr instead of 8 Silfr.
-
JOURNEY: Move 1 unexhausted Longship you control 1-3 steps and optionally trade with other player(s). At any time during your journey you may trade with a rival if your Longships are colocated (in the same region), including before moving the first step. Trading does not count as an action or exhaust your Longship(s). The journey action exhausts the Longship (flip it to mark this). Note: A Longship has to be unexhausted to be able to perform a journey action. Also note that some Tiles and Abilities allows you to move exhausted Longships since they normally do not have an "unexhausted" requirement. The Longships on your Jarlboard takes their first step from a home marker of yours. The following counts as a step: a. To cross a white border. You can not cross black borders. b. To move from a home marker to a Sea region. Sea regions are water areas. c. To move from a home marker to a River region. River regions are land areas, with at least 1 white border. d. To move from a home marker on a post to the Sea region or River region outside the post. e. To move into or out from a post. A post is any Tile-sized circle on the map, empty, preprinted or with a Tile on it. You always move into or out from a post in a River region from the River region itself. You always move into or out from a post with a harbor from the Sea region where the harbor icon is.
A harbor region is on land and have no white borders. You may never ever move into a harbor region, only into its posts. This includes if a harbor region is a duchy and has a home marker on it (see the duchy section later on). Other areas, that has only black borders, can never ever be entered by Longships either.
Sigrid takes the JOURNEY action and moves a Longship 1 step from her Jarlboard (= home marker) to Gandvik and 1 step from Gandvik to Birka. She then exhausts her Longship by flipping it upside down.
-
PLAY: Let's you play a Tile from your hand if you are ALONE with at least 1 Longship in a post in the location listed near the top of the Tile. Ventures, gods, and advocates are played in their respective locations, and established by placing a matching Follower in the indicated Follower icon space. Events are resolved immediately as much as possible and then they are removed from the game.
Sigrid's Winter Solstice (Turn 1)
Winter solstice occurs at the end of each player's turn.
- Gain bonuses from your established Tiles with a winter solstice icon and "WINTER SOLSTICE" text underneath it.
- Gain 1 Silfr for each unique Follower type you have established.
- Discard Tiles from your hand down to your hand limit (normally 4).
- Refresh by unexhausting all exhausted components and refilling the saga track if there are any empty spaces (as described above).
If you are playing with Novice Victory Conditions, such as in this tutorial game, you will also check to see if any player has met any Victory Condition.
During Sigrid's winter solstice she gains 2 Silfr from her god Freyr's Ability which triggers during winter solstice, and 1 Silfr for having one type of Follower established. She is under her hand limit and does not need to discard any Tiles. Refresh unexhausts her Longships, the saga track is already filled and does not need to be refreshed.
Styrbjörn's Influence Phase, Action Phase, and Winter Solstice
Because it's his first turn, nothing happens during his influence phase either. For his 4 Actions he invests twice, buying the Tiles on the 1 and 2 Silfr cost positions, paying 3 Silfr. Then he journeys twice, aiming to be able to play the Tiles he just invested in. One Longship moves to German Ocean and the other to Pechenegs, exhausting them both. Note that he cannot move from Bjarmaland to Burtas since they are separated by a black border.
At winter solstice he gains no Silfr since he has no Follower established. He does not have to discard any Tiles from his hand. He refreshes by unexhausting the two Longships he journeyed with and refreshing the saga track, which adds Tiles to the 10 and 12 Silfr cost positions.
Turn 2: Trade Centers, Powerful Allies, Trade, Influence & Parley
Sigrid's Influence Phase (Turn 2)
Check for influence by determining whether you alone currently have more Followers established of any given type than any other player. If so, take the corresponding influence action marker(s) and put one of your Action markers on the space next to it on the influence action marker space. The influence action markers can also be used for Standard Actions.
Sigrid has more jarldom Follower established than Styrbjörn so she exchanges one Standard Action marker for the jarldom influence action marker.
Sigrid's Action Phase (Turn 2)
-
JOURNEY: Sigrid journeys from her Jarlboard, 3 steps to Dublin.
-
PARLEY: Allows you to challenge on a post, and if successful establish that post (unless it is an empty post). a. If you are alone (the only player with a Longship there), establish the post, returning any previous Follower there to the owner. b. If you are not alone on a post, but have more Longships than a rival, you may challenge that rival by returning their first Longship to their Jarlboard, and moving any of their additional Longships to the nearest region. Then, if you are now alone, you may establish the post. c. If the post you establish is a trade center or a powerful ally it has a cost in Silfr noted at its bottom that you must pay when establishing. If you do not have enough Silfr to establish, you may still parley to challenge a rival even though you can not establish the post. d. Trade centers have Persistent abilities that trigger after certain actions are performed; when you establish a trade center, grab the trade center marker to remind you to trigger that ability. Some trade centers are key trade centers. When you establish a key trade center you pay the Silfr cost and then you must place two Followers on it on the indicated spaces. e. Powerful allies have Immediate abilities. This means that their ability occurs immediately when it is established and then not until it is established again by another player. f. Some powerful allies have powerful ally Longships (black, white or gray) which start in the Sea region outside of the post they belong to. The immediate effect of establishing these powerful allies is that you gain control of their Longships, wherever they may be, placing your home marker on them to show your control. You control these Longships as long as you have a Follower established on their corresponding post.
Sigrid does the action parley in Dublin. She has 6 Silfr, just enough to pay the cost to establish Dublin. Sigrid's Longship is alone in Dublin so she meets the requirement to establish and places a jarldom Follower in Dublin and her home marker on each of the 3 black powerful ally Longships outside of Dublin.
-
JOURNEY: Sigrid journeys moving 1 powerful ally Longship 1 step into Dublin, to protect against potential parleys from Styrbjörn.
-
JOURNEY: Sigrid journeys moving 1 powerful ally Longship to the Black Sea. Note that there is a white border at the Strait of Gibraltar that counts as a step, and also note that she used the jarldom influence action marker for a standard action, which is allowed.
Sigrid's Winter Solstice (Turn 2)
Sigrid's gains 2 Silfr from Freyr's ability and only 1 Silfr for the two Follower because they are of the same type. She's under her Hand Limit so she does not need to discard any Tiles. During refresh she unexhausts the Longships she controls, and the saga track is not refreshed since it is already full.
Styrbjörn's Influence Phase, Action Phase, and Winter Solstice (Turn 2)
Styrbjörn has no Followers established so he gets no influence action markers.
- TRADE/JOURNEY: Styrbjörn considers conquering Dublin (which would take 3 journey actions and 1 parley action) but first decides to offer Sigrid a trade as part of his first journey action. He offers to not conquer Dublin if Sigrid gives him the Tile in her hand. Sigrid reluctantly agrees. Styrbjörn continues his journey action to instead move 3 steps with his Longship in the German Ocean to an empty post in Bulgar.
- JOURNEY: He then journeys 2 steps with his Longship in Pechenegs to a post in Burtas. He has now met the requirement for both Tiles he wants to play.
- PLAY: He plays his Bulgar venture, establishing it with a theocracy Follower. Styrbjörn's special ability allows him to gain 3 Silfr when he establishes a venture, so he takes 3 Silfr from the supply.
- PLAY: Then he plays the Bulgar advocate to his Jarlboard, establishing it with a sweden Follower.
Styrbjörn's Winter Solstice
Styrbjörn gains 2 Silfr for having two different types of Follower established. He does not need to discard Tiles. During refresh he unexhausts his Longships, and the saga track is already full.
Turn 3: Activate, Jarldom, Sweden, Theocracy, Event & Althing
Sigrid's Influence Phase (Turn 3)
Sigrid still has more jarldom Follower than Styrbjörn so she keeps the jarldom influence action marker but does not have more Follower of any other type, so she does not gain any other influence action markers.
Sigrid's Action Phase (Turn 3)
-
Sigrid invests and pays 1 Silfr for "The Great schism" event.
-
Sigrid journeys with a powerful ally Longship 2 steps from Black Sea to Burtas. JARLDOM ACTION: Move 1 Longship you control up to 1 step into a post and return a rival Longship in that post and then if alone establish that post. Because the jarldom influence action does not exhaust a Longship, you may use an already exhausted Longship to perform the action. Sigrid's Longship in Burtas is exhausted from its journey, but it can still do a jarldom influence action to return Styrbjörn's Longship, as that action does not exhaust Longships. Sigrid considers this, but instead decides to reposition more of her powerful ally Longships.
-
Sigrid journeys with a powerful ally Longship 3 steps from German Ocean to Damascus.
-
EVENT: Playing an event requires having your Longship(s) alone in a post in the location listed at the top of the Tile. Events must be resolved immediately as much as possible, unless they are althing events. When an althing event is played, in turn order, players vote on whether the event should resolve or not. If 50% or more of the players vote yes, the event is resolved in turn order, otherwise it is discarded. In a 2 player game, the person playing the althing event decides whether to resolve it. Events Tiles are removed from the game after it resolves.
Since Sigrid now has a Longship in the south (Damascus), she plays the event she just invested in. This means that both she and Styrbjörn get to establish a trade center, for free. Sigrid chooses India and places 2 jarldom Follower there. Styrbjörn chooses Chang'an and places 2 rus Follower there. They both take the trade center markers and puts them next to their Jarlboards to remind them of these Persistent abilities.
Sigrid's Winter Solstice (Turn 3)
As before Sigrid gains 3 Silfr (she still only has 1 Follower type established, even though she has 4 of them established now). During refresh she discards no Tiles and she unexhausts her Longships and refreshes the saga track.
Styrbjörn's Influence Phase (Turn 3)
Styrbjörn has 1 sweden, 1 theocracy, and 2 rus Followers established and Sigrid has none of these so Styrbjörn exchanges 3 of his action markers for the rus, sweden and theocracy influence action markers.
Styrbjörn's Action Phase (Turn 3)
-
ACTIVATE: You can activate the ability on a venture where you have an established Follower and an unexhausted Longship by exhausting that Longship. You can activate that same ability multiple times as long as you have multiple Longships to exhaust. Note that you do not need to be alone on the venture to activate it.
Styrbjörn exhausts his Longship on The Radimichs in Burtas and places 2 of his Longships there, from his Jarlboard.
-
SWEDEN Action: Requires you to have and use the sweden influence action marker. It lets you: a. Draw 1 Tile from the saga pile. b. If it is a venture, you may place a Longship on any post that is in the region/wind listed on it. c. If the Longship is placed in an empty post or on a venture and you are alone, you may establish the existing venture or the one you drew with a Follower.
Styrbjörn performs the sweden influence action and draws a Tile from the saga pile. It is not a venture so he puts it in his hand.
-
JOURNEY: Styrbjörn journeys with one of his Longships 3 steps from Burtas to India.
-
PARLEY: Styrbjörn parleys in India. He pays the 9 Silfr cost and establishes the post, replacing Sigrid's 2 jarldom Follower with 2 of his own.
Styrbjörn's Winter Solstice (Turn 3)
During winter solstice Styrbjörn now gains 4 Silfr for having 1 of each Follower type established. He does not need to discard Tiles, and during refresh he unexhausts his Longships and the saga track is already full.
Future Turns: Rus, Theocracy, Duchy, Key Trade Center, Game End
You are now three turns into the game. Sigrid had a strong start, gaining presence with Longships on many parts of the map and rushing to 4 jarldom Followers (where 6 is a win). Styrbjörn did a strong recovery during turn 3, using his venture to stop Sigrid. In addition she will lose the jarldom influence action marker (putting it back on the board) at the start of her next turn since Styrbjörn now has 2 jarldom Followers, same as her.
Here follows some more actions and rules not yet covered.
RUS INFLUENCE ACTION: Requires you to have a Longship alone in an established advocate's location. Lets you take the advocate from that player's Jarlboard and play it to your Jarlboard instead.
If Sigrid gains 2 more rus Follower, she can overtake the rus influence action marker and possibly steal Styrbjörn's advocate.
THEOCRACY INFLUENCE ACTION: Lets you establish any theocracy venture or theocracy powerful ally without the need for a Longship in that post, but paying its cost as normal.
At the moment Styrbjörn has the theocracy influence action marker. He also has quite a lot of Longships on the map. A potential strategy for future turns may be to add even more Longships, maybe Activating his venture in Burtas again, and then use the theocracy influence action to establish Trøndelag and thus get 1 step for free with all his Longships.
Duchy: If a player has 2 ventures established in the same region, this forms a duchy. Mark a duchy as yours by placing one of your home markers in the region (unless otherwise specified). That marker counts as a home location for you, allowing you to journey from your Jarlboard directly to that region. If you ever lose one of the ventures in a duchy, you no longer have that duchy and must return the home marker from it.
Note that a journey from your Jarlboard using a home marker in a harbor region means that the first step must be to a Sea region where a post in that duchy has a connected harbor icon.
Example A: The red player performs two journey actions using a duchy home marker in Byzantine. Longships are taken from the Jarlboard. One Longship moves 3 steps to Damascus. The other moves 2 steps to a post in Byzantine. From a home marker in Byzantine, Longships always enters the Black Sea, since Byzantine has no harbor icons elsewhere.
Example B: The red player performs two journey actions using a duchy home marker in Bjarmaland. Longships are taken from the Jarlboard. One Longship moves 3 steps to Birka. The other moves 2 steps to a post in Bjarmaland.
Victory
The game ends if a player has completed 1 of the Victory Conditions found at the top right of the Gameboard and a Victory Condition check is resolved. You perform this victory check during each player's winter solstice when playing with the Novice Victory Condition Cards or after each time a player has resolved a played event Tile when playing with the other difficulties. You can read more about this on page 1 (see How to Win).
General Rules
Component Limits: Your Longships and Followers are limited to 6 of each, and your home markers are limited to 12 each. You can only place these if you have them in your supply. The Silfr and gull coins have no limit. In the situation that you run out of them, use replacements.
Economy Limits: You can never go into debt, except through promises made in trade during the journey action. Thus, when you choose an action yourself, such as invest, you must have enough to pay the cost or you cannot take that action. If you are forced by game effects to pay Silfr and do not have enough, pay as much as you can.
The Golden Rule: If any text on a Tile or card says something different than what is written in these rules, the Tile or card text has precedence.
Order: Unless stated otherwise, when an ability applies to several players, resolve the ability in clockwise order, starting with the active player.
Replaced Tiles: When a Tile has been replaced, it is discarded to the discard pile.
Soft requirements: Unless stated otherwise, you can perform as much of an action or ability as you want, except for events which must be resolved as fully as possible.
Gameboard Anatomy
The map on the Pax Viking Gameboard shows the areas to which the Vikings traveled, with a focus on their eastward exploration. The regions reflect cultures and kingdoms present around the 10th century that you will populate and compete over during the game.
A. Influence action markers: One for each Follower type: jarldom, sweden, rus and theocracy are stored here at the top of the Gameboard when not claimed by a player.
B. Victory Condition Cards: The selected Victory Condition cards are displayed at the top of the Gameboard in the 4 printed card spots, (see Setup).
C. Saga track: The saga track contains the saga pile in the zero Silfr cost spot, followed by a market of 7 faceup saga Tiles with indicated costs starting at 1 Silfr in the lowest spot and continuing to 12 Silfr at the highest spot before the saga pile.
D. Map: The map is divided in areas of three levels, where wind is the largest, each wind contains a number of regions and each region contains a number of posts. In addition the starting home locations are shown using each Jarl's personal symbol.
Wind
A wind is a group of regions of the same color. They are named after the four winds found on a compass. The west wind is purple, the north wind is blue, the east wind is green, the south wind is orange. There is a compass on the map, found next to Normandy, to help you remember the colors.
Region
A region is any named area on the map that can be identified as one of the following three types:
- Sea regions (name in black text) are water areas, they have no posts.
- River regions (name in white text) are land areas that have one or more white borders. You move into or out from their posts from the region itself.
- Harbor regions (name in white text) are land areas that have no white borders. You move into or out from their posts via harbor icons from the Sea region where the harbor icon is.
Post
A post is a circle on the map, either an empty circle, a circle with a venture Tile on it or a pre-printed circle that has a trade center or powerful ally icon. There are four types of posts:
- Empty post is a post that has no saga Tile on it and is not a pre-printed post.
- Venture post is a venture Tile that has been played onto a post. It provides the ability written on the Tile when you have a Follower there and activate it with a Longship (not when you play it).
- Trade center (gray-bordered pre-printed posts on the map) provides a Persistent ability to the player that establish it. There is a cost that has to be paid every time it is established, written at its bottom. When you establish a key trade center you pay the Silfr cost and then you must place two Followers on it on the indicated spaces.
- Powerful ally (brown-bordered pre-printed posts on the map) provides an Immediate ability to the player that establish it. There is a cost that has to be paid every time it is established, written at its bottom. Some powerful allys' Immediate ability lets you place a home marker in it. This does not count as a duchy. Some powerful allys' Immediate ability lets you gain control of the powerful ally's Longships. Mark this by placing your home markers on them (removing any rival's home marker). Powerful ally Longships remain where they are and are instantly available to use by their new Jarl.
Home
This works as a Starting location for your Longships. You have 1 home location from the start of the game, depicted by the symbol on your Jarlboard that is also found on the map. During setup you place one of your home markers on both symbols.
During the game some effects may let you add more home markers on the map. Note that home markers have white borders which means they cost 1 step to exit.
A journey from your Jarlboard using a home marker located:
- In a River region means that the first step must be to that River region.
- In a harbor region means that the first step must be to a Sea region where a post in that region has a harbor icon.
- On a post means that the first step must be as if you step onto that post, then your next step may be out of that post.
Saga Tile Anatomy
Much of the historical record of the Vikings is told through the Sagas, written down centuries after the events took place. Different historical people and events from the Sagas may become important when you play a game of Pax Viking, creating new and unique Sagas of your own each time. This Saga is not set. There is no fate but what we make for ourselves.
On each Saga Tile, you will find:
A. Type: The icon at the top center of the Saga Tile represents whether it is a venture, event, god or an advocate. Also notice the frame color and border differences of each card type.
B. Location: To play a Tile, you need to have a Longship you control in the location written on the Tile. There can not be any other players Longships there. The background color of the location text is a help to easily see which wind it belongs to. Some Tiles have a wind as its location, then you can play the Tile in any post in that wind.
C. Follower icon: This leftmost icon on the Tile represents the type of Follower to be placed from your Jarlboard onto this Tile when played. They can be: jarldom, sweden, theocracy, or rus Follower(s). Events do not have Follower Icons.
D. Name & Historical Context: The thematic flavor text located in the bottom banner of the Saga Tile offers historically relevant detail that does not affect gameplay.
E. Trigger Icon: This icon on the right side indicates when the ability activates.
- Persistent — Persistent ability, may only apply during the listed action underneath. If an action, such as parley, is listed under this icon, the ability only applies during the parley action.
- Activate — This Tile needs to be activated using an unexhausted Longship.
- Immediate — A one-time ability that occurs immediately when the post is established or when the Tile is played.
- Althing — In turn order, vote whether the event resolves. If 50% or more agree, resolve. Check Victory Conditions regardless.
F. Ability: The effect that occurs under the conditions of the Trigger.
G. Saga Tile Number: Each Saga Tile has a unique number for ease of reference.
H. Solo version indicator: Remove these Tiles when playing the solo version.
I. Starter Deck Indicator: Showing for which player count this should be in the saga pile when playing using a Starter deck.
Jarlboard Anatomy
In Pax Viking, the supplies of your Jarl, a powerful leader in the Norse culture, are stored on your Jarlboard. You will need to make clever use of these supplies if you wish to unite Sweden as its first monarch!
A. Follower supply: Followers of each type are stored at the top of your Jarlboard when not in play: jarldom, sweden, theocracy, rus.
B. Longship Supply: The Longships in your player color are stored at the top of your Jarlboard until put into play onto the Gameboard.
C. Special Ability: Each Jarl has a unique special ability that should be noted and utilized to the player's advantage.
D. Home: This is your starting location. You have 1 home location from the start of the game, depicted by the symbol on your Jarlboard that is also found on the map. During setup you place one of your home markers on both symbols. The Jarlboard name plate color indicates the wind in which you will find your first home. All Longships stored on your Jarlboard start their movement from your home marker(s), taking their first step to the region. See more specified rules under "Home" in the Gameboard Anatomy section above.
E. Gods and advocates: You may play god Tiles and advocate Tiles onto the marked circles on your Jarlboard for your personal use of their abilities once established.
F. Actions: The 4 influence Actions and 5 Standard Actions are referenced on your Jarlboard. When you take an Action, put an unexhausted Action marker on that Action slot to indicate it is exhausted. If you have an influence action marker, you can use it to take its corresponding influence Action or any of the 5 Standard Actions. You may perform the same Standard Action multiple times but you can never perform more than 4 actions in a turn.
G. Sequence of Play: A quick reference of the steps to take in each Phase of a Turn.
Solo Version: Norse Empire
The solo version Norse Empire takes place during a longer period of time than the normal game, spanning from 793-1066. It simulates a situation where you represent a strong family, somewhere in what came to be the areas where Vikings had settlements; stretching from North America to the Caspian Sea, via Persia to India and China (over the Silk road). Your task is to sail your Longships to all corners of this Viking world and extend your influence through your Followers, to establish a Viking empire, where a Jarl from your family controls the trade and power structures throughout it all.
Key Concepts
Priority: If you need to choose a post, choose whichever is the southernmost. If you are uncertain which is the southernmost, choose the easternmost among those in question.
Rival:
- There is only one rival, and all components that are not your color belong to that one rival.
- If the rival needs to make a choice on the map, it always chooses according to Priority.
- To determine the nearest post, count steps. Follow Priority if multiple posts are equidistant.
- When placing a rival's Longship, take it randomly from a supply of all colors.
- The rival does not place any Followers but posts with only rival Longships is considered established by the rival.
- The powerful ally Longships always belong to the rival, even if you control Iceland, Faroe, or Dublin.
- If the rival runs out of components for any color, no replacements are used.
- The rival's Silfr is not tracked. Any Silfr that is to be paid to the rival is instead paid to the supply.
- The rival has no hand of Tiles and never has advocates or gods.
- If there are more than 1 rival Longship that are to be (re)moved the player chooses in which order.
- The rival wins all ties.
Setup
A. Lay out the Gameboard in the middle of the table.
B. Choose between Aud, Sigrid, Ingvar, Gunhilde or Edla as your Jarlboard and take all components of a chosen color (except the action markers).
C. Take 3 Silfr, then add any additional Silfr that may be listed on your Jarl's special ability and locate your home on the Gameboard and add a home marker there.
D. Put the 4 influence action markers on the indicated spaces on the Gameboard.
E. Put the 7 trade center markers next to the Gameboard.
F. Put 1 powerful ally Longship in each post in the north, leaving 1 post in Bjarmaland unoccupied.
G. Remove all Tiles with the solo version indicator icon from the game. It is found on the right side of the Tile next to its card number.
H. Separate all the Tiles by type and create 3 shuffled facedown piles: advocates and gods as one pile, ventures as one pile and events as one pile.
I. Draw 12 of the events and keeping them facedown into an event pile next to the Gameboard. If you want more or less of a challenge, add more (easier) or fewer events (harder). Leave the unused events nearby.
J. Place the advocates and gods as the saga pile. Discard the top 6 Tiles from the saga pile to create a starting faceup discard pile. Then fill the saga track from the saga pile as in a normal game.
K. Place 9 ventures drawn from the venture pile on the map according to their locations. If you are to add a venture and that region is full, discard it and add another one instead.
L. Mix the rival Longships (all that are not your color) and add one at random on each venture, trade center, and powerful ally on the map. Any leftover Longships creates the rival's supply of Longships.
How to Win
You immediately win the game if all your Followers are established.
You lose the game if you are to reveal an event Tile but there are no more left to reveal.
Sequence of Play
1. Rival Movement
If any rival Longship is outside a post or in an empty post, move it to the nearest venture or trade center without any Longships and/or Followers, if none, move it to the nearest non-empty post that has Longships of the same color. If there are no rival Longships of that color, move it to the nearest post with any rival Longships. If ever tied see Priority.
The powerful ally Longships (black, white and gray) never move into west posts and avoid moving to a post that already has a powerful ally Longship, unless there are no other option, then it moves to the nearest post with any rival Longships.
2. Event
a. Reveal the top event Tile. b. Add a random rival Longship from its supply to a post in that event's location. c. Resolve the event as if the rival played it. Longships will only parley in step 5.
Event resolution clarifications
- If a Tile mentions the rival, this means you (the rival's rival).
- If instructed to take/buy/draw a Tile from the saga track or saga pile. The rival takes from the 1 cost slot, or the cheapest available slot in the saga track but not from the saga pile. All Tiles taken are discarded.
- If instructed to return a rival Longship and there are multiple choices, it prioritizes to return a Longship from a post where you both have Longships. If none, it prioritises a Longship where you have the most Longships, if tied, choose the southernmost Longship. If multiple Longships are to be returned choose each individually.
- If instructed to place Longship(s), prioritize placing them on a single post where the rival already has Longship.
- If instructed to establish a post, place a Longship from the supply there.
- If instructed to establish a Tile from the saga track, discard the cheapest of the indicated type and place a Longship from the supply in its location.
- If instructed by "all players" return/discards a component, only you the rival's rival performs the effect.
3. Invest
You may invest once, following the same rules as the standard game.
4. Actions
Standard Action markers are not used. Instead exhaust your Longships to perform actions, giving you 6 actions per turn. You never exhaust more than one Longship to perform a standard action.
You may perform journey, play, and activate actions as in the normal game. No other standard actions can be taken.
- Performing a journey action exhausts the Longship that has moved.
- Performing a play action exhausts any 1 of your Longships on the map, as long as you have at least 1 of your Longship in a post that meets the location requirement.
- Performing an activate action exhausts 1 Longship that is located on the venture that is activated.
Influence Actions can be taken if you have the corresponding influence action marker(s). Exhaust the influence action marker and a Longship to take the action. Influence Actions are modified from the normal game as follows:
- SWEDEN: Discard 1-4 Tiles of your choice on the saga track and refresh. Then take 1 Tile without paying its cost and refresh. This exhausts the sweden influence action token and any 1 of your Longships on the map.
- THEOCRACY: Move an unexhausted longship into any theocracy post. This exhausts the theocracy influence action token and the Longship that moved.
- JARLDOM: Move 1 Longship you control up to 1 step into a post and return a rival Longship in that post. This exhausts the jarldom influence action token and the Longship that moved.
- RUS: Exchange 1 god or advocate from your hand with one on your Jarlboard (ignore requirement), also change the Follower if needed to the new type. This exhausts the rus influence action token and any 1 of your Longships on the map. Gunhilde's ability does not trigger.
5. Automatic Parley
There is an automatic parley performed at the end of your turn on any post where you are not alone and where you are alone and can establish that post (including paying any required cost).
On each post where there is a parley: a. If you are alone, establish that post (if able). b. If you are not alone and you have more Longships than the rival, return 1 rival Longship to its supply and move any additional rival Longships from the post to the nearest region. Then establish that post (if able). When returning rival Longships, return any non-powerful ally Longships first to the supply. If a powerful ally Longship is returned it is instead removed out of the game. c. If you are not alone and do not have more Longships than the rival, return all your Longships from that post and return any Follower of yours from that post.
Modified powerful ally and trade center effects after establishing
| Post | Effect |
|---|---|
| Vinland | Place a home marker on Vinland. Add one more event to the event deck (ONCE PER GAME). |
| Greenland | Place a home marker on Greenland. Return 2 rival Longships on any Theocracy post(s) on the map. |
| Normandy | Place a home marker on Normandy. Add a random venture to an empty post (ONCE PER GAME). |
| Iceland | Remove 1 White Longship from any region, out of the game. |
| Faroe | Remove 1 Grey Longship from any region, out of the game. |
| Dublin | Remove 1 Black Longship from any region, out of the game. |
| Iberia | Place a home marker on Iberia. Discard 1-6 Tiles of your choice on the saga track and refresh. |
| Persia | Gain 1 Silfr when the rival take/buy/establish/draw Tiles from the saga track. |
6. Winter Solstice
Perform the winter solstice as in the standard game with one modification: if you have at least 4 of any of your Followers established, take the corresponding influence action marker.
List of Terms and Icons
ALL — Every player, including you.
ALONE — Have only your LONGSHIP(S) in a POST.
ALTHING — Vote in turn order, If 50% or more agree, the EVENT RESOLVES otherwise DISCARD. Check Victory Conditions regardless.
AVAILABLE — If the component is in your hand, Jarlboard, SAGA TRACK, or discard pile.
BUY — Transfer the listed amount of Silfr to the supply to add the Tile to your hand.
CHALLENGE — Choose a RIVAL in the same POST who has fewer Longships. RETURN RIVAL's first Longship and move every other RIVAL's Longship to the nearest REGION. RETURN all RIVAL's Followers acting as Longships.
COLOCATED — Longships that are in the same REGION. A POST is always in a REGION.
COPY — Use a RIVAL's ability.
DISCARD — Move Tile(s) to the discard pile face up. The discard pile is open information.
DRAW — Draw a Tile from the top of the SAGA PILE and place it in your hand. If you used the INVEST action to DRAW, remove the 1 cost Tile from the SAGA TRACK and REFRESH.
DUCHY — A REGION with two VENTURES with Followers of the same color. Some abilities may also create a DUCHY. Add a HOME marker to a DUCHY you control.
EAST — Is in the East WIND.
ESTABLISH — (RE)PLACE Follower(s) on the indicated Follower icon(s), pay the cost at the bottom of the POST if necessary. There can never be more than one color Follower on a Tile or a POST. Abilities are not active until after the FOLLOWER is ESTABLISHED.
(UN)EXHAUST — Mark or unmark that a component has been used. It can no longer be used for actions that require EXHAUSTING that component.
GAIN — Without spending an extra action or Silfr, gain this ability or component.
HAND LIMIT — The number of tiles allowed in your hand (the default is 4) at the end of your WINTER SOLSTICE.
HARBOR — Denotes that the POST may only be entered from the sea REGION the HARBOR is in.
HOME — A starting location, either printed on the Jarlboard or added with HOME markers. It is not considered a part of any REGION or WIND.
KEY TRADE CENTER — TRADE CENTERS marked with a key icon: Miklagård, Chang'an, India, and Damascus.
NORTH — Is in the North WIND.
ONCE — Ability applies only once per the owning player's turn.
(RE)PLACE — Place or replace a component from your hand or Jarlboard on the Map or Jarlboard. You cannot replace Trade Centers or Powerful Allies.
POST — Any circle on the map. These include empty circles, VENTURES, TRADE CENTERS, and POWERFUL ALLIES.
POWERFUL ALLY — The brown preprinted POSTS on the map. Their abilities immediately trigger when ESTABLISHED.
REFRESH — Refill empty SAGA TRACK spots. If you're in WINTER SOLSTICE, UNEXHAUST all of your components.
REGION — Any named area on the map that is not a POST. Sea REGIONS have black names. River REGIONS have at least one white border. HARBOR REGIONS have no white borders.
REQUIREMENT — Have only your Longship(s) in a POST in the location listed near the top of the Tile.
RESOLVE — You must follow the instructions on the EVENT Tile as much as possible, then remove (not DISCARD) it from the game. Then check to see if anyone has met a Victory Condition.
RETURN — Return the component to its starting setup position.
RIVAL — Any other player or components another player controls.
SAGA PILE — The stack of unrevealed Tiles on the zero cost space.
SAGA TRACK — The selection of Tiles in the marked cost spaces on the right side of the map.
SOUTH — Is in the South WIND.
STEP — One movement into/out of a POST, or across a white border into/out of a REGION or HOME marker. POSTS without a HARBOR must be entered from a River REGION.
TRADE — Exchange Tiles, Followers, Longships, Silfr, and/or non-binding promises with a COLOCATED RIVAL.
TRADE CENTER — The grey preprinted POSTS on the map. After ESTABLISHING, their abilities trigger during certain actions.
WEST — Is in the West WIND.
WIND — One of the 4 colored areas of the map: NORTH, SOUTH, EAST, WEST.
WINTER SOLSTICE — The last phase of each player's turn.
Icon Legend
The back of the rulebook closes with a printed icon legend, pairing each of the game's icons with its name and (for the trigger icons) the same ability text given under Trigger Icon in the Saga Tile Anatomy section above (Activate, Immediate, Persistent, Althing). The remaining icons pictured are: Venture, Event, God, Advocate, Trade Center, Key Trade Center, Harbor, Action, Powerful Ally, Longship, Post, Tile, Silfr, and Any Follower.