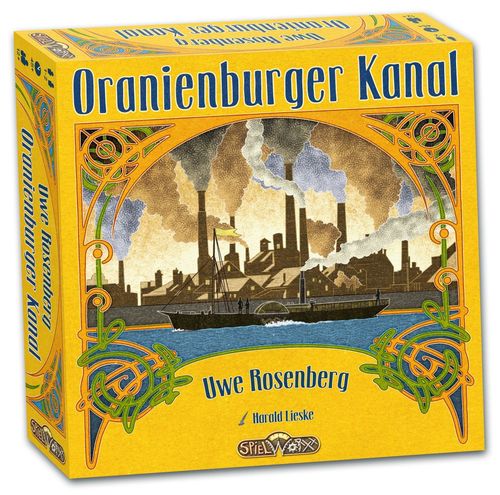
Oranienburger Kanal
Oranienburger Kanal Rulebook
Table of Contents
Table of Contents
- 02 Goal of the Game
- 03 Game Components
- 04 Set Up
- 05 General Concepts
- 06 Sequence of Play
- 07 End of the Game and Final Scoring
- 08 Solo Game
- 09 Symbols
02 Goal of the Game
In Oranienburger Kanal you plan and build new industrial areas. Even though your plans are vague at the beginning, you raise structures and shape the infrastructure. You raise paths, build roads and lay rail tracks. You also gradually excavate parts of the canal and, importantly, build bridges to connect the structures.
This is all done using several actions. Taking them at the right time will be crucial.
At the end of the game you add up the prestige points of your structures, routes, thaler and remaining materials together with the prestige points earned during the game to determine who built the best industrial area.
Oranienburger Kanal also includes a solo game!
03 Game Components
This copy of Oranienburger Kanal contains the following components:
- 1 action board
- 2 industry boards
- 2 supply boards with material wheels (incl. 2 plug connections)
- 5 action discs (4 silver and 1 golden)
- 1 starting disc (red)
- 10 material tokens (2 each for wood, clay, ore, brick, and iron)
- 60 structure cards "Deck A"
- 60 structure cards "Deck B"
- 56 path tiles (28 short and 28 long)
- 36 road tiles (18 short and 18 long)
- 30 rail track tiles (15 short and 15 long)
- 24 canal tiles (12 short and 12 long)
- 25 bridges
- 40 thaler (30 "1", 10 "5")
- 33 prestige tokens (10 "1", 10 "2", 10 "5", 3 "20")
- 1 scoring pad
- 2 play aids (English and German)
- 4 glossaries (English and German)
- 2 rule booklets (English and German)
BEFORE THE FIRST GAME: The game includes two material wheels for the supply boards. Attach these wheels with the plug connections, as shown in the illustration.
The Action Board
The action board shows 7 action spaces. On three of these spaces you place card stacks with structures, so you only uncover part of the actions during the game.
The Starting Disc and Action Discs
With the action discs you mark the chosen action spaces during the action phase of a round. The starting player keeps the starting disc in front of them for the whole round. In the solo game, you use this disc as a blocking disc.
The Industry Boards
Your industry boards show 12 structure spaces. Between these structure spaces and at the edge of the industrial area are 31 route spaces, arranged in four rows with 4 route spaces each, and 5 columns with 3 route spaces each. On the front side of the industry boards are 2 paths, 1 rail track, and 1 canal already imprinted; on the back side, these route spaces are empty.
The Supply Boards, Material Wheels, and Material Tokens
You mark your supply of materials on your supply board with the help of the material wheel and the 5 material tokens. You count the basic materials (wood, clay, and ore) in the bigger area of the material wheel with a scale from 0 to 8, and the valuable materials (iron and bricks) in the smaller area with the reverse scale from 0 to 6.
Structure Cards
The front of the structure cards, from now on referred to only as structures, always has the same layout. At the top are the building costs of materials and thaler. The building costs are always in the same order: wood, clay, bricks, iron, thaler (ore is never part of the building costs). Below the building costs is the name of the structure, below that is the prestige you earn in final scoring. The bottom half shows the effect of the structure that you can activate up to two times during the game. At the bottom right is the structure number, the letter A or B for the deck, followed by the numbers 01 to 60. The borders of the card on the front and back show the game stage which determines when the structure is available; at the start of the game the border is green, then orange, and at the end blue.
Paths, Roads, Rail Tracks, and Canals
You mark the routes you build on the industry board with the different route tiles: paths, roads, rail tracks, and canals. Because of the shape of the structure spaces the game includes route tiles in two different lengths.
Bridges
You build bridges on the industry board across the routes. With each bridge you connect two adjacent structures.
Thaler and Prestige Tokens
You pay the building costs for the structures and the costs for the "at anytime" actions with thaler. At the final scoring you gain prestige for remaining thaler. You gain prestige tokens during the game for activating effects of your structures.
During the whole game you can exchange 5-thaler coins for five 1-thaler coins and vice versa. The same is valid for the 1, 2, 5, and 20 prestige tokens.
Scoring Pad
With help of the scoring pad, you can count your prestige during final scoring. Each scoring sheet offers space for several games.
A Note Regarding the Game Components
In rare cases the supply for a type of route tile may deplete. If this happens, please improvise by using other tiles. The same applies for bridges, thaler, and prestige tokens.
04 Set Up
A Place the action board on the table.
B Choose a deck of structure cards you want to play with, either A or B. Shuffle the green, orange, and blue structures from your chosen deck separately and place the following structures in face down card stacks on the matching spaces of the action board. In doing so you cover some actions of these three action spaces. These actions will be uncovered later during the game.
- Solo game: 6 green, 5 orange, and 7 blue structures
- 2 players: 9 green, 7 orange, and 8 blue structures
Place the remaining structures in the game box, you do not need them for the current game.
C Draw 4 green structures from the face down card stack on the action board and place them face up in a row below the action board.
- Solo game: sort the structures by their structure numbers from low to high.
D Place all thaler and prestige tokens in separate supplies next to the action board. You start the game without thaler or prestige.
E The action board has 7 action spaces. Place 1 thaler on each of the four upper action spaces.
F Place all route tiles of the four different types as supplies next to the action board: paths, roads, rail tracks, and canals. Place the bridges in a supply next to the routes.
G Both of you take a supply board, an industry board, and a play aid.
- Solo game: Place the boards and play aid for the second player in the game box.
H Turn the material wheel on your supply board, so the small arrow of the big hand is on top of the matching arrow printed on the supply board; thus, the hand points between the spaces with wood and iron symbols.
I Both of you take a set of material tokens. Place them on the spaces of your supply board showing the matching symbols to the left and right of the big hand. You start the game with the following materials: 2 clay, 1 ore, and 1 brick. Your supplies of wood and iron are both 0 at the start of the game.
J For the first games, place your industry board with the side showing the imprinted routes face up in front of you. You start the game with the imprinted 2 paths, 1 rail track, and 1 canal, and initially do not have any roads or bridges on your industrial area.
Variable set up: After a few games you can face a new challenge by using the blank side of the industry boards. Take 2 paths, 1 rail track, and 1 canal from the supplies and place them similar to the imprinted routes on free route spaces of your choice at the edge of the industry board, or on the spaces pointing from the edge into the industry board.
K Prepare the stack of action discs.
- Solo game: Place the red starting disc as a blocking disc on the upper left action space of the action board and place the thaler from this space back in the supply. Take 4 action discs and place the stack as follows in front of you: 3 silver action discs at the bottom, with the golden action disc on top.
- 2 players: Choose a starting player. That player places the red starting disc in front of themself and next to it all 5 action discs in a stack: 4 silver action discs at the bottom, with the golden action disc on top.
You are now ready to build your industrial areas at the Oranienburger Kanal!
05 General Concepts
In the following we explain the two important concepts of Oranienburger Kanal, before explaining the sequence of play in all details.
The Material Supply on the Supply Board
You track your material supply with help of the material wheel and the material tokens.
When you gain or pay materials, move the matching material tokens on the supply board, so that the scale of the material wheel shows the correct amount. Sometimes you can also turn the material wheel to change the supply of all materials simultaneously. You produce the two valuable materials from the three basic materials. Turning the material wheel is a central mechanism in Oranienburger Kanal.
BEFORE STARTING YOUR FIRST GAME, TRY THE FOLLOWING:
I. Move the wood token counter-clockwise by two spaces, so that you now have 2 wood, 2 clay, and 1 ore in the bigger area, and 1 brick and 0 iron in the smaller area.
II. Turn the material wheel in the direction of the small arrow, thus counter-clockwise, for one position. As you can see, turning the wheel reduced the amount of wood, clay, and ore each by 1, while the amount of iron and bricks each increased by 1. Thus, you produced 1 iron and 1 brick for 1 each of wood, clay, and ore. Before starting the game, please return your material tokens and the material wheel to their initial positions.
Effects of the Structures
During the game you raise different structures on your industry board. All structures offer effects that you can activate up to two times to gain different proceeds.
The effects are mostly dependent on the adjacent routes and connecting bridges of the structures. You activate the effects as soon as you either build the fourth route adjacent to the structure (or as you raise a structure on a space already surrounded by four routes), or by building the second bridge on that structure.
06 Sequence of Play
The following game rules are valid for 2 players and mostly for the solo game, too. There are a few changes for the solo game which you can find at the end of this rule booklet.
You play several rounds in Oranienburger Kanal. In each round, first you conduct an action phase, and then finish the round by taking care of some preparations for the next round.
During the action phase you always alternately take exactly 5 actions. Thus, the starting player of a round takes 3 actions, and the other player only 2.
After the action phase, both of you can turn your material wheel once for free, and you conduct some preparations for the next round.
You play the last round of the game when you place all blue structures face up below the action board, and therefore the face-down card stack with blue structures is empty.
After the last round of the game ends you finish with a final scoring and select the best industrial area at the Oranienburger Kanal.
The Action Phase
During the action phase you alternately take exactly 5 actions. The starting player begins this phase with the stack of action discs, and also takes the red starting disc and keeps it in front of them.
To choose the first action, the starting player places the stack of action discs on one of the seven action spaces of their choice on the action board and takes the corresponding action. Then, the other player moves all but the bottommost disc to an unused action space of their choice and takes the action on that space. Both players continue to alternate in the same way to choose the third and fourth actions of the round.
Lastly, the starting player chooses the fifth and final action of the current round by moving only the golden disc to a new action space, so that together both players have chosen a total of five of the seven action spaces.
Thanks to the golden action disc you can always see which action is currently "active," if you like to think about possible options during your turn and lose track.
NOTE: During your first game you may forget to leave the bottommost action disc on the action space when moving the stack to your chosen action space. Please mutually keep track and make corrections when necessary.
Often, there are 1 or more thaler on the action spaces. Each time you choose an action, take all thaler on that action space and place them next to your supply board.
You must choose an action space during your turn, but then you may decide which actions on that space you take. You also can pass on some or all of the available actions on your chosen action space.
Example: I. Marion starts the action phase. She keeps the starting disc in front of her and places the remaining stack of action discs on the action space "4 clay". II. Then, she takes that action. Next, Angelika moves the stack to the empty action space "Raise 1 structure and build 1 path/road", leaving the bottommost action disc on the first action space. She takes the thaler and takes that action.
The 7 Action Spaces
The action spaces offer three types of actions: raise structures, build routes and bridges, and gain materials.
YOU CAN CHOOSE BETWEEN THE FOLLOWING OPTIONS:
- Raise 1 structure and build 1 path or road.
- Raise 1 structure.
- In addition: build 1 bridge (building the bridge is only possible as soon as the card stack with green structures is empty).
- Build up to a total of 3 paths and roads (you can build both route types, but also solely paths or roads).
- Alternatively: Build 1 path, 1 road, and 1 bridge (only possible as soon as the card stack with orange structures is empty).
- Build up to any 2 routes (you can build the same or different routes).
- Alternatively: Raise 1 structure (only possible in the last round, as soon as the card stack with blue structures is empty).
- Gain 4 wood.
- Gain 3 wood, 3 clay, or 3 ore.
- Alternatively: Build 1 bridge.
- Gain 4 clay.
If an action space offers several actions, you can perform them in any order and choose to pass on doing any specific action. There are three actions that are only available after the corresponding card stack has been depleted and the action text is visible.
Paying the building costs
All structures and routes that you can raise or build in Oranienburger Kanal have building costs. You must pay the full building costs at once. You can buy missing materials on short notice with "at anytime" actions (see "At Anytime" Actions).
If you activate the effect of a structure that explicitly is for free you can ignore the full building cost.
You pay building costs by moving the matching material tokens accordingly on your supply board. If you must pay thaler, place them in the supply next to the action board.
You can pay with thaler that you just gained from the chosen action space.
Raise 1 structure
To raise a structure, choose one of the face up structures below the action board and pay all building costs as shown on the structure.
Keep the following details in mind:
- You can raise the structure on any one empty structure space of your choice on your industry board. There are no restrictions. Only when you want to activate the effect of the structure are you required to fulfill the listed conditions.
- If building costs are shown with an "or" slash /, you pay either the left or the right costs (you cannot "merge" these costs).
- You cannot for any reason tear down or overbuild a raised structure.
- When you raise a structure, you may immediately activate its effect if you meet the conditions for doing so.
IMPORTANT: As soon as you have raised structures on all 12 structure spaces of your industry board, when taking this action you must place the topmost structure from the card stack into the game box, instead of raising another one. You will rarely use this rule, but it ensures that you cannot deliberately stall the game.
Example: Angelika raises the Towrope Shed and pays 1 wood. She moves the wood token down 1 space on her supply board, takes the Towrope Shed, and places it on an empty space of her industry board. Angelika could have paid 1 clay instead of the wood.
Build 1 route or 1 bridge
To build a route or a bridge, pay the appropriate building costs with materials or thaler. Then, take the matching tile or a bridge from the supplies next to the action board, and place it on your industry board.
Keep the following details in mind:
- You place paths, roads, rail tracks, and canals on the route spaces between the structure spaces or on the edges of the industry board.
- You can place the routes so that different route types intersect. Additionally, route tiles of the same type can branch out.
- When you build a route or a bridge, you may immediately activate the effect of a structure if you meet the conditions for doing so.
- Build 1 path: Pay the building costs of 1 clay. Take a matching path tile from the supply and place it on any one empty route space of your choice. Important: Built paths are the only route type that you can overbuild with the other route types. If you do that, place the path back in the supply.
- Build 1 road: Pay the building costs of 1 brick. Take a matching road tile from the supply and place it on any one empty route space or overbuilt a path of your choice.
- Build 1 rail track: Pay the building costs of 1 iron and 1 wood. Take a matching rail track tile from the supply. You can only place the rail track if you can place it on an empty route space or overbuilt a path adjacent to another rail track. Thus, all rail tracks form a single connected network.
- Build 1 canal: Pay the building costs of 3 thaler. Take a matching canal tile from the supply. You can only place the canal if you can place it on an empty route space or overbuilt a path adjacent to another canal. Thus, all canals form a single connected network. Directly after building the canal you gain 2 clay and move your clay marker accordingly on the supply board.
- Build 1 bridge: Pay the building costs of 1 wood. Take a bridge from the supply. Bridges are no routes. Instead, build a bridge across an existing route to connect two adjacent existing structures. Thus, you cannot build a bridge on the edges of the industry board. You can build at most 1 bridge across each route.
Examples: Marion cannot build a second bridge across the road. She also cannot build a bridge across the canal, as she first needs to raise a structure adjacent to the Canal Shack. She also cannot connect the Canal Shack with the Industrial Storage, as she first needs to build a route between these structures.
Gain materials
When you gain materials, move the matching material tokens accordingly on your supply board. Via these actions you only gain wood, clay or ore. You only gain iron and bricks via "at anytime" actions, optionally at the end of a round by turning the material wheel, and via effects of the structures.
Keep the following details in mind:
- You can only own an amount of materials that can be displayed by the material wheel on the supply board: which would be at most 8 each of wood, clay, and ore, as well as 6 each of iron and brick. If you were to gain more materials, you forfeit the additional materials. You can always turn basic materials into valuable materials via the "at any time" actions to create some new space on the supply board for more basic materials before taking any of the actions.
"At Anytime" Actions
There are two "At anytime" actions.
Buy basic materials
You can do the following at any time and as often as you like (even several times in a row):
- pay 1 thaler to move one of your wood, clay, or ore tokens from space 0 to 1.
- pay 2 thaler to move one of your wood, clay, or ore tokens from space 1 to 2.
- pay 3 thaler to move one of your wood, clay, or ore tokens from space 2 to 3 and so on.
Iron and brick are valuable materials. You cannot buy them directly via this action. You can only produce them (see below), or alternatively gain them by activating effects of the structures.
Examples: Even without having any clay, Angelika can raise the Boatman Shed. She buys a total of 2 clay for 3 thaler (1 thaler for the first clay, 2 thaler for the second clay). Then, she can pay the building costs for the Boatman Shed.
When Angelika later activates the effect of the Boatman Shed, because of the 2 adjacent canals she can use the trading effect of the Boatman Shed two times. As each trade is considered to be a separate action, Angelika could buy a required ore before each of the trades (In the case of the Boatman Shed, this is less important, as Angelika can use thaler for each trade).
Produce additional valuable materials
You can pay 2 thaler at any time and as often as you like (even several times in a row) to turn your material wheel in the direction of the small arrow, thus counter-clockwise, for one position.
IMPORTANT: You can only do this when all three wood, clay, and ore tokens are at least on space 1. Remember that you can turn your material wheel once for free at the end of each round.
Example: In order for Marion to produce valuable goods during her turn, she must pay 3 thaler. I. First, Marion buys 1 wood for 1 thaler. II. Then she turns her material wheel one position for 2 thaler.
Each time, you must pay costs, you must pay the complete costs at once. You cannot interrupt the payment with "at anytime" actions.
However, if you gain different material types, initially you can take only some material types, then use "at anytime" actions, and afterward gain the remaining material types. Just remember these restrictions:
- While gaining materials of a single type, "at anytime" actions are forbidden.
- Between gaining different material types, "at anytime" actions are allowed.
NOTE: If you already have the maximum amount of 6 bricks or 6 iron, you cannot gain more of these valuable materials. In such cases it is rarely worthwhile to use this "at anytime" action only to produce the other valuable material.
Example: Marion builds a rail track at the Arsenal and currently has 6 ore (thus, she only has space for another 2 ore) and 0 thaler. By activating the effect of the Arsenal, she can first use the second effect of the Arsenal, so she can pay for producing additional valuable materials. By doing this she gets some space on her supply board and can gain all 3 ore via the first effect of the Arsenal.
Alternatively, assume Marion builds 3 rail tracks at the Arsenal and has 0 ore and 0 thaler. If she would activate the effects of the Arsenal, she would gain 9 ore that she could not fully store on the supply board (only at most 8 ore can be stored). Sadly, Marion could not first take 3 ore, then slide in a production of additional valuable materials, and then take the remaining 6 ore.
Activate the Effects of the Structures
All structures offer effects that you can activate up to two times during the game to gain advantages.
You activate these effects immediately in two different ways:
- As soon as the structure is surrounded by 4 routes. This happens immediately when you build the fourth route, or when you raise the structure on a structure space that is already surrounded by 4 routes. You do not activate an effect again when you overbuild a path with one of the other route types.
- As soon as 2 bridges connect the structure with two other adjacent structures. This happens when you build the second bridge. You do not activate an effect again when you build a third or fourth bridge at the same structure.
You can activate an effect first by building 4 routes, and later by building 2 bridges, or vice versa. The order does not matter.
Keep the following details in mind:
- If you activate the effects of two adjacent structures by building the fourth route for both structures between them, you activate the effects of both structures one after the other in the order of your choice.
- Restriction for bridges: If you would activate the effects of two adjacent structures by building a bridge between them, you can only activate the effects of one of the buildings! You must forfeit the effects of the other building, and cannot later activate them by building a third bridge. You may choose which one of the structures you want to activate and which one to forfeit.
Each structure offers one or more unique effects, offering all kinds of proceeds when activated. The following basics give you a good idea about most effects without looking in the glossary:
- Many structures offer multiple effects; you may choose how many of them you want to use and which order to do them in or whether to do them at all.
- For nearly all effects you must fulfill requirements to gain the proceeds. If you cannot fulfill a requirement, you do not gain the proceeds.
- The following different symbols for the effects on the structure cards are very important:
- If routes, bridges, structures, and so on are shown without any additional symbol, then they are laterally adjacent to the structure (and thereby restricted to a maximum of four).
- If routes, bridges, structures, and so on show crossed arrows, they can be anywhere on your industry board.
- If routes are shown vertically, they are directly next to a structure or directly adjacent to other routes.
- For nearly all effects exact amounts apply like "1 road", "2 bridges" and so on. Only if the amount is followed by a "+," minimum quantities apply like "2+" for at least 2.
- Many effects offer variable requirements and proceeds, depending on the amount of routes, material supplies and so on. If that is the case, you do not have a choice which requirements you want to fulfill. Instead, you must use the variant you are fulfilling by the current amount of routes you built, material supplies you have, and so on.
Example: When Angelika activates the Loading Depot, she gains 2 clay for each laterally adjacent canal at the Loading Dock. Additionally, she gains 1 thaler for each rail track on her industry board.
Example: When Marion activates the Boat Shed, her proceeds depend on the number of canals directly laterally adjacent to the Boat Shed. With 3 canals at the Boat Shed Marion gains 2 iron and 4 wood.
You can find all details for all effects of the structures in the separate glossaries.
Prepare the Next Round
After exactly 5 actions you finish the action phase. Prepare the next round by following these steps (you also do this at the end of the last round of the game).
NOTE: During the solo game, you prepare the next round differently, as explained in the chapter Solo Game.
1. Refill structures
During the first rounds draw the green structures from the card stack and place them face up below the action board, so that there are again a total of 4 structures.
If you draw the last green structure and deplete that card stack, additionally draw an orange structure and place it face up below the action board as a fifth structure.
From now on, during this step draw structures and place them face up below the action board, until there are a total of 5 structures. Additionally, you can now use the revealed action of the second action space.
Accordingly, if you draw the last orange structure and deplete that card stack, additionally draw a blue structure and place it face up below the action board as a sixth structure.
From now on, during this step draw structures and place them face up below the action board, until there are a total of 6 structures. Additionally, you can now use the revealed action of the third action space.
NOTE: If you must draw 2 structures, but there is only a single green (or a single orange) structure left in the card stack, draw an additional orange (or blue) structure to place the necessary higher total amount of structures face up below the action board. When preparing the last round, if there are not enough blue structures left in the card stack, you can only choose from 5 different structures.
Example: Angelika and Marion must draw 2 green structures, but there is only 1 green structure left in the card stack. Thus, they also draw 2 orange structures, and place them face up next to the green structures. From now on they can use the expanded action "Raise 1 structure. In addition: build 1 bridge".
2. Turn the material wheel
You can both turn your material wheels for free exactly 1 position in the direction of the small arrow, if all three wood, clay, and ore tokens are at least on space 1. You can instead choose to pass on turning your material wheel.
NOTE: At the start of the game in the starting position you could not turn the material wheel, as the wood token on space 0 would prevent that.
Keep the following details in mind:
- If the brick and/or iron token are on space 6 of your supply board, you would push them with the wheel, so their amounts would not further increase.
- If your wood, clay, and/or ore tokens are on space 0 and prevent you from turning the material wheel, you can use the "at anytime" actions to buy these materials.
- You can turn the wheel at the end of the last turn one more time for free.
Examples: Marion cannot turn her material wheel, as both wood and clay tokens are on space 0. Via the "at anytime" action, she buys 1 wood for 1 thaler and 1 clay for 1 thaler. Now she can turn her material wheel for free.
3. Distribute new thaler
Place 1 thaler on each of the 4 action spaces on top of the action board, even if there are already thaler. Place 1 thaler on each of the 3 action spaces at the bottom, if you did not choose them during the action phase.
Example: After the current action phase three action discs are on the action spaces on top of the action board, and two are on the action spaces at the bottom. Angelika and Marion place 1 thaler on all four action spaces on top of the board and on the action space "4 wood".
4. Hand over the action discs
The current starting player hands over the red starting disc, as you always alternate being the starting player. Collect all action discs from the action board and stack them again with the golden action disc on top.
You are now ready to start the next round.
07 End of the Game and Final Scoring
You start the final round after you draw the last blue structures and deplete the card stack. If you must draw 2 structures, but there is only a single blue structure left in the card stack, you only have a choice between 5 face up structures.
You can also use the revealed action of the fourth action space during the final round.
At the end of the last round, you can again use "at anytime" actions and turn the material wheel one more time for free. Then, finish the game with the final scoring.
Final Scoring
Add up your prestige and use the scoring pad that contains the following categories:
Structures on the industry board: Add up the prestige of all your structures.
Thaler: Add up your remaining thaler. Each thaler counts as 1 prestige.
Prestige tokens: Add up your prestige tokens that you collected during the game for activating the effects of your structures.
NOTE: Thaler and prestige tokens have the same value, the only difference is that you can invest thaler during the game.
Iron and bricks: Add up all bricks and iron on your supply board. Each of these materials counts as 1 prestige.
Smallest amount of wood, clay, or ore: Only count the smallest amount of wood, clay, or ore on your supply board. Each of these materials counts as 1 prestige.
Roads, rail tracks, and canals (not paths): Add up the roads, rail tracks, and canals on your industry board. Each of these routes counts as 1 prestige. You do not gain prestige for paths.
Empty route spaces: Add up the empty (thus not built on) route spaces on your industry board. Subtract 1 prestige for each of these empty spaces. You do not subtract prestige for empty structure spaces.
You win Oranienburger Kanal, if you have the most prestige. In case of a tie, check who better fulfills the first of the following requirements: less empty route spaces > less empty structure spaces > more iron and bricks > more wood, clay, and ore.
08 Solo Game
All present rules are valid with the following changes and additions.
Sequence of Play
During each round, you only take 4 actions.
IMPORTANT: You cannot choose the action space containing the red blocking disc.
Prepare the Next Round
1. Refill structures
You must always draw 2 structures from the current card stack and place them face up below the action board. Always sort the structures by their structure numbers from low to high.
If you only build 1 or even no structure at all during the round, first you must remove the face up structure (or two structures) with the lowest structure number(s) below the action board and place them into the game box, before you draw the new structures.
At the end of the first round, the card stack with green structures depletes. Additionally draw 1 orange structure and place it face up below the action board as a fifth structure. From now on, there are always 5 face up structures below the action board at the end of this step.
At the end of the third round, the card stack with orange structures depletes. Additionally draw 1 blue structure and place it face up below the action board as a sixth structure. From now on, there are always 6 face up structures below the action board at the end of this step.
At the end of the sixth round, the card stack with blue structures depletes. You then play a seventh round, before finishing the game with the final scoring.
2. Turn the material wheel
As explained above, you can turn your material wheel for free exactly 1 position in the direction of the small arrow, or pass on turning the wheel.
3. Distribute new thaler and move the blocking disc
Place 1 thaler on each of the 4 action spaces on top of the action board, even if there are already thaler. Place 1 thaler on each of the 3 action spaces at the bottom if neither your action discs nor the blocking disc are on these spaces (meaning they were not chosen this round).
Take back all action discs and place them in a stack in front of you: the 3 silver discs at the bottom and the golden disc on top. Move the blocking disc to the next action space of the action board. If there are thaler on that space, place the thaler back in the supply next to the action board.
At the end of rounds 1 to 3, move the blocking disc from left to right on the four action spaces at the top of the action board, then at the end of rounds 4 to 6 from left to right on the three action spaces at the bottom.
Example: At the end of the round, always move the blocking disc to the next action space.
End of the Game and Final Scoring (Solo)
The solo game ends after the seventh round. After you took your four actions and chose "at anytime" actions of your choice, finish the game with the final scoring. Remember to turn the material wheel one more time for free.
Depending on your total prestige, you achieved the following:
- Less than 80 prestige: It does not work without practice.
- 80 to 99 prestige: Your plans start to get in shape.
- 100 to 119 prestige: This is already ok, but not quite enough.
- 120 to 129 prestige: You are victorious!
- 130 to 139 prestige: Great! Your industrial area is worthy of an award.
- 140 to 149 prestige: Superior achievement!
- 150+ prestige: Do you know more than we do? Unbelievable!
Solo Campaign
If you want to have a bigger challenge, you can try this campaign. After choosing a deck of structures, play 3 games in a row. At the start of each game, you take new structures from all three types, so you use almost all structures of the deck during the campaign.
BLUE STRUCTURES: As there are only 20 structures for each game stage, but you need 21 blue structures for the campaign, at the end of the first two games you must set aside the remaining face up blue structures below the action board. At the start of the third game, shuffle the blue structures set aside. Draw one of them and shuffle it together with the remaining 6 blue structures to form the blue card stack for your third game.
MOVE THE BLOCKING DISC:
I. During the first game, at the end of each round you first move the blocking disc from left to right on the spaces at the top of the action board, then from left to right on the action spaces at the bottom.
II. During the second game, move the disc from left to right by alternating between the top and bottom row.
III. During the third game, start the game by placing the blocking disc on the top right action, and then first move it from right to left on the spaces at the top of the action board, then from right to left on the action spaces at the bottom.
WINNING THE SOLO CAMPAIGN: Depending on your total prestige collected in all three games, you achieved the following:
- Less than 350 prestige: There is still room for improvement.
- 350 to 369 prestige: You are victorious!
- 370+ prestige: This is a great performance!
09 Symbols
Materials, Thaler, Prestige
- wood, wood supply
- clay, clay supply
- ore, ore supply
- brick, brick supply
- iron, iron supply
- thaler
- prestige token
Structures, Routes, Bridges
- structure
- general route, route type
- path
- road
- rail track
- canal
- bridge
Position on the Industry Board
- anywhere on the industry board
- corner space of the industry board
- at the edge of the industry board
- empty structure space
- adjacent structure space
- circular course
- column with 3 route spaces
- row with 4 route spaces
- built-over imprinted path
- 90°-angle with routes
- route is directly next to a structure or directly adjacent to other routes
Miscellaneous
- for each
- trade for
- additional
- afterward
- first activation
- second activation
- not activated
- remove a route
- place a route
- choose
- not/none
- material wheel
- any number of times
- different
- or