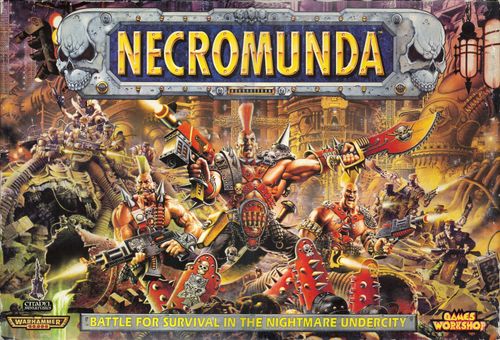
Necromunda
Necromunda Rulebook
Table of Contents
Table of Contents
- Introduction
- What You Will Need
- Characteristics
- The Turn
- Movement
- Shooting
- Hand-to-Hand Combat
- Leadership
- Advanced Game Rules
Introduction
Tabletop Conflict
The Necromunda game allows you to fight conflicts between rival Underhive gangs on the tabletop. The opposing gangs are represented by models, assembled and painted by yourself, each representing an individual gang fighter. You'll find more information about the different cultures and peoples of Necromunda in Campaigns. Your tabletop becomes a part of the Underhive, the scene of the action, with ruined buildings, gantries and multi-level walkways.
The aim of the game is to outfight your opponent, which requires a mixture of skill and luck. You'll soon learn how to arm and equip your gang efficiently, and how to exploit the ruins and other terrain to your best advantage. You'll also want to expand your gangs from their modest beginnings. Many models are available for the different gangs, with these you can expand your collection, equip fighters with different weapons, and add more powerful characters.
Building the Gang
Every time you play Necromunda you earn the opportunity to expand or improve your gang. Each time a gang fights, its members gain in skill and experience. Young juves quickly progress to become full gang fighters, and fighters learn new abilities which make them superior combatants. By winning games you gain territory, discover ancient artifacts, uncover mineral wealth, and so on. With this wealth you can buy more weaponry and hire more gang fighters.
As the gang's leader becomes richer and his followers ever more deadly, his fame will spread throughout the Underhive. Famous gunfighters and other renegades will come and seek him out, perhaps to join him, maybe to collect the inevitable bounty that piles upon his head! By recording the details of your gang you can watch it grow from a bunch of young hopefuls to hardened fighters feared and respected throughout the Underhive.
This Book
This book contains all of the rules that you need to play either one-off games or a full blown campaign in the dangerous Underhive of Necromunda. The book is divided into three separate sections, the Rules which naturally contains all of the core rules of the game, Campaigns which adds the campaign system and Outlanders which contains additional rules as well as new gang types.
The Rules
The first part of the book contains the rules of the game. You don't need to learn all the rules to play, but we suggest you read through the Rules at least once before attempting your first game. The most important rules are summarised on a playsheet, provided at the end of the book, and you'll quickly find these are all you need in most situations (for easy reference we suggest you cut out or photocopy the playsheet). For more detailed rules and to resolve more complex situations, you can always refer to the relevant rules section.
New Players
If you're new to Games Workshop games then you'll be reassured to know that finding other players isn't normally a problem - you'll be surprised how many there are! There may be a Games Workshop store nearby, where you can obtain models, paints and game supplements. Games Workshop stores are not just shops, they are hobby centres where the staff will happily help you learn the rules, show you how to paint, and suggest ways to use and develop your collection. Games Workshop staff are also players who collect and paint their own forces and fight battles themselves.
What You Will Need
As well as this book, you will need the following things to play Necromunda.
Citadel Models
You will need enough miniatures of the appropriate type to represent the fighters of your gangs. At the end of this book is a catalogue section showing the vast range of figures available for Necromunda. It is a good idea to make up your gang on paper first and then purchase the miniatures that you need. If there is no figure available with the particular weaponry that you require, you can convert an existing figure by adding bits from other miniatures or the Necromunda weapons sprue to create your own unique fighter. The plastic Necromunda figures are specially designed to have interchangeable arms and weapons, making the process a lot easier.
As you will see in Campaigns, there are many different gangs inhabiting the Underhive, and you will need to choose one to play with. Each gang has a different style of fighting and each will have their own aims and objectives. You could choose a gang that reflects your preferred tactics or you could read the background section in Campaigns and choose whichever gang particularly grabs your imagination. A good way of choosing which gang to play with is simply to pick the Necromunda gang models that you like the best.
Playing Surface
You will need a firm, level tabletop or area of floor to play Necromunda on. A kitchen table will do fine. Some gamers make their own gaming tables from a sheet of chipboard or something similar. Such a table can be slightly larger than the table or trestles that support it, and can be divided into two or more pieces for ease of storage. Many players find that a heavy blanket draped over a table or spread upon the floor makes a fine surface on which to play a battle. Whatever you use, you will find that an area approximately 4 feet square is about right for most battles.
Scenery
The desperate struggles of a Necromunda battle usually take place over tangled walkways, hastily constructed barricades and labyrinthine architecture. Pre-cut card and plastic scenery is available from Games Workshop, but many gamers enjoy the challenge of making their own terrain. Although properly modelled terrain will enhance your enjoyment of the game, you can still play with only a bare minimum of scenery. As a rule, you will find that a table cluttered to overflowing with scenery will lead to closer and more exciting games.
Throughout the book you will find photographs, drawings and descriptions of the Underhive. These should give you plenty of ideas for producing your own scenery. Games Workshop's book 'How to make Wargames Terrain' is also a good source of ideas and practical hints on all aspects of scenery building.
Templates
At the back of the book you will find sheets of pre-printed blast markers and templates for weapons that affect an area such as flamers and grenades. Before you play, you should cut these out and, if you wish, mount them on card for extra durability. You can photocopy these sheets first if you don't want to cut up your copy of Necromunda.
Counters
As well as the templates, there are also counters to help keep track of things happening on the tabletop. You can of course keep separate notes on pieces of paper of which models are hidden or on overwatch and so forth, however the counters provide a convenient way to jog your memory and speed up gameplay. Just as with the templates, these should be cut out and can be mounted on cardboard if you wish. The counters include: Hidden counter, Broken counter, Loot counter, Overwatch counter, and Run counter.
Dice
Four different dice are used in the game as explained in the rules. Don't worry about how the dice work for now, this is covered in detail later on. The different dice are:
- Ordinary Dice (D6)
- Sustained Fire Dice
- Scatter Dice
- Artillery Dice
Ordinary dice are marked 1 to 6 in the usual way. These dice are used a lot during play and to save space on charts they are always referred to as D6 (where 'D' stands for dice). So, when the rules call upon you to roll a D6 we are simply asking you to roll a dice. D6+1 means roll a dice and add 1 to the score. 2D6 means roll two dice and add the scores together to obtain a score of 2-12.
The Sustained Fire dice is marked 1,1,2,2,3 and with a special JAM symbol. This dice is used to shoot a protracted burst of shells where 1, 2 or 3 hits can be caused (as discussed in the rules).
The Artillery dice is marked 2,4,6,8,10 and a MISFIRE symbol. This dice is used in conjunction with the Scatter dice to determine how far shells land from their mark. A MISFIRE result can result in a shell proving dud or even exploding in the breech. Both the Sustained Fire dice and the Artillery dice can be substituted with an ordinary D6 at a pinch. For the Artillery dice, simply roll a D6 and double the score counting sixes as a MISFIRE result. The Sustained Fire dice is almost as simple, count a score of one as a JAM and halve any other result, rounding the score down.
The Scatter dice is marked with four arrows and two HIT symbols. This dice is used to determine where grenades and shells land if they miss their target, hence 'scatter'. The dice can be used to establish any random direction from a point. Note that the HIT symbol also has a small arrow on it to facilitate this.
A selection of other dice will also prove useful: for example a four-sided dice (D4), ten-sided dice (D10) and twelve-sided dice (D12). These are used to establish the amount of wounds inflicted by some large or deadly weapons. None of these dice are strictly necessary, as you can generate random numbers using the D6 provided. In the case of a D4 roll a D6 and re-roll numbers of 5 or 6. For a D12 roll a D6, on a 1-3 roll a D6 to give a number of 1-6, on a roll of 4-6 roll D6+6 to give a number of 7-12. A D10 can be represented the same way but re-roll 6's.
All of these dice are available from Games Workshop stores and Mail Order, and most will be supplied with one of Games Workshop's boxed games.
Tape Measure
For measuring ranges you will need a retractable steel tape measure marked in inches or a couple of the plastic range rulers supplied in most Games Workshop boxed games.
Other Things You Will Need
Pens and pencils, and plenty of paper will also be required. When you play a game you will need to keep track of wounds suffered by your fighters, the weapons they are carrying, and other details. This is most easily done using a roster sheet, and a blank sheet is included at the end of the book. We recommend that you make additional copies and use them to record details during the game. We'll explain more about roster sheets and how to use them in Campaigns.
Characteristics
The Underhive fighters of Necromunda have wildly varied martial skills and physical abilities. Some are faster than others, some are stronger, some more determined, some are better shots, and so forth. This tremendous variety is fully represented in the Necromunda game in the form of characteristics and special skills. Right now we won't worry about the special skills - these come later with practice and battle experience. For the moment we'll just consider a fighter's characteristics.
Each model fighter is defined by a set of characteristics namely: Move, Weapon Skill, Ballistic Skill, Strength, Toughness, Wounds, Initiative, Attacks and Leadership. Each characteristic is assigned a value of (usually) between 1 and 10. The higher value your model has for any characteristic the better - for example, a model with a Strength of 6 is stronger than a model with a Strength of 2. Descriptions of the different characteristics are given below.
MOVE (M). A model's move shows the number of inches it can move in a turn under normal circumstances. The usual number is 4 as almost all fighters move 4" per turn, although they can move faster when they are running or charging, as you'll see later.
WEAPON SKILL (WS). Weapon Skill is a measure of close combat ability - how good the person is at hand-to-hand fighting. A good swordsman or a skilled knife fighter would have a high value compared to a green juve, for example. An average value is 3.
BALLISTIC SKILL (BS). Ballistic Skill shows how good a shot the individual is. When you shoot a gun the chance of hitting a target depends upon your Ballistic Skill. An average score is 3 and a dead-eye shot might have a Ballistic Skill of 4, 5 or even higher.
STRENGTH (S). Strength simply shows how strong a person is! Strength is especially important when you fight hand-to-hand combat because the stronger you are the harder you can hit or thrust. A Strength value of 3 is about average.
TOUGHNESS (T). Toughness is a measure of how easily an individual can withstand a hit from a weapon or a blow from a club or fist. The tougher you are the harder you are to wound or kill. An average value is 3.
WOUNDS (W). A model's Wounds value shows how many times a fighter can be wounded before he collapses and goes down dead or incapacitated. Most individuals have a Wound value of only 1 but tough old gang leaders and veteran gangers might have a value of 2 or more.
INITIATIVE (I). The Initiative value represents alertness and reaction speed. It determines a fighter's chance of dodging a sudden blow or gathering his wits while shells and bombs explode around him. An average Initiative value is 3.
ATTACKS (A). The Attacks value indicates the number of 'Attack dice' rolled when the model fights in hand-to-hand combat. Most individuals roll only one dice and so have an Attacks value of 1, but experienced fighters might have a higher value and roll correspondingly more dice. The more dice you roll the more chance you have of beating your opponent!
LEADERSHIP (Ld). Leadership represents raw courage and self-control. The higher a person's Leadership the more likely he is to remain steadfast in combat while others run off or are slain around him. An average Leadership value is 7.
Characteristic Profiles
A model's characteristic values are written in the form of a convenient chart which we call his characteristic profile or just profile.
| Fighter | M | WS | BS | S | T | W | I | A | Ld |
|---|---|---|---|---|---|---|---|---|---|
| Mak McMadd | 4 | 3 | 3 | 3 | 3 | 1 | 3 | 1 | 7 |
This is the average profile for a gang fighter or 'ganger', as they are called. When you raise your first gang it will include gangers with exactly this profile. As you fight games against other players your fighters will get better and their characteristics will rise. All these details are recorded using gang roster sheets. This is explained properly later on. For now it's enough to know what the characteristics are and how the values vary.
The Turn
During the game you take command of a gang of Necromundan Underhive fighters. Your opponent commands a rival gang, your deadly opponents in the forthcoming conflict.
The model fighters and scenery are set up on the tabletop as appropriate for the encounter you are fighting (see the Scenarios section in Campaigns). There are many different types of encounter, varying from the straightforward shoot-out to rescue missions, ambushes and daring raids. Depending on the encounter played, you can set the gang fighters up in different ways, but all the games are basically played in the same fashion.
To begin with one side takes a turn, then the other side, then the original side and so on, much like a game of draughts or chess. When it is your turn you can move all your models, shoot with any fighters that are able to do so, and fight hand-to-hand combats. Once your turn is complete it is your opponent's turn to move, shoot and fight with his gang. Once your turn is complete it is your opponent's turn. Your opponent works through each phase, moving, shooting, fighting hand-to-hand and recovery, after which his turn is over.
Games last until one side either gives in or is forced into defeat as described later. You can also be obliged to withdraw from the fight if your side takes too many casualties. During some encounters, there is a specific objective which you must achieve, perhaps to destroy a machine or rescue a captive. Each of the special encounters describes what you must do to win, and therefore end, the game.
Phases
To keep track of who's doing what and when, your turn is divided into four distinct phases as follows. Each phase is completed before beginning the next. So, begin by moving all your models, then shoot with all models that can do so, then fight hand-to-hand, and finally recover any models that have run from the fight.
During the movement phase you may move your gang fighters according to the rules given later for movement.
In the shooting phase you may shoot with any appropriate weapons as described in the rules for shooting.
During the hand-to-hand phase all models in hand-to-hand combat may fight. Note that both sides fight in hand-to-hand combat regardless of whose turn it is.
During the recovery phase you can attempt to recover individuals whose nerve has broken. The rules for keeping your nerve, running away and recovery are described later.
Movement
During the movement phase you can move your models as you wish in accordance with the rules given below. Move your model fighters one at a time and finish moving each before moving the next one.
You can move your fighters in any order except where noted below.
- Chargers - If you want a model to charge at an enemy and attack him hand-to-hand then you must do this before moving any other models. When you charge you must declare to your opponent that you are charging and indicate which enemy model you are attacking.
- Compulsory Moves - Sometimes a model is obliged to move in a certain way and this is called a 'compulsory move'. For example, a fighter whose nerve breaks must run away from his enemies and take cover. Make all your compulsory moves before finishing any remaining movement.
- The Rest - Once you have moved chargers and compulsory movers you can move the rest of your models as you wish.
Moving
During their movement phase models can move up to their move rate in inches in any direction. Most fighters have a move characteristic (M) of 4 and so can move 4" in any direction including up or down ladders.
In normal circumstances you do not have to move the full permitted distance or at all if you do not wish. Any exceptions are described later and invariably involve either charges or compulsory moves.
Running
The normal 4" move represents a person moving at a fairly rapid rate but allowing time to aim and shoot a weapon and generally observe what is going on around him. If you wish a model can move much quicker than this - he can run! A running fighter can move at double speed: 8" rather than 4", for example.
A running model loses his chance to shoot in the turn. He is concentrating on running and is not prepared to fight, having shouldered his weapons or replaced them in holsters. You should declare that models are running as they move, as this will help to remind both players that the model is unable to shoot that turn. You can place a Run counter beside the model to jog your memory if you wish.
If a running model approaches within 8" of an enemy that he can see he must stop immediately. The runner is surprised to find an opponent so close and immediately stops to draw a weapon or ready himself to fight.
Charge!
If you wish a model to engage an enemy in hand-to-hand combat then you must declare and make a special move called a charge. The reason we do this is that the enemy may get a chance to shoot as you leap towards him waving your weapons and yelling a bloodcurdling cry. Without measuring the distance, declare that you are charging and indicate which enemy model you wish to attack.
A charge is like a run, at double move rate, but ends with the attacker touching his enemy base-to-base. Once opposing models are touching bases in this way they are engaged in hand-to-hand combat. Models are also engaged in hand-to-hand combat if separated by a low wall or obstacle, where it is literally impossible for the bases to touch because the wall is in the way.
It can happen that you charge towards an enemy but fail to reach him because you have miscalculated the distance. If this happens the model is moved as far as possible towards his enemy and can do nothing for the rest of the turn.
Note that you cannot move models into hand-to-hand combat except by charging - any move intended to bring a fighter into hand-to-hand combat is a charge by definition.
Hiding
The Hiding rule allows us to represent the fact that real people can duck down and conceal themselves in a way our unmoving and dramatically posed models cannot. A hiding fighter keeps as still as possible, just peeking out over his cover or around a corner. Hiding is sometimes useful if you want to keep out of a fight until the enemy gets within close range, or if you want a breather to recover and regroup your forces.
A model can hide if it ends its movement behind a low wall or column, at the corner of a building, or in a similar position where a person might reasonably conceal himself. The player declares that his fighter is hiding and can indicate this by placing a Hidden counter beside the model.
While hidden a fighter cannot be seen or shot at, even if a portion of the model is actually sticking up or out from its cover.
While hidden a model cannot shoot without giving away its position or coming out of hiding. If a hiding model shoots or moves so that it can be seen then it is no longer hidden and can be shot at as normal.
A model that runs or charges is not able to hide that turn. His sudden burst of speed does not give him time to conceal himself from view.
A model may stay hidden over several turns so long as it remains behind a concealing wall or similar feature. It may even move around behind cover so long as it remains concealed while it does so. If an enemy moves into a position where he would clearly be able to see the hidden fighter, then the model cannot claim to be hidden any longer and the counter is removed.
A model may not hide if it is too close to an enemy - he will be seen or heard no matter how well concealed he may be. This distance varies according to the enemy fighter, who will always see, hear, or otherwise spot hidden foes within his Initiative value in inches. So, a fighter whose Initiative value is 3 will automatically spot all hidden enemy within 3".
Terrain
The underworld of the Necromundan hives is a dark and ruinous place where the tumbled constructions of a distant age form a broken and hazardous landscape. Collapsed tunnels and gushing rivers of effluvia make the going arduous and sometimes impossible. Many parts of the Underhive are connected by man-sized crawlholes which travellers must squeeze through to reach their destination. Even the open areas of the Underhive, the ancient and abandoned habitation domes, are a tangle of half buried buildings, industrial zones and collapsed service tunnels.
Battles mostly take part in open areas where movement is easiest. Obviously high walls and other constructions will block your progress, but the ground level and raised surfaces are reasonably solid. However, should you find yourself struggling over shifting ash wastes or up to your elbows in marshes of bubbling pollutant, your progress will be impeded as indicated below.
OPEN GROUND. The tabletop surface, building floors, connecting walkways and ladders are all considered to be open ground which does not affect your movement. You can also move through doors or hatches without slowing your speed.
DIFFICULT GROUND. Difficult ground includes steep or treacherous slopes, dense stands of hive foliage such as giant fungi, pools of pollutant liquid or effluvia, and thick or sodden hive dust. Models move over difficult ground at half speed or half rate, so 1" of movement counts as 2". For example, to cross a 7½" wide pool of bubbling algal slime you must expend 3" of your move. Similarly, if moving over a steep mound of ash waste you'll move at 2" per turn rather than 4".
A fighter who is running is slowed down by difficult ground. He will run at 4" rather than 8" over steep slopes for example, because all models move at half speed over difficult terrain.
VERY DIFFICULT GROUND. This is the really nasty stuff you wouldn't want to go near. It includes tar pits, deep or noxious pools of liquid wastes, and narrow crawlholes through the rubble. Models move over very difficult ground at a quarter rate, so each 1" of movement counts as 4".
IMPASSABLE GROUND. Much of the Underhive is simply impossible to move over or through, such as deep or corrosive pools, enveloping layers of soft hive dust, and, of course, solid walls, collapsed tunnels and the like.
WALLS AND BARRIERS. Walls, pipelines, small heaps of debris, and other low obstacles form barriers that you can either go around or leap over. A model can leap over a barrier less than 1" high and no more than 1" wide without impeding its movement at all. A barrier between 1" and 2" high, and no more than 1" wide, can still be crossed by climbing over but you must give up half of your total move that turn to do so. For example, if you would otherwise move 4" then you must give up 2". A barrier higher than 2" is too tall to climb over and is effectively impassable.
Shooting
Necromundan Underhive fighters carry a variety of weaponry. Individual fighters often have several different weapons such as grenades, pistols, knives and guns.
During the shooting phase of your turn each of your fighters may shoot once with one of his weapons. So you can either shoot a laspistol, fire a boltgun, or throw a grenade, for example.
Work through your models one at a time. Pick which fighter is going to shoot, nominate his target, work out if he hits his enemy and, if he does so, any wounds or injuries caused, and then continue to the next shooter. You can take shots in any order you wish.
Who Can Shoot
Each model can shoot once in the shooting phase so long as he can see a target and assuming he has a suitable weapon and isn't fighting in hand-to-hand combat (as described later). The fighter is always assumed to face in the direction faced by the model itself, and is able to see within a 90 degree arc to his front. You can only shoot at a target within this arc.
The Orlock can shoot at Goliath A because that model is within his 90° arc of sight. He cannot shoot at Goliath B because this model is outside his 90° arc of sight.
To shoot at a target a fighter must be able to see it, and the only way to check this is to stoop over the tabletop for a model's eye view. Sometimes it will be obvious whether a target can be seen, at other times it will be more difficult as buildings and girders will be in the way. So long as the shooter can see at least a part of the target's body he can shoot, even if all that can be seen is an arm or leg. If he can see nothing but the tip of a gun or the end of a sword then he cannot shoot as he is unable to see the target's body. If in doubt, and if you've checked the shot from both the firer's and the target's view and still can't decide, then roll a dice - on a 1, 2 or 3 you can't see and on a 4, 5 or 6 you can.
Closest Target
You must shoot at the closest enemy as he represents the most immediate threat and therefore the most obvious target. However, you can fire at a more distant target if it is easier to hit. For example, a closer target may be hard to hit because it is partly obscured by cover whilst a more distant target might be in the open and therefore an easier shot.
Here, the closest target (A) is behind cover and so is more difficult to hit than the more distant targets B, C and D. In this situation the firer may shoot at target B even though he is further away.
Range
Once you have decided to shoot and have chosen your target you must measure to see whether the shot is within range. Each type of weapon has a maximum range as indicated later in the Armoury section of the book. The following examples show the short, long and maximum ranges of a selection of typical weapons.
| Weapon | Short Range | Long Range | Maximum Range |
|---|---|---|---|
| Laspistol | 0-8" | 8-16" | 16" |
| Bolt Pistol | 0-8" | 8-16" | 16" |
| Autogun | 0-12" | 12-24" | 24" |
| Lasgun | 0-12" | 12-24" | 24" |
| Boltgun | 0-12" | 12-24" | 24" |
| Melta-gun | 0-6" | 6-12" | 12" |
| Shotgun | 0-4" | 4-18" | 18" |
| Missile Launcher | 0-20" | 20-72" | 72" |
| Heavy Stub Gun | 0-20" | 20-40" | 40 |
Assuming your target is within range you can proceed with the shot. If the target is out of range then you have automatically missed, but you still have to test to see whether your weapon develops a fault (see Ammo Rolls, later in this section).
Hitting the Target
To determine whether a shot hits its target roll a D6. The dice score needed will depend upon how good a shot the firer is (as indicated by his Ballistic Skill or BS). The chart below shows the minimum D6 roll needed to score a hit.
| BS of shooter | 1 | 2 | 3 | 4 | 5 | 6 | 7 | 8 | 9 | 10 |
|---|---|---|---|---|---|---|---|---|---|---|
| D6 score | 6 | 5 | 4 | 3 | 2 | 1 | 0 | -1 | -2 | -3 |
For example: If the shooter is a ganger with a BS of 3, a dice roll of a 4 or more is required to hit the target. An easy way to remember this is simply to subtract the firer's BS from 7 to find the number needed to hit.
You will notice that the chart covers scores of 1 and even less. However, a dice roll of a 1 is always a miss regardless of circumstances. There is no such thing as a certain hit - if the dice turns up a 1 you have missed!
Hit Modifiers
Some shots are easier than others. It is easier to hit a target that is in the open compared to a target behind cover. Usually it is easier to hit a target if it is close compared to one further away. These situations are represented by the following modifiers.
| Modifier | Condition | Description |
|---|---|---|
| -1 | If the target is in partial cover | Up to half the target is obscured as defined in the section on cover. |
| -2 | If the target is in cover | More than half the target is obscured as defined in the section on cover. |
| -1 | Appearing/disappearing or charging target | The shooter is firing at a suddenly appearing/disappearing or charging target whilst on overwatch. See the Overwatch rules later in this section. |
| -1 | Rapid moving target | The target moved 10" or more in his previous move phase. |
| -1 | Small target | The whole target is less than ½" tall or wide. Such targets might include unexploded bombs, mechanical devices, or a specific point on the ground or wall. Enemy fighters are always larger than this! |
| +1 | Large target | The whole target is 2" tall or wide. Such targets include large processor tanks, bulkhead doors and other sizeable bits of industrial equipment. |
Modifiers for range depend upon the weapon used. All weapons have their own range bands and different modifiers at short or long range, as indicated in the Armoury section of this book. The following examples show how this works.
| Weapon | Short Range | Long Range |
|---|---|---|
| Laspistol | +2 | -1 |
| Bolt Pistol | +2 | - |
| Plasma Pistol | +2 | -1 |
| Autogun | +1 | - |
| Boltgun | +1 | - |
| Heavy Bolter | - | - |
| Shotgun (Solid slug) | - | -1 |
As you can see, pistol weapons are very sensitive to range: they are likely to hit at short range but can be inaccurate at long range. Remember, long range isn't necessarily very far in the case of a pistol! Heavy weapons, on the other hand, tend not to be sensitive to range. With these weapons it is as easy to hit at a distance as it is at short range because a close moving target is hard to track with a weighty or clumsy weapon. Most other weapons are marginally easier to hit with at short range, as you would expect.
Example 1: A ganger with a BS of 3 shoots a laspistol at a target 12" away. The ganger needs to roll a dice score of 4 to hit. The target is not in cover so no modifiers apply there. On the other hand the target is at long range for a laspistol (8-16") and so suffers the -1 to hit penalty. The firer therefore needs to roll at least a 5 to successfully hit (5-1 = the required score of 4).
Example 2: The same ganger (BS3) shoots his laspistol at a target 12" away which is partially obscured by cover. He basically needs a 4 to hit, but there is a -1 penalty for shooting at long range, and a further -1 for shooting at a partially obscured target. He will therefore need a 6 to hit.
Cover
The many walls, girders, buttresses and ruined buildings in the Underhive provide plenty of cover. If a target is partly obscured by intervening cover then it will be harder to hit. How much harder depends upon how much of the target is obscured by the cover.
If the shooter can see at least half of the target's body but not the entire body, then the target is said to be 'in partial cover'. The shooter suffers a -1 to hit penalty.
If the shooter can see some of the target's body but less than half of it, then the target is said to be 'in cover'. The shooter suffers a -2 to hit penalty.
If a target model is in cover or partially in cover and hiding, then it cannot be seen or fired at even if the shooter can see a portion of the model's body. The fighter is assumed to be keeping still, concealing himself in the shadows and hugging his cover as closely as he can (see Hiding in the Movement section).
A certain amount of judgement is called for by the players when deciding whether a model can be seen, if it is in cover, or whether it can reasonably continue to hide behind cover. In practice, players quickly reach an agreeable method of determining this for themselves, but if you really cannot decide in a particular case then each player rolls a dice to settle the matter, the highest scorer deciding in that instance.
Small and Large Targets
These modifiers are not normally used unless the encounter involves a specific target which is especially large or small. For example, perhaps you must destroy a water still collecting vane or a chemical storage tank to achieve your objective. Enemy fighters are never small or large targets and you cannot specifically aim at items they are carrying.
7+ Hit
Because of the modifiers it is quite possible that you will end up needing a score of 7 or more to hit the target. It is obviously impossible to roll a 7 on a D6, but you can still hit if you are lucky. Roll a D6 as before. If you roll a 6 then you might have hit. Roll a further D6 - the additional score required is shown on the chart below.
| Score Required to Hit | 7 | 8 | 9 | 10 |
|---|---|---|---|---|
| Additional D6 Score | 4+ | 5+ | 6+ | Miss |
Example: A juve is shooting a laspistol at a target 12" away and behind partial cover. The juve's BS is 2 so he requires a 5 to hit. The modifiers are -1 for long range and a further -1 for partial cover. A score of 7 is therefore needed. To achieve this the juve must roll a 6 followed by a further roll of a 4 or more.
Pinned
As soon as a fighter is hit the model is knocked over and placed face up. We say the model has been pinned by enemy fire.
The force of the shot has knocked the fighter off his feet. The shot may have hurt or even killed him, or he may be lucky and escape without significant harm. Even if he survives he is momentarily confused, or, at best, his instincts force him to hit the dirt and keep his head down.
Later we'll deal with what happens to the pinned fighter if he survives unharmed. First, we'll find out whether the shot has wounded him.
Wound
Once you have hit a target you must test to see whether a wound is inflicted. A shot may fail to cause a wound because it hits part of the target's equipment or weaponry, or perhaps it just scratches the skin or causes some very minor injury which the fighter bravely ignores. If you fail to cause a wound then the target is unharmed but is still pinned by enemy fire as described later.
To determine whether your shot has caused a wound you must compare the Strength value of the weapon with the Toughness (T) characteristic of the target. You will find a complete description of the various weapons together with their Strength values and special rules in the Armoury section, but a few examples are given here.
| Weapon | Strength |
|---|---|
| Laspistol | 3 |
| Bolt Pistol | 4 |
| Stub Gun | 3 |
| Autogun | 3 |
| Lasgun | 3 |
| Boltgun | 4 |
| Melta-gun | 8 |
| Lascannon | 9 |
| Auto-cannon | 8 |
| Heavy Stub Gun | 4 |
The chart below shows the D6 score required to turn a hit into a wound. Remember, an average Toughness characteristic value is 3.
Wound Chart - D6 score needed, by Strength (rows) vs. Target's Toughness (columns 1-10):
| Strength \ Toughness | 1 | 2 | 3 | 4 | 5 | 6 | 7 | 8 | 9 | 10 |
|---|---|---|---|---|---|---|---|---|---|---|
| 1 | 4 | 5 | 6 | 6 | N | |||||
| 2 | 3 | 4 | 5 | 6 | 6 | N | ||||
| 3 | 2 | 3 | 4 | 5 | 6 | 6 | N | |||
| 4 | 2 | 2 | 3 | 4 | 5 | 6 | 6 | N | ||
| 5 | 2 | 2 | 2 | 3 | 4 | 5 | 6 | 6 | N | |
| 6 | 2 | 2 | 2 | 2 | 3 | 4 | 5 | 6 | 6 | N |
| 7 | 2 | 2 | 2 | 2 | 2 | 3 | 4 | 5 | 6 | 6 |
| 8 | 2 | 2 | 2 | 2 | 2 | 2 | 3 | 4 | 5 | 6 |
| 9 | 2 | 2 | 2 | 2 | 2 | 2 | 2 | 3 | 4 | 5 |
| 10 | 2 | 2 | 2 | 2 | 2 | 2 | 2 | 2 | 3 | 4 |
A result of 'N' on the chart means that it is impossible to cause a wound on a target as tough as this using a weapon of that strength.
Injuries
Most fighters have a Wound characteristic of 1 but some have a value of 2 or more. If the target has more than 1 wound then deduct 1 wound from his total for each wound he suffers. Make a note on the roster sheet. So long as the model has at least 1 wound left he can continue to fight.
As soon as a fighter suffers his last remaining wound roll to determine the extent of his injuries. The player who inflicted the wound rolls a D6.
| D6 | Result |
|---|---|
| 1 | Flesh Wound - The target has sustained a minor wound. Deduct -1 from both his Weapon Skill and Ballistic Skill for the rest of the game. |
| 2-5 | Down - The target falls down to the ground where he lies wounded and barely conscious. Turn the model over, or face down, to show that the fighter has gone 'down'. |
| 6 | Out of Action - The target has been badly wounded and falls to the ground unconscious. He takes no further part in the game and the model is immediately removed from play. |
Flesh Wound
A model with a flesh wound can continue to fight even though it has 'zero' wounds left. If the model takes further wounds then roll for injury once more, just as if it had lost its final wound.
A fighter can sustain several flesh wounds and still continue to fight, albeit at reduced effectiveness. Make a note on your roster sheet and apply the penalties indicated for the rest of the game. Leave the model lying face uppermost to show it is still pinned (see later).
Each time a model suffers a flesh wound, it loses a further 1 point of BS and WS, so a model with several flesh wounds may have a WS or BS of 0. If his WS and BS both reach 0 the fighter automatically drifts into unconsciousness due to loss of blood and is taken out of action.
Down
When a fighter goes down he is either badly injured or temporarily knocked senseless: he might recover or he might lapse into unconsciousness and even die. Turn the model face down to show the fighter has gone 'down'. A model which goes down may do nothing except crawl as noted below.
A player must roll to see what happens to any of his fighters who are down at the end of his recovery phase. Fighters may recover, stay down, or go out of action. Roll a D6 and consult the Injury chart again (1 = flesh wound, 2-5 = down and 6 = out of action). Models which recover to flesh wounded may continue to fight but suffer the -1 WS/BS penalty, and are 'pinned' for one turn (see Pinned). Turn the model face up to show this. Models which stay down remain face down and unchanged. Models which go out of action are removed.
During his movement phase a man who is down can crawl or stagger 2" as if he had a M characteristic of 2. He may do nothing else and he may not run or charge. This enables a badly wounded character to get behind cover or escape from his enemies (if he's lucky!).
Out of Action
'Out of action' indicates a man is out of combat and also out of the game. Remove the model from the tabletop. It is impossible to tell whether the fighter is alive or dead, but for game purposes it makes no difference at this stage. After the fight is over you can test to see whether he survives and if he sustains any serious lasting injuries as a result of his wounds (see Campaigns for details).
Multiple Wounds
Some weapons inflict more than 1 wound when they hit. A model cannot be reduced to fewer than 'zero' wounds, but each extra wound inflicted means you roll another Injury dice. So, if a fighter has 1 wound remaining and suffers 4 wounds he rolls four Injury dice.
Multiple 'down' results are ignored but a fighter can suffer multiple flesh wounds. A fighter who suffers flesh wounds and goes down at the same time is treated as going down but suffers the penalties indicated for his flesh wounds as well. Remember, any fighter reduced to 0 WS and BS by flesh wounds automatically goes out of action.
Armour
Armour is less important and less readily available in the confines of the Necromundan Underhive than on a conventional battlefield. Gangers rely more upon the natural cover of the hive and their own wits to avoid injury. However, some fighters wear protective clothing or armour which may save them from a wound if they are lucky. To represent this there is a special test called a saving throw.
If a fighter is wearing armour and suffers a wound then roll a D6. If the dice roll is sufficiently high then the wounding shot has struck the armour and not hurt the wearer at all. The dice score required varies according to the type of armour. The most common armour types and the D6 roll required to effect a save are given below.
| Armour | Minimum D6 score required to save |
|---|---|
| Flak | 6 |
| Mesh | 5 |
| Carapace | 4 |
For example: A fighter is hit by a shot from a laspistol and suffers a wound. Fortunately, he is wearing carapace armour, a hardened plasteel jacket or plate which covers his upper body. He rolls a D6 and scores 5 - easily enough to deflect the shot and save him.
Some weapons are better at penetrating armour than others. A shot from a laspistol might be deflected relatively easily, but a shot from a huge lascannon is a different matter! To represent this, each weapon has an armour save modifier as indicated in its description in the Armoury section. For example, a boltgun has a -1 save modifier so all armour saves must deduct 1 from the dice roll. It is not possible to effect a save if the score required is more than 6.
Pinned Fighters
Often a fighter is hit and pinned by enemy fire but doesn't go down or out of action. He might be hit and not wounded, or he might suffer a flesh wound, and so on.
A model that is pinned remains knocked over lying face up. Whilst pinned, the fighter can do nothing. He cannot move, shoot, or so on.
A model which is pinned at the start of his turn will automatically recover from pinning at the end of that turn. In effect, the model misses his turn and is then ready to fight once more. At the end of the turn stand the model up to show that the fighter is no longer pinned.
Escape from Pinning
A model which is engaged in hand-to-hand combat will automatically escape pinning. The pressing need to defend himself galvanises the fighter into action. Stand the model up to show he is no longer pinned.
If a model has at least one other model from the gang within 2" then he can try to escape pinning at the start of his turn. If successful the fighter will not have to miss his turn at all. Roll a D6. If the score is equal to or less than his Initiative value he has recovered his wits immediately. Stand the model up. The fighter can move and fight normally that turn.
Note that when testing to escape pinning at the start of the turn juves, fighters who are down, and fighters whose nerve is broken do not count. Rather than reassuring the fighter and offering covering fire, the proximity of these unreliable comrades will only encourage him to keep his head down!
Shooting into Hand-to-Hand Combat
Normally it would be considered very rash indeed to shoot at fighters who are grappling with each other at close quarters - it would be very easy to hit the wrong man! Although the models themselves are immobile the fighters are actually ducking, diving and rolling about in a whirlwind of action.
Should you wish to shoot at a model engaged in hand-to-hand combat roll to hit as normal. If you hit then you must decide whether you have hit the intended model or a model fighting the target. There is as much chance of hitting the target as there is of hitting each model he is fighting. So, if there are two models fighting a D6 roll of 1-3 indicates one model, a 4-6 indicates the other. If the target is fighting two opponents then you'll need a 5 or 6 to hit the right man, and so on.
Moving and Shooting
In most cases a model may move at its normal movement rate and shoot. There is no penalty for this, as the normal move rate assumes a certain amount of time spent stationary or nearly so.
Some 'heavy' weapons are so cumbersome that it is impossible to move and shoot with them in the same turn. These weapons are indicated in the Armoury section. Models which run or charge may not shoot.
Models which have gone down as a result of an injury, or which are pinned as a result of a hit, cannot shoot.
Models fighting hand-to-hand combat cannot shoot, any weapons fire at close quarters being worked out in the hand-to-hand phase. Models which are broken are also unable to shoot (see the Leadership Tests section).
Shooting at a Fighter Who is Down
You do not have to shoot at a target who is down even if it is the closest target. However, you can shoot at a fighter who is down if you want to and he is the closest or easiest shot.
If a fighter who is already down takes a further wound or wounds, roll again on the Injury table and apply the result. A flesh wound will inflict further WS/BS penalties. If the fighter goes down again then ignore the result. If he goes out of action remove the model from combat.
Generally speaking, it is rare for players to shoot at enemy fighters who are down unless they are stranded in the open and there are no other targets available. However, it sometimes happens that blast weapons scatter from their point of aim and accidentally hit men who are already down.
Blast Weapons
Some weapons fire an exploding shell or energy blast which inflicts damage over a large area. The spread of a shot or blast is represented by a circular blast marker. These vary in size from 1" radius upwards. Different weapons use different sized blast markers as indicated in the Armoury section.
When you shoot a weapon that uses a blast marker nominate your target and roll to hit exactly as you would with any other weapon. If the target lies beyond the weapon's range then the shot dissipates harmlessly causing no damage. Otherwise take the blast marker and proceed as follows.
If you hit the target place the blast marker with its centre directly over the target model. The target is hit, and any other model that lies wholly inside the blast marker is hit too. If a model lies partially within the blast marker then it is hit on a further D6 roll of a 4, 5 or 6. Roll for wounds and injuries on each model that is hit.
If you miss the original target then your shot has flown wild but may still land close enough to cause damage. To determine where the shot has landed you must make a Scatter roll. To do this you will require two special dice, the Scatter dice (marked with arrows and a hit symbol) and the Artillery dice (marked with numbers and a 'misfire' symbol). Take both these dice and roll them so that they land as close to the target as possible.
If the Artillery dice shows a number this indicates how far you have missed the target by - 2", 4", 6", 8" or 10". The direction in which the shot lands is indicated by the scatter dice arrow. Note that the Hit symbol also has an arrow marked on it, so it can be used to indicate direction. Place the marker in the position indicated by the two dice.
If the Artillery dice shows a misfire then the shot dissipates in the air or is a dud and has no effect.
If the dice show a Hit and Misfire then the shell may have exploded in the breech as explained in the rules for Exploding Weapons (see Exploding Weapons in the Advanced Game Rules section).
Once the marker is positioned any models that lie wholly under the blast marker are hit. Any models which lie partially under the blast marker are hit on the further D6 roll of a 4, 5 or 6. Work out the effect of hits normally.
Example: The Goliath fires his shotgun at an Orlock 8" away. He misses and must therefore roll the scatter and artillery dice to determine where the shot lands. He rolls a 4 on the artillery dice, indicating that the blast marker is moved 4" in the direction of the arrow on the scatter dice. Because the Goliath is only 8" away the maximum distance the shot can scatter is 4" - half the distance between the Goliath and his target. Even if the artillery dice had rolled 6, 8 or 10 the scatter distance would still have been 4".
Note that no shot can ever scatter by more than half the range between the shooter and their target. If the target is 10" away, for example, the miss may not scatter by more than 5" regardless of the dice score. However, a wildly scattering shot may land outside its usual fire arc (90 degrees in front of the firer) or beyond its usual maximum range.
Grenades
There are many different sorts of grenades available to Underhive fighters. The most common are explosive fragmentation or 'frag' grenades and implosive energy grenades called 'krak'. If a model carries grenades then it is assumed that he has enough to last the entire battle, regardless of how many he might actually throw. See Grenades in the Armoury section for a description of the different types of grenades.
A model may throw a grenade rather than shoot a weapon. A grenade throw is treated exactly like any other shot, so roll to hit using the thrower's Ballistic Skill (BS) characteristic.
Frag grenades and most of the special grenade types use a blast marker. All grenades scatter if they miss just like other weapons with blast markers. Work out scatter as described already, except that the number on the Artillery dice is always halved because grenades are thrown at very short ranges. On the other hand, the maximum scatter limit does not apply to grenades, which can bounce around all over the place before going off! A grenade thrown at a target 2" away may therefore scatter up to 5" in any direction.
The maximum range of a thrown grenade depends upon the Strength characteristic of the fighter as shown on the chart below.
| Thrower's Strength | Range of Throw |
|---|---|
| 1 | 4" |
| 2 | 6" |
| 3 | 8" |
| 4 | 10" |
| 5 or more | 12" |
Some special grenades are designed to produce clouds of smoke or gas which can be used to provide cover. When you throw a smoke grenade, for example, you don't want to actually throw it at an enemy fighter but at a specific point on the ground. You can do this by simply nominating the point you wish to aim the grenade at. The point counts as a small target, and therefore suffers the -1 to hit penalty for shooting at small targets.
Flamer Templates
Flamers utilise a special teardrop-shaped template which represents a jet of flame. There are two sizes of template to represent both sizes of this weapon: the hand flamer and the larger-sized flamer.
To shoot with a flamer or hand flamer take the appropriate-sized template and place it with the narrow end touching the base of the shooter and the broad end over your target. Any models wholly covered by the template are hit automatically and any models partially covered are hit on a further D6 roll of a 4, 5 or 6.
Any hits are resolved as normal, roll for wounds and then determine injuries for any wounded models. Note that the hit modifiers for range, cover, and such like do not apply to flamers. Flamers are especially good at winkling enemy fighters from behind cover! See the Armoury section for further details.
Example: A Goliath armed with a hand flamer shoots at three Orlock fighters. The Goliath player places the template as shown. Two Orlocks are completely covered by the template and are therefore hit automatically. The other Orlock is only partially covered by the template, and will be hit on a D6 roll of 4 or more.
Sustained Shooting
Some especially large and dangerous weapons can fire a sustained burst of shells which may hit several targets at a time. This is called sustained shooting or sustained fire. Weapons which are capable of making sustained shots are indicated in the Armoury section. Basically, these are machine gun type weapons such as the heavy stubber and autocannon which can rake targets with a hail of shells.
When you shoot with a weapon of this kind declare whether you are firing a normal single shot or a sustained shot. A single shot is worked out as normal. A sustained shot is worked out as follows.
Pick your target and shoot to hit as normal. If you don't hit then you have missed and hit nothing. If you hit then roll a Sustained Fire dice (marked 1, 1, 2, 2, 3 and the jam symbol). The score indicates how many times you have hit the target. So if you roll a 1 you have hit once, if you roll 2 you have hit twice, if you roll 3 you have hit three times.
If you wish, you can spread excess hits amongst other visible enemy models within 4" of the target (at least 1 hit is allocated to the original target). So, if you score 3 hits you can hit your chosen target once and two other models once each if they are within 4". You can allocate hits in any way you wish, providing the extra models targeted would not have been harder to hit than the original target. If a target in the open is hit, hits could not be allocated to other targets behind cover. Allocate all the hits before testing for wounds and injuries.
Example: The Orlock shoots his stubber and hits the Goliath ganger. Two sustained fire dice are rolled revealing 3 hits. There are three other models within 4", but one is behind cover, and so cannot be hit. One shot always hits the target; the remaining 2 shots can be allocated to the target or either of the other two eligible models.
Ammo Jams
If you roll a jam symbol on the Sustained Fire dice then no hit is caused and the weapon has gone wrong. You must take an Ammo roll to find out what happens.
The rules for Ammo rolls are covered below. Weapons which use sustained fire are far more likely to malfunction than ordinary weapons.
Multiple Sustained Shots
Some weapons allow you to throw not just one Sustained Fire dice but two or three. In this case you can either roll the number of dice indicated, or you can roll less if you prefer. You may wish to roll fewer dice because the more dice you roll the greater chance you will have of rolling a jam.
When you roll a jam then no hits are inflicted from that dice. Any indicated hits on other dice are still valid and can be worked out as normal. In addition, you make a separate Ammo roll for each jam rolled.
Ammo Rolls
Ammo rolls represent faults in the internal mechanisms of weapons or ammunition as well as the possibility of simply running out of ammo. Power packs can fade or suddenly release a burst of energy which burns out circuits, shells jam in the loading mechanism, explode or simply prove dud. No weapon is absolutely reliable or has an infinite ammo supply. Some weapons are notoriously fickle.
When you roll to hit a target a dice score of a 6 indicates that your weapon may have malfunctioned after firing and a D6 Ammo roll is required. Note that you still hit your target with the roll of a 6 and the successful shot is worked out as normal.
Some weapons are more reliable than others. This is reflected by the weapon's Ammo roll rating as shown in the Armoury section. Roll a D6. If you roll less than the number indicated the weapon has malfunctioned and is useless for the rest of the game. Make a note on your roster sheet. If you roll the score indicated or more, then the weapon is alright and you can continue to use it normally. The examples below give the Ammo rolls for some common weapons.
| Weapon | Ammo Roll |
|---|---|
| Laspistol | 2+ |
| Autopistol | 4+ |
| Bolt Pistol | 6+ |
| Lasgun | 2+ |
| Autogun | 4+ |
| Boltgun | 6+ |
| Flamer | 4+ |
| Heavy Stubber | 4+ |
As you can see, laspistols and lasguns are very reliable weapons, which is why they are favoured by gang fighters. Bolt pistols and boltguns are more potent weapons but their complex ammunition means that they are far more likely to go wrong.
Ammo Jams
Weapons which utilise the Sustained Fire dice can also go wrong as a result of an Ammo jam roll on this dice. You must make a standard Ammo roll for every jam scored. This means such weapons are far more likely to go wrong because they can malfunction either during the hit roll itself or as a result of rolling ammo jams.
Flamers
Some weapons, notably flamers, use a highly volatile fuel or energy charge and these must make an Ammo roll every time after they are fired. See the Armoury section.
Grenades
Grenades will automatically fail any Ammo test they are required to make. This means that you have thrown your last grenade of that type, or that all further grenades of that type that you have are duds.
Out of Range
If you shoot and your target is out of range then you must still make a hit roll to see whether an Ammo roll is required (ie on the D6 score of a 6).
Overwatch
The Overwatch rule allows a model to shoot during the enemy player's turn. This represents a fighter taking up position to shoot at an enemy as he appears in view. The reasoning behind the Overwatch rule will become apparent once you have played a few games, so if you are reading this for the first time we recommend you skip this section for now. Come back and read it when you have played once or twice. The Overwatch rule is not a vital part of the game and can be conveniently ignored to start with.
Going on Overwatch
Any model may go onto overwatch at the start of its turn. A fighter who is down or pinned, or whose nerve is broken cannot go onto overwatch. You will find it convenient to place an Overwatch counter by the model to indicate it is on overwatch.
A model must give up its whole turn to go on overwatch. The model cannot therefore move or shoot. The model cannot hide, but may remain hidden if it started the turn hiding.
During the enemy's turn the model may shoot at any target as it presents itself at any time. For example, the model could shoot before the target moves, after it has completed its move, or actually while the target is moving. Overwatch is obviously very useful for shooting at enemy models as they dash from cover to cover or as they peek out of hiding to shoot.
Once a model has fired on overwatch remove the counter. The model is no longer on overwatch and is free to move and shoot normally in its following turn, or go onto overwatch again if you prefer.
If a model on overwatch does not shoot in the enemy's turn then it reverts to normal - the Overwatch counter is removed and the model may move and shoot. If you wish you may set overwatch again and give up a further turn as before.
If a model is hit whilst on overwatch it loses its overwatch status immediately. The same applies if the model is forced to move for any reason. For example, if a fighter's nerve breaks he will be forced to move and will therefore lose overwatch status.
Shooting on Overwatch
When you wish to shoot with a model on overwatch begin by declaring that you are doing so and then determine the position of the enemy model at the moment of fire.
Work out the shot as normal but bear in mind there is a special -1 hit modifier for shooting at an emerging or disappearing target whilst on overwatch. This applies when the target is emerging from a position where he can't be seen or is attempting to move to where he can't be seen, presenting a fleeting target to the firer.
The same -1 hit modifier is also applied if the target is charging the overwatcher, representing the unnerving effect of the enemy's rapid approach. Remember that you can fire on overwatch at any time during the enemy's turn so you will want to let a charger get into close range before firing.
Hand-to-Hand Combat
Hand-to-hand fighting is the most dangerous kind of combat, with adversaries using swords and knives, point blank fire from pistols, and even fists, feet and heads.
Who Can Fight
Models which are touching base-to-base are said to be engaged in hand-to-hand combat. This can only happen once a fighter has charged an enemy, as models are not otherwise allowed to move into physical contact. See the Charge! section of the Movement rules.
In the hand-to-hand combat phase all close quarter fighting is worked out. Regardless of whose turn it is, all models that are engaged in hand-to-hand combat will fight. Unlike shooting, a model in hand-to-hand combat can fight all round against enemy to its side, front or rear. In reality the models are constantly moving, dodging, ducking and weaving as they struggle to kill their adversaries.
Models fighting in hand-to-hand combat do not shoot in the shooting phase. They are far too busy struggling with their adversaries. Any very close range shots they are able to make with pistols are taken into account in the hand-to-hand combat rules that follow.
Procedure
Most fights are 'one-on-one' where a model is fighting one other model. These combats are worked out as described below. Fights involving several models attacking a single opponent are worked out slightly differently as described later.
- Throw Attack Dice - Both players roll a number of D6's equal to their model's Attacks characteristic.
- Work Out Combat Score - Each player picks his highest scoring dice and adds his model's Weapon Skill (WS) to the score. He then adds any Combat Score modifiers as shown on the chart. The total is the Combat Score.
- Determine Winner - The player with the highest Combat Score wins. In the case of a tie the model with the highest Initiative characteristic wins. If there is still a tie the combat is a stand-off.
- Number of Hits - Compare the Combat Scores of both combatants. The difference between their Combat Scores is the number of times the winner has hit the loser. If you win the combat on a tie you still cause 1 hit.
- Throw to Wound - For each hit scored the winner rolls a D6 on the Wound chart in exactly the same way as hits from shooting. The Strength value will depend upon the weapon used.
- Saving Throw - Models which are wearing armour may attempt saves in the same way as troops hit by shooting.
- Resolve Injuries - Resolve injuries in the same way as you would for wounds inflicted by shooting.
Attack Dice
Roll the number of Attack dice indicated by the model's Attacks characteristic. This will normally be one but some especially mean fighters may have two or more Attacks.
Although a model may roll more than one Attack dice it is only the best result that counts towards the Combat Score. The advantage of rolling more dice is that it gives you a better chance of rolling high.
Fighting with Two Weapons
If the model carries a weapon in each hand, such as two pistols, two swords, or a pistol and a knife, then the model rolls one extra dice to represent the extra weapon.
This bonus only applies to fighters armed exclusively with pistols and/or hand-to-hand combat weapons, not to fighters who carry other basic, special or heavy weapons in addition. Carrying grenades does not prevent you using an extra weapon as they are assumed to be clipped to the model's belt or stowed conveniently out of the way. These different types of weapon are discussed in detail in the Armoury section.
Determine Winner
Each player takes his best Attack dice roll, adds the model's Weapon Skill (WS) and then applies the following modifiers. The highest score is the winner. In the case of a tie the highest Initiative wins. If both models have the same Initiative the result is a stand-off and no blows are struck.
Combat Score Modifiers
| Modifier | Name | Description |
|---|---|---|
| +1 | Opponent Fumbles | Add +1 to your score for each of your opponent's fumbled dice (rolls of 1). See the Fumble rule for an explanation of how this works. |
| +1 | Critical Hit | Add +1 to your score for each critical hit inflicted (additional rolls of 6). See the Critical Hit rule. |
| +1 | Charging | If your fighter charged into combat this turn add +1 to his Combat Score. |
| +1 | Higher Up | If your fighter is standing on a higher level, platform, or slope then add +1 to his Combat Score. |
| -1 | Encumbered | If your fighter is carrying a heavy weapon, or other heavy piece of equipment, he suffers a -1 penalty on his Combat Score. |
| -1 | Obstacle | If you charge an enemy who is sheltering behind cover such as a low wall, then you suffer a -1 penalty on your Combat Score that turn. Note this penalty only applies during the turn when you charge. |
Note that hit modifiers for weapons are never applied in hand-to-hand fighting. These only apply when shooting at a distance as described in the Shooting section.
Number of Hits
The difference between the winner's Combat Score and the loser's Combat Score is the number of times the winner has hit the loser.
Example: A ganger (WS3) is fighting a juve (WS2). The ganger rolls a 4 and adds his WS of 3 to make a total of 7. The juve rolls a 5 and adds his WS of 2 to make 7, but the juve has charged and so adds a further +1 making 8. The juve has won by 8 to 7, and the difference (1) is the number of hits he has struck.
Wounds, Armour and Injuries
Once you have established the number of hits, the remaining procedure is the same as for shooting. Refer back to the Shooting section for a description of how to do this.
Note that models cannot be pinned by hand-to-hand hits, but they suffer wounds in the same way and injuries are resolved in the same way too.
Weapons
Only hand-to-hand weapons and pistols can be used to fight hand-to-hand combat. All fighters carry a knife at the very least, and are assumed to have one tucked out of sight if the model itself does not include it.
A fighter will, generally speaking, fight hand-to-hand combat with the weapons he carries as depicted on the model. However, as it is impossible to use basic, special or heavy weapons in close combat (as described in the Armoury section) fighters are allowed to draw any one pistol or hand-to-hand combat weapon from a pouch, bag, holster etc.
Bear in mind that a fighter with a basic, special or heavy weapon needs at least one hand just to carry it, so he can only ever have one hand free to carry a sword, pistol, etc.
A fighter who carries a hand-to-hand weapon or pistol in each hand normally fights with the two weapons depicted as carried by the model. However, if he wishes he is allowed to swap one weapon for another pistol, sword, etc at the start of the hand-to-hand combat. For example, a fighter who has a laspistol and a stub gun could put away his stub gun and draw a sword. The player must declare he is doing so at the start of the combat.
Fighters cannot swap weapons around once they are fighting hand-to-hand; they must persevere with their chosen weapons until the combat is over.
Hits
If a fighter is using a single weapon then any hits inflicted in hand-to-hand fighting are assumed to have been made with that weapon - be it a sword, knife, pistol etc. Resolve the hit using the Strength of the weapon as indicated in the Armoury section.
If a fighter is using two weapons (one in each hand) then any hits are inflicted alternately, first with one hand and then the other. For example, a fighter who carries a sword and a laspistol and who inflicts 2 hits will strike once with the sword and once with the laspistol. Any odd hits can be resolved with either weapon.
Armour Modifiers
Knives, swords and other close combat weapons often use the fighter's own Strength. The chart below is used to determine saving throw modifiers where a model's own Strength is used in hand-to-hand fighting.
| Model's Strength | Armour Save Modifier |
|---|---|
| 3 or less | 0 |
| 4 | -1 |
| 5 | -2 |
| 6 | -3 |
| 7 | -4 |
| 8 | -5 |
| 9 or more | -6 |
The Parry
Fighters armed with swords are allowed to parry or attempt to turn aside an opponent's blows. To represent this, a model fighting with a sword can force an opponent to re-roll his highest scoring Attack dice before working out his Combat Score. Remember, if your opponent has 2 or more Attack dice he can always choose his next highest score rather than the score of the re-rolled dice.
If both combatants are fighting with swords then the ability to parry cancels out and neither may do so. In the unlikely event that a model carries two swords it may parry twice - that is, it may force two re-rolls or one re-roll against a model with a single sword.
Fumble
In the mayhem of close combat it is only too easy to trip or overbalance and leave yourself open to a quick punch or stab. This is represented by the Fumble rule.
Any Attack dice rolls of a 1 indicate that you have tripped, dropped a weapon, or otherwise fumbled. For each fumble rolled your opponent may add +1 to his own Combat Score.
Critical Hits
A critical hit represents a lucky blow, a spectacular feint or a cunning trick. When you roll more than one Attack dice there is a chance of scoring a critical hit. You must roll at least two 6's. The first 6 is taken as your highest score and each extra 6 counts as a critical hit adding a further +1 to your total.
For example, if you have an Attacks characteristic of 2 and a pistol in each hand you will roll 3 Attack Dice (2 for your Attacks and +1 for the extra weapon). If you roll two 6's and a 3 you pick one of the 6's as your highest score and add +1 critical hit for the extra 6 giving a Combat Score of 7 plus your WS.
Multiple Combats
When two or more models are fighting a single enemy this is called a multiple combat. The outnumbered model must fight each of his opponents one after the other during the hand-to-hand combat phase. The outnumbering player may decide the order in which his models will fight. Having chosen the first model to fight the combat is worked out exactly as described for one-on-one fights.
If the outnumbered model survives he must go on to fight his second opponent. The enemy chooses his second fighter and the combat is worked out as before except that the outnumbering player may now roll an extra Attack dice and adds a further +1 to his Combat Score.
If the outnumbered model survives he goes on to fight the third, fourth, fifth and each successive enemy until they have all fought. Each subsequent enemy he fights gains a further Attack dice and adds a further +1 to his Combat Score. For example the third enemy has +2 Attack dice and +2 Combat Score, the fourth has +3 dice and Combat Score, and so on.
Follow-Up
If all of a model's hand-to-hand opponents go out of action the model may make a special follow-up move. This is an exception to the normal turn sequence and it makes no difference whose turn it is. The model may be moved up to 2". You can use this 2" move to get behind cover, to engage another model in hand-to-hand combat, or in any way you wish. You can cross an obstacle without penalty during a follow-up, but other terrain penalties apply as normal.
If you use a follow-up move to engage another enemy then move the model but don't work out further combat that turn. The fight continues in the next hand-to-hand combat phase. This is because the fighter has insufficient time to do anything other than follow-up. This is an exceptional circumstance where a model may engage in hand-to-hand combat without charging. No charging bonus is added to the Combat Score if a model follows-up in combat.
Note that a follow-up doesn't affect a model's ability to move in its following movement phase. The follow-up is an extra bonus move which reflects the intense activity of close quarter fighting.
Fighters Down
Fighters who are wounded and go down are completely at the mercy of their enemy. In a one-on-one combat any model that goes down is automatically out of action. His enemy finishes him off with a quick blow and the model is removed.
In multiple combats a fighter who goes down has more chance of survival. Where all models on one side go down they are automatically out of combat. Where two or more models are fighting on the same side, some can go down and crawl away at 2" in their movement phase so long as at least one continues to fight.
Pinned Fighters and Hand-to-Hand Combat
Fighters cannot be pinned when fighting hand-to-hand combat. A fighter who is hit whilst engaged in hand-to-hand combat, even if hit by shooting in the shooting phase, is not pinned.
If a fighter is already pinned when he is charged then the pin is discounted as soon as he is engaged.
Moving from Combat
Once models are engaged in hand-to-hand fighting they cannot move away in their movement phase. They must stand and fight until they are taken out of action, until they take out their enemies, or until one or the other breaks and runs as described later.
The only exception to the above is in a multiple combat, where fighters who are down may crawl away so long as friends continue to fight.
Breaking from Combat
A fighter who loses his nerve whilst fighting hand-to-hand combat will break off and make a run for it as described in the Leadership section.
When a fighter breaks off from a fight he simply turns his back and runs off. His opponent automatically hits the fighter as he breaks, inflicting 1 hit which is worked out immediately.
Leadership
Keeping Your Nerve
This section of the rules is concerned with how your fighters react under fire: whether they bravely continue to fight while shells explode around them or whether they turn tail and run for cover. Regardless of your own feelings or those of the gang's leader, even the most hardened gang fighter can be driven off or forced to take cover as the action hots up.
Leadership Tests
A fighter may be called upon to take a test to see if his nerve holds. This test is taken using the model's Leadership characteristic (Ld) and is therefore called a Leadership test. To take the test roll two dice (2D6) and add the scores together.
If the result is more than your model's Ld then the test is failed. The fighter's nerve is broken and he runs to cover as described below.
If the result is equal to or less than your model's Ld then the test is passed, and the fighter keeps his nerve. In this case there is no further effect and the model continues to fight as normal.
When to Test
If a model goes 'down' or 'out of action' then each friend within 2" must take an immediate Leadership test.
Broken Fighters
If a model fails a Leadership test then the fighter's nerve has broken. For this reason we refer to such fighters as broken and you can indicate this by placing a Broken counter by the model if you wish.
The broken fighter is momentarily panicked or shaken and will attempt to run for cover. He might recover sufficiently to return to the fray once he has steeled himself to fight on.
Run to Cover
As soon as a fighter is broken he turns tail and runs for cover. This movement takes place outside the normal turn sequence and is worked out immediately. The fighter makes a dash of up to 2D6" away from his enemy and towards cover. Roll the dice and determine how far the model runs.
If he can reach a position of cover within this distance where he cannot be seen then he stops there.
If he is unable to reach cover where he cannot be seen the fighter runs the full distance rolled. In subsequent movement phases he continues to move 2D6" away from the enemy until he reaches such a position. If he can get out of sight by staying where he is and hiding then he will do so (see the Movement section).
A broken fighter may do nothing other than run to cover and remain there while he attempts to recover his nerve as described below. He may not otherwise move and he will not shoot.
Combat with Broken Fighters
Should a broken fighter be charged and forced into a hand-to-hand engagement then he is in deep trouble! While broken a fighter's WS counts as zero. If he survives the hand-to-hand phase, even if he wins, he automatically breaks from combat and runs for cover at the end of the phase as described below.
Breaking from Hand-to-Hand Combat
A fighter who loses his nerve and breaks while fighting hand-to-hand combat turns away from his enemy and runs away 2D6" just like any other broken fighter.
Because a broken fighter is turning his back upon the enemy he is very likely to be struck as he turns to flee. To represent this the model takes one automatic hit from his enemy. Work this out as soon as the fighter breaks and before he is moved.
Recovering Your Nerve
A broken fighter may attempt to recover his nerve during his recovery phase so long as he is in cover and he cannot be seen by an enemy model.
To attempt to recover a fighter's nerve roll 2D6. If the score is equal to or less than the fighter's Leadership he has passed the test and can fight normally from then on. If the score is more than the fighter's Leadership he fails the test and remains broken.
Broken That Turn
It is not possible to be broken and recover your nerve during the same turn. Consequently, a fighter who loses his nerve during his own side's turn will not be able to recover in the recovery phase of that turn.
Leaders
A fighter within 6" of the gang's leader may use the Leadership characteristic of the leader when taking any Leadership test. This applies to tests to see if a fighter loses his nerve and also to tests to recover. This represents the leader's ability to encourage his fighters and push them beyond their normal limits!
A leader cannot confer this benefit if he is down or broken himself. The sight of your leader running for cover is far from encouraging.
The Bottle Test
The Bottle test is a special test the player must make at the start of his turn if a quarter (25%) or more of his gang is down or out of action. For example, in a gang of 10 men a test is required if 3 or more men are down or out of action.
If the Bottle test is failed the gang automatically loses the fight. The game ends immediately and surviving fighters retreat from the area. A failed Bottle test is the most common way in which a game ends.
To take a Bottle test roll 2D6.
If the score is more than the gang leader's Leadership characteristic then the test is failed. The gang bottles out of combat and the player has lost the game.
If the score is equal to or less than the gang leader's Leadership characteristic the player has passed the test and may continue to fight.
If the gang's leader is out of action or is down, then the player may not use his Leadership to take the test. Instead, use the highest Leadership characteristic amongst those of the remaining fighters who are neither down nor out of action.
Voluntary Bottle Out
Once his gang has taken two or more casualties down or out of action a player may bottle out at the start of any of his turns without taking a test.
Sometimes this is by far the best option, as it allows a player to save his remaining gang from a hopeless situation. Preserving your gang for another day is important once you are playing in a full blown campaign as described later.
Advanced Game Rules
This section includes a variety of new rules which add further detail and complexity to the game. They are not necessary in order to play, and for this reason the rules have been gathered together at the end here to avoid potential confusion.
We recommend that new players ignore this section to start with, or at least until they are familiar with the way the game works. If you consider yourself to be an experienced games player then you'll have no problem introducing these more complex elements as you go along.
Falling
The multiple levels and gantries of the Underhive afford fighters ample opportunity to fall from a great height.
Test to Fall
If a fighter is pinned or goes down within 1" of an edge there is a chance he will slip and fall off. To determine this roll a D6. If the score is more than the fighter's Initiative characteristic then he falls over the edge to the ground.
If a fighter is engaged in hand-to-hand fighting within 1" of an edge then he may fall off if he loses the combat. Roll a D6. If the score is more than the fighter's Initiative characteristic, or a 6, then he falls over the edge to the ground.
Damage
A fighter who falls sustains an automatic hit at a strength equal to the height of the fall in inches. Where a wound is suffered a fall of up to 3" will inflict 1 wound, and a fall of more than 3" will inflict D6 wounds. Although the scenery available from Games Workshop does not scale to such dizzy heights, a fall of more than 12" is assumed to take the fighter out of action with no dice rolls required.
Armour saves do apply to wounds sustained by falling. Save modifiers are the same as for hand-to-hand combat hits from combatants with high strengths. So S4 counts -1, S5 -2, S6 -3 and so forth. See the Hand-to-Hand Combat section for the full chart.
A model which falls without going down or out of action is automatically pinned as if hit by enemy fire.
Falling onto Another Model
In the unlikely event that someone else lies directly in the path of a plummeting fighter then he may also be hurt. The hapless individual is hit on a D6 roll of a 4, 5 or 6. He sustains the same strength hit as the faller, suffering 1 or D6 wounds depending on the distance of fall.
If struck by the falling fighter, and assuming he doesn't go down or out of action, the victim is pinned as if hit by a shot.
Assuming the faller and victim survive, position the models 1" apart to make it clear they are not in hand-to-hand combat.
Jumping
A model may jump down from one height to another but is quite likely to hurt himself in the process, especially if the height is a great one. Any damage is worked out in exactly the same way as a fall and the results are the same. In effect a vertical jump is simply a fall by any other name.
A model may also attempt to jump across a horizontal gap from one side to the other. He does this instead of a normal move and jumps D6". If he fails to cover the gap the fighter plummets down as per a fall.
A model may attempt a jump by way of a charge in order to engage an enemy, but still jumps only D6".
A jumping model counts as moving and will otherwise fight as normal.
Stray Shots
When a fighter shoots and misses it sometimes happens that the path of the shot passes close to one of your own fighters.
If a shot passes within ½" of a friend at any point along its path then there is a chance of accidentally hitting the friend. This can only happen when you miss and roll a 1 to hit.
Roll a further D6 to determine if the stray shot hits the intervening model. On the roll of a 1 the intervening model is hit. Work out whether the target is wounded as normal.
There may be a choice of more than one model that could be hit by a stray shot. In this case randomise which target is hit in some convenient way - eg 1, 2 or 3 the target on the left, 4, 5 or 6 the target on the right.
Exploding Weapons
Badly maintained weapons, home-made ammunition and old corroded power packs can explode destroying the weapon and probably harming the shooter. This represents the weapon overheating, plasma leakage, or a magazine exploding as the next shell is auto-loaded. While not as dangerous as a direct hit from the weapon, this is still bad news and can easily take a man down or out of action.
When a 6 is rolled to hit then an Ammo roll is required as already described in the Shooting section. In the case of flamers, an Ammo roll is required every time a weapon shoots. Jams from sustained shooting also require an Ammo roll.
If an Ammo dice roll is a 1 then the weapon is not only useless for the rest of the game (as a 1 will inevitably fail) but there is a chance it might explode. Roll a further D6. If the score is less than the weapon's standard Ammo roll rating then the weapon explodes.
If a weapon's ammo rating is 'auto' then it automatically fails an Ammo roll so none is taken. Roll a dice anyway and the weapon explodes on the roll of a 1.
An exploding weapon inflicts an automatic hit on the user as if he were struck by his own weapon but with a Strength value of 1 less than normal. In the case of weapons with blast markers and templates no template is used: the blast is confined to the firing model.
Wild Grenades and Shells
Grenades and weapons which use a blast marker can also go catastrophically wrong. If the thrower or shooter misses his target the player must establish where the shell or grenade lands using the Scatter and Artillery dice as described in the Shooting section.
If the Scatter and Artillery dice turn up Hit and Misfire then roll a D6 and refer to the following chart.
Misfire Table
| D6 | Result |
|---|---|
| 1 | The grenade goes off in the thrower's hand or the shell explodes in the breach. Place the template directly over the model and work out damage normally. |
| 2 | The grenade throw goes wild or the shell spins out of control as it leaves the weapon. The projectile travels 2D6" in a random direction and explodes. |
| 3 | Grenades as above. For other weapons as above but the shell travels D6 x D6" and explodes. |
| 4 | As for 3 above except that the grenade or shell lands and does not explode. Mark the position of the projectile. From now on, at the start of each player's turn roll a D6. On the score of a 4 or more the projectile explodes. |
| 5 | A grenade tumbles from the thrower's hand down a deep crack. A shell spins upwards and strikes the dome roof. There is a muffled explosion, the ground shakes ominously and chunks start to fall from the roof and tall ruins. From now on each player must roll a D6 at the start of his turn. If he rolls a 1 then one of his fighters has been struck by debris and suffers a Strength 3 hit. Randomly determine which of the player's gang fighters has been struck. |
| 6 | The grenade or shell drops to the floor in front of the thrower/shooter and fizzes ominously. It is a dud. |
Attacking Structural Features
The Necromunda game rules represent combat between rival fighters. Sometimes a fighter may want to attack an inanimate object rather than an enemy. Perhaps he wants to cave in a door, destroy a fuel pipe, rip apart a power cable, or smash a water still. These are all structural features and can be attacked as described below.
Toughness and Wounds
Although not strictly accurate it is convenient to think of structures as being able to take a fixed number of 'wounds', just like fighters. You can consider a wound to be equivalent to a damage point if you find this more acceptable.
Structures have a Toughness value and they can sustain a certain number of wounds before they are destroyed or damaged. For example, the water still in the Hit and Run scenario has a Toughness of 6 and is damaged once it has taken 1 wound. These details are covered in the scenarios themselves.
Shooting
A structure can be shot at just like an enemy fighter. You must therefore roll to hit and score wounds as normal. Many structures will be easier to hit than fighters because they are large targets (+1 to hit).
A fighter can also use Krak grenades or Melta bombs as demolition charges. The device can be placed upon a structure within 1" of the fighter during the shooting phase. This is considered to be shooting although no roll is required to hit, and charges placed in this way never scatter. The bomb is fastened to the structure by means of its magnetic casing, it explodes, and the target is hit automatically.
Hand-to-Hand
A fighter can strike a structure in base contact in the hand-to-hand combat phase. He cannot fight hand-to-hand combat against an enemy or shoot his weapon in the same turn. In effect the fighter is attacking the structure during the turn, hacking away at it with whatever weapons he has.
A fighter automatically strikes 1 hit on a structure for each Attack on his profile. Work out the result of hits in the normal way.
Tests for Fear
Fear is a natural reaction to horrific mutants, unearthly psychic powers, and some particularly gruesome injuries. To represent this, models must take a Leadership test when confronted by fearsome creatures or circumstances. This test is taken in exactly the same way as a Leadership test for keeping your nerve.
A Leadership test is required under the following fearful circumstances.
- If the model is charged by an individual or creature which causes fear. Such horrific creatures are rare. Take the test as soon as the enemy declares its charge. If the test is passed there is no further effect. If the test is failed the fighter is broken immediately and runs 2D6" to cover just as described in the Leadership Tests section.
- If the model wishes to charge an individual or creature which causes fear. Take the test when you declare the charge. If the test is passed you may charge and fight as normal. If the test is failed you may not charge and the fighter is momentarily transfixed by fear. The model is unable to do anything for the rest of the turn.
Tests for Terror
Terror is a more potent form of fear. Although no creature described in the Rules or Campaign Book causes terror, the rule has been included here next to fear, which it resembles. The importance of terror will become clear in Outlanders.
Just as some horrific individuals or creatures are so ghastly they cause fear, others are even worse and cause terror instead. Circumstances which cause terror automatically cause fear as described above, so you will need to test if you want to charge a terrifying creature or individual, or if the creature charges you. In addition, a Leadership test is required if the model is within 8" of someone or something which causes terror at the start of your turn.
A Leadership test must be taken before declarations of charges are made and if it is failed the model is broken and runs 2D6" to cover as described in the Leadership section. This comprises the model's move for that turn.
Special Fear and Terror Liabilities
Later on you may acquire fighters who are sufficiently repulsive to cause fear themselves! Obviously individuals who are so impressively hideous are not going to be put off by others of their kind.
A model which causes fear does not have to test Leadership for fear. It treats any enemy which causes terror as causing fear instead - ie, it does not have to test just because the model is within 8" at the start of its turn.
A model that causes terror cannot be affected by either fear or terror and no Leadership test is required for either.
Tests for Stupidity
Many large and severely mutated creatures are so dim-witted that they often behave in a fairly random and stupid way. A gang fighter may sometimes be reduced to a state of bafflement as a result of injuries or shock. Such individuals are described as stupid.
Stupid models must make a Leadership test at the start of each of their turns to determine how they react.
Take the test in the usual way. If the test is passed the model may act normally. If the test is failed the following rules apply until such time as the test is taken again.
- If fighting in hand-to-hand combat the model is temporarily disoriented or confused. Roll a D6 before each hand-to-hand phase.
- 1-3: Roll no Attack dice this turn. Your WS still counts towards the Combat Score representing basic instincts only.
- 4-6: Fight normally.
- If not fighting in hand-to-hand combat roll a D6 to determine how the model moves at the start of your movement phase.
- 1-3: Roll a Scatter dice. The arrow indicates the direction in which the model moves this turn. The model moves its full normal move distance. If the model moves into contact with an enemy it becomes engaged in hand-to-hand combat and may or may not fight (roll as above).
- 4-6: The model does not move.
- The model can do nothing else this turn. The fighter will not shoot weapons or otherwise move unless he loses his nerve and runs 2D6" to cover as described in the Leadership section.
- The model does not have to take any further Leadership-based tests for fear or terror. It must still take tests to keep its nerve as described in the Leadership section. If such a test is failed the model will run 2D6" to cover. The rules for broken fighters override the rules for stupidity.
Hatred
Hate is a powerful emotion and in the Underhive there is plenty of opportunity for gangs to develop bitter rivalries. Grudges and ingrained animosity can lead to feuds that tear gangs apart and leave dozens dead. This is represented by the special rules for hatred. Hatred can develop following disturbing injuries.
Models can hate specific enemy gangs or even entire Necromundan Houses. The following rules apply to models which hate their rivals.
- If a fighter hates his adversaries all Leadership tests are taken as if he had a Ld characteristic of 10.
- A model fighting hand-to-hand combat with a hated foe may re-roll any Attack dice in the first turn of any hand-to-hand combat engagement. After the first turn the model has vented his pent-up anger and fights as normal.
- A model in hand-to-hand combat must use his 2" follow-up move to engage a hated enemy if possible. Otherwise he must use the follow-up to move towards a hated enemy he can see. He may not use follow-up to move away from hated enemies or take cover if there are hated enemy in sight.
Frenzy
Some fighters are more than a bit crazed and can be driven into a frenzy of slaughter during combat. Such wild and dangerous individuals are described as frenzied. How or exactly why a fighter may go over the edge in this way is not particularly important - he could be psychotically deranged, under the influence of dangerous hive fungi, or affected by localised gases or radiation.
If an individual is frenzied the following rules apply.
- A frenzied model must always charge the closest enemy within his charge move (usually 8") if able to do so.
- The frenzied model doubles his Attacks characteristic. For example, A1 becomes A2, A2 becomes A4 and so on.
- Frenzied models cannot parry (see Parry in the Hand-to-Hand Combat section).
- Frenzied models must use their 2" follow-up move to engage in hand-to-hand combat if possible. Otherwise they must use the extra move to move closer to their enemy. They may not use a follow-up move to get behind cover or retreat (see Hand-to-Hand Combat).
- Frenzied models are never affected by fear or terror, nor are they affected by stupidity or hatred.
- If a frenzied model loses his nerve and is broken as described in the Leadership section, then the Frenzy rules no longer apply. The fighter has taken a beating and his sense of self-preservation asserts itself.
- A player may try to gain full control over a frenzied model at the start of his turn. This is purely up to you - you may not wish your splendidly berserk fighter to calm down and behave sensibly! To gain control over the model take a Leadership test as you would for testing your nerve. If the test is passed then the fighter is under control and can act normally - however, none of the special Frenzy rules described above will apply. This control lasts until the start of your following turn.