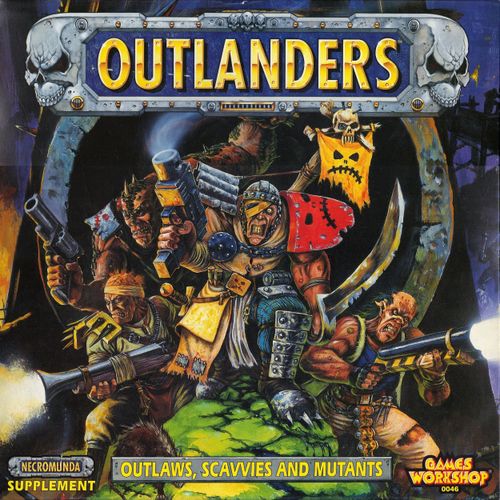
Necromunda: Outlanders
Necromunda: Outlanders Rulebook
Table of Contents
Table of Contents
- Components
- Outlaws
- Illegal Trading Posts
- Outlaw Scenarios
- Outlanders
- Redemptionists
- Renegade Ratskins
- Spyrer Hunters
- New Weapons
- New Equipment
- Random Events
- New Gang Leader
- Mercenaries
- Wyrds
- Special Characters
- Arbitrator Campaigns
- Arbitrator Scenarios
- Underhive Bestiary
Components
Outlanders contains a new building, a watchtower, five barricades and various items that you can add to your games of Necromunda. Although some of these items feature in the scenarios and the new Outlanders rules, they can be integrated into any game. The Targets of the Lord of the Tower scenario, for example, make excellent cover for any gang fight.
Outlanders contains the following material:
- 1 Outlanders Rulebook
- 2 card Buildings
- 12 plastic Walkway sections
- 1 card Bridge
- 4 card Targets
- 5 card Barricades
- 4 Toxic Bomb markers
- 2 Vigil Insignia markers
Vigil Insignia marker. This insignia is carried by gangs that become Vigilantes. See the Outlaws rules for more details.
Toxic Bomb marker. When used, toxic bombs poison an entire area. These markers are placed to show the areas contaminated by the toxins. See the Equipment section for more details.
Barricades. Barricades are simple walls made of stone, metal elements and other debris. Barricades have a Toughness of 5 and one Wound point for each inch of length. Once a barricade has lost its maximum number of Wounds it is removed from play. Barricades provide full or partial cover against shooting, and a defensive obstacle to close combat. Barricades can be placed anywhere, including on buildings and walkways.
Parapets and railings. Models on a walkway, or on a structure fitted with a parapet (the bridge or the watchtower), are less likely to fall off the edge. When you take an Initiative test to see whether a model falls, you may re-roll the dice once to give the model a chance to grab hold of the railing. The second result must be applied, so it is always possible to learn some lessons about flying!
Watchtower. Watchtowers are old walkways, pylons or pillars whose top is fitted with a protective parapet. They are used as observation posts and fortified positions by gangs in the settlements and in important territories. The watchtower provides total or partial cover against enemy fire, as well as a good firing position. It can be placed at ground level or on top of a building, but it must stand firmly on the roof, not straddling the edge.
Lift. The lift can be used by models that are on it, or that enter it, during their Movement phase. Each change of level counts as 1 inch of movement. A model on a moving lift can still shoot with a weapon that would normally prevent it from moving and shooting. Models may also call the lift when it is stopped at another level, if they are in contact with the wall that carries the lift. Each level the lift travels to reach the model that called it counts as 1 inch of movement.
The lift can be damaged. Its Toughness is 6 and it has 2 Wounds. Once the lift has lost its 2 Wounds it is out of use, and models must use the ladders instead. If the lift suffers 4 Wounds it is destroyed and crashes to the ground. Any model on it at that moment suffers the normal damage of a fall. Any model underneath it suffers 1D6 hits at Strength 6 on a roll of 4+ on 1D6.
Target. Targets are used in the arenas of the Lord of the Tower scenario. They may also be used as additional terrain elements in other scenarios.
Outlaws
Becoming an Outlaw
Nobody becomes an outlaw voluntarily; it simply happens to you, suddenly. Of course, the Redemptionists know that they place themselves outside the Laws of the Houses and of the Hive when they don their red robes and masks, but they do not care, and they refuse even to hear of the most basic rules in force in the settlements. Being born a ratskin, a scavvy or any other twisted creature whose survival is closely bound up with the sump does not help either. Spyrers believe that no law of the Underhive applies to them, and they are probably right. But the real outlaws, the gangs driven out into the wastelands, have simply been less lucky than the others. They got caught.
After every gang fight there is always a chance that a gang will be declared an outlaw by the Guilders. A gang may have committed no crime at all and still be declared an outlaw, following false accusations from someone who is frightened of it or jealous of it. Far more often, the gang has broken the law and simply been unlucky enough to be caught. The law never makes gifts in the Underhive, and anyone declared an outlaw must leave the settlements very quickly, or risk seeing his head adorning a pike as a warning to others.
Whenever two players fight a game of Necromunda, either player may decide to report the incident afterwards to the Guilders' Watchmen. This accusation may cause the other gang to be outlawed, particularly if that gang has been engaged in dubious activities or is of significant size or renown.
Nothing can stop the two players from reporting each other to the Watchmen; such slanders are very common. Of course, outlaw gangs and Outlanders cannot contact the Watchmen, who would shoot them on sight or imprison any messenger they sent.
In the post-battle sequence, after the resource rolls, skill rolls and so on have been made, each accused player must roll 2D6 to determine whether the accusations have drawn the attention of the merchants' court. The rolls are made in the presence of both players and are modified as shown below. Note that both gangs may be outlawed if both have reported each other.
Outlaw Table
| 2D6 | Result |
|---|---|
| 12 | Vigilantes. The merchants are so impressed (or cowed) by your law-abiding attitude that they offer you the chance to become Vigilantes and help them keep order. If you accept, you gain a resource bonus of 25 credits for each game you play against outlaws, and you may impose a -1 modifier on another gang on this table after a game against it. Take a Vigil Insignia to prove your new position. You may give up this insignia whenever you wish, and cease to be a Vigilante. |
| 3-11 | Clean. You are good citizens. Move along. |
| 2 | Outlawed! It is high time to leave town. You must choose one of your territories to keep as your lair, and cross all the others off your gang roster (the merchants confiscate them). |
Modifiers
Scenario
- -1 If the scenario you have just played was Ambush (Embuscade) and you were the attacker.
- -1 If the scenario you have just played was First Blood (Premier Sang) and you drew second.
- -2 If the scenario you have just played was First Blood and you drew first.
- -3 If you have just played an outlaw scenario (Scénario Hors-la-loi) and you were the attacker.
Gang
- -1 For each wyrd or slave in your gang.
- +1 If the value of your gang does not exceed 1000 credits.
- -1/+1 If the value of your gang exceeds 2000 credits. Roll 1D6 for each game: 1-3 = -1, 4-6 = +1.
- -2/+2 If the value of your gang exceeds 3000 credits. Roll 1D6 for each game: 1-3 = -2, 4-6 = +2.
Others
- -3 If you attacked a force of the Imperium in the game you have just played.
- +1 If none of the modifiers given above has ever been applied to your gang.
Being an Outlaw
Life as an outlaw is very hard. You must draw your sustenance from the rubble and the rusted pipes, in the form of rats, snakes, mushrooms and nutritious sludge. Finding enough food to survive is not simple. All transactions must be made at illegal trading posts or with smugglers, where a conspicuous weapon is more useful than good negotiating skills. On the other hand, there are many mercenaries in the Zone who never show themselves in the settlements, and powerful allies can be recruited from among the wyrds and slaves.
Some outlaw gangs manage to set up small kingdoms covering a few square kilometres, where the leader reigns supreme over everything within. Others prefer to pay their fine and return to the settlements to recover their former territories. Still others amass real fortunes and emigrate up the Hive; rumours even say that some have been found in the service of the great families of the Spire. Some disappear without trace.
Territories
A gang may keep a territory when it is outlawed; its other assets are confiscated by the merchants. Even if the territory the gang holds lies within a colony, it is assumed that the gang leader was warned in time to carry the main resources off into the wastes before the Vigilantes arrived. Once resettled in the wastes, the territory becomes the outlaw gang's lair or base camp.
An outlaw gang may end up losing its only territory after a severe defeat in a scenario such as Empoignade or Ambush. If this happens, the outlaws must move house and find another lair: make a roll on the Outlaw Territories Table to determine which charming little corner will welcome the gang.
Resources
A gang's territory always generates resources, provided that a ganger is assigned to collect them. Unfortunately these resources are halved, because of the difficulties met in the Zone when one no longer enjoys the support of the merchants. This penalty does not apply to territories drawn from the Outlaw Territories Table, which are already as bad as they could be!
Resources collected, and the results of scavenging (see below), are not compared with the size of the gang as would normally be the case. However, the gang must somehow obtain supplies; see So Many Mouths to Feed below.
Scavenging
Anyone who was not seriously wounded in the previous game may scavenge the surroundings. Kids, gangers, heavies and even the leader may all scavenge, but if they do so they cannot carry out special tasks, such as visiting the illegal trading post on the corner or collecting the territory's resources. Each scavenger collects 1D6 credits' worth of miscellaneous products from the wastes. Hired guns and special characters never scavenge; they are not paid for it.
So Many Mouths to Feed
Unfortunately, the gang needs food and munitions. After a game, once resources have been collected and scavenging carried out, each member of the gang must pay 3 credits to stay in good health. Hired guns and special characters are not concerned by this; we assume their pay is enough to buy them rat burgers. Any credits remaining may be added to the stash.
Famine
If the gang cannot pay the 3 credits for each of its members, either from the stash or from the resources collected, those members risk dying of hunger. Any fighter who cannot pay the 3 credits after a game loses 1 point of Strength and 1 point of Toughness until he can do so. These penalties accumulate over successive games, and any fighter whose Strength or Toughness is reduced to 0 dies of hunger and is removed from the gang roster. Yes, you may keep his weapons and equipment after his death.
Gaining Additional Territories
An outlaw gang cannot hold more than one territory at a time, because in the Zone it cannot risk dispersing its members in order to protect them. This means that when an outlaw gang gains a territory, it has two choices:
- Occupy. The gang takes possession of the new territory and abandons its former lair (update the gang roster).
- Pillage. The gang loots the new territory, carries off whatever is of value, then destroys the rest.
If you pillage a territory, you gain double the territory's normal resources. For a territory with variable resources, you gain double the maximum it could normally bring in. For example, pillaging a tavern yields 120 credits. As with revenue collected in the Zone, this amount is not halved.
Outlaw Territories Table
| D36 | Territory | Revenue | Notes |
|---|---|---|---|
| 11-15 | Wastes | 0 | |
| 16 | Collapsed Dome | 0/2D6 | A model may search this sector and will get 2D6 credits. On a result of 2, the sector collapses completely and the territory must be removed from the gang roster. In addition, the model searching the sector must take an Initiative test; if it fails, it is killed. |
| 21-25 | Wastes | 0 | |
| 26 | Mushroom Farm | 0 | The gang may feed on mushrooms to avoid the effects of famine. Roll 1D6; on a result of 1, a randomly determined gang member eats poisonous mushrooms and dies. |
| 31-36 | Radioactive Zone | 0/2D6 | Valuable mineral resources can be found in a radioactive sector. The only problem is that it is very dangerous to go and look for them. If you wish, you may send a fighter to exploit this territory, and he will bring back 2D6 credits. However, if you roll a double, the fighter is horribly burned by the radiation and immediately causes , without collecting any resources. |
Rewards
The head of an outlaw is usually priced, dead or alive; that is why bounty hunters exist, after all. Any gang that captures or kills outlaws may claim a reward from the Vigilantes. This is generally equal to the total value of the figure captured or killed. For example, Kaiser of the Death's Heads gang is a ganger carrying a rebreather, a sword and a submachine gun; the reward for putting him out of action is therefore (50 + 10 + 10 + 15 = 85) 85 credits.
Outlaws do not claim rewards for the death of other outlaws. There is no ethics involved; they would simply be shot down by the Vigilantes if they tried.
Outlaws Captured
If an outlaw is captured, a gang may demand a ransom or exchange him normally (something that happens more often than you might think). But he may also be sold to the merchants' court of justice, to collect the reward, which is increased by a bonus of 1D6x5 credits for bringing him back alive. In all cases, the gang may not claim the prisoner's weapons and equipment; they are exhibits, after all.
Gangers Captured by Outlaws
Outlaws have the normal options when capturing a ganger: exchange him, demand a ransom, or sell him as a slave to the first caravan that passes, keeping his weapons and equipment.
Fines Paid to the Guild
A gang may pay a fine and have its outlaw status lifted, wiping out the murders and ravages it has committed. The fine set by the Guild for a gang to have its condemnation lifted and be reintegrated into the settlements is equal to 10% of the gang's value, rounded up to the next 10 credits.
For example, the outlaw gang Death's Heads has a value of 2788; the fine imposed by the Guild is therefore (2788 / 10 = 278.8), which rounded up to the next 10 gives 280 credits.
It is important to note that the fine is set at the moment the gang is outlawed, according to its value at that moment. Clearly note the amount of this fine to avoid any later confusion. Once the gang has accumulated enough credits, it may have its condemnation lifted and become an ordinary gang again, simply by deducting the value of the fine from its stash in the presence of another player.
Recovering Territories
When an outlaw gang pays its fine, it is free to return to the settlements, re-establish its former contacts and resume its activities. To represent the gang's return, generate five new territories on the Necromunda Territories Table. The gang's former lair may be abandoned and removed from the gang roster, or kept as one of the five territories, at the gang leader's choice.
Repeat Offenders
Unfortunately, the fine an outlaw gang must pay increases with each new misdeed it commits, in other words with each new game it plays, unless it is opposed by another outlaw gang. Each game adds 1D6x10 credits to the fine. Note the new value of the fine after each game.
If an outlaw gang attacks or wounds a merchant in any way, it definitively loses the possibility of paying its fine. The Guild will do everything in its power to hunt down those who committed such crimes to the depths of the Zone.
Moreover, particularly hardened outlaws refuse to pay their fine, and complain that it is not high enough and should be five or ten times higher.
Illegal Trading Posts
Illegal trading posts are scattered more or less throughout the Zone. The most famous is the Heretics' Burrow, so well established that the merchants turn a blind eye to its activities and even use it on occasion for their own illicit dealings. Other famous trading posts of this kind are Bloodflow (Coulesang), Hell's Burrow (Terrier d'Enfer), Vaseville and Black Rift (Fissure Noire). Many are in fact colonies over which notorious outlaws reign. Small, heavily armed caravans of illegal traders cross the wastes between the illegal trading posts, supplying weapons to scavvies and ratskins.
Helmawr and the imperial authorities are less tolerant of illegal trading posts than the merchants' Guild. Their spies are everywhere, and expeditions are mounted to wipe out illegal posts situated too close to the settlements. The inhabitants are usually long gone by the time the authorities arrive, but surprise attacks have led to some bloody clashes. The Heretics' Burrow has been razed and rebuilt many times over, and the massacre at Bloodflow remains in the memory as a dreadful day.
Spending Your Money as an Outlaw
After each game, an outlaw gang may collect its territory's resources and scavenge the surroundings, as described in the previous section. The credits collected may be spent on recruiting new members or buying equipment. Transactions must take place in an illegal trading post; outlaws no longer have access to the legal trading posts.
New Recruits
Illegal trading posts are full of young vagabonds and old drunkards, so new combatants can be recruited there in the same way as in a legal trading post. Consult the Recruiting a Gang chapter of the Necromunda rulebook. New recruits may be equipped with weapons described in the Gang Recruitment List, but may not receive any other equipment until they have fought in at least one battle.
Gangs may recruit fighters of any type, but the normal restrictions on the number of leaders, heavies and so on still apply.
Recruiting Mercenaries
Players may recruit mercenaries for their gang. Consult the Mercenaries chapters of Necromunda or of Outlanders for more details. The mercenaries met in outlaw gangs are criminals, pariahs or vagabonds ready to sell their skills to whoever can pay. Obviously there will be no bounty hunters in an outlaw gang.
Weapons
If a player wishes to buy weapons or other equipment for existing fighters, consult the list that follows. It contains the weapons and equipment available in an illegal trading post, although certain items are not always available and their prices may vary.
Buying
Common items can normally be found fairly easily on the stalls of the noisy bazaars of an illegal trading post. Players may generally buy as many items of this type as they wish. Their price is fixed, so players always pay the same price for them.
Rare items are almost impossible to find. They are only offered for sale occasionally, and the asking price is often above their real value. Players must be ready to buy these items as soon as they are offered, especially if it is a weapon or piece of equipment that is almost impossible to find.
Rare Items
To represent this scarcity of rare items, each player rolls a die to determine how many items are offered to him. Roll 1D3 (roll 1D6: 1-2 = 1, 3-4 = 2, 5-6 = 3). This is the number of rare items offered to your gang leader as he walks the stalls of the trading post and visits his contacts. Roll 1D66 for each rare item and consult the Illegal Trading Post Table below to discover what is offered, one copy each time, unless the same result has come up more than once with the D66 rolls.
Note that each player makes his own rolls, even if both gangs are outlaws; they are not necessarily in the same place and do not have the same contacts. A player may not buy an item that has been offered to another player.
Gangers and Trade
If a player wishes, he may use a ganger to tour the trading post and see whether there are other rare items to buy. A ganger carrying out this action may not collect the territory's resources or scavenge. Searching for rare items replaces the collection of resources.
For each ganger carrying out this action, you may add a randomly determined rare item to the list of those you can already buy.
Illegal Trading Post Table
The list below is used to determine the rare items offered to your gang leader. 1D3 items are offered to your gang leader, plus one for each ganger assigned to searching for rare items. The prices are given further on in the price list.
| D66 | Item |
|---|---|
| 11 | Special: lost at gambling |
| 12-13 | Special: stolen |
| 14-15 | Special: swindled |
| 16 | Special: gambling win |
| 21 | Energy weapon. Roll 1D6: 1 Energy Axe; 2-3 Energy Mace; 4-6 Energy Sword |
| 22 | Gas grenades. Roll 1D6: 1-2 Asphyxiant; 3-4 Nightmare; 5-6 Hallucinogenic |
| 23 | Grenades. Roll 1D6: 1 Fusion bombs; 2-3 Photonic; 4 Plasma; 5-6 Smoke |
| 24 | Sights. Roll 1D6: 1-2 Laser sight; 3 Scope; 4 Telescopic sight; 5-6 Infrared sight |
| 25 | Armour. Roll 1D6: 1-4 Flak vest; 5 Carapace; 6 Composite |
| 26 | A bionic organ to choose from below: Arm, Eye, Leg |
| 31 |
Special Results
Special results represent the encounters and events that take place in the corner during your visit. Each is unique: if the same special result comes up more than once on your D66 rolls, roll again.
Lost at Gambling. Although it is not compulsory to gamble in a trading post (there being no law in such places), you should do so. Most deals are made around the gaming table, and it is considered a weakness not to play. It shows you are not prepared to take risks, which makes you an easy mark. You lose 2D6 credits and leave a little wiser than before.
Stolen. You look for your credits and cannot find them any more. Some crook has robbed you. You look around, but there are dozens of possible candidates. Roll 1D6. On a result of 6, a twitch betrays the guilty party as you look at him, and you catch him before he can run away. You recover your money and give him a good lesson. On a result of 1-5, you are out of luck and must write off 3D6 credits (nobody is fool enough to keep all their money in one pocket).
Swindled. You negotiate for equipment on terms that seemed very advantageous, but the item turns out to be damaged, faulty, badly made or a counterfeit, and totally useless. You lose 3D6 + 10 credits and must be more careful next time.
Gambling Win. You start by losing a pile of credits, but luck turns and you win back a little more than you lost. You gain 2D6 credits.
Rumour. You hear a rumour about what is going on in the wastes: where certain gangs go and what they are looking for. You may modify your next roll on the Scenario Table by +1 or -1. This modifier is applied after the dice roll.
Tip. An old contact gives you some good information that will allow you to earn some credits. You may re-roll your next roll on the Scenario Table if you wish.
Local Information. A local informer offers to sell you vital information for 10 credits. If you pay him, then in your next game you may choose the scenario you wish to play.
Price Table
The table below gives the cost of items available for sale in an illegal trading post. The cost of rare items is shown in this table, but these items may only be bought if they have been offered as described above. Some items have a variable price plus a supplement, for example 40 + 3D6 credits. The variable part represents the mark-up due to the rarity of the item: the bonus to be paid for the chance of owning it.
Close Combat Weapons
| Item | Cost | Availability |
|---|---|---|
| Sword | 10 | Common |
| Chainsword | 25 | Common |
| Club, Mace or Axe | 10 | Common |
| Chain or Flail | 10 | Common |
| Dagger (first one free) | 5 | Common |
| Axe, Sword or Two-handed Club | 15 | Common |
| Energy Axe | 35 + 4D6 | Rare |
| Energy Mace | 35 + 4D6 | Rare |
| Energy Sword |
Pistols
| Item | Cost | Availability |
|---|---|---|
| Machine Pistol | 15 | Common |
| Bolt Pistol | 20 | Common |
| Light Flamer | 20 | Common |
| Laser Pistol | 15 | Common |
| Needle Pistol | 100 + 5D6 | Rare |
| Plasma Pistol | 25 | Common |
| Autopistol | 10 | Common |
| Web Pistol | 120 + 5D6 | Rare |
Basic Weapons
| Item | Cost | Availability |
|---|---|---|
| Assault Gun | 20 | Common |
| Bolter | 35 | Common |
| Laser Gun | 25 | Common |
| Shotgun (ordinary rounds and shot) | 20 | Common |
Special Weapons
| Item | Cost | Availability |
|---|---|---|
| Flamer | 40 | Common |
| Grenade Launcher (grenades not included) | 130 | Common |
| Fusion Gun | 95 | Common |
| Needle Rifle | 230 + 5D6 | Rare |
| Plasma Gun | 70 | Common |
Heavy Weapons
| Item | Cost | Availability |
|---|---|---|
| Autocannon | 300 | Common |
| Heavy Stubber | 120 | Common |
| Heavy Bolter | 180 | Common |
| Heavy Plasma Gun | 285 | Common |
| Laser Cannon | 400 | Common |
| Missile Launcher (missiles not included) | 185 | Common |
Grenades
| Item | Cost | Availability |
|---|---|---|
| Asphyxiant | 15 + 3D6 | Rare |
| Frag | 30 | Common |
| Hallucinogenic | 40 + 5D6 | Rare |
| Anti-tank | 50 | Common |
| Melta (A Fusion) | 40 + 4D6 | Rare |
| Photonic | 20 + 3D6 | Rare |
| Plasma | 30 + 4D6 | Rare |
| Nightmare | 20 + 3D6 | Rare |
| Smoke |
Missiles
| Item | Cost | Availability |
|---|---|---|
| Frag | 35 | Common |
| Anti-tank | 115 | Common |
Special Ammunition
| Item | Cost | Availability |
|---|---|---|
| Killer Rounds | 5 | Common |
| Incendiary Rounds | 5 | Common |
| Bolts | 15 | Common |
| Dum-dum Rounds | 5 | Common |
Sights
| Item | Cost | Availability |
|---|---|---|
| Laser Sight | 40 + 4D6 | Rare |
| Scope | 40 + 4D6 | Rare |
| Telescopic Sight | 40 + 4D6 | Rare |
| Infrared Sight | 30 + 4D6 | Rare |
Armour
| Item | Cost | Availability |
|---|---|---|
| Flak Vest | 10 + 3D6 | Rare |
| Carapace | 70 + 4D6 | Rare |
| Composite | 25 + 4D6 | Rare |
Bionic Organs
| Item | Cost | Availability |
|---|---|---|
| Arm | 80 + 4D6 | Rare |
| Eye | 50 + 4D6 | Rare |
| Hand | 50 + 4D6 | Rare |
| Leg | 80 + 4D6 | Rare |
Miscellaneous
| Item | Cost | Availability |
|---|---|---|
| Archeotechnology | D6 x 10 | Rare |
| Bio-scanner | 50 + 3D6 | Rare |
| Contact Poison (per dose) | 10 + 1D6 | Rare |
| Vial of Serpent Spirit | 30 + 2D6 | Rare |
| Bottle of Whiskar | 10 + 1D6 | Rare |
| Harness | 10 | Common |
| Respirator Filters | 10 | Common |
| Infrared Goggles | 30 + 3D6 | Rare |
| Psychotropic Jelly |
* Becomes Common once the first supplier of it has been encountered.
Translator's note: the French price table gives the Sights and Bionic Organs entries as listed above; the Melta grenade appears in the French list as "A Fusion" (fusion grenade), which the transcriber has rendered as Melta on the basis of the English grenade types.
Outlaw Scenarios
Outlaw Scenario Table
Outlaws (including scavvies, Redemptionists and ratskins) roll on the Outlaw Scenario Table rather than on the ordinary Necromunda table. This table is reserved for outlaws; other gangs must use the ordinary table. If a gang is allowed to choose its scenario, it may choose one of the standard scenarios of Necromunda or one of the new scenarios offered in Outlanders.
An ordinary gang that obtains a result on the Necromunda Scenario Table allowing it to choose its scenario may decide to play an outlaw scenario, if it wishes. The only problem is that it has a greater chance of being outlawed if its opponent decides to report it to the Vigilantes.
| 2D6 | Result |
|---|---|
| 2 | The non-outlaw gang may choose the scenario. If both gangs are outlaws, the one with the highest value chooses. The battle takes place in a dangerously polluted sector of the Underhive. Roll 1D6 for each model that moves at ground level (not on buildings or walkways). On a result of 1, the model suffers a Strength 3 hit from the toxic debris. Even ratskins suffer the effects of the poisonous debris. |
| 3 | The non-outlaw gang may choose the scenario. If both gangs are outlaws, the one with the highest value chooses. |
| 4 | Play the Lightning Attack scenario (Attaque Éclair). The outlaw gang is the attacker. If both gangs are outlaws, the one with the lowest value is the attacker. The attacker has been paid by a rival gang to carry out this operation, and therefore receives a bounty of 1D6 x 10 credits, whether it wins or loses. |
| 5 | Play the scenario Les Pillards. |
| 6 | Play the scenario Les Chasseurs (The Hunters). |
| 7-11 | The outlaw gang may choose the scenario. If both gangs are outlaws, the one with the lowest value chooses. |
| 12 | The outlaw gang may choose the scenario. If both gangs are outlaws, the one with the lowest value chooses. Moreover, because of the ferocity of the fighting, both camps double the Experience points they gain for this battle. |
Outlaw Scenario 1: The Plot (Le Complot)
Underhive rivalries frequently end in violence, and ambitious gang leaders are often the target of assassination attempts. So it is not rare for a gang to try to get at the leader of an enemy gang by laying an ambush for him. In this scenario, the attacking gang has followed its target carefully and has planned to kill him as he leaves a colony, a tavern or a gambling den.
Terrain. Beginning with the attacker, each player places in turn one piece of terrain: a ruined building, a walkway or a barricade.
Gangs. Before deployment, the defender divides his gang into one or more groups, each containing two or three models. The defender takes the group containing his leader and places it openly anywhere on the table. The attacker may place up to 2D6 of his models, choosing the fighters he wishes to take part in the Plot. All attacking models must be deployed under cover and hidden, at more than 16 inches from the enemy gang leader. 1D3 attacking models may begin in Alert status.
Once the attackers are deployed, roll 1D6 for each group of the defender and consult the table below.
| D6 | Result |
|---|---|
| 6 | The group must be deployed within 6 inches of the leader. |
| 4-5 | The group must be deployed more than 12 inches from the attackers and their leader. |
| 1-3 | The group is not deployed at the start of the game. Roll 1D6 for this group at the start of each of the defender's turns; on a result of 6, it may enter by a randomly determined table edge, in the same way as in the Lightning Attack scenario. |
Start of the Game. Roll 1D6. On a result of 1-3, the attacker plays first, generally launching a challenge of the type "Varsqua, wineskin! Your hour has come!!!". On a result of 4-6, the defending gang leader senses that something is happening, stays on alert, and so the defender plays first.
End of the Game. If the defending gang leader is taken out of action, or the attacking gang is routed, the game stops immediately. The attacking player may also stop the game by moving off the table, by any table edge, all of his models that are not knocked down or out of action.
The defender fights for his life, so he may not rout, voluntarily or otherwise. The attacker is determined to spill his adversary's blood, so he need only take rout tests if his gang has suffered 50% casualties.
Experience.
- +D6 Survival. If the fighter survives the battle, he gains 1D6 points. Even wounded and out-of-action fighters receive these points for their participation.
- +5 Wound Inflicted. A fighter receives 5 points for each wound he inflicts during the battle. Note on the gang roster each time a fighter scores a hit that wounds his target. Although some weapons may inflict several wounds with a single shot, only 5 points are marked in that case, not 5 points per wound.
- +10 Defending Gang Leader. If the defending gang leader is neither knocked down nor taken out of action, he gains 10 experience points, which does his reputation good.
Special. If the attacker succeeds in putting the enemy leader out of action (forcing him to make a Serious Injury roll), roll 1D6.
| D6 | Result |
|---|---|
| 6 | The attacker seizes a random territory of the defender, depending on the case either the leader recovering from his wounds or being carried off to the ground. |
| 1-5 | The attacker seizes half of the defending gang's resources for this game, taking advantage of the fact that the enemy leader is temporarily out of circulation. The defending gang loses 50% of its resources to the attacker. |
Note that this scenario does not bring in much if the defending gang is outlawed, unless the attacker collects some reward from enemies whose heads have a price on them.
Experience (The Plot and Take All). Experience is awarded as follows.
- +D6 Survival. If the fighter survives the battle, he gains 1D6 points. Even fighters who are wounded and out of action receive these points for their participation.
- +5 Wound Inflicted. A fighter receives 5 points for each wound he inflicts during the battle. Note on the gang roster each time a fighter scores a hit that wounds his target. Although some weapons may inflict several wounds with a single shot, only 5 points are marked in that case, not 5 points per wound.
- +10 Defending Gang Leader (Take All). If the attacker fails to seize even one Loot marker, the defending gang leader gains 10 additional experience points.
Special (Take All). Each Loot marker captured by the attacker brings him 1D6 x 5 credits. The total of the gains collected in this way by the attacker is deducted from the resources collected by the defender at the end of the game. If the defender's resources are not enough to pay the attacker for the Loot markers he has taken, the defender must draw on his stash. If even the stash is not enough, one of the defender's territories is pillaged and destroyed, as described in the outlaw rules.
Outlaw Scenario 3: The Hunters (Les Chasseurs)
When an outlaw gang achieves too much success, it may expect to be hunted down by the Vigilantes or by former enemies. The hunters know that they can find information about where outlaws are hiding in any illegal trading post. In this scenario they have learned more than they hoped, and rush straight at the men they are looking for, somewhere outside a trading post. As each camp sees the other, all the fighters stop, ready to grab their weapons and eye each other menacingly. The hunters savour their advance towards victory, but the outlaws know that some of their comrades are hidden behind their adversaries and should open fire on them... any moment... now!
Terrain. The terrain represents a small colony lost in the wastes. Each player places in turn one piece of terrain: a building, a walkway or a barricade. It is suggested that all the terrain be grouped on an area of about 1.20 m x 1.20 m.
Gangs. The defending player rolls 1D6 to see how many fighters from his gang come face to face with the Hunters. These fighters are selected at random; they are not chosen by the defending player. The Hunter player uses his entire gang.
The hunters and the selected defenders are deployed roughly in the middle of the table. The two groups are deployed 16 inches apart; all models are at ground level and completely in view of the enemy. Roll 1D6 to determine who deploys first. Each gang must deploy in a line with at most 1 inch between each model. The rest of the defending gang may be deployed anywhere on the table at least 16 inches from the hunters. It must begin the game hidden.
All fighters who come face to face are assumed to carry their rifles slung and their pistols in their holsters at the start of the game. Until the first weapon is drawn, a special game sequence called The Tension Mounts (La Tension Monte) is used.
The Tension Mounts. The game sequence is unusual. The hunters move first, then each camp tries to keep its cool, as described below. If both camps pass this test, play passes to the next turn, and so on until one of the two gangs cracks and the brawl begins.
While the tension mounts, the hunters advance slowly towards the defenders until one of them loses his nerve and draws his weapon. To represent this, the hunters may advance 2 inches per turn. They must head towards the enemy and may not take cover. The defenders must stay where they are while sweat begins to bead on their brow. When the hunters are within 4 inches of the defenders, they halt.
Defenders who were hidden may move at their normal Movement rate, but must always remain under cover and hidden. If a hidden defender is spotted by one of the hunters, the hunter realises the trap that has been laid and immediately draws his weapon.
After each move of the hunters, each camp must test its nerve. The hunters roll 1D6, but the defenders are so nervous that they roll 2D6. Each player must note the result he obtains. At the end of each move, each player makes another nerve roll and adds the result to the previous total. Both players continue to make their rolls after each hunter move, adding their results, until one of them exceeds 15.
Important: a roll of 6 counts as 0 on nerve tests. If you roll a 6, your total does not change.
As soon as a player exceeds 15, his gang loses its composure and draws its weapons (see Fire at Will below).
Fire at Will (Feu à Volonté). Once one fighter has grabbed his weapon, everyone else does the same. Hell breaks loose: this sequence is called Fire at Will. During this phase, no camp may move, but all the models of both camps may shoot. Defenders who are still hidden do not shoot during this phase; they join in a few seconds later.
In this phase both camps may shoot, but the order in which figures shoot is determined separately. To determine the shooting order, roll 1D6 for each figure and add the fighter's Initiative to the result. Then add +1 if the fighter has a pistol, and subtract 1 if he has a heavy weapon. The total is the result for that fighter.
Determine the results for all fighters. The fighter with the highest score shoots first, and the shot is resolved normally. Once the first figure has shot, the second-highest score shoots, then the next, and so on. In case of a tie, a pistol shoots before a basic, special or heavy weapon. Otherwise shots are considered simultaneous, which means it is possible for two fighters to shoot each other at the same time! Fighters who are hit before they have been able to shoot lose their shot.
Once all the fighters have shot, the normal game sequence resumes. Each player rolls 1D6, and the one with the better result plays first.
End of the Game. The game ends if a camp fails a rout test or chooses to rout. The other camp then wins the scenario. Do not forget that the hunters receive a reward for each outlaw killed or captured, provided the outlaws are not themselves outlaws (see the Rewards section).
Experience (The Hunters).
- +D6 Survival. If the fighter survives the battle, he gains 1D6 points. Even fighters who are wounded and out of action receive these points for their participation.
- +5 Wound Inflicted. A fighter receives 5 points for each wound he inflicts during the battle. Note on the gang roster each time a fighter scores a hit that wounds his target. Although some weapons may inflict several wounds with a single shot, only 5 points are marked in that case, not 5 points per wound.
- +10 Winning Gang Leader. The leader of the winning gang gains 10 experience points.
Outlaw Scenario 4: Caravan (Caravane)
Caravans make very tempting targets for outlaws. A gang that attacks a caravan exposes itself to reprisals, but outlaws have nothing left to lose, and caravans carry small fortunes in credits. Merchants hire local gangs to protect their caravans as they cross their territories, but past experience has taught the merchants that it is better not to let the guards come too close to the caravan itself, as they might well succumb to temptation. So the gangs act as a vanguard, or watch the flanks, repelling the mutants and outlaws who come too close. For their part, the outlaws want to get past the screen of guards and reach the loot.
Terrain. The terrain represents a sector in ruins in the wastes. Each player places one piece of terrain: a ruined building or a walkway. It is suggested that the game be played on an overall area of about 1.20 m x 1.20 m.
Gangs. Note: in this scenario, the defender may not be an outlaw gang.
Both camps roll 1D6. The higher result chooses its deployment table edge, and the lower result takes the opposite edge. The defender deploys first, placing his whole gang up to 12 inches from his table edge. The attacking player then deploys his gang up to 24 inches from his table edge; none of his models may be placed within 16 inches of the defenders.
Start of the Game. Both camps roll 1D6. The player with the highest result plays first.
Reaching the Caravan. The caravan is only a few hundred metres beyond the defenders' table edge, so the attacker need only get some of his fighters past the guards. Once the attackers have passed through, they can kill a few slaves and loot the caravan at their leisure.
If the attacker succeeds in getting any of his models off the defender's table edge, set these models aside until the end of the game. Figures that reach the caravan will not return in time to influence the fighting between the gangs.
End of the Game. The game stops if all the attackers are knocked down, out of action or have left the table. It also stops if the attacker fails a rout test or chooses to rout. The attackers are very determined and need only take a rout test if they have suffered 50% casualties, instead of the usual 25%. Note that attacking models that have left the table do not count as casualties.
The defenders protect the caravan as it crosses their territory, and if the merchants were attacked their reputation would take a sacred blow. This means that the defenders are never obliged to take a rout test, and they will never rout, voluntarily or otherwise.
Experience.
- +D6 Survival. If the fighter survives the battle, he gains 1D6 points. Even fighters who are wounded and out of action receive these points for their participation.
- +5 Wound Inflicted. A fighter receives 5 points for each wound he inflicts during the battle. Note on the gang roster each time a fighter scores a hit that wounds his target. Although some weapons may inflict several wounds with a single shot, only 5 points are marked in that case, not 5 points per wound.
- +5 Caravan Attacked. Each attacker that leaves the table by the defender's table edge gains 5 points.
- +10 Defending Gang Leader. If no attacker reaches the caravan, the defending gang leader gains 10 additional experience points.
Sacking the Caravan
Once the game is over, count the number of attackers who managed to get through the defenders. Add to this number the result of a D6 roll to determine what the attackers have managed to steal from the merchants.
| D6 | Result |
|---|---|
| 1-3 | The attack has failed miserably. Each attacker gathers 1D6 credits in cash or merchandise, but on a result of 1, he is shot at and suffers a Serious Injury. |
| 4-5 | The attackers have managed to recover some bales lost by the fleeing merchants. Each figure collects 3D6 credits in cash or merchandise. |
| 6-7 | The attackers have killed some slaves, whom they then loot. Each attacking figure gains 1D6 x 5 credits. |
| 8-10 | The attackers have killed a merchant and stripped his corpse completely, gaining 1D3 x 10 credits per figure. |
| 11+ | The attackers have killed several slaves and a merchant, recovering 2D6 x 5 credits per figure. |
The Merchants' Vengeance
Merchants do not really appreciate attacks on caravans, even less so if one of them is killed in the assault. Being the attacker in this scenario automatically leads to outlawry and to a doubling of the fine weighing on the gang. If a merchant has been killed (a result of 8+ above), the gang is permanently outlawed and can no longer buy its way out by paying its fine.
Guards' Retribution
The caravan's guards may collect the resources of their territories normally, but they also receive 10 credits per fighter from the merchants. However, the merchants retain 20 credits per model from the total payment until the caravan is reached, and they pay nothing at all if a merchant has been killed. In no case must the defending gang pay anything to the merchants (no gang leader is that stupid at this point).
Outlanders
In the anarchic wastes that separate the colonies lies the hidden scum of Necromunda's outlaws: the Outlanders. While hivers are thrown out of the inhabited zones for breaking the codes of the Underhive and become outlaws, Outlanders are barred from entering the colonies because they belong to groups that simply do not accept the codes of the Underhive, for reasons of belief or birth.
There are four predominant types of Outlanders in the Underhive of the Primus hive, although their influence is weaker in other hives. They are feared and hated by the colonists, who must fight every day to survive in the Underhive.
Outlanders may be dispossessed ratskin warriors, grouped into bands of renegade ratskins whose only desire is to make the colonists pay for the invasion of their land and the desecration of their sacred places. Outlanders may also be fanatics of the cult of Redemption who have descended into the depths to pursue their crusade, hunting mutants and deviants with fanatical zeal. Bands of scavvies, hideous mutant and degenerate creatures, lurk near the civilised zones, pillaging and massacring at the slightest opportunity. But the worst are the spyrers, noble sons who come down from the Spire into the Underhive to perform the initiation rites that will allow them to take their place in the aristocracy.
Outlanders cannot weave a network of contacts and allies and make a place for themselves in the Underhive as other gangs do. They live and die alone. To survive and prosper, Outlanders must fight terrible battles and steal weapons, equipment and food from gangs and colonists. Every defeat brings them a little closer to death. Those who are weak or badly led have no chance. The Underhive swallows them, and their bones mingle with those of the thousands of others who came here in search of a new life and found only death.
Scavvies
Scavvies are the scum of humanity, so deformed that they can no longer truly claim the status of humans. They have suffered grave mutations from the toxic environment in which they live. They go dressed in rags and give off a foul smell. Their yellowish, scalded skin is covered in warts, blisters and chilblains. Their limbs are so often withered or reduced to stumps that peg-legs and hooks are not uncommon, although a scavvy who is too badly mutilated becomes an easy prey for his own kind.
Scavvies must tear their subsistence from the most polluted wastes of the Underhive, eagerly awaiting the slightest opportunity to kill, steal and pillage. Scavvies must huddle together to survive, and a typical gang is made up of a few very large families in which inbreeding reigns. The dominant male of the band imposes himself through brute force, with neither subtlety nor grace, and through the largest possible progeny. Although isolated scavvies pose little problem to a well-armed gang, they are cunning enough to lay traps and ambushes, and to use their numbers to even the odds.
Sometimes a scavvy king imposes himself and unites several bands of varied origin under his authority into a tribe. Such coalitions can produce hordes of scavvies large enough to ravage colonies and trading posts. The excesses of King Neznoir the 81st are still remembered throughout the Underhive, and the colony of Basseville suffered under the yoke of the man who called himself the Beggar King. By chance, scavvy kings seek to escape the attention of the authorities more than they seek conquest. They rely on fear, intimidation and extortion rather than war. Their subjects seize vital resources and tax the inhabitants of the Underhive if they are numerous enough to do so. Honest colonists and workers then hire gangs and bounty hunters to repel the scavvies, until life returns to normal.
Scavvy Special Rules
Outlanders. Scavvies belong to the Outlanders and, as such, follow the outlaw rules, except for the exceptions set out below. Being Outlanders, scavvies are not condemned by the Guild and can never pay a fine to lift their outlaw status.
Starting Territories. Scavvies begin with a territory generated on the Outlaw Territories Table. This represents their camp. Scavvies may move their camp to another territory if they capture one, but they can never hold more than one at a time. If the scavvies lose their camp, they generate another territory on the Outlaw Territories Table.
Resources. Scavvies collect the resources of their territory and carry out scavenging like any other outlaw gang. After each game they may visit an illegal trading post and recruit new members from the scavvy list. They may also hire mercenaries, whose services they will have difficulty paying for.
Cannibals. Scavvies are not averse to a little cannibalism when famine strikes. If a scavvy gang cannot pay the 3 credits per member, the player may decide to put one of his fighters, or a prisoner, in the pot. If the gang does so, it does not suffer hunger until after the next game.
Reward. A reward for the head of each scavvy is paid by the Guild, simply to keep their numbers in check.
Scavvy Weapons. Scavvy weapons are not reliable at all. They are generally poorly maintained, even rusted, and often short of ammunition. To represent this, a scavvy must take an Ammo test if it rolls a natural 1 or 6 on its to-hit roll. This does not apply to the weapons of Zeks.
Scavvy Gang Members
Scavvy Chief Recruitment cost: 100 credits
| M | WS | BS | S | T | W | I | A | Ld |
|---|---|---|---|---|---|---|---|---|
| 4 | 4 | 3 | 3 | 3 | 1 | 4 | 1 | 7 |
Weapons. A scavvy chief may receive weapons chosen from the Ranged Weapons, Close Combat Weapons and Grenades and Ammunition sections of the special Scavvy list.
Special Rules. Command. A scavvy chief directs his men through the fear and respect he inspires; they are motivated by his presence. This means that any scavvy within 6 inches of its chief may use his Leadership when taking Leadership tests. A scavvy chief may always try to break free of a pin, even if no fighter of his gang is within 2 inches of him.
Scavvy Recruitment cost: 25 credits
| M | WS | BS | S | T | W | I | A | Ld |
|---|---|---|---|---|---|---|---|---|
| 4 | 3 | 2 | 3 | 3 | 1 | 3 | 1 | 6 |
Weapons. Scavvies may receive weapons chosen from the Ranged Weapons and Close Combat Weapons sections of the special Scavvy list.
Special Rules. Mutants. Scavvies often suffer mutations because of their terrible living conditions. Most of these mutations are more horrible than useful: webbed fingers, extra toes, a tentacled nose, skin colours running from pale orange to a sickly green, and so on. However, some scavvies are born with very useful mutations, and other mutants hide among the scavvies, or among other outlaws, out of fear of the Redemptionists and the Imperial authorities. These creatures may possess tentacles that can act as whips, bony spurs, crab pincers and other natural weapons. Scavvy chiefs use these mutants as gangers to reinforce their band, giving them a chance to avenge the beatings they suffer.
Any scavvy may be bought as a mutant when recruited, by choosing a mutation from the list below. A mutant may possess only one mutation, and it is rare for several members of the same gang to share one. To represent this, the first mutant who chooses a mutation pays the normal price. The second with the same mutation pays double, the third triple, and so on.
For example: a scavvy gang already has a mutant with tentacles in its ranks and recruits a second. This mutant costs 25 credits for the scavvy itself, plus 20 credits for its tentacle (double the normal price), a total of 45 credits. If the same gang recruits a third mutant with tentacles, it must pay 55 credits.
Recruitment. It is not surprising that scavvies make up the core of scavvy gangs. So your gang must contain at least half scavvies (not mutants). If the number of scavvies in your gang falls below half of the gang, you may only recruit scavvies until their number again exceeds half of your fighters.
Mutations
| Mutation | Cost | Effect |
|---|---|---|
| Eyes on Stalks | 10 credits | The mutant has a 180 degree firing arc and hides better behind cover. Add an extra -1 modifier to hit it if it is in cover or partially in cover. |
| Pincer | 5 credits | The mutant's Strength is increased by +1 when it fights in close combat. |
| Tentacle | 10 credits | The mutant may re-roll one Initiative test to avoid a fall. In close combat, it may grab its opponent to reduce its Attacks by 1, to a minimum of 1. |
| Two Heads | 25 credits | The mutant has a firing arc of 180 degrees and may fire with two pistols in the same Shooting phase. |
| Spines | 30 credits | A mutant with spines benefits from an armour save of 5+, but may not wear armour of any type. |
| Third Arm | 10 credits | The mutant may use up to three pistols and/or close combat weapons in close combat (+2 Attacks), or carry a basic weapon in one hand and two close combat weapons in the other two hands (+1 Attack). |
Zeks
Recruitment cost: 120 credits (0-2 per gang)
Even in this hell that the wastes of the Underhive are, some mutations stabilise over time and create a distinct sub-species. The most common human sub-species in the Imperium are the mutant races of ogryns, ratlings and squats. Scaly ones, or "zeks", are another of these sub-species, although, unlike the others, their appearance is far from fully stabilised. Zeks are massive reptilian mutants, almost as wide as they are tall. Their endurance and strength are legendary, and they have the reputation of terrors of the Underhive.
Zeks are rarely met in the Underhive, which is precisely where they are most numerous. They are without doubt intelligent, but they cannot speak human languages: their throats and larynx are too deformed to articulate the words of a human tongue. So very little is known of their origins, or whether there are clans or tribes of zeks living and hiding in the most polluted expanses of the Zone. Nobody knows why zeks agree to ally themselves with scavvies, but any chief worthy of the name will do everything to recruit, and keep in his gang, every zek he can find.
| M | WS | BS | S | T | W | I | A | Ld |
|---|---|---|---|---|---|---|---|---|
| 4 | 4 | 3 | 5 | 4 | 2 | 2 | 2 | 9 |
Weapons. A zek may receive weapons from the Close Combat Weapons, Ranged Weapons and Zek Weapons sections of the list.
Special Rules.
- Scaly Skin. The skin of a zek gives it an armour save of 5+.
- Killer Reputation. Zeks cause Fear.
- Regeneration. A zek may regenerate lost fingers, toes or even a whole limb, although the process is very slow. Roll 1D6 for each Serious Injury suffered by a zek after a battle, whether or not the zek took part in it. On a result of 6, the zek no longer suffers the effects of that injury; cross it off the gang roster. Note that this applies to every injury, whether beneficial (for example Impressive Scars) or not.
Plague Zombies
Recruitment cost: 10 credits per D6 zombies
A long time ago, Necromunda was struck by a mysterious neural plague which spread from the depths of the Underhive to the highest spires of the Spire. The victims of the plague fell ill for weeks, days or a few hours after their infection. If they succumbed to the fever, their brains, burned out by the virus, lost all capacity for reasoning and turned them into mere beasts. Unfortunately these beasts must also feed, and quickly, so thousands of half-dead, decerebrated creatures haunted the boulevards and streets of the immense hives in search of fresh flesh. Each time they laid hands on an unfortunate citizen and tore his flesh with fangs or claws, another victim was infected and joined their ranks. Anarchy and chaos then spread through the hives, as the Necromundans fought the hordes of plague zombies and drove the survivors down into the depths of the Underhive.
Plague zombies make incursions from time to time into the Underhive, and bands of these creatures are another danger met in its dark depths. Zombies live in small packs like dogs, fighting among themselves and squabbling over the corpses they find, or anything else stupid enough to be caught. In sufficient numbers, these creatures can be sent in packs against the colonies or rival gangs. Plague zombies have forgotten what fear is and are insensitive to pain, which makes them very hard to stop. Moreover, any wound inflicted by a zombie can contaminate its adversary and turn it into another plague zombie.
A scavvy gang may "buy" plague zombies for a battle. The cost represents the scraps of food used to lure the zombies to the right spot. Each 10 credits of bait attracts 1D6 plague zombies into the fight. The plague zombies are under the control of the scavvy player for the duration of the game, but they are not integrated into the gang and return to wandering once the game is over.
| M | WS | BS | S | T | W | I | A | Ld |
|---|---|---|---|---|---|---|---|---|
| 2D6 | 2 | 0 | 3 | 3 | 1 | 1 | 1 | 5 |
Weapons. Plague zombies never carry any equipment; they are armed with stakes, sharp bones, claws and teeth.
Special Rules.
- Shambling. Plague zombies generally have a hesitant gait. Sometimes, when the smell of fresh blood reaches their rotting nostrils, they rush forward in a stumbling charge. Plague zombies cannot run or charge; they always move 2D6 inches. To represent these unpredictable movements, roll 2D6 individually for each zombie in the Movement phase. You are not obliged to move each zombie the full distance rolled. A zombie that comes into contact with an enemy is always assumed to have charged.
- Impervious to Pain. Plague zombies no longer feel pain. You may burn them, shoot them or cut them to pieces: they will always try to get at you until the fatal blow. That is why plague zombies are never pinned and do not suffer the effects of light wounds.
- Immune to Fear. Since the parts of their brains that allow reasoning were destroyed long ago, plague zombies are no longer intelligent enough to feel fear. They ignore all the rules of psychology and never take Leadership tests to keep or lose their nerve. If the gang that controls them routs, the zombie pack is no longer driven forward and scatters too.
- The Plague! Plague zombies obviously carry the plague virus, if you see what I mean. If another figure is wounded in close combat by a zombie, it may contract the disease and (gulp) turn into a plague zombie. Note on the gang roster which members have been wounded by zombies. At the end of the game, roll 1D6 on the table below for each such fighter. This is in addition to any roll on the Serious Injury table if the fighter was taken out of action.
| D6 | Result |
|---|---|
| 4-6 | Zombie! The fighter has been infected and his brain dies within a few hours. Roll 1D6. On a result of 4-6, the new zombie escapes into the wastes and joins its fellows. On a result of 1-3, the zombie immediately attacks a random figure of the gang, and the two fight in close combat at once. In both cases, all of the fighter's equipment is contaminated and lost. |
| 2-3 | Sick. The victim is ill for several days and does not take part in the gang's next battle. |
| 1 | Immune. After a few days of anxious waiting, no symptoms of the plague appear and the fighter is declared immune. |
Modifiers to the D6 roll on the table above:
| Modifier | |
|---|---|
| Light wound only | -2 |
| Not reduced to 0 Wounds | -2 |
| Doc territory (Territoire Toubib) | -2 |
| A gang member has the Healer skill (Guérisseur) | -1 |
| The gang has a Medipac | -1 |
Scavvy Weapons
Note: scavvy weapons must be tested for ammunition. A scavvy must take an Ammo test when it rolls a natural 1 or 6 to hit (see Scavvies above).
Ranged Weapons (cost in credits)
| Weapon | Cost |
|---|---|
| Assault Gun | 16 |
| Machine Pistol | 12 |
| Blunderbuss | 7 |
| Hand Crossbow | 4 |
| Musket | 5 |
| Shotgun (ordinary rounds and shot) | 16 |
| Autopistol | 8 |
Zek Weapons (cost in credits)
| Weapon | Cost |
|---|---|
| Harpoon Gun (Fusil Harpon) | 55 |
| Scatter Cannon (Canon à Mitraille) | 80 |
| Discus / Throwing Axe | 6 |
Close Combat Weapons (cost in credits)
| Weapon | Cost |
|---|---|
| Club, Mace or Axe | Free / 10* |
| Chain or Flail | 5 |
| Axe, Sword or Two-handed Club | 10 |
| Dagger | Free |
| Sword | 15 |
* The first club, mace or axe of a scavvy is free. If the scavvy is equipped with an additional weapon of this type, it costs 10 credits.
Grenades and Ammunition (cost in credits)
| Item | Cost |
|---|---|
| Frag Grenades | 30 |
| Toxic Bombs | 20 |
| Killer Rounds | 5 |
| Incendiary Rounds | 5 |
| Bolts | 15 |
| Dum-dum Rounds for Autopistol | 5 |
Scavvy Experience Tables
Starting Experience
| Type | Starting Experience Points |
|---|---|
| Scavvy | 0 |
| Zek | 60 + 1D6 |
| Chief | 60 + 1D6 |
Progression Table
| Experience | Title | Notes |
|---|---|---|
| 0-5 | Scavvy | Starting level of Scavvies. |
| 6-10 | Scavvy | |
| 11-20 | Scavvy | |
| 21-30 | Scavvy | |
| 31-40 | Scavvy | |
| 41-50 | Scavvy | |
| 51-60 | Scavvy | |
| 61-80 | Chief | Starting level of Chiefs and Zeks. |
| 81-100 |
Advancement Table
Roll 2D6 each time the fighter gains an advance.
| 2D6 | Result |
|---|---|
| 2 | New Skill (any table). |
| 3 | New Skill. |
| 4 | New Skill. |
| 5 | Characteristic increase. Roll 1D6: 1-3 = +1 Strength; 4-6 = +1 Attacks. |
| 6 | Characteristic increase. Roll 1D6: 1-3 = +1 Weapon Skill; 4-6 = +1 Ballistic Skill. |
| 7 | Characteristic increase. Roll 1D6: 1-3 = +1 Initiative; 4-6 = +1 Leadership. |
| 8 | Characteristic increase. Roll 1D6: 1-3 = +1 Weapon Skill; 4-6 = +1 Ballistic Skill. |
| 9 | Characteristic increase. Roll 1D6: 1-3 = +1 Wound; 4-6 = +1 Toughness. |
| 10 | New Skill. |
| 11 | New Skill. |
| 12 | New Skill (any table). |
Available Skills
| Fighter | Agility | Combat | Ferocity | Muscle | Shooting | Stealth | Tech |
|---|---|---|---|---|---|---|---|
| Scavvy | ✔ | – | ✔ | – | – | ✔ | – |
| Zek | – | – | ✔ | ✔ | – | ✔ | – |
| Chief | ✔ | ✔ | ✔ | ✔ | ✔ | ✔ | – |
Maximum Characteristics
| Type | M | WS | BS | S | T | W | I | A | Ld |
|---|---|---|---|---|---|---|---|---|---|
| Scavvy or Chief | 4 | 6 | 5 | 4 | 4 | 3 | 6 | 3 | 8 |
| Zek | 4 | 7 | 6 | 6 | 5 | 4 | 5 | 4 | 10 |
Redemptionists
Redemption! Redemption! By fire and by blood! The cries of the fierce Redemptionist brotherhood echo through the hive in a wave of hatred. At every street corner, Redemptionist preachers hail the people with appeals to intolerance and violence. In the halls and temples where Redemptionist meetings are held, priests lead the populace in prayers of hatred and xenophobia, calling for the divine wrath of the Emperor to fall upon the galaxy. For the Redemptionists, all creation is contaminated by a corruption which can be eradicated only by fire, blood and faith.
The Redemptionist Crusade
The beliefs of Redemption arise from those of the Ecclesiarchy. They venerate the Emperor, the supreme man whose existence clearly shows that the destiny of mankind is to rule the galaxy. The Redemptionists believe that humanity has strayed from the path laid down by the Emperor, and that its sins will lead men towards decay and depravity. As long as man is incapable of mastering his lazy nature, he will be incapable of uniting to conquer the universe that the Emperor hoped for. Sin must be extirpated from man by fire, blood and faith.
Sin may take many forms: alcoholism, gambling, lying, trickery, profanity, fornication (merely thinking of fornication is already a sin), and firing on the innocent and the workers who are the Redemptionists' victims. The worst sinners are mutants and sorcerers, the progeny of the devil. Next come the heretics who tolerate sin and refuse to listen to the message of Redemption. The movement secretly believes that the Noble Houses and the Guild are also infested with sinners, so it finds little support in the Spire. The majority of its adepts come from the labouring masses of the Hive City.
Redemption is powerful among the Houses that control the Hive City, with active or secret militants in each of them. One of the Houses, Cawdor, is even entirely devoted to the Redemptionist cause and is effectively controlled by them. The path of righteousness runs through it, and it is respected as the first of the chiefs, with public witch-hunts and mass burnings of heretics and mutants. The Cawdor adepts are so pure that they consider even Redemptionists from the other Houses to be hardly better than sinners.
Unfortunately, sin infests Necromunda, especially the Underhive, and the Redemptionist councils preach total war to bring light into the obscurity of the lower levels. Many devotees from the Hive City go down into the Underhive to begin a new life and set up colonies and farms far from the most populated places (regarded as nests of sin and damnation). These isolated communities have very few dealings with the outside world, and visit the merchant trading posts only from time to time to restock.
Redemption, through its most fanatical adepts, launches "crusades" into the Underhive to purify sin with the holy fire of combat. A crusade is led by a Redemptionist priest appointed by the council and supported by adepts armed to the teeth. A crusade travels ceaselessly through the Zone, stopping from time to time at the colonies and farms of Redemption to restock. The priest preaches his sermon there, reinforcing the faith of the colonists, while his followers levy a tithe on local production or take up a collection. Then, and only then, the crusade sets out to confront evil, protecting the colonists by shooting down the mutants, sorcerers and heretics who haunt the wastes.
Following particularly bloody and notorious incidents, the Guild declared that anyone who takes part in such crusades will be considered an outlaw, to the great anger of Redemption. Above all, the outlawing of the crusaders has made them even more savage, because they no longer care about any law and, at least officially, no longer answer to Redemption. This has led to attacks on merchant caravans, and on colonies and farms whose only crime was to trade with the merchants. It goes without saying that in this case the crusade does not loot.
Redemptionist Special Rules
Outlanders. Redemptionists are Outlanders and, as such, follow the outlaw rules, except for the exceptions set out below. Being Outlanders, Redemptionists are not subject to any particular condemnation by the Guild, and can never pay a fine to lift their outlaw status.
Territories. Redemptionists begin with a territory generated on the Redemptionist Territories Table. This is their first base camp, and they can never hold more than one territory. Any other territory they capture is burnt and pillaged (see the outlaw rules for details of pillage); this is a matter of principle. Redemptionists move after each game, spreading the sacred word and continuing their pilgrimage. After collecting all the resources of the place they are leaving, the crusade rolls on the Redemptionist Territories Table to determine where its destiny will lead it in the next game.
Capturing a Redemption Territory. A crusade may suffer such a heavy defeat that the territory it has just reached is lost. If this happens, the enemy gang gains the territory and may collect its resources, as well as those of any other territory it holds. Weapon caches may also be exploited: the enemy gang has managed to drive the Redemptionists out before they discovered the cache. Remember that a weapon cache which has been used must be removed from the gang roster as soon as it is exploited.
For farms and colonies, the inhabitants will be hostile and will do everything possible to make the gang feel unwelcome, but they will not provoke any incidents. If a crusade has the chance to take a territory from a gang that holds a Redemptionist territory, it automatically chooses that territory. The bearers of the faith deserve their reward, so the crusade may collect the resources of the territory recovered, as well as those of the territory it passes through. It goes without saying that in this case the crusade does not loot.
Resources. Redemptionists collect the resources of their territory and carry out scavenging like any other outlaw gang. However, their resources are not halved as they are for other outlaws, because the local help the Redemptionists enjoy makes it easier for them to collect money.
Purchases. A crusade's weapons and equipment are often supplied by colonists with an innocent air who secretly support Redemption. This means that the Redemptionists use the tables of the official trading posts instead of those of the illegal trading posts. The crusade may recruit additional fighters after each battle.
Mercenaries. Redemptionists will never pay sinners to help them spread the light, so they never employ mercenaries. The only special character they may use is the Archdevotee.
Malnutrition. Redemptionists suffer the effects of malnutrition like anyone else. In fact, they do not detest this divine penance (nor the visions of ecstasy that extreme deprivation can bring).
Reward. Redemptionists are considered dangerous psychopaths by the merchants, who offer a reward equal to their total value, as for any outlaws.
Capture. Fighters captured by Redemptionists are offered two possibilities: repent, or die. The only way for a gang to recover captured fighters is to play the Rescue (Sauvetage) scenario against the Redemptionists. If it fails, or does not attempt the operation, the redemption priest will try to convert the prisoner, unless the prisoner is a scavvy, a mutant, a sorcerer or another heretic (see the Redemption Priest entry for the details of repentance). If the prisoner does not repent and does not accept the path of Redemption (or is corrupted beyond all hope), he or she will be burned, and his or her weapons and equipment will be confiscated by the Redemptionists.
If a Redemptionist is captured, his brothers must try to free him; they never pay ransoms or exchange prisoners. If they fail, there is a chance that the Redemptionist handed over to the merchants' court of justice, or sold as a slave, may escape with the help of a sympathiser or thanks to his fanatical zeal. Roll 1D6 for each Redemptionist handed over to the court or sold as a slave. On a result of 6, the individual escapes and rejoins the Redemptionists. A result of 1-5 means that his fate is clearly less glorious and probably shorter.
Scenarios. Redemptionists roll on the Outlaw Scenarios Table. If they are allowed to choose the scenario, they may choose it from Necromunda or from Outlanders. If you think certain scenarios are not suited to Redemptionists, do not forget that they consider all the inhabitants of the Underhive to be heretics. This means that Redemptionists have no scruples whatsoever about (a) purging the unbelievers, by killing them, and (b) financing their crusade.
Redemptionist Gang Members
Redemption Priest
Recruitment cost: 140 credits
The redemption priest is the guide of every crusade sent into the Underhive. He is the one the brothers in the depths follow to prove their faith. He is the one the colonists welcome in ecstasy, and who inspires their secret collaboration. Only the words of a redemption priest can kindle the fire of faith in a man's heart, or save the unbelievers from their impious existence.
| M | WS | BS | S | T | W | I | A | Ld |
|---|---|---|---|---|---|---|---|---|
| 4 | 4 | 4 | 3 | 3 | 1 | 4 | 1 | 8 |
Weapons. A redemption priest may receive weapons chosen from the Close Combat Weapons, Basic Weapons, Pistols, Special Weapons, Grenades and Ammunition sections of the special Redemptionist list.
Special Rules.
-
Command. A redemption priest is an absolute leader to his followers; in his presence they are filled with the fury of the righteous. This means that any Redemptionist within 6 inches of the priest may use his Leadership for any test based on Leadership. A redemption priest may always try to break free of a pin, even if no member of his gang is within 2 inches of him.
-
Repentance. If the Redemptionists capture an opponent who is not a scavvy, a mutant, an alien, a spyrer or a sorcerer (outlaws and ratskins are not necessarily beyond the reach of redemption), the redemption priest may try to convert him. The Redemptionist player rolls 2D6 and adds the priest's Command to the result. The prisoner's player rolls 2D6 and adds the Command of the captured model. If the Redemptionist's result is higher than the prisoner's, the prisoner repents. Note his characteristics, skills, experience and so on on the Redemptionist gang roster. All of the converted fighter's equipment is sold (it is too contaminated), and he is re-equipped from the gang's reserves or by buying from the Redemptionist list. The converted fighter must be represented by a Redemptionist model; the Redemptionist player may not keep the original model.
If the Redemptionist's result is lower than or equal to the prisoner's, the prisoner resists and refuses to repent. The Redemptionists kill him and keep his weapons and equipment.
-
Sacred Hatred. Before a game, the priest may try to plunge himself and his followers into a fanatical fury of hatred for the enemy. Roll 2D6. If the result is lower than or equal to the priest's Command, he and his followers are subject to the rules for Hatred against their opponents for that game. A redemption priest will automatically succeed in this test if the opposing gang includes mutants, sorcerers, aliens, spyrers, outlanders or outlaws.
Deacons
Recruitment cost: 60 credits
Deacons look after the crusade's external affairs: silencing opponents, keeping the crowd under control during sermons, serving as a close guard around the priest, and so on. They are confirmed brothers, devoted to Redemption to the point of fanaticism, and the priest places complete trust in them. Their faith is rewarded with a position of responsibility and better armament.
| M | WS | BS | S | T | W | I | A | Ld |
|---|---|---|---|---|---|---|---|---|
| 4 | 3 | 3 | 3 | 3 | 1 | 3 | 1 | 7 |
Weapons. A deacon may receive weapons chosen from the Close Combat Weapons, Basic Weapons, Pistols, Special Weapons, Grenades and Ammunition sections of the special Redemptionist list.
Faithful
Recruitment cost: Novice – 25 credits; Brother – 50 credits
The faithful are the body of Redemption, the mass of those who support it in the Hive and have joined the path of righteousness. Confirmed brothers have already spent time in the Underhive; many of them are former gangers or converted soldiers of the Houses. Novices are often ordinary workers of the Hive who come down into the Underhive for the first time, hoping that their fanatical zeal will make up for their lack of experience. The faithful are generally well equipped, but their weapons are of a more common type than those of the priests or deacons.
Novice
| M | WS | BS | S | T | W | I | A | Ld |
|---|---|---|---|---|---|---|---|---|
| 4 | 2 | 2 | 3 | 3 | 1 | 3 | 1 | 6 |
Brother
| M | WS | BS | S | T | W | I | A | Ld |
|---|---|---|---|---|---|---|---|---|
| 4 | 3 | 3 | 3 | 3 | 1 | 3 | 1 | 7 |
Weapons. The faithful may receive weapons from the Close Combat Weapons, Pistols, Basic Weapons, Grenades and Ammunition sections of the special Redemptionist list.
Special Rules. Recruitment. The faithful are the soul and heart of a Redemptionist crusade. To represent this, half of the models making up a crusade must be faithful. If their number falls below half of the members of the crusade, only faithful may be recruited, until they again make up half of the fighters.
Devotees
Recruitment cost: 60 credits
Devotees are madmen touched by the Imperial fury. They are so furious that they are continually enraged. They put their faith to the test by hurling themselves headlong into combat with the greatest sinners within reach. They also flagellate themselves to savour the pain of purification, but would rather drive the precepts of righteousness into the hearts of their enemies. Devotees carry only pistols and close combat weapons, preferring to fight their battle for the faith against the sinners at close quarters.
| M | WS | BS | S | T | W | I | A | Ld |
|---|---|---|---|---|---|---|---|---|
| 4 | 3 | 3 | 3 | 3 | 1 | 3 | 1 | 7 |
Weapons. A devotee may receive weapons chosen from the Close Combat Weapons and Pistols sections of the special Redemptionist list.
Devotees most often carry an Eviscerator, a kind of giant circular saw fitted with a reservoir of Exterminator chemicals, with which to cut up and burn the unbelievers (solely to save their souls, of course).
Special Rules. Frenzy! Devotees are subject to the rules for Frenzy. Note that this cancels the rules for Hatred, unless the frenzy is controlled by passing a Leadership test at the start of the devotee's turn. So, in a single turn, a devotee may be frenzied or subject to hatred, but not both.
Redemptionist Weapons
Weapons marked with an asterisk (*) may be fitted with an Exterminator reservoir (see the Exterminator entry below).
Basic Weapons*
| Weapon | Cost |
|---|---|
| Assault Gun | 20 |
| Shotgun (ordinary rounds or shot) | 20 |
Special Weapons*
| Weapon | Cost |
|---|---|
| Bolter | 35 |
| Flamer | 40 |
| Grenade Launcher (grenades not included) | 130 |
| Laser Gun | 25 |
| Fusion Gun | 95 |
| Plasma Gun | 70 |
Pistols
| Weapon | Cost |
|---|---|
| Machine Pistol | 15 |
| Autopistol | 10 |
| Light Flamer | 20 |
Close Combat Weapons*
| Weapon | Cost |
|---|---|
| Chain or Flail | 10 |
| Chainsword | 25 |
| Club, Mace or Axe | 10 |
| Eviscerator | 30 |
| Dagger | Free / 5 |
| Axe, Sword or Two-handed Club | 15 |
| Sword | 10 |
Exterminator Reservoir
| Item | Cost |
|---|---|
| Exterminator | 15 |
Grenades and Ammunition
| Item | Cost |
|---|---|
| Frag Grenades | 30 |
| Anti-tank Grenades | 50 |
| Killer Rounds | 5 |
| Incendiary Rounds | 5 |
| Bolts | 15 |
| Dum-dum Rounds (for Autopistol) | 5 |
Redemptionist Experience Tables
Starting Experience
| Type | Starting Experience Points |
|---|---|
| Novice | 0 |
| Brother | 20 + 1D6 |
| Devotee | 20 + 1D6 |
| Deacon | 60 + 1D6 |
| Priest | 60 + 1D6 |
Experience Table
| Experience Points | Title | Notes |
|---|---|---|
| 0-5 | Novice | Starting level of novices. |
| 6-10 | Novice | |
| 11-20 | Novice | |
| 21-30 | Brother | Starting level of brothers and devotees. |
| 31-40 | Brother | |
| 41-50 | Brother | |
| 51-60 | Brother | |
| 61-80 | Superior Brother | Starting level of priests and deacons. |
| 81-100 |
Redemptionist Advancement
Advancement Table
Roll 2D6 each time the fighter gains an advance.
| 2D6 | Result |
|---|---|
| 2 | New Skill (any table). |
| 3 | New Skill. |
| 4 | New Skill. |
| 5 | Characteristic increase. Roll 1D6: 1-3 = +1 Strength; 4-6 = +1 Attacks. |
| 6 | Characteristic increase. Roll 1D6: 1-3 = +1 Weapon Skill; 4-6 = +1 Ballistic Skill. |
| 7 | Characteristic increase. Roll 1D6: 1-3 = +1 Initiative; 4-6 = +1 Leadership. |
| 8 | Characteristic increase. Roll 1D6: 1-3 = +1 Weapon Skill; 4-6 = +1 Ballistic Skill. |
| 9 | Characteristic increase. Roll 1D6: 1-3 = +1 Wound; 4-6 = +1 Toughness. |
| 10 | New Skill. |
| 11 | New Skill. |
| 12 | New Skill (any table). |
Available Skills
| Fighter | Agility | Combat | Ferocity | Muscle | Shooting | Stealth | Tech |
|---|---|---|---|---|---|---|---|
| Novice | – | – | ✔ | – | – | – | – |
| Brother | – | – | ✔ | – | ✔ | – | – |
| Devotee | – | ✔ | ✔ | – | – | – | – |
Maximum Characteristics
| M | WS | BS | S | T | W | I | A | Ld |
|---|---|---|---|---|---|---|---|---|
| 4 | 6 | 6 | 4 | 4 | 3 | 6 | 3 | 10 |
Redemptionist Territories Table
| D66 | Territory | Resources | Description |
|---|---|---|---|
| 11-15 | Wastes | 0 | The crusade has found nothing but an abandoned burrow in the wastes, until it moves on again. |
| 16 | Tunnels | 10 | The Redemptionists find the entrance to an old network of maintenance tunnels running beneath the dome. In case of battle, the crusade may use these conduits to deploy up to three fighters anywhere on the table at ground level. The figures are placed at the end of the player's first turn, at more than 8 inches from any enemy. |
| 21-25 | Ruins | 10 | The crusade sets up camp amid ruins. If a brother or deacon is sent to search the surrounding ruins, he finds 10 credits' worth of assorted debris and decayed archeotechnology. |
| 26 | Ventilation Ducts | 10 | The Redemptionists find the entrance to an old network of ventilation ducts in the roof of the dome. In case of battle, the crusade may use these ducts to deploy up to three fighters anywhere on the table except at ground level. The figures are placed at the end of the player's first turn, at more than 8 inches from any enemy. |
| 31-36 |
Renegade Ratskins
Ratskins are normally a timid and peaceful people who tend to avoid the noisy, brutal hivers and their colonies. They never ask anything of them, and live in small communities far from the colonists and their weapons. If colonists begin to settle near a ratskin camp, the ratskins pack up and move a little further into the wastes. Ratskins find hivers strange and disconcerting, and prefer to avoid them.
Unfortunately, the peaceful philosophy of the ratskins makes them vulnerable to exploitation by unscrupulous merchants or gangs. Outlaws may loot and massacre entire camps, leaving only a few survivors seething with vengeance against all hivers. These ferocious ratskins turn their backs on their own people and become renegades, hunting down and killing the hivers they find in order to purify the Underhive of their presence.
Other ratskins go to the colonies, driven by curiosity or by the need to find work as trappers or guides, and are corrupted by contact with the hivers. The ratskins themselves repudiate such individuals and call them badskins. Badskins spend their money on alcohol and gambling until they grow bored and are expelled from the colonies for good by the Vigilantes. They cannot rejoin their people, because contact with "civilisation" has corrupted them, so they wander from place to place until they meet a band of renegades and find themselves once more among their own kind.
Ratskin Special Rules
Outlanders. Ratskins are an Outlander gang and, as such, follow all the rules applying to outlaws, except for the exceptions set out below. As Outlanders, ratskins are not subject to any particular condemnation by the Guild, and can never pay a fine to lift their outlaw status.
Territories. Ratskins begin with a territory generated on the Outlaw Territories Table. This is the renegades' camp, hidden in the wastes; they cannot normally hold several territories at the same time. Ratskins may move their camp after each game, striking the former camp from the gang roster and immediately generating a new one on the Outlaw Territories Table.
Captured Territories. Territories gained from another gang are pillaged and destroyed (see the outlaw rules for more details on pillage). However, archeotech sites are sacred to the ratskins, who will always try to drive the colonists out of them. If a gang holding an archeotech site loses a territory to the ratskins, it automatically loses this type of territory, without any need for a dice roll.
Archeotech Sites. Archeotech sites captured by the ratskins must remain intact and generate no resources. They are kept hidden and guarded, to prevent ill-intentioned colonists from disturbing the calm of the place. The only justification for ratskins holding several territories is the capture of archeotech sites, which they may keep in addition to their camp, in any number. They protect these sites by posting sentries and setting traps, and move from one to another through secret passages. Ratskins derive no direct benefit from holding archeotech sites, but these particular places attract the favour of the spirits of the Hive (see the Ratskin Shaman below).
Resources. Ratskins collect the resources of their sole territory, like any other outlaw gang. They may also carry out scavenging, and in this field they are more efficient than ordinary outlaws: they add +1 to the result of their scavenging roll.
Purchases. Ratskins use the Illegal Trading Posts table.
Mercenaries. Ratskins may hire mercenaries of all types.
Malnutrition. Ratskins suffer the effects of malnutrition like anyone else; they simply find food a little more easily than others.
Reward. Renegade ratskins are considered dangerous by the merchants, who offer a reward equal to their total value, as for all outlaws.
Capture. No special rule applies to a captured ratskin, or to a fighter captured by ratskins.
Scenarios. Ratskins roll on the Outlaw Scenarios Table, but may add or subtract up to 2 from the result. If the opposing gang has a ratskin tracker (pisteur ratskin) in its ranks, the modifier is reduced to +1 or -1. If the renegades are allowed to choose the scenario, they may choose it from those offered in Necromunda or in Outlanders.
Ratskin Gang Members
Sachem Ratskin
Recruitment cost: 120 credits
A ratskin does not become a sachem by birth; he is chosen by his elders and peers. He is always a talented warrior, a great leader of men, and knows the ways of the Underhive perfectly. Some renegade sachems are inspired by a fanatical hatred of the hivers who defile their land; others have a few sympathies for the colonists who have been expelled, and will even help them, although they would prefer them gone. A sachem's words are always listened to with respect, even once he has become a renegade, and braves and warriors join him for the honour of fighting at his side.
| M | WS | BS | S | T | W | I | A | Ld |
|---|---|---|---|---|---|---|---|---|
| 4 | 4 | 4 | 3 | 3 | 1 | 4 | 1 | 8 |
Weapons. A sachem may be equipped with weapons from the Close Combat Weapons, Ranged Weapons, Special Weapons, Grenades and Ammunition sections of the special Ratskin list.
Equipment. A ratskin sachem may be equipped with a Vial of Serpent Spirit for 20 credits.
Special Rules.
- Command. A ratskin chief inspires respect in his men, and they are motivated by his presence. This means that any ratskin within 6 inches of the chief may use his Leadership for any test based on Leadership. A ratskin chief may always try to break free of a pin, even if no friend is within 2 inches of him.
- Resilient. Ratskins are very resistant to wounds and have a well-developed instinct for survival. They are less likely than others to get lost or be captured and, if they are wounded, they hide more easily. To represent this greater resilience, a ratskin who is out of action makes two rolls on the Serious Injury table, and the player chooses the result he prefers.
- Native. Ratskins are at home in the lower levels of the Hive. They are born and live in conditions unimaginable to outsiders. They feel so much at ease in the Underhive that they are totally immune to the effects of the Random Events Table (see later). They can track their adversaries even in fog or thick darkness thanks to their very keen hearing, and can always find their way through bottomless pits of viscous substances or pools of boiling toxic liquid. They are never attacked by wild creatures, and always avoid acid rain, cave-ins, hive tremors and so on.
Ratskin Shaman
0-1 per gang. Recruitment cost: 120 credits
Ratskin shamans are mysterious individuals, rarely met outside ratskin enclaves. Rumour places them living in hidden caverns, amid archeotech sites, watching over these sacred places filled with ancient science. It is said that shamans have supernatural powers which, according to them, come from the spirits of the Hive: a powerful and mysterious magic, even for wyrds or psykers. A shaman whose cavern has been desecrated may join a ratskin sachem to avenge the guilty, or may be led by his visions to another place in need of protection.
| M | WS | BS | S | T | W | I | A | Ld |
|---|---|---|---|---|---|---|---|---|
| 4 | 3 | 3 | 3 | 4 | 1 | 4 | 1 | 7 |
Weapons. A shaman may be equipped with weapons from the Close Combat Weapons, Ranged Weapons, Special Weapons, Grenades and Ammunition sections of the special Ratskin list.
Equipment. A ratskin shaman may be equipped with a Vial of Serpent Spirit for 20 credits.
Special Rules.
-
Great Spirits (Grands Esprits). The shaman is in communication with the spirits of the Hive and can call upon their help. When you recruit the shaman, make a roll for him on the Great Spirits Powers Table. Each archeotech site controlled by the ratskins attracts the favour of the spirits to them and grants the shaman another power. If an archeotech site is lost, the shaman randomly loses one of his powers, the spirits thus showing their displeasure.
The Great Spirits Powers Table is given at the end of the ratskin section.
-
Resilient. As for the Sachem Ratskin above.
-
Native. As for the Sachem Ratskin above.
Any Number of Ratskin Braves
Recruitment cost: 35 credits
Braves are young warriors who follow the sachem into the wastes in search of an exciting and glorious life. Ratskin communities always have a number of young people discontented with the calm, peaceful life dictated by the elders, and they quickly join a chief who confronts the hivers. Braves are inexperienced but already experts at survival in the perilous Underhive. Their determination to prove themselves in action makes them ferocious and bloodthirsty warriors, as feared by the gangs as by the colonists.
| M | WS | BS | S | T | W | I | A | Ld |
|---|---|---|---|---|---|---|---|---|
| 4 | 2 | 2 | 3 | 3 | 1 | 3 | 1 | 6 |
Weapons. Braves may receive any weapon from the Close Combat Weapons and Ranged Weapons sections of the special Ratskin list.
Equipment. A ratskin brave may be equipped with a Vial of Serpent Spirit for 20 credits.
Special Rules.
- Resilient. As for the Sachem Ratskin above.
- Native. As for the Sachem Ratskin above.
Any Number of Ratskin Hunters
Recruitment cost: 60 credits
Ratskins are warriors and hunters. Many of those who follow the renegade chiefs are embittered. Some are dispossessed, their family or clan having been killed or plundered by outlaws or greedy hivers. Others have been exploited through their work in the colonies and suffer the condescension of the hivers towards their culture.
| M | WS | BS | S | T | W | I | A | Ld |
|---|---|---|---|---|---|---|---|---|
| 4 | 3 | 3 | 3 | 3 | 1 | 3 | 1 | 7 |
Weapons. Ratskin hunters may receive any weapon from the Close Combat Weapons, Ranged Weapons and Special Weapons sections of the special Ratskin list.
Equipment. A ratskin hunter may be equipped with a Vial of Serpent Spirit for 20 credits.
Special Rules.
- Resilient. As for the Sachem Ratskin above.
- Native. As for the Sachem Ratskin above.
Ratskin Weapons
Ranged Weapons (cost in credits)
| Weapon | Cost |
|---|---|
| Machine Pistol | 15 |
| Blunderbuss | 8 |
| Hand Crossbow | 5 |
| Musket | 6 |
| Autopistol | 10 |
Special Weapons (cost in credits)
| Weapon | Cost |
|---|---|
| Shotgun (ordinary rounds and shot) | 20 |
| Assault Gun | 20 |
| Laser Gun | 25 |
Close Combat Weapons (cost in credits)
| Weapon | Cost |
|---|---|
| Club, Mace or Axe | Free / 10* |
| Chain or Flail | 5 |
| Axe, Sword or Two-handed Club | 10 |
| Dagger | Free |
| Sword | 15 |
* The first club, mace or axe of a ratskin is free. If the ratskin is equipped with an additional weapon of this type, it costs 10 credits.
Grenades and Ammunition (cost in credits)
| Item | Cost |
|---|---|
| Frag Grenades | 30 |
| Killer Rounds | 5 |
| Incendiary Rounds | 5 |
| Bolts | 15 |
| Dum-dum Rounds (for Autopistol) | 15 |
Ratskin Experience Tables
Starting Experience
| Type | Starting Experience Points |
|---|---|
| Brave | 0 |
| Hunter | 20 + 1D6 |
| Shaman | 60 + 1D6 |
| Sachem | 60 + 1D6 |
Experience Table
| Experience Points | Title | Notes |
|---|---|---|
| 0-5 | Brave | Starting level of braves. |
| 6-10 | Brave | |
| 11-20 | Brave | |
| 21-30 | Hunter | Starting level of hunters. When a brave reaches the level that makes him a hunter, he may receive weapons chosen from the Ratskin Special Weapons list. |
| 31-40 | Hunter | |
| 41-50 | Hunter | |
| 51-60 | Hunter | |
| 61-80 | Warrior | Starting level of sachems and shamans. |
Advancement Table
Roll 2D6 each time the fighter gains an advance.
| 2D6 | Result |
|---|---|
| 2 | New Skill (any table). |
| 3 | New Skill. |
| 4 | New Skill. |
| 5 | Characteristic increase. Roll 1D6: 1-3 = +1 Strength; 4-6 = +1 Attacks. |
| 6 | Characteristic increase. Roll 1D6: 1-3 = +1 Weapon Skill; 4-6 = +1 Ballistic Skill. |
| 7 | Characteristic increase. Roll 1D6: 1-3 = +1 Initiative; 4-6 = +1 Leadership. |
| 8 | Characteristic increase. Roll 1D6: 1-3 = +1 Weapon Skill; 4-6 = +1 Ballistic Skill. |
| 9 | Characteristic increase. Roll 1D6: 1-3 = +1 Wound; 4-6 = +1 Toughness. |
| 10 | New Skill. |
| 11 | New Skill. |
| 12 | New Skill (any table). |
Available Skills
| Fighter | Agility | Combat | Ferocity | Muscle | Shooting | Stealth | Tech |
|---|---|---|---|---|---|---|---|
| Brave | ✔ | – | – | – | – | ✔ | – |
| Hunter | ✔ | ✔ | – | – | – | ✔ | – |
| Shaman | ✔ | ✔ | ✔ | – | – | ✔ | – |
Maximum Characteristics
| M | WS | BS | S | T | W | I | A | Ld |
|---|---|---|---|---|---|---|---|---|
| 4 | 6 | 6 | 4 | 4 | 3 | 6 | 3 | 9 |
Great Spirits Powers
When a shaman is recruited, roll 1D6 on the table below.
| D6 | Power |
|---|---|
| 1 | Mud Dance (Danse de la Vase). The shaman may ask the spirits of the Hive to raise fog, create mud ponds, creatures and other such things. When a roll is made at the start of the game to determine random events, the shaman may re-roll that roll if he first succeeds on a Leadership test with 2D6. |
| 2 | Curse (Malédiction). The shaman may call the curse of the Hive spirits down upon the enemy gang. If he succeeds on a Leadership test with 2D6 at the start of his turn, he then dances and chants for the rest of that turn (that is, he stays in place, does not shoot and does not fight in close combat), and he may cast a curse. The curse lasts for the whole ratskin turn and the opponent's following turn. It affects the entire enemy gang and automatically causes all of its fighters to fail any Initiative test until the start of the next ratskin turn. If the shaman is pinned, wounded or engaged in close combat, the curse ends immediately. |
| 3 | Ghost Dance (Danse des Fantômes). The shaman may ask the spirits of the Hive to protect the ratskins. If he succeeds on a Leadership test with 2D6 at the start of his turn, he then dances and chants for the rest of that turn (that is, he stays in place, does not shoot and does not fight in close combat), and he may set up a protection. It lasts for the whole ratskin turn and the opponent's following turn. The protection affects all ratskins and gives them a save of 4+ until the start of the next ratskin turn. This save is subject to all normal modifiers. If the shaman is pinned, wounded or engaged in close combat, the effects of the dance end immediately. |
| 4 | Ritual of the Blind Serpent (Rituel du Serpent Aveugle). After each game, the shaman may perform the ritual of the blind serpent. If he succeeds on a Leadership test with 2D6, he makes a vial of Serpent Spirit free of charge, which may either be given to a member of the band or sold at an illegal trading post for 30 credits. |
Spyrer Hunters
Even in this nightmare that is the Underhive, nobody speaks of the spyrers without a shudder. Parents send their children to bed threatening them with this name, and adults fall silent when they hear the tales of their attacks. For the inhabitants of the Underhive, they are blood-thirsty demons from the darkness, who fall upon gangs in conflict without remorse or pity.
These creatures are neither demons nor ghosts, as the inhabitants of the Underhive know all too well. They are the sons and daughters of the Noble Houses who run the Primus Hive and all of Necromunda from the heights of the Spire (also called the Spyre). These young men and women of noble blood are sent into this purgatory to prove their endurance, to test their resources and to show themselves worthy of their place among the ruling families. In a hive of billions of souls, only the most dynamic and the most pitiless individuals can hope to play a role there, or simply survive.
Spyrers are sent in groups beyond the Wall. Once in the Underhive, they cannot count on any help, financial support or resources: only the equipment they brought with them and their own gifts can help them survive. Of course, a hunting suit is not an ordinary armour. They use ritual combinations of weapons and armour favouring different styles of combat. Each suit is meticulously assembled outside the world, a marvellous object using technologies that are half forgotten and worth their weight in credits.
The armour has automatic maintenance, repair and built-in weapon systems and, most importantly of all, power boosters that are activated as the user masters each subtlety of the armour. These boosters make each spyrer evolve in a different way, creating over the course of the hunts a group of powerful and versatile individuals.
A spyrer team can only recross the Wall once its objectives have been achieved, which may be the killing of half a dozen warriors of the Underhive, surviving in the wastes for a given period or other tasks. Their combat suits record everything that happens in the depths and verify the abilities of the user, so no cheating is possible. Spyrers must succeed in their quest or die. They are feared and hated in the Underhive, but in the Spire they will be feted on their return, and the survivors of the team will take back the place that is theirs within the elite of the Spire of the Primus Hive.
Special Rules
The Vow (Le Vœu). A spyrer team must accomplish a particular task during its stay in the Underhive. The spyrers' vow must be made when the team is formed, and must be chosen from the following:
A) Kill a total of enemy fighters equal to the number of members of the team at the start. If the team has six members, they must kill six enemies (a result of 11 to 16 on the Serious Injury table) before recrossing the Wall.
Or
B) Gain a total of 200 experience points for each member of the team at the start. If the team has five members, it must gain a total of 1000 experience points before recrossing the Wall.
Or
C) Survive a total of two games for each member of the team at the start. If the team has four members, they must survive a total of eight games before recrossing the Wall.
Outlanders. Spyrers are Outlanders and, as such, follow all the rules that apply to outlaws, except for the exceptions set out below. As Outlanders, spyrers are not under the condemnation of the Guild and can never pay a fine to lift their outlaw status.
Starting Territory. Spyrers begin with a territory generated on the Outlaw Territories Table. This is their base camp. Spyrers may move their camp to another territory if they capture one, but they can never hold more than one at a time. If the spyrers lose their current camp, generate another territory on the Outlaw Territories Table.
Income. Spyrers never collect income, and can never recruit additional members after the initial recruitment. They remain in the Underhive until they have accomplished their vow.
Malnutrition. Spyrers feed on synthetic reserves built into their armour, so they are not subject to the effects of malnutrition.
Capture. Fighters captured by spyrers are transformed into ornaments for their armour. Spyrers are not interested in ransoms or exchanges. The only way for a gang to recover a captured fighter is to play the Rescue scenario against the spyrers. The spyrers adore using prisoners as bait for their traps. Captured spyrers can only hope for death. Their companions will never attempt a rescue, and they can expect no ransom money from the Spire. A captured spyrer is automatically killed, and the normal reward is claimed for him. The weapons and equipment of spyrers can never be used by non-spyrers.
Power Boosters (Stimulateurs de Puissance). The power boosters of spyrer armour come into play as soon as the hunter begins to kill and gains experience points in combat. They work by increasing the quantity of energy supplied to the weapon systems, making them more powerful; by improving the cybernetic systems, making the user ever stronger and faster; by thickening the armour cells to improve protection; and so on. Power boosters, like skills and characteristic increases, can only be obtained through experience points.
Chief. A spyrer team has no clear chief. The chief is whichever member has the best hunting record at the moment, or who has the best ideas for leading the group. In game terms, rout tests are taken on the highest Leadership in the team (provided that member is neither knocked down nor out of action). In some scenarios a bonus of experience points goes to the winning gang leader; for spyrers, this bonus goes to the member with the highest Leadership value taking part in the game.
Blockade (Blocage). Spyrers are in constant communication with each other, and are highly motivated. This means that a pinned spyrer is always allowed to try to break free of the pin at the start of his turn, even if no other spyrer is within 2 inches of him.
Scenarios. Spyrers roll on the ordinary Scenario Table, not on the Outlaw Scenario Table. If they are allowed to choose the scenario, they may choose only from the following:
- Standard scenarios: Empoignade (Brawl), Ambush (Embuscade), Lightning Attack (Attaque Éclair), Raid.
- Outlaw scenario: The Plot (Le Complot).
Returning from the Underhive. Once the team has returned beyond the Wall, it breaks up, and each hunter devotes himself to his new life within the Noble Houses. Many, however, take a liking to this exciting and bloody hunt, and go back down into the Underhive with another team. Veteran hunters may therefore be recruited when you form a new team after your old one has accomplished its vow and returned beyond the Wall. A veteran costs his base value (not counting credits spent on training) plus 1 credit for each experience point he has gained. The same hunter may therefore make several stays in the Underhive.
Spyrer Gang Members
Jakara
Recruitment cost: 190 credits
| M | WS | BS | S | T | W | I | A | Ld |
|---|---|---|---|---|---|---|---|---|
| 5 | 4 | 3 | 3 | 3 | 1 | 3 | 1 | 7 |
Weapons. The jakara armour is equipped with a monomolecular sword and a mirror shield. The shield allows the user to parry in close combat. If the mirror shield is hit by an energy attack (laser, plasma or fusion), the jakara may immediately reflect that attack. Make a roll to hit using the jakara's Ballistic Skill. If the shot hits, determine the damage using the profile of the weapon that made the original attack.
Armour. The jakara armour gives its user the following characteristics: Movement +1, Weapon Skill +1. These improvements are already included in the profile of the jakara hunter given above.
The jakara armour also gives an armour save of 5+ on 1D6. The mirror shield gives the jakara an additional save of 4+ on 1D6 against attacks coming from a 90 degree arc in front of the user. The shield save is not subject to modifiers, and is always 4+.
Equipment. A jakara spyrer is equipped with a bio-booster, a cerebral microprocessor, respirator filters, and contact lenses or a photo-visor.
Yeld
Recruitment cost: 170 credits
The yeld is the strangest of the spyrer hunters. It is a winged being with chameleon-metal feathers and laser claws. When its wings are not in use, the yeld folds them to form a metal envelope and reveals the laser tubes of its main armament. The edges of the wings are as sharp as razors and can cut a victim in two. When the yeld needs discretion, it wraps itself in its wings, which take on the appearance of the environment, hiding the spyrer from the sight of the adversary until it chooses to strike again.
| M | WS | BS | S | T | W | I | A | Ld |
|---|---|---|---|---|---|---|---|---|
| 5 | 3 | 4 | 3 | 3 | 1 | 3 | 1 | 7 |
Weapons. The yeld armour is equipped with laser gauntlets.
Armour. The yeld armour gives its user the following characteristics: Movement +1, Ballistic Skill +1. These improvements are already included in the profile of the yeld hunter given above.
The yeld armour also gives an armour save of 5+ on 1D6. It also carries the yeld's wings, which are described in the New Equipment section.
Equipment. A yeld spyrer is equipped with a bio-booster, respirator filters or a respirator, and contact lenses or a photo-visor.
Malcadon
Recruitment cost: 165 credits
The malcadons are cunning and subtle hunters, who trap their victims in nets of armoured mesh, as strong as steel, before tearing them apart with their metal claws. Two bulbous reservoirs used to create the web are mounted on the arms of the armour and connected to a network of tubes on the malcadon's back. The limbs and back of the malcadon are covered in plates and overlapping spikes turned downwards. Its arms and legs are fitted with hydraulic pistons which allow it to climb supplely and make fantastic leaps, so it can move quickly among the pipes and broken girders which make up the vault of the Underhive.
| M | WS | BS | S | T | W | I | A | Ld |
|---|---|---|---|---|---|---|---|---|
| 6 | 4 | 3 | 3 | 3 | 1 | 4 | 1 | 7 |
Weapons. The malcadon is equipped with a web spitter (crache-toile).
Armour. The malcadon armour gives its user the following characteristics: Movement +2, Weapon Skill +1, Initiative +1. These improvements are already included in the profile of the malcadon hunter given above.
The malcadon armour also gives an armour save of 5+ on 1D6.
Equipment. A malcadon spyrer is equipped with a bio-booster, respirator filters or a respirator, and contact lenses or a photo-visor.
Orrus
Recruitment cost: 185 credits
The orrus is the most brutal aspect of the spyrer hunters. Its energy arms, with their deliberately oversized proportions, speak volumes about its combat methods: crushing its adversaries and turning them to mincemeat. Rows of armoured pistons drive its arms, and its hands are fitted with cutting claws; a row of bolt-lances along the back of its wrists serves to destroy the enemy at range. Although it is the slowest of the spyrers, the orrus is also the hardest to defeat. Not only are its arms and shoulders heavily armoured, but a force field also protects it in its fierce charges.
| M | WS | BS | S | T | W | I | A | Ld |
|---|---|---|---|---|---|---|---|---|
| 4 | 4 | 3 | 4 | 3 | 1 | 3 | 2 | 7 |
Weapons. The orrus armour is equipped with two crusher gauntlets, each fitted with a bolt-lance.
Armour. The orrus armour gives its user the following characteristics: Weapon Skill +1, Strength +1, Attacks +1. These improvements are already included in the profile of the orrus hunter given above.
The orrus armour also gives an armour save of 4+ on 1D6, and it is protected by a force field which gives a save of 6+ on 1D6 against shooting. The force field save is not subject to modifiers, so it is always 6+.
Equipment. An orrus spyrer is equipped with a bio-booster, respirator filters or a respirator, and contact lenses or a photo-visor.
Spyrer Experience Tables
Starting Experience. All spyrer hunters begin at level 0 (Young Hunter).
Training. Spyrer gangs may buy experience points at the start, representing the time spent in the training arenas of the Spire. Each D6 of experience costs 10 credits, and all the credits spent on experience must be paid before the roll is made. The cost of this training is added to the spyrer's base value. It is quite possible for a spyrer to begin his career with one or more progressions due to his training. These are determined by making rolls on the tables below.
Experience Table
| Experience Points | Title | Notes |
|---|---|---|
| 0-5 | Young Hunter | Starting level of spyrers. |
| 6-10 | Young Hunter | |
| 11-20 | Young Hunter | |
| 21-30 | Hunter | |
| 31-40 | Hunter | |
| 41-50 | Hunter | |
| 51-60 | Hunter | |
| 61-80 | Tracker | |
| 81-100 |
Maximum Characteristics
| Hunter | M | WS | BS | S | T | W | I | A | Ld |
|---|---|---|---|---|---|---|---|---|---|
| Orrus | 4 | 7 | 6 | 6 | 5 | 3 | 5 | 4 | 9 |
| Malcadon | 8 | 7 | 6 | 5 | 4 | 3 | 6 | 3 | 9 |
| Yeld | 8 |
Spyrer Progressions and Power Boosters
Each spyrer type has its own progression table and its own Power Booster table. A progression result of "Power Booster" means that the spyrer gains a power booster: roll 1D6 on the booster table of his type. Each time a booster is activated, its effect applies; the effect is cumulative with the results obtained earlier. Power boosters can only be obtained through experience.
Orrus
Progressions (roll 2D6)
| 2D6 | Result |
|---|---|
| 2 | Orrus Power Booster. |
| 3 | Combat skill. |
| 4 | Ferocity skill (re-roll if you obtain Iron Will (Volonté de Fer)). |
| 5 | Characteristic increase. Re-roll: 1-2 = +1 Initiative; 3-6 = +1 Leadership. |
| 6 | Characteristic increase. Re-roll: 1-2 = +1 Ballistic Skill; 3-6 = +1 Weapon Skill. |
| 7 | Characteristic increase. Re-roll: 1-4 = +1 Strength; 5-6 = +1 Attacks. |
| 8 | Characteristic increase. Re-roll: 1-3 = +1 Wound; 4-6 = +1 Toughness. |
| 9 | Muscle skill (re-roll if you obtain Big Arms (Gros Bras)). |
| 10-12 | Orrus Power Booster. |
Orrus Power Booster (roll 1D6)
| D6 | Result |
|---|---|
| 6 | Sustained Fire Bolt-Lances (Lance-Bolts à Tir Soutenu). New ammunition becomes available, allowing the arms to fire a sustained burst. Each bolt-lance gains one die of Sustained Fire. The maximum number of dice is 2 per bolt-lance. |
| 5 | Reinforced Force Field (Champ de Force Renforcé). The save roll of the force field is improved by +1, so the first time this booster is activated the save passes from 6+ to 5+. The best save the force field can provide is 2+. |
| 4 | Combat Neurons (Neurones de Combat). The suit adds new neural connections that improve the user's combat skills. You may make a roll to obtain a new skill from any Skill table, or increase a characteristic of your choice by 1 point. |
| 3 | Reinforced Armour (Armure Renforcée). The plating of the armour is thicker and more resistant, and its save is improved by +1, so the first time this booster is activated the save passes from 4+ to 3+. The best save the armour can provide is 2+. |
| 2 | Heavy Bolt Supply (Approvisionnement en Bolts Lourds). The bolts fired by the suit's lance-launchers explode with more violence on impact. The first time this booster is activated, their Strength becomes 5; the second time, their save modifier becomes -2; and the third time, the number of wounds they inflict becomes D3. |
Malcadon
Progressions (roll 2D6)
| 2D6 | Result |
|---|---|
| 2 | Malcadon Power Booster. |
| 3 | Ferocity skill (re-roll if you obtain Iron Will). |
| 4 | Stealth skill (Discrétion). |
| 5 | Characteristic increase. Re-roll: 1-4 = +1 Initiative; 5-6 = +1 Leadership. |
| 6 | Characteristic increase. Re-roll: 1-3 = +1 Ballistic Skill; 4-6 = +1 Weapon Skill. |
| 7 | Characteristic increase. Re-roll: 1-3 = +1 Strength; 4-6 = +1 Attacks. |
| 8 | Characteristic increase. Re-roll: 1-3 = +1 Wound; 4-6 = +1 Toughness. |
| 9 | Agility skill (re-roll if you obtain Lightning Reflexes (Réflexes Foudroyants)). |
| 10-12 | Malcadon Power Booster. |
Malcadon Power Booster (roll 1D6)
| D6 | Result |
|---|---|
| 6 | Web Spitter (Crache-Toile). The openings of the web spitter change to allow it to fire over a wider area. The first activation makes the web spitter fire on a 1 inch template, the second on a 1.5 inch template and the third on a 2 inch template. |
| 5 | Toxin Pouches (Poches de Toxine). Insidious synthetic neurotoxins from the suit, made from pollutants found in the wastes, coat the filaments. The malcadon's Strength in close combat is increased by +1 each time this booster is activated, to a maximum of +3. |
| 4 | Combat Neurons (Neurones de Combat). As for the Orrus booster of the same name. |
| 3 | Reinforced Armour (Armure Renforcée). As for the Orrus booster of the same name: the save passes from 4+ to 3+ the first time, and the best save the armour can provide is 2+. |
| 2 | Reinforced Motive Energy (Énergie Motrice Renforcée). The power supply to the armour's motor systems is improved, increasing its speed of movement. Add +1 to the spyrer's Movement each time this booster is activated. |
| 1 | Improved Range (). The range of the web spitter is increased by 2 inches, to a maximum of 18 inches. |
Yeld
Progressions (roll 2D6)
| 2D6 | Result |
|---|---|
| 2 | Yeld Power Booster. |
| 3 | Combat skill. |
| 4 | Stealth skill (Discrétion). |
| 5 | Characteristic increase. Re-roll: 1-4 = +1 Initiative; 5-6 = +1 Leadership. |
| 6 | Characteristic increase. Re-roll: 1-2 = +1 Strength; 3-6 = +1 Attacks. |
| 7 | Characteristic increase. Re-roll: 1-4 = +1 Ballistic Skill; 5-6 = +1 Weapon Skill. |
| 8 | Characteristic increase. Re-roll: 1-4 = +1 Wound; 5-6 = +1 Toughness. |
| 9 | Shooting skill (re-roll if you obtain Pistolero). |
| 10-12 | Yeld Power Booster. |
Yeld Power Booster (roll 1D6)
| D6 | Result |
|---|---|
| 6 | Overcharged Lasers (Lasers Sur-alimentés). New power circuits are connected to allow the weapons to fire sustained bursts. The yeld's lasers gain one die of Sustained Fire. The maximum number of dice obtained in this way is 3. |
| 5 | Razor-edged Wings (Bords des Ailes Tranchants). The edges of the wings become ever sharper, losing molecules. The yeld's Strength in close combat is increased by +1 each time this booster is activated, to a maximum of +3. |
| 4 | Combat Neurons (Neurones de Combat). As for the Orrus booster of the same name. |
| 3 | Improved Chameleon Powers (Pouvoirs Caméléons Améliorés). The chameleon circuits of the yeld's wings become faster and more effective. The first activation gives a -1 modifier to hit the yeld at short range; the second gives -2 at long range; the third gives -2 at short range. |
| 2 | Improved Wings (Ailes Améliorées). New power circuits are connected to allow the wings to work better. Add +1 to the spyrer's Movement each time this booster is activated. |
| 1 | Super-powerful Lasers (). The lasers of the armour become more concentrated and more devastating. The first activation gives them Strength 4; the second gives them a save modifier of -2; the third gives them Strength 5. |
Jakara
Progressions (roll 2D6)
| 2D6 | Result |
|---|---|
| 2 | Jakara Power Booster. |
| 3 | Stealth skill (Discrétion). |
| 4 | Combat skill. |
| 5 | Characteristic increase. Re-roll: 1-4 = +1 Initiative; 5-6 = +1 Leadership. |
| 6 | Characteristic increase. Re-roll: 1 = +1 Ballistic Skill; 2-6 = +1 Weapon Skill. |
| 7 | Characteristic increase. Re-roll: 1 = +1 Strength; 2-6 = +1 Attacks. |
| 8 | Characteristic increase. Re-roll: 1-3 = +1 Wound; 4-6 = +1 Toughness. |
| 9 | Agility skill (re-roll if you obtain Lightning Reflexes). |
| 10-12 | Jakara Power Booster. |
Jakara Power Booster (roll 1D6)
| D6 | Result |
|---|---|
| 6 | Improved Reflexes (Réflexes Améliorés). The reaction speed of the armour is incredibly increased, and the jakara can swing its shield to protect itself from enemies arriving from different directions. The first activation allows the spyrer to pivot 45 degrees during the enemy's movement phase; the second allows a 90 degree pivot; the third a 180 degree pivot. |
| 5 | Sharpened Monosword (Mono Épée Effilée). Molecules disappear from the blade to make the sword even sharper. The jakara's Strength in close combat is increased by +1 with each activation, to a maximum of +3. |
| 4 | Combat Neurons (Neurones de Combat). As for the Orrus booster of the same name. |
| 3 | Improved Mirror Shield (Bouclier Miroir Amélioré). The shield is improved and becomes capable of absorbing different energies. The first activation allows the shield to reflect kinetic-energy projectiles (shells, missiles and so on) as well as energy weapons. The second activation improves the shield save to 3+, and the third allows the user to split the Strength of an attack reflected by the shield between two targets, making a roll to hit for each target. |
| 2 | Reinforced Motive Energy (Énergie Motrice Renforcée). As for the Malcadon booster of the same name: add +1 to the spyrer's Movement each time this booster is activated. |
New Weapons
Slave Weapons
Slave weapons, as their name suggests, are used by slaves. Slaves are a new type of mercenary, described later.
Drill (Perceuse). This weapon, originally intended for work in the mines, is terrifying in close combat. If the slave inflicts two or more hits in close combat, it exchanges these hits for a single one, whose Strength and damage are increased. The bonuses to Strength and damage are +1 for each hit accumulated from the second onwards. Two hits are therefore exchanged for one hit of Strength 5 causing 2 wounds, three hits for one hit of Strength 6 causing 3 wounds, and so on.
| Range (Short / Long) | To Hit (Short / Long) | Strength | Damage | Save Mod. | Ammo |
|---|---|---|---|---|---|
| Close combat | – | 4 | 1 | -3 | – |
Special: see above.
Pincers (Pince). A slave armed with pincers may lift its opponent and throw it, in addition to the normal close combat hit, if it wins the close combat. The loser is thrown a distance of 1D6 inches in the direction chosen by the slave. The thrown figure suffers a hit whose Strength is equal to half the throwing distance (rounded up to the next unit). If it hits a wall or other construction, it stops. If it hits another figure, both suffer a hit whose Strength is equal to half the distance of the throw. If the figure is thrown from a building, use the normal rules for falls to determine the damage.
| Range (Short / Long) | To Hit (Short / Long) | Strength | Damage | Save Mod. | Ammo |
|---|---|---|---|---|---|
| Close combat | – | 4 | 1 | -1 | – |
Special: see above.
Scythe Blades (Lames de Faux). Enormous scythe blades are often adapted to slaves to mow down mushrooms and tear off sheets of metal. They are also capable of severing a man. If the slave hits its opponent in close combat, re-roll any die that scores a 6 to wound. If the second roll also scores a 6, the victim is decapitated unless it passes its armour save (or dodge test). A model suffering this grim fate is automatically killed, and it is not rolled for on the Serious Injury table. Note that the model cannot be revived by the Healer skill, a medipac or any other means.
| Range (Short / Long) | To Hit (Short / Long) | Strength | Damage | Save Mod. | Ammo |
|---|---|---|---|---|---|
| Close combat | – | 4 | 1 | -1 | – |
Special: see above.
Circular Saw (Scie Circulaire). Circular saws are given to slave metalworkers and gladiators, who do not really go in for subtlety. It is a serrated metal disc that spins at high speed and can cut through metal as easily as through flesh in a single movement.
| Range (Short / Long) | To Hit (Short / Long) | Strength | Damage | Save Mod. | Ammo |
|---|---|---|---|---|---|
| Close combat | – | 5 | 1 | -2 | – |
Special: none.
Chainsaw (Tronçonneuse). Chainsaws are very popular with gladiators, especially since the chief slave Gorg the Stuffer. A chainsaw is generally fixed to the end of a wrist or in place of a forearm, but the infamous Harkan Vore had his lower jaw replaced by a chainsaw! As this weapon is fairly long, sharp and easy to handle, its user may also use it to parry in close combat.
| Range (Short / Long) | To Hit (Short / Long) | Strength | Damage | Save Mod. | Ammo |
|---|---|---|---|---|---|
| Close combat | – | 4 | 1 | -1 | – |
Special: Parry.
Hammer (Marteau). Giant hammers are adapted to slaves of the mines and foundries. The force of a pneumatic hammer is such that an opponent in close combat may be knocked to the ground before it has the slightest chance to counter-attack. Any combatant facing a slave armed with a hammer sees its Weapon Skill halved (rounding down), unless it passes a roll of 1D6 under its Initiative.
| Range (Short / Long) | To Hit (Short / Long) | Strength | Damage | Save Mod. | Ammo |
|---|---|---|---|---|---|
| Close combat | – | 4 | 1 | -1 | – |
Special: none.
Close Combat Weapons
Eviscerator (Éviscérateur). The eviscerator is an enormous two-handed chainsaw, very much in vogue among the fanatics of Redemption. The double rows of opposed teeth of an eviscerator can even cut through the carapace and bones of the toughest mutants, reducing an enemy to pieces in a single movement. The size and weight of this weapon mean that it can only be wielded in two hands, and even then its user is limited to large movements.
Special Rules. The eviscerator is so heavy and dangerous that it cannot be parried. However, this weapon does not encourage a technique of finesse: a figure equipped with an eviscerator automatically loses the close combat and suffers a wound, regardless of the combatants' Initiative.
| Range (Short / Long) | To Hit (Short / Long) | Strength | Damage | Save Mod. | Ammo |
|---|---|---|---|---|---|
| Close combat | – | User +3 | D3 | -3 | – |
Special: parry impossible.
Basic Weapons
Exterminator (Exterminateur). Only the fanatics of Redemption use exterminators, especially novice brothers who are more enthusiastic than skilled at shooting. An exterminator is not really a separate weapon; it is more like a hose connected to a small fuel reservoir. It is fixed beneath a basic weapon, such as an assault gun or a shotgun, giving the combatant the possibility of a single shot from a flamer at short range.
Special Rules. An exterminator may be attached to a basic, special or close combat weapon (in which case the projection system is fixed to the weapon and is carried as part of it). An exterminator cannot be fixed to a pistol.
During the Shooting phase, a figure may use the exterminator in place of the weapon to which it is attached. The effects of an exterminator are identical to those caused by a normal flamer.
Single Shot Weapon. The exterminator contains enough liquid for one single shot. Once used, it is out of ammunition for the rest of the game.
Template. The jet of flame is represented by the largest teardrop-shaped template. Place the template so that its point touches the firing figure's target and the rest of it covers one or more targets. Any figure wholly covered is automatically hit; any figure partially covered is hit on a 4+ on 1D6.
Catching Fire (Prendre Feu). If a figure hit by a jet of flame is knocked down or put out of action, it suffers no further effect: the flames have absorbed the whole impact in one blow. If the figure is put out of action and the flames are still burning, the flames go out without further effects. If the target is hit but is neither knocked down nor put out of action, roll 1D6 immediately to determine whether it catches fire. On a result of 1-3, the target does not catch fire and there is no further effect. On a result of 4+, the target catches fire.
A figure that has caught fire continues to burn until the flames go out. Make a test at the start of the fighter's turn. Roll 1D6:
| D6 | Result |
|---|---|
| 1-5 | The figure continues to burn and suffers an automatic hit at Strength 4. If it is knocked down or put out of action while on fire, the flames go out with no further effects. A fighter caught in the flames is automatically pinned, but his figure moves 2D6 inches in a random direction rather than towards cover (the direction may be determined with a scatter dice). A figure caught in the flames does not engage in close combat, and other figures move away from it automatically. |
| 6 | The flames go out without any other significant effect. |
If another figure is within 1 inch of a burning figure during its Movement phase, it may try to put out the flames. It does not shoot in the Shooting phase. Roll 1D6 and add +1 for each additional figure trying to put out the flames (two figures = +1). If the total is 6+, the flames are extinguished and cause no further effect.
Frenzied target (Cible frénétique). A figure subject to frenzy caused by the flames ignores them and continues to move, shoot and fight despite them. It will, however, suffer the effects described above.
Special: uses a flamer template.
Light Flamer Pistol (Lance-Flammes Léger). The light flamer is a pistol-sized version of the flamer. Its profile is shown below, with the same special rules as the exterminator's flame jet.
| Range (Short / Long) | To Hit (Short / Long) | Strength | Damage | Save Mod. | Ammo |
|---|---|---|---|---|---|
| Special | Special | 4 | 1 | -2 | Auto |
Special: uses a flamer template.
Basic Weapons (continued)
Hand Crossbow (Arbalète de Poing). A compact crossbow, a sort of harpoon gun made from recovered rods and twisted tubes. Ratskins are particularly fond of them, because they are silent and use ammunition that is easily recovered and reused. The crossbow fires a short iron or steel bolt with a barbed point that embeds itself deep in the flesh. The weapon can be used with one hand, but it is too cumbersome to be used as a pistol in close combat. A hand crossbow cannot be reloaded while moving.
Special Rule. The bolt of a hand crossbow can pierce flesh without difficulty, but it lacks the force to embed itself in thick armour. Any target with an armour save of 4+ or better has that save raised to 2+ against a hand crossbow shot at range.
Translator's note: the French text reads "portée à 2+", which the transcriber has rendered as "raised to 2+". This is the literal sense of the sentence as printed.
| Range (Short / Long) | To Hit (Short / Long) | Strength | Damage | Save Mod. | Ammo |
|---|---|---|---|---|---|
| 0-8 / 8-16 | – / -1 | 4 | 1 | Special | 6+ |
Special: move or fire.
Musket (Mousquet). Muskets are primitive weapons, made of a long barrel fixed to a wooden stock. A small charge of powder propels a ball or a volley of shot. Muskets are easy to build and maintain. On the other hand, at long range they are much less accurate than modern weapons. The loading process is slow and forces the shooter to remain in place. Muskets are very common among ratskins and scavvies, although they always tend to acquire a more sophisticated weapon.
| Range (Short / Long) | To Hit (Short / Long) | Strength | Damage | Save Mod. | Ammo |
|---|---|---|---|---|---|
| 0-12 / 12-24 | – / -1 | 3 | 1 | -1 | 6+ |
Special: move or fire.
Blunderbuss (Tromblon). Fouilleurs use blunderbusses and all sorts of home-made firearms. These weapons are sometimes also used by ratskins. A blunderbuss is a rudimentary weapon made of one or more small barrels (often with flared muzzles) fixed to any handle. An explosive charge is placed in each barrel before various metal fragments, grenades or other debris are loaded, all held in place by a plug of one kind or another. When the weapon is fired, the blunderbuss spits out a cloud of debris which, with a little luck, goes in the direction of the target.
| Range (Short / Long) | To Hit (Short / Long) | Strength | Damage | Save Mod. | Ammo |
|---|---|---|---|---|---|
| 0-6 / 6-9 | +3 / -1 | 3 | 1 | Special | 6+ |
Special: none.
Zek Weapons
These weapons may only be used by figures with a Strength of 5 or more.
Harpoon Gun (Fusil à Harpons). Zek harpoon guns are enormous and very powerful weapons, made from parts of ancient machines found in the Zone. The weapon is loaded by a zek that uses all its strength to compress the spring and jam a short shaft or harpoon into the barrel. The weapon launches the shaft with terrible force, enough to pierce a first body and strike a second, even at long range.
If a figure is hit by a harpoon gun, roll 1D6 to determine how many inches the victim is thrown backwards by the blow. If the victim hits another figure on the way, the second figure is also hit and suffers a Strength 5 hit causing 1 wound, with a -2 save modifier. The second victim is then also pushed back over the rest of the distance. If a third figure is hit, it suffers a Strength 4 hit causing 1 wound, with a -1 save modifier, and so on.
It goes without saying that a figure thrown from a building by a harpoon shot suffers the normal damage of a fall. After firing, place a marker near the figure that used the harpoon gun. The gun is discharged and cannot be used again until its user has devoted an entire Shooting phase to reloading it. While reloading its harpoon gun, the figure may not run, charge, be on Alert or fight in close combat.
| Range (Short / Long) | To Hit (Short / Long) | Strength | Damage | Save Mod. | Ammo |
|---|---|---|---|---|---|
| 0-12 / 12-24 | – / -1 | 6 | D3 | -3 | 6+ |
Special: see above.
Example (from the printed diagram): figure A is hit by the harpoon and is pushed back 3 inches, to figure B. Figure A suffers a Strength 6 hit causing 1D3 wounds. Figure B suffers a Strength 5 hit causing 1 wound.
Scatter Cannon (Canon à Mitraille). A scatter cannon is a larger version of the blunderbuss, with a calibre the size of a fist. Its quantity of shrapnel and its powerful explosive charge increase the scatter cannon's range and make it terribly devastating in the confined environment of the Underhive. The recoil of a scatter cannon is so great that only a creature with a zek's strength can fire it.
| Range (Short / Long) | To Hit (Short / Long) | Strength | Damage | Save Mod. | Ammo |
|---|---|---|---|---|---|
| 0-8 / 8-16 | +3 / +1 | 4 | 1 | -1 | 6+ |
Special: 2 inch template.
Grenades
Toxic Bomb (Bombe Toxique). A toxic bomb is a sealed container or bottle holding toxic (and deadly) products gathered from the wastes by the fouilleurs. When a toxic bomb is thrown, it shatters and its polluted contents burst in the targeted area, forming flakes of corrosive jelly and clouds of poisonous gas.
| Strength | Damage | Save Mod. | Ammo | Special |
|---|---|---|---|---|
| 4 | 1 | 0 | Auto | See below |
The normal rules for grenades apply to throwing a toxic bomb. Place a Toxic Bomb marker where the bomb exploded. Any figure within 2 inches of the marker is hit on a 4+ on 1D6, or on a 6+ if it wears a respirator (respirator filters are ineffective). Leave the marker in place for the rest of the game. Anyone who approaches within 2 inches of the marker risks being hit as above.
Throwing Axe / Discus (Disque/Hache de Lancer). Zeks sometimes carry enormous throwing axes, or metal discs with teeth as sharp as razors. Thrown with a zek's strength, these primitive projectiles can be deadly, capable of severing a limb or the head of the unfortunate who happens to be in their path.
| Range (Short / Long) | To Hit (Short / Long) | Strength | Damage | Save Mod. | Ammo |
|---|---|---|---|---|---|
| 0-6 / 6-12 | – / – | 5 | 1 | -1 | 6+ |
Special: none.
Spyrer Weapons
Note: a spyrer weapon damaged by the Disarm skill or in some other way is automatically repaired at the end of the game.
Orrus Bolt-Lances (Lance-Bolts Orrus). The bolt-lances built into the orrus armour are small tubes mounted on the crusher gauntlets. The power boosters of the combat armour orrus allow various improvements: a better range, a larger explosive power, and the possibility of firing volleys.
Special Rules. Orrus bolt-lances are designed to work together and must therefore fire at the same target: only one roll to hit is made. However, if the shot hits, make two separate rolls to wound.
| Range (Short / Long) | To Hit (Short / Long) | Strength | Damage | Save Mod. | Ammo |
|---|---|---|---|---|---|
| 0-8 / 8-16 | +1 / 0 | 4 | 1 | -1 | 2+ |
Malcadon Web Spitter (Crache-Toile Malcadon). The bulbs of a web spitter project silk filaments that solidify into cables as strong as steel. A victim trapped in a web remains at the mercy of the malcadon's claws. The malcadon may also use its filaments to climb vertical surfaces, or to let itself down over a drop.
Special Rules. If a malcadon hits a figure with its web spitter, it rolls 2D6 and keeps the better die, while the opponent rolls only 1D6. Both players then add the Strength of their respective figure to their result. If the malcadon's result is lower than that of its victim, the victim is merely held by the attack, and may try to escape if a friendly figure within 2 inches passes an Initiative test. If the results are equal, or if the malcadon's is higher, the victim is entangled and knocked down, and the normal rules for being knocked down apply. The victim may therefore crawl 2 inches during its Movement phase, and make its roll during the Rally phase, representing its chance to free itself or to suffer serious injury from the embrace of the steel. A figure that frees itself keeps its full total of Wounds, but suffers a -1 penalty to its Weapon Skill and Ballistic Skill as a result of its light wound.
If the malcadon runs, charges or simply does not shoot, it may use its web to help it move. This means that it can climb up or down a walkway or platform without using a ladder or lift. The distance travelled upwards or downwards is deducted from the malcadon's Movement, and it must finish its movement on a horizontal surface; it cannot remain suspended between two platforms.
| Range (Short / Long) | To Hit (Short / Long) | Strength | Damage | Save Mod. | Ammo |
|---|---|---|---|---|---|
| 0-4 / 4-10 | +1 / +1 | Special | Special | Special | 2+ |
Special: see above.
Yeld Laser Gauntlets (Gantelets Laser Yeld). The yeld hunting suit is equipped with enormous gauntlets fitted with multiple laser tubes. The gauntlets project a hurricane of laser beams from the yeld's wrists, a formidable attack with the longest range of all the spyrer hunters. The yeld's power boosters make the lasers even more powerful, sending them more energy so that they can fire sustained bursts and improve their penetration.
| Range (Short / Long) | To Hit (Short / Long) | Strength | Damage | Save Mod. | Ammo |
|---|---|---|---|---|---|
| 0-10 / 10-20 | +1 / – | 3 | 1 | -1 | 2+ |
Jakara Monosword (Mono-Épée Jakara). The monomolecular sword carried by the jakara is a marvel of molecular technology. Its blade is a living crystalline structure which permanently restores its cutting edge when it is blunted. The blade is only a few molecules thick and can cut through the densest materials. The jakara's power booster accelerates the regeneration of the sword's edge even further, to make it sharper still.
| Range | To Hit | Strength | Damage | Save Mod. | Ammo |
|---|---|---|---|---|---|
| Close combat | – | User +1 | 1 | -1 | – |
Special: Parry.
New Equipment
Archeotechnology
All kinds of remains of ancient technologies litter the Underhive: corroded debris extracted from polluted dumps, dazzling artefacts buried in forgotten domes dating from the first colonisation. By decree, all archeotechnology must be sold to the merchants as soon as it is discovered, but some pieces inevitably end up in illegal trading posts, where they are sold just as illegally. The problem with archeotech pieces is that those whose use is known were squandered long ago. The remaining pieces are incomprehensible without constant observation and a great many experiments. They most often resemble a locked chest or an enigmatic chrome sphere, a black box or a piece of shining crystal. Most people do not dare to tinker with these objects, which are sold as if they were a loaf of bread, but you never know what you might find: a superb testimony to a lost technology, or a very pretty paperweight.
Special Rules. If you decide to buy a piece of archeotechnology, you must give it to a member of your gang so that he tries to unlock its secrets. Roll 1D6 to determine what happens. You may not transfer the artefact to another fighter after it has been examined: only the one who examined it knows how it works.
| D6 | Result |
|---|---|
| 1 | Dangerous. The operator accidentally activates the device, which explodes on the figure. It suffers 1D6 hits of Strength 2, and the archeotechnology piece is reduced to ashes. |
| 2 | Viewer (Visualiseur). The operator can use this device to see various places by projecting his perspective onto any point of the surroundings, even behind closed doors or walls. If the operator does not move, does not shoot and does not fight in close combat for one turn, he can locate any hidden fighter on the table. If it is used as a sentry, roll 1D6 at the start of the operator's turn; on a result of 6, it automatically sounds the alarm, as it has spotted the enemy prowling around. Imaginative players may find other applications for this device. |
| 3 | Cutting Ray (Rayon Découpeur). The device can focus a cutting ray on a stationary object. Unfortunately it cannot be used as a weapon, because the target and the operator must remain absolutely motionless, but it is a very good can opener. Against doors, walls, objectives and so on, the device causes a Strength 6 hit during the first turn of use. The Strength rises to 7 on the second turn and to 8 on the third, to a maximum of Strength 10. The operator can do nothing else while he manoeuvres the cutting ray. |
| 4 | Suspensor (Suspenseur). A very sophisticated anti-gravity device which can cancel or reduce the gravity of its user, letting him float up or down for a few moments. The operator may move up or down a walkway even if he has no ladder, and never suffers injury from a fall: he may simply jump from a platform and let himself drop without trouble. The movement is, however, quite slow, and it counts as the figure's only movement for the turn. |
Spyrer Equipment
Spyrer equipment is the exclusive armament of the spyrer hunters, built in the Spire and not found in the settlements.
Jakara Mirror Shield (Bouclier miroir jakara). The jakara mirror shield is a complex object which contains a particular force field generator. The generator creates on the surface of the shield a resonating energy vortex, which sends the absorbed energy into one of the accumulators covering the surface of the shield. This energy may then be returned to its source in an incandescent beam of light and heat.
Special Rules. The shield allows the jakara to parry in close combat. If the mirror shield deflects an energy weapon shot (laser, plasma or fusion), the jakara may immediately return it to its sender. Make a roll to hit using the jakara's Ballistic Skill. If the shot hits, determine the damage using the profile of the original attacking weapon.
The mirror shield gives the jakara an additional save of 4+ on 1D6 against any attack coming from a 90 degree arc in front of it. The shield save is not subject to modifiers and is therefore always 4+.
Yeld Wings (Ailes de yeld). A yeld wing consists of hundreds of metal plates linked together by microfibres attached to an articulated support. The bundles of fibres are activated by brainwaves read directly from the wearer's cortex, through a series of conducting filaments. With a little training, the wearer can beat his wings by willpower alone, which allows him to glide smoothly above the ground or gain altitude with a little more effort. Each metal plate carries circuits which change its colour to match the surroundings of the wearer, which is one of the yeld's means of defence.
Special Rules. The yeld's wings allow it to fly a vertical distance equal to its Movement in one turn, or double that distance if it runs or charges. The wings allow the yeld to glide rather than truly fly, so it must land at the end of its movement. Flying upwards costs 2 inches for each inch of ascent; flying downwards costs 1/2 inch for each inch of descent.
The chameleon effect of the wings allows the yeld to hide even when it is not behind cover. The yeld need only stay motionless long enough for its silhouette to disappear. Moreover, this effect makes the yeld difficult to aim at over long range: any shot at long range against a yeld suffers an additional -1 modifier to hit.
Contact Poison
Most of the fungi found in the Underhive are violent poisons, such as the widow-maker, the scarlet fire and grey moss. Some, like the black death, are even fatal to the touch, and can kill a creature that brushes against them. Black death grows on the corpses of its victims, which provide both its food and the matter that attracts other scavengers.
A contact poison is obtained from a mixture of natural poisons which produces a violet substance that kills a man within seconds. Ratskins are experts at contact poisons, but they normally use them only against huge and dangerous mutants, or other beasts that are almost immune to conventional weapons. Other outlaws are clearly less scrupulous and will use poisoned swords and daggers if they think that this may give them an advantage in combat. The only problem is that a clumsy fighter wielding a poisoned blade is as dangerous to himself as to others.
Special Rules. Doses of poison are kept in the gang's lair and handed out before the start of the game to the fighters who will use them. One dose coats a blade for the duration of a single game, after which the poison loses its efficiency. Contact poison can only be applied to an ordinary sword or dagger, not to a chainsword or a two-handed sword, for example. Contact poison has the following effects:
- Every hit inflicted with the weapon causes 1D3 wounds instead of one.
- The user of the weapon suffers a Strength 1 hit for each 1 (a bad blow) rolled on the attack dice.
Whiskar Bottle
Whiskar is a rare and strong snake liquor distilled in the Zone, where it costs a fortune. If an outlaw manages to get hold of some, it is not rare for him to take it into combat, invested with the "courage of the serpent", as the state of drunkenness caused by this alcohol is known.
Special Rules. If you send a ganger to search for rare items and he finds a bottle of Whiskar, you must buy it: the ganger cannot simply bring it back for free, nor a bad bottle either. A talented chief may always use Whiskar to instil a little of the "courage of the serpent" into his gang by making them drink it before a battle. The whole bottle is passed around, and the whole gang sees its Leadership increased by +1, up to a maximum of 9. Unfortunately, the sedative effects also reduce all of the gang's Initiatives by -2. At the end of the game, the characteristics of the gang return to normal, with the inevitable headaches.
Psychotropic Jelly
Psychotropic jelly is a rare and very dangerous organism, a transparent, gelatinous ball the size of a fist, found in the Underhive. Once mature, the organism seeks out a living creature and slowly attaches itself to the top of its skull, where it is gradually absorbed by the victim's brain. The organism is neither particularly fast nor very agile, so it approaches its victim only when the victim is almost immobilised by sleep. During absorption, it protects itself by injecting into its victim's mind psychotropic substances which profoundly affect its behaviour. The effects are so euphoric, and the feeling of power so strong, that the victim makes no attempt to remove the parasite.
Once in the victim's brain, the organism reproduces like an amoeba. It divides into millions of miniature replicas which break through their protective shells and begin to feed on the brain. Rapidly, the victim's brain is gnawed from within. Within a few hours, the pressure of the fast-growing organisms bursts the victim's skull, and millions of organisms come out. They are only a millimetre across, but they grow rapidly, enveloping and digesting creatures many times their size.
The physical and mental performance of a user, and the feeling of euphoria, are so great that some use psychotropic jelly as a drug. They escape death either by making sure that someone else will remove the organism at the last minute, or by using an antiparasite that kills it before it encysts. Once integrated into the brain, the protective shell of the organism is so resistant that it is immune to everything, and the only way to get rid of it is a major surgical operation.
The risks of using psychotropic jelly are considerable, even for those who protect themselves with other drugs. The effectiveness of antidotes is variable, especially in the dubious conditions in which they are taken. Among the decadent elite who are used to this practice, the risks are smaller, because people can get a high-quality antidote, but even in this case the outcome is uncertain, since some psychotropic organisms are immune to antiparasitic drugs.
Special Rules. Effect. Psychotropic jelly has powerful effects on the individual: the chemical substances it releases improve his strength, improve his agility, increase his reflexes and make him insensitive to pain, which makes him able to keep fighting and to survive terrible injuries. These effects are thought to be produced by the parasite organism, which ensures that its host survives long enough for its reproduction to be completed.
Effects. Roll once on the table below for each of the user's characteristics, except for the number of Wounds and the Leadership. The effect lasts for the whole game.
| D6 | Result |
|---|---|
| 6 | Characteristic increased by +3 for the whole game. |
| 4-5 | Characteristic increased by +2 for the whole game. |
| 2-3 | Characteristic increased by +1 for the whole game. |
| 1 | Characteristic not increased. |
Wounds and Leadership are doubled, up to a maximum of 10 each. Furthermore, the character is so altered by the paste that the figure is never pinned after being hit by a shot.
Duration of effects. The effects of psychotropic jelly last for the whole game, after which the organism must be removed, or the user dies. The organism is destroyed when it is removed, so it cannot be used again once it has been used once.
Secondary effects. Roll 2D6 at the end of the game. If the result is 2, the parasite has had time to penetrate the user's brain completely before he was removed. The victim dies in great suffering. On a result of 3 to 11, the organism is removed without problems. On a result of 12, it is removed and the user benefits from the time spent in contact with the jelly: it heals all serious injuries, including permanent ones (such as scars). If he had no injury, the fighter receives a free roll on the Advancement Table.
Kalma
The result "Kalma" on the Illegal Trading Post table indicates that you have made contact with someone who can supply it from now on. This means that, even if kalma is listed as a rare item in the price list, it is considered common once you have obtained this result.
The name "kalma" covers a group of sedatives and euphorics which diminish consciousness and produce a state of well-being. These drugs are often reduced to powder and used in small quantities in food. A tablet of kalma makes a person docile and agreeable: he lets himself be led and remains passive. Kalma is sometimes used to calm prisoners and hostages, so that they can be quickly taken away from the combat zone.
Special Rules. Effects. The Rescue (Sauvetage) scenario is the only occasion on which kalma may be used. The defender may give kalma to a prisoner, who is then treated as a fighter knocked down for the whole game (lying on his stomach, and able to move only 2 inches per turn), but without making an injury test at each Rally phase.
Duration of effects. Roll 2D6 at each Rally phase and add the fighter's Toughness to the result. If the total is higher than 12, the fighter comes out of his lethargy and may act normally. If the total is 12 or less, the fighter remains affected and continues to smile stupidly.
Secondary effects. None.
Geiger Counter
A Geiger counter is a device which often takes the form of a medallion or a bracelet. It signals dangerous radiation levels by changing colour or by a sound signal. A fighter equipped with a Geiger counter may explore the most contaminated sectors by relying on its warnings to tell him where the highly radioactive places are.
Special Rules. A fighter equipped with a Geiger counter may roll 2D6 instead of 1D6 when he makes a scavenging roll in the wastes. If a fighter possessing a Geiger counter is sent to collect the resources of a Radioactive Zone, he may re-roll the dice that determine the amount of resources collected, and he will suffer the effects of radiation only on a double 1.
Rax
As with kalma, the result "Rax" on the Illegal Trading Post table indicates that you have come into contact with someone who can supply it from now on. Roll 1D6 in each trade phase: on a result of 2+, rax is available; on a 1, it is not.
Effects. Rax is a combat drug made from the glands of mutant rats and synthetic adrenaline. This drug increases the user's abilities, improving his perceptions and his speed, and even seeming to slow the world around him by increasing his mental activity. If it were not for its damned side effects, it would be the ideal combat drug.
Special Rules. A fighter may absorb one dose of rax before the start of a game. His Initiative and Weapon Skill are each increased by 1D3 points; his Ballistic Skill is not affected. When the effects are exhausted, the fighter's characteristics return to normal.
Duration of effects. Roll 2D6 at each Rally phase and add the fighter's Toughness to the result. If the total is 12 or less, the fighter is still affected by the drug. If the total is higher than 12, the effects are dispelled, the fighter collapses suddenly, he is considered knocked down, and he is no longer under the influence of the stimulant. A fighter may absorb only one dose of rax per game, or the cumulative effects would be fatal.
Secondary effects. There are dangers associated with prolonged use of rax. Each time 2D6 are rolled for the duration of the effects, there is a chance that the fighter will sink into addiction. On a result of 3-12, the long-term effects of the drug are non-existent (although they may have disappeared as described above); but on a result of 2, the fighter becomes addicted. An addicted person no longer benefits from the drug, but must keep taking it so as not to fall into withdrawal.
If an addicted fighter does not receive his dose regularly, he loses 1D3 points of Initiative and Weapon Skill until he receives another dose. If one of these characteristics falls to 0, the fighter cannot fight. "Junkies", those accustomed to the drug, progressively lose all mental balance as they age if they are refused it. These human wrecks with jerky movements haunt the Underhive, incapable of telling friends from enemies, or men from monsters.
Spirit
Spirit is extracted from the remains of synthetic food abandoned thousands of years ago, sometimes discovered in the form of heaps in the polluted wastes by fouilleurs and ratskins. These food deposits, recycled from the bodies of inhabitants who died of hunger, were probably formed in a period of famine. They may serve to transmit the memory of the race, whose data is imprisoned in their DNA.
Over the millennia, the synthetic food, decomposing, was altered by mutant moulds which became an important ingredient, transforming it into a powerful and dangerous dark-greenish powder. Prepared in the form of a foaming liquid, it is a drug for those foolish enough to consume it. A single small glass vial may contain one standard dose.
Spirit amplifies the latent psychic powers of humans. Most wyrds created artificially by spirit have no innate psychic force (otherwise their latent powers would have developed by themselves, in a natural way). They are psychically vulnerable and prone to daemonic assaults of every kind, as are many wyrds.
Special Rules. Effects. A dose of spirit will temporarily give a figure a minor wyrd power. Generate the power by rolling 1D66 on the Minor Wyrd Powers table at the start of the game (see the wyrd rules in the Necromunda rulebook). The result may be a power that is unusable on its own, or even no power at all. Taking spirit is not an exact science. Even if an individual absorbs spirit several times, the effects will not be the same each time.
Duration of effects. One dose lasts for the whole game.
Secondary effects. Daemonic Attack! See the rules for wyrds for details of the perils of the Warp. A daemonic attack may occur during a game when the user of spirit uses his power and rolls a 2 or a 12 on his Leadership test.
Slash
As with kalma and rax, the result "Slash" on the Illegal Trading Post table indicates that you have come into contact with the product. Roll 1D6 in each trade phase: on a result of 4+, slash is available; on 1-3, there is none.
The name Slash covers a range of stimulants with similar effects. These substances produce harmful side effects which deter most people from taking them. Taking slash entails risks which are never the same, since the power of the effects cannot be determined in advance. All these substances stimulate the nervous system, sharpen the senses, and increase muscular reactions and the speed of thought. Stimulants that are too old, out of date or badly prepared may be ineffective.
Special Rules. Effects. A figure may absorb one dose of slash before the start of a game. Roll 1D6 on the table below to determine the effects.
| D6 | Result |
|---|---|
| 6 | Initiative and Weapon Skill are increased by +1D6 points each; Ballistic Skill and Movement are increased by +1D3 each. Because of the nervous hyperactivity, the fighter is knocked down for one turn when the effects of the drug wear off; he then recovers automatically. |
| 4-5 | Movement and Initiative are increased by +3 points, but this makes the nervous system hypersensitive, and too severe a physical shock may render the fighter unconscious. To represent this, the fighter's Toughness is reduced by -1 for as long as the slash is in effect. |
| 2-3 | Movement and Initiative of the figure are increased by +1D3 points. |
| 1 | Ineffective. The product is out of date or defective. |
Duration of effects. Roll 2D6 at each Rally phase and add the fighter's Toughness to the result. If the total is 12 or less, the effects continue. If the total is higher than 12, the effects disappear and the fighter is no longer under the influence of the drug. Only one dose of slash may be absorbed per game, or the cumulative effects would be fatal to the user.
Secondary effects. None.
Needle Patch
The needle (aiguillon) is a rare and precious fungus that grows in the lost places of the Zone. The needle can only be found in sectors where organic waste mixes with radioactive refuse at a precise temperature. The fungus grows over a few hours, then explodes to scatter its poisonous spores in the surroundings (hence the name). Afterwards, the fungus dries and dies.
If the fungus is gathered before it reaches maturity, its spores can be used to make a healing balm or compresses that stimulate the immune system. The restorative effects of the needle are well known to surgeons and doctors, and this fungus is grown on a large scale in some places, to be used in the hive and in the Spire, and even exported off-world.
Special Rules. A needle patch may be used to:
- Cure a serious injury of a fighter.
- Re-roll one result on the Serious Injury table, unless the first result was "Dead", "Captured" or "Multiple Serious Injuries".
A needle patch may only be used once.
Random Events
The Underhive is constantly changing: mudslides and sewer floods can inundate an area in a few hours, power cuts can plunge whole sectors of the hive into darkness, and the ground can suddenly collapse into a bottomless pit. Worse still, the terrible hive tremors ravage the Underhive while the massive structure of the hive settles on its foundations.
The rules for random events described below present only part of the many dangers of the Underhive in your games of Necromunda. Random events may be added to almost all scenarios of Necromunda and Outlanders. The only exception is the First Blood scenario (Premier Sang), which takes place in a colony or a tavern, where the only dangerous random events are the meals served!
Players may agree together not to use random events if they wish (cowards!). But if only one of the two players wants to use them, the other must accept.
Roll for random events after the scenario has been chosen and the terrain set up, but before the gangs are deployed. The table requires a D66 roll, as for the Serious Injury table: roll two dice, the first giving the tens and the second the units. For example, a 1 and a 5 give a final result of 15; a 6 and a 3 give a final result of 63.
Ratskins. Ratskin hunters (pisteurs) and renegade ratskins are immune to the effects of random events. Ratskins are born and raised in the midst of the dangers of the Underhive, and so they learn quickly to avoid them. Those who do not manage to do so die very young...
11-16: Bubbling Sludge (Vase Bouillonnante)
Something particularly repugnant comes from the sewer.
11 – Mud Sea (Mer de Vase). A thick layer of blackish and nauseating mud covers the ground. Figures must wade through this disgusting mud to reach the nearest walkway or platform, which makes all movement extremely difficult. While wading, movement is reduced to 2 inches per turn. Nobody may double their Movement to run or charge in these conditions, as the mud is too thick and prevents rapid movement. Walkways and platforms are not covered with mud, so figures on them are not affected by this rule.
12 – Slippery Surface (Surface Glissante). A thin layer of phosphorescent mud covers the ground. Figures may move normally, but if they double their Movement to run or charge, they must pass an Initiative test on 1D6 (a result less than or equal to their Initiative) to avoid slipping; a figure that fails is considered pinned. Walkways and platforms are not covered with mud, and figures on them are not affected by this rule.
13 – Sticky Film (Pellicule Gluante). The whole sector is covered with a horrible sticky film, but this is only mildly annoying. Carry on fighting normally.
14 – Old Settling Basin (Ancien Bassin de Décantation). Vase conduits and sludge grilles clearly show that this place is an old settling basin, unused for a very long time. Carry on fighting normally.
15 – Old Settling Basin, Filling Up! (Ancien Bassin de Décantation). Vase conduits and sludge grilles clearly show that this place is an old... Oh, damn, it is filling up! Deploy the gangs, then roll 1D6 for each figure to determine who is splashed by the conduits pouring out their disgusting sludge. Figures splashed on a result of 1, 2 or 3 are considered pinned at the start of the game, and they may also fall if they are within 1 inch of the edge of a walkway or platform. Make only one roll per figure; the sludge has no other effect afterwards. Figures that try to use tunnels or ventilation ducts to get around the enemy must roll 1D6: on a result of 1, 2 or 3, the flows of sludge in the conduits block their passage, and they do not take part in this game at all.
16 – Bottomless Pit (Fosse Sans Fond). The whole surface of the table is covered with a layer of mud which apparently has no bottom. The whole game must be fought on the upper levels, but figures that fall into the mud suffer no damage, because the mud cushions the blow. Unfortunately, at the start of each of its turns, a figure in the mud must pass an Initiative test on 1D6 (a result less than or equal to its Initiative). If it passes, it may move 2 inches that turn to reach the nearest ladder or to get out of the mud. If it fails, the figure sinks into the mud (gloop!). All equipment and weapons carried by a figure which sinks are lost with it.
21-26: Violent Winds (Vents Violents)
The fighting takes place not far from the junction of several giant ventilation conduits. Large domes can also generate their own microclimate, which sometimes causes giant whirlwinds of air. These violent winds can make any presence on a walkway or platform hazardous.
21 – Roaring Winds (Vents Rugissants). The winds are so violent that no one would dare risk a walkway or platform. The game must take place entirely on the ground, where it is easier to find cover. Players may use ventilation ducts to get around their opponent while the winds roar.
22 – Gusts (Bourrasques). Shooting is very delicate in such conditions, especially at long range. Anyone who makes a shot at long range suffers a -1 modifier to hit. It is very hard to keep a target in one's sights, so no one may benefit from the Quick Shot (Tir Éclair), Rapid Fire (Tir Rapide) or Lynx Eye (Œil de Lynx) skills.
Translator's note: the skill names in this section are rendered literally from the French; they were not checked against the English 1996 skill names, which the transcriber could not consult.
23 – Strong Wind (Grand Vent). There is wind, but seasoned fighters are used to such conditions and can fight normally.
24 – Fans Stopped (Ventilateurs Arrêtés). The giant fans which circulate air through the conduits are stopped or out of order for the moment. Carry on fighting normally.
25 – Blowing Hard! (Ça Souffle!). The winds are violent today, which makes heights dangerous. Any figure on a walkway or on the upper level of a building must pass a test at the start of each of its turns, on 1D6 (a result less than or equal to its Strength), to remain on its feet. If the test is failed, the figure is pinned and risks falling if it is within 1 inch of the edge of the walkway or platform.
26 – Hold on to Your Hoods! (Accrochez-vous à vos Capuches!). Powerful gusts of wind make any shooting particularly difficult. Shots at short range suffer a -1 modifier to hit, and shots at long range suffer a -2 modifier. Because it is impossible to keep the target in one's sights, no one may benefit from the Quick Shot, Rapid Fire or Lynx Eye skills.
31-36: Toxic Fogs (Brouillards Toxiques)
The Underhive is really not a pleasant place to live. Heavy industry, a squalid environment and sewer vapours carry toxic fumes through the Underhive. Not only are these clouds dangerous to breathe, but they mask visibility, hiding fighters at long distances behind their wisps of vapour.
Figures without respirators or filter plugs may become unwell from the toxic vapours. Roll 1D6 for each figure without protection before deployment. On a result of 1, the figure is not fit enough for combat and does not take part in the game, although it will still be able to collect the territory's resources, use its skills as an inventor and so on after the game.
31 – Pea Soup (Purée de Pois). Greenish-yellow clouds drift through the Underhive. Visibility is limited to 10 inches. Targets appear and disappear suddenly. No one may benefit from the Quick Shot, Rapid Fire or Lynx Eye skills.
32 – Thick Fog (Épais Brouillard). Banks of fog form here and there in the middle of the fighting. Visibility is limited to 16 inches. Targets appear and disappear suddenly. No one may benefit from the Quick Shot, Rapid Fire or Lynx Eye skills.
33 – Come On! (Allez-y!). The fog lifts for a few moments, allowing you to fight normally.
34 – Normal Conditions (Conditions Normales). The fog has drifted to another sector and does not affect your fight. The game goes on normally.
35 – Scattered Clouds (Nuages Épars). Drifting clouds hamper your fight. Visibility is limited to 20 inches. Targets appear and disappear suddenly. No one may benefit from the Quick Shot, Rapid Fire or Lynx Eye skills.
36 – Charge! (Chargez!). The two gangs were ready to fight when a thick orange cloud fell a few hours ago. Everyone is two fingers from retreating when the cloud suddenly tears apart. One gang takes advantage of the situation and advances rapidly on the enemy. Both players make a Leadership test for their leader. The one who passes with the greatest margin may redeploy his figures up to 12 inches from his deployment edge, and will automatically play first. Repeat the tests in case of a tie. If both players fail their tests, each misses its chance to gain an advantage from the situation, and the game proceeds normally.
41-46: Poor Lighting (Mauvaise Luminosité)
The Underhive is a dark and obscure place, and variable light can affect combat. Figures equipped with infrared goggles and sights are not affected by poor light. Figures equipped with photo-visors or contact lenses can see at double the distance in poor light.
41 – Ink Black (Noir d'Encre). This sector of the Underhive is so badly lit that visibility for shooting is reduced to 8 inches. Spotting a fighter is so difficult that no one may benefit from the Quick Shot, Rapid Fire or Lynx Eye skills.
42 – Half-darkness (Pénombre). Half-darkness reduces visibility for shooting to 16 inches. Spotting a fighter is so difficult that no one may benefit from the Quick Shot, Rapid Fire or Lynx Eye skills.
43 – Weak Light (Lumière Faible). The light is far from brilliant, but you can see enough to fight normally.
44 – Normal Light (Lumière Normale). You may fight normally.
45 – Blinding Light (Lumière Aveuglante). An extremely violent light source shines from one side of the battlefield. Figures facing that side suffer a -1 modifier to hit when they shoot. Randomly determine from which side of the table the light comes.
46 – Twilight Shadows (Ombres Crépusculaires). The grazing light creates large areas of shadow, allowing everyone to run and hide within the same turn.
51-56: Swarms (Nuées)
The Underhive is the perfect place for the massive breeding of all kinds of more or less repugnant vermin. Insects and rats are particularly at home in this environment. Underhive fighters are used to avoiding or killing most of the dangerous creatures, but some sectors swarm with vermin. Wyrd masters of packs are never affected by swarms.
51 – Carrion Bats (Chauve-souris Charognardes). Clouds of carrion bats cross the sector at the start of the game. They swirl around the heads of the fighters, who must throw themselves to the ground to avoid them. After deployment, each figure takes a Leadership test. A figure that fails starts the game pinned, and risks falling if it is within 1 inch of the edge of a walkway or platform.
52 – Clouds of Flies (Nuages de Mouches). The flies are so numerous that fighters have trouble seeing their targets. All shots suffer a -1 modifier to hit for the whole game. The distraction caused by the flies also prevents anyone from benefiting from the Quick Shot, Rapid Fire or Lynx Eye skills.
53 – Cockroaches (Cafards). Cockroaches cover the ground, but they do not hamper the fighting.
54 – All Clear (Tout Baigne). Nothing alarming in the sector. Carry on fighting.
55 – Rats. Hordes of rats run across the battlefield. The rats are particularly annoying because they throw themselves under your feet, sometimes biting as you pass. This is above all a nuisance in close combat: any figure engaged in close combat counts its results of 1 and 2 as misses. The distraction also prevents anyone from benefiting from the Quick Shot, Rapid Fire or Lynx Eye skills.
56 – Giant Rats (Rats Géants). They are nasty and horrible, but luckily fewer in number than their cousins. Each player rolls 1D6 for each of his figures. On a result of 1, the figure is attacked by a giant rat and automatically suffers a light wound. Reduce its Weapon Skill and Ballistic Skill by -1 for the duration of the game.
61-66: Exceptional Conditions (Conditions Exceptionnelles)
The most dangerous events occur only very rarely, which makes their consequences even more serious, because fighters are never ready when they happen.
61 – Acid Rain (Pluie Acide). This is not a slightly acidic rain, but pure acid flowing from a damaged reservoir several levels up. Roll 1D6 for each figure at the start of the game. On a result of 1, the figure is burned by the acid and must pass a Leadership test to avoid being taken out of action. Any figure that passes this test, however, gains the Impressive Scars (Cicatrices Impressionnantes) injury; see the Injuries section of the Necromunda Codex. The acid rain calms down when the game begins and has no effect on the rest of the game.
62 – Methane (Méthane). Rotting refuse, mould and carrion can generate highly volatile pockets of methane, which only wait for a spark (or a shot) to explode. Any figure in cover that fires and rolls a 1 on its to-hit roll sets off a pocket of gas, with the same effects as a frag grenade centred on the figure which fired. Figures in the open do not set off the explosion of gas pockets.
63 – Asphyxiating Gas (Gaz Asphyxiant). Clouds of toxic gas drift across the sector, making the fighters cough. Each player rolls 1D6 for each of his figures at the start of the game. If the result is higher than the figure's Toughness, the figure has breathed in the gas and struggles to recover its breath. Figures equipped with respirators or respirator filters may re-roll this test once. Roll a scatter dice to determine the direction of the figure's movement; the distance it moves is 1D3 inches. If it falls, determine the normal damage from the fall. Once the fighting has begun, the fighters recover their wits and ignore the gas: it has no further effect once the game has started.
64 – Layer of Ash (Couche de Cendres). A thick layer of ash covers the ground. The ash constitutes difficult terrain which halves Movement on the ground. Buildings and walkways are clear, and figures on them are not affected.
65 – Massive Electric Discharge (Décharge Électrique Massive). The giant hives of Necromunda must be very well protected from outside atmospheric conditions. Lightning represents a terrible danger, and storms on Necromunda can last for weeks. On the upper levels, huge lightning conductors run along the hive and channel the energy of the lightning. This system is not as effective in the lower levels, where lightning often finds its own way down to the ground. Roll 1D6 for each figure once the gangs have been deployed. On a result of 1, the figure is struck by a huge electric discharge which springs from the nearest piece of metal. Every figure struck suffers 1D6 hits of Strength 6, each causing 1 wound.
66 – Hive Tremor! (Tremblement de Ruche!). The Underhive is very unstable, and many fighters die crushed under tons of debris. After deployment, each player rolls 1D6 for each of his figures. On a result of 1, the figure disappears under the rubble and is immediately taken out of action! A tremor has multiple secondary consequences, because it raises clouds of toxic dust, disturbs swarms of creatures, causes mud to overflow and so on. For this reason, roll a second random event after the direct consequences of the hive tremor have been resolved.
New Gang Leader
Loss of the Leader
If the leader of a gang is killed, the fighter with the highest Leadership becomes the leader, and therefore benefits from all the special rules concerning the leader and has access to the equipment which was reserved for the former leader. This means that another figure within 6 inches can use the new leader's Leadership for its tests, and that the new leader may try to break free of a pin even if no friend is within 2 inches. If several fighters have the same Leadership value and could become leader, it is the one with the highest experience who becomes the new leader.
Challenges
During a campaign, members of a gang may obtain a Leadership better than that of their leader. This naturally causes friction within the gang, because the fighter with the stronger Leadership becomes ever more influential with the other members and always seems to have the best ideas and the best plans.
The gang risks splitting apart irretrievably if it is obliged to fight under these conditions, since the fighters no longer know whom to listen to and risk losing precious time in discussion. This will inevitably lead to a dispute: the leader in office will try to keep the gang together by opposing the potential usurper, and the young pretender will try his luck and issue a challenge to take the leader's place.
If a challenge is issued, roll 1D6 to determine the outcome.
| D6 | Result |
|---|---|
| 1-2 | Both adversaries must fight in close combat in front of the gang. They may only use daggers, and they must not wear any armour. The first to be knocked down or taken out of action loses the challenge. The winner takes or keeps command. The loser must accept the result. The combat is resolved as a close combat, if possible with another player making the rolls for the leader or for his challenger. |
| 3-4 | As above, but the combat is resolved as the First Blood scenario between the two rivals. Each may use any weapon in his possession. |
| 5-6 | The challenger is loyal to the leader in office and remains his faithful companion. He will never challenge him again. |
Notes. Van Saar gangs treat a roll of 1-2 as a roll of 3-4. Goliath gangs and renegade ratskins treat a roll of 3-4 as a roll of 1-2. Redemptionists treat all results as 5-6.
Translator's note: the French text uses the word "calife" (caliph) for the gang leader in this passage; the transcriber has rendered it as "leader".
Defeated Challenger
If the challenger is beaten by the leader in office, what happens next depends on the leader. The challenger does not challenge the former leader again until he obtains another Leadership progression. Some particularly vindictive leaders are inclined to sell their challenger as a slave, or to give him a few swimming lessons in a mud pool. This is far rarer than you might think, because a leader always hesitates to voluntarily reduce the strength of his gang. That is why the challenger most often returns to the ranks of the gang.
Deposed Leader
If the challenger wins the confrontation, he takes the place of the leader. The new leader benefits from all the rules relating to his new position, while the former leader loses all the advantages due to those rules. Roll 1D6 to determine the reaction of the deposed leader.
| D6 | Result |
|---|---|
| 1 | He leaves the gang and disappears for ever. |
| 2-4 | He leaves the gang and becomes a mercenary. His recruitment cost is one fifth (20%) of his total value, plus his experience. |
| 5-6 | He accepts his defeat at the hands of a better man than himself and becomes loyal to the new leader. He will never challenge again to take control of the gang. |
Mercenaries
This chapter of the Outlanders rules introduces new mercenaries: escaped slaves, wyrds with psychic powers and a selection of special characters. All this lovely crowd will fight at your side for a handful of credits, without asking a single question.
Slaves
Slaves are the unfortunates who have ended up sold to merchants by gangs or by the Vigilantes. They are used in the Underhive to work in the mines, as pack animals in the caravans, or as gladiators. Some are dangerous criminals who deserve nothing better; others have the misfortune of having no friend able to pay their ransom when they were captured by a rival gang. Merchants generally "modify" their new acquisitions to adapt them to the task for which they are destined. Arms are amputated and replaced with drills or circular saws for those destined for the mines; pack slaves have their hands and feet replaced by hooks or pincers, to get a better grip on their loads; and slaves can end up looking like half-flesh, half-steel beings straight out of a nightmare. The owner's mark is implanted on the slave so that everyone knows he belongs to a merchant, and then the unfortunate is put to work for the rest of his days.
Some enduring and determined slaves escape through cunning, through an accident or by overpowering their guards. Escaped slaves are theoretically pursued by the law and will be captured if they stroll openly in the street. But the Vigilantes have something else to do than chase slaves, and most escapees end up at the side of gangs.
Recruiting Slaves. Outlaw gangs meet escaped gladiators in illegal trading posts, who often fight their own battles to earn a few credits. Other gangs may pick up escaped slaves in the middle of the wastes or near the burrows, where they try to find a little compassion and some food. Any gang may recruit slaves, although this risks outlawing it if the news reaches the ears of the Vigilantes. If a player wants to hire the services of a slave, he must pay the standard recruitment cost, which is 10 credits. A gang may recruit any number of slaves. The profile and skills of a slave are determined after recruitment.
A standard value of 50 per slave is added to the calculation of the gang's value (five times the 10-credit pay).
Slave Profile
| M | WS | BS | S | T | W | I | A | Ld |
|---|---|---|---|---|---|---|---|---|
| 4 | 3 | 3 | 3 | 3 | 1 | 3 | 1 | 7 |
Slaves have probably acquired some skills and superior characteristics during their servitude. These are determined after their recruitment. The basic characteristics are given above. In addition, the slave has a certain number of "progressions".
Slave Progressions. A slave has four "progressions", each of which is either a bonus to its profile or a skill. Roll 1D6 four times and consult the table below, noting the progressions and skills obtained in order. A slave cannot increase any one of its characteristics beyond +2. If the same progression is obtained for the third time, re-roll. Similarly, if you obtain the same skill a second time, re-roll to obtain another one. Note that a slave's Strength and Toughness may exceed the normal maximum of 4 for a human; this is because of the cybernetic modifications it has undergone, which may give it superhuman resistance and strength.
| D6 | Progression |
|---|---|
| 1 | +1 Weapon Skill |
| 2 | +1 Attacks |
| 3-4 | Re-roll 1D6: 1-3 = +1 Strength; 4-6 = +1 Toughness |
| 5 | Re-roll 1D6: 1-2 = +1 Wound; 3-4 = +1 Initiative; 5-6 = +1 Leadership |
| 6 | Re-roll 1D6: 1 = Dodge (Agility skill); 2 = Tough as Nails (Dur à Cuire, Muscle skill); 3 = True Brave (Vrai brave, Ferocity skill); 4 = Infiltration (Stealth skill); 5 = Parry (Combat skill); 6 = Throw (Projection, Muscle skill) |
Translator's note: the skill names in this table are rendered literally from the French and were not checked against the English 1996 names.
Slave Weapons. Slaves fight with weapons adapted to their bodies, as described below. They generally carry a pistol which they have stolen or bought, or any other equipment they can obtain. Slaves spend all their money on refined food, maintenance products for their chrome parts and other whims whose taste they had almost forgotten.
Slaves are equipped with one of the following weapons:
- Drill (Perceuse)
- Pincers (Pince)
- Scythe blades (Lames de faux)
- Chainsaw (Tronçonneuse)
- Circular saw (Scie circulaire)
- Hammer (Marteau)
Slaves may also have one of the following pistols:
- Autopistol with dum-dum rounds
- Machine pistol
- Laser pistol
Slaves may be fitted with minor improvements, such as brooches and plates, metal feet or hands, a camera eye and so on. These objects do not act directly as weapons, and are represented in part by the slave progression table.
Wyrds
Wyrds are individuals endowed with natural psychic powers, poorly controlled and very varied. In fact, a significant part of the Necromundans, perhaps 10%, possess a few minor abilities which they do not even consider a psychic mutation. They may be "lucky" at cards, for example, or very good at "guessing" the thoughts of others, but to a level such that other people would rather think they were simply born under a lucky star or are a little more receptive, and not that they are mutants. Wyrds have much more effective powers! They are, however, very different from the highly trained psykers of the Adeptus Astra Telepathica, because wyrds develop their powers alone, in a totally anarchic way.
The powers of wyrds are very varied, and it is very rare for two wyrds to have exactly the same abilities. That said, it is possible to classify wyrds into categories. For example, a good many wyrds are telepaths: their powers allow them to affect the minds of other people. But the way in which this power manifests itself varies from one to another: some can take control of a mind, others can induce terrifying mental visions, and so on. The situation is even more complex, because most wyrds possess one or more additional minor powers.
Wyrds who conceal their powers are relatively safe in the hive, although there is always a risk of discovery. Sometimes a wyrd, reaching an advanced age, gains confidence and begins to show off his powers. Very few wyrds really realise the danger they run by revealing their powers in this way, and many end up on a pyre as sorcerers, or in the hands of the Scholastica Psykana, because they overestimated their abilities. For this reason, many wyrds choose to live in the Underhive, where most mutants are tolerated as long as their mutations are not too deforming or their powers not too dangerous. Wyrds whose powers become impossible to hide have no choice but to escape to the Underhive or face death or capture, which is almost certain.
Recruiting Wyrds
Once in the Underhive, wyrds must rely on their powers to survive. Some help others, especially those with beneficial abilities which allow them to heal physical problems or to help those who have sunk into psychic torment. These healers are often protected by Underhive communities, who appreciate their powers and respect their wisdom. But most wyrds forced to live in the Underhive hire out their services as mercenaries. Although hiring a psyker is a crime in Necromunda, many gangs are ready to take the risk, and outlaw gangs are quick to hire wyrds, since they have nothing to lose by breaking the law once more.
Any gang, except the Redemptionists and the spyrers, may hire the services of a wyrd, although if this comes to the ears of the Vigilantes the risk of outlawry is great. If a player wants to hire a wyrd, he must pay the standard fee of 25 credits.
A gang may only benefit from the services of one wyrd at a time. Wyrds belong to one of four basic families: Kino, Pyro, Telepath and Belluaire. A player is allowed to choose the family of the wyrd he hires, but the wyrd's exact powers are only determined after recruitment.
A standard value of 125 for the wyrd is added to the calculation of the gang's value (five times the 25-credit fee).
Wyrd Profile
All wyrds have the following profile, whatever their family. In addition, the wyrd possesses a certain number of powers, as explained below.
| M | WS | BS | S | T | W | I | A | Ld |
|---|---|---|---|---|---|---|---|---|
| 4 | 2 | 2 | 3 | 4 | 1 | 4 | 1 | 7 |
Wyrds are not fighters; they prefer to rely on their mental power. However, nobody moves through the Underhive unarmed, so wyrds are equipped with at most two weapons chosen from the following list:
Pistol: autopistol with dum-dum rounds; machine pistol; laser pistol. Close combat: sword; axe; chain or flail; club, mace or axe.
Wyrd Powers
A wyrd possesses one "primary" power and one "minor" power, generated at random on the following tables. The primary power depends on the family to which the wyrd belongs: a telepath rolls on the Telepathic Primary Powers table, a pyro on the Pyrotechnic Primary Powers table, and so on.
Using Wyrd Powers
An intense concentration and great inner calm are necessary for a wyrd to use one of its powers, which is not always easy in the middle of a skirmish! To use a power, the wyrd must first pass a test: roll 2D6, and the result must be less than or equal to its Leadership. If the test is failed, the wyrd's concentration has been broken and it may not use its powers that turn. If it succeeds, the power may be used (see below). A wyrd may not use more than one power per player turn.
The powers of wyrds are subject to the same rules for choosing a target as shooting: they must normally attack the nearest enemy. Even telepaths find that the mind of the nearest opponent is more accessible and easier to isolate, while more distant minds blur and mix together in confused whirlwinds.
Perils of the Warp
Although most wyrds are not aware of it, they draw on the power of a parallel universe of pure energy called the Warp. This is very dangerous, because the Warp is inhabited by strange and abominable creatures which humanity calls daemons. If one of these creatures is in the vicinity when a wyrd draws Warp energy to use one of its powers, it will attack and try to possess the wyrd or drag it into the Warp to play with it, as only daemons are capable of doing. In such circumstances, the wyrd must rapidly break its mental link with the Warp, or it will know a fate much worse than death.
To represent this possibility of a daemonic attack, a wyrd who rolls a 2 or a 12 on its Leadership test when using a power must roll 1D6 on the Warp Dangers table below. Note that on a result of 2, the wyrd is allowed to use the power for which it made the test, before rolling on the following table.
Warp Dangers Table
| D6 | Result |
|---|---|
| 1 | Dragged into the Warp. Unless the wyrd passes a roll on 1D6 less than or equal to its Initiative, it is dragged into the Warp and disappears for ever! Remove its model from the table. If the wyrd is lost, the figures within 2 inches of it must pass a roll less than or equal to their Initiative, or be dragged into the Warp with it. |
| 2-3 | Possessed. The wyrd must take a Leadership test on 2D6. If the result is less than or equal to its Leadership, it manages to repel mentally the daemon trying to possess it, but may do nothing else except defend its body until the end of the turn. If the result is higher than its Leadership, the wyrd is possessed. See Daemonic Possession below. |
| 4-6 | Attacked. The daemon uses its powers to try to roast the wyrd's brain! The wyrd suffers an automatic hit at a Strength equal to 1D6, with no armour save allowed. |
Daemonic Possession
A possessed wyrd sees its body totally invested by a daemonic entity. The aggressive energy of the creature will quickly consume the wyrd's fragile fleshly envelope, but in the meantime it will try to cause as much damage as possible!
A possessed wyrd is played alternately by both players. Make its moves and attacks before those of all other figures. It moves 2D6 inches in a direction chosen by the player who does not have the turn. It may engage an enemy figure in close combat if the player moving it wishes.
If the wyrd is not in close combat, it casts a bolt of Warp energy at the nearest figure within sight of it. The bolt hits on a 2+ and inflicts a Strength 6 hit with no possibility of saving; the normal modifiers for cover and so on apply. If the wyrd is engaged in close combat, it fights normally, but its Weapon Skill, Strength and number of Attacks are tripled (so its Weapon Skill will normally be 6, its Strength 9, and it will make 3 Attacks!).
Damage suffered by the wyrd is determined normally. However, it is never pinned, and it ignores the "light wound" and "knocked down" results of the Injury table. If a player puts it out of action, make an immediate roll on the Serious Injury table. Only a "dead" result returns the daemon to the Warp and kills the wyrd. On any other result, the wyrd is unharmed!
If by some miracle a fighter manages to kill a possessed wyrd, he gains a bonus of 20 experience points. If the fighter is a Redemptionist, this bonus is doubled, and he gains 40 experience points.
Fortunately for both gangs engaged in the fight, the daemon will quickly consume the energy contained in the fragile mortal envelope. Roll 1D6 at the end of each player's turn. On a result of 1, the wyrd's body bursts into flames and the daemon is forced to dive back into the Warp. Remove the wyrd's model from the table: only a few bones remain amid a pile of ash!
Finally, a possessed wyrd forces all other figures to take a fear test, or rather two!
Belluaire Primary Powers
Unlike other wyrds, a belluaire's primary power is not determined at random. It is accompanied by 1D3 creatures from the following list: giant rats, centipedes and lamias. The details of these creatures are given in the Underhive Bestiary chapter. The number of "charming companions" a belluaire has changes constantly, so re-roll the D3 at the start of each game to determine how many accompany him.
The creatures under a belluaire's control must in all circumstances remain within 16 inches of him. As long as they remain within this radius, they may use his Leadership for any Leadership test. If they ever end their movement more than 16 inches from the belluaire, or if the belluaire is taken out of action, the creatures are assumed to have escaped through a crack or some other hole.
Pyrotechnic Primary Powers
Roll 1D6 on the table below for a pyro's primary power.
1 – Human Torch (Torche Humaine). The pyro can make its body so hot that anything which comes too close to it is quickly reduced to ashes. The wyrd may attempt to provoke this at any moment of its turn, and the effects last for the rest of its turn and the opponent's following turn. While the pyro's body is white-hot, it is completely immune to attacks by flamers, fusion guns, multi-fusers and fusion grenades. It also receives an unmodifiable save of 4+ against all other attacks. Any close combat engaged against a white-hot pyro suffers an automatic Strength 8 hit with a -4 save modifier at the start of each close combat turn. Moreover, any close combat weapon which hits the pyro is destroyed if the pyro passes its special save of 4+.
2 – Spontaneous Combustion (Combustion Spontanée). The pyro can set an enemy's body alight! The pyro may attempt to use this power instead of a normal attack during the Shooting phase. If the power works, designate the nearest enemy figure in sight, at most 12 inches from the pyro. The victim must pass a Leadership test on 2D6. If the result is less than or equal to its Leadership, it survives the attack but is pinned. If the result is higher than its Leadership, the victim catches fire spontaneously and suffers 1D3 wounds with no possibility of saving.
3 – Fireball (Boule de Feu). The pyro can generate a fireball. It may attempt to create it, instead of a normal attack during the Shooting phase, at a point in sight and up to 24 inches away. If the power works, represent the fireball with a template of 1.5 inches (that of the heavy plasma gun). Any figure wholly covered by the template is automatically hit; figures partially covered are hit on a 4+. Figures hit by the fireball suffer exactly the same damage as that caused by a flamer (a hit at Strength 4 with a -2 save modifier), and they may catch fire.
4 – Wall of Flames (Mur de Flammes). The pyro may generate a wall of flames several metres long. It may attempt this at any moment of its turn; the wall lasts for the rest of that turn and the opponent's following turn. If the power works, the wall of flames is represented by placing a Necromunda range ruler on the table. The ruler must lie entirely within 24 inches of the pyro, with at least a portion of it in view of the pyro. The ruler is always placed at ground level, so the wall cannot be placed on top of a building. Any figure crossed by the ruler must be moved 1 inch by its owner to get it out of the way: it has thrown itself into cover. As long as the ruler stays in place, no one may move through it or shoot through it. Note that the flames and smoke rise straight up, so the ruler cannot be crossed even by using an upper level. The pyro may decide to "extinguish" the wall of flames at the end of its turn.
5 – Flame Jet (Jet de Flammes). The pyro can generate a jet of flame which spurts from its fingers. It may attempt this power instead of a normal attack during the Shooting phase. If the power works, the pyro creates a flame jet as if it were armed with a flamer, except that its attack never runs out of ammunition and never jams. Simply place a flamer template with its point touching the pyro's figure, then determine the effects of the attack as for a flamer.
6 – Fusion (Fusion). The pyro can agitate the molecules of anything on which it concentrates, creating a formidable effect of micro-waves similar to that of a fusion gun or a multi-fuser. Although the pyro's attack is less reliable than that of these weapons, it is potentially more destructive. The pyro may attempt to use this power instead of a normal attack in the Shooting phase. If the power works, it may be used against the nearest visible enemy within 24 inches, or even outside the pyro's line of sight. Roll the artillery dice (the one numbered and bearing a Misfire face) to determine whether the attack hits. If a number is rolled, the attack hits with a Strength equal to the number shown on the dice, causing 1D3 wounds with a -4 save modifier. If the dice shows "Misfire", the target suffers only a breath of hot air: it is pinned but suffers no other effect.
Telepathic Primary Powers
Roll 1D6 on the table below for a telepath's primary power.
1 – Mental Control (Contrôle Mental). The telepath can take control of another person's mind, forcing him to do what it commands. The victim will not perform any action of its own choosing, but mental control can be pushed to make it perform senseless or criminal actions. The telepath may attempt to use this power at any time during the enemy turn. If the power works, it may try to take control of the mind of a figure within 24 inches, without needing to see it, but it must choose the nearest target. Make a Leadership test on 2D6 for the victim. If the result is less than or equal to its Leadership, the victim passes the test and repels the mental assault, but it is pinned. If the result is higher than its Leadership, the telepath has the upper hand and decides the actions the victim takes for the rest of the turn (it may decide its direction of movement, the target at which it fires, and so on). At the end of its turn, the victim returns to its normal state.
Remember that the victim will not perform any suicidal action: you cannot therefore force it to throw itself from the fifteenth floor or to shoot itself. This requires a certain amount of good sense from both players. If you cannot agree and the discussion about what counts as a suicidal action goes on for ever, roll the die again to choose another power!
2 – Terror (Effroi). The telepath can summon terrifying mental visions representing what the enemy fears most. The telepath may attempt to use this power at any time during the enemy turn. If the power works, it may provoke illusions in any enemy figure within 24 inches. The target need not be in sight, but it must be the nearest figure. The victim is automatically demoralised (no Leadership test is necessary) and must flee 2D6 inches towards cover, as described in the Leadership section of the Necromunda rulebook. The figure must regain its composure by following the normal rules.
3 – Invisibility (Invisibilité). The telepath can affect the mind of an adversary, which then sees only what the telepath wants it to see. The telepath may attempt to use this power at any moment during the enemy turn. If the power works, it may affect the mind of the enemy figure nearest the telepath within 24 inches, even if that figure is out of sight of the wyrd. The victim is unable to see any member of the gang to which the telepath belongs! It may not make any shot or attack, and if it is engaged in close combat, its score is halved (rounding down). If the victim is in Alert status, it must leave that status. If the victim is a sentinel, it has no chance of giving the alarm. At the end of its turn, the victim returns to its normal state.
4 – Mental Assault (Assaut Mental). The telepath can launch a mortal mental assault which may provoke a heart attack in the victim. The telepath may attempt to use this power instead of a normal attack during its turn. If the power works, it may attack the mind of the nearest enemy within 24 inches, even if that enemy is out of sight. Make a Leadership test on 2D6 for the victim. If the result is less than or equal to the figure's Leadership, the attack has no effect. If the result is higher than its Leadership, the figure suffers a wound with no possibility of saving.
5 – Hallucinations (Hallucinations). The telepath can affect an adversary's mind and provoke horrible hallucinations. The telepath may attempt to use this power at any moment during the enemy turn. If the power works, place a 2 inch template (that used for frag grenades) over the nearest enemy within 24 inches, even if out of sight. Any figure wholly covered suffers the same effects as those caused by a hallucinogenic grenade; figures partially covered are affected on a 4+. Immediately make a roll on the Hallucinations table on page 59 of the Necromunda rulebook to determine how the affected figures behave until the end of the turn. The template is removed once the attack has been launched; unlike a hallucinogenic grenade, it is not left in place.
6 – Mental Strength (Force Mentale). The telepath can increase its own physical abilities, or those of a companion, by calling upon the powers of the mind. The telepath may attempt to use this power at any moment of its turn. If the power works, it may affect either its own mind or that of any friendly figure within 24 inches. The chosen figure has one of the following characteristics increased by 1D3 points, to a maximum of 10 (the player chooses which characteristic is affected): Weapon Skill, Ballistic Skill, Strength, Toughness, Initiative or Attacks. The increased characteristic remains increased for the rest of this turn and the opponent's turn, then returns to its normal level.
Telekinetic Primary Powers (Kino)
Roll 1D6 on the table below for a kino's primary power.
1 – Hail of Blows (Grêle de Coups). The kino can strike an adversary with psychic blows, as if it were being attacked by an invisible being. The wyrd may attempt to use this power instead of a normal attack during its turn. If the power works, it may attack the nearest enemy figure within 24 inches. The normal rules for choosing a target apply. The player may move the victim 1D3 inches in any direction, even into close combat with another figure, into a blast template, or over a ledge (provided no terrain feature prevents the movement), and may decide its facing.
2 – Debris Storm (Ouragan de Débris). The wyrd can use its telekinetic powers to gather the debris which litters the ground and hurl it at an adversary. The kino may attempt to use this power instead of a normal attack during its turn. If the power works, it may attack as if it had a firearm with the characteristics shown below. The attack hits automatically, but the normal rules for choosing a target apply. If the Sustained Fire die shows a jam symbol, no hit is scored, but the wyrd does not have to make an ammo test. Roll to determine the Strength of each hit separately.
| Range (Short / Long) | To Hit (Short / Long) | Strength | Damage | Save Mod. | Ammo |
|---|---|---|---|---|---|
| 12 / 24 | Auto | D6 | 1 | -1 | NA |
Special: 1 Sustained Fire die.
3 – Crushing (Écrasement). The kino can use its telekinetic powers to crush a victim to death. The kino may attempt this instead of a normal attack during its turn. If the power works, it may attack the nearest enemy in sight and within 24 inches. Roll 2D6 for the wyrd and 1D6 for the victim, adding the victim's Strength to its result. If the victim's score is equal to or higher than the kino's, the attack has no effect. If the kino's score is higher, the victim suffers one wound for each point of difference (if the wyrd gets 8 and the victim gets 6, the kino inflicts 2 wounds). Armour saves apply normally.
4 – Force Field (Champ de Force). The kino can generate a force field to protect itself and its close companions. Unlike most wyrd powers, a force field may be used several times in a turn. If the kino or a friend within 2 inches of it suffers damage, the wyrd may attempt to use its force field in response to a special save. The kino must pass a Leadership test to determine whether the power is activated. If it succeeds, all damage is cancelled. If it fails, the damage is inflicted normally. Note that save modifiers do not apply.
5 – Displacement (Déplacement). The kino can transport a friendly figure across the battlefield. The affected figure disappears in a flash of energy, to reappear a few seconds later somewhere else. The kino may attempt to use this power during its own Movement phase, instead of a normal move. If the power works, it may move itself, or a friendly figure it can see, up to 3D6 inches away. The move ignores any figure in the way, any obstacle or terrain feature, and may change level if desired. This movement is made instead of the figure's normal move. It may be used to engage in close combat, in which case the figure is considered to have charged.
6 – The Fists of Fury (Les Poings de la Fureur). The kino can transform its fists into formidable weapons surrounded by scintillating mental energy, which can pierce even the thickest armour. A kino possessing this power has its Attacks increased by +1 and its Weapon Skill increased by 1D3 points permanently. This is not a psychic power, but it reflects the fact that the wyrd has raised its combat abilities to a higher level. The wyrd may attempt to use this power at the start of any close combat phase. If it succeeds, it is considered to be armed with close combat weapons with the profile shown below. If it fails, it must use its normal abilities. Note that if the wyrd tries to use this power and fails, it must nonetheless fight with its bare hands and is not allowed to use a close combat weapon in its possession.
| Range (Short / Long) | To Hit (Short / Long) | Strength | Damage | Save Mod. | Ammo |
|---|---|---|---|---|---|
| Close combat | – | 8 | 1 | -5 | NA |
Special: close combat.
Minor Wyrd Powers
Roll 1D66 on the table below for a wyrd's minor power.
11-16 – None (Aucun). The wyrd possesses no minor power, and has only a primary power.
21 – "You Can Fly..." ("Tu peux voler..."). The wyrd may attempt to use this power instead of a normal attack during its Shooting phase. If the power works, it may affect the mind of any visible enemy figure within 16 inches which is also within 1 inch of the edge of a walkway or platform. The victim attempts to prove that it can fly by throwing itself into the void! Unfortunately, its illusions are short-lived, and it crashes to the ground, suffering the normal damage of a fall (see the Necromunda rulebook).
22 – Float (Flotter). The wyrd may attempt to use this power at any moment of its Movement phase. If the power works, the wyrd itself, or a friendly figure within 12 inches, may move as if it had an antigrav device (see page 64 of the Necromunda rulebook).
23 – Curse of the Weapons (Malédiction des Armes). The wyrd may attempt to use this power if an enemy figure shoots at it. If the power works, the figure concerned must make an ammo test for the weapon it used, whatever its roll to hit.
24 – Frightening Aura (Aura Effrayante). The wyrd provokes fear as described in the Necromunda rulebook. This power always works: the wyrd does not have to make any Leadership test to create the aura.
25 – Suspended Time (Temps Suspendu). The wyrd can slow down time while it moves. It seems to the other figures that the wyrd is capable of moving at an incredible speed. The wyrd may attempt to use this power just before its movement. If it works, it may add 1D6 inches to its normal movement, and may then double that movement if it runs or charges. Moreover, the wyrd may attempt this power if it is engaged in a duel: if the power works, it always shoots first!
26 – Power Cancellation (Annulation de Pouvoir). The wyrd may attempt to use this power if an enemy wyrd which is in sight and within 24 inches passes its Leadership test to use one of its powers. If Power Cancellation works, the power of the enemy wyrd is cancelled and cannot be used that turn.
31 – Banshee Howl (Hurlement de Banshee). The wyrd may attempt to use this power at any moment against an enemy it can see, which is within 24 inches and in Alert status. If the power works, it distracts the enemy's attention and takes it out of Alert status.
32 – Trigger Finger (Doigt Déclencheur). The wyrd may attempt to use this power instead of attacking during its turn. If the power works, it designates the nearest enemy in sight and within 24 inches. The victim accidentally fires one of its weapons (determine randomly which). Roll a scatter dice to determine the direction of the shot. The first figure in that direction, at any level, is the target. Make the rolls to hit and to wound normally, as if the figure had voluntarily used its weapon! If no figure is in the line of fire, the shot automatically misses, but make the roll to hit anyway, in case an ammo test is required.
33 – Rejection (Rejet). The wyrd may attempt to use this power if it is charged by an enemy figure. If the power works, the attacker is repelled 1 inch from the wyrd, and is considered pinned at that point.
34 – Sense of Presence (Sensation de Présence). The wyrd senses the presence of enemies up to 12 inches away, even if they are normally out of sight. This power always works: the wyrd does not need to make a Leadership test beforehand to sense the presence of the enemy. This means that enemy figures cannot hide from the wyrd. If the wyrd is acting as a sentinel in a Raid scenario, it will always detect enemy figures within 12 inches throughout the turn.
35 – Spider Man (Homme Araignée). The wyrd is able to generate a telekinetic field around its hands and feet, which allows it to climb walls and other flat surfaces. The wyrd may attempt to use this power just before its movement. If the power works, it may climb any surface as if using a ladder.
36 – Zen Shooter (Tireur Zen). The wyrd concentrates on using only one of its weapons. The wyrd may attempt to use this power just before making a shot. If the power works, the shot automatically hits a target that the wyrd can see and that is within range of one of its weapons. Even if no roll to hit is necessary, you must still make an ammo roll where one is required.
41 – Wall Walker (Passe-Murailles). The wyrd is able to pierce a small breach in reality, which allows it to pass through walls and other obstacles. The wyrd may attempt to use this power just before its movement. If the power works, it passes through any wall or obstacle up to 1 inch thick that it encounters during its movement. The wyrd may also use this power to pass through a floor, but if it does so, it lands on a lower level and risks being injured.
42 – Chameleon (Caméléon). The wyrd may attempt to use this power after it has moved. If the power works, the wyrd is considered hidden, even if it is totally in the open. The power acts for the whole of that turn and the following turn of the opponent. As the normal restrictions on being hidden apply to Chameleon, this power may not be used if the wyrd has just charged or run, and the wyrd will automatically be revealed if it shoots with one of its weapons.
43 – Reverse Image (Image Inversée). The wyrd may attempt to use this power if it wants to disengage from close combat. If the power works, it is able to generate a reversed image of itself which so disturbs the opponent that the wyrd manages to break off the combat without suffering the slightest damage. Normally, the wyrd moves away from the figure it is fighting, as is usual in the movement of an engaged figure.
44 – Vocal Projection (Projection Vocale). The wyrd may attempt to use this power if it can see a friendly figure which is pinned in place at the start of its turn. The pinned figure may not leave its position, but if the wyrd manages to make its voice heard by the figure, that figure may try to shoot or fight as if a friendly figure were within 2 inches of it.
45 – Blinding Flash (Éclair Aveuglant). The wyrd may attempt to create a small sphere of stunning kinetic energy and project it at a target, where it explodes on impact. The wyrd may attempt this power instead of a shot. If the power works, it has exactly the same effects as a photonic grenade (see page 60 of the Necromunda rulebook).
46 – Aura of Luck (Aura de Chance). The wyrd is very, very lucky. Once per turn, it can force an enemy to re-roll a die which affects it directly. For example, it can force an adversary to re-roll its roll to hit if that shot is aimed at the wyrd, but not if it is aimed at another figure of the same gang. The wyrd must accept the new result, even if the consequences are worse than those of the first roll! This power always works: the wyrd does not need to pass a Leadership test to create this aura.
51 – Healing Hands (Mains de Guérison). The wyrd may attempt to use this power on a friend who is lying on the ground and in base-to-base contact with it at the Rally phase. If the power works, the fighter immediately suffers the effects of a light wound and does not make a roll on the Injury table in the Rally phase. If the power fails, the wounded fighter must make its roll normally in the Rally phase.
52 – Appeasement (Apaisement). A wyrd possessing this power may attempt to use it on a fighter of its gang who risks missing the next battle because of an old injury. If the power works, the fighter may take part normally in the fight. The wyrd may try to help several members of the gang in this way, but must pass a separate Leadership test for each of them. If it becomes possessed and tries to use this power, it is assumed that it has killed the person it was trying to help and has disappeared in smoke!
53 – Old Pain (Vieille Douleur). A wyrd possessing this power may attempt to use it instead of an attack during its turn. If the power works, it may choose the nearest enemy in sight and within 24 inches. If the victim suffers from an old injury, it is immediately taken out of action, as if the old wound had suddenly reawakened. Remove the figure from the table, but do not make a roll on the Serious Injury table. If the victim does not suffer from an old injury, this power has no effect on it.
54 – Garrotte (Garrot). The wyrd may attempt to use this power on a friend who has suffered one or more light wounds, if it is in base-to-base contact with him during the Rally phase. If the power works, these light wounds are healed, restoring the Weapon Skill and Toughness points lost. If the power fails, the wounded fighter must make its normal roll during the Rally phase.
55 – Premonition (Pressentiment). The wyrd is able to see into the future, and can often alert the gang leader if he is about to walk into trouble. If the wyrd is a member of a gang, the player may choose to re-roll the result obtained on the Scenario Table. The player must then accept the second result, even if the first was better. If both gangs engaged in the battle have a wyrd possessing this power, their effects cancel each other out, and no re-roll may be demanded. This power always works: the wyrd does not need to pass a Leadership test beforehand to use it.
56 – Impossible Possession (Possession Impossible). The wyrd has a strong will and cannot be possessed by a daemon. Ignore any "Possessed" result on the Warp Dangers table. This power always works: the wyrd does not need a Leadership test beforehand to use it.
61-65 – Multiple Minor Powers (Pouvoirs Mineurs Multiples). The wyrd has 1D3+1 (that is, 2 to 4) minor powers. Make one roll on this table for each power. If you obtain a result of 11-16 or 61-65 again, re-roll each time you obtain it twice, or once for each of 11-16 and 61-65.
66 – Additional Primary Power (Pouvoir Primaire Supplémentaire). The wyrd has an additional primary power. Make a roll on the Primary Powers table corresponding to the wyrd. If you obtain a power which it already possesses, re-roll. If a belluaire gains an additional primary power, it may control an even larger number of creatures: roll 1D6 instead of 1D3 for the number of creatures controlled by the belluaire during this battle.
Special Characters
This chapter of the rules presents some of the most famous or most infamous individuals who haunt the Underhive. The special characters fighting with gangs are supposed to be only passing through, crossing the territories fairly often, and lending a hand in exchange for a share of the cake, or when it suits their own plans.
Like mercenaries, special characters do not count in the collection of resources or in gang upkeep expenses. A player may not buy equipment or weapons for them, nor borrow, lend or steal any piece of equipment belonging to them for the benefit of a member of the gang. Special characters do not gain experience points and so will never gain new skills or characteristic progressions.
How to Find Them
During any trading phase, a leader may try to find a special character and persuade him to come and help his gang. Roll 2D6 and pay the result in drinks, bribes and other under-the-table payments made during the search. If the result is a double (the same number shown on both dice), the character is unfindable during this trading phase. On any other result, the character hears about the gang interested in his collaboration and gets information about it before making contact. Many are wanted for a reward or for revenge. The character will demand to be paid before his first fight alongside the gang, with another payment after each fight, including the first.
Retribution
For special characters, retribution is special. It varies greatly according to the individual and his characteristics. Most will demand a random sum after each fight, 1D6 x 10 or 4D6 credits, for example. This amount must be paid before the character fights for the gang and after each battle in which he takes part, including the first. If the gang cannot pay the sum demanded, the character will not take part in the next battle, but will remain available in the future. Some characters will also have certain special demands, described separately.
Mentors
A special character sometimes helps a gang for free, if the gang is opposed to a particularly strong adversary. For one reason or another, the special character takes an interest in the gang's progress and sometimes gives it a hand without asking for any payment. The gang does not need to look for a mentor: the mentor will find it all by himself.
If you possess a painted figure representing a special character, you may roll a dice at the start of the game to determine whether he will come to your aid in this fight. You may make this roll only once per scenario, not once per figure of the character that counts for your gang. But a special character will not help just anyone in this way: each special character has a list of gangs with which he has some affinities and to which he will come to the rescue. If your gang does not appear on his list, he (or she) will not help you, even for money. Moreover, a special character will only help a gang if its value is at least 500 points lower than that of its opponent in a scenario, because he knows serious problems are coming and will very probably give the gang a good kicking in the next battle. In game terms, this means that a character will only help a gang if its value is at least 500 points lower than that of its adversary in a scenario. (Note that you must be sure of your gang's value, otherwise you will be unpleasantly surprised.)
Consult the table below to find the result needed to obtain free assistance from a special character. Note that the gang value difference must be exceeded in order to benefit from this table. If you obtain a result lower than the one required, the special character will not help your gang (unless you can pay for him to do so, in which case the payment is made). If the result obtained is equal to or higher than the one required, the special character will come to your aid free of charge for this scenario.
| Gang value difference | D6 |
|---|---|
| 0-499 | He will not help you |
| 500-749 | 6+ |
| 750-999 | 5+ |
| 1000 or more | 4+ |
The Archdevotee of Redemption (L'Archi-dévot de la Rédemption)
The archdevotee is one of the Underhive's most feared Redemption priests. He is a mystic and a prophet of the Redemptionist cause, leading a solitary existence. He travels constantly from one place to another, preaching and pushing the Redemptionists into a state of fury and intolerance which ends at least in a lynching, and quite often in a carnage or massacre of great scale. His opinions are considered rather, let us say, extremist even by his fellow priests, and some say he should be excluded from the Redemptionist movement. The archdevotee denounces all who hold such views as traitors, and influences the masses so that those whose remarks are unfavourable quickly retract them, or end up hanging at the end of a rope, strung up by a hysterical and bloodthirsty crowd driven by the archdevotee's stirring speeches.
| M | CC | CT | F | E | PV | I | A | Cd |
|---|---|---|---|---|---|---|---|---|
| 4 | 4 | 4 | 4 | 5 | 2 | 4 | 1 | 9 |
- Weapons: Flamer, Autopistol, Two-handed Sword.
- Armour: Composite (worn under the robe).
- Skills: Parry (Combat), Jump Back (Saut en Arrière, Agility), Steel Nerves (Nerfs d'Acier, Ferocity).
- Equipment: Fuel reservoir (see below).
- Psychology: The archdevotee is immune to all psychology except Hatred, because he hates everyone!
- Allegiance: The archdevotee works only for the Cawdor or the Redemptionists.
- Value: The archdevotee increases the value of the gang by +325 points.
- Retribution: 1D6 x 10 credits.
- Reward: His head is priced at 325 credits.
Special Rules
Fuel Reservoir. The archdevotee's flamer is very well maintained and he carries an enormous reservoir on his back. So he never runs out of ammunition, and never suffers an incident when firing.
Leader of Men. Any gang including the archdevotee fights in a frenzy of blood-lust just before the battle, driven on by one of his famous speeches. Fighters do not admit defeat and never break off combat unless the archdevotee himself orders them to. This means that the gang never takes rout tests, and may only rout voluntarily.
Red Rust the Magnificent (Rouge-Verrue le Magnifique)
Red Rust is a Goliath-born (fouisseur) king who slowly builds a terrible reputation in the Underhive. He is called "The Magnificent", not because of his nature but because of his fashion sense, his impressive collection of scars and missing extremities, things which are extremely prestigious among the fouisseurs. This is what has enabled Red Rust to show that he is a leader of exceptional brutality, cunning and full of resources, qualities which have helped to establish his reputation.
For now, the bands of fouisseurs under his orders are no more than a dozen, but new gangs join him continually. At Girder Falls, the colony which has suffered most from the raids of Red Rust's growing army, fear increases all the time, and the idea spreads more and more that something really must be done to stop Red Rust before he causes major disasters.
| M | CC | CT | F | E | PV | I | A | Cd |
|---|---|---|---|---|---|---|---|---|
| 4 | 5 | 4 | 4 | 4 | 2 | 5 | 2 | 9 |
- Weapons: Machine pistol, staff (counts as a club).
- Armour: None.
- Skills: Iron Will (Volonté de Fer, Ferocity).
- Equipment: None.
- Psychology: None.
- Allegiance: Red Rust helps only fouisseur gangs.
- Value: Red Rust increases the value of the gang by +195 points.
- Retribution: 1D6 x 5 credits.
- Reward: His head is priced at 195 credits.
Special Rules
Fouisseur King. If Red Rust is part of a gang, he becomes the leader of that gang for the scenario. This means that a fighter of the gang within 6 inches of him may use his Leadership for tests based on Leadership, and that any rout test is taken using Red Rust's Leadership instead of that of the leader. If Red Rust is taken out of action or knocked down at the end of the game, the normal leader of the gang takes back control.
Oath of Allegiance. Any fouisseur gang which uses Red Rust swears an oath of allegiance to him. The gang accepts Red Rust as its king, and must henceforth obey his every whim, or expose itself to serious problems. This applies only if you take part in a campaign run by an arbitrator (see further on). Of course, a gang may decide not to obey Red Rust's orders, which would cause a civil war among the fouisseurs, opposing Red Rust's loyal followers to the renegades.
Mad Donna
Mad Donna was once called Donne Ulanti, the twelfth daughter of old Sylvanus, patriarch of the noble House Ulanti of the Pointe. Sylvanus wanted to keep her pure for a possible political marriage, so he kept her locked in an outside tower of the Pointe. Some say that Sylvanus used to slip in there to torment her, while others say it is that life in this tower which made her mad. Whatever the reason, her disorders only became apparent when she met her future husband, Count Ko'Iron, during a dinner of exotic food from distant worlds, served in crystal goblets and gold-covered plates. All went well until the fourth plate, when Donne stabbed one of the Count's eyes with a little silver spoon. The guards rushed in alerted by the Count's howls (while she was tearing out his other eye), but they did not dare to shoot her, and Donne took advantage of this hesitation to fire the Count's pistol at them.
After that, Donne fled the palace of the Ulanti in complete confusion, sinking deeper and deeper into the hive, until she reached the lower levels. Glory Hole took her in for a while, and this is where her career as a warrior began. She quickly gained a reputation as a crazed fury who cut to pieces everyone who fell between her hands, even flaying a Goliath she had captured and then gouging out one of her own eyes because a barman had told her she was pretty.
Mad Donna then separated from the Escher and wandered for a time among the outlaws in the white wastes before being brought to a gang of Orlock at the Deadly Burrow, in search of archeotechnology. Donna came back alone, and people began to think that she was blessed or cursed. She disappeared again when it became clear that many bounty hunters were looking for her, and the latest news of her, from Two Tunnels, says that the hunters are still on her heels.
| M | CC | CT | F | E | PV | I | A | Cd |
|---|---|---|---|---|---|---|---|---|
| 4 | 5 | 4 | 3 | 3 | 2 | 5 | 1 | 9 |
- Weapons: Plasma pistol, laser pistol and chainsword.
- Armour: None.
- Skills: Impetuosity (Impétuosité, Ferocity), Killer Reputation (Réputation de Tueur, Ferocity), Dodge (Agility), Leap (Bond, Agility).
- Equipment: Bionic eye.
- Psychology: Mad Donna is subject to the rules for Frenzy, and she hates all spyrers.
- Allegiance: Mad Donna works with all gangs except Goliath, spyrer, fouisseur and Redemptionist gangs.
- Value: Mad Donna increases the value of the gang by +225 points.
- Retribution: 1D6 x 10 credits. On a result of 1, Mad Donna does not take part in the next battle, but rejoins the gang later.
- Reward: Her head is priced at 225 credits.
Special Rules
Mad at Heart (Folle à Lier). Every story told about Mad Donna goes on at length about her sadistic leanings, her criminal mania, and the truly horrible things she does to her enemies. If she puts an adversary knocked down or out of action in close combat, and no other person is within range of her next movement of pursuit (4 inches because of her Impetuosity), leave the unfortunate victim in base-to-base contact with her.
During this phase of close combat, and all those that follow, roll on the Serious Injury table for the victim and immediately apply the result, unless it is 61 to 66. In that last case, Mad Donna loses interest in her victim and makes her next pursuit movement. If Mad Donna begins her turn with an enemy figure at charge distance or pinned, she may take a Leadership test. If she passes it, she abandons her victim and continues the combat normally.
Hunted (Traquée). Following her "exploits" in the upper levels of the hive, Donna has always lived precariously, and has often succeeded in making herself forgotten by joining small, little-known gangs. To represent this, roll 1D6 before every game in which Donna is to take part. On a result of 6, the opposing gang gets a bounty hunter free of charge for the duration of the game, even if it already had one. If the value of the gang including Donna exceeds that of the opposing gang by 500 points or more, add +1 to the result of the die; if the difference is 1000 points or more, add +2 to the result.
Gorg the Brute (Gorg le Buffle)
Gorg the Brute was a famous gladiator who led the greatest slave revolt in the Underhive. At the head of an army of former slaves, he captured the colony of Cul-de-Sac Pass and levied a tax on the merchandise of the caravans passing through. Gorg also decreed the abolition of slavery in the colony and freed the prisoners of all the caravans that came by. This was very badly received by the powerful merchants who owned those caravans. They sent an army of cut-throats and bandits to attack the town. A traitor opened the gates of the colony, and the merchants' army sacked Cul-de-Sac Pass, turning its streets into torrents of blood. Gorg the Brute was captured and executed like a common criminal, and his head was displayed on the point of a pike as a warning to those who would dare to defy the power of the merchants.
But... rumours tell that the execution of Gorg the Brute was entirely staged by the merchants, and that Gorg himself managed to escape and is still hiding in the Underhive. These stories are only whispered, because those who talk too loudly draw the attention of the merchants and disappear suddenly or die in mysterious accidents. But the tale keeps spreading, and today most of the inhabitants of the Underhive believe that Gorg is still alive, and that he will one day return to Cul-de-Sac Pass at the head of a new army.
| M | CC | CT | F | E | PV | I | A | Cd |
|---|---|---|---|---|---|---|---|---|
| 4 | 7 | 3 | 4 | 4 | 3 | 6 | 3 | 9 |
- Weapons: Two turbo-chainswords.
- Armour: Gorg is protected by a refracting field which gives him an unmodifiable save of 5+ on 1D6.
- Skills: Bulldozer (Muscle), Tough as Nails (Dur à Cuire, Muscle), Killer Reputation (Réputation de Tueur, Ferocity), Master Combatant (Maître Combattant, Combat).
- Equipment: Gorg is armed with a pair of turbo-chainswords built specially for him. They are treated as ordinary chainswords, but his Strength and save modifier are each increased by +1 (Strength 5 and save modifier -2). Note that since Gorg has two swords, he benefits from two parries.
- Psychology: Gorg hates all merchants and anyone who works for them.
- Allegiance: Gorg will join any gang except spyrer and Redemptionist gangs, provided the gang does not work for the merchants' Guild. (He will not join a gang for the next scenario if it is La Caravane and the gang is defending the merchants.)
- Value: Gorg the Brute increases the value of the gang by +375 points.
- Retribution: 1D6 x 15 credits, but he fights for free if he is the attacker in La Caravane.
- Reward: There is no reward for Gorg's head (after all, the merchants have already officially executed him).
Special Rules
Defender of Freedom (Défenseur de la Liberté). Gorg hates slavery. He will not accept that a prisoner captured by his gang be sold as a slave. Any captured fighter who is neither ransomed nor exchanged will be sent into exile in another hive. He is not allowed to rejoin his former gang, and if the gang that captured him sells him as a slave, that gang gets no credits for him!
Hero of the Slaves (Héros des Esclaves). Slaves regard Gorg as a hero and as the man who led them to freedom. They will never attack him and never attack his gang. This does not prevent Gorg the Brute or any slaves he may have from taking them on in combat, although they will not fight one another. Moreover, any fighter in the same gang as Gorg may use his Command for any Leadership test while Gorg is not knocked down or out of action.
Brakar the Avenger, He Who Rains Death (Brakar le Vengeur, Celui qui Fait Pleuvoir la Mort)
Where Brakar comes from, and how he came to be found at the edge of death in a forgotten tunnel of the Underhive, nobody knows. He was very certainly dead after the terrible wounds he had suffered, had he not been discovered by members of a ratskin tribe. The ratskins carried the wounded man away, nursed him and he slowly recovered, but it was as if the memories of his past life had been erased. He could speak and was able to serve the enormous machine gun which had been found beside him with formidable efficiency, but he did not remember where he came from, nor who he was.
The ratskins who had taken Brakar in were attacked shortly afterwards by a gang of Van Saar armed with bone knives. Brakar was not there when the Van Saar attacked, and when he arrived he found them bending over the bodies of the ratskins. Brakar pushed them all back alone, cutting down more than half of them with short but very accurate bursts of fire. He now roams the wild zones of the Underhive like a phantom, helping any ratskin who needs him, and dealing out his good remembrance to anyone who harms the ratskins without good reason. The ratskins have given him the name of Brakar, after that of their god of war and vengeance, because of his extraordinary combat skills and the supernatural way in which he appears when they need him.
| M | CC | CT | F | E | PV | I | A | Cd |
|---|---|---|---|---|---|---|---|---|
| 4 | 4 | 6 | 4 | 4 | 2 | 3 | 1 | 8 |
- Weapons: Machine gun, bolt pistol, dagger.
- Armour: None.
- Skills: Armourer (Armurier, Tech), Weapons Expert (Expert en Armement, Tech), Rapid Fire or Bolt Pistol Shooting (Tir Rapide ou Pistolet Bolter, Shooting), Ambush (Stealth), Dive (Plongeon, Agility) and Infiltration (Infiltration, Stealth).
- Equipment: None.
- Psychology: None.
- Allegiance: Brakar will only work with ratskin gangs.
- Value: Brakar increases the value of the gang by +330 points.
- Retribution: Brakar never works for money. He will not help a gang as a mentor.
- Reward: His head is priced at 330 credits.
Special Rule
The Avenger. As mentioned above, Brakar never works for money, and he will never be part of a gang except that of renegade ratskins, which may take him on as a mentor. Moreover, Brakar will not help renegade ratskins opposing other renegade ratskins.
Karloth Valois
Karloth Valois is one of the many people who fled into the Underhive to hide a dark and terrible secret. This secret was that he was a wyrd, a human with latent psychic powers. Prophetic visions constantly gave him nightmares, and he had the feeling that the consciousnesses of others struck him like waves on a jetty. Unable to bear the cacophony of the Hive City, he fled towards the depths of the hive and settled in the desolations, as far as possible from the others.
Alone in the crawling horrors of the Zone, he quickly weakened and nearly died several times. Finally, while Karloth was searching the desolations for a wretched means of subsistence, he was pursued by plague zombies, a band of walking corpses hungry for flesh. Karloth ran until his weakened body collapsed, and the demented creatures threw themselves upon him like dogs. Karloth could feel the faint consciousness of his attackers, instinctive and more primitive than that of a child.
Driven by the force of despair, Karloth repelled the monsters with a tremendous effort of will, annihilating their murderous instincts and forcing them to stand passively at a distance. He stayed there, wounded and abandoned among the zombies, while the terrible plague they had injected into him slowly gnawed at his brain. The hours passed, and somehow Karloth got the upper hand over the disease threatening his vital forces, by drawing in the remains of will still present in the zombies, which allowed him to preserve his own existence. Finally, the plague calmed down, and Karloth found himself more or less alive.
Strangely, Karloth's powers were affected by the neural plague. He was able to impose his will on the plague zombies from a distance, unleashing their violence or sharpening their awareness as he wished. He could absorb the vital energy of others, and found that this was his only means of subsistence. Above all, Karloth had a vision of death: an endless boredom, horrible torments and continual terror. He swore that it would never take him.
Karloth began a wandering existence in the desolations, hunting the forms of life he met and using the plague zombies to protect himself from his enemies or to obtain what he needed. His reputation grew, and he was feared across the whole Underhive as a thief of souls and of lives. Some gangs made more or less dubious pacts with him to obtain his help, and his hordes of zombies became a real danger. It was whispered that the dark gods watched over the Valois, and people began to tremble at the sound of his name. But the servants of Redemption rushed into the Underhive for the sole purpose of testing their faith against this human-shaped archdemon, and their flamers kept pushing him further and further into the depths.
The hunt for Karloth Valois became legendary. Wherever he went he was rejected, for people feared him, or Redemption, or both at once. He managed for a time to escape among the poisoned pools and the refuse of the fouisseurs, but the fanatics of Redemption found him even there. The Redemptionist followers of the Red Robe pursued Karloth all the way to the edge of the Abyss, where he had to face them and fight for his own life. The zombies and the devotees clashed in a terrible battle beneath the spiders' webs, and the jets of flame lit up the darkness while they destroyed the ranks of the decomposing zombies. Karloth gathered his brothers and did not allow the empty envelopes of flesh to be left behind, but the priests were animated by a hysterical fervour, and no zombie could ever have stopped them. To escape the fate reserved for heretics, Karloth threw himself into the void of the abyss, several kilometres deep, shouting his defiance of death.
Redemption searched for weeks, but no one ever found any trace of Karloth's body. The inhabitants of the Underhive knew that trying to find him was madness, because nothing can be recovered from the Abyss.
| M | CC | CT | F | E | PV | I | A | Cd |
|---|---|---|---|---|---|---|---|---|
| 4 | 3 | 3 | 4 | 4 | 3 | 4 | 1 | 9 |
- Weapons: Machine pistol, laser sight, Sorcerer's Staff (see below), dagger.
- Armour: Flak vest, save 6+, or 5+ against templates.
- Skills: Dissimulation and Infiltration (both Stealth).
- Equipment: Black Crown (see below).
- Allegiance: Karloth Valois may join any gang except the Cawdor, spyrer or Redemptionist gangs.
- Value: Karloth Valois increases the value of the gang by +250 points.
- Retribution: Karloth demands 1D6 x 10 credits, plus every fighter captured in combat. The opposing gang may always attempt a Rescue scenario to recover its captured members, otherwise they will be fed to the zombies. If Karloth has joined a gang, he can summon plague zombies for 10 credits per D6+1 zombies. This cost is added to his retribution.
- Reward: Karloth's head is priced at 250 credits. Fighting alongside Karloth gives a -3 modifier on the Outlaw Table if the gang is reported to the Vigilantes.
Special Rules
Wyrd Power: Master of the Zombies (Maître des zombies). Karloth can influence the plague zombies thanks to his powers, both by calling them and by motivating them. If Karloth is present, add +1 to each die roll to determine the number of zombies called. All plague zombies within 9 inches of Karloth may roll an additional die for their movement, giving a total of 3D6, and choose two dice for their movement. Plague zombies engaged in close combat within 9 inches of Karloth also add +1 to their Weapon Skill and +2 to their Initiative. This power always works, without a Leadership test.
Wyrd Power: Mind Reading (Lecture des pensées). Karloth can locate a hidden figure within 18 inches if he passes a Leadership test on 2D6. Karloth is not affected by the dangers of the Warp, even on a result of 2 or 12.
Insensible to Pain. Since he escaped the plague, Karloth no longer feels pain. He is therefore never pinned, and ignores the effects of light wounds.
Insensible to Fear. Karloth ignores all the rules of psychology, and is never obliged to take a Leadership test to determine whether he is demoralised. If the gang including Karloth routs, he sighs deeply, mutters something about the unreliability of mortals, and follows the gang.
Black Crown (Couronne Noire). Karloth made the Black Crown himself to increase his vampiric powers. Absorbing vital energy was long and delicate for Karloth, but with this crown he can drain a man's life force instantly in a flash of black energy. Karloth may use the Black Crown instead of his pistol in the Shooting phase. It works like a shot: Karloth cannot use it if he has just run or charged, or if he is engaged in close combat, and he must have his target in view. The crown affects a figure within 9 inches. Both players roll 2D6 and add the Leadership of their figures. If the results are equal, or if Karloth's score is the lowest, the attack has no effect and the victim is not even pinned.
If Karloth's score is higher than the victim's, he may absorb one point from one of the victim's characteristics and add it to his own. He may choose any characteristic, but he may not increase any one of his own characteristics by more than one point. The Black Crown may also restore Karloth's lost wounds: a victim reduced to 0 Wounds by the Black Crown is automatically knocked down, and no injury roll is made. Victims taken out of action must still roll on the Serious Injury table. The Black Crown also affects figures already knocked down, but it does not work on plague zombies.
After the battle, all the characteristic points stolen are returned to their victims, and Karloth's characteristics return to normal.
Sorcerer's Staff (Bâton de Sorcier). This is a strange weapon used by Karloth, who says he found it in a deep labyrinth. The staff is wielded in both hands and allows Karloth to parry in close combat. If Karloth wins a close combat with the staff, he adds +2 to his Strength for the wound roll. The staff is also a powerful protection against the powers of other wyrds. If a wyrd power affects a figure within 18 inches of Karloth, Karloth may cancel its effects by passing a Leadership test on 3D6 (a result less than or equal to his Leadership).
Arbitrator Campaigns
The Necromunda game contains everything you need to run a basic campaign. Players organise and fight their battles, gangs develop in experience and in size, and the whole world has a good time! This form of campaign is pleasant to play and the different scenarios that can be played make the game pleasant and varied. However, once you have led one or two gangs to the top of the hierarchy, you may want to extend and develop your campaigns so that the characters who begin to take on a life of their own can be given something to do. That is the purpose of the Arbitrator Campaigns.
(The designer's illustrated example campaign, a Chronicle of the Castle Rock campaign, is omitted from this transcription as flavour text.)
To run an Arbitrator campaign, the first thing to do is to appoint an Arbitrator, who should be the most experienced player and the one in whom the others have most confidence. The Arbitrator is responsible for the smooth running of the campaign and, more importantly, must organise certain special scenarios for the players. The Arbitrator also enjoys throwing a few random events into the campaign, to give the players extra opportunities or to make them suffer setbacks they would not have met in a normal campaign.
The Arbitrator notes the results of the gangs and may even publish a bulletin for the other players. The bulletin is an ideal way of keeping all the players informed of what is going on. It is very amusing to write and easily filled by the events of the campaign: challenges, insults, epitaphs, advertisements, reports of battles, and everything else you can think of. The Arbitrator may himself play a gang for as long as he does not take advantage of his position to gain an unfair advantage.
(The remaining pages of the Arbitrator section describe the campaign rules, scenarios and events and are transcribed below.)
When Is a Gang Too Strong?
(The designer's account of the campaign in which these rules were developed is omitted as flavour text. The rules themselves follow.)
Some gangs in the campaign fought a great many battles and reached dizzying values. These gangs had fighters with terrible combinations of improved characteristics and skills, capable of demolishing a less experienced gang in a few turns, or even in one. Some of these gangs were simply very numerous, with 16 or 18 fighters; others had fewer members, but all were very experienced and very well armed. Players with very powerful gangs quickly noticed that they had too many fighters with too many skills to remember everything during a battle. They also noticed that nobody wanted to play with them any more, and so there was less fun to be had for them.
Gradually, the players began to withdraw their gangs voluntarily, so that they could play a new one, and perhaps try out a different House or one of the outlander gangs. As Arbitrator, I adopted this idea and encouraged the reluctant players to retire. A little later, I introduced a semi-official rule decreeing that any gang reaching a value of 4000 points must withdraw from the campaign within the week.
This seemed to be appreciated by the players. The owners of the retiring gangs felt that they had proved their skill, and wanted to show with their new gang that it had not been a matter of luck. The retired gangs became legends, and gave their less powerful rivals the chance to occupy the space thus created.
Gangs which retire do not disappear for ever. The players may use them in Arbitrator scenarios or in multi-player games (even when they are attacked elsewhere). The challenges representing these games are more suited to the firepower that such gangs can produce than those of ordinary gangs. We therefore consider that gangs which retire simply protect their territory without getting too involved.
Another approach is to consider that a gang which retires is destined for a higher task, such as joining the Planetary Defence Forces in the hope of being given high posts in the Imperial Guard. This gives the opportunity to create special scenarios to develop the history of the gang, or even to introduce it into Warhammer 40,000 games. Such gangs can also found or protect a colony, become professional gladiators in the Hive City, work for a noble House of the Spire, establish an outlaw kingdom in the wastes, leave the planet (by legal means or by hijacking a ship), or go to another hive by a long and perilous journey, and so on.
Multi-Player Games
Multi-player games are pleasant to run for a novice or very busy Arbitrator, because they are very simple to organise and to play. They do not demand a lot of work, so you can concentrate on making things go as well as possible. In a multi-player game, it is the cooperation (or non-cooperation) and rivalries and recriminations between players which add a different dimension to the battle. Such games can easily turn into campaigns in their own right, while battles in ranks, uprisings, rivalries between Houses, territorial wars and so on rage around them.
Scenarios for two players of Necromunda and Outlanders work very well with several players, as long as the gangs are spread between camps of roughly equal size. At each turn, the players of one camp move, shoot and fight as they would in a normal game. Then all the players of the opposing camp play, and so on. Gangs take their rout tests normally, but the game does not stop until all the players of one camp have routed.
Of all the multi-player games I have run as Arbitrator, the most amusing was a simple Brawl (Empoignade) with three players. To ensure the game was not unbalanced, I had noted in advance the value of all the gangs, and had made sure that the total of each camp was approximately equal.
Trying to play games with three or more camps becomes difficult, because the players of the other two camps must wait until the others have played before they can rejoin. The best solution is to limit the number of fighters that each player may use in the battle, so that the turns go faster. If you are interested in games with three or four camps, look at the Arbitrator scenario Lord of the Tower, which will give you some ideas.
Once the game is under way, all the Arbitrator has to do is keep the players focused on what they are doing, so that the game does not become muddled and confused. I personally solved this problem by shouting at the start of each phase and giving the players ten to twenty minutes to finish their actions before the next phase. Since the players already know the rules, the role of the Arbitrator is reduced to settling disputes (essentially lines of sight and the importance of cover) and helping novice players.
Arbitrator Scenarios
One of the most rewarding aspects of the Arbitrator's role is creating special scenarios for the other players. Let your imagination run wild and invent all sorts of situations not covered by the standard scenarios. Arbitrator scenarios also let you bring in creatures and inhabitants of the Underhive which one does not normally meet in classic scenarios. In these scenarios, you will generally play as Arbitrator, the opponents of the players or, if they are several, one against the other. Your role is not to eliminate gangs (if you do, you will soon find nobody prepared to risk his gang against you). Arbitrator scenarios are rather an opportunity to do something amusing and different, encouraging players to try a new approach or to adapt their tactics.
Outlanders includes three Arbitrator scenarios: The Purge (La Purge), Lord of the Tower (Seigneur de la Tour) and The Assault of the Barricades (L'Assaut des Barricades). They are included as examples of the Arbitrator scenarios. Each presents suggestions for variations or for dealing with particular problems that may arise when you run them. Once you have played each of them one or two times, you should be able to devise your own Arbitrator scenarios.
To help you perfect your Arbitrator scenarios, we have included a bestiary presenting the creatures which can make good opponents for the gangs of the Underhive. The enemies may be of all sorts: outlaws, mutants, outlanders, extraterrestrials, Chaos Space Marines, worshippers and so on. The list is limited by space, but the choice should be instructive.
If one of the figures in your collection is not included in this list, do not hesitate to devise your own rules for it. The weapon profiles or creature profiles not presented may be taken directly from the Warhammer 40,000 game. With a little luck, we will present more information on the skills and special rules of other inhabitants of the Warhammer 40,000 universe in future issues of White Dwarf. Do not forget that you can also create your own special characters to help or oppose the gangs, or to introduce them into special missions. For example, a gang may be hired to escort a high-ranking individual, such as an Imperial Inquisitor carrying out an investigation into the deviant activities of the Underhive. Another gang may be paid to eliminate that Inquisitor. You can see the kind of thing...
Finally, it is a good thing that Arbitrator scenarios let players acquire rewards which they could not otherwise obtain. Rare weapons and equipment, or great sums of money, are often more attractive than cash, but a large sum of money will also tempt the players. Make sure that the difficulty of the mission corresponds to the reward, and do not give anything too powerful. For example, a master flamer is very desirable and not too powerful, but distributing carapace armour to the whole gang risks making it far too strong.
Campaign Events Table
The Campaign Events Table adds a little spice and colour to a Necromunda campaign. The events tend to give newcomers more chances than well-established gangs, so they are useful for balancing the campaign and preventing the old gangs from dominating. However, campaign events offer each player his share of opportunities and calamities.
In our campaign, we rolled on this table once a week, since we played six or seven games a week. In a calmer campaign, it is better to roll on this table only once every two or three weeks. As you will see below, the most important thing is that the Arbitrator keeps all the players up to date with what is going on.
Most events have an effect which lasts until the next event is rolled. Some of them produce immediate effects (such as "Hive Tremor", for example), and once these events have been resolved, they have no further effect. The duration and effects of each event are specified in the table below.
| D66 | Result |
|---|---|
| 11 | HIVE TREMOR. Each player must immediately lose a randomly selected territory. Players who have fewer than three territories may ignore this result. |
| 12 | PLAGUE ZOMBIE. An epidemic of the terrible plague breaks out in the sector. Each player must randomly designate a member of his gang. This fighter must make a roll on the Serious Injury table as if he had been taken out of action by a plague zombie (see the Fouisseurs chapter for the rules on plague zombies). |
| 13 | MUTANT INVASION. An abnormally large number of mutants invades the sector. Make a monster roll as in the Les Pillards scenario for each battle fought until the next event. |
| 14 | SHORTAGES. Unexpected shortages cause local prices to rise. All weapons and equipment see their price doubled until the next event. |
| 15 | FOUISSEUR KING. A fouisseur king has succeeded in uniting all the fouisseurs of the sector, and they extort large sums from the colonies. Until the next event, outlaws and gangs that are not outlawed must divide by two the revenues of their territories. |
| 16 | DISCOVERY. A cavern, a well or similar place has been discovered, and the gang with the highest value takes it. Generate a new territory. Note the value of all the gangs. The next time you roll an event, the gang whose value has increased the most will obtain this new territory. |
Transcriber's note: the printed table gives each result as shown above. Where a result gives a new territory, the territory is generated on the Necromunda Territories Table unless the event states otherwise.
Arbitrator Scenarios
Necromunda Scenario: Master of the Spire (Maître de la Spire)
Master of the Spire is a perfect example of the type of arena game popular in the Underhive. It takes place in a heavily guarded area of the Lower Levels, the spyrodrome, and is open to any gang with a value of at least 1250. The arena is dominated by a great central tower which represents the objective of the combat. The gangs each have a base in a corner of the terrain, from which they launch themselves to reach the top of the tower. The first gang to reach the large red button on the top floor wins a substantial prize. Two to four gangs may take part.
Gangs. Master of the Spire is usually played with four gangs, and sometimes with two or three. More than four gangs would make the affair too confusing for poor players (and would also make a sacred headache for the Arbitrator). Each gang is entitled to have up to three figures in play at any time. If all four bases are occupied, each gang may have three figures. If there are only three gangs, each may have four figures; if there are only two gangs, each may have six figures.
All gangs may fight in the spyrodrome, including outlaws and outlanders. All weapons may be used, even heavy weapons. The only real rule in Master of the Spire is that wyrds may not take part (for the safety of the organisers and the spectators).
Set-up. Master of the Spire is played on a square table of approximately 1.20 m x 1.20 m. The centre of the table is occupied by a large tower. The three-storey tower of Necromunda (the "Building Two" of the assembly guide) is perfect, but the tower is large, so we prefer that. For our games, we use the towers of two boxes stacked one on top of the other. At the top of the tower is a large red button, represented by a counter.
The tower must be surrounded by other buildings and connected to them by walkways. The four bases are placed at an equal distance from the tower. Each base must be a building and contains a Target counter (represented by a special card element) which the gang must defend.
All players roll 1D6. The player who obtains the highest result chooses a base he wants, then sets up his warriors within 4 inches of his Target counter. The player who obtained the second highest result then chooses one of the unoccupied bases, and so on. Tunnels, ventilation ducts and infiltration skills may not be used.
Sequence of Play. Roll again to determine which player plays first. Once the first player has finished his turn, the player on his right plays his turn, and so on.
Bases. Each base contains the player's Target counter. This is an objective the size of a man, which lights up and makes noise when it is touched or struck. Primitive weapons are used at the spot: drums or old horns, for example, are used by the Master of the Spire to make the sound. Gangs must protect their Target at all costs, for several good reasons. The Target represents the territory of the gang in the game, and if it is touched by an enemy (or by a shot), it is said that the enemy has devastated the base. This forces a fighter from the devastated gang to leave the game immediately, reducing the strength of his gang.
If an enemy fighter shoots and hits the Target, he may choose one of the members of the "devastated" gang and remove him immediately from the game. The fighter designated is blown up by one of the numerous traps in the floor of the arena. The fighter is unhurt (assuming he was unhurt when removed from the game), but he cannot be replaced, and this reduces by one the number of fighters the gang can field.
If an adversary fighter engages in close combat with a gang's Target, that gang is entirely removed from the game at the end of the close combat phase (all its remaining fighters leave the arena).
Reinforcements. If a fighter is taken out of action, a reinforcement may arrive at the gang's base at the start of its next turn. A fighter knocked down may be withdrawn and replaced by another member of the gang if he manages to reach his base and touch the Target counter (the crowd loves these long and painful returns to base). On the other hand, fighters who manage to return to base do not have to roll on the Injury table, because it is assumed that they have been cared for and put back on their feet as soon as they leave the arena.
The Big Red Button. The first player who begins his turn in contact with the big red button at the top of the tower may press it and win 100 credits for his gang. You may not press it in the turn in which you arrive at the top of the tower, so the other gangs have a turn to stop you. Pressing the button usually signals the end of the game, although in some arenas the combats do not stop until someone has pressed the button two or three times, or until all the fighters have regained their base.
End of the Game. Gangs do not take rout tests; they may rout voluntarily but do not replace their casualties. When they no longer have any fighters, it is over. Gangs with no more men to replace are also out of the game. Gangs are also eliminated if the adversary fighters manage to touch their Target.
When the reward is won, the game generally stops automatically, as previously noted. This is also the case if only one gang remains in play. Note that if only one gang remains, nobody gets the reward: the aim was to reach the top of the tower, not to kill each other!
Experience.
- +10 For the leader of the winning gang.
- +10 For pressing the big red button.
- +5 For each wound inflicted, or for each hit (in hand-to-hand combat or by a shot) on an enemy's Target.
- +D6 For surviving the game.
- +1 For each consecutive level a figure climbs in the tower. This bonus is only awarded once. If a figure climbs back down a level, it does not gain additional experience by climbing back up to that level.
Suggestions. Master of the Spire is only one example of the arena games in which the gangs take part. The games are generally quite fast. If you want them to last longer, you may modify the rules. For example, you may say that the button must be pressed by a fighter who has to stay on it for a turn before returning to his base before he earns the reward and ends the game.
There are other types of arena combat which make very good Arbitrator scenarios, and if you find something interesting, send it to us, and who knows, perhaps we will publish it in White Dwarf! We have tried a variant of this game in which the crowd demands that combats be fought at close quarters, so that only pistols, grenades and close combat weapons would be allowed. This type of game is even faster (machine guns slow you down a lot), so you may need to impose extra rules to lengthen the game.
If 100 credits seems to you too great or too small a reward, fix an appropriate sum or some other thing more interesting than money. To attract gangs, you can put in play a heavy weapon or a rare item of their choice, or a territory. The winner may also qualify for a special mission, which is then an excellent introduction to a one-on-one scenario.
Campaign events may be used in this scenario, but they require an intelligent interpretation or replacement dice rolls. You may also simply choose the result that suits the arena combat. The ever-popular Bottomless Pit (Fosse sans Fond) is the best example of something amusing and dangerous. You may also introduce a flora or fauna dangerous enough to keep the players wary, or disperse some traps in the arena. Imagine the scene: a fighter finally reaches the top of the tower and finds himself face to face with an enraged giant spider...
Arbitrator Scenario: Purge!
The authorities, worried by a recent increase in the number of mutants and deviants in the Underhive, have authorised a Purge. The Purge will take place at a fixed place and time. Two to four gangs may take part, and their warriors will then act together against hordes of deviants and vermin controlled by the Arbitrator. Bounties will be paid for everything that is killed.
Gangs. Outlaw gangs may not take part in a Purge scenario, because they are more likely to be hunted than to hunt! Gangs taking part in a Purge may be of any value, but the more experienced they are, the more powerful the deviants will be. However, if high-level gangs fight alongside weaker gangs, the latter will have to cooperate effectively to prevent the deviants from escaping. Add together the values of all the gangs playing in this scenario to determine the type of deviants they will meet.
Deviant Figures. Before running a Purge scenario, the Arbitrator must gather together all the appropriate figures in his collection to represent the deviants and the vermin, as well as all those he can borrow, divert or wheedle from other players. The more varied the figures, the more interesting the game will be. The figures which may be used are given below. You may not know some of the models indicated; do not worry, since all these creatures are described in the Underhive Bestiary. Place all the figures you have been able to gather next to the table.
| Category | Usable figures |
|---|---|
| Hive vermin | Giant spiders, charoptères, lamias, spider mothers, centipedes, giant rats |
| Deviants | Chaos worshippers, kinsmen (Consanguins), fouisseurs, outlaws, mutants, renegade ratskins, beastmen |
| Extraterrestrials | Genestealer hybrids, genestealers, Chaos Space Marines, orks and gretchin, Eldar scouts |
| Chaos creatures | Beasts of Nurgle, beasts of Slaanesh, Hounds of Khorne, daemonettes, Rose Horrors, Tzeentch incendiaries, Plague Bearers, bloodletters |
| Sorcerers | All types of wyrds, psykers, magus genestealers |
Important note: any deviant and so on may only be equipped with weapons which are visible on its figure. This avoids confusion for the Arbitrator running the game, and is fairer for the gangs fighting the creatures. Likewise, you may consider that the gangers carry only the weapons and equipment visible on their figures, the rest being left visibly with the gang's loot.
You may also use figures equipped with special or heavy weapons against very high-value gangs, such as those described in more detail later. Deviants, wyrds and extraterrestrials are equipped with rebreathers and/or photo-visors if these are visible on the figure.
Deployment. The Purge scenario must be played on a table of at least 1.50 m x 0.90 m, and preferably larger. You will need to combine at least two boxes of Necromunda to obtain a correct density on the table. The more terrain there is, the better. The Purge takes place in the Zone, and most of the terrain you can lay out will do the job: debris, rubbish, muddy ponds, makeshift structures and so on. This makes it very suitable to use the Random Events in the Purge scenario. If your table is large enough (1.80 m x 1.20 m or more), it may be amusing to roll different events for each quarter of the table. Re-roll contradictory results or those which might create problems because of the placement of terrain (Bottomless Pit, for example). Where it is useful, mark the limits of certain effects (Sea of Mud, for example).
The gangs deploy on the two long edges of the table, each gang using its own section of table edge. The players decide how they will place their warriors, and a gang may spread its fighters along both deployment edges. The gangs may deploy up to 3 inches inside the table. Once all the gangs have deployed, the Arbitrator prepares the Encounter cards as described below.
Encounter Cards. To play the Purge scenario, the Arbitrator needs a pack of ordinary playing cards (called Encounter cards from now on) to generate the creatures the players will meet during the Purge. Take the pack of cards, shuffle it thoroughly, and place three cards roughly in the middle of the table. The cards are face down, and neither the Arbitrator nor the players may look at them before they are revealed. A pack of Encounter cards like this one represents one of the many places which serve as hideouts for the inhabitants of the Underhive. For example, the cards may indicate the lair of a vermin infestation, a deviant watch post or a camp of outlaws.
Now deal another pack of three cards. Each pack must be placed at least 16 inches from another pack and at least 16 inches from the edge of the table. Once set aside, they may be placed anywhere. Continue to deal packs of cards in this way until it is no longer possible to place any more.
Sequence of Play. The game begins with the gangs' turn, then the deviants' turn, and so on. The game continues until all the Encounter cards have been revealed and there are no deviants left on the table, or until all the gangs have failed their rout test or have voluntarily routed.
Note that all the players move their gangs at the same time. If the situation becomes confused (which is likely), have the players play one after the other. The gangs may not attack each other in this scenario.
After all the players have completed their turn, it is the Arbitrator's turn, moving all his figures (in the order he chooses). The gangs may move, shoot and fight as in a normal game, but only the deviant figures controlled by the Arbitrator may be moved in the Arbitrator's turn. The deviants may move, shoot and fight, but they follow the rules of the Purge scenario concerning their special behaviour.
Revealing Encounter Cards. As soon as a member of a gang finishes his movement within 12 inches of a pack of Encounter cards, the cards are revealed. This immediately interrupts the rest of that gang's movement. The cards are also revealed if the Arbitrator obtains a 6 at the start of his turn, as described below. When they are revealed, the Arbitrator turns them over and looks at them.
The nature of the cards indicates the type of deviants roaming the corner. Since more experienced gangs have the mission of cleaning up the most dangerous zones, the meaning of the cards depends on the cumulative value of the gangs taking part. The tables below give advice on the density of figures appropriate to each card. You may modify these tables, or invent your own, so that they suit the figures you have available or the strengths and weaknesses of your players.
Cumulative Value of Gangs: less than 8000
| Card | Effect |
|---|---|
| Joker | Surprise attack! See below. |
| Black Ace | 1 Chaos creature or 1 sorcerer or 1D3 extraterrestrials. If none of these figures is available, the card is treated as a joker. |
| Black King | 4 figures of vermin or deviants. A deviant figure may be armed with a special or heavy weapon. If no figure is available, the card is treated as a joker. |
| Black Queen | 3 figures of vermin or deviants. If no figure is available, the card is treated as a joker. |
| Black Jack | 2 figures of vermin or deviants. If no figure is available, the card is treated as a joker. |
| Black 2-10 | 1 figure of vermin or deviant. If no figure is available, the card is discarded. |
| Red cards | No effect. Discard. |
Cumulative Value of Gangs: between 8000 and 12000
| Card | Effect |
|---|---|
| Joker | Surprise attack! See below. |
| Ace | 1 Chaos creature or 1 sorcerer or 1D3 extraterrestrials. If none of these figures is available, the card is treated as a joker. |
| Black King | 1 Chaos creature or 1 sorcerer or 1D3 extraterrestrials. |
| Red King | 4 figures of vermin or deviants. A deviant figure may be armed with a special or heavy weapon. If no figure is available, the card is treated as a joker. |
| Queen | 3 figures of vermin or deviants. If no figure is available, the card is treated as a joker. |
| Jack | 2 figures of vermin or deviants. If no figure is available, the card is treated as a joker. |
| 2-10 | 1 figure of vermin or deviant. If no figure is available, the card is discarded. |
| All Hearts | No effect. Discard. |
Cumulative Value of Gangs: more than 12000
| Card | Effect |
|---|---|
| Joker | Surprise attack! See below. |
| Ace | 1 Chaos creature or 1 sorcerer or 1D3 extraterrestrials. |
| King | 1 Chaos creature or 1 sorcerer or 1D3 extraterrestrials. |
| Queen | 4 figures of vermin or deviants. One deviant may be armed with a special or heavy weapon. If no figure is available, the card is treated as a joker. |
| Jack | 3 figures of vermin or deviants. One deviant may be armed with a special or heavy weapon. If no figure is available, the card is treated as a joker. |
| 10 | 2 figures of vermin or deviants. If no figure is available, the card is treated as a joker. |
| 2-9 | 1 figure of vermin or deviant. If no figure is available, the card is discarded. |
Notes on the Encounter cards.
Jokers. If the card is a joker, the gang which revealed the cards is the victim of a surprise attack. Roll 1D6 and refer to the Surprise Attacks table below to determine the follow-up. If the cards were revealed by the Arbitrator when he obtained a 6 at the start of his turn, the surprise attack applies to any figure on the table!
Placement. Figures which appear may be placed anywhere within 4 inches of the position of the cards. The only exception concerns the vermin of the hive, which may be placed directly in base-to-base contact with the figure which revealed the cards: they leap from the undergrowth to ambush the unfortunate fighter! If vermin were revealed by the Arbitrator's 6 at the start of his turn, they may attack any figure on the table. Vermin attacking in this way are considered to have charged during the first round of combat.
The Arbitrator's Turn. After all the players have completed their turn, it is the Arbitrator's turn, in which he moves all his figures still alive on the table and makes them fight. Before doing so, however, he may roll 1D6. On a result of 1-5, nothing happens and the Arbitrator plays his turn normally. On a result of 6, he may turn over and reveal a pack of cards which has not yet been exposed. The noise and confusion have alerted the deviants, which decide to act before they are discovered!
Surprise Attacks Table
The Surprise Attacks table includes creatures from the Underhive Bestiary. When you run a Purge, you may use the simplified rules below, or, if you prefer, the full rules for these creatures given in the Bestiary.
| D6 | Surprise Attack |
|---|---|
| 1 | Face-Eater (Mange-Face). The victim must roll under its Initiative or suffer a Strength 3 hit. The face-eater stays attached and inflicts another Strength 3 hit each turn until it is removed. It is removed using the extinction procedure for flames. In the meantime, the victim moves as if it were on fire (except that here it has a face-eater attached to its face). |
| 2 | Shower of Ashes (Conque des Cendres). The victim must roll under its Initiative or be unable to move for the rest of the game. The figure recovers completely after the game. |
| 3 | Spider Swarm (Vers Fouettards). The victim is attacked by 1D3 spider swarms. Each of them inflicts one hit at Strength 3 on a result of 4+ on 1D6. |
| 4 | Brain Leech (Cérébrine). The victim must pass a Leadership test. If it fails, it is controlled by the brain leech and will be treated as a figure of the Arbitrator's for the rest of the game. The figure recovers completely after the game. |
| 5 | Gas Mushroom (Champignon à gaz). Roll 1D6: on a result of 1-3, treat it as if a hallucinogenic grenade had exploded at the feet of the victim. On 4-6, treat it as if an asphyxiant grenade had exploded. |
Wounded Deviants
Consider that all deviants which suffer a "knocked down" result on the Injury table are placed "out of action" instead. The player whose attack knocked the deviant down takes the figure and guards it until the end of the game (he then collects the bounty). Deviants which suffer light wounds are pinned, but suffer no penalties to their Weapon Skill and Toughness.
Fleeing Deviants
Deviants may escape by leaving the table through the gangs' deployment edges. Deviants which escape in this way are gone for good and will not be rewarded, as indicated below. Deviants may not escape by the long edges of the table.
End of the Game
The game continues until all the Encounter cards have been revealed and there are no deviant figures left on the table, or until all the gangs have failed their rout test or have voluntarily routed.
The gangs collect bounties for each of the Arbitrator's figures they have knocked out of action or off the table. The amount depends on the type of deviant, as detailed below.
| Type | Bounty |
|---|---|
| Hive vermin | 10 credits |
| Deviants | 20 credits |
| Extraterrestrials | 40 credits |
| Chaos creatures | 80 credits |
| Sorcerers | 100 credits |
Reduce the sum received by 5% for each figure which has escaped (so if two figures have escaped, reduce all bounties by 10%). If all the gangs have routed, consider that all the deviants of these cards escape with those which are already on the table (taking with them, no doubt, all hope of bounties).
Whatever the result of the Purge, once the game is over, the players may collect the revenues of their territories normally.
Experience
During a Purge, the warriors gain the following experience points:
- +2D6 For surviving the battle (even if wounded).
- +5 For having put a figure of the Arbitrator's out of action or off the table.
- +20 For the leader of the gang which has taken the largest bounty.
Purge Suggestions
The Purge is a good multi-player scenario which encourages gangs to cooperate against a common enemy. Be careful: games involving several large gangs can turn into major battles, and it can be useful to have an assistant Arbitrator. Since the gangs start on opposite edges, each Arbitrator must always respect the sequence of play.
The scenario itself is very flexible and can be adapted to the strangest collections of figures. When a pack of cards allows you to take several figures, try to make sure that all the figures are of the same type (all worshippers or all beastmen, for example), or of the same "family" (genestealer hybrids and kinsmen, for example). This makes the scenario more coherent, and prevents the players from being attacked by a random selection of creatures.
If you have access to a Warhammer 40,000 army, you can give the Purge a distinct theme by using this army to represent the villains. For example, I have a genestealer cult which I used in a Purge scenario. It was easy to use the genestealers and hybrids as extraterrestrials, and kinsmen as deviants. To add a bit of variety, I also used some vermin such as giant spiders (which killed someone) and lamias (which left a fine scar on a leader).
The Magus corresponded to a specific card (the ace of spades), and had some wyrd powers determined before the game. This may seem particularly hard on the gangs, but they were very experienced, and some had already been half retired. In the end, they all got lost...
I used genestealers, but you will probably have found it just as simple to use a Chaos army to represent an expanding Chaos cult, simply by taking mutants, beastmen and worshippers to represent the deviants, vermin and sorcerers for the aces. If demons are involved, this gives you the opportunity to include an Inquisitor to hunt them. The orks and eldar are a little more difficult to introduce, but they may be found in the Underhive on a secret mission, and get caught up in the Purge.
One problem with the Purge is that it cannot be played by outlaw and outlander gangs. A possible solution (suggested by Gavin Thorpe) is to assign pre-designated outlaw or outlander groups to certain cards (for example, the Jack of Clubs = Mad Dog and Brother Zeke of the Dog Soldiers gang). When that card is revealed, the players place their figures on the table and control them from that moment, moving and shooting after the gangs but before the Arbitrator's turn.
There are many good reasons for outlaws and outlanders to be caught up in a Purge. The outlaws will try to protect their hideout or to flee; the spyrers will take advantage of the confusion to improve their hunting score; the Redemptionists will try to wipe out the impure (and the others too, for that matter), and so on. You will need to set appropriate experience bonuses for outlaws and outlanders to compensate for the fact that they do not earn bounties. For example, an outlaw who escapes may gain 5 experience points, and a Redemptionist who kills a mutant, a sorcerer or an extraterrestrial may gain double experience points.
Arbitrator Scenario: The Assault of the Barricades (À l'Assaut des Barricades)
From time to time, a coalition of gangs attacks a colony or a fortified trading post and fights a pitched battle. These gangs may be greedy outlaws in search of plunder, or law-abiding gangs seeking to collect a fat bounty in a single blow. Up to three gangs may take part in this scenario, either against an attack directed by the Arbitrator, or against one or two defending gangs run by players.
Gangs. As noted above, any gang may take part in the Assault of the Barricades, but avoid strange combinations, such as Redemptionists with fouisseurs, or outlaws with Vigilantes. If outlaw gangs or outlanders and law-abiding gangs both want to take part, send the numerous low-value gangs to fill the role of defenders.
Add together the values of the gangs of both camps to ensure that the attackers are stronger than the defenders, at a ratio of about 2/1 or 3/2 (so if the total value of the attackers is 6000 points, the defenders should reach 3000-4000 points in total).
Defenders. If the players cannot provide the defenders, or if the players on the defending side do not have a sufficient value, you will need to choose additional forces. The value of the defending gang directly reflects the amount of credits the Arbitrator must spend. So, in the example above, the defenders would be worth 3000-4000 credits. If a gang defending a level of 1500 takes part, the Arbitrator must take between 1500 and 2000 credits of additional defenders.
Use the standard gang lists to choose the defenders, since most will be gangers or ordinary kids. Ignore the maximum of two ballistae: instead, the defender may have one ballista for each 1000 credits. The defenders are entitled free of charge to the five sections of barricades and to the watchtower. In addition, they may spend credits on the following supplements:
Rampart Weapons (Armes de Rempart). Special and heavy weapons fixed to the barricades, towers or buildings by mounts may be bought at half their normal cost. Note that they are not bought for specific figures, unlike ballistae. These weapons, on the contrary, represent old weapons consuming a lot of ammunition and too heavy to be moved. A weapon of this type would be a handicap in the wastes but is perfect for the defence of a colony.
Rampart weapons may not be moved and are attacked separately like any other figure. They have an Endurance of 4 and 1 Wound. Any weapon which suffers a wound is destroyed.
Traps. Improvised mines, grenades made from tins, pit traps lined with stakes and other snapping traps line the approaches to colonies. Trapped areas are represented by counters costing 50 credits each. Any figure (including defenders) which passes within 3 inches of a trap counter must pass an Initiative test or suffer a Strength 3 hit. If a figure rolls a 1 on its Initiative test, the trap is disarmed and the counter is removed.
Animals. Many inhabitants of the Underhive have pets which would make most normal people howl and run away. The guards of a colony or a trading post may even have very dangerous creatures to detect intruders. Trained creatures may be bought from the Underhive Bestiary at the price indicated. They act like normal figures, since they are perfectly trained. The defender may have only one creature for every three defenders.
Metavine (Métavigne). These barbed vines are frequently used in defence and need no maintenance, just a little food from time to time! Metavine hedges may be bought at a cost of 15 credits per element of 1 inch x 1 inch (so a hedge of 6 inches x 1 inch costs 90 credits).
Barricades. Additional barricades may be bought at a cost of 50 credits each.
Additional Watchtowers. These may be bought at a cost of 200 credits each.
Table set-up. The Assault of the Barricades is played on a table of at least 1.50 m x 0.90 m, and preferably larger. The Arbitrator places all the available buildings and terrain, starting from one long edge and spreading them out so that the terrain becomes less dense as one approaches the opposite edge, as shown below. The table edge with the least terrain marks the start of the desolations. The densely covered side represents the colony or trading post.
After placing the terrain, place the barricades and watchtowers of the defender to form a more or less continuous wall within 12 inches of the defenders' edge. This marks the edge of the colony or trading post. The wall is generally of low height, but may incorporate buttresses and structures already placed. Then clear the terrain to make a clear zone 12 inches wide between the barricades and the desolations (you may leave a little cover, but only partial). This represents the zone in front of the ramparts which the defenders have cleared to have a good field of fire.
Once the terrain is placed, the Arbitrator may place up to six Loot counters. These counters may be placed anywhere in the colony, between the barricades and the table edge. They represent stocks of food, ammunition, materials and equipment which the attackers are trying to steal. It is more appropriate to use these counters if the attackers are outlaws or outlanders (other than spyrers, of course). If the defenders are outlaws, the attackers can hope for a large reward, so do not spoil it for them with the loot.
The defenders are then placed. Choose up to 3D6 sentinel figures or guard animals. The sentinels may be placed anywhere in the colony, between the barricades and the table edge. The traps, metavine hedges and guard animals are then placed anywhere on the table between the table edge of the desolations and the wall. The other defenders may enter as reinforcements from the colony edge of the table during the defender's first turn.
The attackers then deploy their gangs anywhere on the table on the other side of the wall, desolation side. They may be placed anywhere but must always be more than 12 inches from any defender.
Sequence of Play. When the scenario begins, the guards have just spotted the attackers and raise the alarm. In the confusion that follows, each camp rolls 1D6. The highest result plays first. Then the two camps play in turn until the end of the game.
Picking Up Loot. A Loot counter may be picked up by any figure which passes over it during its movement. A fighter may carry any number of Loot counters without its Movement or its ability to move, shoot or fight being affected.
Fighters put out of action drop the Loot counters they carry where they are. Models in base-to-base contact may hand Loot to other figures in the Shooting phase, but the figures involved may not shoot during that turn. If a fighter puts an enemy out of action in close combat, he automatically captures any Loot the figure was carrying.
Attackers may also recover rampart weapons. Once captured, these weapons may not be used because the ammunition has been left behind, but they may be sold after the game.
Reinforcements. At the start of the game, the defender divides his non-deployed guards into groups of one or more figures. They are not placed on the table but may enter later as reinforcements.
Once the alarm has been raised, the defender may attempt to bring on a group of reinforcements each turn. Designate the group you wish to bring on and roll 1D6. If the result is equal to or greater than the number of fighters in the group, the reinforcements may enter as described below. If the result is less than the size of the group, no reinforcements may enter that turn. As you may see, the larger the group, the fewer chances it has of entering. The defender must therefore weigh the number of figures he intends to bring on carefully.
Reinforcements enter from the colony edge of the table. The reinforcements may not be placed less than 8 inches from an attacker. Reinforcements may move and shoot normally in the turn in which they are placed.
End of the Game. The game ends as soon as the last attacking gang routs. If the attackers collect all the Loot counters and the figures carrying them are 8 inches or less from the table edge at the start of their turn, the game ends and the attackers have won.
The defenders fight for their friends and territories, so they do not take rout tests and cannot rout voluntarily. The attacking gangs take their rout tests individually and may choose to rout voluntarily once they have suffered two casualties. Because the attacking gangs launch a determined assault, they need not take rout tests until they have suffered 50% casualties.
Each Loot counter captured by the attackers is worth 2D6 x 10 credits. Rampart weapons carried off may be sold at a quarter (25%) of their base cost.
Experience.
- +2D6 Survival. If the fighter survives the battle, he gains 2D6 points. Even fighters who are wounded and out of action receive these points for their participation.
- +5 Per Wound Inflicted. A fighter receives 5 points for each wound he inflicts during the battle. Note on the gang roster each time a fighter scores a hit that wounds his target. Although some weapons may inflict several wounds with a single shot, only 5 points are marked in that case, not 5 points per wound.
- +20 Best Attacking Leader. The leader of the attacking gang which takes the largest sum in loot and bounties gains 20 additional experience points.
Barricade Infiltration: Scenario Variant
A simple but pleasant variant of this scenario, which really tests the ardour of the attackers, is to turn it into a variant of the Raid scenario. Make the following changes, and you have a completely new game:
- Limit the attackers to 2D6 figures per gang.
- Treat the guards as sentinels, using the rules of the Raid scenario.
- Use the alarm rules of the Raid scenario.
An additional way to raise the tension for the attackers is to allow the defence to buy searchlights. Heavy searchlights fixed by mounts to the barricades, towers or buildings may be bought for 50 credits each. Searchlights are represented by a figure or a counter. They have an arc of light of 90 degrees and may be used by figures in base-to-base contact with them (not only sentinels). Searchlights are attacked separately like any other figure, have an Endurance of 3 and 1 Wound. Any searchlight which suffers 1 wound is destroyed.
A sentinel in base-to-base contact with a searchlight does not move. Place a paper circle 2 inches in diameter, 24 inches from the sentinel, within the 90 degree arc of the searchlight. The paper (if you had not guessed) represents the area lit by the searchlight. The sentinel operating the searchlight may spot everything within the circle of light as if it were within its spotting range of 2D6 inches.
At each turn, instead of moving, the sentinel may move the circle of light. The circle moves by 2D6-5 inches. If the result is negative, the attackers may move the circle 2 inches. For example, if the result is 3, then 3-5 = -2, and the attackers may move the circle 2 inches. The circle of light may never be moved so that a solid object lies between the centre of the light and its source, nor may it leave the 90 degree arc of the searchlight.
Suggestions for the Assault of the Barricades
The Assault of the Barricades is a delicate scenario, even for experienced groups. It is certainly strongly influenced by a number of films in which villains try to seize the colony of the good folk in search of the promised land. As with the Purge scenario, you may need an assistant Arbitrator if several large groups are involved, but the fact that the mission is classic keeps things less complicated. It is better to avoid random events in this scenario: a lot already happens, so there is no point in making the affair confused.
I must make a few useful suggestions on how to make the extra equipment quickly, although well-made terrain pieces are preferable.
Rampart Weapons. Use unused weapons by fixing them with modelling putty. Plastic weapons are the best, especially those of old Warlord Titans (unfortunately no longer available). Otherwise, pen cartridges (without ink!) cut to the correct length will do the job.
Metavine. It may be represented by steel wool or a scouring sponge, stretched to the right length and width and painted a very garish colour.
Barricades. Prepare a length of modelling putty of the desired length, and plant in it small pieces of card, burnt matches and toothpicks, so that a figure behind it is protected up to the chest.
Watchtowers. This is something you probably cannot make at the moment (but I am sure that the most gifted of you will prove me wrong).
Traps. Use Outlander counters, bases or any other object.
Beasts. Warhammer Quest monsters are perfect, as is any other creature from your collection.
If players are involved in the defence, you may want to take away their credits and/or territories if the attackers clearly win. Consult the Raid scenario for advice. You may also give a colony or another territory to the best attacking gang. If the defenders are outlaws, you may complicate their life by adding forces of law and order to the attackers, if you judge it appropriate. This creates a new situation for the hive: the troops of the planetary governor land in force in the Underhive. This is, of course, a rare occasion.
Underhive Bestiary
The Underhive Bestiary is there to cover all sorts of eventualities. Are you tired of gang fights? Go and hunt the Spider Mothers! Have you been ambushed once too often? Go and visit the deviants! The creatures presented below may be used by the Arbitrator, and no guarantee of survival is given to the gangs which would like to tangle with them.
The Hive Vermin
Necromunda is almost entirely dominated by the human species, to the point that many people do not believe in the existence of other species. Nevertheless, some of the original inhabitants of the planet survive, having succeeded in entering the hive, evolving and adapting to it, and transforming themselves into hideous parodies of what they once were. Other creatures have arrived clandestinely from distant worlds in the holds of interstellar cargo ships. Pets or guard animals have also escaped from their masters and fled through the immense air-conduits of the hive.
Apart from the few gardens and zoos of the Hive City, fauna and flora exist only in the damp, cold darkness of the Underhive or in the lonely desolations. These forms of life are called vermin or food, depending on the appetite of each.
Value. Each creature has a value which measures its strength compared with a Necromunda warrior, and indicates its cost in credits in certain scenarios. This is also the sum which the gang receives for killing it, and for its teeth, bones, fur and flesh when it is killed.
Giant Spiders
Value: 40.
Several kinds of mutant spiders, which can sometimes reach nearly a metre across, exist in the Underhive. They are called giant spiders. The name is associated with Necromunda, and the most famous Imperial regiment recruited on the planet is called the Arachnids. Giant spiders live everywhere in the Underhive, from the air-conduits of the domes to the forgotten tunnels filled with debris.
Each kind of giant spider corresponds to a kind of hunting. Wolf spiders have long legs and pursue their prey until it is exhausted, before killing it with their sharp mandibles. Orb spiders weave solid, sticky webs in the shape of a funnel, at the end of which they hide. Many unfortunate fugitives rush into these webs, taking them for tunnels, before being paralysed and slowly drained of their vital substance by the terrible huntress. Their corpses may sometimes be seen hanging in abandoned webs which hang in the darkest sectors of the Underhive.
Wolf Spider
| M | CC | CT | F | E | PV | I | A | Cd |
|---|---|---|---|---|---|---|---|---|
| 7 | 3 | 0 | 4 | 3 | 1 | 1 | 1 | 5 |
Orb Spider
| M | CC | CT | F | E | PV | I | A | Cd |
|---|---|---|---|---|---|---|---|---|
| 3 | 3 | 0 | 3 | 3 | 1 | 1 | 1 | 5 |
Special Rules (Orb Spider).
- Movement. Orb spiders may climb up and down any surface as if it were flat ground. Moreover, they may use their web to let themselves fall, up to a maximum of 6 inches per turn for free.
- Armour. Orb spiders have an armour save of 6+ on 1D6 against all damage, to represent their chitinous carapace.
- Webs (Toiles). The web of an orb spider has the effect of a touch from a lasso, and is considered to cover the zone within 3 inches of the spider's position. A potential victim moving through the web must pass an Initiative test on 1D6 to avoid becoming entangled. If the victim was running or charging, the test is made on 2D6. Once the victim is entangled, the spider attacks and automatically inflicts 1 hit of Strength 3 at each close combat phase.
The spiders in the game. Wolf spiders are excellent for tormenting warriors: not too strong, but strong enough to frighten them. Orb spiders stay motionless, waiting in their web. The Arbitrator must note their location on a card, or give them a specific zone in which they may trap warriors who pass and come to take them.
Spider Mother
Value: 250.
In the eternal night of the deepest recesses and the darkest desolations, live the truly monstrous spider mothers. Spider mothers are immense specimens several metres across, with enormous mandibles and diabolical intelligence. They are aggressive and protect their territory: creatures which approach them are rarely found intact when they leave. In spite of the dangers, hunters seek out the mothers of spiders for their flesh and their venom, which are worth a small fortune in the Underhive. The most sought-after are those which weave their webs in the Sewer. Their eyes are as pure as diamonds and of equivalent value. Innumerable hunters have lost their lives in the Sewer trying to make their dreams of fortune come true.
| M | CC | CT | F | E | PV | I | A | Cd |
|---|---|---|---|---|---|---|---|---|
| 5 | 3 | 3 | 5 | 4 | 4 | 1 | 2 | 7 |
Special Rules.
- Movement. Spider mothers may climb up and down any vertical or sloping surface as if it were flat ground.
- Armour. Spider mothers have an armour save of 5+ on 1D6 against all damage, to represent their thick hide.
- Web Spit (Jet de toile). Spider mothers can spit a mass of sticky threads whose effect is equivalent to a lasso. If the spider attacks in close combat a victim caught in the web, it automatically inflicts 2 hits of Strength 5 at each close combat phase.
- Terror! Even hardened warriors are struck with horror at the sight of these monstrous creatures charging. Warriors must take a terror test because of the size and appearance of spider mothers if one of them is in view within 8 inches. See page 35 of the Necromunda rulebook for the details of terror.
- Unblockable. Because of their great size, spider mothers cannot be blocked.
The spider mothers in the game. Spider mothers are generally solitary, but may sometimes be accompanied by a swarm of giant spiders which they have spawned. Spider mothers pursue intruders tirelessly, but they are far from stupid. If they are reduced to 1 or 2 Wounds, or if they face an adversary who can seriously wound them, they retreat into their lair or try a different approach.
Ash Conch (Conque des Cendres)
Value: 10.
Ash conches are bizarre creatures which live in the Underhive. Nobody knows how they got there, but it is known that they thrive in the ash desolations outside the hive. Ash conches bury themselves beneath layers of debris and refuse and are very sensitive to vibrations. When a creature passes over them, they react instinctively to the vibrations and immediately open their shell, swallowing whatever has just passed over them. Conches try to absorb all living creatures which come a little too close, but a man is much too big for them and will generally be seized by the ankle or the leg.
| M | CC | CT | F | E | PV | I | A | Cd |
|---|---|---|---|---|---|---|---|---|
| 0 | 0 | 0 | 4 | 5 | 1 | 0 | 0 | 10 |
Special Rules.
- Grab Attack (Attaque de Saisie). If conches are used in a game, all figures risk being attacked. During your movement phase, roll 1D6 for each figure which moves at ground level. A result of 1 means that a conch tries to seize the figure. The figure may then take an Initiative test to try to pull its leg free before the conch closes. If it succeeds, it may continue on its way, and the frustrated conch sinks back into the ash. If the figure fails its test, it is seized by the conch and may not move until freed. If a gang routs, figures seized by conches are automatically captured by the winning camp. Friendly figures may free a figure trapped by a conch by killing the conch. If you shoot at the conch, roll 1D6. On a result of 1-3, you have hit the trapped figure instead of the conch. If a friendly figure reaches the conch in base-to-base contact, it may open the beast by passing a test on 1D6 equal to or less than its Strength.
The conches in the game. This monster trap is not deadly but is annoying. If you wish, the frequency of conches may be increased, so that they appear on a result of 1-2 or 1-3 depending on the scenario played and how easy it is to avoid the ground.
Gas Mushrooms (Champignons à gaz)
Value: 5 per 1 inch x 1 inch square.
There are hundreds of types of mushroom in the Underhive. The damp, dark desolations offer them a perfect habitat. Most are harmless, some are eaten by fouisseurs and mutants, and others serve to make poisons and drugs. Mushrooms tend to grow in groups where various varieties are often found. Gas mushrooms protect themselves by releasing clouds of mycotoxins which have variable effects on humans. One of the most dangerous is dream-spore, which resembles a rainbow puffball. When one walks on it, the mushroom throws out hallucinogenic spores which cause nightmarish visions and waking dreams in those who breathe them in. Victims of dream-spores are at the mercy of the myriad other dangers of the Underhive, and are often recovered drowned in mud pools, dried out in spider webs, crushed at the foot of cliffs, and so on.
Special Rules. Any figure which crosses a zone of mushrooms during its turn must roll 1D6. On a result of 1, the figure has crushed a dangerous gas mushroom and is enveloped in a cloud of spores. Place a 2 inch template over the figure. Any figure under the template may be affected on a result of 4+ on 1D6. Roll 1D6 to determine the type of gas: 1-2 Hallucinogenic; 3-4 Asphyxiant; 5-6 Nightmare. Roll 1D6 for each figure hit by the gas. If the result is higher than or equal to the figure's Endurance, it is affected. If it is lower than the Endurance, the figure is not affected. See page 59 of the Necromunda rulebook for the details of the effects of the various gases. The cloud of spores may last for several turns; this must be determined on the grenade gas table at the start of each player's turn.
Mushrooms in the game. As with ash conches, the frequency of mushrooms may be increased. Mushrooms combine well with other trap monsters such as spider swarms or orb spiders, making these innocent plants rather dangerous. Do not forget that mushrooms may also grow on buildings and walkways, and that warriors in the grip of hallucinations may make very fine falls!
Centipede (Centipatte)
Value: 40.
Centipedes are horrible mutant centipedes which can reach two metres in length. They normally live in the lairs of the Underhive. There, they lie in wait in the darkness until an unsuspecting creature comes near them. When the victim is near enough, the centipede leaps out of its lair and sinks its poisoned fangs into its prey. The fast-acting poison of the centipede knocks out almost all creatures, except the largest. The predator then drags its victim into its lair and devours it in complete tranquillity.
| M | CC | CT | F | E | PV | I | A | Cd |
|---|---|---|---|---|---|---|---|---|
| 4 | 4 | 0 | 1 | 3 | 1 | 4 | 1 | 4 |
Special Rules.
- Movement. Centipedes may climb up and down any vertical surface or sloping surface as if it were flat ground.
- Poisoned Bite (Morsure empoisonnée). If a centipede wins a round of close combat against an opponent, it bites with its poisoned fangs. Each hit obtained automatically inflicts a wound, without the need to roll to wound. Armour saves apply normally. If the victim loses its last Wound against a centipede, do not roll on the Serious Injury table, but on the table below.
| D6 | Result |
|---|---|
| 1-2 | No Effect. The centipede's venom does not paralyse the victim. The figure continues to fight as if it had suffered a light wound, except that it does not suffer the penalties to CC and CT. |
| 3-6 | Out of Action. The victim is paralysed, and the centipede eats a good part of it. With a little luck the figure may survive, but in any case it can no longer fight. Remove the figure as for all warriors put out of action. |
The centipedes in the game. Wyrd belluaires may use centipedes as companion animals. For the Arbitrator, these are useful creatures for ambushes, patiently waiting until warriors come a little too close before leaping out to attack them.
Charoptère
Value: 20.
These large bats live in the tunnels of the Underhive, where they hang upside down in swarming colonies. If disturbed, they fly off in an immense howling cloud. These bats have jaws resembling those of piranhas, and survive by devouring the corpses of creatures killed by other predators. They are attracted by the smell of fresh blood and rush to get a share before the rats can come and clean the carcass. The hive dwellers fear chariopterans, because their bite can transmit the viruses carried by their food, including the abominable neural plague.
| M | CC | CT | F | E | PV | I | A | Cd |
|---|---|---|---|---|---|---|---|---|
| 8 | 3 | 0 | 2 | 2 | 1 | 3 | 1 | 4 |
Special Rules.
- Flight (Vol). Charoptères can fly. This allows them to climb and descend without using a ladder. 1 inch of vertical movement (upwards or downwards) uses up 1 inch of the creature's movement potential.
- Plague! Warriors put out of action by charoptères must roll 1D6 in addition to the serious injuries at the end of the game. On a result of 1, 2 or 3, the charoptères were carrying the plague virus. Make a roll on the plague contamination table, as if the figure had been wounded by a zombie.
Charoptères in the game. Charoptères do not generally attack groups of warriors, but may attack isolated individuals. They pose a serious problem for figures which have been put out of action, because they will come and attack them in close combat and put them out of action once more.
Lamia
Value: 40.
Lamias are dangerous creatures resembling bats, which normally inhabit the largest abandoned domes of the Underhive. They hang from the ceiling of their dark domain, and fall on creatures which venture there. Lamias attack by enveloping the head of their prey in their leathery wings, then tear at the face, throat and eyes of their victim while holding it in their wing-grip. Unless the lamia is quickly driven off, its victim dies asphyxiated or bled white.
| M | CC | CT | F | E | PV | I | A | Cd |
|---|---|---|---|---|---|---|---|---|
| 8 | 2 | 0 | 1 | 2 | 1 | 4 | 1 | 4 |
Special Rules.
- Flight (Vol). Lamias can fly. This allows them to climb and descend without using a ladder. 1 inch of vertical movement (upwards or downwards) uses up 1 inch of the lamia's movement potential.
- Lamia Attack (Attaque de Lamia). Lamias have a special attack which takes place during the close combat phase in place of the normal close combat. Lamias never fight during the close combat phase. If they are charged by an enemy figure, they simply fly off. Enemy figures may nevertheless shoot normally at them. In place of the close combat, a lamia in base-to-base contact with a figure during the close combat phase may attempt to envelop the head of its opponent.
Lamia (continued).
- Enveloping. Roll 1D6 for each lamia attacking an enemy figure. If the result is higher than the victim's Initiative, or on a result of 6, the lamia envelops its target. A figure can only be enveloped by one lamia at a time, but several lamias may try to envelop the same victim. Lamias which succeed but find themselves surplus must find another prey. An enveloped figure falls to the ground and may neither move nor shoot until it dies or the lamia is removed. If the victim is engaged in close combat, it is considered to have a Weapon Skill of 0 and cannot parry.
- Release. Roll 2D6 for the figure during the Rally phase. If the result is less than or equal to the figure's Strength, the lamia is removed and killed (remove it from the game). If the result is higher than the figure's Strength, the lamia remains firmly attached, and the victim suffers a Strength 4 hit with no armour save. Figures reduced to 0 Wounds are automatically put out of action.
- Help. Figures may help comrades attacked by lamias. To do so, the figure must be in base-to-base contact with the lamia's victim during the close combat phase. If it is, the friendly figure may add its Strength to that of its comrade when determining whether the lamia is removed.
- Serious Injuries. If a figure is put out of action by a lamia, do not roll on the Serious Injury table, but make a roll on the Lamia Injuries table below.
| D66 | Injury |
|---|---|
| 11-16 | Dead |
| 21-23 | Head Wound |
| 24-26 | Blinded in One Eye |
| 31-36 | Old Battle Wound |
| 41-46 | Full Recovery |
| 51-56 | Impressive Scars |
| 61-66 | Horrible Scars |
Lamias in the game. Wyrd belluaires may train lamias to fight for them. In games, lamias are very aggressive, seeking out and attacking warriors as soon as possible.
Cérébrine
Value: 30.
The cérébrine is an extraordinary plant which seems to possess a certain intelligence, although a rather primitive one. It resembles a grey vine, which allows its tendrils to be practically invisible among the debris of the Underhive. There is nothing remarkable about the cérébrine's tendrils, except that they end in a special leaf. Each leaf is a macro-cell and takes part in the plant's intelligence. The leaves carry hooks and nerve endings which attach to a living creature if it comes too close. The leaf injects complex fibres which spread through its victim's nervous system until the victim is no more than a stupid instrument at the orders of the plant. Although it is not very intelligent, the cérébrine is able to use its victims in a sensible and rational way, and poor slaves are generally used as compost or as a means of protecting young shoots. Once a leaf has attached itself to a host, it detaches from the plant, which then grows another.
| M | CC | CT | F | E | PV | I | A | Cd |
|---|---|---|---|---|---|---|---|---|
| 0 | 4 | 0 | 0 | 4 | 3 | 0 | 1 | - |
Special Rules.
-
Tendrils. If a figure comes within 6 inches of a cérébrine, it is automatically attacked by a tendril, and you must fight a round of combat during the next close combat phase. If the figure beats the cérébrine, it escapes and may either strike the plant to destroy it, or use its pursuit movement to get out of reach. If the plant obtains at least one hit, a leaf attaches itself to the target which, unless it passes an armour save, is automatically knocked down, whatever its Endurance or Wounds.
-
Domination. Roll normally for the leaf's victim during the following Rally phases, as for all figures knocked down. On a result of 1, the victim escapes the leaf but suffers a light wound. On 2-5, it remains knocked down. On a 6, the leaf dominates the victim, which is from then on controlled by the Arbitrator.
A figure dominated by a cérébrine cannot rally by itself and will be definitively lost to the gang unless it is helped. Fortunately, control by the leaf makes the warrior so sensitive that a single wound puts him out of action. Once its victim is out of action, the leaf falls off and dies, but a serious injury roll must be made for the warrior. If he has not been put out of action before the end of the game, he may be said goodbye to, for he now has about as much brain as a lettuce!
Cérébrines in the game. Once a victim is controlled by a cérébrine, do not hesitate to use it in any way that is not self-destructive, using its equipment to attack or defend. Generally, the plant simply tries to kill as many creatures as possible to feed on them. However, any other idea is possible: the plant may want to be (carefully) dug up and carried elsewhere, or it may want protection against all the gangs which roam its territory, and so on.
Medusoid (Médusoïde)
Value: 60.
Medusoids are venomous creatures which live in the mud seas and industrial waste pools so common in the Underhive. Medusoids living in the depths of stagnant seas and lakes may become enormous, but most measure less than one metre across. They are gelatinous spherical creatures which trail several filaments behind them. Medusoids can instinctively sense any vibration in their liquid element; they then leap to the surface and seize with their filaments those who stand on the bank. These filaments paralyse their victims and bring them down into the mud to be digested.
| M | CC | CT | F | E | PV | I | A | Cd |
|---|---|---|---|---|---|---|---|---|
| 0 | 3 | 0 | 1 | 2 | 1 | - | D6 | 0 |
Special Rules.
-
Mud Pool (Mare de boue). Medusoids live in mud pools. A mud pool may be represented on the table by a circular card element about 1 inch in radius, or larger at the Arbitrator's discretion. The pool may be placed in an awkward spot, in the middle of an access route for example. The medusoid cannot leave its pool, but if a figure comes within 2 inches of the bank, it rises to the surface and makes a surprise attack with its filaments.
-
Paralysing Dart (Dard paralysant). When a figure arrives within 2 inches of the mud pool, the medusoid makes its attack. It engages the figure in close combat, so the figure may not finish its movement or shoot that turn. The medusoid has 1D6 attack dice for its filaments and adds +1 to its combat result because of the surprise. The attacked figure may not parry.
If the medusoid wins the combat, roll 1D6 for each hit and, if one of them scores 4+, the victim is paralysed and knocked down. Although it can no longer move, armour saves apply normally. A medusoid which loses the combat and survives, or which fails to paralyse its victim, slips back into its pool at the end of the close combat phase, and may attack the following turn if someone comes close enough.
-
Splash! (Plouf!). If it manages to paralyse a figure, the medusoid may drag its victim 1 inch per turn towards the pool. If this brings the figure into the mud pool, the figure disappears for ever at the end of its next turn, dragged to the bottom of the pool by the medusoid.
Friendly figures may only help the paralysed figure by killing the medusoid with a firearm (risky, since they may hit the victim) or by attacking it in close combat (even more risky). If the medusoid is killed before the end of the victim's turn, leave the victim lying on the ground and begin making rally rolls normally. If a paralysed figure is put out of action, it does not roll on the Serious Injury table. A paralysed figure always recovers fully after the end of the game.
Medusoids in the game. To make full use of the paranoia that medusoids create, place several pools on the table, only some of which contain monsters, the others being empty. If you really want to be mean, place a few medusoids in combination with the result Bubbling Sludge from the Random Events table. In a "sea of mud" or a "bottomless pit", paralysed figures are killed immediately; and do not forget that medusoids can reach their target up to 2 inches above the mud!
Giant Rats of Necromunda (Rats géants de Necromunda)
Value: 35.
The Underhive contains a real labyrinth of tunnels and sewers infested by swarms of rats. There are several subspecies of mutant rats on Necromunda, and their physiology varies enormously. Giant rats can exceed a metre in length (not counting the tail), and the fangs of the largest of them can reach 30 centimetres. The rats of Necromunda show a certain intelligence and their reactions are of incredible speed. All of this gives them a supernatural ability to avoid the attacks aimed at them.
| M | CC | CT | F | E | PV | I | A | Cd |
|---|---|---|---|---|---|---|---|---|
| 6 | 4 | 0 | 3 | 2 | 1 | 3 | 1 | 4 |
Special Rules.
- Dodge (Esquive). Rats receive an unmodifiable save of 4+ on 1D6 against any damage they suffer, to represent their ability to dodge attacks. The save may be used against shooting attacks or close combat attacks, but not against special attacks which normally do not allow an armour save.
Giant rats in the game. Wyrd belluaires may use giant rats as companion animals. They are also creatures useful to the Arbitrator in any scenario. Giant rats move in packs and attack anything they can get their teeth into.
Face-Eater (Mange-Face)
Value: 20.
The face-eater is one of the worst vermin that can be found in the Underhive. This very dangerous life-form, deliberately imported from the hostile world of Catachan, was originally released into the air-conduits to combat the deviants and the vermin which used these conduits to move through the hive. Face-eaters thrived in the hot, damp pipes and became a problem within a few months. A campaign of eradication followed, which drove them back into the Underhive, where the very difficult living conditions limit their numbers.
Face-eaters can lurk almost anywhere, but they prefer to hang from girders, where anyone who sees them from afar may take them for scraps of cloth. Anyone foolhardy enough to approach a face-eater must be very agile, because the monster uses a powerful muscular spasm to launch itself at its victim's face. If the face-eater reaches its target, it wraps itself round the victim's head, clinging with hundreds of tiny hooks and points. Powerful digestive enzymes then begin to eat away the victim's face. It is almost impossible to remove a face-eater without seriously damaging its prey.
| M | CC | CT | F | E | PV | I | A | Cd |
|---|---|---|---|---|---|---|---|---|
| 0 | 3 | 0 | 3 | 2 | 1 | 5 | 1 | 10 |
Special Rules.
-
Leap (Bond). A figure which approaches within 4 inches of a face-eater is immediately attacked. With a powerful muscular contraction, the face-eater throws itself at the figure, which must pass a test under its Initiative on 1D6 to avoid the attack. A face-eater which misses its target must be placed 1 inch from the figure it attacked, and will attack again during its next turn.
If the face-eater hits, the figure immediately suffers a Strength 3 hit, with no armour save possible unless it wears a completely closed helmet. A figure may be enveloped by only one face-eater at a time, but several face-eaters may try to envelop the same victim. Those which succeed but find themselves surplus must find another prey.
-
Removal. At the start of each of the figure's later turns, it may try to pull the face-eater off its head. Roll 1D6: on a result of 6, the face-eater is removed and killed. Otherwise, the figure suffers another Strength 3 hit and moves in a random direction during the next movement phase. This continues until the face-eater is removed and killed, or the victim is put out of action, when the face-eater flees to a dark corner to digest its meal, and will not attack again for several hours.
If you wish, any figure arriving in base-to-base contact with someone who has a face-eater on his head may try to remove it. If a warrior tries to remove a face-eater, roll 1D6. If there is only one figure, a 6 is needed. With two figures, a 5+ is needed; with three, a 4+, and so on. However, because of the face-eater's hooks, any figure which tries to remove one suffers a Strength 2 hit and, if the face-eater is removed, the victim immediately suffers another Strength 3 hit as the hooks tear away half of its face. Figures are not blocked by these hits, because they are effectively in close combat.
-
Camouflage. Face-eaters are perfectly camouflaged and very hard to spot. To represent this, a face-eater is always considered to be hidden. A figure can therefore only spot a face-eater if it is at a distance less than or equal to its Initiative.
-
Serious Injuries. If a figure is put out of action by a face-eater, do not roll on the Serious Injury table, but make a roll on the table below.
| D66 | Injury |
|---|---|
| 11-16 | Dead |
| 21-23 | Head Wound |
| 24-26 | Blinded in One Eye |
| 31-36 | Old Battle Wound |
| 41-46 | Full Recovery |
| 51-56 | Impressive Scars |
| 61-66 | Horrible Scars |
Face-eaters in the game. A face-eater may be represented by a ball of modelling putty stuck to the head of the attacked figure. You may choose before the game where the face-eaters wait, or use a random method to determine when a figure is attacked, such as the cards in the Purge scenario.
Lashworm (Ver Fouettard)
Value: 10.
Some areas of the Underhive are infested with lashworms, strange creatures which arrived on Necromunda as spores buried in a cargo of textiles from the Jubilon sector. These worms live in fissures and wait, coiled upon themselves, for a victim to approach. The sensitive tip of the lashworm's tail protrudes from the creature's lair. Any vibration, caused for example by someone walking nearby, triggers an attack, in which the worm throws out its long flexible tail and tears a piece of flesh from its victim. The meat is then carried back to the lair, where it is digested. The worms themselves are rather small, barely as big as a man's fist. Lashworms do not move; they act immediately and instinctively, and are almost impossible to kill, because they are buried too deep in their crevices.
| M | CC | CT | F | E | PV | I | A | Cd |
|---|---|---|---|---|---|---|---|---|
| 0 | 3 | 0 | 1 | 3 | 1 | 0 | 1 | 0 |
Special Rules.
- Whip Attack (Attaque-fouet). A lashworm's lightning attack is not resolved like a normal close combat. Instead, a potential victim is attacked as soon as it comes within 2 inches of the worm's position. The victim must pass an Initiative test to avoid the tail-blow: failure means it is hit and suffers a Strength 3 hit. If the worm's attack misses or does not wound, the worm turns on itself during the close combat phase to try to tear off a piece of flesh with its teeth. Once a lashworm has inflicted a wound, it retreats into its lair to digest, which makes it virtually invulnerable. The lashworm will not attack while it is digesting, which may take several hours.
- Lair (Repaire). Lashworms are so well camouflaged that they cannot be attacked before they have attacked themselves. Lashworms normally receive an armour save of 3+ on 1D6 against any damage, to represent their protective hide. If they retreat into their lair, their save rises to 3+ on 2D6.
Lashworms in the game. As they are hidden and immobile, it is better to declare certain zones "infested with lashworms". Figures which move through these zones risk being attacked. 1D6-3 is a good number of worms, which you may modify according to the circumstances or your fancy (1D6 minus the figure's Initiative, for example, or 2D6-3 if the figure is running, and so on).
Rubber Moss (Mousse-caoutchouc)
Value: 1 per 1 inch x 1 inch square.
Several lichens and mosses grow in the ruined domes. The most troublesome is rubber moss, which covers large areas. Although harmless in itself, this thick moss is elastic and perfectly unstable!
Special Rules. A figure moving on rubber moss may move 2 inches per turn without penalty. If it goes faster, roll 1D6. On a result of 1-3, the figure starts to bounce and is moved 1D3 inches in a random direction, determined by the scatter dice. If the figure lands on rubber moss again, it bounces once more for 1D3 inches. This continues until the figure lands on solid ground.
A figure bouncing on the moss may be thrown against a wall. If this happens, it suffers a hit of a Strength equal to half the distance of the bounce (rounded up to the next whole number). Once the figure has finished bouncing, it is considered blocked. On the other hand, figures falling from a building, walkway or other high point onto rubber moss are not injured, but bounce 2D6 inches in a random direction. Unfortunately, the figure suffers damage as if it had hit a wall by touching the ground outside the moss.
Rubber moss in the game. Rubber moss is very interesting placed under or on walkways, to send warriors bouncing as they pass. You may also use pits full of moss which will bounce warriors 2D6 inches, which works very well in the Master of the Spire scenario.
Crystal Lamies (Cristolamies)
Value: 5 per 1 inch x 1 inch square.
These are mineral deposits which appear near stagnant pools, dumps, and anywhere pollutants accumulate over long periods. They resemble coral, forming a dense mass of fragile, sharp crystals. It is impossible to hide among them, and very dangerous to move through them unless protected by armour. These crystals inflict thousands of tiny cuts which become infected very quickly, because of the toxic and corrosive nature of the elements from which they form.
Special Rules. Because of their particularly dangerous nature, it is impossible to hide in a crystal lamie deposit. Crystal lamies are difficult to cross, since they can inflict nasty wounds, and are therefore treated as difficult terrain. Any figure crossing a deposit of crystal lamies must roll on 1D6 a result less than or equal to its Toughness to avoid damage. On a failure, it suffers 1D3 light wounds, each reducing its Weapon Skill and Ballistic Skill by 1 for the rest of the game. If the figure's Weapon Skill and Ballistic Skill are both reduced to 0, the loss of blood makes it faint and it is put out of action. Armour saves may be taken against the light wounds and, because the cuts are shallow, add +1 to the save rolls.
Metavine (Métavigne)
Value: 15 per 1 inch x 1 inch square.
Certain old industrial centres and official buildings of Necromunda are defended by belts of metavine, a genetically modified xenomorph imported from a hostile world. Over the centuries some spores have scattered, and areas covered in metavine can now be found in the Underhive and the desolations.
The plant was originally a form of military defence, a kind of biological barbed wire, far more effective than steel wire. Metavine is very resistant and regenerates quickly. Its sharp thorns pierce armour and lacerate bare flesh down to the bone. The sap of metavine is a powerful acid which reduces those unlucky enough to become entangled in it to skeletons within a few minutes.
| M | CC | CT | F | E | PV | I | A | Cd |
|---|---|---|---|---|---|---|---|---|
| 0 | 0 | 0 | 6 | 4 | - | 0 | 0 | - |
Special Rules. It is very, very dangerous to cross metavine. If a figure is foolhardy enough to attempt this feat, roll 1D6 as soon as it reaches the metavine, and again at the start of each of its turns for as long as it remains in it. On a result of 6, the figure survives without harm. On a result of 1-5, it suffers a Strength 6 hit and is blocked if it has not been knocked down or put out of action. If the figure is armed with a sword, it may add +1 to the result. If it has a chainsword, a power sword or a power axe, it adds +2 to the result. Figures put out of action in metavine are immediately killed. They are treated as having rolled "Dead" on the Serious Injury table.
A figure equipped with a normal or light flamer may clear a path and move through the metavine safely and automatically. However, the figure must make an ammo test each turn it remains in the metavine. If it uses such a weapon, the figure may not shoot while it is in the metavine.
Plasma grenades, heavy plasma guns and heavy flamers may also be used to destroy the metavine, which has an Endurance of 4. Metavine lying under a template is automatically destroyed if it suffers a wound. It does not burn well and never catches fire!
Metavine in the game. This plant is very unpleasant, dangerous and terrifying to the players (especially the out-of-action = dead effect). Fortunately, it is no problem if avoided, so make sure it is possible to avoid the metavine by taking another route. On the other hand, if the players systematically go round the zones where this vegetation grows, you may place a few gas mushrooms or some rubber moss to send them there!
Deviants
Deviant is a general term which covers all the lost, the mad and the heretics who haunt the Underhive. Deviants are drawn into the Underhive as if by a magnet, and there they set up hidden strongholds and secret temples in the midst of the desolations and the ruins. Far from the surveillance of the Imperial inquisitors and the Adeptus Arbites, deviants may pursue their insane projects to bring about the anarchy/armageddon/fall of the present order/destruction of all the other inhabitants of the Underhive, according to the doctrine of the group. Naturally, this makes them rather unpopular in the eyes of gangs and authorities, who both fight frequent battles against the deviants and regularly carry out purges in the vicinity of colonies to keep them under control.
Weapons. Deviants may be armed with a plethora of weapons, and the best way to get out of this is to equip them with the weapon carried by the figure you are using. This makes life easier for all players. About one deviant in ten will be equipped with a special or heavy weapon of some kind. Generally, the weapons carried by deviants call on very simple technologies: machine guns, automatic weapons and so on. However, it is not impossible that they are equipped with stolen weapons, such as bolters for example. Deviants make ammo tests just like anyone else, unless otherwise stated.
Consanguines (Consanguins)
Value: 60.
Consanguines are humans who have been contaminated by genestealers and who serve as breeders for the hybrid spawn. The minds and wills of consanguines are completely swallowed up in the collective mind of the swarm, transforming them into fanatics totally devoted to the cause of the extraterrestrials.
Consanguines may come from every layer of society: clerks, workers, teachers, lawmen, hive gangers and others. The genestealers will begin by contaminating as many victims as they can but, as time goes on and the swarm grows ever larger, they become more and more selective in their choice of victims and try to reach the dominant figures of society. To this end, the cult infiltrates the local authorities and the planetary defence forces whenever it has the chance. This reduces the probability that the sect will be unmasked, and when it finally decides to pass to open confrontation, it has access to military equipment and a body of trained troops to control the planet.
| M | CC | CT | F | E | PV | I | A | Cd |
|---|---|---|---|---|---|---|---|---|
| 4 | 3 | 3 | 3 | 3 | 1 | 3 | 1 | 7 |
Special Rules. Psychology. Consanguines are fanatical disciples and are subject to the rules for hatred described in the Necromunda rulebook. Consanguines hate all their enemies whatever their race, and their fanatical devotion to the swarm and to their kind knows no limit.
Translator's note: the printed term fouisseurs (the scavvy caste of the Underhive) is kept here as the name of this deviant type.
Fouisseurs
Value: 25.
Fouisseurs make up the lowest layer of the Underhive community. Many of them are deformed, having only a vaguely human appearance. Fouisseurs live right in the middle of the desolations, wresting their miserable livelihood from the most radioactive and most poisoned sectors of the hive. They dress in anything they can find to hang together, and their skin is covered with pustules, grime and disgusting, festering warts.
Life for fouisseurs in the desolations is very hard. Food is scarce, and a fouisseur will fall upon anyone foolish enough to walk about alone at the first opportunity. Fouisseurs tend to group together and move in large bands, often made up of members of the same family. It is not uncommon, however, for gangs to run into small groups of fouisseurs on the raid.
| M | CC | CT | F | E | PV | I | A | Cd |
|---|---|---|---|---|---|---|---|---|
| 4 | 3 | 2 | 3 | 3 | 1 | 3 | 1 | 6 |
Special Rules. Ammo Roll. Fouisseur weapons are not very reliable, because of daily rough treatment and a chronic shortage of ammunition. This obliges fouisseurs to make an ammo test each time they roll a natural 1 or 6 on their to-hit roll.
Mutants
Value: 35-55.
Mutants are numerous in the desolations. Most of them are fouisseurs horribly deformed by long exposure to toxins and radiation; others have suffered natural mutations caused by particularly harsh living conditions. Mutations are most often a nuisance, such as webbed fingers or an odd skin colour, but some are very useful and can turn mutants into terrifying adversaries.
| M | CC | CT | F | E | PV | I | A | Cd |
|---|---|---|---|---|---|---|---|---|
| 4 | 3 | 2 | 3 | 3 | 1 | 3 | 1 | 6 |
Special Rules.
- Ammo Roll (Jet de Munitions). Mutant weapons are not very reliable, because of daily rough treatment and a chronic shortage of ammunition. This obliges mutants to make an ammo test each time they roll a natural 1 or 6 on their to-hit roll.
- Mutations. A mutant has a single mutation, chosen from the list below. To use a mutant, you must have an appropriate figure.
- Pincer (Pince). The mutant's Strength is increased by +1 in close combat.
- Extra Arm (Autre Bras). The mutant may use up to three pistols and/or close combat weapons in close combat (+2 dice of attack), or carry a basic weapon in one hand and two close combat weapons in the other two hands (+1 dice of attack).
- Spines (Piquants). A mutant with spines benefits from an armour save of 5+, but may not wear armour of any other type.
- Tentacle (Tentacule). The mutant may re-roll a test under its Initiative to avoid a fall, and in close combat it may seize its opponent to reduce its Attacks by 1, to a minimum of 1.
- Two Heads (Deux têtes). Firing arc increased to 180 degrees, and the possibility of firing two pistols in the same Shooting phase.
- Eyes on Stalks (Yeux pédonculés). The mutant has a 180 degree firing arc and hides better behind cover. Add an extra -1 modifier to hit it if it is totally or partially in cover.
- Wings (Ailes). The mutant may rise by its normal Movement characteristic in one turn, or double this distance to charge or run (gliding). The mutant must finish its movement on the ground. Flying upwards costs 2 inches per inch of height; flying downwards costs 1/2 inch per inch of height.
Chaos Worshippers (Adorateurs du Chaos)
Value: 50-60.
Daemons of the Warp constantly seek means of extending their domination over the physical universe, either by possessing wyrds or by using more subtle means. To gain a foothold in the material universe, they deceive naive individuals by making pacts with them, in exchange for promises of forgotten secrets and unlimited power. Worshippers of daemons often hold secret meetings in the Underhive and raise clandestine temples far from the inquisitorial eyes of the authorities, for giving one's soul to the dark forces is the worst of crimes against the Imperium. Gatherings of worshippers may even summon daemons of the Warp through sacrifices and insane rituals. These vile practices may infest an entire world with daemons if the worshippers manage to keep a gateway open between the realms of the Warp and real space.
| M | CC | CT | F | E | PV | I | A | Cd |
|---|---|---|---|---|---|---|---|---|
| 4 | 3 | 3 | 3 | 3 | 1 | 3 | 1 | 7 |
Special Rules. Daemonic Blessing (Bénédiction démoniaque). Worshippers may be invested with the power of their daemonic patron. For each worshipper so blessed by its daemon, choose either a mutation from the list above or a minor wyrd power.
Beastmen (Hommes bêtes)
Value: 80.
Beastmen are a strange and stable form of mutant, like the zeks. They are always closely associated with demonic cults and the domination of Chaos. Most often, such creatures come from the depths of the Abyss or the sewers, but certain stories are whispered about worshippers transformed into beastmen by their daemonic masters, or about children born that way under the curse of the dark gods.
Redemptionists and gangs of the House Cawdor often roam the Underhive in search of deviants whose appearance would be as blasphemous as that of the beastmen. Worshippers venerate beastmen and protect them from the fanatics who want to burn them alive. Chaos worshippers regard a beastman as a gift from the dark gods, and believe it to be a prediction of their future power.
| M | CC | CT | F | E | PV | I | A | Cd |
|---|---|---|---|---|---|---|---|---|
| 4 | 4 | 3 | 3 | 4 | 2 | 3 | 1 | 7 |
Special Rules. Mutants. Beastmen often have mutations: if you have an appropriate figure, you may choose a mutation for it from the list above.
Extraterrestrials
Humanity is not alone in the galaxy. Among the millions of worlds of the Imperium, entire solar systems are under alien control. The Imperium knows no friends among the stars and treats all foreign races with hostility and suspicion. Some extraterrestrials find their way to Necromunda, one way or another, to settle their own affairs: searching for lost artefacts, spying on defence systems, escaping pursuit or buying information.
Eldar Scouts
Value: 250.
The eldar are a very ancient race. They live on immense spaceships called craftworlds, whose destiny is to wander the galaxy for eternity. The eldar are the most technologically advanced race in the galaxy. Long ago they discovered a network of access points and tunnels called the Webway, which allows them to move rapidly from one point of space to another many light-years away. The Webway is limited compared with the infinite possible destinations offered by the Warp, and its entry and exit points are fixed and cannot be moved. The eldar are always searching for lost or hidden access points, to extend the number of worlds to which they have access.
One of the many missions of the eldar scouts is the search for hidden doors into the Webway. The scouts are therefore of paramount importance to an eldar craftworld. Their role is not only to infiltrate enemy lines and raid their positions: they also carry out reconnaissance on alien worlds, recover lost artefacts such as soulstones, and monitor important events taking place on planets of the galaxy which might affect the eldar race. Eldar scouts may be found on Necromunda for any of these reasons; only they know the exact nature of their mission.
Eldar scouts are the kings of infiltration and ambush fire. They blend into their surroundings thanks to their cloak of chameleon fabric, which hides them from the eyes of their enemies except for the most observant. They are armed with formidable needle rifles, which they use with disconcerting precision.
| M | CC | CT | F | E | PV | I | A | Cd |
|---|---|---|---|---|---|---|---|---|
| 5 | 3 | 3 | 3 | 3 | 1 | 4 | 1 | 8 |
Special Rules.
- Skills. Lynx Eye (Œil de Lynx), Ambush (Embuscade), Infiltration (Infiltration).
- Weapons. Eldar scouts are equipped with a needle rifle (see the Necromunda rulebook for a full description). Eldar usually carry as a secondary weapon a laser pistol of very fine make.
- Armour. Eldar scouts always wear a composite armour.
- Equipment. Eldar scouts wear a cloak of chameleon fabric which copies the colours and texture of the surroundings. Because of this, anyone who shoots at an eldar scout suffers a -1 modifier to hit.
Orks
Value: 95.
Orks are large, green and very sturdy! Legends about orks agree that they can keep firing even with a bullet in the skull and a body riddled with shrapnel. Orks are a race of bio-engineered warriors whose efficiency was so great that it finally reduced their creators to slavery, and they spread out of control across the galaxy. Orks are without doubt the most widespread of the extraterrestrials, although ork space is divided into hundreds of tiny kingdoms ruled by rival chieftains.
Orks love fighting more than anything, and they spend most of their existence squabbling. However, from time to time a powerful ork warlord launches a Waaagh, a wave of ork invasions and conquests which is at once a religious crusade and a gold rush. During a Waaagh, the anarchic hordes are unified into a terrifying war machine which even the Imperium can only hope to stop at the end of a long and bloody war. In the past, the fury of the Waaagh has already broken against the fortified hives of Necromunda, and it is quite possible that some orks still hide in the Underhive, unless they belong to ork pirate bands carrying out some contract for an outlaw crime lord.
| M | CC | CT | F | E | PV | I | A | Cd |
|---|---|---|---|---|---|---|---|---|
| 4 | 3 | 3 | 3 | 4 | 1 | 2 | 1 | 7 |
Special Rules.
- Never Knocked Down (Jamais bloqué). Because of their very tough nature, orks are never pinned.
- Armour. Orks always wear a flak vest.
- Weapons. Orks are generally equipped with bolt pistols, axes and frag grenades.
Gretchin
Value: 40.
Gretchin are not as strong or as tough as their large ork cousins, but they belong to the same race and show the same love of combat. In a normal ork society, gretchin form the slave caste which carries out all the tedious and exhausting tasks the orks refuse to do. Gretchin follow the orks to war in the hope of copying them and winning some fragments of personal glory. On Necromunda, gretchin accompany ork raids against gangs in order to obtain equipment and food.
| M | CC | CT | F | E | PV | I | A | Cd |
|---|---|---|---|---|---|---|---|---|
| 4 | 2 | 3 | 3 | 4 | 1 | 2 | 1 | 5 |
Special Rules. Weapons. Gretchin are generally equipped with assault guns.
Genestealers
Value: 280.
Genestealers are very dangerous alien creatures, which may be found on the wrecks of spaceships drifting in the void. They are intelligent and cunning beings, yet they never use tools or weapons of any kind. They have the power to implant their genetic code into other species (humans for example). Once contaminated, the victim is controlled by the collective intelligence of the genestealer swarm, becomes totally devoted to their cause and worships them as gods.
The implanted seed grows in the body of its host until it is ready to hatch. The genetic characteristics of genestealers are passed on to the offspring, giving birth to a monstrous hybrid, whose own descendants will be either pure genestealers or hybrids even closer in appearance to humans. The genestealers themselves are monsters with a stooped silhouette, with two powerful legs and four arms fitted with claws strong enough to tear steel. They possess superhuman agility and are formidable in close combat.
The slaves of the genestealers help to conceal them and transport them to planets where they can contaminate other victims. The spread of genestealer influence is slow and insidious, because they take care not to attract the attention of authorities powerful enough to seize control of a planet. On several occasions on Necromunda, genestealer cults have been discovered and mercilessly exterminated by the Imperial inquisitors, but the Underhive remains a place that cannot be entirely purified.
| M | CC | CT | F | E | PV | I | A | Cd |
|---|---|---|---|---|---|---|---|---|
| 6 | 7 | 0 | 6 | 4 | 1 | 7 | 4 | 10 |
Special Rules.
- Psychology. Genestealers are immune to all psychology. They never take fear, terror or other psychological tests from the Necromunda rulebook. Note, however, that genestealers are nevertheless affected by Leadership tests, like all other fighters.
- Unblockable (Blocage). Genestealers are never pinned by shooting, thanks to their incredible reflexes and their inhuman obstinacy.
- Chitinous Armour (Armure chitineuse). Genestealers have a thick chitinous armour which can absorb considerable damage. This gives the genestealer an armour save of 5+ on 1D6.
- Fear (Peur). Genestealers are frightening creatures which force other fighters to take a fear test; see the advanced rules of the Necromunda rulebook.
Magus Genestealer
Value: 190.
A magus genestealer is a special mutation which develops within the swarm after a few generations. It is almost human in appearance, although invariably beardless and of imposing stature. It is also very intelligent and, since genestealers instinctively seek to contaminate individuals with latent psychic powers, it is always a powerful psyker. It acts as spokesman for the genestealer cult, leading the troops in appearance but in fact receiving its instructions from the collective intelligence of the swarm.
The magus directs the swarm's operations, sending hybrids to raid human dwellings and organising genestealers to implant their genes in an ever-growing number of victims. It also sends the most human members of the swarm to infiltrate the planetary government or its armies, weakening their defensive capabilities in preparation for seizing control of the world.
| M | CC | CT | F | E | PV | I | A | Cd |
|---|---|---|---|---|---|---|---|---|
| 4 | 3 | 3 | 3 | 3 | 1 | 5 | 1 | 8 |
Special Rules. Wyrd Powers. The magus has one primary wyrd power and three minor wyrd powers.
Genestealer Hybrids
Value: 80-90.
When a genestealer implants its genes into a human or any other creature, the cell created develops in the body of the host until it hatches. The hybrid child does not kill its host, but absorbs part of its mind as it grows. The parent becomes the child's slave, and will do everything to protect and feed it. Genestealers infiltrate human society in this way. Hybrids gather together, producing more hybrids and genestealers.
Hybrids appear to be halfway between a genestealer and their human parents, with a number of arms ranging from two to four, and a random combination of the physical attributes of the two races. Some hybrids are almost human in appearance, with a strong tendency to baldness and a robust skeleton; others are almost pure genestealers. Whereas genestealers totally lack creative intelligence, hybrids combine human intelligence and alien talents: they are capable of using weapons and of acting in secret within human society. Hybrids may even possess a few wyrd powers if their parents had some latent abilities; genestealers prefer such hosts above all, to strengthen the swarm.
Hybrid Neophyte
| M | CC | CT | F | E | PV | I | A | Cd |
|---|---|---|---|---|---|---|---|---|
| 4 | 4 | 2 | 4 | 3 | 1 | 5 | 1 | 8 |
Hybrid Acolyte
| M | CC | CT | F | E | PV | I | A | Cd |
|---|---|---|---|---|---|---|---|---|
| 4 | 3 | 3 | 4 | 3 | 1 | 5 | 1 | 8 |
Special Rules (Hybrid Acolyte). Psyker. Roll 1D6 for each hybrid acolyte. On a result of 6, the acolyte has one primary wyrd power and one minor wyrd power. On a result of 5, the acolyte has only one minor wyrd power. On a result of 1-4, the acolyte has no wyrd power.
Chaos Space Marines
Value: 300.
Legend tells that several millennia ago a civil war broke out within the Imperium. Brother turned against brother in the bloodiest conflict humanity has ever known, and even some of the Emperor's own soldiers. The formidable Space Marines betrayed him and followed their war-master to besiege the Imperial palace on Earth. The traitors were led by daemons from the Warp, seduced by their dreams of power and glory, which drew them ever further along the road to damnation.
Those who remained loyal to the Emperor defeated the rebel legions, but only at the cost of the Emperor's own life. The defeated renegades fled into the Eye of Terror, a sector where daemons walk freely and reign over the souls of enslaved mortals. The energies of the Warp make time pass strangely within the Eye of Terror, and the Chaos Space Marines live on today, filled with hatred of the Emperor and of the Imperium they once helped to build. The war-fleets of the Chaos Space Marines often break through the Imperial blockade surrounding the Eye of Terror and scour the space lanes, ravaging entire worlds and slaking their vengeance on humanity.
Chaos Space Marines in battered, heavy armour have been encountered in the Underhive in the past. It is believed that worshippers secretly seek their help to infiltrate the Helmawr dynasty. The worshippers know that they could never resist the Imperial Space Marines who would be sent to destroy them if they seized power, but with the aid of the terrible Chaos marines they would be able to face the wrath of the Emperor.
| M | CC | CT | F | E | PV | I | A | Cd |
|---|---|---|---|---|---|---|---|---|
| 4 | 4 | 4 | 4 | 4 | 1 | 4 | 1 | 8 |
Special Rules.
- Weapons. Chaos Space Marines carry bolters, bolt pistols and frag grenades. Their weapons are well maintained and they automatically pass their ammo tests.
- Armour. Chaos Space Marines wear power armour which gives them an armour save of 3+. Power armour is connected directly to the mind of the wearer, and does not penalise his Initiative as carapace armour would.
- Skills. Rapid Fire – Bolter/Bolt Pistol (Tir Rapide – Bolter/Pistolet Bolter). True Grit (Vrai Brave).
- Never Knocked Down (Jamais bloqué). Chaos Space Marines are never pinned.
The Daemons of Chaos
The creatures of Chaos are beings originating in the Warp, daemons and insane apparitions which can survive in real space for a limited period. Such entities can only reach material space by possessing a vulnerable wyrd, or through rituals performed by worshippers. But once a first breach has been opened in the structure of reality, it becomes easier for others to follow. The terrible dangers which these beings pose to the whole planet compel the authorities to hunt them down as quickly as possible, and even gangs may be deployed to take part in the search.
Daemons may take all sorts of appearances and sizes, but they are affiliated with one of the four great Powers of the Warp, the gods of Chaos who desire the fall of reality. The daemons belonging to each of these Powers are described below, but there are certain special rules common to all daemons of Chaos, rules due to the unique nature of these creatures.
Special Rules for Daemons
- Daemonic Aura (Aura démoniaque). All daemons are surrounded by an aura of Warp energy which holds them in the material universe and protects them against physical damage. The aura provides the daemon with an armour save of 4+ on 1D6 against hits from shooting or in close combat, falls and so on. The 4+ save is not modified by the weapon used or by the Strength of the attack: a result of 4, 5 or 6 always saves. Since this aura is made of Warp energy, it offers no protection against wyrd powers.
- Never Knocked Down (Jamais bloqué). Daemons are never pinned by shooting. Did you seriously think they could be?
- Wounds (Blessures). Daemons ignore light wounds, but results of "knocked down" or "out of action" affect them, symbolising grave damage inflicted on their material manifestation. Daemons take a recovery test at the end of their turn like any other figure. Note that the rules for possessed wyrds are slightly different from these, because they represent a very powerful daemon taking control of the body of a wyrd, not an entity emerging from the Warp itself.
- Fear. Daemons are obviously powerful and very dangerous supernatural creatures, which force every mortal fighter to take a fear test; see the Necromunda rulebook.
Daemons of Khorne
Khorne is the power of the Warp associated with bloodthirsty inclinations, anger and violence. Daemons of Khorne are warlike and aggressive; their skin is blood-coloured, and they have curved horns and sharp claws. Worshippers of Khorne summon these daemons to slaughter their enemies in bloody massacres, and impose obedience on the survivors through terror.
Hound of Khorne (Chien de Khorne) — Value: 350
| M | CC | CT | F | E | PV | I | A | Cd |
|---|---|---|---|---|---|---|---|---|
| 10 | 5 | 0 | 5 | 4 | 2 | 6 | 1 | 10 |
Bloodletter (Sanguinaire) — Value: 300
| M | CC | CT | F | E | PV | I | A | Cd |
|---|---|---|---|---|---|---|---|---|
| 4 | 5 | 5 | 4 | 3 | 1 | 6 | 2 | 10 |
Special Rules.
- Hounds of Khorne. Every hound of Khorne wears a Khornate collar which, it is said, is forged in the heat of Khorne's hatred. The collar draws in the Warp energy around it, strengthening the daemon and protecting it against hostile psychic attacks. As a result, no wyrd power or ratskin shaman's power may affect a hound of Khorne.
- Bloodletters. Bloodletters are armed with a terrible sword called a Hell Blade. A hell blade constantly drips with blood and glows with the malevolent energy of Chaos. A hell blade gives its bearer a parry, and inflicts 1D3 wounds instead of only one.
Daemons of Slaanesh
Slaanesh is the prince of pain and pleasure; his mortal worshippers are drawn to him by vice and lust. Daemons of Slaanesh have a delicate appearance, while being formidable apparitions which can pervert the weak and lull the vigilance of even the strongest minds. The worshippers of Slaanesh exercise their power through corruption and blackmail, but their daemonic patrons are always there to eliminate the incorruptible.
Daemonette (Démonette) — Value: 270
| M | CC | CT | F | E | PV | I | A | Cd |
|---|---|---|---|---|---|---|---|---|
| 4 | 6 | 5 | 4 | 3 | 1 | 6 | 3 | 10 |
Beast (Bête) — Value: 190
| M | CC | CT | F | E | PV | I | A | Cd |
|---|---|---|---|---|---|---|---|---|
| 6 | 3 | 0 | 3 | 3 | 1 | 3 | 3 | 8 |
Special Rules.
- Daemonettes. Daemonettes have the power to manipulate Warp energy in a subtle way. Make a roll to give a minor power to each daemonette in play. If the daemonette obtains a primary power, it is always a telepathic power.
- Beasts of Slaanesh. Beasts of Slaanesh give off a sweet odour which overwhelms the minds of their adversaries with waves of drowsy pleasure. Any opponent in close combat with a beast of Slaanesh doubles the effect of its Fumbles: that is, each attack die scoring a 1 adds +2, not +1, to the beast's combat result. Moreover, any Critical Hit inflicted by the beast's opponent is ignored.
Daemons of Tzeentch
Tzeentch is the god of Chaos worshipped by those who seek power and change. Tzeentch is a master of manipulating the energies of the Warp, and is the secret patron of many of the most powerful wyrds. The daemons of Tzeentch are capricious and anarchic, impulsive and overflowing with Warp energy.
Pink Horror (Horreur Rose) — Value: 320
| M | CC | CT | F | E | PV | I | A | Cd |
|---|---|---|---|---|---|---|---|---|
| 4 | 5 | 5 | 4 | 3 | 1 | 6 | 2 | 10 |
Blue Horror (Horreur Bleue) — Value: -
| M | CC | CT | F | E | PV | I | A | Cd |
|---|---|---|---|---|---|---|---|---|
| 4 | 3 | 3 | 3 | 3 | 1 | 7 | 1 | 10 |
Flamer Daemon (Incendiaire) — Value: 440
| M | CC | CT | F | E | PV | I | A | Cd |
|---|---|---|---|---|---|---|---|---|
| 9 | 3 | 5 | 5 | 4 | 2 | 4 | 2 | 10 |
Special Rules.
- Horrors (Horreurs). Horrors can manipulate the energy of the Warp with a snap of their fingers. Make a roll to give a minor power to each horror in play. If a horror obtains a primary power, it may be of any type. Moreover, when a pink horror is knocked down or put out of action, it immediately splits into two blue horrors. Remove the pink horror's model and replace it with two blue horror models. They fight in place of the pink horror until they are put out of action and removed from the game. Note that neither pink nor blue horrors benefit from the save granted by an aura.
- Incendiaries (Incendiaires). Incendiaries move by leaping: they can jump over any obstacle without penalty, and may leap up to a higher level without using a ladder. Each level climbed in this way counts as 3 inches of movement. Incendiaries may project a jet of flame in the Shooting phase. The jet has a range of 6 inches, and any figure struck suffers 1D6 hits of Strength 3. Incendiaries also use their jet of flame to engulf an opponent in close combat. To represent this, each hit scored by an incendiary inflicts 1D3 wounds rather than 1.
Daemons of Nurgle
Nurgle is the lord of rot and disease. His mortal servants are wrecks ravaged by infections who pray for the end of their torments. Daemons of Nurgle are grotesque monstrosities covered in purulent abscesses and oozing sores. The contamination dangers which Nurgle's servants pose to the dense population of a hive are terrible.
Plaguebearer (Portepeste) — Value: 270
| M | CC | CT | F | E | PV | I | A | Cd |
|---|---|---|---|---|---|---|---|---|
| 4 | 5 | 5 | 4 | 3 | 1 | 6 | 2 | 10 |
Beast (Bête) — Value: 320
| M | CC | CT | F | E | PV | I | A | Cd |
|---|---|---|---|---|---|---|---|---|
| 3 | 3 | 0 | 3 | 5 | 3 | 3 | D6 | 6 |
Special Rules.
- Plaguebearers. Plaguebearers brandish swords from which a contagious and virulent pus runs. Any figure which suffers a wound from a plaguebearer's sword is put out of action on a result of 4+ on 1D6, regardless of how many Wounds it has left. A plaguebearer is surrounded by a cloud of flies which buzz around its rotting flesh. When a plaguebearer fights, these vile insects fly into the eyes and mouth of its enemy, and enter its ears and nostrils. Any enemy engaging a plaguebearer in close combat suffers a -1 penalty to its combat result because of the nuisance caused by the flies.
- Beasts of Nurgle. Beasts of Nurgle have 1D6 attacks in close combat, thanks to their sticky tentacles. The number of attacks is determined at each round of combat. The corrosive ooze of the tentacles penetrates the opponent's armour automatically, so no armour save is allowed for a figure wounded by a beast of Nurgle. When it moves, a beast of Nurgle leaves behind it a trail of fetid, poisonous slime. This prevents several opponents from attacking it at once without slipping in the slime. To represent this, multiple attackers do not receive the usual bonuses: they do not gain an extra attack, and the +1 to the combat result for each additional attacker after the first is not given.