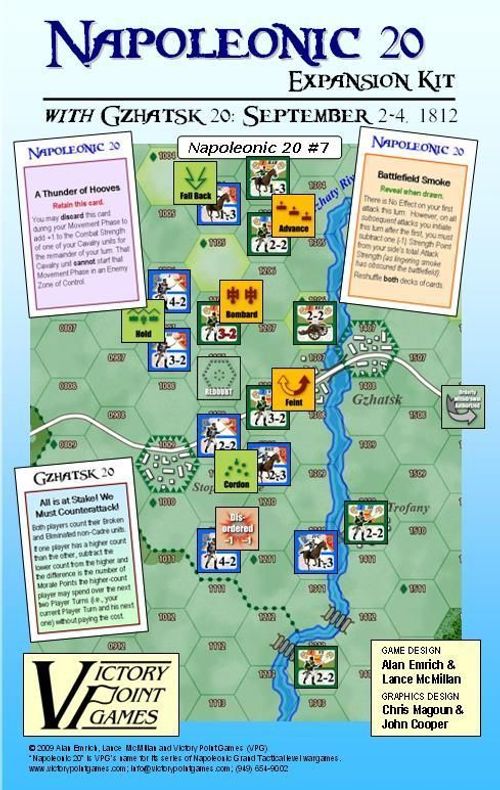
Napoleonic 20: Expansion Kit
Napoleonic 20: Expansion Kit Rulebook
Table of Contents
Table of Contents
[0.0] Exclusive Rules
This Rules booklet is for the Expansion Kit supporting all of the Napoleonic 20 games. You must own at least one of these games in order to use this Expansion Kit. These Rules, when used, supersede the Standard and Exclusive Rules for that particular game if there is a conflict.
[1.0] Introduction
Three new component "modules," expanded Victory Conditions and a new Optional Rule are included to enhance your game play experience. Each can be used individually, in concert with other components of this Expansion Kit, or all can be used together. Before beginning a game, both players should agree which, if any, of these Expansion Kit components to use.
[2.0] Game Equipment
Special Random Event Cards
The Random Events Module includes Sixteen new Random Event cards. There are two types: purple background "Retain" cards that are retained for future use when drawn, and orange background "Reveal" cards which must be shown and acted upon as soon as they are drawn (similar to the standard Event cards that come with each game). See Rule 5.0 (below) for details.
Maneuver Matrix
The Maneuver Matrix Module includes two sets of five Maneuver counters ("chits") and two Maneuver Matrix cards (tables). In addition, a set of new Routed / Disordered markers are included (with the latter result only used in combination with the Maneuver Matrix). See Rule 9.6.9 (below) for details.
+1/2 Morale Markers
The Morale Module brings new Morale Markers to the game, each with a "+1/2" side on the reverse. See Rule 12.0 (below) for details.
[3.0] Setting Up the Game
Adding the Special Event Cards
Separate the purple background Retain cards from the orange background Reveal cards. Shuffle each group separately and distribute/set them aside according to the specific method selected in Rule 5.0 below.
Adding the Maneuver Matrix
Each player receives a set of Maneuver Matrix components (i.e., a set of five different chits and a reference card).
Adding in Half-Step Morale
Simply substitute the half-step morale markers for the standard morale markers that came with the original game.
[5.0] Random Events
The new Special Random Event cards can alter the historical "storyboard" told through the standard cards that come with each Napoleonic 20 series game. The more Special cards that are played, the more divergent from the historical record a game might become. Yet, all of these new events are consistent with myriad Napoleonic battles and will maintain the proper "feel" of these games.
In this module, there are three methods for injecting Special Event cards into the game, ranging from least to most influential on gameplay.
Mild: During setup, shuffle all 16 Special Event cards together. Then randomly draw two without revealing them and simply shuffle them in with the game's regular Event deck.
Set aside the remaining special cards; they will not be used.
Medium: During setup, separate the Retain cards from the Reveal cards.
Shuffle the four Reveal cards, randomly select one without revealing it and shuffle it in with the game's regular Event deck.
Shuffle the twelve Retain cards and deal four to each player. Each player then selects one from among those they were dealt to be shuffled into the regular Event card deck.
Set aside the remaining special cards; they will not be used.
Spicy: During setup, separate the Retain cards from the Reveal cards.
Shuffle all four Retain cards into the game's normal Event deck.
Then shuffle all 12 of the Retain cards together and set them aside in a special location near the map, forming their own Special Events Draw Pile.
During play, whenever a Random Event occurs that instructs the player to reshuffle the deck(s), e.g., an "According to Plan" card, after performing that Event and reshuffling, the player whose turn it is then draws the top card from the Special Event draw pile and retains that card.
Using the New Cards (Spicy)
Special Events cards, when used as their own Draw Pile, are also placed in their own Discard Pile next to that Draw Pile. They are reshuffled after the last of them has been drawn or when instructed by the Battlefield Smoke card.
[9.0] Combat
The Maneuver Matrix
The Maneuver Matrix supplements the standard rules of Combat, allowing players the chance to abstractly perform 'approach to contact' maneuvers and thus alter the conditions of individual battles before the die is rolled to determine the outcome.
While using the Maneuver Matrix can add considerable depth to gameplay, it also increases the length of time required to finish the game. In this module, there are three methods for incorporating the Maneuver Matrix into the game, ranging from the quickest to the most intense.
Fast: During play, each player may use the Matrix to resolve any one battle during his friendly Combat Phase. With this method, the Matrix is never be used for battles occurring during a Reaction Phase.
Fun: During setup, each player takes the unused Morale marker for their side (either the standard one which came with the original game, or the +½ Morale marker that comes with this Expansion Kit, whichever is not being used to track morale) and places it together (i.e., "stacked") with any friendly on-map unit or any Game Turn 1 reinforcement. These on-map Morale markers now function as each side's Direct Command marker. This marker represents the attention of the army's commander being focused on a particular area of the battlefield, not the physical presence of an actual leader.
Each turn, at any point during his Movement Phase, that player must place his Direct Command marker on any of his on-map units. That Direct Command marker remains stacked with that unit (advancing, retreating, routing, and being removed from the map with it) until the Owning Player's next Movement Phase, at which time it is replaced on the map once again on any desired friendly on-map unit.
During play, whenever any Battle occurs at or adjacent to the hex occupied by his Direct Command marker, that player may opt to have that Battle resolved by using the Maneuver Matrix. If both players' Direct Command markers are within range of that Battle, either player may demand use of the Maneuver Matrix, with the Phasing Player declaring his desire first.
Furious: During play, the Maneuver Matrix is used to resolve any Battle if either player desires to use it. The Phasing Player always declares his desire first.
Maneuver Matrix Prohibition
The Maneuver Matrix is never used to resolve a battle where any of the defending units are in a Redoubt or Fortified hex.
A 'storming the ramparts' type of battle offers little opportunity for maneuver. Such Battles are always resolved in the regular manner.
Using the Maneuver Matrix
Using the Maneuver Matrix adds the following Steps to the Battle Sequence:
Step A.1 – Select Maneuver Chits: To resolve a battle using the Maneuver Matrix, the attacker and defender take their respective set of chits, and each selects one Maneuver (i.e., either as the attacker or defender) in secret, keeping them hidden in the palm of their hands as they do so. This is done between Steps A (where the Phasing Player commits his units) and B (where he commits his Reserves) as a new "Step A.1" in the Battle Sequence.
After both players make their selections, they set their respective Maneuver chits aside in two piles: one with their selected Maneuver chit, and one with the remaining four unselected Maneuver chits. Both of these piles must be hidden from the other player until it is time to reveal them! One good way to do this is to place each pile under one of that side's unused counters.
Step F.1 – Reveal Maneuver Chits: Between Steps E (consulting the Combat Results Table) and F (rolling the die to determine the battle's result), a new "Step F.1" is added to the Battle Sequence. At this juncture, both sides' selected Maneuver chits are revealed and the proper Defending Player's Maneuver row is cross-indexed with the Attacker Player's Maneuver column to discover the outcome of their combined maneuvers. The results are given and explained on the front and back of the Maneuver Matrix card.
Maneuver Matrix Table
Defender (rows) against Attacker (columns). Footnotes follow the table.
| Defender \ Attacker | Bombard¹ | Feint | Outflank | Advance | Charge² |
|---|---|---|---|---|---|
| Fall Back³ | DW | DW | ► / Dd | Bd | Cav / Bd |
| Cordon | — | N | Bd | — | Cav / Dd |
| Envelop | ► / Ad | N | ◄ | Cav | ► / Bd |
| Hold | ► / Dd | — | Cav | Ad | ◄ / Ad |
| Cntr-attck⁴ | ◄ / Dd | Ad | ◄ / Bd | Dd | Bd |
1 = No attacking unit can Advance after Combat. 2 = At least one victorious attacking unit must Advance after Combat. 3 = No defending unit can Advance after Combat. 4 = At least one victorious defending unit must Advance after Combat.
Explanation of Results
- ◄ = Shift one column to the left before resolving the battle.
- ► = Shift one column to the right before resolving the battle.
- DW = Do not roll the die; the battle result is automatically D(efender) W(ithdraws) and is applied immediately.
- N = Do not roll the die; the battle result is automatically e(N)gaged and is applied immediately.
- Ad = All surviving attacking units become disordered (see 9.6.9) after the battle result is applied.
- Cav = All attacking Cavalry units' Combat Strengths are doubled.
- Bd = All surviving units on both sides become disordered (see 9.6.9) after the battle result is applied.
- Dd = All surviving defending units become disordered (see 9.6.9) after the battle result is applied.
- — = There is no maneuver effect; roll the die and resolve the battle normally.
Advance After Combat
Rule 9.9.3 is modified when certain Maneuvers are conducted as follows:
'Cautious' maneuvers (i.e., Bombard and Fall Back) prevent any victorious unit on the side performing them from advancing after combat (even Cavalry).
Conversely, 'aggressive' maneuvers (i.e., Charge and Counterattack) force a victorious unit on the side to perform Advance after Combat. As per 9.9.3, this must be a Cavalry unit (if present), but if not, then an Infantry unit (if present) must be advanced. Note that artillery never Advances after Combat, even under this circumstance.
Example 1: During the new Step A.1, the Phasing Player decides to Charge with his forces while the Defending Player has ordered his troops to Hold (/Ad). Later, after committing their respective Reserves to this battle, during the new Step F.1, the Maneuver chits are revealed, the battle is modified so that: A) the column used on the Combat Results Table is shifted one to the left (◄) before the attacker rolls the die; B) all surviving attacking units become Disordered (Ad; see 9.6.9 below); and C) at least one victorious attacking unit (if there are any) must Advance after Combat.
Example 2: The attacker decides to play it cautiously and Bombards while the defender wants to abandon his position and Fall Back. The attacker unwisely commits Reserves to this battle (wasting 1 Morale Point) because, he discovers, the Combat Results Table is not even consulted! No die roll is made; the battle result is an automatic DW (Defender Withdraws) and is applied immediately. Furthermore, none of the victorious attacking units can Advance after Combat because they chose to stay put and Bombard.
New Combat Result: "Disordered"
A new combat result, Disordered ("d"), is added with this Expansion Kit.
[9.6.9] d: Disordered. Place a "Disordered" marker on the unit if it does not already have one. A second Disorder or Rout result has no additional effect.
Disordered Effects: When a unit is Disordered, the following effects apply:
- Values: Reduce both its Combat Strength and Movement Allowance by one (-1). A unit's Combat Strength can never be reduced to less than 0 or Movement Allowance to less than 1.
- Zone of Control: Disordered units do retain their Zones of Control.
- Disordered and Routed: If a unit is already Routed, or receives a Rout marker while Disordered, when computing their effects, the Disorder effect is applied before the Rout effect.
Examples: The following units are both Disordered and Routed: a 1-3 Cavalry becomes a 0-2, a 2-3 Cavalry becomes a 1-2; a 2-2 Infantry becomes a 1-1, as does a 3-2 infantry. A 4-2 or 5-2 is reduced to a 2-1.
Recovery from Disorder: A unit recovers from disorder automatically at the end of its Owning Player's Movement Phase if it is not in an enemy ZOC. Remove the Disordered marker from that unit. (Note: a Disordered unit does recover if adjacent only to enemy units that currently have no ZOC; e.g., at night).
[12.0] Army Morale
A more granular system for tracking Army Morale is to allow 1/2 Morale Point adjustments on certain occasions; Morale Points are now also measured in 'halves' as indicated on the Morale Track by flipping a side's Morale marker over to and from its "+1/2" point side.
[12.1] New Morale Limits: An Army's maximum morale may now rise up to 10 1/2 Morale Points, and an Army continues fighting even if it only has 1/2 a Morale Point Left!
[12.7] Using 1/2 Point Morale Points: The following Subcases apply:
[12.7.1] "Small Formation" Casualties: When the loss of a 0- or 1-printed strength unit (i.e., use its printed Combat Strength, unmodified by Disordered or Rout effects) causes a change in either side's morale due to routing or breaking (only) it only causes a 1/2 Morale Point adjustment.
Example: If you break an enemy's 1-strength cavalry or Cadre unit, you would only gain 1/2 of a Morale Point, and your opponent would only lose 1/2 of a Morale Point.
[12.7.2] Rallying Die Roll Modifier: When you attempt to rally units (12.4), you may now spend 1/2 a Morale Point for a plus one (+1) die roll modifier when applied to rally a single, specific unit. Players can still spend a whole Morale Point for a plus one (+1) die roll modifier to all of your rally die rolls conducted at that time (i.e., applying it to two or more rallying units at one time). Note that a +1 die roll modifier is the maximum allowed per rally roll.
[12.7.3] LOC Hex Occupation at Night: When occupying enemy LOC hexes at night, each costs the enemy 1/2 a Morale Point (instead of 1 per pair).
[12.7.4] Guard Commitment: When Committing the Guard as per Rule 12.6, there is no Morale Point cost if either side has fewer than 2 Morale Points.
[12.7.5] A Full Morale Point: It still requires 1 full Morale Point when breaking down and combining to form large units (16.71 and 16.72), and 1 full Morale Point is gained or lost when a Small Formation unit is withdrawn from the map (via some Event cards and Pursuit; see 16.8).
[15.0] How to Win
General Rule
The Victory Conditions are broadened to include both Morale Values and the control of key map locations at the game's end.
- Decisive Victory is achieved by a player if, at any time, the enemy side's Morale Value (MV) is reduced to zero (0) or less and his side's Morale Value is one-half (1/2) or more.
- If neither side achieves a Decisive Victory, a Marginal Victory is awarded to a player if, at the end of the game (i.e., at the conclusion of the last Game Turn), his side's Morale level is at least equal to the other side's and his units physically occupy more total enemy Objective, enemy LoC, and Fortress and Redoubt hexes than the other side (i.e., he was left 'in possession of the battlefield').
- If neither side achieves a Decisive or Marginal Victory, a Tactical Victory is awarded if, at the end of the game, that side's Morale level is at least one higher than the other side's Morale.
- A Draw Occurs with any other result (e.g., both side's Morale levels were within 1/2 point of each other and neither side managed to control the battlefield). Often, such battles would see one side withdraw for various reasons or both sides remain to fight again the next day in hopes of achieving a final victory.
[16.0] Optional Rules
[16.8] Pursuit
In any game in which one side currently has the option to exit its units from the map (typically via an Event authorizing the player to conduct some sort of orderly withdrawal), the other side may now "pursue" them. Such pursuit can only be conducted while the enemy has the option to exit its units.
Procedure: If a friendly unit occupies an enemy LOC hex, other friendly units that move to that hex during your Step 2 may be voluntarily eliminated in that hex (i.e., 'marched off the map' in Pursuit of the enemy's forces outside the playing area).
[16.8.1] Limitation: Only one friendly unit per turn per occupied enemy LOC hex may be thus "eliminated" in Pursuit. Place such units just off the map adjacent to the LOC hex that they exited from as a reminder.
[16.8.2] Pursuit Effect: During Night turns, when the enemy suffers Morale Loss due to captured terrain (14.0-2) is determined, in addition to the loss of the LOC hex (if it is still friendly-occupied), another Morale Point is lost (-1 MP) for each friendly unit sent off the map in Pursuit.
During his Night Turn, you still occupy one Enemy LOC hex and have exited two units in Pursuit. From that alone, the Enemy Player will lose 2 1/2 Morale Points (as per Case 12.7.5).
[16.8.3] Permanence: Units that exit the map via Withdrawal (allowed by certain Event cards in some games) or Pursuit (this rule) cannot be Rallied (10.0) or "marched" back onto the map. Such exited units are permanently removed from play. A marker is included to help remind players when these special conditions are in effect.