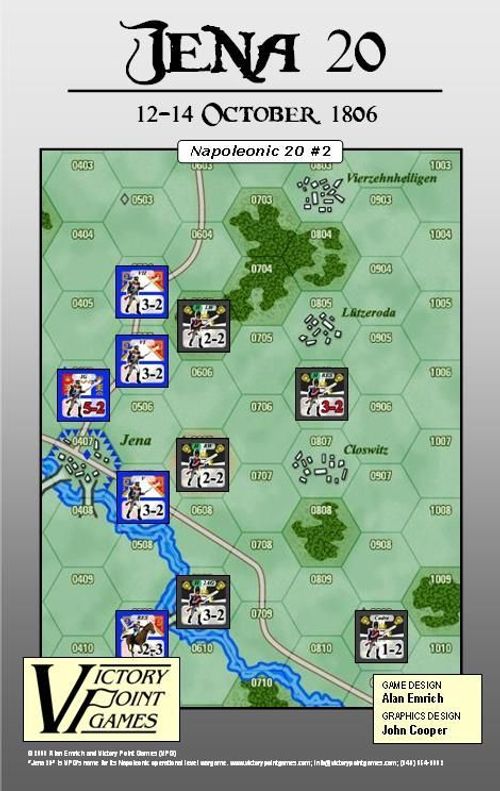
Jena 20
Jena 20 Rulebook
Table of Contents
Table of Contents
Using These Rules
The instructions for this game are organized into major "Rules" sections, represented by the number to the left of the decimal point (e.g., rule 4.0 is the fourth rule). These rules generally explain the game's subject matter, its components, the procedures for play, the game's core systems, how to set it up, and how to win.
With each Rule, there can be "Cases" that further explain a rule's general concept or basic procedure. Cases might also restrict the application of a rule by denoting exceptions to it. Cases (and Subcases) are an extension of a Rule shown in the way that they are numbered. For example, Rule 4.1 is the first Case of the fourth Rule; and Rule 4.1.2 is the second Subcase of the first Case of the fourth Rule.
Introduction
Napoleonic 20 is a wargame system for recreating operational level campaigns during the Napoleonic Wars using approximately 20 pieces per game. This Standard Rules booklet applies to all games in the series, each of which also has its own Exclusive Rules sheet.
Game Scale: Each unit represents a division to a corps of troops (approximately 8,000 - 20,000 men and their equipment). Each space on the map is approximately one-half to one mile across.
Game Equipment
The Game Maps: The 11" x 17" game boards features maps portraying the area where various Napoleonic campaigns took place. A hexagonal grid is superimposed over it in order to regularize the movement and positioning of the pieces.
The Playing Pieces: The cardboard game pieces represent the actual military units that took part in the original campaign. These playing pieces are referred to as 'units.' The front of a unit shows its designation (e.g., 1st Corps), type (e.g., Infantry), and Combat Strength. The back shows its Movement Allowance.
Combat Strength is the relative strength of a unit to engage in combat. Movement Allowance is the maximum number of open terrain hexes through which a unit may be moved in a single Movement Phase.
Game Charts, Tables, and Tracks: These are found both on the game board and on a separate Player Aid sheet.
- The Combat Results Table is used to resolve battles.
- The Morale Track indicates the current number of Morale Points an army has available.
- The Terrain Effect Chart is used to provide information about the effects of terrain on movement and combat.
- The Game Turn Record Track indicates the current Game Turn.
Setting Up the Game
Players determine what side they will play. The French player controls all of the French units, the Anti-French player controls the other (i.e., opposing) units. Shuffle the cards to form a Draw Pile.
Follow the game's Exclusive Rules sheet for the remainder of the setup instructions.
Sequence of Play
General Rule
The game is played in successive Game Turns, composed of alternating Player Turns. During each Game Turn, the players maneuver their units and resolve battles in a strict sequence according to the following outline and within the limits provided by these rules. At the conclusion of the last Game Turn, the Victory Conditions are consulted and the winner is determined.
The Game Turn
A Game Turn is divided into two Player Turns, a First Player Turn and a Second Player Turn. (Who is the First Player is indicated in each game's Exclusive Rules sheet.) Each Player Turn is divided into a series of segments called 'Phases.' The term 'Phasing Player' describes the player who is currently conducting a Phase.
The First Player Turn
- First Player Random Events Phase: The First Player draws the top card and enacts it. The French player uses the top event on the card (shaded in blue), while the Anti-French player uses the event on the bottom half of the card (5.0).
- First Player Movement Phase: The First Player may move all, some or none of his units as he desires within the limits of the rules for Movement (6.0), Zones of Control (7.0), and Terrain Effects. He may also bring reinforcements onto the map, if available (11.0).
- Second Player Reaction Phase: The Second Player may have some, none or all of his cavalry units conduct Reaction Maneuvers (8.0).
- First Player Combat Phase: In any order he desires, the First Player uses his units to attack enemy units (9.0).
If he did not Force March during his Movement Phase, and was not involved in any Battles during the enemy's Reaction or his own Combat Phases, he might receive a Morale Point from rest during a "Lull" (13.0).
First Player Night Operations: It if is a Night Game Turn, the First Player may Rally eliminated units (10.0), adjust his side's Morale based upon captured Line of Communication ('LOC') and Objective hexes; recover one Morale Point (14.0), then reconceal all of his units and add his Dummy units to the map when using the Fog of War Optional Rule (16.1).
The Second Player Turn
- Repeat Phases 1 through 5, reversing the roles of the First and Second Players. If it is a Night Turn, reshuffle the Random Event cards to form a new Draw Pile.
Random Events
General Rule
"Random events" simulate imponderables of war that affected these campaigns. At the beginning of each Player Turn, the Phasing Player reveals the top Random Event card and immediately applies the appropriate result. 'Two-tone' events affect whichever player drew that card; 'monochrome' text affects its specific side.
Procedure
The deck is reshuffled at the end of each Night Game Turn. Unless otherwise specified, an individual event may take place more than once per game (i.e., each time the event is drawn from the deck).
Movement
General Rule
During his Movement Phase, the Phasing Player may move as many or as few of his units as he desires. Units may be moved in any direction or combination of directions.
Procedure
Units are moved one at a time, tracing a path of contiguous hexes. As each unit enters a hex, the unit pays one or more Movement Points from its Movement Allowance to do so.
Restrictions and Prohibitions
- [6.1] Strict Sequence: Movement never takes place out of sequence. A player's units may be voluntarily moved only during his own Movement Phase (exception: see The Reaction Phase, 8.0).
- [6.2] Speed Limit: A unit cannot exceed its Movement Allowance during a friendly Movement Phase, with the exception that a unit may always move 1 hex per friendly Movement Phase (as long as it is not into prohibited terrain or across a prohibited hexside), even if it does not have sufficient Movement Points to pay the entire cost. A unit may expend all, some or none of its Movement Points at that time, but unused Movement Points may not be accumulated from turn to turn, nor transferred to another unit.
- [6.3] Enemies: A friendly unit may never enter a hex containing an enemy unit.
- [6.4] No 'Take Backs:' All movement is final once a player's hand is withdrawn from the unit he is moving. Players may not 'change their minds' and retrace their unit's movement.
This rule should be strictly enforced. During these campaigns, it was common for units to be sent in the wrong direction at key points with nearly disastrous results.
Terrain Effects
Normally, units pay one (1) Movement Point to enter each hex, regardless of its terrain type. However, the following special Cases apply:
- [6.5] Rugged Terrain: Units that enter a Forest, Rough or Swamp hex must immediately stop. They may voluntarily move from there at their next opportunity, but if they enter another such hex, they must again stop, forfeiting the rest of their move. Units may not move further, even if their Movement Allowance has been increased by Forced March (see Rule 12.3).
- [6.6] Roads: A unit using road movement (moving directly from road hex to another, connected road hex) does not have to stop in Rugged Terrain (as per 6.5, above). A unit which conducts its entire move along connected road hexes increases its Movement Allowance by one (+1). For example, a cavalry unit moving entirely along connected road hexes that turn would have its Movement Allowance increased to 4.
Zone of Control Effects
- [6.7] Stop: Units that enter an enemy Zone of Control (see 7.0, below) must immediately cease their movement. Friendly units' Zones of Control do not affect the movement of friendly units.
- [6.8] Stuck: Units may only voluntarily leave an enemy Zone of Control through Disengagement (see 8.3). The only other way to leave an enemy Zone of Control is by Advancing or Retreating after Combat (see 9.8 and 9.9).
Effects of Other Friendly Units
- [6.9] No Stacking: A friendly unit may move through hexes occupied by other friendly units (at no extra Movement Point cost). They may not end the Movement Phase stacked in the same hex with another friendly unit.
Zones of Control
A unit's 'Zone of Control' (abbreviated 'ZOC') is constituted by the six hexes immediately surrounding it.
General Rule
Hexes upon which a unit exerts a Zone of Control are called 'Controlled Hexes.' Units that begin their Movement Phase in an Enemy ZOC cannot move. Units must cease their movement upon entering enemy Zones of Control.
- All units exert a ZOC at all times, regardless of the current Phase or Player Turn (except during Night Turns, 14.0).
- The presence of ZOCs is never affected by other units, enemy or friendly.
- ZOCs extend into all types of terrain except Fortified, Redoubt, and between adjacent Town / Fortified / Redoubt hexes (i.e., in a "built-up" area). They also extend across all types of hexsides except Major Rivers (even at bridges and fords). Important: units separated by Major River hexes (except at bridges and fords) are not considered 'adjacent.'
The ZOC of the French unit in La Haye Saint does not extend into Mont St. Jean (where the British unit is), nor into Hougomont. It does extend out from its town into other adjacent hexes, such as where the Prussian unit is.
- [7.1] Multiple Zones of Control: Both friendly and enemy units may exert their ZOCs upon the same hex. There is no additional effect if multiple units cast their ZOCs over the same hex. Thus, if a given unit is in an enemy controlled hex, the enemy unit is also in its controlled hex. The two units are equally and mutually affected and 'locked' into each other's ZOCs.
- [7.2] Movement Cost: Units do not pay any additional Movement Points to enter an enemy Zone of Control.
Effects on Combat
- [7.3] Combat Obligation: The phasing player must attack all enemy units which exert ZOCs on friendly units during his Combat Phases. All friendly units which are in enemy Zones of Control must attack some enemy unit (see 9.1).
- [7.4] Retreat Effect: Units may retreat into a hex containing an enemy ZOC, but they run the risk of Breaking for each such hex entered (see 9.83).
- [7.5] Advance After Combat Effect: Units that Advance after Combat may freely enter enemy Zones of Control; enemy Zones of Control never affect advance after combat (see 9.9).
Night Game Turns
- [7.6] No ZOCs: Zones of Control do not exist during Night Game Turns (14.0).
The Reaction Phase
General Rule
The friendly Reaction Phase takes place during the enemy Player's Turn. During his Reaction Phase, a player may have his cavalry units Countercharge, Disengage - OR - Penetrate (see Optional Rule 16.2).
Countercharge
- [8.1] Seizing the Attack Initiative: Cavalry units may make a special 'Countercharge Attack' during the Reaction Phase (only; not during a player's normal Combat Phase). The reacting player is the "Attacker" in such battles.
Modifications
- [8.2] Unhinging the Enemy: A Countercharge Attack follows the normal rules of combat in most ways (see 9.0), but because they are used to throw off the enemy's timing and coordination before battle, they receive the following benefits:
- [8.2.1] Selective Attacks: Unlike during regular combat (9.1 and 9.2), units conducting a Countercharge do not have to attack every unit whose Zone of Control they are in. Instead, they may attack some, none or all such adjacent enemy units, and thus make 'Selective Attacks.' Multiple cavalry units can combine to conduct a Selective Attack against a single enemy unit if they are all adjacent to it.
- [8.2.2] Strength Bonus: The Combat Strength of units conducting a Countercharge is doubled. Exception: Countercharging cavalry units are not doubled in strength in a battle against enemy cavalry units.
- [8.2.3] Holding Fast: If victorious, defending units cannot Advance after Combat (9.9) following a Reaction Attack. They are too busy protecting their lives by taking cover or forming squares.
Disengagement
- [8.3] Cavalry 'Retreat Before Combat:' A cavalry unit that starts its Reaction Phase adjacent to an enemy unit may move away via 'Disengagement.'
- [8.3.1] Timing: Disengagement occurs only in the friendly Reaction Phase.
- [8.3.2] Enemy Cavalry Prohibition: The disengaging cavalry unit cannot begin its Disengagement Movement in the ZOC of an enemy cavalry unit.
- [8.3.3] Distance: A cavalry unit disengages by moving one hex to an adjacent, vacant non-enemy controlled hex (but see optional exception: 16.2) and then ceasing its movement. If no other route is available, it may move through friendly occupied hexes not in any Enemy Zones of Control to reach a vacant hex. If it does so, it goes one additional hex at a time until it is no longer stacked with a friendly unit.
- [8.3.4] Non-Retreat: Disengagement is not considered 'Retreat after Combat' (9.8). Thus, the enemy may not Advance after Combat (9.9) when a cavalry unit uses Disengagement.
Cavalry Penetration
- [8.3] Cavalry Penetration: See Optional Rule 16.2 for this additional Cavalry Reaction Phase option.
Combat
General Rule
The Phasing Player is termed the 'attacker' and the Non-Phasing Player is the called the 'defender' in a 'battle' (i.e., the resolution of a single attack) regardless of the overall strategic situation.
The Phasing Player declares all his battles before conducting any of them. Then, each individual battle is resolved, one at a time, in any order the Phasing Player's chooses, by rolling a die and consulting the Combat Results Table to determine its outcome.
Procedure
Each Battle, follow these Steps in order:
-
A. The Phasing Player designates which of his units will be attacking which adjacent enemy unit(s).
-
B. Total the combat strength of all the attacking units in that battle. The attacker may spend a Morale Point to 'commit his reserve' troops to battle and increase his total by one (+1).
-
C. Total the defense strength of all the defending units that are the target of the attack. Add in the single best terrain effect for defender's location. The defender may spend a Morale Point to commit his reserve troops to the battle and increase his total by one (+1).
-
D. Subtract the total defending strength from the total attacking strength. The result is the 'Combat Differential,' expressed as either a positive or negative number (or 0).
-
E. Consult the CRT and use the appropriate 'Differential Column.'
-
F. Roll one die. Cross index the die roll with the Differential Column to determine the result of that battle.
-
G. Apply this Combat Result immediately, including Retreats / Advances after Combat.
-
[9.1] Mandatory Combat: All phasing units in an enemy Zone of Control (ZOC) must attack. All non-phasing units in an attacking unit's Zone of Control must be attacked.
- [9.1.1] Attacker's Prerogative: The Phasing Player determines which attacking units will attack which defending units, in any combination he desires, as long as all friendly units in an enemy ZOC participate in an attack, and all enemy units in friendly ZOCs are, themselves, attacked.
- [9.1.2] One Battle per Unit per Combat Phase: No unit may attack more than once per Friendly Combat Phase, and no enemy unit may be attacked more than once per Friendly Combat Phase.
-
[9.2] Declaring All Battles First: The Phasing Player must declare which friendly units will be attacking which adjacent defending units at the beginning of each Combat Phase (to ensure that all adjacent units are attacked according to the Subcases below) before conducting any individual battles.
- [9.2.1] Multiple Unit and Multi-Hex Battles: If a phasing unit is in the ZOC of more than one enemy unit, it must attack all of those enemy units that are not assigned to battle with some other attacking unit. If you have a lone unit that is adjacent to two enemy units, it must fight them both!
- [9.2.2] Combining Units in a Battle: Attacking units in two or more hexes may combine their Combat Strengths and conduct a single battle together provided all of the attacking units are adjacent to all of the defending units. Battles may involve any number of attacking or defending units.
Diversionary Attacks: When organizing a series of battles, a player may allocate his attacking units in such a way that some attacks are sacrificially made at poor differentials (a wargaming technique called 'soaking off') so that other adjacent attacks may be made at more advantageous differentials.
Artillery Bonus
Artillery units represent large, unwieldy parks of cannons that were concentrated into Grand Batteries to blast a hole in the enemy's line. The Combat Strength of an Artillery unit is always doubled when attacking, but it uses its normal (printed) strength when being attacked. Artillery units never Advance after Combat.
- [9.3] Combat Strength Unity: A given unit's Combat Strength is always unitary; it may not be divided among different battles during a single Phase, either for attack or defense.
Terrain Effects on Combat
Defending units benefit from the terrain in the hex they occupy and / or that hex's perimeter hexsides it is attacked through.
- [9.4] The Terrain Effects Chart: The effect of terrain on combat is reflected by adding the Combat Strength of the hex or hexside, as indicated on the Terrain Effects Chart, to the defender's strength total.
- [9.4.1] Non-Cumulative Benefits: The terrain benefits for combat are not cumulative. A defending unit receives only the single most advantageous terrain benefit (for the defender) in a hex or through a hexside.
- [9.4.2] Multiple Benefits: When two or more defending units are involved in a single battle, and they receive different terrain benefits (i.e., different effects on the Combat Differential), then the entire attack is modified by the single most favorable benefit to the defender.
In this illustration, the single French infantry unit must attack the Prussian cavalry unit, and may attack the Prussian infantry unit (9.1, the Prussian infantry unit's ZOC does not extend across the bridged river hexside, so the Phasing French unit is not obligated to attack it). The French situation is desperate, so the French Player declares that he will attack both units, initiating a single Battle against them.
The Prussian cavalry unit is in Open terrain, so the Prussian infantry unit's benefits will apply for the defender (9.4.2). The Prussian infantry is in Jena, a Town hex located across the Saale River at a Bridge hexside. Each of these terrain advantages for the defender (Town and Bridge) is worth 1 additional Combat Value, but their benefits are non-cumulative (9.4.1), so only the single best (i.e., 1) is added.
Prior to commitment of Reserves by either side, this Battle stands at 4 vs. 4 (2 + 1 + 1) and will be resolved on the '0' Differential column of the Combat Results Table (CRT).
- [9.4.3] Attacker Consideration: Terrain in hexes occupied by the attacker has no effect on combat. Note that Fortified, Redoubt, and adjacent Town/Fortified/Redoubt hexes do not have Enemy ZOCs extending into them, nor do ZOCs extend across Major River hexsides (even at Bridges or Fords). Thus, units in these hexes or across these hexsides need not attack out of or across them. However, if they do, Rule 9.1 fully applies.
- [9.5] Voluntary Differential Reduction: The Phasing Player may reduce the Combat Differential of any given battle during Step 'E' in the Battle Procedure, resolving it at a lower differential.
Explanation of Combat Results
Once determined, combat results are applied immediately, including any Retreat and / or Advance after Combat, before resolving the next battle that Phase.
- [9.6] Combat Results: The different battle outcomes are explained below:
- [9.6.1] AB: Attacker Breaks. Break all attacking units in this battle. The defender conducts any Advance after Combat (9.9).
- [9.6.2] AR: Attacker Routed. The defender rolls one die for each Routed unit. The attacker retreats each attacking unit in this battle the indicated number of hexes. The defender conducts any Advance after Combat (9.9). See Optional Rule 16.5.
- [9.6.3] AW: Attacker Withdraws. All attacking units in this battle are retreated one hex (9.8) by the attacker. The defender conducts any Advance after Combat (9.9).
- [9.6.4] DB: Defender Breaks. Break all defending units in this battle. The attacker conducts any Advance after Combat (9.9).
- [9.6.5] DR: Defender Routed. The attacker rolls one die for each Routed unit. The defender retreats each defending unit in this battle the indicated number of hexes. The attacker conducts any Advance after Combat (9.9). See Optional Rule 16.5.
- [9.6.6] DW: Defender Withdraws. All defending units in this battle are retreated one hex (9.8) by the defender. The attacker conducts any Advance after Combat (9.9).
- [9.6.7] EX: Exchange. First, break all defending units, and then the attacker must break from among his units in that battle an amount of Combat Strength Points at least equal to the defender's Combat Strength total. Use only the printed Combat Strength values on the units, unmodified by terrain, Events, etc. Note that if the defending side's morale was not reduced to '0' (i.e., the attacker won the game, as per 15.0), the attacker may be forced to break units whose strength is greater than the defender's if there is no other alternative - i.e., you can't 'make change.' The attacker may also choose to break a stronger unit than necessary if he so desires - this might occur if a weaker unit is deemed more valuable to the attacker for some reason. If there are any surviving attacking units, the attacker conducts any Advance after Combat (9.9).
- [9.6.8] N: Engaged. There is no effect. Neither side breaks any units, retreats or advances as a result of this battle.
Broken Units
A unit that is 'Broken' through combat is removed from the map, but set aside because it can be 'Rallied' (see 10.0).
Routed Units
Important: When an Elite Force (i.e., one with a red Combat Strength) Routs, subtract two (-2) from the Rout die roll. If the modified result is less than one (<1), the outcome is changed to 'Withdraws' (i.e., a 1-hex retreat and no Rout effects).
Retreating After Combat
When a combat result requires a player's unit(s) to retreat (either by Withdrawal or Rout), the owning player must immediately move each such unit the indicated number of hexes away from the hex it occupied during the Battle (i.e., its 'battle hex'). This is called 'Retreat after Combat.'
- [9.7] No Movement Point Cost: Retreat is not considered normal movement; retreating units pay one Movement Point per hex entered regardless of terrain (including rough, forest, etc. where they need not stop during a retreat).
- [9.8] Retreat Restrictions: If a unit is unable to retreat within the following restrictions, it is broken instead:
- [9.8.1] Terrain Effects: Units may not retreat off the map or into prohibited hexes or across Major Rivers (except across bridge or ford hexsides). Units in a Fortified or Redoubt hex may always retreat one fewer hex, at the owning player's option. Thus, units can ignore any Withdraw results that they suffer and Rout one hex fewer; on a Rout die roll of '1,' such a unit is still technically Routed and suffers Rout effects, but it may opt to 'hold its ground.' For Elite Forces, subtract three (-3) from their Rout die rolls when they defend in a Fortified or Redoubt hex.
- [9.8.2] Retreat Hex Priority: Whenever and wherever possible, a retreating unit must retreat into and through vacant hexes not containing an enemy ZOC.
- [9.8.3] Hazardous Retreat Path #1 - Enemy ZOCs: If that is not possible, a unit may retreat into an enemy ZOC. If it does so, however, it must roll one die for each enemy ZOC hex entered. On a roll of 1, 2, or 3, the unit breaks; on a roll of 4, 5, or 6, it retreats normally. Friendly units do not negate enemy Zones of Control for purposes of retreat.
- [9.8.4] Hazardous Retreat Path #2 - Crossing Rivers: When retreating across a Minor River, or a Major River via a bridge or ford, that unit must roll one die. On a roll of 1, 2, or 3, the unit breaks; on a roll of 4, 5, or 6, it retreats normally. If retreating through multiple hazards at a single hex, the player must make a separate die roll for each of them!
- [9.8.5] Friendly Units: If no other route is available, a retreating unit may move through friendly occupied hexes. If its retreat would end in a friendly occupied hex, it retreats one additional hex at a time until it is no longer stacked with a friendly unit. This means additional die rolls if these hexes are in Enemy ZOCs or across bridges!
- [9.8.6] Retreat Direction Priority: While always yielding to Rule 9.8.2, whenever and wherever possible, a retreating unit must retreat in such a way that with each hex it retreats it moves closer to a friendly Line of Communications (LOC) hex (see the Exclusive Rules) than the hex it retreated from. The player has the choice of which LOC hex he retreats each of his units towards if more than one is available (regardless of proximity to the retreating unit).
- [9.8.7] Going the Distance: A retreat path may zig-zag to avoid self-destruction, but it must strive to maintain Rule 9.8.6. The length of the retreat path must be the full indicated number of hexes. If the unit reaches the LOC before reaching the full required distance, it breaks in the LOC hex (retreating "off the map").
Advancing After Combat
Victorious attacking or defending units can usually Advance after Combat.
- [9.9] Advance after Combat Cases: Units must adhere to the following cases when conducting Advance after Combat:
- [9.9.1] The 'Retreat Path:' When an enemy unit retreats as a result of combat, it will leave a specific path of vacant hexes behind it called the 'Retreat Path.' If this path went through a hex containing another unit friendly to the retreating unit (9.84), the Retreat Path ends at the unit retreated through. If a unit breaks, then the hex it occupied at the instant of breaking is the termination point for its Retreat Path.
- [9.9.2] Who is Eligible to Advance? Any or all surviving friendly victorious non-Artillery units that participated in the battle can Advance after Combat along the enemy Retreat Path (only). Units cannot stray from the Retreat Path while advancing.
- [9.9.3] Which Units May and Must Advance: If any victorious Cavalry units were involved in that battle, at least one of them must Advance after Combat into the defeated unit's vacated hex. That Cavalry unit may then advance further, up to the full number of hexes allowed along the Retreat Path (9.9.5). After any mandatory Cavalry unit Advance after Combat has been conducted, if the defeated unit's hex is still vacant, one attacking non-Artillery unit involved in that battle may (at the owning player's discretion) Advance after Combat into that hex (only). Artillery units can never Advance after Combat and Infantry units can never advance beyond the hex occupied by the defender at the start of that Battle.
- [9.9.4] Enemy ZOCs: Advancing units always ignore enemy Zones of Control.
- [9.9.5] Advance Limit: As when Retreating, units do not expend Movement Points nor stop for terrain considerations when Advancing after Combat (9.7). However, under no circumstances, may a Cavalry unit advance a number of hexes greater than its Movement Allowance.
- [9.9.6] Terrain Effects: Units may not Advance after Combat into prohibited hexes (i.e., hexes that they could not enter through normal movement) or across Major Rivers (except across Bridge or Ford hexsides).
- [9.9.7] Immediacy: Any option to Advance after Combat must be exercised immediately before any other battle is resolved.
- [9.9.8] Exhaustion: Advancing units may neither attack nor be attacked again during that Combat Phase, even if their advance places them next to enemy units whose battles are yet to be resolved, or who were not involved in a battle.
Example: Three French units (the 4-strength Imperial Guard, 2-strength III Corps, and 1-strength IV Cavalry Corps) attack one Prussian unit (the 3-strength I Corps) which is defending in a Forest hex.
The attacker (French) has a total of 7 Strength Points, and the French player declines to spend a Morale Point to increase his strength. The defender (Prussian) has a total of 4 Strength Points (3 for the unit plus 1 for the Forest hex it is defending in), and opts to spend 1 Morale Point to increase his total to 5. Therefore, the Combat Differential is 7 - 5 = +2. The French player rolls a die. Looking at the Combat Results Table, the French player's die roll of 6 is cross-indexed with the +2 Column to yield a result of DR (Defender Routs).
This requires a roll to determine the Rout distance. A result of 2 isn't bad, requiring the unit to retreat only two hexes back toward its Line of Communication (LOC) off to the right - and no loss of Morale for Routing more hexes than its Movement Allowance. Unfortunately, the first hex it must retreat through is in an Enemy ZOC (i.e., "hazardous"), so another die roll must be made to see if the Retreating Prussian unit Breaks (as per 9.83). This time, the die roll is a 5, so the Prussian unit survives and continues its Retreat along its Retreat Path as shown above.
Now the French have to deal with Advance After Combat. First, the French Cavalry unit must advance into the Forest hex. The French player then exercises his option to continue to advance his Cavalry unit along the Retreat Path and takes a second hex (which is where the Retreat Path ends). Next, the French player also exercises his option to advance an Infantry unit into the defender's vacated hex, moving the 2-strength III Corps into the Forest.
Rallying
General Rule
At certain times (e.g., Night), a player may attempt to 'Rally' his broken units.
Procedure
For each Broken unit attempting to Rally, roll one die (applying any appropriate die roll modifiers; note that the decision to spend a Morale Point, 12.0, must be made before rolling the die), consult the Rally Table, and apply the result. Also see the Unit Reduction Optional Rule, 16.6.
Placement of Rallied Units
Newly Rallied units are placed on empty friendly Line of Communications hexes. If none are available, or you do not desire to place one there at this time, then the unit simply remains Broken; it is possible to try to Rally it again at a later time. (Also see Rule 16.4 for additional Rally locations.)
Reinforcements
General Rule
Players may receive additional units over the course of play. These units are called 'reinforcements.'
Reinforcements appear in the owning player's Movement Phase on the Game Turn indicated by the setup instruction in that game's Exclusive Rules.
Procedure
A player places his reinforcement units during his friendly Movement Phase next to the colored map edge hexsides indicated in that game's Exclusive Rules.
Important: The notion of reinforcements being poised directly at the map edge is strictly a concept. Until they enter the map, reinforcements have no effect on play. Off-map units have no Zones of Control, may not attack enemy units, etc.
- [11.1] Initial Movement: Reinforcements are presumed to be poised next to the map. When entering its first hex on the map, a reinforcing unit expends its Movement Points normally according to the Terrain Effects Chart. Units entering along a road pay the road movement cost.
- [11.2] March Order: When there is more than one reinforcement unit scheduled to appear at the exact same hex during the same Game Turn, they are lined up off map, one behind the other, with the 'lead' unit poised next to the map entry hex itself. To simulate this 'march order' column of troops, each such unit spends one more Movement Point than its predecessor did to enter the map.
- [11.3] Timing: Reinforcements may arrive at any time during the friendly Movement Phase of the scheduled Game Turn. Once on the map, reinforcements are treated as normal units for all purposes.
- [11.4] Blocked Entry: Reinforcements may not enter a hex that is, at that moment, occupied by an enemy unit. A reinforcing unit may enter a hex in an enemy ZOC, but must cease movement normally.
- [11.5] Delaying Arrival: A player may voluntarily delay reinforcements from Game Turn to Game Turn, bringing them into play on some later turn (if at all). This is what a player must do when a reinforcement's entry location is blocked by another unit. Whether a reinforcement is brought into play on its scheduled turn or later, it must appear at its scheduled entry location.
Army Morale
General Rule
Each side starts the game with a number of Morale Points as indicated in its game's Exclusive Rules. Morale Points represent a side's level of motivation and command skill during that campaign. Players may expend Morale Points to enhance their movement, combat and rally operations.
Keeping Track of Morale Points
Morale Points are recorded on the Morale Track using the Morale markers.
- [12.1] Gaining / Losing Morale Points: See the Morale Chart for specific in-game actions that raise and lower Morale Points. If two or more events occur simultaneously that would change a player's Morale Value, first add and then subtract all Morale Point changes that must be applied.
- [12.1.1] Maximum Morale: A side's Morale Value may never exceed ten (10), with any excess being lost.
- [12.1.2] Morale Destroyed: If a side's Morale Value ever reaches zero (0), then that side immediately loses the game. If this occurs to both sides simultaneously, the game is a draw.
- [12.2] Committing the Guard: Certain units, often referred to as 'Guards' (i.e., ones with a red Movement Allowance) were typically held back and committed only at critical times.
- [12.2.1] Forward: A player must spend a Morale Point to 'commit a Guard unit' (i.e., to move it from a hex that is not previously able to attack an enemy unit into one where it may now do so - even when it does not, such as at Night). Exceptions: There is no cost to commit a Guard unit if either side has only 1 Morale Point remaining. This would be the critical moment in a battle when the Guard was expected to join the fray. There is no Morale cost for a Guard unit to Advance After Combat (9.9). At that point, that Guard unit is already assumed to be committed.
- [12.2.2] Le Garde Recule: If an attacking Guard unit in a battle could not conceivably Advance After Combat (9.9.2), either because it was not victorious or did not survive an EX outcome, that side loses one (-1) Morale Point. That Guard unit does not have to actually advance, it simply must be capable of doing so. This Guard unit morale adjustment is in addition to other morale-adjusting factors.
The French Guard unit pays 1 Morale Point (MP) to move adjacent to an enemy unit that is across a bridge hexside, setting up a very important attack. It Routs (DR) that enemy unit: The enemy loses 1 MP for Routing. That unit then Breaks in a prohibited retreat: France gains +1 Morale (for breaking the enemy unit). When Routed units Break, there is no additional MP loss.
Spending Morale Points
A player may only ever spend a single Morale Point at a time for these purposes:
- [12.3] Forced Marching: During your Movement Phase, you may spend a Morale Point to increase the Movement Allowance of all your units by one (+1).
- [12.4] To Rally: When you attempt to rally units, you may spend a Morale Point for a plus one (+1) die roll modifier to all your rally die rolls conducted at that time.
- [12.5] Committing Reserve Troops to Battle: During a Battle's Steps B and C, the attacker and defender respectively may each spend a Morale Point to add one (+1) to their side's total battle strength in that particular Battle.
- [12.6] Committing the Guard: During your Movement Phase, you must spend a Morale Point to move your Guard unit into a hex from where it was not previously able to attack an enemy unit into one where it may now do so (12.2.1), unless either side has only 1 Morale Point.
Passing ("Lulls")
General Rule
After the first Night Game Turn occurs, during any subsequent Day Turn where both players have units on the map, if a player does NOT Force March his army, nor do any Battle die rolls (9.0) occur during his opponent's Reaction Phase or his own Combat Phase, that player gains one (+1) Morale Point at the end of his Player Turn if either one of these applies:
A) He has fewer than 6 Morale Points, - OR - B) His side does not have more Morale Points than his opponent's.
Night Turns
General Rule
During Night Game Turns, the following rules apply:
- No ZOCs: All units lose their ZOCs. This is a way to exit enemy ZOCs. In effect, all units can disengage at night.
- Speed Limit: All Movement Allowances are reduced to one (1) MP. This may be increased as usual by Roads and/or Forced Marching.
- No Battles: No combat occurs at night.
Additional Activities
The following 'Night Operations' are skipped during non-Night Turns. They are only performed during the Night Operations Phase of a player's Night Turn and must be conducted in order.
- Rally: You may Rally friendly units.
- Morale Loss due to Captured Terrain: If you have units physically occupying enemy LOC and / or Objective hexes (i.e., one in the opposing side's color), their morale loss effects are now applied according to the Morale Chart.
- Morale Recovery from Rest: Your side increases its Morale Value by one (+1) point from a night's recuperation.
- Reconcealment: If the Fog of War Optional Rule (16.1) is being used, reconceal (i.e., flip face-down) and place your side's Dummy units on the map.
- Reshuffle: At the end of the Second Player's Night Turn, reshuffle the cards to create a fresh Draw Pile.
How to Win
General Rule
Each side has its own victory conditions based upon Morale Values:
- A French Decisive Victory is achieved if, at any time, the Anti-French side's Morale is reduced to zero (0) and French Morale is one (1) or more.
- An Anti-French Decisive Victory is achieved if, at any time, the French side's Morale is reduced to zero (0) and Anti-French Morale is one (1) or more.
- An Anti-French Marginal Victory is obtained if, at the end of the game (i.e., at the conclusion of the last Game Turn) the Anti-French side's Morale Value is at least 1 higher than the French side's Morale Value.
- A Draw Occurs with any other result.
Optional Rules
Players can use these Optional Rules in any combination desired.
[16.1] The Fog of War: Hidden Units
Players place their units face-down at all times (including during setup). Units may be inspected freely by their owner but remain hidden (i.e., face-down) to the enemy until revealed. Face-down units function normally in all other respects.
- [16.1.1] Revealing Hidden Units: Face-down (i.e., hidden) units are revealed (flipped face-up) thus:
- At any time the owning player desires.
- When paying a Morale Point to 'Commit the Guard' (12.2), that Guard unit, if hidden, must be revealed.
- At the end of each non-Night Turn's Movement Phase, if there is a friendly, face-up, cavalry unit adjacent to a hex containing face-down enemy units, reveal all those enemy units.
- When an enemy cavalry unit attempts to move during its Reaction Phase via Disengagement (8.3) or Penetration (16.2), and you wish to prevent that maneuver with a hidden friendly cavalry unit, that hidden friendly cavalry unit is revealed.
- After all battles are declared during a Combat Phase (i.e., which friendly units are attacking which other, possibly hidden, enemy units), all units involved in combat are revealed.
No Advance After Combat occurs when only a hidden Dummy unit is revealed in Battle. (No combat; no advance.)
- [16.1.2] Reconcealing Units: Face-up units remain revealed until the end of each player's Night Turn, at which point all of that player's face-up units are turned face-down to begin the new day.
- [16.1.3] Dummy Units: Each side receives one or more 'Dummy' units in their counter mix.
- Unless specified, no Dummy units are deployed on the map during setup.
- One Dummy unit per turn may be placed on the map, if available, with the arrival of any newly Rallied or Reinforcement unit. It is stacked with that unit and one of them must be moved from that hex so that they are not stacked together by the end of their owner's Movement Phase (6.9).
- Dummy units are also placed on the map when units are reconcealed, usually at Night (14.0). When available, they are placed in hexes containing a friendly unit that is not adjacent to an enemy unit. After placement, the owner must immediately relocate one of those two stacked units (real or Dummy) to an adjacent hex that is also not adjacent to an enemy unit.
- A Dummy moves as a cavalry unit (with a Movement Allowance of 3), but moving them only 2 helps to conceal them among infantry units!
- The instant a Dummy unit is revealed, it is removed from the map (at no Morale cost). It can return during the next opportunity for reconcealment.
- When declaring battles (9.2), include hidden Dummy units! Their declared battles do fulfill the attacker's mandatory combat requirement (9.1). That is, a player can use unrevealed Dummy units in diversionary attacks.
- When revealing units as per 16.1.1, Dummy units do cause enemy units to be revealed. Think of them as scouts.
- Until revealed, a Dummy functions in all ways as a normal unit and does control the hex it occupies (e.g., an enemy Objective or LoC hex).
[16.2] Cavalry Penetration
During your Reaction Phase, friendly cavalry units may move through enemy ZOCs under certain circumstances.
Procedure
Cavalry Penetration occurs only during the friendly Reaction Phase as a cavalry unit's single action. The cavalry unit must begin its Reaction Phase adjacent to an enemy unit. It can then move into another hex that is also adjacent to an enemy unit (even moving from one hex in an enemy ZOC to another), but then it must cease its movement for that Phase and cannot conduct a Countercharge attack.
- The Penetrating cavalry unit cannot begin in or enter the ZOC of an enemy cavalry unit.
This move is, in effect, the opposite of Disengagement (8.3).
[16.3] Artillery Support
Individual batteries of artillery were often detached from parks to nearby formations to help shore up threatened parts of the line.
- [16.3.1] Defensive Support: If no attack has been declared (9.2) against an Artillery unit, it adds one (+1) to the strength of all friendly defending units in its Zone of Control (if it currently has one). This benefit has no Morale Point cost and applies during Enemy Combat and Reaction Phases.
- [16.3.2] Bombardment: Artillery units can attack across Major Rivers or other prohibited terrain hexside by Bombardment. Bombarding Artillery units may attack, either alone or combined with other friendly attacking units, using their normal (printed; not doubled as per 9.2) Combat Strength. When Bombarding, Artillery units enjoy a limited immunity to adverse combat results, treating all AB or AR results as AW. If an EX result occurs, Bombarding Artillery can never be Broken to satisfy Case 9.6.7; if the Artillery unit is attacking alone via Bombardment, treat any EX results as Engaged instead.
[16.4] Additional Rally Locations
In addition to vacant LOC hexes, you may also place Rallied units (10.0) in a 'Rally hex' that meets all of these conditions:
- It must be an empty Town, Fortified, Redoubt or same-side's Objective hex (i.e., a 'natural rallying point').
- It must be 'a safe distance' of at least 4 hexes away from the nearest enemy unit and closer to the nearest friendly LOC hex than the nearest enemy unit is to that LOC hex (i.e., 'behind friendly lines').
- It must be able to trace a path of hexes to the closest friendly LOC that is not occupied by an enemy unit; this path may be of any length, but cannot pass through any hex containing or adjacent to an enemy unit, or across impassable (e.g., unbridged or unforded) major river hexsides (i.e. 'not isolated behind enemy lines').
[16.5] Routed Units
Units that Rout receive additional restrictions.
- [16.5.1] Indicated Routed Status: Place a 'Routed' marker on routed units after they complete their Rout Movement.
- [16.5.2] Rout Effects: Are as follows:
- Routed units may only move if they continue to retreat. That is, any Movement Points they spend must be in accordance with Rule 9.8. They may elect to simply stay in place.
- Routed units lose their ZOCs.
- Routed units have their combat strengths reduced by 50% (round fractions up) when both attacking and defending. This does not affect a defender's Terrain Strength benefits.
- If all of the units of one side participating in a battle are already marked as Routed, they may not have a Morale Point spent to commit their reserves to battle (12.5).
- Routed units cannot Advance after Combat.
- Routed units Retreat and Rout again normally if compelled to do so.
- [16.5.3] Rout Recovery: Every routed unit (even one that just suffered an AR result) recovers automatically at the end of that Player's turn if it is not in an enemy Zone of Control.
[16.6] Unit Reduction
Broken units can return to play as smaller formation, reduced-strength units called 'Cadres.'
- [16.6.1] Partial Rallying: When you conduct a Rally Check for an Infantry unit, you may treat a 'No Effect' outcome as a 'Partial Rally' result. Eliminate the Infantry unit that you were rolling for (i.e., it is permanently removed from play), and receive ('Rally') one of the generic, 1-strength Cadre units instead.
- [16.6.2] Cadre Units: Cadre units function as normal Infantry units except, if they are ever Broken, they themselves cannot be Rallied. When Broken, they are returned to their owner's available pile instead and are available for future reuse.
[16.7] Unit Breakdown and Buildup
General Rule
Before it moves during its owner's Movement Phase, a 'large' (i.e., having a Combat Strength of 2 or more) infantry-type unit (only; other types are not eligible) can be exchanged for (i.e., 'broken down into') two Cadre units, if available, at the cost of 1 Morale Point. Conversely, at the end of their owner's Movement Phase, two Cadre units may be stacked together and then be exchanged for (i.e., 'combined into') an eliminated large infantry unit and 1 Morale Point recovered.
- [16.7.1] Breaking Down: A player must have two available Cadre units in order to break down a large infantry unit. Remove the large infantry-type unit being broken down from the map and place it among your eliminated units (i.e., it cannot be Rallied). Replace it in its hex with two Cadre units. These newly placed Cadre units are free to move and engage in combat this turn.
- There is a minus one (-1) Morale Point cost to break down a unit thus.
- If an unrevealed large infantry unit breaks down, one Dummy unit, if available, can also be added to that stack when it is formed.
- [16.7.2] Combining: Any two Cadre units of the same nationality can end their owner's Movement Phase stacked together (an exception to Rule 6.9). When they do so, they are removed from the map and replaced in that hex by their owner's weakest eliminated large infantry unit of that same nationality, which is then free to participate in combat that turn.
- There is a plus one (+1) Morale Point gain when building up a large infantry unit thus.
Jena 20 Exclusive Rules
This is the Exclusive Rules sheet for Jena 20, a game that also uses the Napoleonic 20 Standard Rules above. When combined, these two rules documents form the entirety of the rules needed to play Jena 20.
These Exclusive Rules supersede the Standard Rules when there is a conflict.
Introduction
Jena 20 is based on the Prussian campaign, 12-14 October 1806. One player commands the French army of Napoleon, while the other leads the Prussian (Anti-French) forces of the Prussian armies under Hohenlohe and Brunswick.
Game Equipment
The Game Map: The 11" x 17" game board features a map portraying that part of Prussia where the campaign took place. The blue units are French and black units are Prussian.
Unit abbreviations include:
- IG = Imperial Guard
- Res = Reserve
- Bav = Bavarian
- B = Brunswick
- H = Hohenlohe
- vR = von Rüchel
- SW = Saxe-Weimar
- AG = Advanced Guard
- LW = Left Wing
- RW = Right Wing
Elite Forces
For the purposes of Routing (a -2 die roll modifier; see 9.6) and Rallying (a +1 die roll modifier; see 10.0), both of the following units are considered Elite Forces: the French Imperial Guard and Prussian H Res Corps.
For purposes of Morale fluctuation from their commitment in Battles, only the French Imperial Guard Corps unit is considered an Elite Force.
Setting Up the Game
After sides have been determined (i.e., who will play the French and Prussian side), setup proceeds as follows:
- The Game Turn marker is placed on the 'October 13 Morning' space.
- Place the French Morale marker on the '8' space and the Prussian Morale marker on the '8' space of the Morale Track.
- Place the units on the map or the Game Turn Track (when they enter play as reinforcements, 11.0) as listed below:
French
- Hex 0208: IG
- Hex 0406: VII
- Hex 0407 (Jena): V
- Turn 4: III (B)
- Turn 5: VI (A) and I (B)*
- Turn 6: Res (A)
- Turn 7: IV (A)
Set aside the Bavarian Division. It arrives as a possible Random Event at Area A.
* Starting on turn 5, roll a die during each French Movement Phase to see if Bernadotte's I Corps arrives. On a 1, place it on the map (at Area B) as a Reinforcement. On any other roll, place it ahead one Game Turn to try again.
Prussian
- Hex 0605: H - LW
- Hex 0607: H - RW
- Hex 0806: H - Res
- Hex 0909: H - 2AG
- Hex 1101: B - 1*
- Hex 1203: B - 1AG*
- Turn 1: B - 2
- Turn 2: B - 3
- Turn 3: B - 1R
- Turn 4: B - 2R
- Turn 6: vR - CB
- Turn 7: vR - 3AG
Set aside the SW - CB Cavalry Division. It arrives as a possible Random Event.
* Historical / Alternate Prussian Deployment Scenarios: Historically, the Prussians split their two major commands, sending Hohenlohe's forces toward Jena while Brunswick took the main group down the road to Kösen. But wargames are full of 'what ifs' called "scenarios," and you have some choices that both players should consider and agree to try before commencing play:
- If you wish to play the game as history, all of Brunswick's reinforcements must enter via the northern road entry hex (1001) as indicated on the map.
- If you want a historical setup only, let the Prussian player manage things from there, simply allow Brunswick's reinforcements to enter anywhere along the Prussian entry area.
- If you want to see what a unified Prussian army would have looked like, change these two units' setup hexes: Hex 0701: B - 1, Hex 0503: B - 1AG, and the remainder of Brunswick's reinforcement units must enter via the southern road (i.e., the LOC) entry hex (0601).
- Or you could allow the Prussian player a free deployment scenario. Allow him to deploy the B - 1 and B - 1AG units at either setup location and to freely enter his reinforcements anywhere along the Prussian entry area.
Sequence of Play
The French player is the First Player.
[4.1] Sudden Death: At the end of Game Turns 10 through 12, the Prussian Player rolls a die. If the result is less than or equal to (<=) the number shown on that box of the Turn Track, the game ends and the winner is determined. If the die roll is greater than the number shown, play proceeds to the next Game Turn.
Random Events
Skip the French Player's Random Events Phase on the first Game Turn.
Combat
[9.86] Retreat Direction Priority:
- French units must retreat towards one of the four French LOC hexes on the south and east map edges.
- Prussian units must retreat towards one of the two Prussian LOC hexes on the west map edge.
Reinforcements
[11.5] Unit Arrival Locations: Reinforcement units arrive in the following locations (color-coded along the map edge for your convenience):
- French units: in the 'A' or 'B' areas as designated along the map edge.
- Prussian units: as designated along the west map edge according to the Prussian Deployment Scenario chosen.
Night Turns
French Objective Hexes: Jena (0407) and Hassenhausen (2210).
Allied Objective Hexes: Dornburg (1111) and Auerstadt (2007).
Jena 20 Player Aid Card
The following reference tables are transcribed from the Jena 20 Player Aid Card published with the C3i Magazine Nr.23 (2009, RBM Studio) edition of the game.
Combat Results Table
Cross-index the die roll with the Attacker's Net Combat Strength Differential column.
| Die Roll | -2 | -1 | 0 | +1 | +2 | +3 | +4 |
|---|---|---|---|---|---|---|---|
| 1 | AB | AR | AR | AW | N | EX | EX |
| 2 | AR | AR | AW | N | EX | DW | DW |
| 3 | AR | AW | N | DW | DW | DW | DR |
| 4 | AR | N | DW | DW | DW | DR | DR |
| 5 | AW | DW | DW | DR | DR | DR | DB |
| 6 | N | DW | DR | DR | DR | DB | DB |
Attacks made at greater than +4 are treated as +4. Attacks made at less than -2 are treated as -2.
- A or D: The result applies to the Attacker or Defender.
- B (Breaks): Break all defeated units in this battle. Adjust morale. The victor conducts any Advance after Combat.
- R (Routed): The victor rolls a separate die for each Routed unit and the losing player retreats that many hexes (-2 for a Elite Force; if modified result is < 1, change it to Withdraws). Adjust morale if unit routs more hexes than its Movement Allowance. The victor conducts any Advance after Combat.
- W (Withdraws): All defeated units in this battle must retreat one hex. The victor conducts any Advance after Combat.
- EX (Exchange): Break all defending units. The attacker must break from among his units in that battle an amount of Combat Strength Points at least equal to the defender's total. Use only the printed Combat Strength values on the units, unmodified by terrain or other considerations. Surviving attacking units conduct any Advance after Combat.
- N (Engaged): There is no effect. Neither side breaks any units, retreats, or advances as a result of this battle.
Hazardous Retreats
| Die Roll | Result |
|---|---|
| 1-3 | Break |
| 4-6 | Safe |
Results are applied after that unit retreats into that hex in an Enemy Zone of Control or across that Bridged/Forded river hexside.
- Break: the unit Breaks at that location.
- Safe: the unit is safe at that location.
Rally Table
| Die Roll | Result |
|---|---|
| 1, 2 | Elim |
| 3, 4 | - |
| 5, 6 | Rally |
Die Roll Modifiers:
- +1 for Elite Forces (see Exclusive Rule 3.0)
- +1 when one Morale Point is spent (for all rally die rolls, see 12.4)
Modified die rolls greater than 6 treated as 6.
- Elim: the unit is eliminated and permanently removed from play.
- - (No Effect): the unit remains Broken and may attempt to Rally again later. If using Optional Rule 16.61, a Cadre unit may be placed instead.
- Rally: the unit Rallies; place on a friendly LOC hex (or see 16.4).
Morale Chart
| Circumstance | Friendly | Enemy |
|---|---|---|
| During Combat | ||
| Each Broken enemy unit | +1 | -1 |
| Each enemy unit that Routs more hexes than its Movement Allowance (Elite Forces get -2 to their Rout rolls) | - | -1 |
| Guard force(s) could not conceivably Advance after Combat (see Rule 12.22) | -1 for Guard unit's side | |
| During a "Lull" Turn | ||
| If no mitigating activity during that Day Turn | +1 | - |
| During Night Game Turns | ||
| Occupy two or more enemy LOC hexes | - | -1 |
| For each enemy Objective hex occupied | - | -1 |
| Automatically, from recuperation | +1 | - |
If the unit also Breaks, the net loss is only -1.
Spending Morale Points
Players may spend one Morale Point for each desired effect as follows:
- Forced March: +1 Movement Allowance to all friendly units for that Player Turn.
- Commit the Guard: Movement of a Guard unit next to an enemy unit during your Movement Phase. No cost if either side is down to only 1 Morale Point (Free Guard Commit).
- Commit the Reserves: Increase your side's Strength in a battle by +1.
- Rally: +1 to the Rally die rolls for all friendly units that check at that time.
Morale Track: 0 = Army Defeated, 1 = Guard Free Commit, 2 through 10.
Terrain Effects Chart
Transcribed from the Jena 20 Terrain Effects Chart, C3i Magazine Nr.23 (2009, RBM Studio).
| Type | Movement | Combat |
|---|---|---|
| Open | 1 | +0 |
| Forest | Stop | +1 |
| Rough | Stop | +2 |
| Town | 1; EZOCs do not extend into adjacent town hexes | +1 |
| Major River | No ZOC, move or retreat across | Cannot Attack Across |
| Bridge | No ZOC; +0 MP to cross | +1 if all attackers across hexside; Hazardous Retreat |
| Road | 1 MP along connected road; +1 M.A. if entire move is along road | As other terrain in hex |
| Prussian Objective Hex | As other terrain in hex | As other terrain in hex |
| French Objective Hex | As other terrain in hex | As other terrain in hex |
| Prussian LOC Hex | As other terrain in hex | As other terrain in hex |
| French LOC Hex | As other terrain in hex | As other terrain in hex |
| Setup Hex | As other terrain in hex | As other terrain in hex |
| Enemy Zone of Control | Stop; can only exit via combat | Must attack; Hazardous Retreat |
- This value is added to the defender's Combat Strength. Use only the single best modifier in each battle.
- If any attacking unit is not across this type of hexside from the defending unit, the defender does not receive this cross-hexside combat benefit.
- See Rules 9.83 and 9.84 for Hazardous Retreat restrictions.
Stop: Must cease movement upon entering this hex.
"As other terrain in hex" means use the other terrain type in this hex to determine its movement and combat effects.