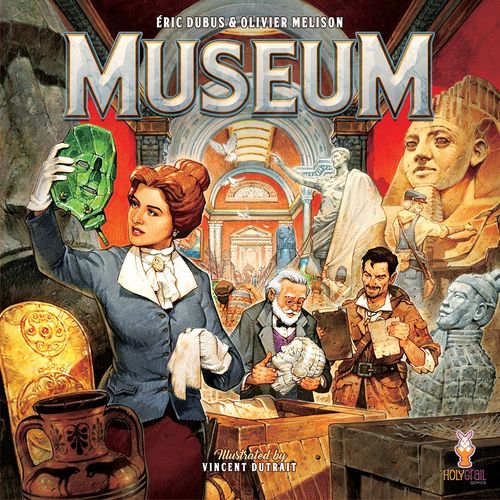
Museum
Museum Rulebook
Table of Contents
Table of Contents
- Aim of the Game
- Components
- Setup
- The Turn
- Furbishing
- Performing an Inventory (picking cards up)
- Playing Favour Cards
- Scoring points during the game
- Ending the Turn
- Public Opinion
- Drawing a Headline card
- Drawing a new Expert card
- Ending the game
- Collections
- Organising your Collections
- Final scoring
- Variants
- Appendix
- Glossary
Aim of the Game
In Museum, players score points by placing Object cards on their personal player boards, which are paid for by discarding other cards.
Players can score even more points by creating Collections! Collections can be based on card colour or type, and are made by placing cards adjacently in your Museum.
The player with the most points at the end wins!
Components
In your Museum box, you'll find:
- 180 Object cards
- 20 Public Opinion cards
- 27 Favour Cards
- 17 Headline cards
- 27 Patron cards
- 4 Player counters
- 12 Public Opinion tokens
- 32 Prestige tokens
- 1 Expert board
- 24 Expert cards
- 1 Embargo Marker
- 1 Customs marker
- 1 Central Board
- 4 Museum Boards
- 8 Gaming aids
Setup
Setting up the Main Board
- Place the Central board in the middle of the table.
- Place the Public Opinion tokens in a pile on top of the newspaper photo to form the reserve.
- Shuffle the Headline cards and place the deck in its spot on the newspaper.
- Prepare each of the four Continent decks by Shuffling 5 Public Opinion cards into them. You can modify the "difficulty" of the game by adding or removing Public Opinion cards (See the "Variants" section). Place the Decks off to one side of the Central board (we recommend that you place each Deck as close as possible to its corresponding spot on the Central Board).
- Draw two cards from each deck and place them in the allocated spot (represented by that deck's icon) on the Central Board. If a Public Opinion card is drawn, shuffle it back into the deck.
- Take the Embargo and Customs tokens out of the box and put them off to one side of the board.
- Shuffle the Favour Cards and place the deck in its spot on the diary.
- Place the Expert board adjacent to the Central board.
- Place the Prestige Tokens in a pile on top of the diploma to form the reserve.
- Shuffle the Expert cards and place the deck in its spot on the left of the Expert board. Then, draw 3 cards and place them on the designated board spaces.
Player Setup
- Each Player takes a Museum board and places it in front of them.
- Each Museum board has a corresponding coloured player marker. Place these on the "0" space of the score track in the top left-hand corner of the Central Board.
- Each player draws one card from each Continent deck and one from the Favour deck to form their starting hand. If a Public Opinion card is drawn, shuffle it back into the deck.
- If the starting cards of a player have a total value of 7 or less, that player may discard their entire hand and draw replacement cards. The discarded cards are shuffled back into their respective decks.
- Each player draws 3 cards from the Patron deck, chooses one and discards the other two. For details on the Patron cards and how they work, see "Collections".
- The last player to have visited a Museum becomes the 1st player.
You are now ready to play!
The Turn
Each player's turn is divided into two phases:
- The Exploration Phase, during which you will be able to add Object cards to your Personal Reserve (your hand).
- The Action Phase, during which you will be able to improve your establishment!
The Exploration Phase
On their turn players will be getting the first pick of the Objects brought back from the four Continents, drawing one to use during the rest of the turn.
Each Object Card is composed of
- Name
- Value: As well as the cost of the card, this number represents the number of Victory Points you score upon exhibiting the card.
- Masterpiece symbol (cards of a value of 5 only).
- Civilisation/Colour: Used when determining points for a Civilisation Collection.
- Domain/icon: There are 6 different Domains in the game. Making Domain Collections will earn you additional points at the end of the game.
- Image
- Historical text
During their Exploration phase, the player must draw one Object card from any Continent and place it in their hand. This action is free but mandatory for the active player.
Afterwards each of their opponents, starting with the player on their left, may also draw one card from any Continent for free. This action is free and optional for other players.
For each opponent that does this the player may take one Prestige point from the reserve.
Prestige points are the currency of Museum, and can be spent during the game to purchase cards and hire Experts.
Once all players have had the chance to draw a card, move on to the Action Phase.
The Action Phase
During the Action Phase, the active player may perform one of 2 actions:
Furbish their Museum or Perform an Inventory
Furbishing
By Furbishing your Museum, you can choose new items to exhibit and hire staff.
Exhibiting Objects
It's time to fill up your galleries!
You can put items into your Museum in 3 different ways:
- From your Personal Reserve (your Hand)
- From your Common Pool (your Discard)
- From another player's Common Pool
Playing Object cards from your Personal Reserve (your hand)
Players may pay to place any Object card from their Personal Reserve (hand) into their Museum. To place a card in your Museum, you must discard cards equal to its value (or more) from your hand into your Common Pool (your discard).
What you need to know:
- You may discard multiple cards to pay for one card.
- You may discard one card to pay for multiple cards.
- You may discard multiple cards to pay for multiple cards.
- You may overpay for a card, but you do not receive any change.
- During their turn, a player may purchase as many cards as they can pay for.
Example: Eric wishes to place The Ishtar Vase (value: 3) and Ceramic Double Bowl (value: 1) into his Museum. To pay for these he discards the Tachi Long Sword (value: 4) from his Personal Reserve (his hand) to his Common Pool (his discard). He then moves 4 points along the score track.
Prestige points can also be exchanged to pay for Object cards. Each Prestige point counts as having a value of 1. You may use one or more tokens when purchasing an Object.
Objects can be purchased using only Prestige points, or you may choose to use a mixture of the two. Used Prestige point tokens are discarded back into the main Reserve.
Example: Olivier wants to place the Statue of Raijin (value: 4) into his Museum. He Discards the Fresco of Pompeii (value: 2) and two Prestige points (value: 2) to pay for it. He could also discard four Prestige points to pay for the statue if he so wished.
The Common Pool (discard pile)
When you discard a card, it isn't lost! Think of your Common Pool as your Museum's warehouse: Objects placed there aren't currently being exhibited, but can be taken out of storage at any moment.
Playing a card from your Common pool (your discard)
Cards in your Common Pool (discard), can be placed into your Museum in exactly the same manner as cards from your Personal Reserve (your hand): by discarding other cards and/or using Prestige points. However, they cannot be used to pay for other cards.
Example: Eric now wants to exhibit his Tachi Long Sword (value: 4), which he previously discarded into his Common Pool. To do so, he pays for it with his Sargon Mask (value: 4) which he discards into his Common Pool. He can now pick up his Tachi Long Sword, which goes directly into his Museum!
Playing a card from another player's Common Pool (discard)
When you place an Object into your Common Pool, it also becomes available to other players…
A card in a Discard Pile may be purchased by any player. To do so, the buyer must first pay the owner one Prestige point. The buyer then discards Objects to pay for the card as per the normal rules, but places those Objects into the owner's Discard Pile, not their own. The purchased Object card is then placed directly into the buyer's Museum.
You may also use Prestige points to purchase cards from another players' Common Pool, but beware: any Prestige points (after the first that must always be paid to the owner) used to purchase an Object from a player are also given directly to that player, which could give them a considerable advantage!
Example: Jamie now wishes to purchase the Sargon Mask (value: 4) which is in Eric's Common Pool. He first gives Eric a Prestige point token to be allowed to take a card from him. Then, he discards his War Chariot (value: 4) into Eric's Common Pool, before taking the Sargon Mask from him and exhibiting it in his Museum. He could also choose to pay for the card with 4 additional Prestige points which he would pay directly to Eric.
Laying Out your Museum
When a card is purchased a player may put it anywhere in their Museum. Players may move Objects around as they please during the game. At the end they will have one last chance to reorganise their Museum in order to form different Collections and score as many bonus points as possible! Players can also gain points by amassing a large single Collection in their Main Gallery (the coloured zones on the player boards) or by filling up their Museum completely. For more information see "Ending the Game".
Recruiting Experts
A Museum is nothing without good staff!
During their turn, players can also pay to hire one of the three Expert characters available from the Expert board. To do so a player must pay their cost by discarding Object cards and/or paying Prestige tokens exactly as described above for the purchase of Objects.
The player then takes that character and places them in the Expert space on the left of their Museum board.
- You can have multiple Experts in your Museum.
- You can hire multiple Experts in one Turn.
- Expert effects stack.
Experts provide a bonus to your Museum as shown on their cards. For more information, see the Appendix.
Refilling the Expert Board: After a Character is hired, slide the two other cards to the right to fill any gaps before immediately drawing a new one.
Performing an Inventory (picking cards up)
If they can't (or don't want to) Furbish their Museum this Turn, the player may decide to perform an Inventory. If they do so, they may take as many cards from their Common Pool (discard pile) as they like and place them back into their Personal Reserve (hand), up to a maximum of 7 (See "Ending the Turn").
Reminder: If a player performs an Inventory, then they cannot exhibit any Objects or recruit any Experts this Turn.
Playing Favour Cards
Favour cards can be played at any time during the player's turn regardless of which action you performed: Furbish or Inventory.
Favour cards represent the growing influence of your Museum. As word of your ever more impressive Collections gets around, your increased notoriety will allow you to make contacts and attract powerful allies whom you can ask for favours. Their help will give you a decisive advantage over your opponents!
- Only one Favour card may be played per turn and only by the active player.
- Once used, apply the effect described on the card and then discard it.
- Players may only have a maximum of three Favour cards in their hand at any time.
- Players draw a new Favour card for every 10 points they score (as shown on the score track by the Favour icon). See the Scoring section below.
Scoring points during the game
In Museum, players will be competing to have the highest score at the end of the game.
Each time a player places an Object card in their Museum, they score its value in Points (the value is the number in the top left-hand corner of the card). Players move their Player Token clockwise along the score track each time points are scored.
- Players do not score points for Hiring Experts!
- Points for Collections are not scored until the end of the game (See: Ending the game)
Masterpieces
Object cards with a Prestige Icon next to their value are Masterpieces. Masterpieces always have a value of 5, which is the highest in the game. These exceptional rarities will draw more visitors to your Museum!
When scoring points for having played a Masterpiece, the scoring player may also take one Prestige point.
Ending the Turn
Once you've done all that you can do (or all that you want to do), it's the end of your Turn!
Before passing play to the person to your left, you must first:
- Check your hand size
- Refill the board.
Additionally, each time a full round of the game is played (meaning each time play passes back to the 1st Player), players must:
- Draw a Headline Card
- Draw a new Expert card
Hand size
There is no maximum hand size in Museum, but if a player possesses more than 7 Object cards in their hand at the end of their turn, they must discard cards of their choice until they only have 7 cards in hand.
However, you may start your turn with more than 7 cards: so even if you already have 7 cards in your hand, you can continue to draw cards during other players' Exploration phases!
Your hand limit does not include Favour Cards (but you may not have more than 3 Favour Cards at any time).
Refilling the board
At the end of the turn, the Objects taken during the Exploration phase are replenished. To refill the board, draw cards until there are two available from each Continent.
Public Opinion
When you draw cards to refill the board, you may reveal a Public Opinion card!
These cards mean that the Press has started to notice that a lot of artefacts are being taken from a certain Continent and too few of them are being exhibited. The resulting bad publicity could have terrible consequences for our curators...
When a Public Opinion card is drawn, the card is left in place on the board for the turn and a Public Opinion token is added to the Continent. These tokens can lose you points at the end of the game based on the cards in your discard pile (see "End of the Game")!
At the end of a player's turn, any Public Opinion cards on the board are discarded before the board is refilled.
Drawing a Headline card
At the beginning of the first player's second turn, and for each of their turns thereafter, a new Headline card is revealed. The new card cancels any existing ones. The effect described on the card affects all players and takes precedent over any rules described in this booklet. There is no Headline card on the first round of the game: draw your first Headline card on the 1st player's second turn.
If the card effect states that the number of Object cards available is increased/decreased; place the Customs token on the board as a reminder. If an Object card has to be removed to comply with these new limitations, it is the card closest to the Headline deck that is replaced on the top of the deck concerned.
If the card effect states that cards are no longer available on a Continent, the cards currently present on the Continent slot are removed and placed on top of the corresponding deck. Place the Embargo Token on the location of the relevant Continent as a reminder.
For more details on the different Headline cards, see the Appendix.
Drawing a new Expert card
Place the rightmost card on the Expert board into the discard pile, slide the two remaining cards to the right and place a new Expert in the first slot.
Ending the game
The first player to reach 50 points signals the end of the game. That player finishes their turn and then all other players get one final turn.
Reorganising your Museum
Once all players have finished their final turn, each of them has one last opportunity to arrange the cards in their Museum into Collections before moving on to the final scoring.
Collections
There are three types of Collections in Museum: Civilisations (Colours), Domains (Icons) and Patron (mixed).
Civilisation Collections
Civilisation Collections (colours) represent one of the 12 Civilisations present in the game:
- Inca
- Mayan
- Polynesian
- Greek
- Roman
- Celtic
- Phoenician
- Egyptian
- Mesopotamian
- Chinese
- Indian
- Japanese
They are comprised of at least 3 cards of the same colour.
You cannot create several Collections of the same Civilisation.
Example: Gaz has 7 Roman (Red) cards in his Museum at the end of the game. This counts as a Civilisation Collection of 7 cards during final scoring.
Domains
Domain Collections represent one of the 6 Domains present in the game:
- Architecture (column icon)
- Culture (book icon)
- Agriculture (amphora icon)
- Warfare (crossed sword and shield icon)
- Navigation (ship's wheel icon)
- Theology (star/orb icon)
A Collection must have at least 3 cards with the same Icon but different colours (Civilisations).
You cannot create several Collections of the same Domain.
Example: Andy has 5 Theology cards in his Museum. However, 2 of these cards are Mesopotamian (Orange) and therefore only one of them will count towards scoring the Collection. This counts as a Domain Collection of 4 cards during final scoring.
Patrons
A wealthy Patron has suggested that you fill your Museum in a certain way! If you succeed, their donation will be generous indeed...
Patron Collections are composed of various Civilisation/Domain/Continent card Collections as shown on the Patron card chosen by each player at the start of the game (see step 4 of player Setup).
Each card will require you to assemble one or more Collections and then award points based on the level of completion. For more details, see the Appendix.
Example: Patrick chooses The Myth and Mysteries Patron card. At the end of the game he has 6 Chinese cards, 2 Egyptian, 3 Incas and no Theology cards in his Museum. He therefore possesses two of the Collections required and scores 10 points as shown on the card.
Example: Johnny chooses the Ancient Europe Patron card. At the end of the game he has 11 cards from Europe in his Museum. He therefore scores 16 points as shown on the card.
Organising your Collections
In order to count as part of the same Collection, Object cards must be orthogonally adjacent to one another, whether horizontally or vertically, just like the corridors and galleries of a real Museum!
As long as this is respected Collections may take any "shape" players wish, branching off in different directions, going around corners, etc. Additionally, a Collection may cross another Collection if the card(s) on which they intercept correspond to both Collections.
Example: Olivier has completed an Egyptian (Yellow) Collection of 6 cards! He also has a Navigation (the Ship Wheel Icon) Collection of 3 cards. His second Egyptian navigation card doesn't count as part of his Domain Collection, as it belongs to the same Civilisation.
Final scoring
Players gain bonus points for the different Collections they will have amassed during the game. One by one, players count up their final score, moving through the different steps below:
Civilisations
Players earn points for each set of Civilisation cards they have collected.
Civilisation Collections are composed of at least 3 cards of the same colour.
The exact amount of points scored depends on the size of the Collection as shown in the table on the gaming aids.
Victory Points Table — Collections based on a Civilisation
| Cards per Civilisation | 3 | 4 | 5 | 6 | 7 | 8 | 9 | 10 | 11 | 12 | 13 | 14 | 15 | 16 |
|---|---|---|---|---|---|---|---|---|---|---|---|---|---|---|
| Victory Points | 1 | 3 | 5 | 9 | 13 | 17 | 22 | 28 | 35 | 43 | 52 | 62 | 73 | 85 |
Domains
Players earn points for each set of Domain cards they have collected.
A Domain Collection is composed of at least 3 cards that possess the same Domain/icon but DIFFERENT Civilisations/colours.
The exact amount of points scored depends on the size of the Collection as shown in the table on the gaming aids.
Victory Points Table — Collections based on a Domain
| Cards per Domain | 3 | 4 | 5 | 6 | 7 |
|---|---|---|---|---|---|
| Victory Points | 5 | 7 | 11 | 17 | 25 |
Patrons
Players earn points for the cards they have collected corresponding to those required by their chosen Patron card.
The exact amount of points scored is indicated on the Patron card.
Prestige
Each remaining Prestige Point that a player has at the end the game is worth 1 victory point.
Galleries
Players score additional points based on the layout and the number of cards in their Museum.
The coloured zone on the player's Museum board is the Main Gallery. If all these coloured slots are filled up with one unique Collection, then the player scores additional points as shown on their Museum board.
If the player fills up every Object slot in their Museum, they score additional points as shown on their Museum board.
If a player manages to do both, they score additional points as shown on their Museum board.
Public opinion
At the end of the game players can lose points based on the cards in their discard pile that correspond to Continents possessing Public Opinion tokens.
Each player determines which of the cards in their discard pile are from Continents possessing at least one Public Opinion token. Each of these cards causes the player to lose points equal to the number of tokens on the card's respective Continent.
Use the score track to tally up each players total. Should a player exceed 100 points, continue to move their token around the score track, adding 100 to the final total.
Once all players have calculated their final result, the player with the highest score wins!
Example: At the end of the game, Amandine has four cards in her discard pile. 2 of these cards are from Europe which has 2 public Opinion tokens. These two cards will therefore lose her 2 points each or 4 points in total.
Vincent finished the game with 47 points.
After rearranging his Museum, he tallies up his final score:
He has two Civilisation Collections of 7 and 6 cards respectively: 11+8 = 19 points.
He has three Domain Collections or 3, 3 and 5 respectively: 5+5+11 = 21 points.
His patron cards requires him to collect Celtic cards, of which he has 7: 10 points.
He has 2 Prestige tokens remaining: 1+1 = 2 points.
His Museum is not full, nor is his Main Gallery: 0 points.
He has 2 cards left in his discard pile. One is from Asia that has 3 public Opinion Tokens and one is from The Americas which has no public Opinion tokens: 3+0= -3 Points.
This leaves him with a final score of 96 points! Not bad Vincent!
Variants
For a more family-friendly experience…
Museum has the potential to be a very challenging, strategic game. However, if you happen to be playing for the first time, are in the company of inexperienced players, or if you just want to keep things simple, here are a few things you can do to tone down the complexity of the game:
- You can play without the Expert cards, which will give you one less thing to think about! All you have to do is not put the Experts board in place and remove the "Good Hiring" Favour Cards, and the "Mysterious Death" and "A School at the Museum" Headline cards.
- Shuffle fewer Public Opinion cards into the Continent decks, or remove them entirely from the game.
- You can avoid having to deal with changing game conditions by playing without Headline cards.
- You can also choose to play without the Patron cards, or choose the simplest challenges, such as multiple Collections (see the Appendix for more details).
For something a little more challenging…
- Add all of the Public Opinion cards to the Continent decks! This will force you to be much more careful with the cards you discard if you don't want to lose a lot of points at the end of the game!
- Try the most difficult Patron cards. Patrons cards that require you to make very large Collections of a single Civilisation are among the most difficult.
- Try to fill your Grand Gallery and/or your entire Museum!
- Try the most difficult alternative Museum layouts.
Appendix
Favour Cards
Press Conference: Gain 1 Prestige Point for each Public Opinion token on the board. At the end of the game, choose one Continent. You may ignore any Public Opinion tokens on that Continent during Final Scoring. This will only affect your Museum.
Express Delivery: Allows you to place an Object card (worth 1 to 4) from your Personal Reserve (your hand) into your Museum without paying its cost.
New Archæologycal Team: To be played at the beginning of your Exploration Phase. Take the 2 currently available Object cards from the Continent space of your choice, and put them at the bottom of the deck. Then draw 4 new cards from the same Continent. Choose 2 and put them face up on the Continent space, then put the two remaining cards on the bottom of the pile.
Special cases: This action is not possible on a Continent closed by a Headline card. If the number of available cards has been reduced to 1, take 2 cards instead of 4 and choose one only.
If the number of available cards has been increased by 1, then draw 6 cards and choose 3.
If one of the drawn cards is a Public Opinion card, it is discarded and a Public Opinion token is added to the Continent concerned. The active player may not draw another card to replace it.
Charity Ball: Allows you to place an Object card (value from 1 to 4) from any Common Pool (discard) into your Museum for free.
Private Collector: Take an Object card from your Personal Reserve (your hand), and remove it from play permanently. You gain the same number of Prestige points as the card value, plus 1.
Archaeological Discovery: The active player draws as many cards from a Continent as the number of players, plus one. The active player then reveals them, and takes one. Going around the table in order of play, each player then takes one of the remaining cards, with the last one going to the active player.
Special cases: This action is not possible on a Continent closed by a Headline card.
If the number of cards available has been reduced by 1, then the number of cards drawn is reduced by 1 as well. The active player will therefore not receive a second card.
Similarly, if the number of available cards has been increased by 1, you can draw one more card, and the active player will receive 3 cards instead of one.
If one of the drawn cards is a Public Opinion card, that card is discarded and a Public Opinion token is added to the relevant Continent. The active player may not draw another card to replace it.
Inventory: Allows you to take one or more cards (up to a total value of 5) from your Common Pool (your discard) and place them in your Personal Reserve (your hand).
Bank Loan: Take 4 Prestige point tokens.
Good Hiring: You may hire one Expert for free OR Take the top 3 cards from the Expert deck. Hire one for free and place the remaining two at the bottom of the deck.
Headline Cards
Africa and the Middle East/Asia/Europe/America and Pacific at War: The Continent concerned is closed for this turn. Any available Object cards are returned to the top of the Continent deck. Place the rectangular "Embargo" token on the Continent space as a reminder. Removed Objects are returned to their place when the effect of the card ends.
Instability in Africa and the Middle East/Asia/Europe/America and Pacific: The number of cards available on the Continent concerned is reduced to 1. Take the card closest to the Headline deck and put it back on top of the Continent pile. Replace this card with the Customs Token on its -1 side as a reminder. This Object is returned to its place when the card effect ends.
A Patron in Africa and the Middle East/Asia/Europe/America and Pacific: The number of cards available on this Continent is increased by 1. Draw a third card and place the Customs token on its +1 side as a reminder.
Mysterious death!: Experts cost +1 to recruit.
A school at the Museum: Experts cost -1 to recruit.
Deflation: When the active player displays an Object card in their Museum, they must pay 1 additional Prestige point.
The Roaring Twenties: When the active player displays an Object card in their Museum, they receive 1 Prestige point.
Grants Awarded: The active player may take 1 additional Object card from the same Continent during the Exploration phase.
Expert Cards
Cards with a War / Culture / Agriculture / Religion / Architecture / Navigation Icon: This Expert counts as an additional card in your corresponding Domain Collection at the end of the game. You may use an Expert to create a Domain Collection (i.e. to go from 2 Objects to 3).
Experts with a colour: This Expert counts as an extra card in your corresponding Civilisation Collection at the end of the game. You can use an Expert to create a Civilisation Collection (i.e. to go from 2 Objects to 3).
Patricia Turner: You can have up to 10 Object cards in your hand.
Ulf Van der Noot: Exhibiting an Object Card in your Museum Costs 1 less.
Balminder Singh: Exhibiting a Masterpiece in your Museum Grants you 2 Prestige Points instead of 1.
Richard Bellota: You can have up to 5 Favour cards in your hand instead of 3.
Boch and Wilhelm: You can ignore the effect of the current Headline card.
Patron Cards
Quadruple Collections: Patron cards of this type require you to collect 4 different, small Collections. Quadruple Collections are among the simplest Patrons cards to achieve.
Legacy Cards: These cards require you to collect a Civilisation Collection of 5, 8 or 11 cards. As they oblige you to specialize enormously, Legacy cards are one of the most difficult Patrons to fulfil.
Continents: Continent Patrons require you to collect as many Objects as possible from the same Continent: 6, 10 or 14. As this type of Objective gives you a little freedom in the Civilisations and Domains that you acquire, it is quite a simple Patron card.
The Perfect Collection: This Patron requires you to make Collections of 5 Cards (either a Domain or a Civilisation), containing Objects with the values 1, 2, 3, 4, and 5.
The Masterpieces: This Patron requires you to gather a certain number of Masterpieces (Objects with a value of 5) in your establishment: 4, 6 or 8. As Masterpieces are rare and expensive to obtain, this is a difficult Patron card.
The Greatest Team: Each Expert you recruit earns you 5 Victory Points.
Fountain of Knowledge: This Objective requires 1, 2 or 3 Domain Collections of 5 cards.
A Glimpse of the Past: This Objective requires a Civilisation Collection of 7 cards and a Domain Collection of 6 cards.
Glossary
Personal Reserve: Your hand.
Common Pool: Your discard. Think of your Common Pool as your Museum's warehouse; the Objects which are there are not yet on display but can be taken out of storage at any time. But be careful, discarded cards can be taken by other players!
Exploration Phase: The first phase of the Turn, when the active player must draw a card. Other players may also do so if they wish, but if they draw a card, they must give the active player a Prestige point from the Reserve.
Action Phase: The phase of your turn during which you can exhibit items, recruit Experts, use a Favour Card or perform an Inventory.
Prestige Points: Prestige tokens are the currency of the Museum. You can use them to exhibit Objects or recruit Experts.
Patron card: Your secret Objective that allows you to earn extra points at the end of the game.
Favour Card: Take a Favour card each time you pass multiples of 10 points on the scoring track. You may use one per turn and have a maximum of 3 in your hand.
Public Opinion: If you reveal a Public Opinion card from a Continent deck, a Public Opinion token is added to the Continent. At the end of the game, you will lose one victory point per token and per card of the Continent concerned in your discard.
Domain: The type of Object. This is the icon at the top right of each Object card.
Civilisation: The Civilisation to which an Object belongs is indicated by the colour of the card.
Headline Cards: Draw one Headline card each time play comes back to the first player.