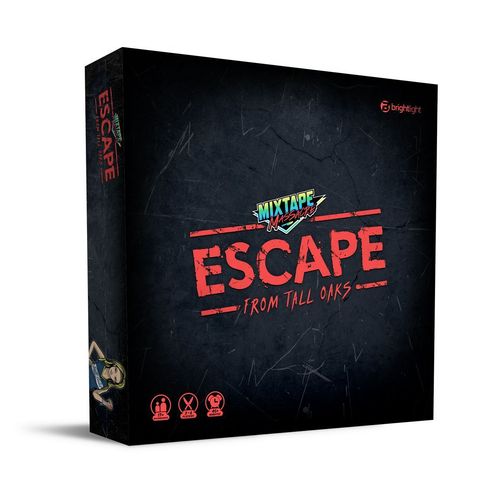
Mixtape Massacre: Escape From Tall Oaks
Mixtape Massacre: Escape From Tall Oaks Rulebook
Table of Contents
Table of Contents
- What's In The Box
- Setting Up The Board
- Player Set-Up
- Winning The Game
- Traveling In Tall Oaks
- Killer Scenes, Dude Cards
- Staying Alive
- Scene Markers / Rescue Tokens
- Restocking Scene Markers
- Empty Locations
- Bonus Tracks
- Sewer Shortcuts
- Searching
- Free Searches After Rescues/Tasks
- Supplies
- When To Use Supplies
- Supply Card Breakdown
- Using A Supply Card / Token When Rolling
- Traitor Card
- The Invaders Card
- Slashers / Slasher Meter & Noise
- Tasks & Safeguarding The Town
- Final Slasher: The Legend Returns
- Final Scenes / Final Rescue Tokens
- Escape: Win The Game
- Scuffles
- Special Abilities
- Unique Combos For Rescues
- Unique Combos Vs. Slashers
- Unique Combos For Defense
- Search Die
- Dice Reference
- FAQs And Additional Modes
What's In The Box
- 1 Tall Oaks Game Board
- 2 Standard D6
- 3 Action Dice
- 1 Search Die
- 36 Health Pegs
- 42 Scene Marker / Rescue Tokens
- 40 Killer Scenes
- 3 Slasher Figures with Stands
- 3 Slasher Profile Cards
- 1 Slasher Meter with Tracker Token
- 1 Rulebook
- 8 Survivor Figures with Stands
- 8 Survivor Profile Cards
- 8 Final Rescue Tokens
- 8 Final Scenes, Dude Cards
- 6 Player Stations
- 4 Task Cards
- 4 Task Tokens
- 30 Bonus Tracks
- 56 Supply Cards
- 24 Supply Trackers
- 2 Helipad Tokens
Note: the box list gives 56 Supply Cards, while the component illustration caption reads "Supply Cards (54)". Both figures are transcribed as printed.
Setting Up The Board
Place the game board in the center of the table. Next, place Smiley's Slasher Profile Card and the Slasher Meter next to the board behind Johnson's Farm. Place the corresponding Tracker Token (marked red with a white knife) near the tracker. When Noise is made, you'll start moving the token across the markings on the tracker, from spot to spot. The tracker will tell you when the Slasher off board will attack. Take Smiley's Character Piece and place him in the notated white knife spot behind Johnson's Farm. As the game progresses, the Slasher Profile cards and characters will switch out.
Grab the 4 (four) Task Cards and 4 (four) Task Tokens. Read the location in which the corresponding Task Token should be placed. These tokens should be placed in their locations yellow-side up. The 4 (four) Task Cards must be placed in the middle of the board (starting with #1 on top) in the Tall Oaks Rec Center. This will be the central location for players to grab tasks from during play. All active player pieces should be placed on a starting point on the board (marked in blue with a white bat). Players may choose the spot they wish to start from.
Lastly, place 1 (one) Scene Marker in all locations except the Tall Oaks Rec Center in the middle of the board (ten locations total). Place the tokens Scene Marker side up. Additional tokens should be stored off the board along with the Bonus Tracks cards, Killer Scenes, Dude cards, and Supply cards in an easily accessible spot as play progresses.
NOTE: The Tall Oaks Rec Center will not be open to Rescues or Searches throughout the game.
Player Set-Up
EFTO allows for up to 6 (six) players maximum, 2 (two) players minimum. Each player chooses a character and takes their corresponding figure, profile card (with special ability on the card), 6 (six) health pegs, 1 (one) color corresponding Final Rescue token and a Player Station (a ruler). Place your character profile card in the allotted slot in your player station and fill in the 6 (six) slots with your health pegs. These will track your health throughout the game.
Each player starts with one weapon, the Baseball Bat. Each player should grab this card from the Supply deck (then reshuffle deck) as well as the correct amount of Supply Tracker tokens for that weapon (two tokens). Be aware as the game progresses: if you have no weapon in your inventory you cannot rescue friends or fight Slashers, leaving you powerless. You'll only be able to defend yourself or run/escape until you find another weapon by Searching.
Each player should also draw 1 (one) card from the Final Scenes, Dude card deck face down. This card will remain face-down during the game until a specified time. Any Final Scenes, Dude cards not dealt can be placed back in the game box (don't peek).
Winning The Game
In order to win the game, players must:
- Complete all 4 (four) tasks
- Collect 5 (five) rescues (individually)
- Successfully complete your Final Scenes, Dude card and collect your Final Rescue token
- Be the first person to make it to the Tall Oaks Rec Center
- ... and, uh, don't die.
Traveling In Tall Oaks
Players roll the 2 (two) Orange Dice (movement dice) to determine who goes first. The player who rolls the highest number starts first.
Note: the source calls these "Orange Dice (movement dice)"; the component list gives 2 Standard D6 and does not mention orange dice. Transcribed as printed.
Going counterclockwise, players roll the Orange Dice to move through Tall Oaks. Players travel through town using the squared road and sidewalk spaces attempting to get to locations. Once in a location with a Scene Marker, the player draws a card from the Killer Scenes, Dude card deck.
NOTE: Locations can only be entered and exited through an entrance space marked with arrows. These spaces count as a move (players cannot just land on the arrow space and "slide" in).
Player component labels (Kimmy's profile card illustration): Profile Card; Final Scenes, Dude card (face down); Supply Tracker Tokens; Baseball Bat Supply Card; Player Station + Health Pegs; Kimmy's Special Ability; Kimmy's Final Scene Token.
Killer Scenes, Dude Cards
Once in a location with a Scene Marker, draw a card from the Killer Scenes, Dude deck.
Attempting A Rescue
To attempt a Rescue the player must be armed with a Supply card that is a weapon. If unarmed, a rescue cannot be made. If the card says "They need a hero! Attempt a rescue.", the player must roll the 3 (three) Action Dice for the amount of Action icons noted in the red circle on the card in order to successfully make the Rescue. The player may also use Supplies to assist in achieving the amount of actions instructed on the card.
If successful, the player takes the Scene Marker and flips it over to show the souvenir they've received for the rescue. The player stores these rescues on top of their Final Scenes, Dude card.
NOTE: If the rescue was worth more than one rescue token, the player can take additional tokens from the bank of tokens stored off the board.
If the player fails to roll the amount of actions required for the rescue, they discard the Killer Scenes, Dude card and they are sent to the nearest starting point on the board.
NOTE: Only one player may occupy a starting point. If the nearest starting point is occupied by another player, go to the next nearest starting point.
Noise
Some Killer Scenes include a yellow circle with a Noise icon and amount noted. When drawn, these immediately raise the Slasher Meter by the amount noted and could lead to a Slasher attack, halting your rescue.
Defending Yourself
If the card says "You're too late. Defend yourself." or "You're too late.", the player loses the amount of health noted on the card and their turn is over. To avoid the damage, roll the number of Shields noted on the card. The player may also use Supplies to assist in achieving the amount of shields instructed on the card. Not all cards will allow for defense.
The card is then moved to the discard pile and the player remains in the location. They will have a chance on their next turn to draw another Killer Scenes, Dude card and attempt a rescue. No roll is necessary.
NOTE: As the game progresses, create a discard pile for your cards. Reshuffle the pile when the deck has been exhausted.
Card anatomy (Example Rescue Card and Example Defense Card illustration labels): Action points needed for successful rescue; Rescue Tokens awarded; Noise made by drawing card; Amount of health to be lost by player; Defense needed to cancel health loss. The numeric values on the illustrations are not legible in the text layer and are not transcribed.
Staying Alive
Each player starts off with 6 (six) Health Pegs. There are many occurrences throughout the game where the player can lose or gain health. When the player is down to 2 (two) health pegs (noted by the final two red markers on the ruler) the player may only use one die for movement as the survivor is now injured. If the player happens to gain health back, they can return to rolling with both movement dice.
Scene Markers / Rescue Tokens
Scene Markers flip to become Rescue tokens when a successful Rescue is made. Each player attempts to collect 5 (five) Rescue tokens during the game. These tokens can be attained by successfully rescuing victims in locations or by pulling a Bonus Tracks card that awards the player with rescues. Players must collect 5 (five) Rescue Tokens in order to turn over their Final Scene and attempt their Final Rescue. Keep track of your rescues by using the token slots on the back of your Final Scenes, Dude card. Collecting more than 5 (five) is allowed but isn't necessary... but... extras can come in handy when folks start stealing rescues from each other.
Restocking Scene Markers
When all locations have been cleared (no Scene Markers), restock Scene Markers in all locations except the last location where the last Scene Marker was taken.
Empty Locations
If a location is empty, the player may count the location as a move (as long as that location has multiple entrances) and use it as a shortcut for moving through town (i.e. Johnson's Farm and Tall Oaks Rec Center). Players can also search empty locations for Supplies.
Bonus Tracks
If a player lands on a Bonus Tracks space, they draw a card from the Bonus Tracks deck and perform the directions that are given on the card.
NOTE: As the game progresses, create discard piles for the different types of cards. Reshuffle the piles once your deck has been exhausted.
Sewer Shortcuts
If a player lands on a Sewer Shortcut, they can move their character to any other sewer space with the same color (blue or orange).
NOTE: If the player rolls more than it takes to get to a corresponding sewer space, they count the sewer space as 1 (one) of their moves, and continue their turn from the next sewer space they move to. Landing on the sewer space you move to does not count as a move.
Searching
When rescues have been made, locations become empty. Players can search empty locations (locations without a Scene Marker token) throughout the game. Once a player enters an empty location, the player must roll the Search Die and if it lands on the Search icon, the player can draw a card from the Supply deck. If a player rolls the Denied icon, nothing is found and their turn ends. If the player rolls a Noise icon, the Slasher Meter goes up by 1 (one).
NOTE: Players cannot search an empty location twice in a row. They must leave the location and go to another vacant location for a new search before returning to the previous location.
Free Searches After Rescues/Tasks
Players are given an automatic/free search after any successful rescue or Task completion. Draw a card from the Supply deck. No search roll necessary.
Supplies
Once a player has made a successful rescue, completed a task, or rolled a Search icon in an empty location, the player draws a card from the Supply deck. If the card is a supply, they can add it to their inventory. Players can only hold 2 (two) supplies at a time (unless noted otherwise), so if needed, players can get rid of 1 (one) of their current supplies and move it to the discard pile to make room for more desirable supply cards they've just drawn.
NOTE: Task cards count as 1 (one) supply when obtained by a player, so from time to time, you may need to sacrifice one of the supplies you are carrying in order to grab and complete tasks.
When To Use Supplies
Supplies can be used to assist a player in rescues, fights with main Slashers, and defense. When using a supply, the player must choose to use the supply before they roll for a rescue, defend themselves, or fight a Slasher.
Supply Card Breakdown
Examples below of how different supplies can add to your different rolls during the game or assist you during play.
Supply card diagram labels: Health awarded per use; Escape points per use; Infinite (means no tokens needed for tracking); Shield points per use; How many times it can be used (how many supply tracker tokens); Noise made per use; Action points per use.
Supply Tracker Tokens
When a supply card is drawn, one of the icons at the bottom is for Turns/Use (noted in the diagram above). Players should take Supply Tracker Tokens in the amount noted to keep track of how many times they can use that supply for an assist before it is exhausted and must be discarded.
NOTE: Some items can contain an ∞ meaning the Supply will stay in your inventory until you lose it or decide to discard it. No tokens are needed for tracking. Some of these can be very advantageous to have (i.e. Knife).
Using A Supply Card / Token When Rolling
When using a supply during a Killer Scenes, Dude card or during a fight with a Slasher, the player must decide what supply they want to use, and how many times they want to use it (how many tokens to spend) before rolling. For each token spent, the player gets the amount of Action, Shield, or Escape noted on the card and can add that to their roll. If the card generates Noise, it causes the amount noted on the card for every token spent.
Examples
-
The following Killer Scene requires the player to achieve 3 (three) Actions to successfully rescue the victims. For our example, our player will only be holding a Chainsaw. As the Chainsaw supply card shows, it allows the player 2 (two) Actions for every time they use it, but the player will also cause 2 (two) Noise for every time they use it. So, if the player decides to, they could just spend both of their Supply Tracker tokens for the Chainsaw during this turn, which would give them 4 (four) Actions. But this would also mean that the Slasher Meter would be raised by 4 (four) Noises (which means the Slasher would attack after the player collected their souvenirs). The other issue is if this is the only weapon they're holding, they'd be weaponless, meaning they'd need to find another weapon.
-
The other option the player has is to spend 1 (one) of their 2 (two) Supply Tracker tokens and roll the Action Dice for the additional Actions needed to achieve a successful rescue. In this case they'd get 2 (two) Actions from the Chainsaw, and only cause 2 (two) Noise. They then take the risk and attempt a roll for the final action needed with the Action Dice. If successful, they'd still have the Chainsaw for further rescue attempts and would also receive a free search for another possible supply.
-
Lastly, the final option the player has is to not spend any tokens and roll for all 3 (three) Actions. As the rule states, a player must have a weapon in hand to fight or attack, but that doesn't mean they need to use the weapon/tokens outright. In an example like this where there are 3 (three) Actions needed, it's probably more beneficial to use a weapon as an assist and roll for maybe 1 (one) Action. But if it were 1 (one) or 2 (two) Actions needed, the odds would be safer to just roll for the Actions needed and hold onto your weapon and Supply Tracker Tokens for harder situations.
NOTE: If a player has more than 1 (one) supply/weapon, both can be used during a turn, but be mindful of the amount of noise that can be made with multiple weapons. Also, Triple Actions, Defense, and Escapes cannot be achieved with points from weapons. They can only be achieved by rolling triples with the Action dice.
Traitor Card
Players can draw this card from the supply deck and hold onto it without it taking up space in their supply inventory. The player must use this card at the start of their turn against any player of their choosing (the opposing player can be situated at any location on the board). Once the player has completed the action of their choosing, their turn is over. The Traitor Card allows the player to do one of the following actions: Steal 1 (one) supply, Steal 1 (one) task, Steal 1 (one) Rescue Token, or send a player back to the nearest starting location.
The Invaders Card
The player who draws this card must defend both themselves and their fellow players from The Invaders by rolling 3 (three) Actions. If successful, the card is canceled and moved to the discard pile. The player remains in the location and on their next turn can draw another Killer Scenes, Dude card from the deck.
If unsuccessful in defeating the Invaders Card:
- The current player loses 2 (two) health and 1 (one) rescue token.
- All other players lose 1 (one) rescue token. If the player doesn't have a rescue, the player loses 1 (one) health instead.
- The power goes out again! Place Task #1 back into the center of the board at the Tall Oaks Rec Center and flip the task token back to yellow inside of the Power Plant. Players must redo this task before completing any other tasks.
NOTE: This only resets Task #1. If all tasks have already been completed, the power is not turned off.
Slashers / Slasher Meter & Noise
NOTE: For this rulebook/walkthrough we're using our recommended order for the Slashers: Smiley, Sarah, then The Legend for the Final Slasher. You can adjust this order if you wish, and as additional characters are released, you can switch up which 3 (three) Slashers you play with.
There is always a Slasher lurking in the woods. At the start of the game, begin with Smiley. As gameplay progresses, certain cards ("They're Here", Dice combinations and Supplies) will create Noise raising the Slasher Meter or will immediately draw Slashers to the board. Anytime Noise is made, place the Tracker Token on the Slasher Meter spots. As Noise is continually made, the Tracker Token gradually moves up a spot.
Fighting Slashers
When the meter hits the fourth spot (Red Knife marking), the Slasher attacks and is called onto the board to the space or location of the player who made the noise. The player must now fight the Slasher. Fighting a Slasher is similar to the mechanics of a Killer Scenes, Dude card with the following possible outcomes:
If the player rolls the necessary Actions to successfully defeat the Slasher, the Slasher is removed from the board and placed back on the spot behind Johnson's Farm. Reset the Slasher Meter back to zero.
If the player rolls the required Escape icons, the player escapes the fight and returns to the nearest starting location. Though the player is safe with no health loss, the Slasher still remains active. Any noise drawn will bring players to the Slasher until they are defeated. If the player fails to defeat the Slasher or Escape the Slasher, the player loses the health noted as well as any extras noted on the Slasher's card (i.e., Supplies, Rescue Tokens) and must return to the nearest starting location, ending their turn. The Slasher is now active and any noise will bring them to players until they've been defeated.
NOTE: Weapons that cause Noise do not raise the Slasher Meter during fights with Slashers. This is usually the most opportune time to use them.
Slasher profile card labels (Smiley's Profile Card illustration): Tracker Token Fourth Spot (Slasher Attacks); Amount of Actions needed to defeat Slasher; Amount of Escapes needed to escape the fight; Amount of health lost if defeated; Amount of Supplies lost if defeated.
Slasher Attacks During Killer Scenes
If the player picks a Killer Scenes, Dude card with Noise that draws the Slasher to them, the player sets aside the current Killer Scenes, Dude card and must first fight the Slasher.
If the player fails to defeat the Slasher, the Killer Scenes, Dude card is moved to the discard pile. The player must return to the nearest starting location, ending their turn. The Slasher is now active and any noise made will bring them to players. If the player successfully defeats the Slasher, the Slasher is removed from the board and their meter is reset back to zero. The player can then continue with the Killer Scenes, Dude card they drew and attempt a rescue.
Slasher Attacks In Proximity To A Player
There are rare occasions where a Slasher is active on the board, outside of a location. If a player lands on the same space as the Slasher or on the spaces next to each other (not diagonally), they must fight the Slasher.
Using Supplies That Draw A Slasher
The same sequence occurs if a player uses a Supply card that makes Noise during a Killer Scenes, Dude card. If the Noise leads to a Slasher attacking, the Killer Scenes, Dude card is moved to the discard pile, the player takes the noted Rescue Tokens for a successful rescue, and then must fight the current Slasher.
NOTE: There are also unique combinations that can be rolled during fights with Slashers that can lead to other resolutions. Refer to the Dice Reference Sheet on page 13 (thirteen) for all possible combinations.
Tasks & Safeguarding The Town
Players can work together to safeguard the town by successfully completing these 4 (four) tasks at these locations:
Task locations (printed): Sucko Power Plant; Tall Oaks Police Dept.; WKIL Radio Station; Fill 'Em All Gas Station.
Acquiring A Task
Task Cards reside in the Tall Oaks Rec Center in the middle of the board. To acquire a task, make your way there and upon entering you can pick up a task. Remember, Tasks take up 1 (one) of the 2 (two) slots in your supplies inventory, so be careful when choosing to complete a task. Also, Tasks must be completed in order from #1 - #4. You can acquire Tasks and hold them in your inventory while others are being attempted, but they cannot be completed before the preceding Task.
Once a Task card is acquired, the player makes their way to the corresponding location. The player must clear the location (no Scene Marker) before completing the task. If the location is cleared, the player enters the location and flips the Task Token over to show the green-side. This signals that the task has been completed. Players move the Task card to a discard pile and are given a free search of the location (no roll necessary), allowing the player to draw a Supply card. The next task can now be completed.
Slashers And Tasks
During the first 2 (two) tasks, Smiley will be your active Slasher. When the player enters Tall Oaks Police Dept. to complete Task #2, the Slasher Meter will become full and the Slasher (Smiley) will be drawn to that location for a final battle. The player must roll the actions noted on the Slasher Profile card to defeat him. The rules for a final battle are the same rules from the Fighting Slashers section, only, if successful, the Task is completed and the Slasher is removed from the game. The successful player is rewarded with a free search.
Once Task #2 is complete, replace Smiley's profile card and character piece with Sarah's and reset the Slasher Meter to zero. The character piece is placed on the spot behind Johnson's Farm. The same rules above will apply when a player attempts to complete Task #4 (only you'll switch Sarah to The Legend).
Slashers And Tasks Continued
Much like any fight with a Slasher, if the player is unsuccessful, the player will lose the health noted on the Slasher Profile Card along with any extras (i.e. Supplies or Rescue Tokens depending on the Slasher) and will have to go back to the nearest starting location. The Slasher stays in the location unless called away by Noise or a "They're Here" card. The Slasher will immediately return to the Task's location when a player attempts to complete the task again.
When all four tasks have been completed, immediately place the Helipad Token in the Tall Oaks Rec Center. Players will now be racing to finish the game and make their way to the helipad to escape. Get to the choppa!
Final Slasher: The Legend Returns
Once all tasks are complete, the final Slasher emerges (The Legend).
The Final Slasher's Meter remains full for the remainder of the game (no exception). This means The Legend will be called immediately to any player who makes a Noise. Players will follow the same rules from the Fighting Slashers section, only, when The Legend is defeated, he returns to the location behind Johnson's Farm and the Slasher Meter remains full.
NOTE: The Legend's card offers no way to Escape him. Only Triple Escapes will get you out of this fight. Otherwise, you must roll the Actions noted to defeat him.
The same applies for the Final Rescue: when a player gets to the location where their Final Rescue occurs, the Legend will immediately be drawn to them. The player will need to roll the required amount of Actions in order to defeat him.
Final Scenes / Final Rescue Tokens
Once all tasks have been completed and the player has successfully acquired their 5 (five) Rescue tokens, that player flips over their Final Scenes, Dude card. The card will inform the player what location they should place their Final Rescue token in. The player's objective during their turns now is to get to that location and fight the final Slasher (i.e. The Legend). But there's a catch. The Slashers stats become the stats provided on your Final Scene card. Hopefully you drew the "easy" one.
NOTE: If the location on your Final Scenes, Dude card has a Scene Marker in it, replace it with the Final Rescue Token. If this is the last Scene Marker on the board, restock the board accordingly (except locations with Final Rescue Tokens).
Final Scenes card labels: Health lost if defeated by Slasher; Actions needed to defeat Final Slasher; Location for Final Rescue Token.
Escape: Win The Game
If the player successfully defeats the Final Slasher (i.e. The Legend), they collect their Final Rescue token. On their next turn, they begin making their way to the Helipad Token in the Tall Oaks Rec Center to make their Escape. The first person to make it to the Helipad/Tall Oaks Rec Center with their Final Rescue Token wins the game.
NOTE: Even when defeated during a player's Final Scene, the Final Slasher (The Legend) remains active and is still drawn to other players who create Noise or attempt their Final Scene until the game ends.
Scuffles
Want to fight your friends? Get into Scuffles with your fellow survivors!
Players may choose to engage in scuffles but it is not a mandatory action. Scuffles can occur when players land on the same space, the spaces next to each other (not diagonally), or in the same location. A scuffle is settled by rolling the 3 (three) Action Dice against each other.
Ways To Win A Scuffle
- The person who rolls the most Actions wins: If a scuffle is settled this way, the losing player removes 1 (one) health and returns to the nearest starting location. Ties are unacceptable. Players continue to roll the 3 (three) Action Dice until someone wins.
- The first person to roll triples of any kind: If someone rolls triples, they are immediately declared the winner. The losing player removes 1 (one) health and gives 1 (one) of their Rescue Tokens to the winning player. The loser then returns to the nearest starting location. If the losing player does not currently have any Rescue Tokens, no Rescue Tokens are awarded to the winner.
NOTE: All scuffles are hand-to-hand combat only, so weapons and special abilities cannot be used to assist in scuffles. Holding a weapon is also not required for a scuffle.
Scuffles In A Space Or Location
- Scuffles on Bonus Tracks: If a player lands on a Bonus Tracks space already occupied by another player and decides to engage in a scuffle, the scuffle must be settled before the current player has a chance to draw a Bonus Tracks card. If the player loses, they do not draw a card.
- Scuffles in a location: If a player lands on a location already occupied by another player with a Scene Marker still in place, the scuffle must be settled first before a Killer Scenes, Dude card is drawn. The same applies for Searching empty locations. Again, scuffles are not mandatory.
- If the person currently occupying the location wins, they still must wait until their next turn to draw a Killer Scenes, Dude card.
- If the player who just landed on the location wins, they continue their turn and draw a Killer Scenes, Dude card.
Special Abilities
Each Survivor has their own unique ability located on their profile card. These can be used during a player's turn to assist with Action rolls (Derrick, Kimmy), assist with Searching (Ivy), keeping noise down (Star), additional Inventory Slots (Mario), fighting without Weapons (Christine), reviving Health (Specs), or cheating death (Johnny).
With different advantages to each ability, some can be used every turn, while others only at certain times, and some only once. Check out each character's profile card and figure out which one is more your style when selecting your survivor.
Welcome back to Tall Oaks. Now run like hell.
The player is awarded double the rescues noted on the Killer Scene. The player buries the current Killer Scenes, Dude card, but does not need to return to the nearest starting location. They may draw a new Killer Scenes, Dude card on their next turn. The player buries their current Killer Scenes, Dude card and moves to the nearest location. If a Scene Marker is present, they immediately draw another Killer Scene. If the location is empty, the player may attempt a search.
Note: this ability description is not labeled with a survivor name in the text layer; it is transcribed in the order printed. The survivor it belongs to is not recoverable from the text.
Unique Combos For Rescues
Instant defeat of the Slasher. The player is also allowed to draw a free supply from the Supply deck.
Lowers the Slasher Meter by 1 (one) and moves the Slasher back to the woods (off the board).
The player escapes the fight and moves to the nearest location. If a Scene Marker is present, they can draw a Killer Scene on their next turn. If the location is empty, they can attempt a search on their next turn. The Slasher remains active awaiting the next person to make a noise.
Unique Combos Vs. Slashers
Nothing. The player takes damage. The player defeats the card and can redraw another Killer Scenes, Dude card.
The player buries their current Killer Scenes, Dude card and moves to the nearest location. If a scene token is present, they can immediately draw another Killer Scenes, Dude card and perform the necessary actions. If the location is empty, the player may immediately attempt a search.
NOTE: If a player escapes to a nearby location occupied by another player, the current player may choose to Scuffle with that player... or not.
Unique Combos For Defense
The player makes a noise raising the Slasher Meter by 1 (one).
Note: the combination names for the three "Unique Combos" sections above are shown only as dice-face images in the printed rulebook and are not present in the text layer. Each outcome is transcribed under its printed section heading, in the order printed; the mapping of each outcome to a specific dice combination could not be verified from the text.
Search Die
The player may draw 1 (one) card from the Supply deck. The player finds nothing of use and their turn ends with no reward.
Note: the face-to-outcome mapping for the Search Die is an icon image in the printed rulebook and is not in the text layer; the outcome above is transcribed as printed.
Dice Reference
A quick breakdown of the icons on the Action Dice and Search Die as well as special combinations:
Actions/Attack
Needed to achieve rescues or defeat Slashers and monsters.
Shield/Defense
Needed to defend against Slashers and monsters.
Escape/Run
Needed to escape from Slashers and monsters.
Note: the dice-face illustrations and the "Dice Reference Sheet on page 13" table of special combinations are images and are not reproduced in the text layer.
FAQs And Additional Modes
FAQs and a "How to Play" video are available on the website at mixtapemassacre.com/extras. Rules for additional modes of play are also available on the website, including: Slashers Vs. Survivors Party, and Mixtape Massacre: Expanded Escape From Tall Oaks.