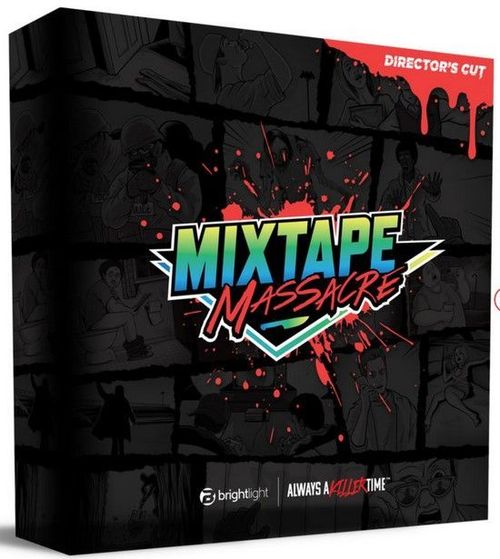
Mixtape Massacre: Director's Cut
Mixtape Massacre: Director's Cut Rulebook
Table of Contents
Table of Contents
- What's in the Box
- Setting the Scene
- Player Set-Up
- Beginning the Game
- Traveling in Tall Oaks
- Location Entrances
- Killer Scenes, Dude Cards
- Locations With Multiple Tokens
- Killing Spree(s)
- Restocking Scene Markers
- Runner Tokens
- Bonus Tracks
- Sewer Shortcuts
- Locked Entrances & Lock Tokens
- Unlocking Doors
- Empty Locations
- Searching
- Free Searches After Kills
- Supplies
- When to Use Supplies
- Supply Card Breakdown
- Using a Supply Card/Token When Rolling
- Heroes / Hero Meter & Noise
- Fighting Heroes
- Hero Attacks During Killer Scenes
- Fighting Heroes (Continued)
- The Survivor Card
- Collecting Souvenirs
- Staying Alive
- Engaging in Brawls
- Ways to Win a Brawl
- Brawls in a Unique Space or Location
- Brawls and Noise
- Winning the Game
- Dice Reference
- Rules Notes From the Back Cover
What's in the Box
1 Rulebook, 1 Tall Oaks Game Board, 1 Search Die, 2 Standard D6 Dice, 3 Action Dice, 3 Hero Figures, 3 Hero Profile Cards, 6 Knife Player Stations, 10 Plastic Stands, 10 Slasher Figures, 10 Slasher Profile Cards, 10 Special Ability Tokens, 14 Lock Tokens, 16 Supply Tracker Tokens, 30 "Bonus Tracks" Cards, 36 Life Pegs (Health), 40 Supply Cards, 50 "Killer Scenes, Dude" Cards, 66 Scene Markers / Souvenir Tokens.
Bonus: 2 Survivor Profile Cards, 2 Final Rescue Tokens (for use when playing Escape From Tall Oaks with Kirk or Linda).
Setting the Scene
First, place your game board in the center of the table.
Place Linda's Character Pieces and Profile Cards (or the hero of your choice) and the Hero Meter in a visible spot off the board. Place the corresponding Tracker Token (marked red with a white gun) near the tracker. When Noise is made, you'll start moving the token across the markings on the tracker, from spot to spot. The tracker will tell you when the off board Hero will attack.
Next, all active player pieces should be placed on a starting location on the board (marked in red with a white knife). Players may choose the spot they wish to start from.
Lastly, place 1 (one) Scene Marker in each location on the board (12 locations total). Place the tokens Scene Marker side up. Additional tokens should be stored off the board (Scene Marker side up to avoid seeing what's underneath) along with the Bonus Track cards, Killer Scenes, Dude cards, Supply Cards, Lock Tokens, and Supply Tracker Tokens, in easily accessible spots.
NOTE: Two Heroes are included with the base game. If playing with Kirk instead of Linda (or any other Hero included in an expansion or booster pack), you'll want to remove the Full Moon cards from the deck, as those are specific to Linda and her Wolf Profile Card/Character Piece.
Setup diagram labels: Hero Profile Cards; Hero Meter + Tracker Token; Killer Scenes, Dude cards (50); Bonus Track cards (30); Supply Cards (40); Dice (6): Movement, Action & Search Die; Scene Marker / Souvenir Tokens (66) (Bank); Lock Tokens (14) (Bank); Supply Tracker Tokens (16) (Bank).
Player Set-Up
Mixtape Massacre allows for up to 6 (six) players maximum, 2 (two) players minimum. Each player chooses a character and takes their corresponding figure, profile card (with special ability on the card), 6 (six) health pegs, 1 (one) corresponding Special Ability token, and a Player Station (a knife). Place your character profile card in the allotted slot in your player station and fill in the 6 (six) holes with your health pegs — these will track your health throughout the game.
Diagram labels: The Legend's Profile Card; The Legend's Special Ability; Player Station + Health Pegs; The Legend's Special Ability Token.
Special Abilities
Each character has a Special Ability they can use once per game. When the ability has been used, the player flips their Special Ability token over to the "X" side, to note their ability has been used.
Beginning the Game
Players roll the 2 (two) purple movement dice to determine who goes first. The player who rolls the highest number starts first. The same player will also roll 1 (one) of the purple die to determine the amount of Locked location entrances the game will start with. Depending on the number rolled, the player takes the corresponding number of Lock Tokens and places them in the entrance spaces of any locations of their choosing, yellow side up.
EXAMPLE: If a 5 (five) is rolled, 5 (five) Lock Tokens should be placed on the board. For entrances with double entrance spaces, place the Lock Token in the middle of the spaces (i.e. Tall Oaks Hospital).
Traveling in Tall Oaks
Going counterclockwise, players roll the purple dice to move their characters throughout Tall Oaks. Players travel the town using the squared roads and sidewalk spaces attempting to get to locations. Active players move each turn either forward or backwards (not both or diagonally). Players must move the entire amount rolled (you cannot just stop). If a player lands in a location with a Scene Marker, the player draws a card from the Killer Scenes, Dude card deck.
NOTE: The only time you do not need to move the amount rolled is if you land in a location or on a locked entrance (i.e., if you need to move 2 spaces to land on a location or locked entrance, but roll 4, obviously you'd only need to move the 2 spaces to be in the location or on the locked entrance.)
Location Entrances
Locations can only be entered and exited through an entrance space marked with arrows. These spaces count as a move (players cannot just land on the space and 'slide' in). These are also the spaces where Lock Tokens should be placed when an entrance becomes locked.
Killer Scenes, Dude Cards
Once in a location with a Scene Marker, draw a card from the Killer Scenes, Dude deck.
Diagram labels (Example Attack Card): Knives needed for a successful kill; Souvenir Tokens awarded; Noise made by drawing card. (Example Defense Card): Amount of health to be lost by player; Fists needed to cancel health loss.
Icon key: Knives Needed; Health Loss; The Survivor Card; Souvenir Tokens Awarded; Fists Needed; Noise Made.
Attempting a Kill
If the card says "This victim is open for an attack!", the player must roll the 3 (three) Action Dice for the amount of Knives noted in the red circle on the card in order to successfully make the kill. The player may also use Supplies to assist in achieving the amount of knives noted on the card.
If successful, the player takes the Scene Marker and flips it over to show the souvenir they've received for the kill. The player also receives a Free Search and is now on a Killing Spree.
NOTE: If the kill was worth more than 1 (one) souvenir token, the player can take additional tokens from the bank of tokens stored off the board.
Running Scared
If the player fails to roll the amount of knives required for the kill, they bury the Killer Scenes, Dude card and remain in the location. The Scene Marker, however, makes a run for it. The Scene Marker moves (runs) to a nearby location. Move the token 1 (one) location up, left, down, or right from its current location (opposing players choose the location).
Noise
Some Killer Scenes include a yellow circle with a Noise icon and amount noted. When drawn, these immediately raise the Hero Meter by the amount noted and could lead to a Hero attack, halting your kill.
Defending Yourself
If the card says "This victim got away!", the player loses the amount of health noted on the card and their turn is over. To avoid damage, roll the number of Fists noted on the card in the orange circle. The player may also use Supplies to assist in defending themselves. But not all cards will allow for defense.
Whether the player is able to defend against the card or not, the card is moved to the discard pile and the player remains in the location. They will have a chance on their next turn to draw another Killer Scenes, Dude card and attempt a kill.
NOTE: As the game progresses, create a discard pile for your Killer Scenes, Dude cards. Reshuffle the pile when the deck has been exhausted.
Locations With Multiple Tokens
As Scene Marker tokens are moved to new locations, the tokens will begin to stack up. Players will make attempts for these tokens as usual, but with a couple twists:
If the player draws a Killer Scenes, Dude card and is successful in making the kill, they collect one of the tokens in the location and begin their Killing Spree. The player can begin their Killing Spree in the same location and draw another Killer Scene to attempt for the remaining token(s) in that location.
NOTE: If the kill was worth more than one souvenir token, the player takes the additional tokens from the current location. If there are not enough tokens in the location, the player takes any additional tokens from the bank of tokens stored off the board.
If the player is unsuccessful in a location with multiple tokens, the player remains in the location, and only one of the tokens is moved to a nearby location. The player can make an attempt for the other tokens in the location on their next turn.
Killing Spree(s)
A player's Killing Spree begins after they are successful in making a kill. A Killing Spree grants the player another roll with the movement dice to continue their turn. If the player is able to reach another location and make another kill, the spree continues. The spree ends when the player is unable to make a kill on their turn.
Restocking Scene Markers
When all locations have been cleared/emptied, restock Scene Markers in all locations except the one where the last kill took place.
Runner Tokens
After a successful kill, if a player turns over their souvenir token to reveal a runner, the player loses their kill and the souvenir token gets mixed back into the token bank, ending their turn. The player remains in the location until their next turn. If a kill is worth more than one souvenir, the player returns the Runner token to the bank and can take the remaining souvenirs awarded from the bank. But their turn still ends.
NOTE: When a runner token has been drawn, regardless of the amount of souvenirs won, the player's killing spree and free search have been canceled.
Bonus Tracks
If a player lands on a Bonus Tracks space, they draw a card from the Bonus Tracks card deck and follow the directions on the card. NOTE: As the game progresses, create a discard pile for the different types of cards. Reshuffle the piles once your deck has been exhausted.
Sewer Shortcuts
If a player lands on a Sewer Shortcut, they can move their character to any other sewer space with the same color. NOTE: If the player rolls more than it takes to get to a corresponding sewer space, they count the sewer space as 1 (one) of their moves and can continue their turn from the next sewer space they move to. Landing on the sewer space you move to does not count as a move.
Locked Entrances & Lock Tokens
Throughout the game, players will run into Locked Entrances, keeping them from entering locations. Players must break into the locations by getting rid of the locks with the Action Dice or Supplies.
There are three ways locations can acquire Lock Tokens:
- The player who begins the game will first roll one of the movement die to determine the number of locked entrances the game will start with
- Players draw certain Bonus Tracks that add either yellow or red Lock Tokens to specific locations
- Heroes who defeat players add Lock Tokens to locations
When activated, Lock Tokens should be placed over the Entrance Space of the location.
NOTE: Locations with two entrances will still be accessible if both entrances haven't been locked.
Unlocking Doors
Players will make their way to Locked Entrances to attempt to remove Lock Tokens.
- If the entrance of the location contains a yellow-sided lock token, the player must roll 1 (one) knife to unlock the door.
- If it contains a red-sided lock, the player must roll 2 (two) knives to unlock it.
- Supplies can also be used to achieve the knives needed to remove the locks.
If successful in removing the lock, the player can enter the location or continue their turn.
If unsuccessful, the player's turn is over. They can attempt again on their next turn or leave the location locked and move on.
Empty Locations
If a location is empty, the player may count the location as a move (as long as that location has multiple entrances) and use it as a shortcut for moving through the town (i.e. Tall Oaks High School and Tall Oaks Town Square). They may also use empty locations to search for supplies using the Search Die.
Searching
When kills have been made, locations become empty. Players can search empty locations (locations without a Scene Marker token) throughout the game. Once a player enters an empty location, the player rolls the Search Die and if it lands on the Search icon, the player can draw a card from the Supply deck. If a player rolls the Denied icon, nothing is found and their turn ends. If the player rolls a Noise icon, the Hero Meter goes up by 1 (one).
NOTE: Players cannot search an empty location twice in a row. They must leave the location and go to another vacant location for a new search before returning to the previous location.
Free Searches After Kills
Players are given an automatic/free search after any successful kill. Draw a card from the Supply deck. No search roll is necessary. As long as the card isn't a "Here Comes A Hero" card, the player can begin/continue their Killing Spree.
Supplies
Once a player has made a successful kill or rolled a Search icon in an empty location, the player draws a card from the Supply deck. If the card is a supply, they can add it to their inventory. Players can only hold 1 (one) supply at a time (unless noted otherwise), so if needed, players can get rid of their current supply and move it to the discard pile to make room for a more desirable supply card they've just drawn.
When to Use Supplies
Supplies can be used to assist a player in attempting a kill, brawls, defending themselves, or fighting a hero or enemy. When using a supply, the player must choose to use the supply before they roll for an attack, defend themselves, or brawl with another slasher.
Supply Card Breakdown
Examples below of how different supplies can add to your different rolls during the game or assist you during play:
Example card labels: Chainsaw (Making a mess... Rev up your chainsaw and let's get chopping. The only thing louder than the saw will be the screams.): Action points per use (+3 knife icon); Noise made per use (+2); Supply tracker tokens (2). First Aid Kit (Ain't got time to bleed... Use now or at the start of any turn to heal yourself with the health noted, then continue your turn.): Health awarded per use (+2); How many times it can be used (How many supply tracker tokens) (1). Skeleton Key (A key to the city... Use this key to enter any location with a Locked Token at its entry. Remove the locks once you enter. (Does not count as inventory)): A card that does not count as inventory; Infinite means no tokens needed for tracking (∞).
Supply Tracker Tokens
When a supply card is drawn, one of the icons at the bottom notes Turns/Use (as seen above). Players should take Supply Tracker Tokens in the amount noted on the card to keep track of how many times they can use that supply for an assist before it is exhausted and must be discarded.
NOTE: Some items may contain a ∞ meaning the Supply will stay in your inventory until you lose it or decide to discard it. No tokens are needed for tracking. Some of these can be very advantageous to have.
Using a Supply Card/Token When Rolling
When using a supply during a Killer Scenes, Dude card, or during a fight with another Slasher, the player must decide what supply they want to use, and how many times they want to use it (how many tokens to spend) before rolling. For each token spent, the player gets the amount of Knife, Fist, or Pentagram noted on the card and can add that to their roll. If the card generates Noise, it causes the amount noted on the card for every Supply Tracker token spent.
Examples
(1) The following Killer Scene requires the player to achieve 3 (three) Knives to successfully kill the victims. For our example, our player will be holding a Drill in their inventory. As the Drill supply card shows, it allows the player 1 (one) knife for every time they use it, but, the player will also cause 1 (one) Noise for every time they use it.
If the player decides to, they could just spend all of their Supply Tracker tokens for the Drill during this turn which would give them 3 (three) knives. But this would also mean that the Hero Meter would be raised by 3 (three) Noises (which means, depending on where the Tracker Token is on the Hero Meter, this could cause the Hero to attack after the player collects their souvenirs). The other issue is the player will now be weaponless when the Hero attacks. Good luck!
(2) The other option the player has is to spend 2 (two) of their 3 (three) Supply Tracker tokens and roll the Action Dice for the additional knives needed to achieve a successful kill. In this case, they'd get 2 (two) knives from the Drill, and only cause 2 (two) Noise. They then take the risk and attempt a roll for the final knife needed with the Action Dice. If successful, they'd still have the Drill for further attacks and would also receive a free search for another possible supply.
(3) Lastly, the final option the player has is to not spend any tokens and roll for all 3 (three) Knives. In an example like this where there are 3 (three) Knives needed, it's probably more beneficial to use a weapon as an assist and roll for maybe 1 (one) knife. But if it were 1 (one) or 2 (two) Knives needed, the odds would be safer to just use your bloody bare hands and roll for the knives needed, holding onto your weapon and Supply Tracker Tokens for harder situations.
Heroes / Hero Meter & Noise
As gameplay progresses, certain cards ("Here Comes A Hero!"), Dice combinations, and Supplies will create Noise raising the Hero Meter or immediately draw the Hero to the board. Anytime Noise is made, place the Tracker Token on the Hero Meter spots. As Noise is continually made, the Tracker Token gradually moves up a spot.
When the meter reaches the fourth spot, the Hero is called onto the board and the player must roll the necessary Knives on the Hero's Profile Card to defeat them, bringing their meter down to zero and removing them from the board.
Diagram labels: Tracker Token; Fourth Spot (Hero Attacks).
Diagram labels (Linda's Profile Card): Amount of Knives needed to defeat Hero ("To Defeat"); Amount of Fists needed to defend yourself ("To Defend"); Consequences if the player is defeated ("If Player is Defeated: The player loses 2 (two) health and a Lock Token (red) is added to the current location.").
Fighting Heroes
If the player fails to defeat the Hero, they face the consequences noted on the card under "If player is defeated" (loss of health, loss of souvenirs, etc) and return to the nearest starting point. The Hero is now active and any Noise made by players will bring the Hero to that player's location on the board for a fight.
If the player defends themselves against the Hero, they face no consequences on the profile card. The Hero Meter is lowered by one and the Hero is removed from the board.
If a player makes a successful kill and then draws a Supply card that results in the "Here Comes A Hero" card, that player immediately raises the Hero Meter to full and draws the Hero to them. If the player defeats the Hero, the Hero Meter goes back to zero, they are removed from the board, and the player can resume their killing spree.
NOTE: Weapons that cause Noise do not raise the Hero Meter during fights with them. This is usually the most opportune time to use weapons to achieve the knives needed and defeat the Hero.
Hero Attacks During Killer Scenes
If the player draws a Killer Scenes, Dude card with Noise that brings the Hero to them, the player sets aside the current Killer Scenes, Dude card and must first fight the Hero.
If the player fails to defeat the Hero, the Killer Scenes, Dude card is moved to the discard pile and the player must return to the nearest starting location, ending their turn. The Hero is now active and any noise made will bring them to players.
If the player successfully defeats the Hero, the Hero is removed from the board and their meter is reset back to zero. The player can then continue with the Killer Scenes, Dude card they drew and attempt a kill or defend themselves.
Fighting Heroes (Continued)
Hero Attacks in Proximity to a Player
There are rare occasions where a Hero is active on the board, outside of a location. If a player lands on the same space as the Hero or on spaces next to each other (not diagonally), they must fight the Hero.
Using Supplies That Draw a Hero
The same sequence occurs if a player uses a Supply card that makes Noise during a Killer Scenes, Dude card. If the Noise leads to a Hero attacking, the Killer Scenes, Dude card is moved to the discard pile, the player takes the noted Souvenir Tokens for a successful kill, and then must fight the current Hero.
NOTE: There are also unique combinations that can be rolled during fights with Heroes that can lead to other resolutions. Refer to the Dice Reference Sheet on page 12 (twelve) for all possible combinations.
The Survivor Card
Someone is always trying to ruin the fun!
The player who draws this card must defend both themselves and their fellow players from The Survivor by rolling 2 (two) Defense Fists. If rolled, the card is canceled and moved to the discard pile.
If unsuccessful in defending yourself:
- The current player loses 2 (two) health and any current supplies in their inventory.
- All other players lose 1 (one) souvenir. If players do not have a souvenir, they lose 1 (one) health instead.
- The Scene Marker is removed from the current location and all players return to their nearest starting points.
Collecting Souvenirs
Each player attempts to collect 10 Souvenir tokens. These tokens can be obtained by achieving successful kills and other ways during play. The first player to 10 souvenirs wins the game. NOTE: To adjust the length of play, the souvenir token goal amount can be adjusted depending upon the amount of players.
Suggested Souvenir Goals Depending Upon Player Count:
- 2 Players - 15 souvenirs
- 3 Players - 12 souvenirs
- 4 – 6 Players - 10 souvenirs
Staying Alive
Each player starts with 6 (six) Health Pegs. There are many occurrences throughout the game where you can lose health or gain health. If you can't collect souvenirs, staying alive might be your best bet at winning the game... or die trying.
NOTE: If you're dead, you are dead. The only way to return to the game after death is with a Supply or Bonus Track card that can resurrect you or if your character possesses a resurrection special ability (i.e. Stitches).
Engaging in Brawls
Brawls occur when players land on the same space, the spaces next to each other (not diagonally), or in the same location. A brawl is settled by rolling the 3 (three) Action dice against each other. The current player rolls first in the brawl.
Supplies may also be used during your brawls with other Slashers. Using a Supply during a Brawl works the same as using Supplies during a Killer Scene, only Brawls can sometimes go multiple rounds. So be careful of Noise.
NOTE: If one player is inside a location and another player lands on the entrance space of the location, a brawl DOES NOT occur. Brawls also CANNOT occur with players on starting points.
Ways to Win a Brawl
The person who rolls the most knives wins: If a brawl is settled this way, the losing player removes 1 (one) health and returns to the nearest starting point. Ties are unacceptable. Players continue to roll the 3 Action Dice and use Supplies until someone wins.
The first person to roll triples of any kind: If triples are rolled, the losing player removes 2 (two) health and gives 1 (one) of their Souvenirs to the winning player. The loser then returns to the nearest starting point. If the losing player has no souvenirs, no souvenirs are awarded to the winner.
NOTE: When using Supplies combined with a roll during Brawls, if a player performs an attack with 6 (six) knives or more to win during a turn, the opposing player loses 2 health. But, the first to roll triples, still automatically wins.
Brawls in a Unique Space or Location
Sometimes brawls occur in a unique space or location:
Brawl on Bonus Tracks: If a player lands on a Bonus Tracks space already occupied by another player or space nearby, the brawl must be settled before the current player has a chance to draw a Bonus Tracks card. If the player loses, they do not draw a card.
Brawl in a Location: If a player lands in a location already occupied by another player and the location contains a Scene Marker, the brawl must be settled first before a Killer Scenes, Dude card is drawn.
- If the person currently occupying the location wins, the player must wait until their next turn to draw another Killer Scenes, Dude card
- If the player who just landed in the location wins, they continue their turn and draw a Killer Scenes, Dude card.
Brawls and Noise
If players use Supplies during a brawl that cause Noise and draw out the Hero, the Brawl must be settled first and whoever wins the Brawl will fight the Hero.
Winning the Game
Players have two ways to win the game: Be the first to collect 10 souvenirs (or the amount agreed upon by players) OR be the last slasher standing/alive.
Welcome to Tall Oaks. Let's get bloody, slashers!
Dice Reference
A quick break down of the icons on the Action Dice and Search Die as well as special combinations:
- Knife: Knives/Stabs needed to achieve a successful kill.
- Fist: Needed to defend against victims and heroes.
- Pentagram: For achieving hexes and other dark magic.
Unique Combos for Attacks
- Three Knives: The player is awarded double the amount of souvenirs noted on their card.
- Three Fists: The player buries the current Killer Scenes, Dude card and can draw a new one.
- Three Pentagrams: The player is not only successful in killing the victim, but they are also awarded double the amount of souvenirs on the card. Meanwhile, all other players lose 1 (one) health in this instance.
Unique Combos vs. Heroes and Other Enemies
- Three Knives and Three Pentagrams (six icons): Instant defeat of the opponent. The player is also allowed to draw a free supply from the Supply deck.
- Three Fists: Lowers the Hero Meter by 1 (one) and moves the Hero back off the board.
Unique Combos for Defense
- Three Knives: Nothing. The player takes damage.
- Three Fists: The player defeats the card and can draw another Killer Scenes, Dude card.
- Three Pentagrams: Nothing. The player takes damage.
Unique Combos During Brawls
- Three Knives, Three Pentagrams and Three Fists (nine icons): The player who rolls triples during a brawl is immediately declared the winner. The losing player removes 2 (two) health and gives 1 (one) of their souvenirs to the winning player.
Search Die
- Search icon (magnifying glass): The player may draw 1 (one) card from the Supply deck.
- Denied icon (circle with a slash): The player finds nothing of use and their turn ends with no reward.
- Noise icon (ear): The player makes a noise raising the Hero Meter by 1 (one).
Rules Notes From the Back Cover
Please note: The two additional Survivor Profile Cards and Final Rescue Tokens included with Mixtape Massacre: Director's Cut are for use when playing as Kirk or Linda during a standard game of Escape from Tall Oaks.
Additional modes of play are available on the publisher's website (mixtapemassacre.com/extras). FAQs and a "How to Play" video are also available there.