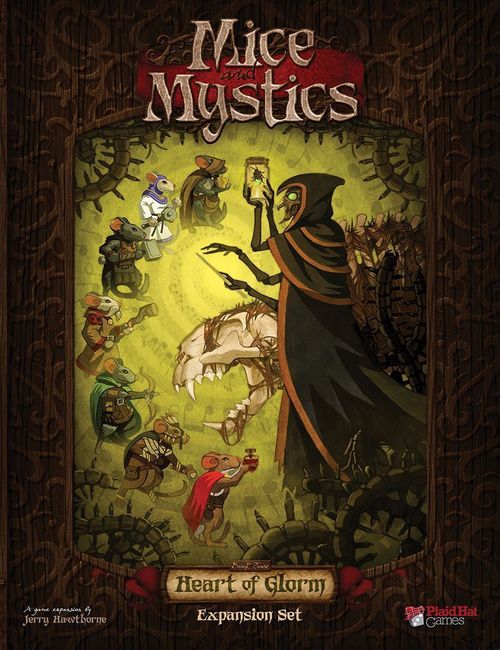
Mice and Mystics: Heart of Glorm
Mice and Mystics: Heart of Glorm Rulebook
Table of Contents
Table of Contents
- Introduction
- Room Tile Rules Types
- Campaign Special Rules
- New Status
- New Mouse Hero
- New Minions
- Pets
- Disguises in Heart of Glorm
- Mouse Head Icons
- New Search and Ability Cards
- Chapter One: Dance of Dread
- Chapter Two: Darkness Follies
- Chapter Three: Chock Full of Nuts
- Chapter Four: The Silencing
- Chapter Five: Chemical Attraction
- Chapter Six: Glorm's Glow
- Individual Achievements
- Expansion Contents
Introduction
This is a Mice and Mystics story book. In its pages you will find instructions on how to setup each chapter and special rules for playing out the chapter, including information on how you win and lose that chapter.
Each chapter of a story book is intended to be played through as a single game session of Mice and Mystics. Players can play through an entire story book, chapter by chapter, over multiple game sessions. This is called playing the story as a campaign.
Heart of Glorm starts off with a prologue. If you are going to be playing through Mice and Mystics as a campaign, we suggest you have someone read the prologue aloud to all the players prior to playing the first chapter.
Players that choose to play Heart of Glorm as a campaign can link the campaign to other Mice and Mystics story books and play an extended campaign. Mice involved in the extended campaign can keep abilities and items found in previous campaigns using the same rules as between chapters, but cannot keep any legendary items found in other story books unless directed by the story book.
Room Tile Rules Types
Special circumstances will abound as you play through each chapter. This gives us the opportunity to inject the game with juicy, narrative flavor. This story book breaks down these special circumstances into a series of rules types as follows:
- Special Search: Some tiles or spaces will allow players to find a specific item in the search deck. After making a special search, shuffle the search deck. Once a special search has been successfully performed, that specific special search cannot be performed again during that game session.
- Special Surge: A special surge always takes place instead of the surge listed on the current encounter card.
- Special Setup: When exploring (moving into) a room tile that has a special setup, follow the special setup instructions instead of drawing an encounter card.
- Special Rule: Some tiles will have rules that apply when the mice are interacting with that tile.
- Story Moment: Story moments will trigger when something specific happens in the game, like exploring a certain tile. Story moments always come with a section of text to be read aloud to the players. Some story moments even give the players a reward for triggering them.
- Optional Side Plot: Sometimes players will be presented with an opportunity to complete a task that is not necessary to complete the chapter. These side plots often come with a reward for completing them.
Campaign Special Rules
Clockwork Mortar
The mice face a menacing new weapon known as the clockwork mortar. The clockwork mortar is represented by the clockwork mortar token, and is placed on the board as directed by the special rules for the tile in which it is encountered.
Attacking with the clockwork mortar
A minion that begins its turn on the clockwork mortar will not move. When it attacks, it will attack using the mortar and is considered a ranged minion for that attack. The mortar can only be used to attack once per round, so any additional minions that start their turn on the mortar will move and attack normally. Roaches and large minions of any kind cannot use the clockwork mortar. The clockwork mortar also cannot be used by a minion if one or more mice are in the same space as the mortar. The clockwork mortar allows the minion operating it to roll 3 dice to attack and hits on bows like any other ranged attack.
Targeting with the clockwork mortar
A minion that attacks using the mortar will attack the space with the most mice. All mice on that same space are affected by the attack and must defend against any hits. If more than one space qualifies or if no mice share a space, the mortar will attack the space that includes the mouse highest on the initiative track.
Ammo for the clockwork mortar
Each time you encounter a clockwork mortar, the chapter special rules will explain which ammo is being used.
- Choke Bombs: A mouse that is wounded by a choke bomb becomes stunned. Place a stunned token on that mouse.
- Tangle Bomb: A mouse that is wounded by a tangle bomb becomes webbed. Place a webbed token on that mouse.
- Fire Bomb: A mouse that is wounded by a fire bomb becomes on fire. Place an on fire token on that mouse.
New Status
On Fire
Heart of Glorm introduces a new negative effect called on fire. When a mouse is on fire, place the on fire marker on that mouse's card. A mouse that is on fire is in danger of being harmed unless it can put out the fire by ending its turn on water, or by successfully using a recover action. Roll one action die plus one additional die for each other friendly mouse in the same space. If you roll at least 1 hit, the mouse successfully puts out the fire, remove the on fire token. If you fail to roll a hit, the mouse retains the on fire token and receives 1 wound at the end of their turn.
Important note: Tilda may use her 'Draw Empathic Power' when a fellow mouse receives an on fire token.
New Mouse Hero
Heart of Glorm introduces a new mouse called Neré. Players may now choose this new mouse even when playing chapters from another Mice and Mystics story book.
- Neré (MYSTIC / WILD). Starting equipment: Ginger Root Wand.
- Natural Healing: When Neré defeats a minion, remove 1 wound marker from this card.
New Minions
Heart of Glorm introduces new versions of the familiar minions, but they have been twisted and made more diabolical by too much exposure to mystical energies. When building an encounter deck while playing a Heart of Glorm chapter, use the new encounter cards with the twisted Glorm versions of the minions listed. Unless directed by the Heart of Glorm story book, we recommend using only the encounter cards included in this set. When creating your own adventures, feel free to mix and match encounter cards from different sets.
Frenzied Crawlers
Heart of Glorm includes a large minion known as a frenzied crawler. These are dangerous centipedes twisted by too much exposure to mystical energies. The frenzied crawler uses 2 initiative cards just like a boss but is not considered a boss.
- Chitinous: When defending against an attack from a sharp weapon, each cheese rolled counts as a block and is not placed on the cheese wheel.
Shard Blast
Some encounter cards include the phrase 'Shard Blast' near the top of the card. While this encounter card is in play, when any knocked down mindless rat rolls to 'Reanimate', if that rat fails to stand back up it will explode into a million dangerous crystal shards. Before removing it, roll 2 action dice as a melee attack. Any figure on the same or adjacent space as an exploding mindless rat must defend against this attack normally. Then remove that mindless rat.
Pets
Pets move and attack using all the rules for minions, except that they are friendly toward the mice and their choices for where to move and who to attack are controlled by the mouse players. Pets do not count as mice, but can be attacked by minions if no mouse targets are available. Pets are usually represented by a token, and do not add to space limits. Minions do not have to stop when entering a space occupied by a pet token. Some pets are summoned to the board temporarily. Remove any summoned pets that are on the board whenever the mice explore to a new tile.
The slug pets in this story book are represented by cardboard chits. Cardboard chit pets do not count towards space limits.
Disguises in Heart of Glorm
In Heart of Glorm, the disguises party item will only work on mindless rats. Skulker rats use their keen sense of smell to find the mice, and are not fooled by the silly disguises.
Mouse Head Icons
When necessary, components in this expansion are marked with a numbered mouse head icon to allow easy distinction from the Sorrow & Remembrance storybook included with the core game set of Mice and Mystics, as well as storybooks included in other expansion sets. The number indicates which book number the component is originally associated with.
New Search and Ability Cards
Heart of Glorm includes a handful of new search cards. You can shuffle these into your search deck before playing a chapter or campaign. This expansion also includes new abilities your mice can learn. Add the new ability cards to your ability card deck.
Note: The following cards require special considerations:
- Summon Pet Slug: The summon pet slugs ability card cannot be chosen as a mouse's ability until after chapter 2.
- Heartwarm Potion: Do not put the heartwarm potion search card in the search deck. Players will only gain use of it through conditions laid out in this story book.
- Arrow of Truth: Do not put the arrow of truth search card in the search deck. Players will only gain use of it through conditions laid out in this story book.
- Pack Rat Peddler: The mice have an opportunity to meet the pack rat peddler. Do not shuffle the pack rat peddler card into the search deck until the mice have earned the pack rat peddler story achievement token.
Ability and Search Card Text
- Summon Pet Slug (Class: MYSTIC; cost 2 cheese): Use this ability instead of taking an action. Place a slug marker on the same space as this mouse, and if necessary, add the slug initiative card to the bottom of the initiative track. This mouse controls that slug.
- Heartwarm Potion (LEGENDARY; No Requirements): Discard this potion when attacking with a bow. If one or more wounds are inflicted on the target minion, and the target minion shares a space with a pet, the target minion will no longer attack mice for remainder of this encounter.
- Arrow of Truth (ACCESSORY; +1; Requires: MUST HAVE BOW EQUIPPED): Discard this arrow before making an attack. Do not roll action dice for that attack. Instead, the target minion receives a number of hits equal to the amount of dice you would have rolled and must defend normally.
- Badger Gloves (SHARP; +1; Requires: WILD or ARCHER): When attacking with these gloves, if you fail to roll at least 1 hit, attack again with these gloves.
- Pack Rat Peddler (Fortune): Draw 4 cards from the search deck. Each mouse may purchase 1 or more of these cards using the cheese from their stash: Trick or Fortune for 1 cheese, Item or Party Item for 2 cheese, Weapon or Armor for 3 cheese. Shuffle Treachery cards, plus any unpurchased cards, back into the search deck.
Source note on the Pack Rat Peddler card: the printed card text is broken across lines, so "Trick or" and "Treachery cards" are separated by the Fortune and price phrases. It is transcribed in the order printed; check against the physical card if in doubt.
Chapter One: Dance of Dread
Chapter Objectives
Protect Barksburg from assault, then hunt down the mysterious hooded figure that seems to be leading these attacks.
Victory Condition: Defeat Glorm and his minion bodyguards in the kitchen.
Defeat Condition: If the hourglass marker reaches the chapter end marker on the chapter track before the mice have defeated Glorm, or if all mice are captured at the same time, the mice are defeated.
Chapter Setup
Chapter End: Place the chapter end marker on page 6 of the chapter track.
Party Setup: Select 4 mice to be in the party for this chapter. The party must include Neré. Neré cannot choose the Summon Slugs ability card yet as she must discover it later.
Encounter Deck Setup: To build the encounter deck, shuffle and place all difficult encounter cards face down onto the encounter area on the story control board. Then shuffle and deal 2 standard encounter cards face down on top of the encounter deck.
Room Tile Setup: Place the following 4 tiles as shown below: Courtyard, Sewers, Dining Hall Tunnels, and Kitchen Tunnels. Place the 4 mice being used this chapter on the start space marked below (the white mouse head icon represents the start space). Place 2 mindless rat warriors and 3 caustic roaches on the Courtyard tile normally (see 'Placing Minions on the Board' on page 14 of the rulebook).
Also place a clockwork mortar token on the space indicated near the hole in the wall. Place the Glorm figure on this token. Choose just 1 of Glorm's initiative cards for this encounter. After dealing the cards to the Initiative track, roll an action die. Move Glorm's initiative card down the track an amount of spaces equal to the number rolled, leaving no empty slots between any cards on the track.
Special Chapter Rules
Mysterious Hooded Figure: The mysterious hooded figure in this chapter is Glorm and is represented by the cloaked glow worm figure. The mice are trying to catch Glorm. Each time the mice encounter Glorm, he will try to escape. Follow the special escape rules listed with each Glorm encounter in this chapter.
Courtyard
Whole tile markers: 3. Tile markers: 1 and 2.
- Special Rule: This Clockwork Mortar is armed with fire bombs.
- Special Rule: Glorm: The shadowy figure is Glorm. He will not leave the mortar. When Glorm takes his turn, he will attack using the mortar. At the end of the first round, or if Glorm is defeated, remove Glorm from the board and remove his card from the initiative track. Then read the Story Moment that follows (narrative omitted in this transcription).
- Special Surge: 1 mindless rat, and 1 caustic roach.
Tunnel Entrance
Whole tile markers: 1 and 4. Tile markers: 2, 3, 5.
- Story Moment: When the mice explore the Tunnel Entrance, a story moment triggers (narrative omitted).
- Optional Side Plot: Investigate the disturbance: After clearing the Tunnel Entrance tile of minions, the mice may choose to investigate the noise by exploring the southern exit. Alternatively, they can avoid this potential danger for now, choosing instead to continue following Glorm through the eastern exit. The story text read afterwards depends on whether the mice explored the disturbance in the sewers (narrative omitted).
- Special Search: Cricket Friends (Note: This helps the mice avoid treachery.)
- Special Surge: Frenzied Crawler.
- Special Rule: The cloaked form of the shadowy figure can be glimpsed escaping through this exit.
Cricket Friends (Trick card): Discard this trick to cancel all effects from a treachery card revealed by any mouse.
Sewer
Whole tile markers: 1, 3, 4, 5, 7. Tile markers: 2 and 6.
- Story Moment: When the mice explore the Sewer, a story moment triggers (narrative omitted).
- Special Setup: Place the pack rat peddler story achievement token on this space. Then place 3 slug tokens on the pack rat.
- Special Setup: Do not draw an encounter card for this tile. Important: Remember that each time players reach the end of the initiative track, if there are no minions on the board, a piece of cheese is added to the minion cheese wheel. So even though there is no encounter on this tile a surge could still happen if the mice take too long to complete their task.
- Special Rule: Removing Slugs: On its turn, a mouse that is on the pack rat's space may spend its action to remove 1 slug marker from the pack rat and set it aside. When all the slugs are removed, the party has helped the pack rat. The party receives the pack rat story achievement token. Advance the chapter end marker 1 space on the chapter track.
- Story Moment: After the mice free the pack rat, if there are no minions on the board, or when all minions on the board have been defeated, a story moment triggers. The party now befriends the pack rat. Retrieve the pack rat peddler search card (which should not have been placed in the search deck as per campaign special rules), use the card immediately, and then shuffle it into the search deck.
- Special Rule: Flip Space: The flip space on this tile cannot be used.
- Special Surge: Spider Lurker.
Dining Tunnels
Whole tile markers: 1 and 2.
- Story Moment: When the mice explore the Dining Tunnel, a story moment triggers (narrative omitted).
- Special Search: Dinner Fork (Note: This item can be used to launch grapes like a catapult.)
Dinner Fork (Party Item, No Requirements): Upon drawing this card, add the dinner fork token to the party stash. See page XX of the rulebook for details on how to use the dinner fork. (The page reference is printed as "XX" on the card and is reproduced as printed.)
Dining Hall
Whole tile markers: 1, 3, 4, 6. Tile markers: 2 and 5.
- Story Moment: When the mice explore the Dining Hall, a story moment triggers (narrative omitted).
- Special Setup: Instead of drawing an encounter card, place the mortar marker on the yellow bordered chair space. Place 1 mindless rat on the mortar. Place Glorm on the dining table, place 2 more mindless rats normally.
- Special Rule: This clockwork mortar is armed with tangle bombs.
- Special Rule: Glorm Escapes: The first time Glorm teleports, instead of choosing a minion entry space, place Glorm adjacent to the exit to the kitchens. At the end of the round, remove Glorm from the board and remove his initiative cards from the initiative track. Glorm escapes. Note: If Glorm receives enough wounds that he would be defeated, remove him as usual, but he is not defeated. Instead, Glorm disappears.
- Special Search: Plans Revealed (Note: This buys the mice some more time.)
- Special Surge: Sudden Shard Blast: Perform immediately: All knocked down mindless rats explode into a million dangerous shards. One at a time for each knocked down mindless rat, roll 2 action dice as a Melee attack. All figures on the same or adjacent space as an exploding mindless rat must defend against this attack. Then remove all knocked down mindless rats and move the hourglass marker on the chapter track as usual.
Plans Revealed (Fortune card): Play immediately. Move the hourglass marker back 1 space if possible. Place this card back in the search deck, then shuffle the search deck.
Kitchen Tunnels
Whole tile markers: 1.
- Special Search: Rest Spot.
Rest Spot (Fortune card): Play immediately. If there are no minions on the board, you may remove all wound markers from each mouse and place 1 cheese on the minion wheel.
Kitchen
Whole tile markers: 1, 3, 4, 5, 6. Tile marker: 2.
- Story Moment: When the mice explore the Kitchen, a story moment triggers (narrative omitted).
- Special Setup: Instead of drawing an encounter card, place Glorm on the kitchen counter. Place 3 skulker rats normally.
- Special Rule: The "Glorm Teleports" initiative card is not used for this encounter. Do not add it to the initiative track.
- Special Rule: Glorm Tricks: If the mice defeat Glorm, remove the Glorm figure and replace it with a skulker rat figure, adding the skulker rat's card to the initiative track if necessary.
- Special Surge: 1 Spider Lurker placed normally. This will apply to the whole tile.
- Story Moment: If the mice successfully defeat Glorm and clear the kitchen of all minions, a story moment triggers (narrative omitted). It concludes the chapter.
Chapter Two: Darkness Follies
Chapter Objectives
The mice are separated and need to find each other.
Victory Condition: Gather all four mice together on one tile. Once all the mice are together, immediately read the section titled "Victory is Close" at the end of this chapter and complete the last obstacle located there.
Defeat Condition: If the hourglass marker reaches the chapter end marker on the chapter track before the mice have found each other and cleared the board of minions, or if all mice are captured at the same time, the mice are defeated.
Chapter Setup
Chapter End: Place the chapter end marker on page 5 of the chapter track.
Party Setup: Select 4 mice to be in the party for this chapter. The party must include Neré. Neré cannot choose the Summon Slugs ability card yet as she must discover it later.
Encounter Deck Setup: The encounter deck is not used in this chapter.
Room Tile Setup: Place the following 4 tiles as shown below: Crystal Tunnels, The Forge, Dining Tunnels, and King's Tunnels. Place 1 mouse being used in this chapter and 1 slug marker on each of the start spaces marked on the tiles. Place 2 mindless rats and 4 caustic roaches on minion entry spaces across all 4 tiles. The players may choose where to place the minions, but each tile must have at least 1 minion.
Special Chapter Rules
Separated
The mice begin this chapter separated from each other. While the mice are separated they will use the same initiative track, but for all purposes, including surges, party items and abilities, the mice are considered separate parties. Party items are not shared between the parties, and abilities that affect more than one mouse only affect mice in the same party. Mice that share the same tile are considered to be in the same party.
Slug Buddies
Each mouse starts the chapter with a pet slug. All slug pets are represented on the initiative track by a single slug initiative card. When the slug card is next up on the initiative track, each slug may take a turn in any order, and is controlled by the mouse they start with, following all the rules for pets outlined on page iii of this Story Book.
Slugs (PET card): Cling: When a mouse or a minion begins a normal move on the same space as a slug, that slug can cling to the moving figure. Place that slug token on the space occupied by that figure at the end of its move. Only 1 slug at a time can cling to a moving figure.
Slugs and Captures
If a slug pet is captured, it is automatically rescued when its controlling mouse defeats all of the minions on a tile. If there are no friendly mice around, slugs may rescue their controlling mouse by defeating all of the minions on a tile. Return the captured mouse to the space its slug is on. If both the slug and its controlling mouse are captured in the tunnels or forge, remove all minions and markers from that tile and flip the tile they were captured on so that the upper level is now showing. The mice can only rescue them after exploring into this tile and searching the indicated space or by using the desperate rescue trick card (in which case the rescued mouse is placed on the space with the mouse that used the card). If both the slug and its controlling mouse are captured on any of the other tiles, the remaining minions are not removed from that tile and the captured mouse can only be rescued when the tile they were captured on is cleared of minions.
Special Surges
When a surge happens anywhere in this entire chapter, move the hourglass marker as usual, then place the minions indicated below based upon the hourglass's current page:
- Page 2: 4 Caustic Roaches.
- Page 3: 2 Mindless Rats, 2 Caustic Roaches.
- Page 4: 3 Skulkers.
- Page 5+: 1 Lurker.
The minions placed from a surge can be placed on any tile the players agree upon, but a minion cannot be placed on a tile that has no mice.
Connected Common Areas
When a mouse explores into a new tile, if that tile is connected to another explored tile by a matching exit, after placing any new minions, consider these tiles to be a continuous area. An explore action is not necessary to move from one continuous area to the next. Spaces along matching exits of two continuous tiles are considered adjacent. Ranged attacks are still limited to the same tile.
Explore Limitation
When using an explore action, a mouse cannot flip an adjacent tile to check for a matching exit if that tile currently has a mouse or slug on it.
Dining Tunnels
Tile markers: 1 (once) and 2 (three times).
- Special Rule: Shadows: Minions roll one additional die for defense while standing on a shadowed space.
- Special Search: Fungus Bits.
Fungus Bits (PARTY ITEM, No Requirements): Discard this item as a free action before making an attack. Roll a die. Add the number result to this mouse's battle during that attack.
The Forge
Whole tile markers: 1 and 2. Tile marker: 3.
- Story Moment: When the mouse that awakes in this room takes its first turn, a story moment triggers (narrative omitted).
- Special Rule: Dim Lighting: Minions on this tile cannot be attacked by ranged weapons unless adjacent to the attacker or in the same space as the attacker.
- Special Search: Tinkerer's Treasure.
Tinkerer's Treasure (ITEM, Requires TINKERER): Look through the search deck. Take any 1 weapon or armor card from the search deck. Place this card back in the search deck, then shuffle the search deck.
Crystal Tunnels
Whole tile markers: 2. Tile marker: 1.
- Special Setup: Place a mousetrap token on the mousetrap space when starting on this tile.
- Special Search: Rest Spot. (Rest Spot is the Fortune card described under Kitchen Tunnels in Chapter One.)
King's Tunnels
Whole tile markers: 1.
- Special Search: Whiskerfroth Elixir.
Whiskerfroth Elixir (ITEM, No Requirements): A mouse can use this elixir anytime during its turn to remove all effect markers, wound markers, and poison wound markers from its character card. Discard this card after using it.
Dining Hall
Whole tile markers: 1. Tile marker: 2.
- Special Setup: When a mouse explores into this room, instead of drawing an encounter card, place 1 mindless rat and 1 caustic roach normally.
- Special Search: A mouse that successfully searches the flip space may return any mouse that was captured in the Dining Tunnels to play. Place that mouse adjacent to, or on the same space as, the searching mouse.
King's Chamber
Whole tile markers: 1 and 2. Tile marker: 3.
- Story Moment: When a mouse first explores into this room, a story moment triggers (narrative omitted).
- Special Setup: When the mouse explores into this room, instead of drawing an encounter card, place 1 skulker rat normally.
- Special Search: A mouse that successfully searches the flip space may return any mouse that was captured in the King's Tunnels to play. Place that mouse adjacent to, or on the same space as, the searching mouse.
Alchemist Chamber
Whole tile markers: 1. Tile marker: 2.
- Special Setup: When a mouse explores into this room, instead of drawing an encounter card, place 1 mindless rat and 1 caustic roach normally.
- Special Search: A mouse that successfully searches the flip space may return any mouse that was captured in the Crystal Tunnels to play. Place that mouse adjacent to, or on the same space as, the searching mouse.
Queen's Chamber
Whole tile markers: 1. Tile marker: 2.
- Special Setup: When a mouse explores into this room, instead of drawing an encounter card, place 1 skulker rat normally.
- Special Search: A mouse that successfully searches the flip space may return any mouse that was captured in the Forge to play. Place that mouse adjacent to, or on the same space as, the searching mouse.
Victory is Close
If all of the mice are on the same tile, the story text is read aloud (narrative omitted). Then move the chapter end marker 1 page further on the chapter track.
Just One More Obstacle: Remove all but one of the slugs. Place a frenzied crawler on the board normally, and add the frenzied crawler initiative cards to the initiative track as usual. The mice must defeat this minion before declaring victory.
Story Achievement: Neré can now level up for free, and must choose the Summon Slug ability.
Chapter Three: Chock Full of Nuts
Chapter Objectives
Get Meeps to the alchemist chamber and set him loose.
Victory Condition: Clear the alchemist chamber of minions and set Meeps loose to deliver a message to Barksburg.
Defeat Condition: If the hourglass marker reaches the chapter end marker on the chapter track before the mice have set Meeps free in the alchemist chamber, or if all mice are captured at the same time, the mice are defeated.
Chapter Setup
Chapter End: Place the chapter end marker on page 5 of the chapter track.
Party Setup: Select 4 mice to be in the party for this chapter. The party must include Maginos.
Encounter Deck Setup: To build the encounter deck, shuffle and place all difficult encounter cards face down onto the encounter area on the story control board. Then shuffle and deal 1 standard encounter card face down on top of the encounter deck.
Search Deck Setup: Remove the pack rat peddler card from the search deck and set it aside. The mice can only encounter the pack rat in this chapter if they accomplish the optional side plot.
Room Tile Setup: Place the following 4 tiles as shown in the next column: Sewers, Tunnel Entrance, Sewer Drain Pipe, and the Alchemist Chamber. Place the Meeps token and the 4 mice being used this chapter on the start space marked on the Sewers tile. Place a lurker and 2 caustic roaches normally.
Special Chapter Rules
Skorch
Skorch is a twisted abomination that Glorm has created from the bodies of 100 different Cave Centipedes. He is relentless. With the exception of the Alchemist Chamber, if the mice face Skorch but have cleared a tile of all other minions, they may flee Skorch by using an explore action to move to another tile. Beware though as Skorch is the surge effect for most of this chapter. When the mice flee a tile with Skorch on it, remove Skorch from the board, remove all wounds from his initiative card and remove his initiative card from the initiative track.
Meeps
Meeps is treated as a pet in this chapter. Use all the rules for pets listed on page iii of this story book. Meeps is represented on the board by his token and has a battle 1 defense 1 and 1 life point. Meeps does not have an initiative card. Instead, use the Meeps ability card as his initiative card. Maginos cannot use the Meeps ability card in this chapter. On his turn, Meeps moves and attacks like any other pet and is controlled by the Maginos player.
Protect Meeps
Each time Meeps gets captured, advance the hourglass marker 1 space on the chapter track.
Sewer
Whole tile markers: 2, 3, 4. Tile marker: 1.
- Special Rule: Guardroom: The guardroom side of this tile is not accessible in this chapter. Ignore the flip space.
- Special Search: Fungus Bits. (Note: This item boosts a mouse's attack value for a single attack.)
- Special Rule: Leaving the Sewer: Before a mouse can use an explore action on an exit area to leave the Sewers tile, all other mice must be on the same side of the water as the exploring mouse.
- Special Surge: 3 caustic roaches.
Fungus Bits (PARTY ITEM, No Requirements): See the Dining Tunnels section of Chapter Two.
Tunnel Entrance
Whole tile markers: 1 and 4. Tile markers: 2 and 3.
- Story Moment: When the mice explore the Tunnel Entrance, a story moment triggers (narrative omitted).
- Special Rule: Courtyard: Due to the nut barricade, the courtyard is not accessible in this chapter. Ignore the flip space.
- Special Search: Acorn Helmet (Note: This item will add to a mouse's defense.)
- Special Surge: Skorch.
Acorn Helmet (ARMOR; Requires WARRIOR or HEALER): The wearer of this helmet cannot be stunned.
Sewer Drain Pipe
Whole tile markers: 1, 3, 4, 5, 7. Tile markers: 2 and 6 (6 appears at the tile's two exits).
- Story Moment: When the mice explore the Sewer Drain Pipe, a story moment triggers (narrative omitted).
- Optional Side Plot: The pack rat peddler is in danger of drowning. Place the pack rat story achievement token on the space indicated. If you pull him out of the water before he gets swept away by the current, add the pack rat peddler story achievement token to your party stash, and advance the chapter end marker 1 space on the chapter track. Immediately retrieve the pack rat peddler search card and follow its directions as if you just drew it from the search deck.
- Special Rule: Swept Away: At the end of each round after all initiative cards have taken a turn, if the pack rat peddler is still in the water, move him 1 water space in the direction of the current.
- Special Rule: Pack Rat Rescue: On its turn, an adjacent mouse that is not in the water can attempt to pull the pack rat out of the water as a free action by rolling an action die. Add an additional action die for each other mouse on the same space as this mouse. If you roll at least 1 hit, the pack rat peddler has been saved.
- Story Moment: If the mice save the pack rat peddler, a story moment triggers (narrative omitted).
- Special Rule: Leaving the Sewer Drain: Before a mouse can use an explore action on an exit area to leave the Sewer Drain tile, all other mice must be on the same side of the water as the exploring mouse.
- Special Surge: Skorch.
Pipes
Whole tile markers: 2 and 3. Tile marker: 1.
- Special Setup: Place the clockwork mortar token on this space. In addition to any minions encountered on this tile, place 1 mindless rat on the clockwork mortar.
- Special Rule: The clockwork mortar on this tile is armed with fire bombs.
- Special Surge: Skorch.
Crystal Tunnels
Whole tile markers: 1 and 2.
- Special Search: Rest Spot (Note: This card will heal the mice.)
- Special Surge: Skorch.
Alchemist Chamber
Whole tile markers: 1, 2, 3, and 5. Tile marker: 4.
- Story Moment: When the mice explore the Alchemist Chamber, a story moment triggers (narrative omitted).
- Special Setup: Instead of drawing an encounter card, when the mice explore into the alchemist chamber place Skorch on the farthest minion entry space and place 3 skulker rats normally.
- Special Rule: Skorch: The mice cannot flee from Skorch in the Alchemist Chamber.
- Special Rule: Releasing Meeps: A mouse that is on the alchemist's table may use its action to search for a crack in the window big enough for Meeps to squeeze through. If Meeps ends its turn on the table, after the crack has been found, it can escape through the crack and deliver a message to Barksburg. When this happens, a story moment triggers (narrative omitted).
- Special Surge: If a surge happens in the Alchemist Chamber, move the hourglass marker as usual, but do not add any new minions.
Rest Spot (Fortune card): See Chapter One, Kitchen Tunnels.
Chapter Four: The Silencing
Chapter Objectives
Battle your way to the source of the music and destroy it.
Victory Condition: The mice win immediately upon destroying the music box.
Defeat Condition: If the hourglass marker reaches the chapter end marker on the chapter track before the mice have destroyed Glorm's music box, the mice lose this chapter.
Chapter Setup
Chapter End: Place the chapter end marker on page 6 of the chapter track.
Party Setup: Select 4 mice to be in the party for this chapter. The party must include Nez. If you are playing this chapter as part of a campaign, do not include Neré as she is staying behind to craft a potion.
Encounter Deck Setup: To build the encounter deck, shuffle and place all difficult encounter cards face down onto the encounter area on the story control board. Then shuffle and deal 1 standard encounter card face down on top of the encounter deck.
Room Tile Setup: Place the following 3 tiles as shown below: Alchemist Chamber, Kitchen Tunnels, and Queen's Chamber. Place the 4 mice being used in this chapter on the start space marked below (the white mouse head icon on the Alchemist Chamber tile). Place 3 skulker rats and 3 caustic roaches normally.
Special Chapter Rules
Grapes
The grape party item is not used in this chapter. Remove the grape card from the search deck before starting this chapter.
Grape (PARTY ITEM, No Requirements): Upon drawing this card, add the grape token to the party stash. See page XX of the rulebook for details on how to use the grape. (The page reference is printed as "XX" on the card and is reproduced as printed.)
Alchemist Chamber
Whole tile markers: 1.
- Special Surge: Frenzied Crawler.
Crystal Tunnels and Kitchen Tunnels
Whole tile markers: 1, 2, 3, 4, 5. These two tiles are linked into one continuous area (see Special Rule 3 below).
- Story Moment: When the mice explore the Crystal Tunnels, a story moment triggers (narrative omitted).
- Special Setup: The Crystal Tunnels and Kitchen Tunnels are linked into one continuous area. After revealing the Crystal Tunnels, and placing the mice, do not reveal an encounter card as usual. Place 5 caustic roaches and 1 spider lurker on the indicated spaces. Also place 1 grape token whole side up on each of the two minion entry spaces indicated. The start spaces are shown in the setup diagram on the printed page: spider lurker start space, caustic roach start space, grape trap start space, and grape trap movement route.
- Special Rule: The Crystal Tunnels and Kitchen Tunnels are linked into one continuous area. Mice do not need to use an explore action to move from the crystal tunnels into the kitchen tunnels. If the mice move from the crystal tunnels into the kitchen tunnels, it is considered already explored. Spaces on either side of the joined exits are considered adjacent. Minions can also move from one tile to the next following all the normal rules for minion movement. The minions on the kitchen tunnels will not move or attack until there are 1 or more mice or a pet on the kitchen tunnels.
- Special Rule: Grape Trap: The minions on these tiles have invented a trap to frustrate the mice. They have found large grapes to roll through the tunnels hoping to squish the mice. When rolling the action die to determine a mouse's movement, if a 1 is rolled, before moving that mouse, you must move both of the grapes. The grapes will each move toward the opposite end of the 2 tiles where the other grape started. Use the stem of the grape to remember which way it is rolling. Roll 2 action dice for each grape to determine how many spaces it moves. When moving a grape, use the shortest route possible to get to the other end, moving to the right if there is more than 1 space to choose from (note the grape trap movement route indicated in the Special Setup diagram in the previous column). At the end of each grape's movement, any figures that grape passed through, or ended its movement on, receive a blunt melee attack. Roll 2 dice once for all affected figures (ignoring cheese). Each figure defends separately. Figures cannot move into a space with a grape. Grapes do not affect other grapes. These grapes do not attract roaches and are not considered a party item. When a rolling grape reaches the other end of the 2 tiles, turn that grape around and continue moving it back toward the opposite end again.
Kitchen
Whole tile markers: 1, 3, 4, 6, 7. Tile markers: 2 and 5.
- Story Moment: When the mice explore the Kitchen, a story moment triggers (narrative omitted).
- Special Setup: Instead of revealing an encounter card, place 3 mindless rat warriors on the kitchen counter, but turn the figures on their sides in the knocked down position. These mindless rat warriors start this encounter knocked down. Also place 3 more mindless rats on the other minion entry spaces and with their front facing away from the flip space. Do not place the mice on the tile. Each individual mouse is placed on the flip spot at the beginning of its turn.
- Special Rule: Sentries: The three standing mindless rats are sentries. They are looking out for intruders, and start the encounter unaware of the mice. If they become alarmed, they could activate the other mindless rats. At the beginning of the mindless rats turn, if any of the sentries are standing, flip a cheese token for each standing sentry. Turn the sentry to face the direction the cheese is pointing. When moving the sentries, they must move in the direction they are facing, using their full movement if possible. If they move into a space with a mouse or adjacent to a mouse, the alarm is sounded, stand all mindless rats up, they all revert to their normal behavior. If any of these 3 sentries starts its turn knocked down, roll for standing that mindless rat sentry up as usual. If the knocked down sentry is removed, the alarm has not been sounded. If the sentry stands up, it sounds the alarm. Stand up all mindless rats. They all revert to their normal behavior.
- Special Rule: Reinforcements: The other three mindless rats that begin this encounter knocked down are reinforcements. These minions will not move or attack and cannot be attacked unless the alarm has been sounded. In which case they will stand up and revert back to their normal behavior.
- Special Rule: Hiding Spot: A mouse that is on the bucket space is safe from discovery unless a sentry moves directly onto the bucket space.
- Special Rule: Leaving the Kitchen: If the alarm is not sounded, the mice can use an explore action, once all three sentries are defeated.
Queen's Chamber
Whole tile markers: 1 and 5. Tile markers: 2, 3, and 4.
- Story Moment: When the mice explore the Queen's Chamber, a story moment triggers (narrative omitted).
- Special Setup: Instead of revealing an encounter card, place the clockwork mortar on the clock special area. Place a mindless rat on the mortar. Also place 5 caustic roaches on the vanity special area.
- Special Rule: Clockwork Mortar: This clockwork mortar is armed with a variety of bombs. To find out which kind are being used during this encounter, roll a die. If you roll a 1, choke bombs are used. If you roll a 2, tangle bombs are used. If you roll a 3, fire bombs are used.
- Special Rule: Destroying the Music Box: The mice must destroy the music box. On its turn a mouse on the vanity can attack the music box. Roll an attack as if you were attacking a minion. The music box has 10 life and cannot roll any dice to defend. Attacking the music box is noisy. Each time the music box is successfully attacked, place another caustic roach on any of the minion entry spaces. Once the music box is destroyed, remove all minions and choose a player to read the following story moment (narrative omitted).
- Special Surge: Frenzied Crawler.
Chapter Five: Chemical Attraction
Chapter Objectives
The mice need to get back to the Alchemist Chamber where Neré is attempting to make a Heartwarm potion.
Victory Condition: The 4 mice must return to the Alchemist Chamber and clear it of minions. The other 2 mice must defend themselves from patrolling minions and create a Heartwarm potion.
Defeat Condition: If the hourglass marker reaches the chapter end marker on the chapter track before the mice have created the Heartwarm potion and reunited with each other, or if all mice in either of the 2 parties are captured at the same time, the mice are defeated.
Chapter Setup
Chapter End: Place the chapter end marker on page 6 of the chapter track.
Party Setup: 6 mice will be used in this chapter. Select 4 mice to be in the adventuring party. Neré and 1 other mouse are also selected to be in a separate party that stays in the alchemist chamber attempting to create a Heartwarm potion.
Encounter Deck Setup: To build the encounter deck, shuffle and place all standard encounter cards face down onto the encounter area on the story control board. The difficult encounter cards are not used in this chapter.
Room Tile Setup: Place the following 4 tiles as shown below: Alchemist Chamber, Kitchen, Dining Hall, Queen's Chamber. Place Neré plus 1 other mouse on the alchemist's table special area space in the Alchemist Chamber. Place the other 4 mice on the vanity special area space in the Queen's Chamber. Place 4 skulker rat warriors on the Queen's Chamber normally (see 'Placing Minions on the Board' on page 14 of the rulebook). Also place 1 more skulker rat on the Alchemist Chamber tile choosing the minion entry space furthest from the mice.
Prepare Secret Formula: Choose a player whose mouse is not Neré. The chosen player must secretly determine the order of the ingredients used to craft the Heartwarm potion. Using 1 Lotus Nectar Token, 1 Tail of Newt Token, and 1 Wisp of the Willow Token, arrange the three ingredients left to right in any order using the Heartwarm potion legendary item card to shield the tokens from the view of the other players. Then cover the tokens with the Heartwarm potion card to keep it secret.
Important Note: if you are playing this chapter solo, you can skip this step. A secret formula is provided at the end of this chapter.
Special Chapter Rules
Separated
The mice begin this chapter separated from each other in 2 separate parties. While the mice are separated they will use the same initiative track, but for all purposes, including surges, party items and abilities, the mice are considered 2 separate parties. Surges happen only on the tile where they occurred. Party items are not shared between the 2 parties. Abilities that affect more than one mouse only affect mice in the same party.
Neré and Company: Neré and 1 other chosen mouse start this chapter separated from the rest of the party. Until the 2 parties are on the same tile the following rule applies: When placing minions from an encounter card or special setup, also place new minions on the alchemist chamber in the minion entry space farthest from the alchemist table. To determine what kind of minion to place, roll a die and compare the number result to this chart:
- 1 = 2 caustic roaches
- 2 = 1 mindless rat
- 3 = 1 skulker rat
The Forge and Crystal Tunnels
The forge and the crystal tunnels cannot be accessed in this chapter.
Alchemist Chamber
Whole tile markers: 3. Tile markers: 1 (five times) and 2.
-
Special Search: Key Ingredients: Neré needs three mystical ingredients to craft the Heartwarm potion:
- Lotus Nectar
- Tail of Newt
- Wisp of the Willow
Lotus Nectar can be found upon a successful search of the alchemist table special area space. Tail of Newt can be found upon a successful search of the mystic circle. Wisp of the Willow can be found upon a successful search of any book space.
Note: The mice may break the normal limit of successful searches per tile in order to find these ingredients.
-
Special Rule: Crafting the Heartwarm Potion: While on the alchemist table special area space, if the mice have found the three key ingredients, Neré can use her action to attempt to craft the Heartwarm potion. To do this the Neré places 1 Lotus Nectar Token, 1 Tail of Newt Token, and 1 Wisp of the Willow Token on the alchemist table left to right in any order. The player chosen to provide the hidden formula, secretly peeks under the prepared Heartwarm potion card. If the formula matches, Neré has successfully crafted the Heartwarm potion, and receives the Heartwarm potion legendary item search card. Advance the chapter end marker one page on the chapter track. If the formula does not match, Neré fails. Add 1 cheese to the minion wheel. Neré can try again on her next turn.
Important Note: If you are playing this chapter solo, we have provided 3 lists of formulas at the end of this chapter, enough for 3 solo adventures. When Neré arranges the ingredients, briefly consult the list of formulas at the end of this chapter. If her formula is on that list, Neré fails. Add 1 cheese to the minion wheel. Neré can try again on her next turn.
-
Special Surge: While the mice are separated, each time a surge happens in the Alchemist Chamber, add 1 mindless rat to the Alchemist Chamber in the minion entry space furthest from the alchemist table. After the mice are reunited, any surge that happens in the Alchemist Chamber will bring 1 frenzied crawler, placed normally.
Queen's Chamber
Whole tile markers: 2. Tile marker: 1.
- Special Search: Tinkerer's Treasure (Note: This item will allow a tinkerer to find an item of their choice.)
- Special Surge: Skulker Frenzy: Add 1 to the battle value of all skulker rats that are on the Queen's Chamber. This lasts until no more skulkers are in play.
Tinkerer's Treasure (ITEM, Requires TINKERER): Look through the search deck. Take any 1 weapon or armor card from the search deck. Place this card back in the search deck, then shuffle the search deck.
Dining Tunnels
Whole tile markers: 1.
- Special Search: Grape.
Grape (PARTY ITEM, No Requirements): Upon drawing this card, add the grape token to the party stash. See page XX of the rulebook for details on how to use the grape. (The page reference is printed as "XX" on the card and is reproduced as printed.)
Kitchen Tunnels
Whole tile markers: 1.
- Story Moment: When the mice explore the Kitchen Tunnels, a story moment triggers. Then reveal an encounter card as usual (narrative omitted).
Kitchen
Whole tile markers: 1, 4, 5. Tile markers: 2 and 3.
- Special Setup: When the mice explore the Kitchen, do not reveal an encounter card as usual. Instead place 6 caustic roaches normally. Place the mortar token on the kitchen counter special area space. Then place 1 mindless rat on the mortar token.
- Special Rule: Mortar Ammo: This mortar is armed with choke bombs.
- Special Rule: When moving caustic roaches, the caustic roach that is closest to the exit leading to the Alchemist Chamber, will move toward that exit instead of toward the mice. If a caustic roach ends its move on a space adjacent to this exit, remove that caustic roach and place it on the Alchemist Chamber adjacent to the matching exit.
- Special Surge: Spider Lurker.
- Story Moment: When the mice are all together in the Alchemist Chamber, and have accomplished both of the chapter objectives (clearing the Alchemist Chamber of minions and crafting the Heartwarm potion), a story moment triggers and concludes the chapter (narrative omitted).
Dining Hall
Whole tile markers: 1, 2, 4, 5. Tile marker: 3.
-
Story Moment/Special Setup: When the mice explore the Dining Hall, a story moment triggers (narrative omitted). The mice encounter Brodie. Place Brodie's paw on the dining table special area space. Use the new Necro-Brodie initiative cards included in this set.
-
Special Rule: Necro-Brodie: This encounter uses the two Necro-Brodie initiative cards. Here are the details for how to move and attack with each of these new initiative cards. Remember, any cheese rolled by Brodie is not added to the minion wheel.
Necrotic Swat: Choose the space with the closest mouse to Brodie. If more than 1 mouse is closest, choose the space that includes the mouse highest on the initiative track. Move Brodie to that space. Attack that mouse then flip a cheese token for that mouse and each mouse sharing that space or adjacent to that space. One at a time, move each mouse as far as possible in the direction the cheese is pointing, ignoring red and yellow lines.
Skeletal Gulp: Roll 2 dice and add the number results together to find out how far Brodie moves. Move and attack with Brodie following the rules for moving and attacking with large minions. A mouse that receives 1 or more wounds from this attack but is not captured, becomes imprisoned inside Necro-Brodie. Place that mouse on this initiative card. On its turn, that mouse cannot move, but can attack this Brodie initiative card. If the attack is successful, instead of wounding Brodie, place that mouse back on the tile adjacent to Brodie's paw. If that card is defeated by a mouse that is not imprisoned at the time, place all imprisoned mice, if any, back on the tile adjacent to Brodie's paw (then remove the paw if this was the attack that defeated Brodie).
-
Special Search: Fungus Bits.
-
Special Search: Disguises (Note: found on any floor space).
-
Special Surge: Brodie Coughs Up Dust: The mice no longer have any line of sight for ranged attacks and must now attack Necro-Brodie from the same or adjacent spaces.
Necro-Brodie card texts (initiative cards): Necrotic Swat and Skeletal Gulp. Each card reads "See page 30 of the Heart of Glorm Story Book" for the full instructions above.
Secret Formulas for Solo Play
Each solo play, chose one of the following lists. When checking to see if Neré successfully crafted a Heartwarm potion, compare your attempt with the chosen list. If your formula is on that list, the attempt is a failure. If the attempt is not on the list, then Neré has discovered the correct formula.
Each formula below is listed left to right as the three ingredients on the alchemist table (Lotus Nectar, Tail of Newt, Wisp of the Willow).
Solo List 1
- Tail of Newt, Lotus Nectar, Wisp of the Willow
- Lotus Nectar, Wisp of the Willow, Tail of Newt
- Wisp of the Willow, Tail of Newt, Lotus Nectar
- Lotus Nectar, Tail of Newt, Wisp of the Willow
- Wisp of the Willow, Lotus Nectar, Tail of Newt
Solo List 2
- Lotus Nectar, Wisp of the Willow, Tail of Newt
- Tail of Newt, Lotus Nectar, Wisp of the Willow
- Lotus Nectar, Tail of Newt, Wisp of the Willow
- Wisp of the Willow, Tail of Newt, Lotus Nectar
- Tail of Newt, Wisp of the Willow, Lotus Nectar
Solo List 3
- Tail of Newt, Lotus Nectar, Wisp of the Willow
- Lotus Nectar, Wisp of the Willow, Tail of Newt
- Tail of Newt, Wisp of the Willow, Lotus Nectar
- Lotus Nectar, Tail of Newt, Wisp of the Willow
- Wisp of the Willow, Lotus Nectar, Tail of Newt
Chapter Six: Glorm's Glow
Chapter Objectives
The mice need to find a way to stop Glorm.
Victory Condition: The mice must defeat Glorm with the Arrow of Truth infused with the Heartwarm potion while Glorm is sharing a space with a pet slug. The Arrow of Truth can be purchased from the pack rat peddler who can be found somewhere in the castle.
Defeat Condition: If the hourglass marker reaches the chapter end marker on the chapter track before the mice have defeated Glorm, or if all the mice are captured at the same time, the mice lose this chapter.
Chapter Setup
Chapter End: Place the chapter end marker on page 6 of the chapter track.
Party Setup: 5 mice will be used in this chapter. The party must include Neré. If you are not playing this chapter as part of a campaign, Neré must choose the Summon Slug ability card as her starting ability. The party must also include at least 1 mouse that is armed with a bow. Choose a mouse that is armed with a bow, that mouse receives the Heartwarm potion legendary item card to be used against Glorm.
Encounter Deck Setup: To build the encounter deck, shuffle and place all difficult encounter cards face down onto the encounter area on the story control board. The standard encounter cards are not used in this chapter.
Quest Deck Setup: This chapter uses a quest deck. To create a quest deck, collect 14 search cards of the players' choosing, add the pack rat peddler search card to those cards. Shuffle those search cards and place them in a face-down stack near the party stash.
Room Tile Setup: Place the following 4 tiles as shown: Crystal Tunnels, Kitchen Tunnels, Dining Tunnels, and King's Tunnels. Place 4 of the mice on the flip space in the Crystal Tunnels. Place the other mouse adjacent. Place 3 skulker rats and 2 elite rat warriors normally.
Special Chapter Rules
Special Search: Quest Deck
Until the pack rat peddler is found, a mouse that makes a successful search action on a tile may draw a card from the quest deck instead of the search deck. Remember that while a mouse may search as many times as it wants, it can only successfully search a tile side once.
Exploring With 5
When the mice explore into a tile, place 4 mice as usual, then place the 5th mouse on any adjacent space.
Pack Rat Peddler
The mice need to find the pack rat peddler. He has the arrow of truth, a powerful legendary accessory. When drawing the cards for the pack rat's wares, add the arrow of truth card to the cards available to purchase. The arrow of truth costs 6 cheese. The mice may combine cheese to purchase this arrow.
If the mice do not have enough cheese to purchase the arrow, they can sell their own cards to the peddler for 2 cheese apiece. Discard any items sold in this manner.
Achievement: When the mice acquire the arrow of truth, advance the chapter end marker 1 page on the chapter track. Choose a player to read the following aloud (narrative omitted).
Arrow of Truth (ACCESSORY; +1; Requires MUST HAVE BOW EQUIPPED): Discard this arrow before making an attack. Do not roll action dice for that attack. Instead, the target minion receives a number of hits equal to the amount of dice you would have rolled and must defend normally.
Crystal Tunnels
Whole tile markers: 1 and 2.
- Story Moment: Choose a player to read the following aloud (narrative omitted).
- Special Surge: Skulker Frenzy: Add 1 to the battle value of all skulker rats in play. This lasts until no more skulker rats are in play.
Kitchen Tunnels
Whole tile markers: 1, 2, and 3.
- Special Setup: Place 2 mindless rat warriors and 3 caustic roaches normally.
- Story Moment: When the mice clear the Kitchen Tunnels of all minions, choose a player to read the following aloud (narrative omitted).
- Special Surge: Cave Centipede.
Dining Hall Tunnels
Whole tile markers: 1.
- Special Search: Grape (Note: This item can be used for roach bait or combined with the Dinner Fork to make a catapult.)
Grape (PARTY ITEM, No Requirements): Upon drawing this card, add the grape token to the party stash. See page XX of the rulebook for details on how to use the grape. (The page reference is printed as "XX" on the card and is reproduced as printed.)
Kitchen
Whole tile markers: 1 and 2.
- Special Setup: When the mice explore the kitchen, do not reveal an encounter card as usual. Instead place 6 greedy roaches normally.
- Special Surge: Spider Lurker.
Dining Hall
Whole tile markers: 1. Tile marker: 1.
- Special Search: Pack Rat Peddler (Note: The pack rat peddler card might still be in the quest deck if the mice have not located him yet in this chapter. If so, retrieve him from that deck if you successfully make this special search.)
Pack Rat Peddler: See the Pack Rat Peddler section of this chapter.
King's Tunnels
Whole tile markers: 1 and 2.
- Story Moment: When the mice explore the King's Tunnels, choose a player to read the following aloud (narrative omitted). Then reveal an encounter card as usual.
- Special Rule: Leaving the King's Tunnels: Before a mouse can use an explore action on an exit area to leave the King's Tunnels tile, all other mice must be on the same side of the water as the exploring mouse.
King's Chamber
Whole tile markers: 1, 2, 3, 4, and 5.
-
Story Moment: When the mice explore the King's Chamber, choose a player to read the following aloud (narrative omitted).
-
Special Setup: When entering the King's Chamber, do not reveal an encounter card as usual. Instead, place Glorm on the king's bed special area space. Also place 3 skulker rats normally.
-
Special Rule: Defeating Glorm: Glorm cannot be defeated normally. In order to defeat Glorm the mice must meet all of the following conditions:
- A pet slug must be on the same space as Glorm.
- A mouse must deliver a successful attack against Glorm that would normally defeat Glorm's last remaining initiative card.
- The attacking mouse must be equipped with the arrow of truth and the Heartwarm potion.
If the mice meet all of these conditions they are victorious. Read the story moment below.
-
Story Moment: When the mice defeat Glorm, choose a player to read the following aloud (narrative omitted).
-
Special Surge: Skorch.
Individual Achievements
Fireproof: The first mouse in a chapter to be captured with an on fire token on its character card is now considered fireproof. Effect: Place no more fire markers on that mouse for the rest of the chapter.
Marksman: The first mouse to roll 3 or more bows in one attack with a ranged weapon earns the marksman achievement. Place the marksman token on that mouse's character card. Effect: When attacking with a ranged weapon, the marksman may discard the marksman token to automatically roll bows on all dice used in that attack.
Expansion Contents
Contents of this expansion set: 1 six chapter storybook, 2 figures, 13 search cards, 9 ability cards, 13 initiative cards, 1 Neré character card, 9 encounter cards, 6 cheese tokens, 1 clockwork mortar token, 4 pet slug tokens, 4 on fire markers, 6 potion ingredient markers, 1 pack rat peddler token, 4 skulker rat tokens, 1 Fireproof achievement token, and 1 Marksman achievement token.