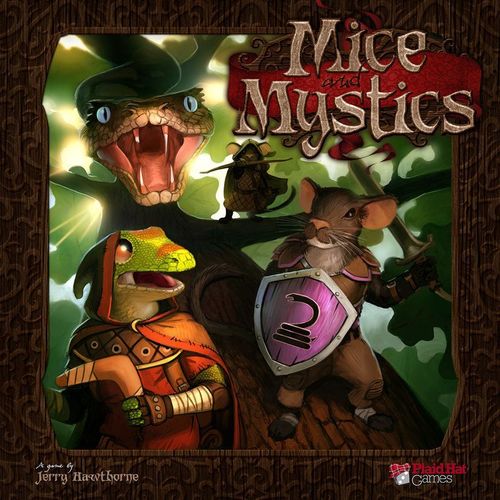
Mice and Mystics: Downwood Tales
Mice and Mystics: Downwood Tales Rulebook
Table of Contents
Table of Contents
- Room Tile Rules Types
- Campaign Special Rules
- New Heroes
- New Tile Rules
- New Cards
- Party Items
- New Minions and Bosses
- Olga the Owl
- Mouse Head Icons
- Prologue
- Chapter One: High Road to Headfall
- Chapter Two-A: Up the Creek
- Chapter Two-B: The Taking of the Shrews
- Chapter Three: The Seers of Downwood
- Chapter Four: We Be Scamps
- Chapter Five: The Shores of Tricklemoore
- Chapter Six: All the King's Mice
- Chapter Seven: The Frog March
- Chapter Eight: Rite of Passage
- Chapter Eight Objectives
- Chapter Eight Setup
- Special Chapter Rules
- Tree and Branch Overlay (Chapter Eight)
- Spiritsburrow (Chapter Eight)
- The Hive (Chapter Eight)
- Tumbledown (Chapter Eight)
- Tricklemoore (Chapter Eight)
- Trickleunder (Chapter Eight)
- Brokenwood (Chapter Eight)
- Deeper Dark (Chapter Eight)
- Chapter Nine: No Rest for the Wretched
- Chapter Ten: Homecoming
- Epilogue
- Individual Achievements
Room Tile Rules Types
Special circumstances will abound as you play through each chapter. This gives us the opportunity to inject the game with narrative flavor. This story book breaks down these special circumstances into a series of rules types as follows:
Story Moment: Story moments will trigger when something specific happens in the game, like exploring a certain tile. Story moments always come with a section of text to be read aloud to the players. Some story moments even give the players a reward for triggering them.
Optional Side Plot: Sometimes players will be presented with an opportunity to complete a task that is not necessary to complete the chapter. These side plots often come with a reward for completing them.
Special Search: Some tiles or spaces will allow players to find a specific item in the search deck. After making a special search, shuffle the search deck. Once a special search has been successfully performed that specific special search cannot be performed again during that game session.
Nightfall: Some encounter cards indicate that night has fallen. If a tile has any special nightfall rules, they will be listed here.
Special Surge: A special surge always takes place instead of the surge listed on the current encounter card.
Special Setup: When exploring (moving into) a room tile that has a special setup, follow the special setup instructions instead of drawing an encounter card.
Special Rule: Some tiles will have rules that apply when the mice are interacting with that tile.
Campaign Special Rules
New Statuses
On Fire
Downwood Tales introduces a new negative effect called on fire. When a mouse is on fire, place the on fire marker on that mouse's initiative card. A mouse can only have 1 on fire marker on it at a time. A mouse that is on fire is in danger of being harmed unless it can put out the fire by ending its turn on water, or using a recover action. Roll one action die plus one additional die for each other friendly mouse in the same space. If you roll at least 1 starburst, the mouse successfully puts out the fire and the on fire marker is removed.
If an on fire marker is on a mouse's card at the end of its turn, place 1 wound marker on its card. If it is raining at the time, a mouse with an on fire status marker does not have to roll a die when using a recovery action to remove the on fire token. Important note: Tilda may use her 'Draw Empathic Power' when a fellow mouse receives an on fire token.
Cursed
Downwood Tales also introduces another negative effect called cursed. When a mouse becomes cursed, place the cursed status marker on that mouse's initiative card. When a cursed mouse rolls to attack or defend, all cheese rolled by that mouse is placed on the minion cheese wheel instead of into that mouse's stash! When a cursed mouse performs a recover action while standing on a space where a four-leaf clover or toadstool is depicted, remove the cursed marker from the mouse's initiative card. Important note: Tilda may use her 'Draw Empathic Power' when a fellow mouse receives a cursed token.
The Fifth Wheel
In some chapters your party may contain more than four mice. When successfully exploring a new tile, place any extra figure(s) on any space adjacent to the other mice on the new tile. A party of more than four mice can only exit a tree using a leaf when all extra figure(s) are adjacent to the leaf.
Creature, Figure and Token
Some rules and game effects use the terms figures, tokens and creatures. A figure is a character with a plastic miniature. A token can be a lot of things, including creatures that are represented on the game board with a cardboard chit. Creature is a term used to describe cardboard chit creatures and plastic figure characters collectively. Creatures represented by tokens do not count toward space limits.
Pets
Pets move and attack using all of the rules for minions, except that the mouse player who summoned the pet controls its movement and attack. Minions do not have to stop when entering a space occupied by a pet token. A pet can be attacked if no mouse is available to attack. Any cheese rolled by a pet is ignored. Whenever exploring a new tile, all pets leave play, remove them from the board. When a mouse performs a search action while sharing a space with one or more pets, roll one additional action die.
Allies
Allies move and attack using all the rules for minions, except that a mouse player, as directed in the special chapter rules, controls their movement and attack. Allies are represented by figures and use their battle, defense and life values as stated on their initiative cards. Minions treat allies as mice for the purpose of movement and attack. Cheese rolled by allies is ignored. Allies are not affected by abilities or conditions referring to mice. However, allies count as mice when determining the number of action dice when moving out of water or putting out fire. Whenever exploring to a new tile, all allies leave play, remove them from the board. If an ally is defeated, the hourglass is not moved.
Critter Citizens
Downwood Tales contains chapters which use friendly characters not belonging to the party. These peaceful, meek forest critters are represented by Critter Citizen tokens. Use these tokens as directed by the special chapter rules.
New Heroes
Downwood Tales introduces new playable characters. Players may now choose these new heroes even when playing chapters from another Mice and Mystics story book. Two of the new characters are not mice. When these characters are in your party, they are considered honorary mice and are affected by all rules that affect the mice in your party.
Jakobe
- Lucky: Jakobe is immune to the cursed status effect.
- Detachable Tail: At the beginning of any chapter, if Jakobe is chosen as a member of the party, place Jakobe's Tail token on this card. Once per game, if Jakobe gets captured, remove Jakobe's Tail token instead of Jakobe. He is considered immediately rescued.
- Starting Equipment: Jakobe's Boomerang, Leaf Vest.
New Tile Rules
Outdoor Tiles
Tiles in Downwood Tales depict outdoor areas called the Downwood (marked by a green orientation arrow), underground environments called the Underwood (marked by a blue orientation arrow) and trees called the Upwood (represented by tree and tree branch overlays). These new tiles expand on the concept of non-rigid movement grids. Individual spaces on a tile are determined by noticeable differences in color and texture.
The printed examples show spaces on outdoor area tiles. On the Headfall tile, the entire head is considered a special area space.
Trees and Tree Branches
- When a room tile setup or special setup includes a tree climb symbol, place the tree climb marker on the corresponding space.
- When a mouse performs an explore action on a tree climb token, remove all figures and tokens from the board and place the tree and branch overlay onto the board, positioning the overlay so that the tree climb symbol printed on it matches up with the corner the tree climb token had occupied.
- Then place the mice on the tree climb space on the tree overlay and reveal an encounter card, or set the tile up as directed in the special set up rules for the chapter you are playing. Mice can use an explore action on this tree climb symbol to return to the tile below.
The combination of tree and branch overlay is considered a single tile and follows all rules applying to normal tiles. While the mice are on the overlay, non-flying creatures cannot voluntarily enter spaces that are not part of the overlay. Flying creatures can cross empty spaces between branches, treating each empty area as a single space for the purpose of movement, but cannot end their move on an empty space. If a non-flying creature moves off an overlay space by an ability or effect, it is immediately defeated or captured. A flying creature is placed onto the closest space it could end its move on instead.
Leaf Tokens
Leaf Tokens on Overlays
Leaf tokens attach to the overlay as directed in the special setup rules, and while attached, are considered to be part of the tree or branch overlay. Leaves are considered spaces adjacent to the overlay space closest to the leaf's stem. A leaf can only accommodate four figures. Mice cannot perform a search action while on a leaf.
Using a Leaf Token to Exit a Tree or Branch
When all mice are on the same leaf, a mouse can use its action to chop the leaf stem. If minions are present on either overlay, the mouse must first roll an action die. If no starburst is rolled, the leaf remains attached. If a starburst is rolled, remove the tree and branch overlays, including any figures and tokens on them, but leave the leaf and mice in place. Make sure the leaf is centered on its space. Choose a minion entry space and turn the leaf so it is pointing toward that space. Roll an action die and move the leaf, with the mice still on it, a number of spaces equal to the number result rolled toward the chosen minion entry space. Use the shortest route possible and ignore any red or yellow lines or any other intervening terrain. The space the leaf stops on is where it lands.
If the leaf would land on a chasm space, pick a land space on either side of the chasm for the leaf to land. If the leaf lands in a water space with a current, immediately move it one space downstream (two spaces when raining). Treat the tile the leaf landed on as any other tile the mice successfully explored.
Leaf Tokens on Land or in Water
When a leaf is on the ground and not in a tree, figures treat the leaf like a normal space, freely moving onto or off of it. When moving from a water space onto a leaf, any rules for climbing out of water apply.
When a leaf is on a water space, the mice can use it similar to a boat. With or without mice on it, a leaf on a water space moves one space in the direction of the current at the end of each round (two spaces when raining).
Board Features
Walls, Stalagmites and Chasms
Stalagmites follow the rules for solid rock and walls (see Mice and Mystics rulebook). In addition, some tiles in Downwood Tales depict buildings. The walls of buildings have black and red lines to show they block movement and line of sight. Some tiles depict chasms that are also black. Chasms do not block line of sight and can only be crossed by flying figures or by using special abilities and items.
Graphical Features
Graphical features, such as flowers, patches of grass and gnarled tree roots, are considered individual spaces if they are equal to or larger than a typical space. Smaller features are either part of a space or in-between spaces. Graphical features in-between spaces can only be moved through if a mouse figure's base can bridge the gap between spaces.
- This flower is part of the space it is centered on.
- Features between spaces, like this plant, are not wide enough to block movement.
New Terrain Feature: Lava
Non-flying creatures cannot move onto or through lava spaces voluntarily. Any creature moving onto lava as a result of an ability or effect is immediately defeated or captured. Flying creatures are not affected by lava but must end their move on a non-lava space.
New Terrain Feature: Shallow Water
Two tiles (Echo Cavern and Trickleunder) contain shallow water. Shallow water spaces disregard any special rules for movement in water but are considered water for the purpose of removing on fire status markers.
New Terrain Features: Hidden Paths and Flip Spaces
Some tiles contain yellow lines or flip spaces with a yellow gecko symbol. These represent secret paths, known only to creatures living in the wilds. If no wild figure is in the party, yellow lines with gecko symbols are considered red lines and hidden flip spaces cannot be explored.
Tiles with 2 Flip Spaces
One tile (Brokenwood) has two flip spaces. If the mice meet the requirements, they can use either flip space when performing an explore action to Deeper Dark. When performing an explore action on the flip space on Deeper Dark, the players can choose which flip location on Brokenwood to appear on, as long as all mice appear on the same space.
Pesky Bees
Some encounter cards include the phrase 'Pesky Bees' near the top of the card. When these cards are revealed, if the mice are on a tile with a green orientation arrow, place a bee marker on each flower and clover on the tile. When a mouse or minion figure ends its move within 2 spaces of an unoccupied bee marker, place that bee marker under that figure. That bee is now following that figure. Reduce a figure's defense and attack value by 1 for each bee that is following it. When a figure with a following bee moves, all bee markers under that figure move with it. After resolving a melee attack on a figure with 1 or more following bees, move all bee markers from under that figure and place them under the attacking figure. Pesky bees cannot be placed under a Boss minion. Remove all bee markers when the mice leave this tile.
Nightfall
Some encounter cards include the word 'Nightfall' near the top of the card. When this encounter card is revealed, place the moon token onto the minion wheel under any cheese already on the wheel. Any cheese tokens added to the minion wheel while the moon token is in play are placed on the moon token. While the moon token is on the minion wheel, any special rules referring to nightfall are in effect. The moon token remains in place until a surge is triggered.
Rain
Some encounter cards include the word 'Rain' near the top of the card. While this card is in play, water with a current becomes strong current. Mice move 2 spaces downstream when ending their turn on water spaces with a strong current. A mouse with an on fire status marker does not have to roll a die when using a recover action to remove the on fire token while on an outdoor tile in the rain. Remember: encounter cards can sometimes remain in play even after the mice explore onto a new tile.
New Cards
New Search and Ability Cards
Downwood Tales includes 59 new search cards. Shuffle these into your search deck before playing a chapter or campaign. This expansion also includes new abilities your mice can learn. Add the new ability cards to your ability card deck.
Note: We included additional copies of certain popular ability cards to allow more than 1 mouse to choose them. We also included an updated version of the Set Trap ability card. Use this new version in place of the old version.
New Minions and Encounter Cards
Downwood Tales introduces new minions and new encounter cards. Players should shuffle the new encounter cards in with an equal number of encounter cards from the base game (in this way minions from both sets will show up in your adventures, creating greater diversity).
Replacement Initiative Cards and Ability Cards
The Send in Meeps ability card replaces the Meeps ability card from the base set. There are also new initiative cards for Maginos and Lily. These have replaced the melee symbol with ranged symbol to allow valuable ranged attacks when these characters are used as allies.
Note: The following cards require special considerations:
- Gnome Grow: If you are playing Downwood Tales as a campaign, remove the Gnome Grow ability card from the ability deck. It is not available until directed in either chapter two-A or chapter five.
- Magic Carrot: If you are playing Downwood Tales as a campaign, remove the Magic Carrot search card from the search deck. It is not available until chapter four.
Card Text
Gnome Grow (ability card, Class: ANY; printed top-right value 1)
Use this ability as a free action while on a normal space on a tile with a green or blue orientation arrow. When on a tile with a green arrow, place a clover token on this mouse's space. On a tile with a blue arrow, place a toadstool instead. Any mouse can use a recover action on a toadstool or clover token to remove a curse status effect from its card.
Magic Carrot (party item; No Requirements)
Add the magic carrot token to the party stash. The mice can discard this token during daylight, when exploring from one Downwood tile to another. The Downwood rabbits arrive to speed their journey. Remove 3 cheese from the minion wheel.
Teaspoon Paddle (party item; No Requirements)
The Teaspoon Paddle can help the mice to navigate the watery tributaries in the Downwood. A mouse on a leaf in water can use its action to steer the leaf (and any mice thereon) onto any unoccupied adjacent water space, even against the current. The card adds: this item can be used to pilot a leaf boat. See page X of the Downwood Tales story book for rules on using teaspoon paddle.
Turtle Whistle (party item; No Requirements)
The Turtle Whistle can be used to call the local turtles when trying to cross the Downwood's fast moving stream, the Trickle. A mouse adjacent to a water space can use its action to blow the Turtle Whistle. Shuffle the 6 turtle tokens and place them on the table, shell side up. Randomly place 3 of these tokens, shell side up, in a straight line on unoccupied water spaces. The card adds: use this whistle to call the turtles to help cross water. See page X of the Downwood Tales story book for rules on using the turtle whistle.
Party Items
Teaspoon Paddle, Turtle Whistle and Magic Carrot
The Teaspoon Paddle, Turtle Whistle and Magic Carrot are described under Card Text above. Their rules are as printed on the cards.
Bullfroglodytes
The froglodytes terrorize the Downwood. Bullfroglodytes are the biggest of these forest bullies. Two bullfroglodyte miniatures are included in this expansion, and on occasion, the mice may face both at the same time. Since bullfroglodytes have 2 life points, if both are in play, track any wounds they receive by placing the wound markers on or near the base of the wounded bullfroglodyte.
Horned Bow
Requires: Tinkerer or Archer or Warden
When attacking a figure that is on the same space as this mouse, this bow is considered a sharp melee weapon.
New Minions and Bosses
Flying Creatures
Creatures with a butterfly symbol on their initiative card are flying creatures. Flying creatures are unaffected by terrain such as water and lava spaces. Flying creatures can move across empty areas between tree branches. They treat each empty area as a single space and can move through yellow and red lines and across chasms. Flying creatures cannot end their move on lava, a chasm or empty spaces between tree overlays.
Meeps
Meeps is a pet. Distract: When a minion that is sharing a space with Meeps rolls to defend, you may reroll any or all of that minion's die results. You must accept the second result.
Cute Scoundrel, Pheasia and Malodor
Cute Scoundrel, Pheasia and Malodor have only one initiative card each but are considered boss minions.
Molox
The molox uses three initiative cards but is not considered a boss. When determining initiative order, only use the "Enraged Molox" card. After placing this card onto the initiative track, place the remaining molox initiative cards on top of this card so that the "Molox" card is on top. Each time one or more wound markers would be placed on the molox, remove its topmost initiative card instead. In this way, the molox gets stronger (and angrier) each time it takes damage.
- Molox (battle 2, defense 2): Blind: Molox moves towards and attacks the mouse with the most cheese in its stash and highest on the initiative track. If the Molox starts its turn adjacent to a mouse or no mouse has cheese, it acts normally.
- Angry Molox (battle 3, defense 3): uses the same Blind rule as the Molox card.
- Enraged Molox (battle 4, defense 4): uses the same Blind rule as the Molox card.
Hesster
The Downwood is home to a cruel hunting snake known as Hesster. Hesster is represented on the board by a head, 4 body segments and a tail.
Non-flying figures cannot move into a normal space that contains any part of Hesster. Figures that begin a turn on a space with Hesster must move out of that space if possible. When attacking or defending with Hesster, any cheese rolled is not added to the minion wheel.
Hesster does not move or act like other minions. Instead he has 2 initiative cards that cause him to take 2 turns in a round and act differently on each turn. When determining initiative order, Hesster Strikes is always placed higher on the initiative track than Hesster Coils. Switch these cards on the track if necessary.
The rules for each of Hesster's initiative cards are as follows:
Hesster Coils
When Hesster is encountered, he will be coiled up. To coil up Hesster follow these 3 steps in order:
- Place Hesster's tail segment on a minion entry space, following the rules for placing large minions.
- Shuffle the body segment tokens and randomly place them in a stack on top of the tail.
- Place the head segment on top of the stack.
Only remove Hesster's initiative cards from the track after both cards have 2 wound markers on them.
When Hesster coils, target the mouse that is highest on the initiative track from among all mice that are adjacent to or on a space with any part of Hesster. Place coiled up Hesster adjacent to the targeted mouse. If no mouse could be targeted, place coiled up Hesster on the space his head occupies. Then roll once to attack. Each creature adjacent to coiled up Hesster is affected by that attack and must defend separately. Any wounds inflicted by Hesster coils are considered normal wounds.
Hesster Strikes
To strike with Hesster follow these steps in order (see example on next page of the book):
-
Remove the head and body segments from coiled up Hesster, leaving the tail section in its space.
-
Turn Hesster's tail segment so the arrow on the wider rounded end is pointing toward the closest mouse.
-
One at a time, randomly draw a body segment token and place it on the tile, positioning it so that its cup shaped end connects to the rounded end of the previously placed tail or body segment. Make sure the diamond pattern on the snake segments creates an unbroken chain. It is acceptable for a Hesster segment to slightly cover a tile border. However, if a segment would be placed completely off the tile or cause crossing over another segment, flip that segment over so that it turns the other way. Flip previously placed body segments as well, if necessary. Hesster segments can be placed across red and yellow lines as well as on black areas, lava, water and other terrain features.
Place the head on the snake, pivoting it so that it is mostly centered in a space, choosing a space with the most figures if possible.
-
Roll once to attack. Each creature that shares a space with any part of Hesster is affected by that attack and must defend separately. Any wounds inflicted by Hesster's strike are considered poison wounds. (Note: All three creatures were affected by the attack in the example.)
This card cannot be removed from the initiative track until both Hesster initiative cards are defeated.
Olga the Owl
The slyest of the predatory birds hunting little forest creatures during nightfall is Olga the Owl. When directed by the story book, place the Olga the Owl token, prior to placing minions, on any minion entry space on the mice's current tile.
If a player rolls a 1 when moving a mouse, immediately move Olga 3 spaces directly towards that figure, choosing the shortest route possible. Olga follows any rules for flying creatures. Olga stops her move if she reaches that figure's space. Any small figure on a space Olga moves through or ends her move on receives 1 unblockable wound.
Olga cannot be targeted by an attack, and does not count toward space limits. Olga does not prevent mice from using an explore action.
Mouse Head Icons
When necessary, components in this expansion are marked with a numbered mouse head icon to allow easy distinction from the Sorrow & Remembrance story book included with the core game set of Mice and Mystics, as well as story books included in other expansion sets. The number indicates which book number the component is originally associated with.
Prologue
The prologue is read-aloud story text only and has no rules of its own. Read it to the players before the first chapter if you are playing the story as a campaign.
Chapter One: High Road to Headfall
The chapter's read-aloud story text is omitted. Its rules, including the rules attached to story moments, are kept.
Chapter Objectives
Find passage through the forest to Headfall Hollow. Deliver the last Barksburg nut to the sheriff of Downwood.
Victory Condition: Deliver the last Barksburg nut to the sheriff who resides in Headfall Hollow.
Defeat Condition: If the hourglass marker reaches the chapter end marker on the chapter track before the mice have delivered the nut, or if all mice are captured at the same time, the mice are defeated.
Chapter Setup
Room Tile Setup: Place the following 4 tiles as shown: Courtyard (this tile is from the Mice & Mystics base set), Thistle Ridge, Tricklemoore, and Headfall. The white mouse head icon represents the start space.
Chapter End: Place the chapter end marker on page 6 of the chapter track.
Party Setup: Select 4 mice to be in the party for this chapter. Jakobe the gecko must be 1 of the 4 chosen party members, now collectively referred to as "mice". He has been hired by Linera to guide the mice through the forest. The party cannot include Ditty the Shrew or Ansel as they have not met the mice yet.
Encounter Deck Setup: To build the encounter deck, shuffle and place all standard encounter cards face down onto the encounter area on the story control board. The difficult encounter cards are not used in this chapter. Note: Throughout this story book, you may choose to mix in standard encounter cards from other Mice & Mystics sets as mentioned in the introduction to this story book. This will give you a wider variety of enemies to contend with.
Tree and Branch Overlay Setup: Place the tree overlay on the courtyard tile as shown, with the branch overlay extending onto Thistle Ridge. Place the 4 mice being used for this chapter on the tree overlay, on the indicated space. Choose a mouse to carry the nut and place a nut token under that mouse. Place 3 froglodytes and 2 firebelly newts on the tree and branch overlay minion entry spaces normally (see 'Placing Minions on the Board' on page 14 of the rulebook). Keep in mind that the tree overlay and branch overlay create one continuous tile. Since firebelly newts are ranged minions, they will need to be placed on the minion entry space of the branch overlay, (far away from the mice). Also place 1 leaf on stem A of the branch overlay.
Special Chapter Rules
Transporting the Barksburg Nut: The mice are charged with transporting the last Barksburg Nut to Headfall Hollow, but the nut is heavy. A mouse can carry the nut, but is at a disadvantage while doing so. To show that a mouse is carrying the nut, place a nut token on that mouse's card. On its turn, a mouse can use its action to transfer the nut from one mouse to another on the same or adjacent space. While carrying the Barksburg Nut, a mouse's battle is reduced by 1. The nut also takes up a paw slot on the mouse's character card. If a mouse is captured while carrying the nut, leave the nut on the space where the mouse was captured. Another mouse can use a free action to pick up the nut while sharing a space with it.
Courtyard: Tree and Branch Overlay
- Story Moment 1: If the mice defeat all the minions on the tree and branch overlay, a story moment triggers (read-aloud text omitted).
- Special Search (2): Bark Shield. (Note: A useful piece of armor for a warden or wild mouse.) Requires: Warrior or Wild. When a mouse equipped with this shield would receive an on fire status effect marker, discard this shield instead, and do not place that marker.
- Special Surge (3): 1 bullfroglodyte.
Courtyard Tree Climb: Leaf Story Moment 4
- Story Moment 4: When all the mice are gathered on the leaf and a mouse uses an explore action, a story moment triggers. If the leaf lands on the upper level, read story moment A. If the leaf lands on the lower level, read story moment B. Story moment A and story moment B are read-aloud text only.
- The leaf is moved as follows: Now remove the branch overlay, but leave the leaf on the board with the mice on top of it. Center the leaf with the mice on the space it mostly occupies and turn it to point at any of the three minion entry spaces on Thistle Ridge. Roll an action die and move the leaf with the mice that many spaces toward the chosen minion entry space using the shortest route possible, and ignoring any red or yellow lines or any other intervening terrain. This is where the leaf lands. Continue to the following section: Thistle Ridge.
Thistle Ridge
- Story Moment 1: When the mice first land on Thistle Ridge, a story moment triggers. If the leaf lands on the upper level, read story moment A. If the leaf lands on the lower level, read story moment B (read-aloud text omitted).
- Landing rule: Now reveal an encounter card as usual, and place any new minions normally. The mice start in the space their leaf landed on.
- Special Search (2): Pick Hammer. (Note: The Pick Hammer allows a healer, warrior or tinkerer to move across red lines.) Pick Hammer +1, BLUNT or SHARP. Requires: Healer or Warrior or Tinkerer. When this weapon is equipped, the mouse can move across red lines at a cost of 3 spaces of movement.
- Special Rule (3): Leaving Thistle Ridge: All mice in your party must be on the same side of the red line that divides Thistle Ridge before any mouse can use an explore action to leave this tile. Mice on the upper level can leave by exploring the exit into Tricklemoore. If the mice are on the lower area, they can use the flip space and explore into The Lair. Note: Because Jakobe is wild, the mice can traverse Thistle Ridge using the yellow line with the gecko symbol at the edge of the ridge. This is a secret forest pathway known only to wild creatures (see New Terrain Features: Hidden Paths and Flip Spaces on page iv of this story book for rules on Hidden Paths).
- Nightfall: If it is nightfall when the mice land, and if they landed on the lower level of the ridge, they can attempt to sneak by the minions on this tile and make a hasty exit into the cave. If the mice choose to sneak, the minions will not move and attack on their turn unless they are attacked or alerted to your party's presence. When rolling for a mouse's movement on its turn, if you roll a 1, your mouse has stepped on a twig and alerted the minions! That mouse turn ends. Immediately move and attack with the minions belonging to the minion card highest on the initiative track. This does not count as their normal turn this round. Then return to initiative order and proceed with play normally. On any other result, the mouse sneaks quietly and the minions remain unaware. The mice must all gather on the flip space before any mouse can use an explore action to leave this tile. If the mice successfully gather on the flip space without alerting the minions they may explore the flip space without defeating the minions. Remove the minions from the board, and their card(s) from the initiative track.
The Lair
- Special Setup (1): When the mice first explore The Lair, instead of revealing an encounter card, place 4 rat warriors normally.
- Story Moment 2: After placing the rat warriors and resetting the initiative track, a story moment triggers (read-aloud text omitted).
- Encounter: Reveal an encounter card as usual. Make sure to check for any special encounter conditions on the card.
- Special Rule (3): Rat warriors: Each of these rats will move toward and attempt to attack the mouse with the nut. They will even pass through or leave spaces with other mice, preferring to move toward the mouse with the nut. When choosing targets to attack, they will choose to attack the mouse with the nut if possible.
- Special Rule (4): Story Achievement: If the mice defeat the rats in this room, add the red gnome hat story achievement token to the party stash. Then advance the chapter end marker 1 page space on the chapter track. (Note: Gnome hats are valued highly by gnomes. You can bet that if you find a gnome hat, there's a gnome out there looking for it.)
- Special Search (5): Mystic Tome. (Note: This item allows you to search for a scroll card of your choice.) Mystic Tome, SPECIAL. Look through the search deck. Take any one scroll card from the search deck. Place this card back in the search deck, then shuffle the search deck.
- Special Surge (6): Molox.
Tricklemoore
- Story Moment 1: When the mice explore Tricklemoore, a story moment triggers (read-aloud text omitted).
- Special Rule (2): Woody Nobbles story achievement: If the mice spy the Woody Nobbles at midnight, add the Woody Nobbles story achievement token to the party stash. Then advance the chapter end marker 1 page space on the chapter track. (Note: Woody Nobbles are a rare sight. Legend has it, they enjoy music.)
- Special Rule (3): Exploring: Before a mouse can use an explore action to leave this tile, all mice must be on the same side of the water as the exploring mouse.
- Nightfall: If the mice encounter this tile during nightfall, a story moment triggers (read-aloud text omitted). Then reveal an encounter card as usual.
Trickleunder
- Story Moment 1: When the mice explore Trickleunder, a story moment triggers (read-aloud text omitted).
- Special Rule (2): Bouncing Mushrooms: Instead of a normal move, a mouse that begins its move on a mushroom, can bounce. Place the mouse on any other mushroom on this tile. This replaces the mouse's normal move.
- Special Search (3): Snail Helm. (Note: This is armor that a healer or mystic can wear.) Requires: Healer or Mystic. When rolling defense against an attack, a mouse wearing this helm can use any cheese rolled as successful blocks instead of as cheese.
Headfall Hollow
- Story Moment 1: When the mice would first explore Headfall Hollow, before moving onto the tile, a story moment triggers (read-aloud text omitted).
- Nightfall: If it is nightfall when the mice explore Headfall Hollow, in addition to any minions, also place the Olga the Owl token on the tile normally, and follow all the rules for Olga the Owl found on page viii of this story book.
- Encounter: Then reveal an encounter card as usual.
- Special Rule: Defeating Cute Scoundrel: If the mice defeat the Cute Scoundrel, the chapter ends immediately. The mice are victorious! See details in this chapter's campaign special rule.
- Special Surge: If a Surge happens on the Headfall Hollow tile, the Cute Scoundrel grabs the nut and escapes the settlement. (Read-aloud story text omitted.)
- Special Setup: Do not reveal an encounter card. Instead, place the Ditty figure on any space adjacent to the well. This figure will represent the Cute Scoundrel. Place the stolen nut token under her. Also place a weasel on any space adjacent to Cute Scoundrel to act as her bodyguard. Now add the Cute Scoundrel and weasel initiative cards to the initiative track as usual.
- Special Rule: Cute Scoundrel movement: On her turn, when the Cute Scoundrel moves, she moves away from the mice if possible before making a ranged attack.
Chapter One Ending
- If the Cute Scoundrel escapes with the nut, you must proceed to chapter two-A after reading the story continues section. When you return the nut by beating chapter two-A, you can also declare victory for chapter one.
- If the mice successfully deliver the nut to McReedy the sheriff, you can proceed to chapter two-B after reading the story continues section.
- The chapter has ended in neither victory nor defeat, as printed in the story continues section.
Campaign Special Rule: If you are playing this chapter as part of a campaign, the mice can keep any cheese acquired during this chapter. In addition, the mice can sell their extra search cards to Danderfur for 1 cheese apiece. The mice can use this cheese to various benefits in Headfall Hollow in one of the next chapters. A mouse cannot carry over more than 6 cheese in this manner.
Chapter Two-A: Up the Creek
The chapter's read-aloud story text is omitted. Its rules are kept.
Chapter Setup
Campaign Note: If you are playing this chapter as part of a campaign, any mice used in the previous chapter can break the normal campaign rules and keep all cheese they ended the previous chapter with (up to 6 cheese per mouse), in addition to the 1 search card. This cheese can be used in Headfall Hollow to prepare for the challenges ahead.
Cheese Setup (not a campaign): If you are not playing this chapter as part of a campaign, before starting, divide 6 cheese among the mice chosen to be in the party.
Encounter Deck Setup: To build the encounter deck, shuffle and place all standard encounter cards face down onto the encounter area on the story control board. The difficult encounter cards are not used in this chapter.
Chapter Two-A Objectives
Chase down Cute Scoundrel and retrieve the Barksburg nut.
Victory Condition: The mice win at the end of any round if a mouse has the Barksburg Nut, and if there are no minions on the same tile.
Defeat Condition: If the hourglass marker reaches the chapter end marker on the chapter track before the mice have reclaimed the nut, or if all mice are captured at the same time, the mice are defeated.
Chapter Two-A Setup
Room Tile Setup: Place the following 4 tiles as shown: Headfall Hollow, Tricklemoore, Tumbledown, and Frogwaller. The Cute Scoundrel figure marks her position on the board.
Chapter End: Place the chapter end marker on page 6 of the chapter track.
Party Setup: Select 4 mice to be in the party for this chapter. Ansel can now be chosen as one of the members of the party. Ditty the Shrew cannot be chosen for this chapter. Place the 4 mice being used in this chapter on the Hawk's Beak Inn space of Headfall Hollow. Also place the Ditty the Shrew figure and the nut token on a leaf on the water space indicated on Tricklemoore to represent the Cute Scoundrel's progress making away with the precious Barksburg nut.
Starting Initiative: Do not reveal an encounter card or place any minions at the start of this chapter. The mice can begin by dealing their cards plus the Cute Scoundrel card to the initiative track and taking their turns in Headfall Hollow, visiting the various shops to gear up before racing off to catch up with the Cute Scoundrel.
Important note: Until the mice are on the same tile as Cute Scoundrel, her initiative card only represents her trek through the Downwood and doesn't count as a minion.
Special Chapter Rules
Chapter Start: This chapter does not start like other chapters. The mice start in Headfall Hollow. There are no minions to fight at first. The mice can linger in the settlement as long as they choose, but remember to add a cheese to the wheel at the end of each round with no minion cards on the board.
Chasing Cute Scoundrel: The Cute Scoundrel has taken the Barksburg Nut and fled Headfall Hollow. The mice need to catch up with her and get that nut back, but she has a head start. Cute Scoundrel and the nut token begin this chapter on a leaf boat on Tricklemoore. On her turn, roll a die to determine how far to move Cute Scoundrel downstream. You must move her leaf boat the full amount rolled, staying in the middle 'lane'. Until the mice catch up with her, Cute Scoundrel will not use her ability.
Cute Scoundrel is trying to make it to Frogwaller using the waterways. If she makes it to Frogwaller before the mice, remove her figure and the nut token and leaf from the board and remove her card from the initiative track. The mice will have to try and find her in Frogwaller. That's froglodyte territory.
Special Rule: Shopping: If there are no minions on the Headfall Hollow tile, a mouse that ends its move on a Headfall Hollow building location can spend its action to shop or otherwise interact in that location. Any search cards purchased from a vendor are taken from the search deck. Shuffle the search deck after shopping.
Tinkerer's Trove
Horton Hamfist the hamster tinkerer has a few items up for grabs today, and he highly recommends a good teaspoon paddle "Fer navigatin' the Trickle":
- Teaspoon Paddle = 2 cheese
- Pine Needle Darts = 3 cheese
- Throwing Daggers = 2 cheese
- Coin Shield = 3 cheese
- Dinner Fork = 2 cheese
- Clockwork Grenade = 2 cheese
- Bedrolls = 2 cheese
Mystic Emporium
Danderfur the itchy flaky old collector will buy any search card for 1 cheese. He also has some items of interest for purchase for 2 cheese:
- Phoenix Rune
- Clover Rune
- Summon Spider Scroll
- Aspect of the Porcupine Scroll
- Teleport Scroll
- Red Gnome Hat
- Heal All Scroll
Hawk's Beak Inn
Brie the kindly rotund innkeeper has some advice to give for those who tip her:
- Choose any trick card from the search deck for a 1 cheese tip.
She also has these items for sale:
- Whiskerfroth Elixir = 2 cheese
- Wilderberry Jam = 2 cheese
- Nut Grass Tincture = 2 cheese
Special Rule: Trickleunder, Echo Cavern and Tadpool: The Trickleunder, Echo Cavern, and Tadpool sides cannot be explored in this chapter.
Play the Dice Game
To play the dice game against one of the locals, the mouse must first bet from 1-3 cheese from its stash. Roll 4 Action Dice for your mouse. You may choose to re-roll up to a number of dice equal to your lore but must keep the second result. Count up the number of starbursts rolled. Now roll 5 action dice for the local and count the number of starbursts rolled.
- If you roll more than the local: You win. Keep the cheese you bet, plus collect a number of cheese equal to your bet.
- If the local rolls the same number as you: Place the cheese you bet in the general supply.
- If the local rolls more than you: Place the cheese you bet on the minion cheese wheel.
Editor's note: the icon the dice are counted for is missing from this page's text layer. The same dice game is printed with a starburst icon in the Chapter Three Headfall Hollow entry (book page 36) and the Chapter Ten Headfall Hollow entry (book page 92), so it is transcribed here as starbursts (also used for the Chapter Two-B copy below).
For Hire
If Jakobe has not been chosen to be a member of your party, you can hire him at the Inn as an ally for 3 cheese. Follow all the rules for having more than 4 in your party as outlined in The Fifth Wheel section on page ii of this story book. Remember that adding an ally to your party can lower the challenge level of the chapter. Unlike other allies, when Jakobe is hired, he stays in your party through the whole chapter, or until defeated.
Headfall Hollow (Chapter Two-A)
- Special Setup: Tree Climbing Space: Place the tree climb token on this space, so that it blocks out the minion entry symbol. Then reveal an encounter card as usual.
- Nightfall: If it is nightfall when the mice explore this tile, they can attempt to sneak by the minions on this tile and make a hasty exit up the tree. If the mice choose to sneak, the minions will not move and attack on their turn unless they are attacked or alerted to your party's presence. If you roll a 1 when rolling for a mouse's movement, your mouse has stepped on a twig and alerted the minions! That mouse turn ends. Immediately move and attack with the minions belonging to the minion card highest on the initiative track. This does not count as their normal turn this round. Then return to initiative order and proceed with play normally. On any other result, the mouse sneaks quietly and the minions remain unaware. All mice must gather on the tree climb space before any mouse can use an explore action to leave this tile. If the mice successfully exit the tile without alerting the minions, remove the minions from the board and their card(s) from the initiative track.
- Special Rule: Searches: Mice cannot search in Headfall Hollow.
- Special Rule: Leaving Headfall Hollow: The mice must use the flip space in order to leave Headfall Hollow.
- Special Surge: Street Fight: 3 rowdy rat warriors.
Tree and Branch Overlay (Headfall Hollow, Chapter Two-A)
- Story Moment: When the mice explore the tree overlay, a story moment triggers and no encounter card is revealed as usual (read-aloud text omitted).
- Special Setup: When the mice explore the tree overlay, instead of revealing an encounter card, place the branch overlay as shown so that it crosses over the Tricklemoore tile. Add 1 leaf to the stem of the branch overlay marked B. Do not add any minions to the board and continue with initiative order. The leaf is the only obvious exit. Note that if the players have 5 members in their party from hiring Jakobe, they will need to use The Fifth Wheel rules found on page ii of this story book. Note that even though there are no minions, lingering in one place too long can be dangerous. The mice should head for the leaf.
Tricklemoore (Chapter Two-A)
- Special Rule (3): The Bald Gnome: If you have a gnome hat in your party stash (found in chapter one or purchased at the Mystic Emporium in Headfall Hollow), the players may give that hat to the gnome now. Discard the gnome hat story achievement token. The gnome is filled with gratitude, and promptly takes his leave after bowing deeply. Advance the chapter end marker 1 page space on the chapter track. If you have a wild character in your party, the gnome shares some useful information. Give that character the gnome grow ability card for free! If you do not have a wild character in your party, add the gnome grow ability card to the ability deck. It may now be chosen using a level up action.
- Special Rule (4): The Bald Gnome, no gnome hat: If the mice do not have a gnome hat: The disappointed gnome wanders away. Add 1 cheese to the minion wheel and continue.
- Special Search (5): Rare Seeds. (Note: These are valuable during future trips to Headfall Hollow.) ITEM. No Requirements. These seeds can be discarded for cheese at Hawk's Beak Inn in Headfall Hollow. During a campaign, a mouse that ends a chapter with this card, can keep it for the next chapter in addition to any other cards kept between chapters.
- Special Surge (4): Spider.
- Special Setup (2): Place a leaf token on the middle water space on the west end of Tricklemoore. Remember that empty leaves in the water drift straight downstream 1 space (2 if it's raining) at the end of each round. If this leaf drifts unmanned off the edge, remove it from play.
- Special Rule (3): Catching the Cute Scoundrel: If the mice enter the Tricklemoore while Cute Scoundrel is on this tile, on her turn, she will continue to move downstream on her leaf boat, in an attempt to escape. If possible, she will use her ranged attack and ability if she ends her move and is still on Tricklemoore. If the mice can defeat her, they can obtain the nut from her leaf boat, which will continue drifting downstream following the rules for leaves in the water listed on page iv of this story book.
- Special Rule (4): Leaving Tricklemoore by Water: Tricklemoore, and the next tile Tumbledown, are connected by water. The mice can only move off of Tricklemoore by way of water. Place the mouse (or mice if they are all on a leaf boat) on the next available water space on Tumbledown. When the first mouse crosses over to Tumbledown in this fashion, reveal a new encounter card and place new minions as if that mouse had used an explore action into Tumbledown. Any other mice still on Tricklemoore, can now use the water normally to cross over to Tumbledown.
Tumbledown (Chapter Two-A)
- Special Setup (1): Froglodyte Sentries: Instead of revealing an encounter card, place 2 froglodyte warriors normally.
- Story Moment (2): When the mice explore Tumbledown, a story moment triggers (read-aloud text omitted).
- Special Rule (3): Dangerous Water: If a mouse ends its turn on any of the water spaces on this tile, in addition to drifting downstream, roll a die. If you roll a starburst that mouse receives 1 unblockable wound. A mouse on a turtle or leaf is not harmed by the dangerous water.
- Special Rule (4): Leaving Tumbledown by Water: Tumbledown, and the next tile Frogwaller, are connected by water. The mice can only move off of Tumbledown by way of water. Place the mouse (or mice if they are all on a leaf boat) on the next available water space on Frogwaller. When the first mouse crosses over to Frogwaller in this fashion, go to the special setup for Frogwaller. Any other mice still on Tumbledown can now use the water normally to cross over to Frogwaller.
- Special Rule (5): Catching up with Cute Scoundrel: If the mice enter Tumbledown while Cute Scoundrel is on this tile, on her turn, she will continue to move downstream on her leaf boat in an attempt to escape. If possible, she will use her ranged attack and her ability if she ends her move and is still on Tumbledown. If the mice can defeat her, they can obtain the nut from her leaf boat, which will continue drifting downstream following the rules for leaves in the water listed on page iv of this story book.
- Nightfall (leaving Tumbledown): If it is nightfall when the mice leave the Tumbledown, any minions left will not follow the mice onto Frogwaller. Remove all minions from Tumbledown when all the mice have left this tile.
- On their turns, any minions on Tumbledown will follow the mice onto the next tile also using the waterway. When a mouse or minion enters a new tile by way of water, its turn ends.
Frogwaller (Chapter Two-A)
- Special Setup (1): When the mice arrive in Frogwaller, do not reveal an encounter card. Instead, place Malodor, a bullfroglodyte, and Cute Scoundrel on this space. Place the nut token under Malodor. Place three critter citizen tokens under the bullfroglodyte to represent the shrew captives. Also place 4 froglodytes as indicated. Place a leaf token on the indicated water exit.
- Story Moment (2): After completing the special setup for this tile, a story moment triggers (read-aloud text omitted).
- Hop Away (froglodyte cards): Before a standing froglodyte rolls to defend against a melee attack, first roll an action die. If the printed die symbol is rolled (see the editor's note below), the attack misses. Move that froglodyte 2 spaces in a direction away from the nearest mouse, if possible.
- Special Rule (3): Bullfrog Escape: On its turn, the bullfroglodyte will move toward the flip space, even if he started his turn in a space with a mouse. If the bullfroglodyte ends its move on the flip space, it dives in the water with the shrew family captives. Remove the bullfroglodyte and the critter citizen tokens from the board and remove the bullfroglodyte card from the initiative track. If the mice defeat the bullfroglodyte before it can escape with the shrews, place the shrews in the party stash.
- Special Surge (6): Lutz Arrives: Lutz will not attack Cute Scoundrel, and she will not attack Lutz. At the beginning of each Lutz turn, if there are still any froglodytes on the board, roll a die. If a starburst is rolled, Lutz will move toward and attack the nearest froglodyte. On any other result, Lutz will move toward and attack the nearest mouse.
- Special Rule (3): Malodor: On his turn, Malodor will move with the nut toward the eastern leaf boat, even if he started his turn in a space with a mouse. If he is alone on the leaf boat at the start of his turn, he escapes with the nut. This will be an immediate loss for the mice. Malodor cannot be bribed in this chapter, but will attack normally if able.
- Special Rule (4): Cute Scoundrel: The Cute Scoundrel wants only to protect her family. She is no longer considered a minion, and is friendly to the mice. Cute Scoundrel now becomes an ally (see page ii of this story book for rules on controlling allies). The players can now control her move and attacks. Because she is now an ally, her 'entourage' ability to call rats to her aid is no longer in effect. Minions will now attack Cute Scoundrel as if she were a mouse. Lutz is under orders, and will not attack Cute Scoundrel unless she attacks him first.
Chapter Two-A Ending
- Campaign Special Rule: If you are playing this chapter as part of a campaign, and if the mice are victorious, they can keep any cheese acquired during this chapter. In addition, in the next chapter the mice can sell their extra search cards to Danderfur for 1 cheese apiece. The mice can use this cheese to various benefits in Headfall Hollow in one of the next chapters. A mouse cannot carry over more than 6 cheese in this manner.
- If the mice are victorious, but fail to rescue the shrews, you must proceed to chapter two-B, "The Taking of the Shrews".
- If the mice are victorious, and also rescue the shrews, proceed to chapter three, "The Seers of Underwood".
_Editor's note: the starburst icon is transcribed as printed in the book; the passages here do not restate its meaning.
Chapter Two-B: The Taking of the Shrews
The chapter's read-aloud story text is omitted. Its rules are kept.
Chapter Two-B Setup
Encounter Deck Setup: To build the encounter deck, shuffle and place all standard encounter cards face down onto the encounter area on the story control board. The difficult encounter cards are not used in this chapter.
Room Tile Setup: Place the following 4 tiles as shown: Headfall Hollow, Brokenwood, Puddleby, Tricklemoore.
Chapter Objectives: Enter into the frog realms and rescue Ditty's family.
Victory Condition: The mice win if they can get all three shrew captives free and off the board.
Defeat Condition: If the hourglass marker reaches the chapter end marker on the chapter track before the mice have rescued the shrews, or if all mice are captured at the same time, the mice are defeated.
Chapter End: Place the chapter end marker on page 6 of the chapter track.
Party Setup: Select 4 mice to be in the party for this chapter. Either Ansel or Jakobe must be chosen, but the party cannot contain both. Ditty the Shrew also must be chosen as one of the mice for this chapter. Place the 4 mice being used in this chapter on the Hawk's Beak Inn space of Headfall Hollow. Do not reveal an encounter card or place any minions at the start of this chapter. The mice can begin by dealing their cards to the initiative track and taking their turns in Headfall Hollow, visiting the various shops to gear up before venturing into frog territory.
Note: Players should be aware that their choice between Ansel or Jakobe is important as they each have a different approach to accomplishing this mission.
Campaign Note: If you are playing this chapter as part of a campaign, any mice used the previous chapter can break the normal campaign rules and keep all cheese they ended the previous chapter with (up to 6 cheese per mouse), in addition to the 1 search card. This cheese can be used in Headfall Hollow to prepare for the challenges ahead.
Cheese Setup (not a campaign): If you are not playing this chapter as part of a campaign, before starting, divide 6 cheese among the mice chosen to be in the party.
Headfall Hollow (Chapter Two-B)
- Special Rule: Shopping: If there are no minions on the Headfall Hollow tile, a mouse that ends its move on a Headfall Hollow building location can spend its action to shop or otherwise interact in that location. Any search cards purchased from a vendor are taken from the search deck. Shuffle the search deck after shopping.
- Special Rule: Searches: Mice cannot search in Headfall Hollow.
- Special Surge: Street Fight: A belligerent weasel.
- Play the Dice Game: To play the dice game against one of the locals, the mouse must first bet from 1-3 cheese from its stash. Roll 4 Action Dice for your mouse, you may choose to re-roll up to a number of dice equal to your lore but must keep the second result. Count up the number of starbursts rolled. Now roll 5 action dice for the local and count the number of starbursts rolled. If you roll more than the local: You win. Keep the cheese you bet, plus collect a number of cheese equal to your bet. If the local rolls the same number as you: Place the cheese you bet in the general supply. If the local rolls more than you: Place the cheese you bet on the minion cheese wheel.
Tinkerer's Trove
Horton Hamfist the hamster tinkerer has a few items up for grabs today:
- Pea Shooter = 3 cheese
- Throwing Daggers = 2 cheese
- Bark Shield = 3 cheese
- Dinner Fork = 2 cheese
- Clockwork Grenade = 2 cheese
- Bedrolls = 2 cheese
Mystic Emporium
Danderfur the collector will buy any search card for 1 cheese. He also has some items of interest for purchase for 2 cheese:
- Phoenix Rune
- Summoning Rune
- Clover Rune
- Fungus Bits
- Aspect of the Porcupine Scroll
- Heal All Scroll
Hawk's Beak Inn
Brie the portly innkeeper has some advice to give for those who tip her:
- Choose any trick card from the search deck for a 1 cheese tip.
She also has these items for sale:
- Whiskerfroth Elixir = 2 cheese
- Wilderberry Jam = 2 cheese
- Nut Grass Tincture = 2 cheese
- Turtle Whistle = 2 cheese
Special Search: Twig of Confusion (MAGIC ranged weapon, +1, Requires MYSTIC or HEALER; Note: This is a magical ranged weapon that can be used by mystics or healers.) Minions in the same or adjacent space as a mouse equipped with this twig of confusion roll 1 less action die when attacking this mouse. Boss minions are not affected by this twig.
Special Search: Nut Grass Tincture (ITEM, Requires MYSTIC or WILD; Note: This can be used to boost a wild or mystic's defense.) Use this tincture as a free action. Discard this card and place 1 poison wound marker on this mouse. While that wound marker is on this mouse, it adds 2 to its defense.
Brokenwood (Chapter Two-B)
- Story Moment: When the mice explore Brokenwood, a story moment triggers (read-aloud text omitted).
- Special Surge: Cave centipede. Place it on any space adjacent to the chasm and on the same side as the majority of mice.
- Nightfall: If it is nightfall when the mice explore onto this tile, add an additional fearie to the tile when placing minions.
- Special Setup: Instead of drawing an encounter card as usual, place 4 fearies normally. Also place a tree climb token in the indicated corner.
- Special Rule: Choices, Choices: If the mice have Jakobe in their party they must use an explore action on either flip space (Jakobe is wild so the mice can use the hidden flip space indicated by the gecko symbol) to climb down into the underwood and attempt to sneak into Trickleunder through newt territory in Hot Below. If they instead have Ansel in their party, they must find a way to cross the chasm and fight their way outdoors to the secret entrance to the frog lands.
Puddleby and the Owl's Nest (Chapter Two-B)
- Special Setup: Instead of revealing an encounter card, when the mice explore onto the tree overlay, also place the branch overlay so that it crosses over the Puddleby tile. Also place an empty nest on the spaces noted. Add 1 leaf to the stem of the branch overlay marked A. Do not place any minions. Place the Olga the Owl token on the nest, and continue playing.
- Special Rule: Sneaking Across the Nest: The mice can see Olga patrolling the skies and guarding the nest. They are trying to sneak past the nest and escape by way of the leaf that is attached to the branch overlay. The nest is a special area bordered by a solid yellow line. It costs 3 move to climb into or out of the nest. While moving, follow all the rules for Olga the Owl found on page viii of this story book. The first time a mouse would receive a wound from Olga's unwanted attention, before placing that wound, a story moment triggers (read-aloud text omitted).
- Special Rule: Gnome Hat: If the mice do not have a gnome hat in their party stash when a mouse attracts Olga's unwanted attention, it receives 1 unblockable wound as usual. If the mice do have a gnome hat story achievement token in their party stash, they can avoid taking the wound and show the hat to Olga, suggesting that a gnome is to blame for the stolen eggs. Discard the gnome hat and a story moment triggers. Remove the Olga token from the tile. The mice can now proceed in relative safety.
- Special Search: Gnome Hat (PARTY ITEM: Use this party item when directed by the story book. Note: This is used to keep Olga from attacking the mice. No Requirements.)
- Special Surge: Spider.
- Story Moment: When the mice explore the tree overlay, a story moment triggers (read-aloud text omitted).
Deeper Dark (Chapter Two-B)
- Story Moment: When the mice explore Deeper Dark, a story moment triggers (read-aloud text omitted).
Puddleby (Chapter Two-B)
- Special Setup: Instead of revealing an encounter card as usual, place 1 bullfroglodyte, and 2 froglodytes normally.
- Special Rule: Leaping: The bullfroglodyte and regular froglodytes can leap across the chasm using just 1 move point.
- Special Rule: Water: The mice need to be careful where the water is concerned on this tile. If a mouse is swept downstream into the chasm on its turn, that mouse becomes captured.
Puddleby (Chapter Two-B, continued)
- Special Rule: Rickety Bridge: The bridge special area space that spans the deep crevasse is old and worn, the wood is dry and rotting. When a non-flying figure moves onto the bridge, it must end its move. If a mouse receives a wound while on the bridge, place that mouse figure in the chasm to the side of the bridge. It is hanging on for its life. While hanging on, a figure cannot attack or use any action until it is pulled to safety. Climbing back up onto the bridge works just like climbing out of water. The mouse uses its entire move, and must roll a starburst on an action die. This mouse gets an additional action die for each mouse on the bridge helping to pull it up.
- Story Moment: When the mice explore Puddleby, a story moment triggers (read-aloud text omitted).
- Special Surge: 1 bullfroglodyte.
- Special Rule: Healing Waters: If there are no minions on the tile, any mouse that spends its action on the water special area of this tile can remove 1 wound marker from its card.
- Special Rule: Flip Space: The flip space here has been sealed by a powerful magical ward and cannot be used at this time.
- Nightfall: If it is nightfall when the mice explore Puddleby, a story moment triggers (read-aloud text omitted).
- Encounter: Then reveal an encounter card as usual.
Hot Below (Chapter Two-B)
- Story Moment: When the mice explore Hot Below, a story moment triggers (read-aloud text omitted).
- Special Setup: Instead of revealing an encounter card as usual, place 4 firebelly newts and 1 bullfroglodyte normally.
- Special Search: Mystic Tome. (Note: This item allows you to search for a scroll card of your choice.) SPECIAL. Look through the search deck. Take any one scroll card from the search deck. Place this card back in the search deck, then shuffle the search deck. Requires: Mystic.
- Special Rule: Defeating the bullfroglodyte: When the mice defeat the bullfroglodyte, if there are any firebelly newts in play, place the defeated bullfroglodyte figure on their initiative card. When the firebelly newts start a turn with a bullfroglodyte figure on their card, instead of moving or attacking, they will spend that turn cheering, high-fiving, and belly bumping instead. Then remove the bullfrog figure from their card. If the mice do not have the Woody Nobbles story achievement yet, add the Woody Nobbles story achievement token to the party stash. Then advance the chapter end marker 1 page space on the chapter track.
- Special Search: Phoenix Rune. (ITEM. Note: This allows a mouse to ignore the effects of the on fire status.) A mouse with this rune ignores all on fire status effects. No Requirements.
- Special Surge: 1 bullfroglodyte.
Tricklemoore (Chapter Two-B, continued)
- Story Moment: When the mice explore Tricklemoore, a story moment triggers (read-aloud text omitted).
- Encounter: Then reveal an encounter card as usual.
Trickleunder (Chapter Two-B)
- Story Moment: When the mice explore Trickleunder, a story moment triggers (read-aloud text omitted).
- Special Setup: Do not reveal an encounter card when the mice arrive in the Trickleunder. Instead, place 1 critter citizen token on each stalagmite to represent the shrew family captives.
- Special Rule: Freeing the Captives: On its turn, a mouse that is adjacent to a shrew captive can spend its action to attempt to untie that captive. The acting mouse rolls 1 action die, plus 1 additional action die for each friendly mouse on the same space. If 1 or more starburst is rolled, the captive is free. Place the token on that mouse's space. If no starburst is rolled, add 1 cheese to the minion cheese wheel. A mouse cannot have more than 1 on fire token at a time.
- Special Rule: Bouncing Mushrooms: Instead of a normal move, a mouse that begins its turn on a mushroom can bounce. Place the mouse on any other mushroom on this tile. Mice cannot bounce if they are accompanied by a shrew captive.
- Special Rule: Escaping: The mice need to get the captives to the flip space. When a mouse starts its move on a space with 1 or more shrew captives, it can choose 1 of those shrew captives and help it move toward safety. Move the mouse normally, then place the chosen shrew captive on that mouse's space when it ends its move. Mice cannot bounce or scurry with the frail shrew captives, and can only help one captive at a time. If all active mice and shrew captives are on the flip space, a mouse can use its explore action to escape and win the chapter even if Hesster is in play.
- Special Surge: Hesster! And now rule number 3 (Shalop's Orders) is no longer in effect. While Hesster is in play, the firebelly newts will not attack the mice for fear of hitting Hesster. Note: players might need to refer to the special rules on page vi of this story book for rules on how Hesster behaves.
- Special Rule: Shalop's Orders: When King Shalop sees the mice entering the cavern to rescue the shrews, he orders his firebelly newt slaves to shoot the mice from above with their flaming arrows. Each time a mouse takes a turn, at the beginning of its turn, before moving or taking any actions, roll 2 dice to make a ranged attack against that mouse as if it were being attacked by a firebelly newt. Note: keep the firebelly newt initiative card handy to refer to the flaming arrows ability. Remember that any cheese rolled by a newt against a mouse who is already on fire, are added to the minion cheese wheel.
Chapter Two-B Ending
- Campaign Special Rule: If you are playing this chapter as part of a campaign, and if the mice are victorious, they can keep any cheese acquired during this chapter. In addition, the mice can sell their extra search cards to Danderfur for 1 cheese apiece. The mice can use this cheese to various benefits in Headfall Hollow in one of the next chapters. A mouse cannot carry over more than 6 cheese in this manner.
Chapter Three: The Seers of Downwood
The chapter's read-aloud story text is omitted. Its rules are kept.
Chapter Three Objectives
Find the Seers of Downwood, and bring them wilderberry jam.
Victory Condition: The mice win if they can find Echo Cavern.
Defeat Condition: If the hourglass marker reaches the chapter end marker on the chapter track before the mice have found Echo Cavern, or if all mice are captured at the same time, the mice are defeated.
Chapter Setup
Chapter End: Place the chapter end marker on page 6 of the chapter track.
Party Setup: Select 4 mice to be in the party for this chapter.
Note: If you are playing this chapter as part of a campaign, any mice used in a previous chapter can break the normal campaign rules and keep all cheese and search cards they ended the previous chapter with. This cheese can be used in Headfall Hollow to prepare for the challenges ahead.
Cheese Setup (not a campaign): If you are not playing this chapter as part of a campaign, before starting, divide 6 cheese among the mice chosen to be in the party.
Encounter Deck Setup: To build the encounter deck, grab 3 difficult encounter cards and 3 standard encounter cards. Shuffle them together and place them face down onto the encounter area on the story control board.
Room Tile Setup: Place the following tile as shown below: Headfall Hollow. Set the Echo Cavern tile to the side. It will be used later. Then create a random tile stack with all of the other remaining tiles from this set, excluding Spiritsburrow. (Shuffle all of the tiles together into a stack.)
Place the 4 mice being used in this chapter on the Hawk's Beak Inn space of Headfall Hollow. Also place Malodor and 3 rat warriors on minion entry spaces normally. The mice must face Malodor and his filthy rats before visiting the various shops to gear up before venturing into the Downwood in search of wilderberries.
Special Chapter Rules
Random Exploration: In this chapter a mouse may use an explore action on a space adjacent to an exit area, even if there is no other tile connected to that exit area. When exploring an exit that has no other tile connected to it, select a tile at random from the random tile stack and place it adjacent to the exit that is being explored. The tile must be placed so that it has the same color side up as the tile that the exploring mouse is on and the orientation arrow on the tile being placed must face in the same direction as the arrows on the tiles already in play. After placing the new tile, check to see if the mouse can legally explore through to the newly placed tile. If the new tile cannot legally be explored, the exploring mouse's turn is over and its explore action was wasted, but leave the new tile in place as there may be other ways to access it. If the explore action proved successful, make sure to check these chapter special rules for the tile you're exploring.
Tree Climb Token: Once during this chapter, the mice can place the tree climb token on any corner space of an outdoor Downwood tile. When exploring the tree climb space onto the tree overlay, the players can choose which direction to place the branch overlay onto any adjacent tile (making sure the tile is Downwood side up). Also place 2 leaves adjacent to any of the available stems on the tree or branch overlay. This will allow the mice to cross to a Downwood tile it might not be able to reach normally. When the mice arrive on the tree overlay, reveal an encounter card and place minions on the tree and branch overlay normally.
Note: Players may want to save this option until they add the Echo Cavern tile to the board. The random nature of this chapter means access to Echo Cavern could be tricky.
Nightfall: If it is nightfall when the mice explore any Downwood tile, in addition to any minions, also place the Olga the Owl token on the tile normally, and follow all the rules for Olga the Owl found on page viii of this story book.
Quest Deck Setup: This chapter uses a quest deck. To create a quest deck, collect 11 search cards, 6 random, and 5 of the players' choosing. Fortune cards cannot be chosen. Add the wilderberry jam search card to 5 of those cards. Shuffle those search cards and place them in a face-down stack near the party stash. Then shuffle the other 6 cards and stack them on top. (If a mouse already has the wilderberry jam search card, borrow it from that mouse until after this chapter.)
Note: Players should choose cards they think will help them in this chapter. Remember that some tiles are difficult or impossible to traverse without proper gear.
Wilderberry Jam: The mice need wilderberry jam to offer the seers. Each time a mouse successfully searches a tile, instead of drawing a search card from the search deck, it may choose to draw a card from the quest deck.
Note: Wilderberry jam cannot be found in trees. Do not draw from the quest deck when successfully searching while on a tree or tree branch overlay.
Achievement: When the mice acquire the wilderberry jam search card, place it in the party stash, and advance the chapter end marker 1 page space on the chapter track. Then place the Tumbledown/Echo Cavern tile adjacent to the tile the mice are currently on. Remember, the orientation arrow must be facing the same direction as the other tiles, but the tile can be placed adjacent to any available tile side.
Headfall Hollow (Chapter Three)
- Special Rule (1): Shopping: If there are no minions on the Headfall Hollow tile, a mouse that ends its move on a Headfall Hollow building location can spend its action to shop or otherwise interact in that location. Any search cards purchased from a vendor are taken from the search deck. Shuffle the search deck after shopping.
- Special Rule (2): Searches: Mice cannot search in Headfall Hollow.
- Special Surge (3): Street Fight: 1 rat warrior.
Tinkerer's Trove
Horton Hamfist the hamster tinkerer has a few items up for grabs today. If any of these are not in the search deck, they are not for sale:
- Nature Blade = 3 cheese
- Hooked Dagger = 2 cheese
- Bark Shield = 3 cheese
- Fishhook & Thread = 2 cheese
- Clockwork Grenade = 2 cheese
- Bedrolls = 2 cheese
Mystic Emporium
Danderfur the collector will buy any search card for 1 cheese. He also has some items of interest for purchase for 2 cheese. If any of these are not in the search deck, they are not for sale:
- Phoenix Rune
- Summoning Rune
- Clover Rune
- Fungus Bits
- Aspect of the Porcupine Scroll
- Heal All Scroll
Hawk's Beak Inn
Brie the portly innkeeper has some advice to give for those who tip her:
- Choose any trick card from the search deck for a 1 cheese tip.
She also has these items for sale. If any of these are not in the search deck, they are not for sale:
- Whiskerfroth Elixir = 2 cheese
- Nut Grass Tincture = 2 cheese
Play the Dice Game
To play the dice game against one of the locals, the mouse must first bet from 1-3 cheese from its stash. Roll 4 Action Dice for your mouse. You may choose to re-roll up to a number of dice equal to your lore but must keep the second result. Count up the number of starbursts rolled. Now roll 5 action dice for the local and count the number of starbursts rolled.
- If you roll more starbursts than the local: You win. Keep the cheese you bet, plus collect a number of cheese equal to your bet.
- If the local rolls the same number of starbursts as you: Place the cheese you bet in the general supply.
- If the local rolls more starbursts than you: Place the cheese you bet on the minion cheese wheel.
Tumbledown (Chapter Three)
- Special Rule (1): Dangerous Water: If a mouse ends its turn on any of the water spaces on this tile, in addition to drifting downstream, roll a die. If you roll a starburst that mouse receives 1 unblockable wound. A mouse on a turtle or leaf is not harmed by the dangerous water.
- Special Rule (2): Exploring: Before a mouse can use an explore action to leave this tile, all mice must be on the same side of the water as the exploring mouse.
Trickleunder (Chapter Three)
- Special Rule (1): Bouncing Mushrooms: Instead of a normal move, a mouse that begins its move on a mushroom, can bounce. Place the mouse on any other mushroom on this tile.
Brokenwood (Chapter Three)
- Special Rule (1): Exploring: Before a mouse can use an explore action to leave this tile, all mice must be on the same side of the chasm as the exploring mouse. Any melee minions trapped on the opposite side of the chasm from the mice will not prevent the mice from exploring.
- Special Rule (2): Bullfroglodytes and regular froglodytes can leap across the chasm using just 1 move point.
Tricklemoore (Chapter Three)
- Special Rule (1): Exploring: Before a mouse can use an explore action to leave this tile, all mice must be on the same side of the water as the exploring mouse.
Deeper Dark (Chapter Three)
- Special Rule (1): Rickety Bridge: The bridge special area space that spans the deep crevasse is old and worn and the wood is dry and rotting. When a non-flying figure moves onto the bridge, it must end its move. If a mouse receives a wound while on the bridge, place that mouse figure in the chasm to the side of the bridge. It is hanging on for its life. While hanging on, a figure cannot attack or use any action until it is pulled to safety. Climbing back up onto the bridge works just like climbing out of water. The mouse uses its entire move, and must roll a starburst on an action die. It gets an additional action die for each mouse on the bridge helping to pull it up.
- Special Rule (2): Exploring: Before a mouse can use an explore action to leave this tile, all mice must be on the same side of the chasm as the exploring mouse.
Echo Cavern (Chapter Three)
- Story Moment (1): When the mice explore Echo Cavern, choose a player to read the following aloud (read-aloud text omitted). Then place Lutz normally. When dealing cards to the initiative track, treat his topmost card as an ambush.
- In addition, if the mice paid cheese to remove Malodor from play at the beginning of this chapter, they will face him again here in Echo Cavern. Place Malodor adjacent to Lutz.
- The mice must defeat Lutz (or Malodor and Lutz) to be victorious.
Editor's note: the printed chapter text does not describe paying cheese to remove Malodor from play at the beginning of this chapter; the sentence above is transcribed as printed.
Chapter Four: We Be Scamps
The chapter's read-aloud story text is omitted. Its rules are kept.
Chapter Four Objectives
Sneak into the farmer's house and steal an item of value.
Victory Condition: The mice win if they can obtain an item of great value by raiding the farmer's larder.
Defeat Condition: If the hourglass marker reaches the chapter end marker on the chapter track before the mice have found the item of value in the kitchen, or if all mice are captured at the same time, the mice are defeated.
Chapter Four Setup
Chapter End: Place the chapter end marker on page 5 of the chapter track.
Party Setup: Select 4 mice to be in the party for this chapter. Collin must be chosen as one of the mice, and Tilda cannot be chosen. Otherwise, players can choose freely, but Collin, Jakobe, Filch, and Ditty would make a good team and will match the narrative. Neré from Heart of Glorm is a good choice as well.
Note: If you are playing this chapter as part of a campaign, only mice used in chapter three can break the normal campaign rules and keep all cheese they ended the previous chapter with.
Encounter Deck Setup: Encounter cards are not used in this chapter.
Room Tile Setup: Place the following 5 tiles as shown below: Echo Cavern, Trickleunder, Tadpool, The Lair, Kitchen Tunnels (this tile is from the Sorrow and Remembrance base set).
Place the 4 mice being used in this chapter on the Echo Cavern in any space adjacent to the campfire. Place a molox on the Echo Cavern on any space adjacent to the tunnel exit, then begin the chapter by dealing the required cards to the initiative track treating the molox as an ambush.
Special Chapter Rules
Underground Journey: Almost this entire chapter is spent in the natural tunnels and makeshift lairs and burrows of the Underwood. With this in mind, ignore all flip spaces with the exception of the Kitchen Tunnels flip space which leads into the Farmer's house.
Minions Fighting Other Minions: In this chapter, some minions might fight each other. Any cheese rolled by minions when attacking or defending against other minions is ignored. Also, any ability the minion has that would affect that attack or defense is ignored as well. If a minion has a choice between multiple targets, the minion will always attack the figure highest in initiative that has not been attacked yet this turn by that minion type.
Echo Cavern (Chapter Four)
- Special Search (1): Whiskerfroth Elixir. (Note: This can be used to heal a mouse.) ITEM. A mouse can use this elixir anytime during its turn to remove all effect markers, wound markers and poison wound markers from its character card. Discard this card after using it. No Requirements.
- Special Search (2): Cheese Cache. (Note: Free cheese!) Fortune. Play immediately. Each mouse on the same tile as the mouse that drew this card receives 1 cheese.
- Special Surge (3): None. Move the hourglass as usual.
Trickleunder (Chapter Four)
- Story Moment (1): When the mice explore Trickleunder, choose a player to read the following aloud (read-aloud text omitted).
- Special Setup (2): Place 6 firebelly newts, 1 on each of the spaces marked 2. Place 1 bullfroglodyte and 4 froglodytes on minion entry spaces normally. Then after dealing cards to the initiative track: Roll 2 action dice and total the numbers rolled. That's how many firebelly newts have been struck down by the cruel froglodytes. Choose that number of firebelly newt figures and knock them down. Then remove the rest of the firebelly newts. They run away.
- Special Rule (3): Firebelly Newts: At the start of the first firebelly newt turn, stand up any knocked down firebelly newt figures. They cannot attack on their first turn. On subsequent turns, the firebelly newts will act normally unless the bullfroglodyte has been defeated (see special rule 4 below).
- Special Rule (4): Froglodyte Bullies: If the mice defeat the bullfroglodyte, all firebelly newts immediately become allies controlled by the mice players, and are no longer considered minions (see page ii of this story book for rules on how to control allies). Froglodytes will now move toward and attack the firebelly newts just as they would mice. When a firebelly newt attacks a froglodyte, ignore their flaming arrow ability. The frogs are too wet and squishy to catch fire.
- Special Rule (5): Story Achievement: When the mice clear this room of froglodytes, if there are any firebelly newts left, add the firebelly freedom story achievement token to the party stash and advance the chapter end marker 1 page space on the chapter track.
Note: Helping the firebelly newts could give the mice an advantage in a later chapter.
- Special Search (6): Fungus Bits. (Note: This provides a mouse with an attack boost.) ITEM. Discard this item as a free action before making an attack. Roll a die. Add the number result to this mouse's battle during that attack. No Requirements.
- Special Surge (7): Cave centipede.
Tadpool (Chapter Four)
-
Story Moment (1): When the mice explore Tadpool, choose a player to read the following aloud (read-aloud text omitted).
-
Special Setup (2): Quick Hide! Do not deal any cards to the initiative track yet. Instead, the mice must hide to avoid being found out! Each mouse must choose 1 of the 4 available hiding spaces marked on the example. Place each mouse on its chosen space. (Note: To match the story, the suggested mice are listed next to the option.)
- Hiding next to the smaller stalagmite: A (Collin)
- Hiding next to the large stalagmite: B (Jakobe)
- Hiding in the pool with the tadpoles: C (Ditty)
- Hiding under the water near the fall: D (Filch)
Then continue reading and follow the directions for each mouse to see how good they are at hiding.
-
Hiding spot D (Filch): Add a bullfroglodyte figure to the pool at position D and place the King Shalop token under it. Also add 5 froglodytes to the tile in spaces adjacent to Shalop. Do not place the minion cards on the initiative track yet. After placing the minion figures, the mouse in hiding spot D must roll a number of action dice equal to its defense value. If 1 or more starbursts are rolled, the mouse successfully endures the bullfrog king's ample bottom. If the mouse fails to roll at least 1 starburst, it gets slightly squished. Add 1 wound marker to that mouse, and also place a cheese token on the board next to that mouse.
-
Hiding spot B (Jakobe): The mouse in position B has a moment to snatch some flies out of the basket before being noticed. Roll a number of action dice equal to this mouse's move value. Count the number of starbursts rolled. This is how many flies the mouse in position B was able to grab. If no starbursts are rolled, place a cheese token on the board next to that mouse and continue reading.
Note: the printed text of the sneak-away step is transcribed as printed; the flies and sneak rolls name the starburst as the rolled result, matching the other rolls on this tile.
-
Special Surge (3): Calamity! If the mice have not been discovered when a surge happens, choose a player to read the following aloud and follow the instructions (read-aloud text omitted). If the mice have already been discovered when this surge happens, just move the hourglass as usual with no further effect.
After the read-aloud: The mice must now fight! Remove Shalop and 1 froglodyte guard from the board. The mouse in position B lets loose the flies it retrieved from the basket if any. Remove one froglodyte figure for each fly. Now deal the cards to the initiative track and conduct the battle as usual.
The Lair (Chapter Four)
-
Story Moment (1): When the mice explore The Lair, choose a player to read the following aloud (read-aloud text omitted).
-
Special Setup (2): Place a weasel on the space with the shabby table, and 3 rat warriors on minion entry spaces normally. Place 1 more rat warrior adjacent to the weasel; they are having a discussion and the mice have a moment to listen in on bits of conversation. Continue reading (read-aloud text omitted). Then, after the read-aloud:
The mice spring into action, catching the minions unprepared! Now shuffle and deal the mouse cards to the initiative track. Then, shuffle and deal the minion cards to the track including the froglodyte initiative card, but don't add any froglodyte figures to the board yet! On their turns each mouse must use its move to leave the space they start on before the froglodytes arrive.
-
Special Rule (3): Froglodyte Pursuit: It didn't take the froglodytes long to discover the treachery and begin pursuit. When the froglodytes start their first turn, place 4 froglodytes on the board in either space adjacent to the exit. The froglodytes consider the rats and weasel to be enemies and will move toward, and attack them just like mice. Likewise, the rats and weasel consider the froglodytes enemies as well, and will attack them just like mice. Follow all the rules listed in the special chapter rules above for minions fighting other minions.
-
Special Rule (4): Hasty Escape: After the froglodytes arrive, any mouse can use an explore action even though there are minions on the tile. The exploring mouse must roll a die. If a starburst is rolled, the mice are successful; if no starburst is rolled, the mice fail, and that action is wasted. If the mice successfully explore, leave the minions on The Lair to battle it out with each other, and leave the cards on the initiative track. On their turns, the rats and froglodytes will continue to battle each other. If the minions run out of enemies, remove the surviving minions and their initiative card(s) and set them aside. We will see them again.
-
Special Search (5): Heal All Scroll. (Card text: Choose a wounded mouse on the same tile as this scroll's user. Remove all wound markers and poison wound markers from that mouse's character card.) SCROLL. Requires: the class icon with the value 2 printed on the card.
Kitchen Tunnels (Chapter Four)
- Special Setup (1): When the mice enter the Kitchen Tunnels, place 8 roaches on or adjacent to the flip space and add their card to the initiative track. Then continue playing. (Remember the battle might still be raging in The Lair.)
- Special Rule (2): These roaches are going up into the farmer's wife's kitchen on a scouting mission for the rats. At the start of each roach turn roll an action die. The number rolled is the number of roaches that escaped, regardless of where they are located on the tile. When removing roaches, remove those roaches from spaces closest to the flip space first. Set those roaches aside. They will be part of the next encounter. Any remaining roaches will move toward the mice and attack normally.
- Special Surge (3): Any 1 minion chosen from the available minions in The Lair (if any). Place that minion on this tile in the minion entry space adjacent to The Lair.
Kitchen (Chapter Four)
- Story Moment (1): When the mice explore the Kitchen, choose a player to read the following aloud (read-aloud text omitted).
- Special Setup (2): Place 4 roaches on the kitchen counter. Add to this any roaches removed from the kitchen tunnels. Add the roach initiative card to the initiative track.
- Story Moment (3): When the mice defeat the last roach, choose a player to read the following aloud (read-aloud text omitted). Then gather all surviving minions from The Lair and place them on and/or adjacent to the flip space in the kitchen. Continue playing. All minions moved from The Lair will now only attack the mice instead of each other.
- Special Surge (4): Spider.
- Story Moment (5): When the tile is clear of minions, choose a player to read the following aloud (read-aloud text omitted).
Chapter Four Ending
- The mice are victorious when they have found the item of value in the kitchen. (The printed ending reads: "If you are reading this, it means your mice have completed the victory requirements of finding something of value. The mice are victorious!")
- Campaign Special Rule: If you are playing this chapter as part of a campaign, return the king's crown story achievement token (from the base game) to your party stash.
Chapter Five: The Shores of Tricklemoore
The chapter's read-aloud story text is omitted. Its rules are kept.
Chapter Five Objectives
Transport Tilda to Puddleby.
Victory Condition: The mice are victorious if they can safely transport Tilda to Puddleby, clear the tile of minions, and place her in the pool for healing.
Defeat Condition: If the hourglass marker reaches the chapter end marker on the chapter track before the mice have healed Tilda in Puddleby, or if all mice are captured at the same time, the mice are defeated.
Chapter Five Setup
Tilda cannot be chosen as she is in need of medical attention! Tilda is unconscious, and must be transported to Puddleby.
Chapter End: Place the chapter end marker on page 6 of the chapter track.
Party Setup: Select 4 mice to be in the party for this chapter. If playing this chapter as part of a campaign, the party cannot include any of the mice used in chapter 4.
Encounter Deck Setup: To build the encounter deck, shuffle and place all standard encounter cards face down onto the encounter area on the story control board. The difficult encounter cards are not used in this chapter.
Room Tile Setup: Place the following 4 tiles as shown below: Tumbledown, Spiritsburrow, Tricklemoore, Puddleby. Tilda's start space is marked on the example.
Note: Tumbledown is used twice. The special rules for this are in the next column.
Place the 4 mice chosen for this chapter on the 4 spaces indicated. Place Tilda on the indicated space and turn her figure on its side to indicate that she is not conscious. Then reveal an encounter card to start the chapter.
Special Chapter Rules
Tilda Swept Away: At the start of this chapter Tilda is unconscious and floating downstream. While in the water, make sure Tilda's initiative card is included with the party's, and is dealt to the initiative track along with the other cards. While in water, each time Tilda would take a turn, simply move her figure 1 space directly downstream in the direction of the current (2 spaces if it's raining).
Pulling Tilda Out of the Water: The mice can attempt to pull Tilda out of the water. On its turn, a mouse that is in a water space with Tilda can pull her along when it moves to another water space. A mouse moving from a water space onto a land space or a space with a leaf boat or turtle space, cannot pull Tilda out of the water on its own. There must be 1 or more friendly mice on the destination space to help pull her out. Each mouse involved rolls an action die. It requires 2 starbursts for the mouse and Tilda to be pulled out of the water. If successful, place Tilda and the rescuing mouse on the destination space. A party item like the fishhook and thread cannot be used to get Tilda out of the water. As soon as Tilda is pulled from the water onto land, turtle, or leaf, remove her initiative card from the initiative track and follow the rules below for moving Tilda across land. The first time the mice successfully pull Tilda out of the water, advance the chapter end marker 1 page space on the chapter track.
Moving Tilda Across Land: A mouse that begins its move in a space with unconscious Tilda, can carry her. That mouse's move attribute is reduced to 0 when carrying Tilda. Move Tilda's figure along with that mouse to show she has been carried. The mouse still rolls a die to determine their limited movement. The unconscious Tilda stays on her side and does not add to space limits. Minions will not stop when moving into a space with unconscious Tilda, unless there is another mouse there to attack.
Tumbledown Used Twice: The Tumbledown tile is used twice in this chapter. After the mice explore out of Tumbledown the first time, move the Tumbledown tile to its new position on the east edge of Tricklemoore (see example above). The second time the mice are on Tumbledown, treat it as a new tile.
Tumbledown (Chapter Five)
-
Special Rule (1): Dangerous Water: If a mouse ends its turn on any of the water spaces on this tile, in addition to drifting downstream, roll a die. If you roll a starburst that mouse receives 1 unblockable wound. A mouse on a turtle or leaf is not harmed by the dangerous water.
Note: Tilda cannot be harmed by this danger.
-
Special Rule (2): Tilda Swept Off The Edge: If Tilda gets swept off the edge of Tumbledown, the mice will need to rush to the Tricklemoore in order to get another chance at pulling her out. Remove her card from the initiative track and place her figure on the card as well. Keep her card and figure nearby. Any other mouse swept off the edge is captured as usual.
Spiritsburrow (Chapter Five)
- Story Moment (1): When the mice explore Spiritsburrow, choose a player to read the following aloud (read-aloud text omitted).
- Special Setup (2): When the mice explore Spiritsburrow, instead of revealing an encounter card as usual, place coiled Hesster on the minion entry space farthest from the mice. Remember, after dealing his initiative cards to the initiative track, make sure the Hesster Strikes card is higher on the initiative track than Hesster Coils. Switch them if necessary.
- Optional Side Plot (3): Investigate the Log: The mice can escape Hesster and investigate the hollow log where the fearie scout went. If all mice are on the flip space, a mouse can use an explore action even if Hesster is still in play. Note that if the mice leave this tile without defeating Hesster, if they subsequently return to this tile, he will be there waiting for them to encounter again!
- Special Search (4): Anklet of the Frog. (Note: This helps a mouse move through water.) ACCESSORY. While equipped, this mouse can move through water spaces as if they were normal spaces, and is unaffected by water current and dangerous water. If a mouse with this anklet receives a wound from a froglodyte, discard this anklet. No Requirements.
- Special Surge (5): Hesster Hypnotizes. If Hesster is in play, each active mouse within sight of Hesster must roll a number of dice equal to its lore value. If a mouse fails to roll a starburst, place a stunned marker on that mouse. Move the hourglass as usual.
- Nightfall: If it is nightfall when the mice explore Spiritsburrow, in addition to any minions, also place the Olga the Owl token on the tile normally, and follow all the rules for Olga the Owl found on page viii of this story book.
The Hive (Chapter Five)
-
Story Moment (1): When the mice explore The Hive, choose a player to read the following aloud (read-aloud text omitted).
-
Special Setup (2): Instead of revealing an encounter card, place 4 fearies normally. Place the fearie queen token on the rectangular special area space in the middle of The Hive. The mice cannot move onto or attack the fearie queen. The fearie queen token blocks line of sight.
After the read-aloud: The mice must fight these fearies and then flee The Hive before the dying queen calls more to the battle!
-
Special Rule (3): Moving Onto Embryo Chambers: The Hive is filled with fearie larvae. You can see them in some of the embryo chambers. Some of the larvae have already hatched and left empty embryo chambers with ruptured covering. Mice cannot move onto the empty embryo chambers, nor can they move onto the space with the fearie queen.
-
Special Rule (4): Attacking While On Embryo Chambers: The embryo chambers are fragile. When a mouse rolls a melee attack while standing on an embryo chamber with a larvae or with a top that is not ruptured, if that mouse fails to roll at least 1 hit, its swing went wild and damages the embryo chamber. If the mouse was on an intact embryo chamber, it falls through and receives 1 unblockable wound. Knock that mouse down. If the mouse was on a chamber with a larvae, the fearie queen lets out an angry shriek, and blasts that mouse with a purple beam of crackling magical energy. Roll a ranged attack against that mouse using 4 dice.
-
Special Search (5): The fearies like to collect shiny things. There are valuables piled around the fearie queen's bed. The first mouse to successfully search any space adjacent to the queen, can look through the search deck, choose any 1 party item, then shuffle the search deck.
-
Special Surge (6): 2 fearies.
Trickleunder (Chapter Five)
- Special Search (1): Rest Spot. (Note: This allows the mice to heal.) FORTUNE. Play immediately. If there are no minions on the board, you may remove all wound markers from each mouse and place 1 cheese on the minion wheel.
- Special Rule (2): Bouncing Mushrooms: Instead of a normal move, a mouse that begins its move on a mushroom, can bounce. Place the mouse on any other mushroom on this tile.
Tricklemoore (Chapter Five)
-
Story Moment (1): When the mice explore Tricklemoore, if they have not pulled Tilda from the water yet, choose a player to read the following aloud (read-aloud text omitted).
-
Special Setup (2): If the mice have already pulled Tilda from the water earlier, there are no special setup rules. Reveal an encounter card as usual. If Tilda has not been pulled from the water yet, place her figure in the middle water space on the western edge (marked above) and add her initiative card to the rest, then reveal an encounter card and continue normally.
-
Special Rule (3): Calmer Water: It's easier to pull Tilda out of the water on Tricklemoore. When rolling to pull Tilda out, it only requires 1 starburst to successfully pull her to safety. In this way, even a single mouse can attempt to pull her out.
-
Special Rule (4): Leaving Tricklemoore by Water: Tricklemoore and the next tile Tumbledown, are only connected by water. The mice can only move off of Tricklemoore by using the water. Place the mouse (or mice if they are all on a leaf boat) on the next available water space on Tumbledown. When the first mouse crosses over to Tumbledown in this fashion, reveal a new encounter card and place new minions as if that mouse had used an explore action into Tumbledown. Any other mice still on Tricklemoore, can now use the water normally to cross over to Tumbledown (unless it's Tilda, of course).
On their turns, any minions on Tricklemoore will use their move to try and follow the mice onto the next tile also using the waterway. When a mouse or minion enters a new tile by way of water, its turn ends.
-
Special Search (5): Leaf. Place a leaf token in your party stash. As a free action, a mouse can remove the leaf from the party stash and place it on any adjacent empty water space to create a leaf boat. Once this leaf is placed in this way, it cannot be picked back up, and is now drifting.
Tumbledown 2 (Chapter Five)
-
Special Rule (1): Dangerous Water: If a mouse ends its turn on any of the water spaces on this tile, in addition to drifting downstream, roll a die. If you roll a starburst that mouse receives 1 unblockable wound. A mouse on a turtle or leaf is not harmed by the dangerous water.
Note: Tilda cannot be harmed by this danger.
-
Special Rule (2): Tilda Swept Off The Edge: If Tilda gets swept off the edge of Tumbledown 2, the mice have lost this chapter!
-
Special Rule (3): Help from the Nobbles: If you are playing the chapter as part of a campaign, and you have the Woody Nobbles story achievement token in your party stash (found in chapter one and chapter two-B), the mysterious nobbles inexplicably help pull Tilda from the water. Add 2 additional dice when rolling to pull Tilda from the water on this tile.
-
Special Search (4): Rest Spot. (Note: This allows the mice to heal.) FORTUNE. Play immediately. If there are no minions on the board, you may remove all wound markers from each mouse and place 1 cheese on the minion wheel.
-
Nightfall: If it is nightfall when the mice explore Tumbledown, in addition to any minions, also place the Olga the Owl token on the tile normally, and follow all the rules for Olga the Owl found on page viii of this story book.
Puddleby (Chapter Five)
-
Story Moment (1): When the mice explore Puddleby, choose a player to read the following aloud (read-aloud text omitted).
-
Special Setup (2): Instead of revealing an encounter card, place 4 fearies. If the mice defeated Hesster at Spiritsburrow, only place 3 fearies.
-
Special Rule (3): Healing Tilda: To heal Tilda (and potentially win this chapter) the mice need to carry her into the pool.
-
Special Surge (4): Molox.
-
Story Moment (5): If there are no more minions on the tile and Tilda is in the pool, the mice are victorious! Choose a player to read the following aloud (read-aloud text omitted).
After the read-aloud, in a campaign where the party does not yet have the gnome grow ability card: the gnomes share some useful information as a show of gratitude. Choose a character in your party. Give that character the gnome grow ability card for free!
Chapter Six: All the King's Mice
The chapter's read-aloud story text is omitted. Its rules are kept.
Chapter Six Objectives
Return Olga's egg to her nest.
Victory Condition: The mice are victorious if they can safely transport Olga's egg to her nest, and clear her tree of minions.
Defeat Condition: If the hourglass marker reaches the chapter end marker on the chapter track before the mice have returned Olga's egg and cleared her tree of minions, or if all mice are captured at the same time, the mice are defeated. The mice are also defeated if Olga's egg is broken.
Chapter Six Setup
Chapter End: Place the chapter end marker on page 6 of the chapter track.
Party Setup: Select 4 mice to be in the party for this chapter. You will also need the Meeps and Notch tokens and initiative cards as they have a special role to play in this chapter (set Meeps and Notch aside for now). The mice also start with the Woodchuck's Hatchet search card. Choose a mouse to carry this weapon.
Encounter Deck Setup: To build the encounter deck, shuffle and place all standard encounter cards face down onto the encounter area on the story control board. The difficult encounter cards are not used in this chapter.
Room Tile Setup: Place the following 4 tiles as shown below: Puddleby, Brokenwood, Spiritsburrow, Thistle Ridge.
Now add the tree overlay on Puddleby, and place the branch overlay so that it reaches out across the adjacent Brokenwood tile. The 4 mice being used in this chapter start on the tree climb space on the tree overlay. Also place 4 firebelly newts on the minion entry space at the end of the branch overlay.
Special Chapter Rules
The Egg: The mice need to transport the egg to Olga's nest. The only way to move the egg is to roll it. The egg is awkward and fragile. Non-flying figures cannot move into a normal space with the egg. The egg can also block line of sight for ranged attacks when targeting normal sized figures.
Moving the Egg: On its turn, a mouse can use its action to move the egg by pushing it and watching it wobble and roll. To do this, the pushing mouse must be adjacent to the egg. The mouse must turn the egg so that the arrow is pointing the direction you want it to go. The player chooses 1, 2, or 3 action dice. Roll the chosen number of dice and add the number results together. Move the egg that number of spaces in the direction its arrow is pointing (yellow lines cost 3 when moving against the arrow). If the egg ends its move not adjacent to a mouse, flip a cheese and move the egg 1 additional space in the direction the cheese is pointing. To explore to a new tile, the exploring mouse must be adjacent to the egg when it uses its explore action on an exit space.
Egg Rolling Over Figures: If the rolling egg would move into a space with 1 or more creatures, perform a blunt melee attack against those creatures using 3 dice. If the creature(s) are not defeated by this attack, the egg stops adjacent and the creature(s) are considered a barrier (see below). If the attack results in an empty space, continue the egg's rolling move. Pets, and other creatures represented by tokens, are also affected by this egg 'attack'. Ignore any cheese rolled by the egg.
Egg Damage: The egg can be damaged or even broken. A minion will attack the egg if it is the only target available. The egg has a defense of 0 against this attack, so be careful where you roll the egg. When rolling the egg, if the egg reaches a barrier but still has additional movement, the egg stops and takes damage equal to the unused movement points. Use wound markers to keep track of egg damage. If the egg receives 6 points of damage it becomes broken. The mice lose if the egg is broken.
Barriers include:
- Red lines.
- Tile edges (exit spaces that lead to an adjacent tile stop the egg but cause only 1 damage no matter how much extra movement the egg had).
- Figures.
Meeps and Notch: Though Meeps and Notch are both pets, for this chapter, they are not removed as usual when the mice explore off of a tile. The players do not summon them into play. They are members of the party. They cannot move the egg because they are too small. If Meeps or Notch get captured, do not move the hourglass. Meeps and Notch can be rescued just like a captured mouse.
Flip Spaces: The flip spaces are not used in this chapter. The entire chapter takes place above ground.
Tree and Branch Overlay (Chapter Six)
- Special Rule (1): Chopping Down the Branch: The mice are trying to create a bridge over the crevasse in Brokenwood. To do this, they have decided to chop down a branch that stretches out over the crevasse. On its turn, a mouse on a space adjacent to the branch overlay and equipped with the woodchuck's hatchet, can attack the branch. The branch does not defend and requires 6 wounds to be chopped through. Once the branch is chopped through, it immediately crashes to the ground of Brokenwood below! All figures or tokens on the branch overlay must be removed. Mice are captured, minions are defeated. Leave the branch overlay in place. The mice can no longer move normally from this tree overlay onto this branch overlay, and must explore down to Puddleby (and when they do, just remove the tree overlay, not the branch overlay as it will serve as a bridge across Brokenwood).
- Special Surge (2): 2 firebelly newts.
Puddleby (Chapter Six)
- Special Setup (1): Instead of revealing an encounter card as usual, place Lutz and 2 rat warriors normally. Place the egg on the western hovel of Puddleby. Place Meeps and Notch on the western hovel as well. When setting the initiative track, make sure to now add Meeps and Notch's initiative cards as well.
- Special Rule (2): Keep the Egg Safe: Lutz is trying to obtain the egg on orders from Malodor. They want to use it to gain the favor of Hesster. Lutz is strong enough to carry the egg on his own. He will move toward the egg on his turns and will not stop when adjacent to mice. If he moves onto the egg, he will not attack on that turn, and instead will pick the egg up (Note: Lutz is allowed to break the rules and move onto the egg because he is picking the egg up). If he starts a turn on the egg, he will move away with it toward the farthest minion entry space, ignoring the mice. If he ends his move adjacent to a mouse, he will attack normally. If Lutz moves onto the minion entry space with the egg, the mice immediately lose!
- Special Rule (3): Healing Waters: If there are no minions on the tile, any mouse on the water special area of this tile may spend its action to remove 1 wound marker from its card.
- Special Search (4): Fishhook & Thread. (Note: The mice will need this item later in this chapter.) PARTY ITEM. Upon drawing this card, add the fishhook and thread token to the party stash. See page XX of the rulebook for details on how to use this item later in this chapter. No Requirements.
- Special Search (5): Levitate Scroll. (Note: The mice will need this item later in this chapter.) SCROLL. Until the scroll user's next turn, when moving, all mice ignore yellow lines, red lines, and voids between pipe spaces. They can pass over mousetraps, occupied spaces, and water spaces as if they were normal empty spaces. Requires: the class icon shown on the card with the value 2.
- Special Surge (6): 2 fearies.
Brokenwood (Chapter Six)
- Story Moment (1): When the mice explore Brokenwood, choose a player to read the following aloud (read-aloud text omitted).
- Special Setup (2): Because the mice chopped it down, the branch overlay should still be on this tile! It is considered part of the tile. Place the egg on the bark space of the branch overlay nearest Puddleby. Place the mice and pets on the other space. Now reveal an encounter card normally, and when dealing cards to the initiative track, make sure to include Notch and Meeps.
- Special Rule (3): Moving onto or off of the branch. Moving onto the branch costs 3 move points. When rolling the egg off the branch, add an additional action die for the egg's movement. If the egg rolls into the crevasse, the mice lose this chapter. Note that the branch may partially cover some spaces. Partially covered spaces are only counted as spaces if a mouse's base can fit in the space, and can only contain as many figures as the space physically allows. The egg cannot stop on a partial space, and will roll to an adjacent space instead when ending its roll. The branch tip can be used as an exit space if it is obscuring one of the exit spaces to Spiritsburrow.
- Special Surge (4): Malodor. He wants that egg for a scheme he's cooking up.
- Nightfall: Nightfall makes the branch bridge dangerous. One false move and a mouse could fall in the crevasse. While on any branch space adjacent to the black void area of the crevasse, if a mouse receives 1 or more wounds, it has slipped off the edge. Place that mouse on the crevasse beside the branch to show that it is hanging on by its claws. On its turn, a mouse that is hanging off must use its turn to attempt to climb back up using the same rules for climbing out of water. Failure to climb up results in the mouse being captured.
Spiritsburrow (Chapter Six)
-
Story Moment (1): When the mice explore Spiritsburrow, choose a player to read the following aloud (read-aloud text omitted).
After the read-aloud: The mice need to get the egg to this space. Upon moving the egg onto the indicated space, and clearing the tile of minions, gather the mice on the space marked with the white mouse head icon above. Remove the bugs from Spiritsburrow, add the tree overlay to Spiritsburrow, and add the branch overlay so that it stretches over Thistle Ridge. Also add the nest to the indicated spaces. Now place both bugs on the tree climb space on the tree overlay, as shown below.
-
Special Setup (2): When the mice explore into Spiritsburrow, instead of revealing an encounter card as usual, place 3 fearies on the hollow log. Also place the tree climb marker in the south west corner.
-
Special Rule (3): Reinforcements: When you defeat a fearie, place that figure on the fearie initiative card. At the beginning of each fearie turn, if there are any fearies on their card, roll a number of action dice equal to the number of fearies still in play. If you roll 1 or more starbursts, remove 1 fearie from the initiative card and add it to the board on the hollow log special area.
-
Special Rule (4): Bug Mission: After clearing this tile of minions, the mice decide to split up by sending Notch and Meeps into the tree to scout it out. Place Notch and Meeps on the tree climb token, and remove their cards from the initiative track for now. Then continue the chapter.
-
Special Search (5): Wilderberry Jam. (Note: Allows a mouse to avoid minion attacks.) ITEM. Discard this card at the end of this mouse's turn, and place a curse marker on this mouse. Until its next turn, this mouse ignores all hits from minion attacks. No Requirements.
-
Special Surge (6): 2 bullfroglodytes.
Thistle Ridge (Chapter Six)
- Special Setup (1): Place Notch and Meeps on the tree climb token and remove their cards from the initiative track for now (see Notch and Meeps start space). Add 2 roaches to the tree and branch overlay, and 4 more roaches on the minion entry space on the upper level of Thistle Ridge. Then choose a player to read the following aloud (read-aloud text omitted).
- Special Rule (2): Fishhook and Thread: Meeps and Notch need to secure the fishhook and thread to the end of the branch so that it reaches the space indicated. Use Meeps flying ability to get there quickly. As soon as one of these pets reaches the end of the branch, place the fishhook and thread as shown.
- Special Rule (3): Advantages of the Ridge: The ridge offers a special vantage. Any mice armed with a ranged attack can attack the roaches on the tree or branch overlay to try and help Meeps and Notch. Meeps can fly between spaces on both Thistle Ridge and the branch overlay.
- Special Rule (4): Levitating the egg into the Tree: As soon as all the mice have used the fishhook and thread to climb onto the branch overlay, on its turn, a qualified mouse can use the levitate scroll to magically lift the egg onto the tree branch adjacent to the nest (no mice are levitated, only the egg).
- Special Rule (5): Hefting the Egg Into the Nest: Remember, the nest is bordered by a yellow line and therefore costs 3 movement points for the egg to be rolled into it. Because there is no arrow along the yellow line, it also costs 3 to roll out of the nest so be careful not to roll the egg too hard or you could overshoot the nest. Because the nest is a special area, mice and other figures can occupy the nest even with the egg in it. If the egg is in the nest it will not roll randomly for not having a mouse adjacent to it.
- Special Surge (6): 3 firebelly newts (placed on the northwest corner of Thistle Ridge), not on the branch overlay. Note: mice on the tree branch can use ranged weapons to attack the minions on Thistle Ridge, and can be attacked by those minions if they have a ranged attack.
Chapter Six Ending
- Victory: The mice are victorious! If playing this chapter as part of a campaign, place the Olga the Owl token in the party stash and treat it as a story achievement token.
Chapter Seven: The Frog March
The chapter's read-aloud story text is omitted. Its rules are kept.
Chapter Seven Objectives
Defeat as many frogs as possible before time runs out.
Victory Condition: The mice are victorious if they can defeat a total of 12 froglodytes and bullfroglodytes.
Defeat Condition: If the hourglass marker reaches the chapter end marker on the chapter track before the mice have defeated 12 froglodytes and bullfroglodytes, or if all mice are captured at the same time, the mice are defeated.
Note for campaign play: This chapter and the next (chapter eight) are linked. If you are playing this chapter as part of a campaign, the result can affect an upcoming chapter. Regardless of whether your mice were victorious or defeated, move on to the next chapter in the story book using the same party with all the gear and cheese, and see how this outcome affects future events.
Chapter Seven Setup
Chapter End: Place the chapter end marker on page 6 of the chapter track.
Party Setup: Select 4 mice to be in the party for this chapter. Prince Collin cannot be chosen for this chapter as he is currently on his way to Headfall Hollow with the other mice. Ansel must be chosen as one of the mice.
Note to Campaign Players: If you are playing this as part of a campaign, the 4 mice chosen for this chapter must also be chosen for chapter eight, and cannot be chosen later for chapter nine.
Encounter Deck Setup: The encounter deck is not used in this chapter.
Room Tile Setup: Place the following 6 tiles as shown below: Thistle Ridge, Tricklemoore, Tumbledown, Brokenwood, Frogwaller, Puddleby. Place the 4 mice being used in this chapter on the indicated space. Place 4 froglodytes on the flip space of Frogwaller, and place a bullfroglodyte adjacent. Also place 2 more froglodytes and 1 bullfroglodyte on Puddleby normally. Then place a tree climb token on Brokenwood in the space indicated. The flip spaces are not used in this chapter.
Special Chapter Rules
Frog March: The frog army is on the march toward Headfall. On the froglodyte and bullfroglodyte turns, any of these amphibians that start their turn on a tile that has no mice, will use their full move to 'march toward Headfall'. Move those figures following the path laid out in the example above. On tiles where the mice are operating, refer to the special rules for that tile, to see how the froglodytes react to the mice presence.
Endless Froglodytes: Each time the mice defeat a froglodyte or bullfroglodyte, place the defeated figure on the flip space of Frogwaller (or adjacent, if that flip space is full). Use wound markers to keep track of how many froglodytes and bullfroglodytes you defeat.
Note: In this chapter, minions will always be present on the board and on the initiative track. Any new minion initiative cards added will go at the bottom of the initiative track. Captured mice can be rescued as long as there are no minions on the tile the mice are on, even though there are minions elsewhere on the board.
Frogs Escape: When a froglodyte or bullfroglodyte moves off the Thistle Ridge tile, it escapes the mouse ambush and is able to continue the march on Headfall. Add a cheese to the minion wheel each time a minion escapes this way, and place that minion back on Frogwaller to continue the endless march. The froglodyte and bullfroglodyte initiative cards stay on the initiative track through the entire chapter.
Frogwaller and Tumbledown: The Frogwaller and Tumbledown tiles are not accessible to the mice in this adventure, and are included solely to show the progression of the froglodyte forces.
Froglodyte Hop Away: The froglodyte tokens in this chapter print the following ability: Before a standing froglodyte rolls to defend against a melee attack, first roll an action die. If a starburst is rolled, the attack misses. Move that froglodyte 2 spaces in a direction away from the nearest mouse, if possible.
Puddleby (Chapter Seven)
- Special Search (1): Choose any party item. (Note: Players should consider the tiles in this chapter and choose wisely. Keep in mind, the mice want to get to the upper part of Thistle Ridge to ambush the marching froglodytes.)
- Special Surge (2): 2 rat warriors.
Brokenwood (Chapter Seven)
-
Story Moment (1): When the mice explore Brokenwood, choose a player to read the following aloud (read-aloud text omitted).
-
Special Rule (2): Decisions, Decisions: There are two ways to cross Brokenwood. The mice can either cross the chasm using scrolls or party items, or they can climb the tree. Depending on the mouse choices, follow these instructions:
If the mice decide to sneak over to the tree climb token: Each mouse must move quickly and quietly to avoid drawing the attention of any minion patrols. All mice must be on the tree climb token in order to use an explore action to climb the tree. When rolling for movement, if any mouse rolls a 1, its turn ends. The mice are assaulted by fearies that have swarmed up from the chasm. Place 3 fearies on the large rock across the chasm from the mice. Add the fearie initiative card to the initiative track and continue play. Also add a pesky bee to the flower.
If the mice decide to cross the chasm: As soon as the first mouse finishes its move on the far side of the chasm that mouse's turn ends. Add 4 firebelly newts to the tile using one of the exit spaces adjacent to Frogwaller. Add the firebelly newt card to the initiative track and continue playing.
-
Special Search (3): Horned Bow +1, SHARP. (Note: This is a ranged weapon for a tinkerer, warden or archer.) Requires: Tinkerer or Archer or Warden. When attacking a figure that is on the same space as this mouse, this bow is considered a sharp melee weapon.
-
Special Surge (4): Molox. Must be placed on the side of the chasm with the most mice.
Tree and Branch Overlay (Chapter Seven)
- Special Setup (1): When the mice explore into the tree overlay, also place the branch overlay so that it reaches out over the adjacent tile Tricklemoore. Place a leaf token on stem (A) of the branch overlay. Add 5 roaches to the tree overlay normally. Also add a spider to the branch overlay normally. Add their initiative cards to the initiative track and continue play.
- Special Rule (2): Sniping: Any mouse on the branch overlay that is armed with a ranged weapon can attack any froglodytes or bullfroglodytes visible on the Tricklemoore tile below. At this distance, the minions roll an additional die when defending against these sniping attacks. When a minion is defeated by a snipe attack, if there are 1 or more bullfroglodytes on Tricklemoore roll a die for each bullfroglodyte. On a starburst that bullfroglodyte will immediately use its tongue to make a ranged attack against the sniping mouse. This works just like a normal ranged attack and does not use the tongue grab ability.
- Special Search (3): Walkabout Twig. (Note: A mouse equipped with this weapon gains 1 move and is considered wild.) BLUNT. When attacking a small minion, if 1 or more hits are rolled, knock that figure down. Any mouse with this twig equipped is considered wild and gets +1 to its move value. No Requirements.
- Special Surge (4): Dusk Mosquitos swarm the mice! Each mouse must roll a number of dice equal to its battle value. If the mouse rolls at least 1 starburst, that mouse successfully swats the mosquito away. If a mouse fails to roll any starburst, place a wound marker on that mouse.
Tricklemoore (Chapter Seven)
- Special Setup (1): When the mice explore to Tricklemoore, either by land or by leaf from the tree branch above, place 3 firebelly newts normally, and add their initiative card to the initiative track.
- Special Rule (2): Froglodyte Behavior: King Shalop has ordered his army to march on Headfall Hollow without delay. Any froglodytes and bullfroglodytes on this tile are part of the march on Headfall and will attempt to continue that march. If a mouse uses an ability against, or attempts to attack one of these minions but fails to defeat it, turn that minion figure to face the mice. On their turn, any minion that is turned to face the mice in this way will abandon its march and revert to its normal behavior. Move that minion toward the mice and try to attack.
- Special Rule (3): Exploring: Before a mouse can use an explore action to leave Tricklemoore, all mice must be on the same side of the water as the exploring mouse. The mice can explore even if there are froglodytes or bullfroglodytes still on this tile.
- Special Surge (4): Dusk Mosquitos swarm the mice! Each mouse must roll a number of dice equal to its battle value. If the mouse rolls at least 1 starburst, that mouse successfully swats the mosquito away. If a mouse fails to roll any starburst, place a wound marker on that mouse.
Thistle Ridge (Chapter Seven)
- Story Moment (1): When the mice explore Thistle Ridge, choose a player to read the following aloud (read-aloud text omitted).
- Special Setup (2): Place 1 cave centipede normally, and add its card to the initiative track.
- Special Rule (3): Froglodyte Behavior: King Shalop has ordered his army to march on Headfall Hollow without delay. Any froglodytes and bullfroglodytes on this tile are part of the march on Headfall, and will attempt to continue that march. If a mouse uses an ability against, or attempts to attack one of these minions but fails to defeat it, turn that minion figure to face the mice. On their turn, any minion that is turned to face the mice in this way, will abandon its march and revert to its normal behavior. Move that minion toward the mice and try to attack.
- Special Rule (4): Frogs Escape: Remember, when a froglodyte moves off this tile, it escapes the mouse ambush and is able to continue the march on Headfall. Add a cheese to the minion wheel each time a minion escapes this way, and place that minion figure back on Frogwaller to continue the endless march.
- Special Rule (5): Causing a Landslide: Once during this chapter, the mice can cause a landslide to crash down on the froglodytes. On its turn, a mouse armed with a melee weapon and on the indicated space can use its battle action to try and pry or knock a rock loose to initiate the landslide. Roll to attack the rock. The rock has a defense of 5. It only takes 1 wound to cause the landslide. If a mouse successfully causes the landslide, all figures on the lower portion of Thistle Ridge immediately receive 1 automatic unblockable wound.
- Special Search (6): Rest Spot. (Note: This allows the mice to heal.) FORTUNE. Play immediately. If there are no minions on the board, you may remove all wound markers from each mouse and place 1 cheese on the minion wheel.
- Special Surge (7): 3 firebelly newts.
Chapter Eight: Rite of Passage
The chapter's read-aloud story text is omitted. Its rules are kept.
Chapter Eight Objectives
Get to Headfall Hollow to help Collin defend the settlement.
Victory Condition: The mice are victorious if they can use an explore action to enter Headfall Hollow. They must first explore 2 randomly placed tiles. See chapter rules below.
Defeat Condition: If the hourglass marker reaches the chapter end marker on the chapter track before the mice have arrived in Headfall Hollow, or if all mice are captured at the same time, the mice are defeated.
Note for campaign play: If you are playing this chapter as part of a campaign, the result can affect an upcoming chapter. Regardless of whether your mice were victorious or defeated, move on to the next chapter in the story book and see how this outcome affects the events.
Chapter Eight Setup
Chapter End: Place the chapter end marker on page 6 of the chapter track.
Party Setup: Select 4 mice to be in the party for this chapter. Prince Collin cannot be chosen for this chapter as he is currently on his way to Headfall Hollow with the other mice. Ansel must be chosen as one of the mice.
Note to Campaign Players: If you are playing this as part of a campaign, you must use the same 4 mice from the previous chapter seven. The mice can keep any and all cheese and items found in the previous chapter. The 4 mice used in this chapter cannot be chosen for chapter nine.
Encounter Deck Setup: To build the encounter deck, grab 3 difficult encounter cards and 3 standard encounter cards. Shuffle them together and place them face down onto the encounter area on the story control board.
Room Tile Setup: Place the following 2 tiles as shown below: Spiritsburrow and Thistle Ridge. Place the tree overlay and branch overlay as shown. Add a leaf to the branch overlay in position A. Also place the fearie outpost on the indicated spaces. Place the 4 mice being used in this chapter on the fearie outpost. Do not reveal an encounter card.
Create A Random Tile Stack: Set the Headfall Hollow tile to the side. Then create a random tile stack with all of the other tiles from this set excluding the ones currently in use. (Shuffle all of the tiles together into a stack.)
Special Chapter Rules
Random Exploration: In parts of this chapter, a mouse may use an explore action on a space adjacent to an exit area, even if there is no other tile connected to that exit area. When exploring an exit that has no other tile connected to it, select a tile at random from the random tile stack and place it adjacent to the exit that is being explored. The tile must be placed so that it has the same color side up as the tile that the exploring mouse is on and the orientation arrow on the tile being placed must face in the same direction as the arrows on the tiles already in play. After placing the new tile, check to see if the mouse can legally explore through to the newly placed tile. If the new tile cannot legally be explored, the exploring mouse's turn is over and its explore action was wasted, but leave the new tile in place as there may be other ways to access it. If the explore action proved successful, make sure to check these chapter special rules for the tile you're exploring.
Finding the Way to Headfall Hollow: The mice are trying to find their way back to Headfall Hollow to help the others. When the mice explore onto the second randomly placed tile, only then can the Headfall Hollow tile be accessed. See Achievement below for more details.
Night Fight: This entire chapter takes place during nightfall. Place the nightfall moon token on the minion cheese wheel, and do not remove it with a surge. This nightfall condition is in addition to any other encounter card hazards such as rain or pesky bees.
Olga the Owl: Once during this chapter, when exploring an outdoor Downwood tile, in addition to any minions, the players can choose to also place the Olga the Owl token on the tile normally, and follow all the rules for Olga the Owl found on page viii of this story book.
Note: if you are playing this chapter as part of a campaign, and you still have the Olga token in your party stash, Olga has given your party safe passage. She has not done the same for the minions! Leave Olga in play but ignore any wounds she would inflict on any member of your party. When a mouse rolls a 1 for movement, Olga will not move toward that mouse.
Tree Climb Token: Once during this chapter, the mice can place the tree climb token on any corner space of a forest Downwood tile. When exploring the tree climb space onto the tree overlay, the players can choose which direction to place the branch overlay onto any adjacent tile (making sure the tile is Downwood side up). Also place 2 leaves adjacent to any of the available stems on the tree or branch overlay. This will allow the mice to cross to a Downwood tile it might not be able to reach normally. When the mice arrive on the tree overlay, reveal an encounter card and place minions on the tree and branch overlay normally.
Note: Players may want to save this option until they add the Headfall tile to the board. The random nature of this chapter means access to Headfall Hollow could be tricky.
Achievement: When the mice successfully explore onto the second randomly placed tile, advance the chapter end marker 1 page space on the chapter track. Choose a player to read the following aloud (read-aloud text omitted). Then: Now place the Headfall Hollow tile adjacent to the tile the mice are currently on. Make sure the orientation arrow is pointing the same direction as the other tiles in play.
Tree and Branch Overlay (Chapter Eight)
- Special Setup (1): The mice are victims of an ambush. Instead of revealing an encounter card, place 6 fearies on the tree and branch overlay normally. When dealing initiative cards to the initiative track, treat the fearies as if they are ambushing (roll a die. The number result is how many slots the fearies move up on the initiative track: pg 14 of the rule book). Also place a cursed status marker on each mouse due to pollen spores the fearies have deployed as a trap.
- Special Rule (2): Fearie Outpost: The structure is a fearie outpost. The mice can move onto the outpost from any space adjacent to the openings depicted on it. Treat the fearie outpost as a special area space. When a mouse or minion moves into the outpost, its move ends. Because of its walls, figures inside the fearie outpost add +1 to their defense when defending against an attack from outside the outpost. The outpost itself blocks line of sight for the purpose of ranged attacks.
- Special Surge (3): It's a trap! A large net is thrown over the mice, and they are hauled away to the fearie hive! Follow these rules: Remove all figures, tokens or overlays from the board. Turn the Spiritsburrow tile over to show The Hive side, and shuffle the Thistle Ridge tile back into the random tile stack. Remove any cursed status markers from the mice. Continue play by reading The Hive special entry below.
Spiritsburrow (Chapter Eight)
-
Special Setup (1): If the mice explore into Spiritsburrow by flipping up from The Hive below, reveal an encounter card and proceed normally.
If the mice explore here by way of a leaf from above, do not reveal an encounter card. Instead, place a cursed token on each mouse that is not already cursed from the pollen spores. Place 6 fearies normally. These fearies are considered ambushing (roll a die. The number result is how many slots the fearies move up on the initiative track: pg 14 of the rule book). If the mice defeat these fearies, they can leave this tile. When exploring, the mice must now use the random explore rules listed above as they try to get an idea of which way takes them back to Headfall Hollow.
-
Special Surge (2): (only if you arrived here by way of leaf) It's a trap! A large net is thrown over the mice, and they are hauled away to the fearie hive! Follow these rules: Remove all figures, tokens or overlays from the board. Turn the Spiritsburrow tile over to show The Hive side, and shuffle the Thistle Ridge tile back into the random tile stack. Remove any cursed status markers from the mice. Continue play by reading The Hive special entry below.
The Hive (Chapter Eight)
-
Special Setup (1): Add the rectangular fearie princess token to the center space young side up. The mice cannot move onto this token, and it blocks line of sight. Place each of the 4 mice on an orange larvae space and try to spread them out so they are not adjacent to each other. Place a fearie figure in the space with each mouse. Place a webbed status effect marker on each mouse's card. Reset the initiative track.
-
Story Moment (2): When the mice explore The Hive, choose a player to read the following aloud (read-aloud text omitted).
-
Special Rule (3): Moving Onto Embryo Chambers: The Hive is filled with fearie larvae. You can see them in some of the embryo chambers. Some of the larvae have already hatched and left empty embryo chambers with ruptured membrane covering. Mice cannot move onto the empty embryo chambers with completely ruptured membranes.
-
Special Rule (4): Fearie Drain: The fearie warriors are draining life energy from the mice to give it to the princess. Instead of causing a curse, if a fearie wounds a mouse that is not webbed, place a webbed status effect marker on that mouse. If a fearie would attack a mouse that is already webbed, instead of rolling the attack normally, make a resistance roll for that mouse. If that mouse fails to roll a starburst on 1 action die, it receives a wound. Also place a wound marker on the princess to show that she is absorbing the life energy.
-
Special Rule (5): The Ascension: If the fearie princess collects 4 wound markers, the ritual is complete. She will begin the gradual transformation into queen. Remove the fearie princess token and place it in the party stash to show she has ascended. This could be a new future threat for the mice. The remaining fearies return to their normal behavior.
If the mice defeat all fearies before the fearie princess completes her ritual, choose a player to read the following aloud (read-aloud text omitted). Then remove the fearie princess token from the board.
Tumbledown (Chapter Eight)
- Special Rule (1): Dangerous Water: If a mouse ends its turn on any of the water spaces on this tile, in addition to drifting downstream, roll a die. If you roll a starburst that mouse receives 1 unblockable wound. A mouse on a turtle or leaf is not harmed by the dangerous water.
- Special Rule (2): Exploring: Before a mouse can use an explore action to leave this tile, all mice must be on the same side of the water as the exploring mouse.
Tricklemoore (Chapter Eight)
- Special Rule (1): Exploring: Before a mouse can use an explore action to leave this tile, all mice must be on the same side of the water as the exploring mouse.
Trickleunder (Chapter Eight)
- Special Rule (1): Bouncing Mushrooms: Instead of a normal move, a mouse that begins its move on a mushroom can bounce. Place the mouse on any other mushroom on this tile.
Brokenwood (Chapter Eight)
- Special Rule (1): Exploring: Before a mouse can use an explore action to leave this tile, all mice must be on the same side of the chasm as the exploring mouse.
- Special Rule (2): Bullfroglodytes and regular froglodytes can leap across the chasm using just 1 move point.
Deeper Dark (Chapter Eight)
- Special Rule (1): Rickety Bridge: The bridge space that spans the deep crevasse is old and worn and the wood is dry and rotting. When a non-flying creature moves onto the bridge, it must end its move. If a mouse receives a wound while on the bridge, place that mouse figure in the chasm to the side of the bridge. It is hanging on for its life. While hanging on, a figure cannot attack or use any action until it is pulled to safety. Climbing back up onto the bridge works just like climbing out of water. The mouse uses its entire move, and must roll a starburst on an action die. It gets an additional action die for each mouse on the bridge helping to pull it up.
- Special Rule (2): Exploring: Before a mouse can use an explore action to leave this tile, all mice must be on the same side of the chasm as the exploring mouse.
Headfall (Chapter Eight)
- Story Moment (1): When the mice explore Headfall, choose a player to read the following aloud (read-aloud text omitted).
- Special Setup (2): Instead of drawing an encounter card as usual, place coiled Hesster adjacent to the mice. When dealing cards to the initiative track, don't forget to make sure Hesster Strikes is higher on the track than Hesster Coils. Switch them if necessary.
- Special Rule (3): If all the mice are on the statue head special area space, a mouse can use an explore action even if Hesster is still in play.
Headfall Hollow (Chapter Eight)
- Special Rule (1): As soon as the mice explore into Headfall Hollow, they are victorious.
Note: If you are playing this chapter as part of a campaign, the outcome of this chapter can affect the next chapter. You should proceed to the next chapter even if you failed this chapter, and discover what happens.
Chapter Nine: No Rest for the Wretched
The chapter's read-aloud story text is omitted. Its rules are kept.
Chapter Nine Objectives
Defeat King Shalop and stop the attack on Headfall Hollow.
Victory Condition: The mice are victorious if they can defeat King Shalop and clear Headfall Hollow of minions.
Defeat Condition: If the hourglass marker reaches the chapter end marker on the chapter track before the mice have defeated King Shalop and his retinue, if the sheriff's warren burns down, or if all mice are captured at the same time, the mice are defeated.
Chapter Nine Setup
Chapter End: Place the chapter end marker on page 7 of the chapter track.
Party Setup: Select 4 mice to be in the party for this chapter. Prince Collin must be chosen as one of the mice for this chapter. Ansel cannot be chosen.
Note to Campaign Players: If you are playing this chapter as part of a campaign, the 4 mice that were chosen for chapter seven (and eight) cannot be chosen for this chapter.
Encounter Deck Setup: To build the encounter deck, shuffle and place all standard encounter cards face down onto the encounter area on the story control board. The difficult encounter cards are not used in this chapter.
Room Tile Setup: Place the following 3 tiles as shown below: Thistle Ridge, Brokenwood, Headfall Hollow. Place the 4 mice being used in this chapter on the indicated space. Also place a tree climb token on the indicated space. Begin this chapter by revealing an encounter card.
Special Chapter Rules
Night Fight: This entire chapter takes place during nightfall. Place the nightfall moon token on the minion cheese wheel, and do not remove it with a surge. This nightfall condition is in addition to any other encounter card hazards such as rain or pesky bees.
Olga the Owl: Because the mice have saved Olga's egg in a previous chapter, she feels indebted to the mice. Once during this chapter, after revealing an encounter card on any Downwood forest tile, the mice can place the Olga the Owl token on any minion entry space normally. The mice are immune to any wounds caused by Olga; only minions are affected. When a mouse rolls a 1 for movement, Olga will not move toward that mouse.
Note for campaign players: If you are playing this chapter as part of a campaign, the Olga token should be in your party stash. Using Olga permanently removes her token from the party stash, signifying that her debt has been paid in full. Once Olga's token is removed from your party stash, she cannot be called on for help in future chapters, and will revert back to her normal behavior if encountered.
Thistle Ridge (Chapter Nine)
- Optional Side Plot (1): The mice need to get a message back to Barksburg letting them know the forest is unsafe. Might there be a woodpecker in the tree above that could peck out a message to Barksburg?
- Special Search (2): Blow Pipe +1, OTHER. (Note: This is a ranged weapon that can be used by a scamp, shrew or wild mouse.) When attacking a minion during nightfall, add +2 to this mouse's battle value instead of +1. Requires: Scamp or Shrew or Wild.
Tree and Branch Overlay (Chapter Nine)
-
Story Moment (1): When the mice explore the tree overlay, choose a player to read the following aloud (read-aloud text omitted).
-
Special Setup (2): When the mice explore into the tree above Thistle Ridge, also place the branch overlay so that it stretches out over Brokenwood. Place a leaf token adjacent to the A and B stems on the branch overlay. Also place the fearie outpost token on the tree and the branch overlays in the indicated spaces. Do not reveal an encounter card or place any minions at this point.
Now place a cave centipede on the minion entry space at the end of the branch overlay, and add its initiative card to the initiative track. (Note this will likely cause a reset of the initiative track.)
-
Special Rule (3): Fearie Outpost: The structure is a fearie outpost. The mice can move onto the outpost from any space adjacent to the openings depicted on it. Treat the fearie outpost as a special area space. When a mouse or minion moves into the outpost, its move ends. Because of its walls, figures inside the fearie outpost add +1 to their defense when defending against an attack from outside the outpost. The outpost itself blocks line of sight for the purpose of ranged attacks.
-
Story Moment (4): When the first mouse ends its move on the fearie outpost, choose a player to read the following aloud (read-aloud text omitted).
-
Special Search (5): Bed Rolls. (Note: This allows the mice to heal or gain a trick of their choice.) PARTY ITEM. After clearing a tile of minions, if it is nightfall, discard this party item to make camp. Each mouse in the party can either heal 1 wound, or look through the search deck and pick any trick card. Then shuffle the search deck. No Requirements.
-
Special Surge (6): 3 fearies.
The Lair (Chapter Nine)
-
Special Search (1): Cloak of the Willow. (Note: This will protect the mice from attacks for a round.) SCROLL. Instead of taking an action, a mouse can discard this scroll. Until this mouse's next turn, all mice sharing a space with this mouse ignore any wound markers they would receive from an attacking minion. Requires: the class icon shown on the card with the value 3.
Editor's note: the card's requirement icon is not legible in the text layer; the printed value is transcribed as shown on the card.
Headfall Hollow (Chapter Nine)
- Story Moment (1): When the mice explore Headfall Hollow, instead of revealing an encounter card as usual, choose a player to read the following aloud (read-aloud text omitted).
- Special Rule (2): Shopping: If there are no minions on the Headfall Hollow tile, a mouse that ends its move on a Headfall Hollow building location can spend its action to shop or otherwise interact in that location. Any search cards purchased from a vendor are taken from the search deck. Shuffle the search deck after shopping.
Sheriff's Warren
The first time a mouse ends its move on the sheriff's warren, choose a player to read the following aloud (read-aloud text omitted). Then advance the chapter end marker 1 page space on the chapter track. Lutz will join the party after they explore up to Headfall.
Tinkerer's Trove
Horton Hamfist the hamster tinkerer has a few items up for grabs today, and he wants to help defend the city by giving a deep discount! All clockwork items are only 1 cheese!
- Any Clockwork card = 1 cheese
- Pine Needle Darts = 3 cheese
- Throwing Daggers = 2 cheese
- Coin Shield = 2 cheese
- Dinner Fork = 1 cheese
- Grape = 1 cheese
Mystic Emporium
Danderfur the itchy flaky old collector will buy any search card for 1 cheese. He also has some items of interest for purchase for 2 cheese:
- Phoenix Rune
- Aspect of the Porcupine Scroll
- Heal All Scroll
Hawk's Beak Inn
Brie the innkeeper will bandage the wounds and offer healing salve to the courageous mice. Remove all wounds or poison wounds from any mouse that ends its turn on Hawk's Beak Inn.
She also has some advice to give for those who tip her:
- Choose any trick card from the search deck for a 1 cheese tip.
She also has these items for sale:
- Whiskerfroth Elixir = 2 cheese
- Wilderberry Jam = 2 cheese
- Nut Grass Tincture = 2 cheese
Play the Dice Game
To play the dice game against one of the locals, the mouse must first bet from 1-3 cheese from its stash. Roll 4 Action Dice for your mouse, you may choose to re-roll up to a number of dice equal to your lore but must keep the second result. Count up the number of starbursts rolled. Now roll 5 action dice for the local and count the number of starbursts rolled.
- If you roll more starbursts than the local: You win. Keep the cheese you bet, plus collect a number of cheese equal to your bet.
- If the local rolls the same number of starbursts as you: Place the cheese you bet in the general supply.
- If the local rolls more starbursts than you: Place the cheese you bet on the minion cheese wheel.
For Hire
If Jakobe has not been chosen to be a member of your party or the party used in chapter eight, you can hire him at the Inn as an ally for 3 cheese. Follow all the rules for having more than 4 in your party listed in the Fifth Wheel section of page ii of this story book. Unlike other allies, when Jakobe is hired, he stays in your party through the rest of the chapter, or until defeated.
- Special Rule (3): Searches: Mice cannot search in Headfall Hollow.
- Special Surge (4): If a surge occurs in Headfall Hollow, move the hourglass as usual. There are no other effects from this surge.
Headfall (Chapter Nine)
-
Special Setup (2): Place Lutz along with the mice on the fallen statue head special area. Add 6 froglodyte warriors and 3 firebelly newts spread out along the eastern tile edge. Also place a bullfroglodyte figure in one of the central spaces containing minions on the eastern edge, and place the King Shalop token under it. Remember, Lutz is an ally controlled by the mice, and as such, he does not collect cheese or use any of his abilities. Do however use both of Lutz's initiative cards.
-
Special Rule (3): Froglodyte Reinforcements: At the end of each froglodyte warriors initiative card turn, add all previously defeated froglodytes to the tile adjacent to Shalop.
-
Special Rule (4): King Shalop the Invincible: King Shalop cannot be harmed by any attacks. King Shalop will not move or attack. Do not add King Shalop's cards to the initiative track. He will stand his ground, croaking orders to the charging froglodytes and calling for more frogs to join the battle.
Note to campaign players: If you are playing this chapter as part of a campaign, if you were victorious at chapter seven The Frog March, ignore special rule number 3 above. King Shalop's call for reinforcements goes unheard!
-
Special Rule (5): Falling Back: On its turn, a mouse can use an explore action on the flip space of this tile to fall back to Headfall Hollow and defend the town from there. A mouse can explore even if there are minions present. This option is only available after any 6 minions have been defeated, but must be exercised after that. When falling back, any currently captured mice are returned to play. Lutz does not fall back. After flipping the tile, proceed to 'Returning to Headfall Hollow' below.
-
Special Surge (6): Hesster! Achievement!: If the mice defeat Hesster on this tile, advance the story end marker 1 page space on the chapter track. The intimidating display of mouse battle prowess buys the mice some more time.
Returning to Headfall Hollow (Chapter Nine)
-
Story Moment (1): When the mice retreat into Headfall Hollow, instead of revealing an encounter card as usual, choose a player to read the following aloud (read-aloud text omitted).
-
Special Setup (2): Place Malodor on the doorstep of the Sheriff's Warren, he is an ally for this chapter. Place 1 critter citizen token in each of the buildings. Place Collin on the thimble bucket adjacent to the well in the town center. The player who is Collin, controls Malodor. Each of the other mice must be placed on the doorstep of a building so that each building has a mouse guarding its entrance (Note: this might allow players to return any captured mice to play!). Then continue reading (read-aloud text omitted).
Now place a bullfroglodyte figure on the flip space and place the King Shalop token under it. Place 3 firebelly newts in the space with Shalop and 3 more adjacent. Also place 1 froglodyte warrior on each space adjacent to an exit, for a total of 4 froglodytes.
Note: If you are playing this chapter as part of a campaign and you have the firebelly freedom story achievement token (earned in chapter four), you may discard it now: Prince Collin calls for the firebellies to be free! Roll 2 dice. Remove a number of firebelly newts equal to the total number result rolled; they are refusing to fight.
Next, place 1 on fire marker on each of the buildings. Those buildings' roofs are on fire. Then deal the initiative cards (including King Shalop's) to the initiative track and proceed.
Each time the firebelly newts take their turn, instead of attacking mice, they will attack buildings. Roll an action die one at a time for each firebelly newt figure. If a starburst is rolled, that firebelly newt attacks a building. Choose any building and place an on fire marker on it. If the building already has an on fire marker, add a wound to that building instead. If a building collects 3 wounds, it has burned down! It can no longer receive any wound markers. If the sheriff's warren burns down the mice are defeated.
-
Special Rule (3): Moving Critter Citizens: The citizens are your fire brigade! After each mouse takes its turn, roll an action die. The player controlling that mouse can move any 1 critter token a number of spaces up to the number rolled. Critter citizens cannot enter a space that has minions in it.
Chapter Nine Ending
- King Shalop: Once at least 1 wound is caused to King Shalop, he is no longer invincible and can be wounded normally. If Shalop becomes defeated, remove all other froglodyte and firebelly newt minions from the board, they retreat. The mice are victorious. Choose a player to read the following aloud (read-aloud text omitted).
Chapter Ten: Homecoming
The chapter's read-aloud story text is omitted. Its rules are kept.
Chapter Ten Objectives
Safely bring the 5 elderly mice to their new home outside of Puddleby.
Victory Condition: The mice are victorious if they can safely escort all 5 elderly mice first to a rest spot, and then to Puddleby.
Defeat Condition: If the hourglass marker reaches the chapter end marker on the chapter track before the mice have arrived in Puddleby, or if the mouse elders lose all their cheese, the mice lose this chapter.
Chapter Ten Setup
Chapter End: Place the chapter end marker on page 6 of the chapter track.
Party Setup: Select any 4 mice to be in the party for this chapter. Make sure to study the map before choosing characters as some tiles benefit from certain party members. (If you prefer your party to match the fiction, we suggest Collin, Tilda, Ditty, Nez and Jakobe [hired].)
Note: If you are playing this chapter as part of a campaign, any mice used in a previous chapter can break the normal campaign rules and keep all cheese they ended the previous chapter with, in addition to the 1 search card. This cheese can be used in Headfall Hollow to prepare for the challenges ahead. Before starting, divide 6 cheese among the mice chosen to be in the party.
Encounter Deck Setup: To build the encounter deck, grab 3 difficult encounter cards and 3 standard encounter cards. Shuffle them together and place them face down onto the encounter area on the story control board.
Room Tile Setup: Place the following 6 tiles as shown below: Headfall Hollow, Tricklemoore, Frogwaller, Brokenwood, Thistle Ridge and Puddleby.
Place the 4 mice being used in this chapter on the space indicated by the white mouse head icon. Also place the 5 critter citizen tokens in the Warren.
Special Chapter Rules
Quest Deck Setup: This chapter uses a quest deck. To create a quest deck, collect 8 search cards, 4 random, and 4 of the players' choosing. Fortune cards cannot be chosen. Add the Rest Spot search card to 4 of those cards. Shuffle those search cards and place them in a face-down stack near the party stash. Then shuffle the other 4 cards and stack them on top.
Note: Players should choose cards they think will help them in this chapter. Remember that some tiles are difficult or impossible to traverse without certain types of gear.
Rest Spot: The mice need to find a rest spot along the way so the elders can catch their breath. Each time a mouse successfully searches a tile, instead of drawing a search card from the search deck, it may choose to draw a card from the quest deck.
Note: If you find the rest spot on a tile while minions are in play, it still counts toward victory.
Achievement: When a mouse successfully finds the rest spot search card, advance the chapter end marker 1 page space on the chapter track.
Boss Deck Setup: This chapter uses a boss deck. To create the boss deck for this chapter, grab the Malodor, Pheasia, and both Hesster initiative cards. Shuffle the cards together and place them face down near the story control board. When the story book directs you to draw a random boss, reveal the top card from the boss deck. This is the boss you will face. If that boss is Hesster, make sure to use both cards. Once a boss has been encountered, do not return its initiative card to the boss deck.
Barksburg Elders: The Barksburg Elders are a frail group of wise old mice. They need help and protection if they are going to make it to their new home. They are represented on the board by the 5 critter citizen tokens.
Barksburg Elders and Initiative: Shuffle the Barksburg Elders initiative card in with the rest when determining initiative. After dealing the cards to the initiative track the first time, place 6 cheese on or near their initiative card. When initiative order changes, make sure to keep up with the remaining cheese, making sure it stays with the Barksburg Elders initiative card.
Barksburg Elders and Cheese: Barksburg Elders start the chapter with 6 cheese tokens on their initiative card. If they ever lose all of their cheese, the mice have been defeated. A mouse on the same space as a Barksburg Elder can share cheese with the Barksburg Elders using a share action. Cheese shared with the Barksburg Elders is placed on Barksburg Elders initiative card. Barksburg Elders cannot have more than 6 cheese tokens on their card at any time.
Moving Barksburg Elders: When the Barksburg Elders take a turn, they will move but cannot attack. Barksburg Elders always move toward the direction the previous migrating Barksburg mice went. They are following the trail left by the masses of mousey feet. Each tile will explain where the previous mice traveled. To move Barksburg Elders, roll an action die one at a time for each elder. Barksburg Elders will move that number of spaces toward the exit the previous migrating mice used. Without the help of a fishhook and thread party item, Barksburg Elders cannot cross red dividing lines, but will pass right over yellow lines without penalty. Barksburg Elders must stop when entering a space that has 1 or more minions on it. When a Barksburg Elder moves off the tile through an exit (flip spaces and tree climb exits count, but the elders will not backtrack to a tile they have previously traversed) while following the trail, place that Barksburg Elder token aside. The next time the mice use an explore action on that same exit, place the Barksburg Elders tokens on the space the mice explore to, then proceed. The mice cannot use an explore action while there are 1 or more Barksburg Elders on the same tile as the mice. They must first assist all the elders off the tile.
Calling to the Elders: A mouse can spend its action to get the elders to follow it. This action costs 1 cheese. Place that cheese token in the space that mouse occupies when it calls the elders. On their next turn, the elders will each move directly toward that cheese using the shortest path possible and will stop if they enter the space with the cheese. Discard the cheese when the elders are done moving. As mentioned above, if their move takes them onto a flip space, tree climb space or a space adjacent to an exit, the elder will move off the tile using that exit.
Barksburg Elders and Water: Barksburg Elders cannot move against the current and must stop when moving into a water space. A mouse that starts its move in a water space with an elder can pull that elder along when it moves to another water space. At the end of the Barksburg Elders' turn, if an elder is on a water space with no hero mice, he will be swept downstream one space just like a mouse. If a mouse is swept downstream while sharing a space with 1 or more Barksburg Elders, the elders will also get swept downstream. Barksburg Elders cannot climb out of water on their own. They must be pulled out by a mouse that is on an adjacent land space. It takes a mouse's action to pull an elder out of the water.
Tree Climb Token: Once during this chapter, the mice can place the tree climb token on any corner space of a forest Downwood tile. When exploring the tree climb space onto the tree overlay, the players can choose which direction to place the branch overlay onto any adjacent tile (making sure the tile is Downwood side up). Also place 2 leaves adjacent to any of the available stems on the tree or branch overlay. This will allow the mice to cross to a Downwood tile they might not be able to reach normally. When the mice arrive on the tree overlay, also place the Barksburg Elder tokens, then reveal an encounter card and place minions on the tree and branch overlay normally. There is no path in the trees for the elders to follow, so the mice need to make sure to call to them so they don't wander off the edge of the tree branch. If an elder would move off the tree or branch overlay, stop that elder at the edge and remove a cheese from the elder's stash.
Note: Players may want to save the tree option until they encounter a tile that is challenging to cross with the elderly mice.
Headfall Hollow (Chapter Ten)
- Special Rule (1): If you are playing this chapter as part of a campaign, any Headfall Hollow building location that burned down in the previous chapter is not available for shopping in this chapter.
- Special Rule (2): The Elders: The elders will stay put resting until the mice explore out of Headfall Hollow. Do not move the elders or add their initiative card to the initiative track until the mice leave Headfall Hollow.
- Special Rule (3): Shopping: If there are no minions on the Headfall Hollow tile, a mouse that ends its move on a Headfall Hollow building location can spend its action to shop or otherwise interact in that location. Any search cards purchased from a vendor are taken from the search deck. Shuffle the search deck after shopping. Make sure and study the map layout, and spend your shopping cheese accordingly.
Tinkerer's Trove
Horton Hamfist the hamster tinkerer has a few items up for grabs today.
- Woodchuck's Hatchet = 2 cheese
- Hooked Dagger = 2 cheese
- Bark Shield = 3 cheese
- Fishhook & Thread = 2 cheese
- Clockwork Grenade = 2 cheese
- Bedrolls = 2 cheese
Mystic Emporium
Danderfur the collector will buy any search card for 1 cheese. He also has some items of interest for purchase for 2 cheese, and he strongly recommends a Turtle Whistle or a Part Water Scroll:
- Phoenix Rune
- Part Water Scroll
- Clover Rune
- Fungus Bits
- Turtle Whistle
- Heal All Scroll
Hawk's Beak Inn
Brie the portly innkeeper has some advice to give for those who tip her:
- Choose any trick card from the search deck for a 1 cheese tip.
She also has these items for sale:
- Whiskerfroth Elixir = 2 cheese
- Nut Grass Tincture = 2 cheese
Play the Dice Game
To play the dice game against one of the locals, the mouse must first bet from 1-3 cheese from its stash. Roll 4 Action Dice for your mouse. You may choose to re-roll up to a number of dice equal to your lore but must keep the second result. Count up the number of starbursts rolled. Now roll 5 action dice for the local and count the number of starbursts rolled.
- If you roll more starbursts than the local: You win. Keep the cheese you bet, plus collect a number of cheese equal to your bet.
- If the local rolls the same number of starbursts as you: Place the cheese you bet in the general supply.
- If the local rolls more starbursts than you: Place the cheese you bet on the minion cheese wheel.
For Hire
If Jakobe has not been chosen to be a member of your party or the party used in chapter eight, you can hire him at the Inn as an ally for 3 cheese. Follow all the rules for having more than 4 in your party listed in the Fifth Wheel section of page ii of this story book. Unlike other allies, when Jakobe is hired, he stays in your party through the rest of the chapter, or until defeated.
-
Special Rule (4): Exploring: Searches: Mice cannot search in Headfall Hollow.
Editor's note: the printed heading reads "Special Rule: Exploring: Searches"; it is transcribed as printed.
-
Special Surge (5): Street Fight: 1 rat warrior.
Headfall (Chapter Ten)
- Story Moment (1): When the mice and elders explore Headfall, choose a player to read the following aloud (read-aloud text omitted). Then reveal an encounter card as usual.
- Special Rule (2): Follow the Trail: The trail leads off the Eastern exit.
Tricklemoore (Chapter Ten)
-
Story Moment (1): When the mice and elders explore Tricklemoore, choose a player to read the following aloud (read-aloud text omitted).
Note: If you are playing this chapter as part of a campaign, and you have the Woody Nobbles story achievement token in your party stash (acquired in chapters one or two-B) you can call on them to create a dam across the water. Treat all water spaces on this tile as normal land spaces. Then choose a player to read the following aloud (read-aloud text omitted).
-
Special Rule (2): Follow the Trail: The trail leads off the Eastern exit.
-
Special Rule (3): Leaving Tricklemoore by Water: Tricklemoore and the next tile Frogwaller, are connected by water. The mice and elders can move off of or be swept off of Tricklemoore by way of water. Place the mouse and/or elder on the next available water space on Frogwaller. If even just one mouse or elder exits the tile in this manner, all active mice and elders must go this way, and special rule 2 above is no longer in effect. When all active mice and elders are on Frogwaller, treat it as an explore, and continue playing. Any minions left on Tricklemoore are removed from play and their initiative card is removed from the initiative track.
Trickleunder (Chapter Ten)
- Special Rule (1): No Trail: Remember the migrating mice did not use the underground route. If no mouse has called to the elders, before moving them, flip a cheese token. Move each elder its full move the direction the cheese is pointing.
- Special Rule (2): Bouncing Mushrooms: Instead of a normal move, a mouse that begins its move on a mushroom, can bounce. Place the mouse on any other mushroom on this tile. Elders cannot bounce.
- Special Surge (3): Draw a random boss from the boss deck.
Frogwaller (Chapter Ten)
- Special Setup (1): When the mice arrive in Frogwaller, do not reveal an encounter card. There are no minions present. The froglodytes must be hiding out, tending to their wounds. The mice must try to get the elders out of the water without making too much noise. If a mouse attempts to climb out of the water, but fails, it falls back in making a noisy splash! Reveal an encounter card as usual. If all mice are able to climb out without revealing new minions, continue playing with no encounter. Remember, the elders cannot climb out of the water on their own. They must be pulled out by a mouse. Don't forget to add a cheese to the minion wheel at the end of each round when there are no minions present.
- Special Rule (2): No Trail: The migrating mice did not use this route. If no mouse has called to the elders, before moving them, flip a cheese token. Move each elder its full move the direction the cheese is pointing.
- Special Surge (3): Draw a random boss from the boss deck.
Tadpool (Chapter Ten)
- Special Rule (1): No Trail: The migrating mice did not use this route. If no mouse has called to the elders, before moving them, flip a cheese token. Move each elder its full move the direction the cheese is pointing.
- Special Surge (2): Draw a random boss from the boss deck.
Brokenwood (Chapter Ten)
- Special Rule (1): Follow the Trail: The trail leads off the Northern exit.
- Special Rule (2): Exploring: Before a mouse can use an explore action to leave this tile, all mice must be on the same side of the chasm as the exploring mouse. Any melee minions trapped on the opposite side of the chasm from the mice will not prevent the mice from exploring.
- Special Rule (3): Dangerous Chasm: If an elder's move would cause it to wander off the edge of the chasm, stop that elder's move at the edge, and remove 1 cheese from the Elder's initiative card.
- Special Rule (4): Leaping Frogs: Any froglodytes or bullfroglodytes can leap over the chasm counting it as 1 space, but cannot end their movement on the chasm.
- Special Surge (5): Draw a random boss from the boss deck. The boss must be placed on the side of the chasm with the most mice.
Deeper Dark (Chapter Ten)
- Special Rule (1): No Trail: Remember the migrating mice did not use the underground route. If no mouse has called to the elders, before moving them, flip a cheese token. Move each elder its full move the direction the cheese is pointing.
- Special Rule (2): Dangerous Chasm: If an elder's move would cause it to wander off the edge of the chasm, stop that elder's move at the edge, and remove 1 cheese from the elder's initiative card.
- Special Rule (3): Rickety Bridge: The bridge space that spans the deep crevasse is old and worn and the wood is dry and rotting. When a non-flying creature moves onto the bridge, it must end its move. If a mouse receives a wound while on the bridge, place that mouse figure in the chasm to the side of the bridge. It is hanging on for its life. While hanging on, a figure cannot attack or use any action until it is pulled to safety. Climbing back up onto the bridge works just like climbing out of water. The mouse uses its entire move, and must roll a starburst on an action die. It gets an additional action die for each mouse on the bridge helping to pull it up.
Thistle Ridge (Chapter Ten)
- Special Setup (1): When the mice explore Thistle Ridge, instead of revealing an encounter card as usual, place 6 firebelly newts normally, then choose a player to read the following aloud (read-aloud text omitted). Now roll an action die. Remove a number of firebelly newts equal to the number result rolled. They have rushed off to see the trial using the flip space.
- Special Rule (2): Follow the Trail: The trail follows along the upper ridge to the hidden path, then it leads off the Eastern exit.
- Optional Side Plot (3): If the mice would like to witness the trial of King Shalop, they can call to the elders and guide them to the flip space instead of letting them follow the trail.
- Special Rule (4): Dangerous Cliff: If an elder's move would cause it to wander off the edge of the ridge, stop that elder's move at the edge, and remove 1 cheese from the Elder's initiative card.
- Special Surge (5): Draw a random boss from the boss deck.
The Lair (Chapter Ten)
- Optional Side Plot (1): From this tile, the mice can hear a commotion from the neighboring tile Hot Below. Even though there is no trail to follow, the elders are attracted to the noise, and will move toward the exit to Hot Below as if there was a trail. What is the source of this commotion? If the players would prefer to avoid this side plot, the mice must call to the elders and attempt to get them to leave this tile by different exit.
- Special Surge (2): Draw a random boss from the boss deck.
Hot Below (Chapter Ten)
-
Story Moment (1): When the mice explore Hot Below, choose a player to read the following aloud (read-aloud text omitted).
-
Special Setup (2): Do not reveal an encounter card. Instead, place King Shalop (a bullfroglodyte figure with the King Shalop token under it) on the indicated space, and place 2 firebelly newts on each of the indicated spaces. Place the elders and mice on the rocky outcropping. Also place 4 froglodytes on the minion entry space furthest from the mice and elders.
Roll 5 action dice (1 for each elder) and count the number of starbursts rolled. These represent how many elders voted to save Shalop:
- If 3 or more starbursts are rolled, read Verdict 1 below, then follow its directions.
- If less than 3 starbursts were rolled, read Verdict 2 below, then follow its directions.
Verdict 1: The Elders choose mercy
Read aloud: the elders plead for mercy, the newts agree to arrange a proper trial, and the froglodytes become enraged (read-aloud text omitted).
After reading Verdict 1 aloud (the froglodytes cry "For our king!"):
Remove King Shalop and the firebelly newts from the board. If you are playing this as a campaign, place King Shalop's token in the party stash. You might need this in a future campaign. The mice must now battle the four remaining froglodytes. Shuffle the elders, froglodytes, and the mice initiative cards, and deal them to the initiative track to begin the fight.
Verdict 2: The Elders choose to not intervene in the firebelly justice
Read aloud: the elders decline to interfere, the newts cheer, and the froglodytes rage and attack, and Shalop snaps his bonds (read-aloud text omitted).
The mice must now battle the froglodytes and King Shalop. Shuffle the elders, King Shalop, froglodytes, firebelly newts and the mice initiative cards, and deal them to the initiative track to begin the fight. For this battle, treat the firebelly newts as allies.
- Special Rule (3): No Trail: Remember, the migrating mice did not use the underground route. If no mouse has called to the elders, before moving them, flip a cheese token. Move each elder its full move the direction the cheese is pointing.
- Special Rule (4): Lava: If an elder's move would cause it to wander off the edge of the rocks and into lava, stop that elder's move at the edge, and remove 1 cheese from the elder's initiative card.
- Special Rule (5): Escaping the Chaos: Once all of the elders have escaped by way of the flip space, on its turn, any mouse can use an explore action on the flip space to leave this tile, even when there are minions present.
- Special Surge (6): 2 froglodytes. Remove all other minions.
Puddleby (Chapter Ten)
- Story Moment (1): When the mice explore Puddleby, they are victorious! Choose a player to read the following aloud (read-aloud text omitted).
Epilogue
The Epilogue (book pages 99-100) is read-aloud story text and is not transcribed. The printed credits, playtester list, publisher addresses and the blank "Game Notes" page are omitted.
Individual Achievements
Fireproof: The first mouse in a chapter to be captured with an on fire token on its character card is now considered fireproof. Effect: Place no more fire markers on that mouse for the rest of the chapter.
Marksman: The first mouse to roll 3 or more bows in one attack with a ranged weapon earns the marksman achievement. Place the marksman token on that mouse's character card. Effect: When attacking with a ranged weapon, the marksman may discard the marksman token to automatically roll bows on all dice used in that attack.
Snake Charmer: The first mouse in a chapter that defeats Hesster earns the Snake Charmer achievement token. Effect: For the rest of the chapter, all large minions roll one fewer die when defending against an attack from the Snake Charmer.