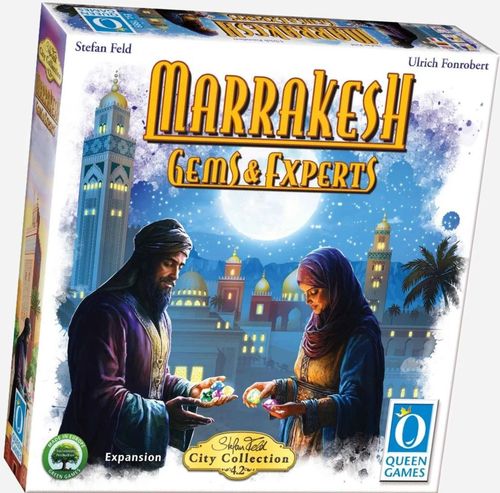
Marrakesh: Gems & Experts
Marrakesh: Gems & Experts Rulebook
Table of Contents
Table of Contents
Essential Edition
To use this expansion with the Essential Edition, apply the changes to the rules presented in green text boxes, like the ones marked "Essential Edition" below.
Modules
- The Closed Madrasa
- Gems
- The Experts
- Alms
- Second-Hand-Shop
- Luxury Goods: Gifts
- Luxury Goods: Statuettes
The Closed Madrasa
Components
- 1 Madrasa board, consisting of 4 double-sided pieces, each with side A and B
- 4 Madrasa markers
- 19 Keshi tiles
Changes in setup
Build the Madrasa board by connecting the 4 parts so that side A of all pieces is facing up (as pictured) and place it over the Madrasa on the game board.
Essential Edition: Place the Madrasa board next to the game board.
Note: Side B is an alternative that you can use instead of side A. It is also possible to mix the A and B sides and thus form completely individual combinations of scrolls.
Then you place 1 Madrasa marker each on the marked spaces of the four areas (see illustration in the manual).
You place these Keshi tiles on the bottommost gray scroll (01/04):
You place these double-Keshi tiles on the topmost yellow scroll (07/10):
You place these double-Keshi tiles on the topmost pink scroll (16):
(The manual shows the tiles in illustrations at each of these three steps.)
You do not need the scroll tiles from the base game. Leave them in the box.
Changes to game play
There are no longer scroll tiles. Instead, there is now a selection of 12 printed-on scrolls with immediate effects. If you use an assistant in the Madrasa for the sector action, you may use 1 of the free scrolls (a scroll is free if no Madrasa marker is on it). The conditions for using a scroll (the number of required gray scholar keshis and the date costs) are the same as those for acquiring a base game scroll and can be read on the printed-on scrolls.
In each of the 4 areas, you can choose from 2 scrolls at any time; the scroll occupied by the Madrasa marker is not available for selection. If you have chosen a scroll, you pay the date costs and immediately carry out the effect. Afterwards, you place the Madrasa marker of the corresponding area on the just-used scroll.
You can still use multiple scrolls in your turn, provided you possess enough scholar keshis and can pay the dates. However, you may use each of the 12 scrolls a maximum of 1 time per turn.
Example: Lukas has 6 gray scholar keshis on his player board and has placed an assistant in the Madrasa: He performs the sector action. He cannot currently use the 3 scrolls marked with a red X in the illustration because they are occupied by a Madrasa marker. First, he pays 2 dates to use the pink highlighted scroll. Then he moves the Madrasa marker to this scroll. Then he pays 1 date to use the green marked scroll, before he also moves the Madrasa marker here.
The Scroll Effects
Grey, 01–03 (side A), 04–06 (side B): You need to have 1 scholar and you must pay 1 date.
- 01/04: Take 1 Keshi tile from the scroll and exchange it for a correspondingly colored Keshi from the supply. Place the Keshi in the corresponding sector, and place the tile next to the Madrasa board. If, after your selection, only 1 Keshi tile remains on the scroll, place all set-aside tiles back onto the scroll. Now the full selection of tiles is available to everyone again.
- 02: Take 2 dinar or advance 1 step on the river track.
- 03: Take 2 water or advance 1 step on the mosque or palace staircase.
- 05: Gain 2 points or draw 1 gem from the supply (only applicable if you play with module 2: "Gems").
- 06: Take 3 dates or 2 water.
Yellow, 07–09 (side A), 10–12 (side B): You need to have 3 scholars and you must pay 1 date.
- 07/10: Take 1 double-goods-Keshi tile from the scroll and exchange it for 2 correspondingly colored Keshis from the supply. Place the Keshis in the Souk, and place the tile next to the Madrasa board. If, after your selection, only 1 double-goods-Keshi tile remains on the scroll, place all tiles back onto the scroll. Now the full selection of tiles is available to everyone again.
- 08: Take 1 dinar, 1 water, 1 date and gain 2 points.
- 09: Advance 1 step on the mosque and palace staircase and gain 2 points.
- 11: Take 1 dinar, 1 water and gain 3 points.
- 12: Receive 1× the bonus from your audience disc from one of the two sections with 3 spectators. For this, you must have placed a pink entertainer keshi at that section.
Pink, 13–15 (side A), 16–18 (side B): You need to have 5 scholars and you must pay 2 dates.
- 13: Receive 1× the bonus from your audience disc from one of the two sections with 3 spectators. For this, you need NOT have placed a pink entertainer keshi at that section.
- 14: Take 1 corresponding resource from the supply for each of your face-up provision tiles and place it above the corresponding provision tile. You may only use these resources for the provisions. You may also choose and use this scroll exactly 1 more time within one season, so that you then have 2 resources above each provision tile. After that, however, this is no longer possible.
- 15: Do 1 sector action of your choice.
- 16: Take 1 double-Keshi tile from the scroll and exchange it for 2 correspondingly colored Keshis from the supply, which you place in the matching sectors. Place the tile next to the Madrasa board. If, after your selection, only 1 double-Keshi tile remains on the scroll, place all tiles back onto the scroll. Now the full selection of tiles is available to everyone again.
- 17: Activate 2 discovered oases without paying the costs. Desert towns do not count.
- 18: Place a red water vendor keshi from the supply next to the green tent in the "Souk" and immediately take 3 water. From your next turn, you receive 1 water when you place an assistant in the Souk.
Orange, 19–21 (side A), 22–24 (side B): You need to have 5 scholars and you must pay 2 dates.
- 19: Receive 2 points for each resource that you return to the supply (incl. gems). You may gain max 12 resources this way.
- 20: Choose any 1 good from 1 stack of the luxury goods. You do not have to pay the indicated goods keshis. You must still pay all other potentially depicted costs on it.
- 21: Take a guard keshi from the supply, then choose any 1 city gate and place it together with the guard keshi on your player board. You receive the points for the city gate as well as any points for the color-matching placement on your board. Then you may take any 1 Keshi from the supply; this one does not have to correspond to the color of the placed city gate.
- 22: Take any 3 differently colored Keshis from the supply and place them in the corresponding sectors.
- 23: For a set of 1 dinar, 1 water, and 1 date, you receive 6 points. You may repeat this two more times (max. 18 points).
- 24: Immediately score 2 of your activated oases. The oases remain in place afterwards and you score them again at the end of the game.
Notes:
- Before the start of the game, you must sort out oases No. 23 and desert town No. 03 and 10.
- The scroll bonus on the second to last space of the track for activated oases tiles now means "Use one of the two free yellow scrolls, without paying dates or needing scholar keshis. Then move the Madrasa marker."
- When playing with the module "Special Buildings" from the 1st expansion, at the start of the game, as described in the rules, you still choose 1 yellow scroll each from 3 scrolls you have drawn. Sort these before mixing and set aside all those that do not have a "Permanent Effect." You may use the chosen scroll "normally," meaning you place it face-up in front of you as a permanent enhancement during the game.
- You cannot play this module together with the module "Second-Hand-Shop"!
Gems
Components
- Necklace boards
- 56 Gems (16× yellow, 14× blue, 12× red, 10× green, 4× orange)
- 56 Deluxe-glass-gems (Kickstarter exclusive)
- 1 Gem dealer board
- 4 Scrolls (in 2 sizes for DELUXE/CLASSIC and Essential Edition)
- 2 Oases
Changes in setup
Place the gem dealer board next to the game board. Then mix all the gems and place them with the discovery side face up as a supply next to the gem dealer board. If applicable, place the deluxe-glass-gems ready next to it. Draw 3 gems and place them on the sales space of the gem dealer board. Keep drawing until you have 3 differently colored gems. You mix all other gems back into the supply.
Shuffle the new scrolls and oases tiles with the other respective tiles and distribute them as usual.
Each of you takes 1 necklace board and places it next to your player board.
Face-up gems: Place the following gems face-up:
- Player board: Draw 2 gems and place them face-up in any order on top of each other on your audience disc on a section with 1 spectator. If you choose the bonus of this section during the course of the game, you additionally receive the topmost gem. The second time, you receive the remaining gem.
- Game board: Draw now and at the beginning of the further seasons exactly 1 gem and place it face-up on the 9th space of the river track. Whoever of you first reaches or moves past the space gets this gem.
- Game board: Draw 1 gem per player and place them face-up on the 12th step of the white palace staircase and the 9th step of the black mosque staircase (marked green in the illustration). These can also be gems of the same color. When your pawn reaches or crosses the respective step with the gems, choose and take only one of them.
Discovery sites: Place random gems face-down, that is with the discovery site side up, on the game board and on your player boards according to the following instructions. During the course of the game, you receive these gems when you reach the discovery site or place Keshis on certain spots.
- Game board: For each player, place 1 face-down gem tile on the orange line that connects the two 3rd sections of the palace and mosque staircases (marked pink in the illustration). You can receive 1 gem tile here as an additional connection bonus. You may take this gem in addition to 1 of the other bonuses. You can only get one gem from here.
- Player boards: Place 1 face-down gem each on:
- Supply board: on the 4th bonus space on the track for activated oases, place the Keshi on it. You receive both when you place an activated oasis on this space of the oases track.
- Sahara: on the last oasis of the left path and on the second oasis of the right path. You receive the gems when you discover the corresponding oasis.
- Medina: on the city gate space (purple/orange/yellow) in front of the Souk. You find this gem when you place a guard keshi there.
- Date orchard: 1 each on the fourth and the seventh Keshi space in the date orchard. Place the date picker keshis from left to right and from bottom to top. As soon as you place your 4th or 7th Keshi in the date orchard, respectively, you get 1 gem.
Note: You receive no further gem if, in the course of the game, you give up the 4th and/or 7th date picker keshi again and later in the game place one on this space again.
Changes to game play
As soon as you reach a space with a discovery site or a face-up gem, you receive the tile. You place this gem on a color-matching space on your necklace board.
Note: If you possess the deluxe-glass-gems (Kickstarter exclusive), you can exchange the gem tile in this step for a corresponding deluxe-glass-gem and place it.
You must begin at the top at the starting spaces (each marked with a green arrow) and may then always place further gems adjacent to existing gems or on another starting space. For this, you immediately receive 1 point. If you can place the gem, you must do so. You may not remove placed gems from the necklace during the game.
If you cannot place a gem immediately, you place it with your other resources on your supply board. You may not place gems from your supply board on your necklace board later, but can only sell them to the gem dealer.
When you place a gem, check if a bonus is visible on the connecting line between the newly placed gem and one or more already placed gems. If this is the case, you may take the bonus immediately. You will receive points indicated next to the rows at the end of the game.
Example: Sarah has found a yellow gem. She could place it in two different spots and decides on the space in the bottom right. She receives 1 point for placing the gem, 1 goods keshi (bonus on the connection to the red gem), as well as 1 step on the white palace staircase (bonus on the connection to the blue gem).
Selling gems
When you perform the sector action of the Souk, you may additionally sell to the gem dealer once. You place gems on the gem dealer board. From the end of your turn, they are available for all players to purchase. You have 2 options:
- Place any 1 gem from your supply board on the gem dealer board and receive 2 dinar.
- Place any 2, but same-colored gems from your supply board on the gem dealer board and take 1 Keshi of the color corresponding to the gems from the supply (or any 2, but different-colored goods keshis for yellow or orange gems) and place it in the corresponding sector.
Purchasing gems
The sold gems lie on the board of the gem dealer and can from now on be purchased by you, when you choose the sector action of the Souk. You may then buy exactly 1 gem from the dealer:
- Pay 3 dinar or 2 same-colored goods keshis, take 1 gem from the board and place it on your necklace board.
You may make 1 purchase and 1 sale per turn, regardless of how many assistants you have placed in the Souk.
Changes in final scoring
Necklace: At the end of the game, you receive points for your necklace, depending on how many different colored gems you possess and which rows you have completed.
| Number of different colored gems | 1 | 2 | 3 | 4 | 5 |
|---|---|---|---|---|---|
| Points | 1 | 3 | 6 | 10 | 15 |
Example: Sarah has placed gems in all 5 colors. For that, she receives 15 points. The complete filling of the 2nd, 3rd, and bottom row earns her a total of 9 points. For remaining resources, she receives another 2 points.
Points for the complete rows are indicated on the necklace board.
Remaining gems: Unplaced, unsold gems also award points together with the remaining resources: 2 items = 1 point.
New scrolls
- 73: Draw 1 gem from the supply.
- 74: Draw 1 gem from the supply and you can trade 1 of your gems lying with the resources for any 1 gem of the gem dealer.
- 75: Draw 2 gems from the supply.
- 76: Draw 1 gem from the supply and choose 1 gem from the gem dealer. Additionally, you can also trade 1 of your gems lying with the resources for any 1 gem of the gem dealer.
New oases
- 39: You receive 1 point for each gem you possess. You can receive a maximum of 15 points.
- 40: You receive 2 points for each gem of a different color that you possess. You can receive a maximum of 15 points.
The Experts
Components
- 1 Expert board
- 12 Expert tiles
- 5 Expert keshis
- 2 new scrolls (in 2 sizes for DELUXE/CLASSIC and Essential Edition)
- 2 new oases
Changes in setup
Shuffle the expert tiles and stack them face down next to the cube tower.
Place the expert board next to the cube tower and place the 5 expert keshis on the marked spaces.
Mix the new scrolls and oases with the other respective tiles and distribute them as usual.
Changes to game play
At the beginning of each round, you draw 1 new expert tile from the stack and then throw as many expert keshis into the tower as there are face-up expert tiles, together with the keshis of all players. If there are already 5 expert tiles in the display, no new tile is turned over this round.
You place all expert keshis that fall out in the keshi display along with the other keshis.
When it is your turn in the "Claim keshis & deploy them" phase, you may, instead of up to 2 keshis of one color (or 1 Nomad (Camels expansion)), choose 1 expert keshi.
If you choose an expert keshi, you look at the expert tiles in the display and choose one of them to take. You must pay for such an expert with resources. The cost for each expert is 1 dinar, 1 date, and 1 water. This is also depicted on the expert tile. If you cannot pay the cost, you may not choose an expert. After paying, place the chosen expert keshi back on the expert board.
Place the expert tile next to your player board. You may use its ability exactly once per game, after which you turn the expert tile over to its back side.
Expert keshis that are still in the keshi display after the selection are placed back onto the expert board.
Example: It is the third round and so far nobody has taken an expert tile. 3 expert tiles are on display and thus 3 expert keshis are thrown into the tower.
Example: Lilli chooses one of the two expert keshis in the display. She pays 1 dinar, 1 water, and 1 date to take the purple expert. She places the expert keshi back onto the expert board.
The experts
The experts are always assigned to a sector, recognizable by the color and the symbol on the respective tiles. When you use an assistant placed in a corresponding sector on your turn, you may also use your expert's ability. The ability can only be used once, after which you turn the expert over to its back side to show that you have used it.
If you do not use an expert by the end of the game, it is worth 5 points.
Note: With the help of an expert, it is possible to virtually get to over 8 keshis in a sector during the game. At the end of the game, you still only score a maximum of 8 keshis in a sector.
The expert abilities
-
Red expert (not assigned to a sector): You can use him when a water vendor is located in one of the sectors marked with an assistant. Take 1 (red) water vendor keshi from the supply and place it immediately on any red space. Afterwards, you receive 1 water and 1 point for each water vendor keshi on your board.
-
Teal expert (river): If you perform the sector action of the river, you can use your expert to enhance the action and get 1 (blue) fish keshi from the supply and place it immediately. Afterwards, for each fish keshi, you move 1 step on the "Tensift" river, and an additional 5 more steps. As always, you may use water to move further steps.
-
Green expert (date orchard): If you perform the sector action of the date orchard, you can use your expert to enhance the action and get 1 (green) date picker keshi from the supply and place him immediately. Afterwards, instead of 1 date per date picker keshi, you receive 2 dates as well as possibly 2 water, if you also have a water vendor there.
-
Luxury goods experts (the three expert tiles with the luxury goods symbol): You may take a face-up luxury good for free. The only condition is that the goods keshis to be paid predominantly show the color of the expert. A tie is also sufficient in this case.
Note: You can also acquire a "Luxury Good: Statuette" with such an expert.
Example: Lilli uses the purple expert's ability and takes a luxury good for free. In doing so, she has the choice of three tiles with goods keshis that are predominantly purple. She cannot choose the two luxury goods in the middle of the picture, as these show no purple goods keshis or fewer of them than goods keshis of other colors. She decides on the more expensive luxury tile, which brings 13 points. Afterwards, she turns her purple expert over, having used it, and will therefore not get 5 points for it at the end of the game.
-
Pink expert (sector action bonus): You receive the bonus you chose through the sector action 1 more time and the two directly adjacent bonuses also 1 time.
All other bonuses (e.g., scrolls) also remain valid when using experts.
Changes in final scoring
Every unused expert is worth 5 points.
New scrolls
- 77 (1×): Once in the game, you may take an expert and lose 1 point for it, instead of paying the resources.
- 78: Immediately use the ability of an expert in the display, without paying the resources. The expert remains in the display.
New oases
- 41: You receive 2 points for each expert you possess. Regardless of whether used or unused.
- 42: You receive 3 points for each of your experts, provided you possess the most experts of all players. A tie is not sufficient. You can gain a maximum of 15 points.
Alms
Components
- 12 Alms tiles
Changes in setup
Mix the 6 alms tiles with the numbers 7–12 (the numbers are on the bottom left of the tile) and place them face down on the exchange office space on the game board. Then, mix the tiles with the numbers 1–6 and place them face down on top of the other 6 tiles. Afterwards, turn the top tile face up.
Changes to game play
At the end of the round, return the face-up alms tile to the box and turn over the next tile. Therefore, all 12 tiles will always be used in a game.
You may still use the exchange office, which are now alms, during a souk action. Here you can either give up points or spend certain resources to get various bonuses, resources, and points. You may only choose one of the two options once per action.
The alms tiles
Each alms tile offers two options, one on the upper half and one on the lower half of the tile. Each option is written as "cost → reward". The arrow (→) is the printed arrow between the two.
- Lose 2 VP → gain 2 water; or pay 1 date → gain 2 VP.
- Lose 2 VP → gain 2 dates; or pay 1 water → gain 2 VP.
- Lose 3 VP → gain 2 dates + 1 water; or pay 1 dinar → gain 2 VP.
- Lose 3 VP → gain 2 dinar + 1 date; or pay 2 water → gain 3 VP. (The printed caption reads "Dattel" here; read as "date".)
- Lose 4 VP → gain 1 dinar + 1 date + 1 water; or pay 2 dates → gain 2 VP + 1 step on the staircase (black or white).
- Lose 4 VP → gain 2 dinar + 2 water; or pay 2 dinar → gain 4 VP.
- Lose 5 VP → gain 1 keshi exchange + 1 dinar + 1 date + 1 water; or pay 2 goods keshis of any color → gain 2 VP + 2 dates.
- Lose 5 VP → gain 1 step each on the staircase (black and white) + 1 dinar + 1 date + 1 water; or pay 2 goods keshis of any color → gain 2 VP + 2 water.
- Lose 8 VP → gain 1 city gate of the −3 points space / no cost / with keshi*, + 2 water + 1 date; or pay 3 resources of any kind → gain 3 VP + 1 goods keshi.
- Lose 8 VP → gain 1 city gate of the −3 points space / no cost / with keshi*, + 2 dinar + 1 water; or pay 3 worker keshis of any color → search for 2 gems**.
- Lose 10 VP → gain 3 dinar + 4 dates + 4 water; or pay 3 goods keshis of any color → search for a gem**.
*Note: This city gate brings 0 points (instead of negative points) and only the keshi itself. A prerequisite for use is an available guard keshi.
**Note: This option is only available with module 2 "Gems". Search through the gem supply and pick any gem. Mix the gem supply afterwards.
Second-Hand-Shop
Components
- 1 Second-hand-shop
- 20 Offer tiles – per player: 4× scroll, 1× oasis
- 20 Used tiles
- 2 New oases
Changes in setup
Place the second-hand-shop next to the game board. Then place the 20 used tiles on the corresponding space. The rest remains empty at the start of the game.
The shop has a space for used tiles, 2 spaces for gray scrolls, 2 spaces for yellow scrolls, 2 spaces for pink scrolls, 2 spaces for oases, a clearance space, 1 additional space for gray and yellow scrolls with 4 players, and 1 space for orange scrolls.
Each player receives the 5 offer tiles in their color. Each tile depicts the price that a player must pay to acquire the scroll or oasis. Each player has 4 offer tiles for scrolls and 1 offer tile for oases.
Mix the 2 oases with the oases of the base game.
Changes to game play
When you are on your turn and have placed at least 1 of your assistants in the Souk, you may additionally in your turn offer 1 of your own scrolls or oases in the second-hand-shop for sale:
- You place the scroll to be sold on a free shelf space on the second-hand-shop that corresponds to the color of the scroll. If there is no free space in the corresponding color, you cannot offer the scroll in this moment.
- You can only offer activated oases for sale. Place it on a free oasis space. If none of the 2 oasis spaces is free anymore, you cannot offer an activated oasis.
Then you place one of your 4 offer tiles from your supply above the scroll, or the oasis-offer tile above the oasis.
You get the offer tile back only when another player accepts your offer and pays you the price printed on the tile (Exception: gray scrolls, see below).
Example: Marie wants to sell a yellow scroll. She chooses an offer tile and places this and the scroll on an empty space of the second-hand-shop.
If you have placed at least one assistant in the Souk, you may in addition to your action buy 1 of the scrolls or oases lying for sale from the second-hand-shop. For this, you must pay the price for the respective scroll or oasis to the seller.
Note: In your turn in addition to the regular Souk action, you may sell 1 scroll or oasis and buy 1 scroll or oasis.
You do not have to pay the printed dates on the scroll and only need at least 1 gray scholar keshi in your Madrasa.
After you have paid, the seller takes his offer tile back into his supply and can use it again.
Each of the scrolls or oases so purchased receives a used tile (place it on the scroll or oasis) and may from now not be offered again in the second-hand-shop. Otherwise, these scrolls and oases function the same as any other scroll or oasis.
Example: Sarah (green) buys the gray scroll, which Lukas (red) is offering for the price of 3 dinar and 2 points. She receives the scroll, places a used tile on it, gives Lukas 3 dinar from her supply and loses 2 points. Lukas sets his point marker 2 steps forward and receives his offer tile back.
Should a gray scroll not have been sold at the end of a season, it slides to the bottom left onto the clearance space. Multiple scrolls can lie here. The offer tile goes back to the player.
The scrolls on the clearance space can be purchased by you for 1 dinar and −1 point. The dinar thereby goes back into the general supply and the original owner of the scroll receives no point.
You do not move the scrolls of the other colors and oases at the end of a season! They remain where they are, until someone buys them.
Note: If you sell an activated oasis and take it from the oasis track (top on your player board), you must, upon receiving a new oasis, fill the free space again, before you add to the track on the right. Freed up bonuses on the oasis track can be activated again, as soon as an oasis is placed on it. Exception: The bonus keshi cannot be activated again.
Example: Jan sells an oasis. He takes it from his reserve tableau without moving the remaining oases. If he again activates an oasis tile he must place it on the freed-up space. He may use the bonus again.
New oases
- 39: You receive 2 points for each used tile on your scrolls or oases.
- 40: You receive 5 points for each combo of 1 used tile on a scroll and on an oasis.
Luxury Goods: Gifts
Components
- 10 Luxury goods: gifts
Changes in setup
Mix all gifts and form an extra stack, which you place below the already existing 5 stacks. Then turn over the top tile.
Changes to game play
The gifts always show as a bonus 1 point and additionally 1 date/water/dinar/staircase step/river step.
When someone acquires a luxury goods tile from one of the 5 stacks on the game board, this player immediately receives in addition without further cost the face-up gift, if the condition stated on the gift is fulfilled. The player takes the gift and receives the bonus. Only when the player has finished their complete turn is the next gift from the stack turned over.
At the season scoring, the top gift is put back into the box and the next gift is turned over.
If the stack of gifts is empty, there are no more.
The gifts
| # | Condition | Bonus |
|---|---|---|
| 1 | Purchase of one of the most expensive openly displayed luxury goods | 1 VP + 1 step on the mosque staircase |
| 2 | Purchase of one of the cheapest openly displayed luxury goods | 1 VP + 1 step on the river track |
| 3 | Purchase of the luxury good from the outermost right stack | 1 VP + 1 water |
| 4 | Purchase of the luxury good from the outermost left stack | 1 VP + 1 date |
| 5 | Purchase of the luxury good from the middle stack | 1 VP + 1 date |
| 6 | Purchase of the luxury good from one of the smallest stacks | 1 VP + 1 dinar |
| 7 | Purchase of the luxury good from one of the highest stacks | 1 VP + 1 dinar |
(The gifts are numbered here in the order they are printed on the manual's page; the manual itself does not number them.)
Luxury Goods: Statuettes
Components
- 12 Luxury goods: statuettes (in 2 sizes for deluxe/classic and essential edition)
Changes in setup
Mix all statuettes into an extra luxury goods stack. Place this stack below the previously existing 5 stacks and turn over the top tile. If you also play with the gifts, you can place them underneath or next to it.
Changes to game play
The individual statuette tiles are purchased normally for the depicted price and bring the reward shown on the bottom left. Each statuette forms a pair with a specific other statuette. Which statuettes belong together is shown on the bottom right on each tile.
When a player purchases the second tile of a matching pair, he receives in addition to the reward also the pair bonus depicted on the bottom right on the tile. Depending on the statuette pair, the player may decide 3, 4 or 5 times to take any 1 resource or 1 point.
Example: Patty has created a statuette pair with her purchase and receives the reward and the pair bonus of the just purchased statuette.
The statuette pairs
Guardian & Gate
- Reward (guardian tile): 7 VP + 1 date
- Reward (gate tile): 7 VP + 1 water
- Pair bonus: 5 times (in any combination) either 1 date / 1 dinar / 1 water / 1 VP
Woman & Palm tree
- Reward (woman tile): 5 VP + 1 date
- Reward (palm tile): 5 VP + 1 water
- Pair bonus: 4 times (in any combination) either 1 date / 1 dinar / 1 water / 1 VP
Man & Camel
- Reward (man tile): 3 VP + 1 date
- Reward (camel tile): 3 VP + 1 water
- Pair bonus: 3 times (in any combination) either 1 date / 1 dinar / 1 water / 1 VP
Note: The pair-bonus caption printed under each of the three pairs reads "5 times". The multiplier shown on the tiles themselves is 5× for Guardian & Gate, 4× for Woman & Palm tree and 3× for Man & Camel, and the rule text says the bonus is 3, 4 or 5 times depending on the pair. The multipliers above follow the tile icons. (This is a discrepancy within the printed manual.)