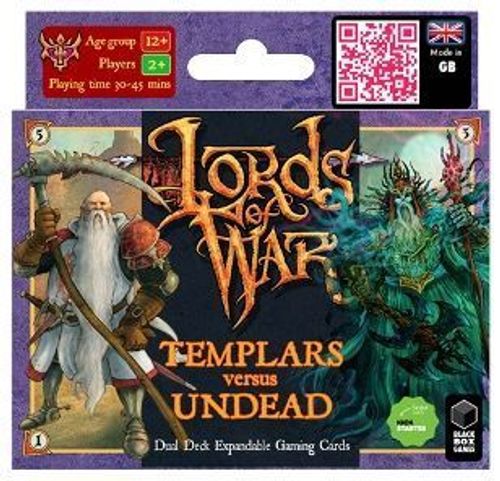
Lords of War: Templars versus Undead
Lords of War: Templars versus Undead Rulebook
Table of Contents
Table of Contents
1) The Cards
Each card, also termed as a "unit" in these rules, has a number of features as shown in the card diagram, with the 3 main features being:
a) Attack arrows - The direction/s the unit can attack in when it is in play. The unit attacks simultaneously in all the directions its attack arrows point.
b) Attack value - The strength of the attack in a given direction.
c) Defence value - The strength of attack/s the unit can withstand without being eliminated.
Card diagram labels: attack arrows, attack value, defence value, target grid and missile damage value, class, rank, name scroll.
Class and Rank
Each unit has a symbol to denote its class and rank.
Class: Infantry, Cavalry, Spear, Ranged, Berserker.
Rank: Recruit, Regular, Veteran, Elite, Special, Command, General.
Most units can be placed directly into combat on the battlefield. A unit that can engage in combat has one or more attack arrows around its border. The more attack arrows around a card's border, the more flexible the unit is on where it can be placed and the directions it can attack at the same time. The higher the numbers on the card, generally the better the unit is in combat.
A ranged weapon unit with the rank symbol has a target grid and missile damage value on its card. This type of unit can shoot at enemy units from a distance and are usually best played behind friendly units in order to keep them out of combat and allow effective use of their ranged weapon.
All spear units and ranged weapon units are support units. A support unit does not have to be placed directly into combat, but can be placed adjacent to a friendly unit. Support units can be used to occupy a space on the Battle Mat to prevent an enemy unit from being placed there or placed next to a friendly card to prevent an opponent attacking from a certain direction.
The six Command Cards represent the leaders of the army and are represented by the command rank symbol on their card.
Loss of four of these command units will result in the collapse of the entire army and the immediate loss of the battle. One of the command cards is the army general which is represented by the general rank symbol.
2) Set-up: The Core Game
- Decide which army each person will play.
- Determine who is player 1 and player 2 by tossing a coin etc.
- Place the Battle Mat face-up with one of the shorter sides in front of each player, so that the number 1 on the Battle Mat is facing and readable by player 1 & the number 2 is facing and readable by player 2.
- Each player takes their General card (with the rank symbol for General on) from their army deck and places it within easy reach.
- Each player shuffles their army deck with the cards face down and deals the top five cards face down in front of themselves. Each player then places the remainder of the deck face down within easy reach.
- Each player takes the five dealt face down cards and their General card to form their "hand" of six cards. Each player then holds their six cards so only they can see them and should not show them to their opponent.
Winning the Game
The first player to eliminate any 20 of the opposition's cards or 4 of the opposition's Command Cards is the winner.
3) Issuing the Challenge
-
Player 1 chooses one card from their hand of 6 and places it face up onto the square on the Battle Mat with the number 1 on it. The unit is laid so that it is facing and readable by Player 1, not the opposing player. Player 1 then takes the top card from his army deck (not showing it to his opponent) to refresh his hand back up to six cards.
-
Player 2 then chooses a card from his hand of 6 and places it face up onto the square on the Battle Mat with the number 2 on it. Player 2 then takes the top card from his army deck (not showing it to his opponent) to refresh his hand back up to six cards.
The Battle is Ready to Begin...
Each player, starting with Player 1, now takes it in turns to follow the 3 phase turn sequence:
Phase 1 - Deployment: Play a unit from your hand onto the battlefield according to the "Engagement Rule" & its exceptions.
Phase 2 - Elimination: Determine whether any unit has been eliminated by combat or ranged attack or a combination of both.
Phase 3 - Reinforcement: Increase the number of cards in hand back up to six.
4) Phase 1: Deployment
The player chooses one card from their hand of six and lays it face up onto any empty square on the Battle Mat. The card is laid so that it is facing and readable by the placing player, not the opposing player.
The unit must be placed adjacent to any of the opponent's units on the Battle Mat, so that at least one of its attack arrows is pointing at a corner or edge of at least one of the opposing units on the Battle Mat. This is known as the "engagement rule".
Note: The card you are placing to engage an enemy unit does not have to be adjacent or next to any of your friendly units already on the Battle Mat.
Examples of deployment: The Dwarf player has a Marauder on the Battle Mat and it is the Orc player's turn. The Orc player chooses to play his Ravager. It must be played according to the "engagement rule", so can be placed in any of the following positions: (diagram of permitted positions).
As indicated in the second diagram, the Orc Ravager cannot be placed behind the Dwarf Marauder or to the right hand side of it since it will not be following the "engagement" rule as none of its attack arrows would be pointing at a corner or edge of the opposing Dwarf Marauder card.
There are two exceptions to the engagement rule:
a) The deployment of support units. A support unit (a spear or ranged weapon unit) may be placed so that it engages in the usual way or instead it can be placed adjacent to any friendly unit on the battlefield. When placed adjacent to a friendly unit the card doesn't have to have any of its attack arrows pointing at the friendly unit or have any of the adjacent friendly unit's attack arrows pointing at it.
Note: A support unit gives no + attack or defence bonus of any kind to the friendly unit it is placed adjacent to.
b) If for any reason there are no enemy units on the Battle Mat at the beginning of a player's turn, the player can deploy ANY unit from his hand adjacent to any other friendly unit on the battlefield.
If there are no cards on the Battle Mat at the start of a player's turn, the player can place a card from their hand onto any square on the Battle Mat.
Note: If you cannot lay a card on your turn in accordance to the engagement rule and its exceptions, you must place a card of your choosing from your hand adjacent to any enemy card on the Battle Mat and then show your hand to your opponent (to prove you cannot go).
5) Phase 2: Elimination
Once the player places a card onto the Battle Mat, they check to determine whether one or more units have been eliminated by combat or ranged attack or a combination of both.
Combat is a simultaneous process and ALL units on the Battle Mat attack in ALL directions of their attack arrows in the same turn. This means no matter whose turn it is all units on the Battle Mat of both players are fighting in combat, which may result in units from either side being eliminated. Therefore, when a new unit is placed onto the battlefield, check the attack and defence values of all the units on the Battle Mat, including ranged weapon attacks, to determine whether a unit has been eliminated.
A unit is eliminated when the total combined attack value of one or more of the opponent's cards engaging and /or "range attacking" the unit, is greater than the unit's defence value.
If the (total combined) attack value is equal to or less than the opponent's defence value, then there is no effect and the defending card stays in play on the Battle Mat.
Eliminated units are not removed until the results for all the possible engagements have been checked. An enemy's eliminated units are kept face up in a discard pile to one side of the Battle Mat by the opposing player to keep track of the number of eliminated units needed to win.
Note: Friendly units never cause damage to each other, even if engaging each other.
A One-on-One Combat Example
The Orc player has just placed the Orc Deathbringer (OD) to engage the Dwarf Marauder (DM) and Slugger (DS).
-
The Orc Deathbringer has eliminated the Dwarf Marauder because it is engaging it for an attack value of 5, which is greater than the Marauder's defence value of 4.
-
The Orc Deathbringer has NOT eliminated the Dwarf Slugger because it is engaging it for an attack value of 3, which is NOT greater than the Slugger's defence value of 3.
-
The Orc Deathbringer, with a defence value of 2, has NOT been eliminated by the Dwarf Marauder who is only engaging it for an attack value of 1.
-
The Dwarf Marauder is removed from the Battle Mat and put in the opposing player's discard pile.
A Two Against One Combat Example
The Orc player has just placed the Orc Ravager (OR) to engage the Dwarf Marauder (DM).
-
The Orc Ravager and Goblin Shanker (GS) have jointly eliminated the Dwarf Marauder. The Goblin Shanker is engaging it for an attack value of 4 and the Orc Ravager is engaging it for an attack value of 5. This combined attack of 9 is greater than the Dwarf Marauder's defence value of 4.
-
The Orc Ravager, with a defence value of 3, has NOT been eliminated by the Dwarf Marauder who is only engaging it for an attack value of 2.
-
The Goblin Shanker, with a defence value of 3, has NOT been eliminated by the Dwarf Marauder who is only engaging it for an attack value of 1.
-
The Dwarf Marauder is removed from the Battle Mat and put in the opposing player's discard pile.
Elimination Situations
Sometimes placing a unit onto the Battle Mat may cause one or more of the following situations, which are all legal moves:
i) the elimination of more than one enemy unit simultaneously, either by itself or in combination with friendly units already on the Battle Mat.
ii) the placed unit and any number of enemy units being eliminated at the same time; this is known as a suicide move.
iii) the placed unit being instantly destroyed and no opposing units being eliminated.
A player that eliminates the enemy's General immediately takes an extra turn, after having refreshed their hand back up to six cards. Killing an enemy General is the only time when the normal turn sequence is disrupted. If both army generals are eliminated simultaneously, neither player gets the option of an extra turn.
6) Elimination Involving Ranged Units
All ranged weapon units, such as the Orc Catapult (shown) have a target grid with a missile damage value.
The target grid on the card shows which squares on the Battle Mat the ranged unit can target when deployed. The Orc catapult, (card C), according to its target grid, can range attack any one of the 9 squares to its front, as represented by the grey squares shown in Figure 1.
The missile value is the damage caused to a chosen single enemy unit every time the ranged unit shoots. The Orc catapult displayed above causes 4 points of ranged attack missile damage.
This Dwarf Axethrower is a ranged unit that range attacks to its rear. The Axethrower, (card A), according to its target grid, can range attack any one of the 6 squares to its rear when on the Battle Mat, as represented by the grey squares shown in Figure 2. The Axethrower causes 3 points of ranged attack missile damage.
A Ranged Attack Combat Example
The Orc player has just placed the Orc catapult (OC) (a support unit) adjacent to (behind) his Goblin Shanker (GS).
-
The Goblin Shanker is not engaging the Dwarf Slugger (DS), so is not attacking it.
-
The Dwarf Slugger is not engaging the Goblin Shanker, so is not attacking it.
-
The Orc Catapult has eliminated the Dwarf Slugger because it is shooting it for a missile damage value of 4, which is greater than the Slugger's defence value of 3.
-
The Dwarf Slugger is removed from the Battle Mat and put in the opposing player's discard pile.
A Combined Combat Involving a Ranged Attack Example
The Orc player has just placed the Orc catapult (OC) (a support unit) adjacent to his Orc Deathbringer (OD).
-
The Orc Deathbringer and Orc Catapult have jointly eliminated the Dwarf Marauder (DM). The Orc Deathbringer is engaging it for an attack value of 3 and the Orc Catapult is shooting the Dwarf Marauder for a missile damage value of 4. This combined attack of 7 is greater than the Dwarf Marauder's defence value of 4.
-
The Dwarf Marauder is not engaging the Orc Deathbringer, so is not attacking it.
-
The Dwarf Marauder is removed from the Battle Mat and put in the opposing player's discard pile.
Ranged Weapon Situations
Units with ranged weapons can make a ranged attack in the same turn they are placed on the Battle Mat and, once on the Battle Mat, they can make a ranged attack every time it is their controlling player's turn.
Ranged attack units can shoot over any units and do not need a clear line of sight to the enemy unit they are shooting at.
Ranged units cannot shoot if "engaged" by an enemy unit, e.g. when an adjacent enemy unit has one or more of its attack arrows pointing at it.
A ranged unit can shoot if it has one or more of its attack arrows pointing at adjacent enemy unit/s (engaging them), but the adjacent enemy units have no attack arrows engaging back.
Units with ranged weapons which find that they have the opportunity to both fire their weapon and fight in combat must choose to do only one during their turn. A ranged weapon unit can only ever shoot at a single enemy unit (chosen by the controlling player) within its target area, but two or more friendly ranged weapon units can shoot at a single enemy unit in a turn.
Ranged units are never permitted to target friendly units.
Moving Units
A Unit that can Move has one or more Movement Arrows.
A Moving Unit can be moved at any time during the controlling player's turn but can only be moved if it is not being engaged by an opposing card. A player does not have to move their Moving Units.
A Moving Unit can only ever be moved one space per turn in the direction of any of its movement arrows, and can only move into an unoccupied space.
Note: A Moving Unit that is deployed from a player's hand onto the battlemat can be moved in that turn if it is not engaged. Moving Units that have eliminated an opposing card may still move as long as they have not already moved and are not engaged (which may result in an additional elimination).
7) Phase 3: Reinforcement
After deploying his chosen unit onto the Battle Mat and determining whether any units have been eliminated or not, the player completes his turn by refreshing his hand back up to six cards.
In order to refresh his hand back up to six cards, a player can choose to either take the top card from his face down army deck and place it into his hand (so only he can see it) or "recall" a unit from the Battle Mat.
To be able to "recall" a unit back from the Battle Mat and into the hand, the unit:
-
must not be engaged by an enemy card (does not have an enemy card adjacent to it that has at least one of its attack arrows directly pointing towards it).
-
must not have been placed down that turn.
-
must not have just taken part in a combat that has eliminated an enemy unit (this includes ranged weapon units as well).
If a unit is not subject to any of the three conditions, it can be withdrawn from the battlefield and placed into the player's hand to refresh the hand back up to six cards.
8) To the Bitter End
After player 1 has completed his 3 phase turn, player 2 then takes his turn following the three phase turn sequence:
Phase 1 - Deployment: play a unit from your hand onto the battlefield according to the "engagement rule" & its exceptions.
Phase 2 - Elimination: determine whether any unit has been eliminated by combat or ranged attack or a combination of both.
Phase 3 - Reinforcement: increase the number of cards in hand back up to six.
Players continue to take turns following the above three phase turn sequence until one player wins the game.
For a full video tutorial of the above rules visit www.lords-of-war.com
Tactical Tips
Deploy ranged units so they are safely shielded from combat behind other friendly units and can take advantage of the reach of their weapons.
Do not just play weaker units for the sake of it; they will be eliminated very easily. Deploy a weaker unit to "engage" an opposing stronger unit in one of its vulnerable positions where it does not have an attack arrow. This will stop it from being recalled and make it more vulnerable to elimination.
A weaker unit can also be used to deliver the final attack to eliminate an opposing stronger unit. Even if used in a suicide move; the loss of a weaker unit for the elimination of a stronger unit, such as a command unit, is worth it.
What Next?
A) Battles with No Boundaries
Play the game exactly the same way, but ignore the boundaries of the Battle Mat or play the game without the Battle Mat at all. Playing this way will present new opportunities and challenges to an experienced player.
B) Game Length
To shorten or lengthen the game time both players agree to change the number of units and / or command units that have to be eliminated to win.
C) Personalise Your Army
Every core army deck has a number of units of each rank:
- 6 Command units
- 4 Special units
- 4 Elite units
- 6 Veteran units
- 8 Regular units
- 8 Recruit units
To personalise your army you can take any card out of your army deck and replace it with any card of a similar rank from another deck.
Example: as an Orc player I would like some more ranged firepower, so I take out two Orc Ravagers (of veteran rank) from my army deck and replace them with two Orc catapults (of veteran rank).
Personalising your army by rank swapping in this way can be done as many cards as you wish.
Designing your own army in this way provides the chance to try a wide range of different combinations to use against your opponents, as well as creating an army that appeals to your own personal style of play.
D) Building a Mercenary Army
Not happy just playing one race? Using the same rank swapping system, personalise your army even further by taking any card out of your army deck and replacing it with any card of a similar rank from any other army deck.
Example: as an Orc player I would like some more archers with a better ranged attack than my Goblin Bow Pests, so I take out two Orc War hogs (of Elite rank) from my army deck and swap them with two Lizardman Quillshots (of Elite rank).
Intermediate Rules
Intermediate Lords of War matches use all of the base Lords of War rules with some additions. The Intermediate Rules grant new abilities to two unit types: Cavalry and Berserkers.
Cavalry
When playing with the Intermediate Rules, Cavalry function slightly differently. This addition enables Cavalry to move more fluidly in and out of battle, heightening their usefulness.
While played out as normal, during the Reinforcement phase of a players turn they can always choose to Recall a Cavalry unit so long as it is not engaged by a Spear unit. This means that if a Cavalry unit is engaged by any other unit type apart from Spears, including other Cavalry, then it can still be recalled. Note: No card can ever be recalled in the same turn in which it was played.
Berserkers
Like Cavalry, Berserkers function slightly differently in the Intermediate rules. This addition makes Berserkers all the more deadly and more risky to use.
If a Berserker unit successfully eliminates an enemy card (or helps to eliminate an enemy card) and it is not engaged by one or more other enemy cards, that Berserker unit moves into the place vacated by the card it eliminated (or helped to eliminate).
This movement is not optional; successful Berserkers must advance if they eliminated an opponent. If a Berserker eliminates more than one unit in the same attack, the controlling player may choose which space to move that Berserker into.
With this in mind, a player's Berserker units are now capable of achieving multiple kills in one turn and/or killing themselves accidentally.
Additional guidance on army building is available on the website.