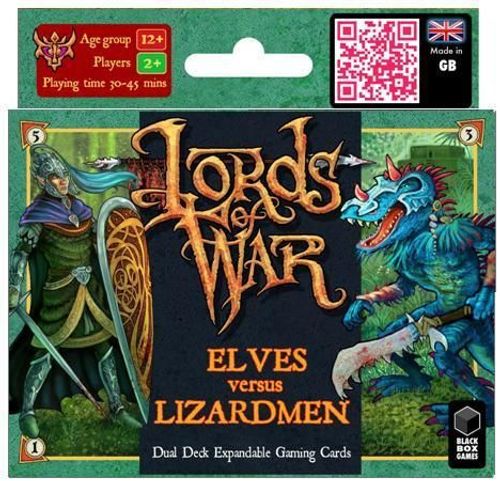
Lords of War: Elves versus Lizardmen
Lords of War: Elves versus Lizardmen Rulebook
Table of Contents
Table of Contents
Contents
- 2 basic army decks of 36 cards each
- 1 battle map
- 1 rulebook
The Cards
Every card, referred to in this rulebook as a "unit," has a set of properties listed in the overview below. There are 3 main properties:
a) Attack Arrows
The direction(s) in which the unit can attack once it is in play. The unit attacks simultaneously in all directions shown by its attack arrows.
b) Attack Strength
The strength of the attack in the respective direction.
c) Defense Strength
The strength of one or more attacks that a unit can withstand without being eliminated.
Classes and Ranks
Every unit has a symbol that reflects its class and its rank:
Class: Infantry, Cavalry, Spear, Ranged, Berserker
Rank: Recruit, Normal, Veteran, Elite, Special, Command, General
Most units can be placed directly into combat on the battlefield. A combat-capable unit has one or more attack arrows on its edge.
The more attack arrows a card has, the more versatile the unit is in terms of its deployment area and the directions in which it can attack at the same time.
In general, the higher the numeric values on a card, the better the unit is in combat.
A ranged unit has a target grid and a shot value printed on the card. This unit type can fire on enemy units from a distance, and units of this kind are usually best kept behind allied units that keep them out of melee combat and allow the ranged weapon to be used effectively.
All spear and ranged units are also support units at the same time. A support unit does not have to be deployed directly into combat — it can also be placed next to an allied unit.
Support units can be used to occupy a space on the battle map so that it cannot be taken by an enemy unit. They can also be placed next to an allied unit to block an attack coming from a particular direction.
The six command cards represent the leaders of the army. Losing four command cards causes the entire army to collapse, resulting in immediate defeat.
One of the command cards is the general of the army. It has its own rank symbol.
Setup: The Basic Game
First, the players must decide which army each of them will play. It is randomly determined who is Player 1 and who is Player 2.
Now the battle map is spread out between the players with its shorter sides facing them, so that the number 1 faces Player 1 and the number 2 faces Player 2.
Each player takes the general card out of their army deck and sets it aside.
Next, the players shuffle their army decks and draw the top 5 cards from them, placing them face down in front of themselves. The remaining cards are placed face down as the draw pile.
Now the players take the five drawn cards plus their general into their hand. These six cards form their starting hand. Hand cards should always be kept secret from the opponent.
Victory
The player who first eliminates 20 of the opponent's cards (any cards) or 4 of the opponent's command cards wins the game.
The Battle Begins
Player 1 chooses one of their 6 hand cards and places it face up on the space marked with the number 1 on the battle map. The card is always placed so that it faces the player who placed it and is readable to them, not to the opponent.
Player 1 then draws the top card from their army deck, without showing it to the opponent, so that they again have 6 cards in hand.
Player 2 chooses one of their 6 hand cards and places it face up on the space marked with the number 2 on the battle map. Player 2 then draws the top card from their army deck, without showing it to the opponent, so that they again have 6 cards in hand.
Now the battle can begin!
Sequence of Battle
The players carry out the battle round by round and take alternating turns, starting with Player 1. Each turn has 3 phases:
Phase 1 – Deployment
A unit is played from hand onto the battlefield. When doing so, the Engagement Rule (see below) and its exceptions must be followed.
Phase 2 – Elimination
It is determined whether units are eliminated in melee, by ranged weapons, or by a combination of both.
Phase 3 – Reinforcement
The hand of cards is refilled back up to 6 at the end of the turn.
The Phases in Detail
The following section explains each of the phases in detail.
Phase 1 – Deployment
The player chooses one of their 6 hand cards and places it face up on an empty space on the battle map. The card is placed so that it faces the player who played it and is readable to them, not to the opponent.
The unit must be placed next to one of the opponent's units, so that at least one of its attack arrows points at the edge or corner of an opposing card. This is called the Engagement Rule.
Note: The card that is placed to fight an enemy unit does not need to be placed next to an allied unit that is already on the battle map.
Example: Michelle plays the Dwarves and Marco plays the Orcs. Michelle has a Marauder on the battle map, and Marco is taking his turn. He plays a Ravager. He must follow the Engagement Rule, so that he may only play the Ravager in the following positions: the Orc Ravager cannot be placed behind or to the right of the Dwarf Marauder, since it would not follow the Engagement Rule in those positions — it has no attack arrows pointing at the opposing Dwarf Marauder there.
There are two exceptions to the Engagement Rule:
1.) Deployment of Support Units
A support unit (a spear or ranged card) can either be placed so that it takes part in combat as usual (Engagement Rule), or it can instead be placed next to an allied unit on the battle map. If the support unit is placed next to an allied unit, none of its attack arrows need to point at the allied unit, and vice versa.
Note: Support units give no attack or defense bonus to the allied units they are placed next to.
2.) No Enemies Ready for Battle
If, for any reason, there are no enemy units on the battle map at the start of a player's turn, the player may place any unit from their hand next to an allied unit on the battlefield.
If there are no cards at all on the battle map at the start of a player's turn, the player may place a card from their hand on any space of the battle map.
Note: If a player is on their turn and, after the Engagement Rule and its exceptions, cannot place a card, they must place a card of their choice next to any enemy card on the battle map and then show their hand to the opponent.
Phase 2 – Elimination
When a player places a card on the battle map, they check whether units have been eliminated in melee, by ranged weapons, or by a combination of both.
Combat in Lords of War happens simultaneously; all units on the battle map always attack in all directions shown by their attack arrows. Therefore, whenever a new unit is placed on the battle map, the attack and defense strengths of all units on the battle map — including ranged attacks — must be checked to determine whether any units have been eliminated.
A unit is eliminated when one or more enemy cards fight against it, or attack it with ranged weapons, and the sum of the attack strengths is greater than the unit's defense strength.
If the sum of the attack strengths does not exceed the enemy's defense strength, the attack has no effect and the defending card remains in play.
Eliminated units are not removed until the results of all possible combats have been checked. A player's eliminated units are collected by their opponent in a victory pile.
Note: Allied units never deal damage to each other.
Example "One-against-one": Marco has just played the Orc Deathbringer to attack Michelle's Dwarf Marauder and Dwarf Slugger with it.
1.) The Orc Deathbringer has eliminated the Dwarf Marauder, since it attacks it with an attack strength of 5, exceeding the Marauder's defense strength of 4.
2.) The Orc Deathbringer has not eliminated the Dwarf Slugger, since it attacks it with an attack strength of 3, which does not exceed the Slugger's defense strength of 3.
3.) The Orc Deathbringer has a defense strength of 2. It is therefore eliminated by the Dwarf Marauder, since the Marauder attacks it with an attack strength of 4.
4.) The Dwarf Marauder is removed from the battle map and placed in the opponent's victory pile.
Example "Two-against-one": Marco has just played the Orc Ravager to attack Michelle's Dwarf Marauder with it.
1.) The Orc Ravager and the Goblin Shanker have together eliminated the Dwarf Marauder. The Goblin Shanker attacks with an attack strength of 4 and the Orc Ravager attacks with an attack strength of 2. This gives a combined attack strength of 6, which exceeds the Dwarf Marauder's defense strength of 4.
2.) The Orc Ravager has a defense strength of 3, so it has not been eliminated, since the Dwarf Marauder only attacks it with an attack strength of 2, which does not exceed the Orc Ravager's defense strength.
3.) The Goblin Shanker has a defense strength of 3. It was eliminated by the Dwarf Marauder, since the Marauder attacks the Goblin Shanker with an attack strength of 4.
4.) Both the Goblin Shanker and the Dwarf Marauder are removed from the battle map and placed in the respective players' victory piles.
Common Elimination Situations:
Sometimes, placing a unit on the battle map causes one or more of the following situations, all of which are permitted:
-
More than one enemy unit is eliminated at the same time. It does not matter whether this happens because of the newly placed unit alone or in combination with units already on the battle map (→ double kill, triple kill, etc.)
-
A newly placed unit and any number of enemy units are eliminated together (→ sacrifice play).
-
A newly placed unit is destroyed immediately, without any enemy units being eliminated.
A player who eliminates the opposing general immediately takes another turn, after refilling their hand back up to six cards. Killing an enemy general is the only situation in which the normal turn sequence is interrupted. If both generals are eliminated at the same time, neither player receives an extra turn.
Elimination With Ranged Units
All ranged units have a target grid with a shot value. This target grid shows which spaces on the battle map a ranged unit can target when it is played.
For example, the Elven Archer can attack any of the 9 spaces in front of it (shown in gray in the accompanying illustration).
The shot value is the damage caused each time a ranged unit fires, against a single chosen enemy unit.
The Dwarf Axethrower is a ranged unit that makes its attack behind itself. It can attack any of the 6 spaces behind it (shown in gray in the illustration below).
Example, Ranged Attack: Marco has just played the Orc Catapult (a support unit) next to (behind) his Goblin Shanker.
1.) The Goblin Shanker has no attack arrow that points at the Dwarf Slugger, so it does not attack it.
2.) The Dwarf Slugger has no attack arrow that points at the Goblin Shanker, so it does not attack it either.
3.) The Orc Catapult eliminates the Dwarf Slugger, because it hits it with a shot value of 4, which exceeds the Dwarf Slugger's defense strength.
4.) The Dwarf Slugger is taken off the battle map and placed in the opponent's victory pile.
Example, Combined Attack With Ranged Fire: Marco has just played the Orc Catapult (a support unit) next to (behind) his Orc Deathbringer.
1.) The Orc Deathbringer and the Orc Catapult have together eliminated the Dwarf Marauder. The Orc Deathbringer attacks the Dwarf Marauder with an attack strength of 3, and the Orc Catapult hits it with a shot value of 4. This gives a combined attack strength of 7, which exceeds the Dwarf Marauder's defense strength of 4.
2.) The Dwarf Marauder attacks the Orc Deathbringer with an attack strength of 2, which does not exceed the Orc Deathbringer's defense strength of 2.
3.) The Dwarf Marauder is removed from the battle map and placed in the opponent's victory pile.
Ranged Combat Situations:
Ranged units can make a ranged attack in the very round in which they are played. Once they are on the battle map, they can always attack, whenever the player who controls them is taking their turn.
Ranged units can fire over or through any units and do not need a clear line of sight to the enemy unit they are targeting.
When ranged units fight directly against an enemy (i.e., when one or more attack arrows of an adjacent enemy unit point at them), they cannot make a ranged attack.
However, a ranged unit can fire when one or more of its attack arrows point at an adjacent enemy unit that has no attack arrows pointing back at the ranged unit.
Units with ranged weapons that have the option of either firing their weapon or fighting in melee against a single enemy unit must choose one of these two actions each round.
Ranged units can never target allied units.
Note: Ranged units can only ever fire at a single enemy unit within their target grid. The player who controls the ranged unit chooses the target. However, two or more allied ranged units can fire at a single enemy unit in the same round.
Phase 3 – Reinforcement
After playing the desired unit and checking whether any units were eliminated, the player ends the round by refilling their hand back up to 6 cards.
To do this, the player may choose either to take the top card of their face-down army deck, or to take a card back from the battle map into their hand. Taking a card back into hand is called Withdrawal.
A withdrawal is only possible if the following conditions are met:
1.) The unit must not have been played this round.
2.) The unit must not currently be engaged in combat with an enemy unit (that is, no attack arrows may be pointing at it).
3.) The unit must not have been involved in a melee or ranged attack in which an enemy unit was destroyed.
If all three conditions are met for a unit, it can be withdrawn from the battlefield and taken back by the player, so that they have six cards in hand again.
Until the Bitter End
After Player 1 has completed their first turn with its three phases, Player 2 does the same, and the game continues following the three-phase pattern:
Phase 1: Deployment
Phase 2: Elimination
Phase 3: Reinforcement
... until one of the victory conditions is met.
What's Next?
Once you have played Lords of War a few times and are looking for new challenges or game variants, the players can try out the variants described in this section.
Combat Without Limits
Lords of War was originally developed without the battle map, and we recommend playing the game this way once you are familiar with the rules.
Other Victory Conditions
If you want to play shorter games of Lords of War, the victory condition can be changed so that the game ends sooner — for example, eliminating 10 cards or 3 command cards first. If you would rather play longer games, you can also play until the first player is unable to play any cards. Expansion rules (currently English only) can also be downloaded from www.lords-of-war.com, including, for example, the cavalry rule.
Berserker Mods
Berserker mods (modifications) are interesting ways to use Lords of War's berserker units. Here are a few examples that are popular among our players:
1.) Raging Berserkers:
When a berserker eliminates an enemy unit, it may, as long as it is not engaged in combat, move onto the space that the eliminated unit occupied.
2.) Kamikaze Berserkers:
Berserkers automatically die at the end of the round in which they were played.
3.) Support for Berserkers:
For every round that a berserker unit remains on the battle map, a coin, marker, or similar token is placed on the berserker card. Each marker represents one additional point of the berserker's defense strength. However, if the supported berserker is withdrawn, it loses all accumulated markers.
Building a Personal Army
Every Lords of War basic set contains the following units, identifiable by their rank symbols:
- 6 command units
- 4 special units
- 4 elite units
- 6 veteran units
- 8 normal units
- 8 recruit units
To adapt an army to personal preference, any card can be removed from the army deck and replaced with any card of the same rank from another deck.
Example: Marco is playing an Orc army. He notices that the Orcs' basic deck is not very strong at ranged combat, which he would like to change. He removes two Orc Ravagers (veterans) from his deck and replaces them with two Orc Catapults (also veterans).
Furthermore, units of different races can be chosen, and Orcs, Dwarves, Elves, and Lizardmen can be combined in a single deck, built according to a player's own preferences, or simply containing all of a player's favorite cards. As long as the rules above are followed, so that the self-built deck has the same distribution of unit ranks as a basic deck, the game will remain balanced.
Tactical Tips
- Ranged units should always be set up behind stronger units, so that they are protected by the stronger units while the player still benefits from their long range.
- Weaker units should not simply be played just because you can; they are eliminated very easily. A weaker unit should be played so that it attacks a stronger unit at a position where the stronger unit itself has no attack arrow. This prevents the stronger unit from withdrawing and makes it more vulnerable when other units attack it.
- A weaker unit can also be used to deliver the finishing blow to an enemy unit that is already in combat with other allied units, thereby eliminating it. Even if this results in the sacrifice of the weaker unit, destroying a stronger unit is worth it.