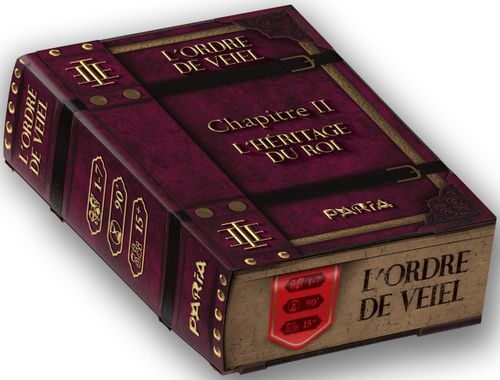
L'Ordre de Veiel: Chapitre II – L'Héritage du Roi
Official rulebook: Paria Editions · PDF
L'Ordre de Veiel: Chapitre II – L'Héritage du Roi Rulebook
Table of Contents
Table of Contents
- Box Contents
- Before Anything Else
- Changes and Additions to the Chapter 1 Rules
- Playing Chapter 2
- Combat
- Setup
- Death and Resurrection
- When Is a Target Adjacent?
- Turn Structure
- Movement
- Two Entities on the Same Square
- Crossing an Obstacle
- Disengaging or Moving Next to an Enemy
- Player Combat Actions
- A New Keyword
- Corruption Essences
- Changing Equipment or Items
- Endurance Recovery
- A Chapter 2 Without Crystals
- Loot
- Events
- Monster Behaviour Without a DM
- New Effects
- Corruption
- Concentration: Do Not Suffer Your Bad Luck
- Battlefields
- Variants
- Specific Points
- Extending the Experience
Box Contents
The box contents page is illustrated; its printed counts read:
- 261 cards, including 6 powerful monsters and 4 miniatures (the line is cut off in the printed image)
- 37 weapons
- 30 armours and shields
- 32 runes and class cards
- 35 alchemist items
The box also contains a scenario booklet and a bookmark (see "Using the Scenario Booklet" and "End of the Game" below).
Before Anything Else
The following manipulation prepares your equipment and alchemist piles. It only needs to be done once, and it lets you play both chapter 1 and chapter 2.
- Remove the "Tongs chaussettes" card from the chapter 2 equipment. This card was unlocked during the Kickstarter after an error on the designer's part leaked on social media. It is a challenge for the players and is not part of the game.
- Take the silver and bronze weapons of chapter 1, then make a pile containing one copy of each card. You may put any weapon cards not in this pile into the game box; you will no longer need them.
- Take the silver and bronze shields, armour and runes of chapter 1, then remove one copy of each card. Then add the remaining cards to the weapon pile made in the previous step. You may put any cards not added to this pile into the game box; you will no longer need them.
- Shuffle the pile you have just made together with the bronze and silver cards of chapter 2.
- Make a second pile containing the gold weapons of chapter 1 and all the gold cards of chapter 2.
- Take the gold shields, armour and runes of chapter 1, then remove one copy of each card. Then add the remaining cards to the gold weapon pile made previously. You may put any cards not added to this pile into the game box; you will no longer need them.
- At the alchemist, replace the "Bombe alchimique" (Alchemical Bomb) and the "Kit de réparation" (Repair Kit) cards of chapter 1 with the new chapter 2 versions. You may put the old versions away; you will no longer need them. Then add the new alchemist cards to the chapter 1 pile.
- Make a pile containing all the basic monsters of both chapters, then a second pile containing the intermediate monsters (these monsters have a star above their name). Then shuffle the powerful monsters. The powerful monsters of chapter 2 are: "La dame d'Oréiss", "L'esprit de Sylvhe", "L'expérience", "Le gardien oublié", "Le golem de silex" and "La pestilence".
- Shuffle the event cards of both chapters together.
Changes and Additions to the Chapter 1 Rules
This section covers only the changes and additions that apply during a chapter 1 game. Most chapter 1 rules are unchanged.
Starting Equipment
To make setting up chapter 1 games easier, the starting equipment of all heroes has been reprinted. You will no longer need to search the blacksmith's pile to equip yourself.
Conditional Texts
Some new chapter 2 elements have descriptive texts that differ depending on the chapter. If part of a text is underlined, you must ignore it when playing chapter 1. Sometimes the text explaining the card's effect in a chapter 1 game is shown in brackets.
For example, the level 1 ability "Télékinésie" (Telekinesis) contains the underlined wording "il déplace l'ennemi de 2 cases" ("it moves the enemy 2 squares"). This wording does not work in chapter 1 and must be completely ignored. Apply the text in brackets instead.
Level 1 Abilities
If you own the reprint of the chapter 1 manual, you are offered to start the game with a "Couteau empoisonné" (Poisoned Knife) and an "Alchemical Bomb". These two items are no longer given to you. Instead, you start the game with one level 1 ability per player. We also encourage you to drop the phylacteries in favour of the level 1 abilities. The phylacteries were meant to make you use your endurance at the start of the game, a role that these new abilities fulfil perfectly.
To use a level 1 ability, your character must have, from level 1, an ability value at least equal to the learning prerequisite of the ability.
Level 7 Abilities
Players can now go up to level 7. There is one ability, in the form of a card, for each character. The crystal cost of level gains follows the logic of chapter 1.
A new board for the new abilities: a new A6 board is placed next to the character sheet. It lets you place your level 1 and level 7 abilities.
Reminder: heroes cannot exceed 10 VIT or 10 END. The two extra characteristic points you can place on your hero open new possibilities for customisation.
Turn Order
Players may take their turns in any order they wish. This means that a player who has been resurrected can now take their turn whatever happens. In addition, a player may now pass their turn if they wish.
Corruption Catalysts
New items called "Catalyseur de corruption" (Corruption Catalyst) appear at the alchemist. They give extra abilities to your heroes (see "Les essences de corruption", p. 17).
Intermediate Monsters
During the 3rd incursion into the dungeon, shuffle the intermediate monsters into the pile of basic monsters. They are treated in every way like basic monsters. To tell them apart, intermediate monsters have a star above their name.
Note: the intermediate monster named "Arbalétrier" (Crossbowman) has the effect of forcing a player to play last.
Powerful Monsters
Shuffle the new powerful monsters in with those of chapter 1. When a player reaches level 7, the "Monstre puissant" (Powerful Monster) room then contains 3 powerful monsters instead of 2.
New Bosses
The chapter 2 bosses are not accompanied by special rooms and boss powers. Although we do not rule out producing these cards for chapter 3, we preferred to focus on the chapter 2 experience. Therefore, when you face a chapter 2 boss, take a room and a power from chapter 1.
Loot in the Crypt
You now have two piles (see "Avant toute chose", p. 5): one containing gold equipment (or rare equipment), and one containing bronze and silver equipment (or common equipment). When you must draw loot without rolling dice, as in the "Coffre" (Chest) room for example, you draw from the common equipment pile. If you are explicitly asked to draw gold cards, as in the "Tombeau du roi" (King's Tomb) room, draw them from the rare equipment pile. Likewise, the blacksmith only sells you equipment from the common equipment pile.
At the end of a combat, the loot dice rules are as follows. Roll the usual number of dice, but if you get:
- between 1 and 3: you gain no loot;
- a 4 or a 5: you gain two loot items, which you draw from the common equipment pile;
- a 6: you gain two loot items, which you draw from the rare equipment pile.
The Alchemist
The alchemist's pile contains more items, so it no longer refills when you return to the rest zone. An item that is used is discarded for good. In addition, you can now store alchemist items in a bottomless box, as you did for blacksmith equipment. Therefore, unequipped consumable items must no longer be discarded.
Repairing Equipment
Repairing equipment no longer costs crystals. In the rest zone, spend as much END as the crystal cost of an item to repair it. Similarly, for wear (see "Les nouveaux effets", p. 22), pay 1 END per wear point you wish to remove.
In this spirit, the "Kit de réparation" (Repair Kit) has been reprinted. Of course, in the rest zone, the END spent on your repairs is not recovered before you leave for the dungeon.
Events
If you play against a Dungeon Master (MDD), it has one extra event.
- 6 cards in the dungeon = 2 event cards
- 9 cards in the dungeon = 3 event cards
- 12 cards in the dungeon = 4 event cards
- 15 cards in the dungeon = 5 event cards
Of course, you must always take into account the balance according to the number of players.
Without a DM: the event pile is infinite. An event is triggered each time a player who attacks makes a roll of 5 or less.
Also remember to remove the following contextual events from chapter 2: "Alchimiste véreux" (Corrupt Alchemist) and "Échec critique" (Critical Failure).
New Variant
To make the most of your level 7, we propose a new variant. Play a normal game, then after killing the boss, you gain 15 crystals. After a stop in the rest zone, you must cross the dungeon again and face two bosses in a row. Between the two boss fights, you may use your abilities and items as if you were about to advance into the dungeon.
Note: do not hesitate to propose new game variants to the community group on Facebook.
Playing Chapter 2
Cards Unusable in Chapter 2
At the alchemist, the cards "Passe-partout" (Master Key), "Plan vers l'entrée secrète" (Map to the Secret Entrance) and "Anneau de repos" (Ring of Rest) cannot be used in chapter 2. Likewise, the events "Porte dérobée" (Secret Door), "Contrôle de la corruption" (Corruption Control), "Perdre ses appuis" (Losing Support) and "Erreur stratégique" (Strategic Error) may be removed from the pile when you play chapter 2.
Abilities of Some Heroes Replaced
Some heroes whose abilities are hard to transpose into chapter 2 have been given new abilities. Simply place the token of the new ability on top of the old one on the character sheet when you play chapter 2.
These heroes are: "Assassin", "Aventurier" (Adventurer), "Briseur de hordes" (Horde Breaker), "Érudit" (Scholar), "Pyromancien" (Pyromancer) and "Scelleur" (Sealer).
The Alchemist and the Blacksmith
Sometimes you will be allowed to buy whatever you wish from the blacksmith. All purchases are made from the common equipment pile.
Remove the following items from the alchemist's pile: "Anneau d'extraction" (Extraction Ring), "Collier de rétention" (Retention Necklace), "Kit de premiers secours" (First Aid Kit), "Musette enchantée" (Enchanted Haversack), "Piège à gros gibier" (Big Game Trap) and "Kit de réparation" (Repair Kit).
Do not worry: these unique and powerful alchemist items will be given to you as rewards in certain scenarios. Indeed, only items sold in several copies can be bought by players.
Level Gains
While reading the booklet, you will be told when your heroes change level. You will also be offered the chance to place your characteristic points again.
Game Modes
Chapter 2 offers two distinct game modes. If you have a good mastery of the game, we recommend the realistic mode for its immersive side. If you are a beginner, or if you want a more relaxed game, we recommend the story mode. Read the specifics of each one before making your decision. The manual leaves you free to mix the rules of the two modes.
Realistic Mode
Choose this mode if you want to prioritise immersion. Note, however, that this mode requires a greater knowledge of the game.
At the very start of the adventure, the heroes split into 4 groups to face the threats attacking Ednel. In realistic mode, a hero used in one of these 4 groups cannot be used in the other 3. You must therefore think about the composition of your teams at the start of the game. Be careful: as you will be clearly told when separating the heroes, some of them are mandatory in certain scenarios and therefore cannot be used outside of them:
- "l'Élu divin" (the Divine Chosen) is mandatory in the Temple of the Ten
- "la Guerrière Sylvom" (the Sylvom Warrior) is mandatory in the Forest of Sylvhe
- "l'Illusionniste" (the Illusionist) is mandatory in the University of Orcal
Finally, since the 4 scenarios take place in parallel, loot collected by one group of heroes cannot be transferred to the other groups.
Story Mode
The story mode focuses on enjoying the game and discovering the story, at the expense of immersion and challenge. Unlike realistic mode, you may reuse or change heroes as you wish across the 4 main scenarios. You may choose not to take the heroes that are mandatory in the scenarios.
You may transfer your equipment to other heroes, or keep your heroes, when you finish one main scenario and start another.
If you reuse your heroes in another scenario, you do not have to reduce their level. Likewise, heroes recover their VIT and END, and all the negative effects they suffer are removed at the end of each scenario.
Playing Alone, in Cooperation, or with a DM
Chapter 2 always adapts to the number of players. As in chapter 1, if you play alone, take at least two heroes.
If you play cooperatively or solo, you must read the scenario booklet yourself. The monsters will then behave automatically (see "Monster Behaviour Without a DM", p. 19). Events are triggered automatically when you make a roll of 5 or less while attacking.
If you play with a DM, the DM reads the scenario booklet and plays the monsters as they wish. The DM now has a DM screen that lets them hide their rolls, monster cards and the scenario booklet.
We remind you that the dungeon master gradually becomes a game master. It is recommended to punish the players' mistakes. However, you are above all a conductor, and you make sure the players have an enjoyable time. On a playful level, you oppose them, but in your heart you must have the soul of a narrator. You are encouraged to lie about your rolls to create tension, and also to ease off when fate bears down on your players. Likewise, the VIT values of monsters may change slightly if you feel the need. Make sure their victory is earned, but also that the crossing is enjoyable. Reward their initiative and punish their foolishness.
Using the Scenario Booklet
You will find a scenario booklet in the game box. The booklet tells the epic of the heroes of Ednel. Made up of a large number of branches, this story is shaped by your choices.
To use the scenario booklet, begin reading the first branch (numbered 1). At the end of each branch are choices with numbers in square brackets. This number is the next branch you must read, and so on until the end of the adventure.
From time to time, rolls will be asked of you, and these will lead you to different branches depending on your result.
For better immersion, we advise you to live with your decisions and not go back.
Battles will of course be offered to you. If you fail a combat, start the confrontation again from the beginning, trying a new strategy.
Starting or Resuming a Game
In all cases:
- place the event, monster, common equipment, rare equipment and alchemist piles on the table.
- give each player a red cube, a green cube, a yellow cube and a purple cube. Give each player a token used to track corruption and concentration.
Then, if it is the first time you play chapter 2:
- do not choose a character.
- simply start reading the scenario booklet at branch number 1.
If you have already played:
- take back your characters, placing them back in the exact state they were in. To save your heroes, we advise you to use the official website (www.paria-edition.fr/ModuleODV). In the workshop section, you will find the option to save your heroes.
- resume reading the scenario booklet at the branch where you stopped.
End of the Game
You are free to end the game whenever you like. Simply use the bookmark supplied in the game box to remember the branch where you stopped.
The Rest Icon
Sometimes a rest icon is placed next to the number of a branch. This indicates that the players are in a rest zone. At the start of these branches, all heroes recover their VIT and END, and then you may repair your equipment (see "Repairing Equipment", p. 9).
Combat
Unless explicitly stated otherwise, the players always go first. Likewise, the players and the monsters take their turns in any order they wish. (The monster "Arbalétrier" forces a player to play last; see the intermediate monsters above.)
Setup
Players place themselves on the square containing the star icon, and the other players then place themselves on the squares adjacent to that same square. Sometimes there are several numbered squares containing the star icon. The scenario will tell you whether this is a choice made by the players or an obligation. If it is a choice, separate as you wish. Sometimes no square is offered to you; in that case, you will be told that the players choose their starting positions.
Your starting positions have a great effect on how the combat unfolds!
Death and Resurrection
In chapter 2, all players who die during a combat automatically come back to life with 1 VIT at the end of it. However, you may use an item or ability of resurrection if you want to revive an ally yourself, and thus give them more VIT.
During combat, a dead ally is never considered an obstacle. You may therefore consider that they are no longer on the battlefield when you move or use your distance abilities.
When Is a Target Adjacent?
A target is considered adjacent if it is on a square right next to your square.
In chapter 1, the term "adjacent" means:
- for players: side by side around the game table;
- for monsters: side by side on the battlefield.
Turn Structure
During its turn, a monster or a player may make one movement and one action. Once it has made its two actions (or only one, or none if it wishes), its turn ends.
You may move and then take your action, or take your action and then move. However, you may not carry out part of your movement, then your action, and then finish your movement.
Movement
All players and monsters may move a maximum of 4 squares.
You are not obliged to move. To move, simply move your piece 1 to 4 squares.
Two Entities on the Same Square
If, following an ability such as "Télékinésie" (Telekinesis), a resurrection of an ally or many other effects, two entities (ally or enemy) end up on the same square, the last to arrive takes the position on the square, and the one who was there moves to an adjacent square of its choice.
Note that this rule does not mean that you may move through enemies and push them.
Example 1: The "Illusionniste" (Illusionist) uses "Télékinésie" on the "Griveton" and moves it 2 squares. The "Égorgeur" (Throat-Cutter) is therefore pushed back one square.
Example 2: The "Illusionniste" tramples the corpse of the "Éclaireur" (Scout). This is allowed, since a dead ally is no longer an obstacle. The "Guérisseur" (Healer) brings the "Éclaireur" back to life using its level 5 ability. Since two players cannot end up on the same square, the "Illusionniste" shifts to the left or to the right.
There are many specific cases that would be long and laborious to list. Simply resolve these special cases by drawing on the examples above.
Crossing an Obstacle
When moving, it is impossible to cross a scenery obstacle or a living enemy. A living ally is not an obstacle unless it is itself adjacent to an enemy. The dead are never obstacles.
Disengaging or Moving Next to an Enemy
If you are adjacent to an enemy and wish to move, you must make a pure roll greater than or equal to that enemy's DEF. If several enemies surround you, add their DEF values together. The same rules apply when you wish to move past one or more enemies.
Each enemy has only one chance to stop you. If you move across several squares adjacent to the same enemy, make a single roll; if you succeed, move freely.
If you fail your roll, your movement stops immediately. Being stopped in your movement does not prevent you from taking an action.
Example: Before moving to position 1, the "Chevalier" (Knight) must make a roll greater than or equal to the DEF of the "Baroudeur" (Brawler). If it fails, it stays where it is and cannot move any further this turn. Before moving to position 2, it must make a roll greater than or equal to the combined DEF of the "Griveton" and the "Arbalétrier" (Crossbowman). If it fails, it stays where it is and its movement ends for this turn. It can reach position 3 without making a roll, since it has already made rolls for its two enemies.
Note: some battlefields have crossing zones. You can learn more on page 25.
Player Combat Actions
The combat actions acquired in chapter 1 do not change in chapter 2. You may use an item, attack with your weapon, or use an ability.
However, if your action is a melee action, you must be adjacent to your target to attack it.
At range, your action has a maximum reach of 6 squares. You must have a clear line of sight to your target to make your ranged action. This means that no obstacle may block your field of view. Remember that an ally adjacent to an enemy is an obstacle. Unless stated otherwise, all actions targeting your allies are considered ranged.
If doubt remains about whether a ranged action is possible, a linear token (called "La règle de la mauvaise foi", the rule of bad faith) settles the matter. Place the token at the centre of your square and orient it so as to target the centre of your target's square. If the central line does not cross any occupied square, your attack is possible. If you pass over the edge of a square, your attack works.
Note: some weapons or monsters have range increases, such as the "Lance des illuminés" (Lance of the Enlightened) or the "Lossona". Likewise, "Runes de précision" (Precision Runes) increase the range of ranged attacks.
Ranged attacks have no minimum range.
Example of a ranged attack: green marks the ranged attacks that are possible. Red marks the ranged attacks that cannot be made. It is perfectly possible to use a ranged attack on an enemy adjacent to your position.
Example of an area attack: the "Pyromancien" (Pyromancer) deals 5 damage to enemies 3 squares away or closer. Green marks the enemies that take damage. In red, the "Arbalétrier" takes no damage because the "Mage rouge" (Red Mage) blocks the way.
A New Keyword
New abilities appear that begin with the words "À tout moment" (At any time). This keyword means the ability may be used at any moment, even when it is not the player's turn. Likewise, if the player uses this ability on their turn, it does not use their action.
Corruption Essences
In addition to the level 1 and level 7 abilities, these new actions appear in chapter 2.
In chapter 2, all players obtain a "Catalyseur de corruption" (Corruption Catalyst). When you equip one, choose the corruption essence you want. It has a corruption cost (see "Corruption", p. 23). Your corruption increases each time you use it, by the amount shown on the card. As with an ability, you must first pay the cost. This means you increase your corruption before making the roll asked for, if there is one.
In chapter 1, "Catalyseurs de corruption" are available for sale at the alchemist.
Example: To use "Guérison impure" (Impure Healing), you increase your corruption by 3, then make a dice roll. If your roll is greater than or equal to your corruption level, you recover 4 VIT.
You may choose not to use "Catalyseurs de corruption" if you want a less complex game experience. Certain aspects of the game, such as corruption essences, can be ignored by less experienced players.
Changing Equipment or Items
A player may place on their sheet equipment or items not carried by another player. You may equip as many pieces of equipment or items as you wish in one action. Outside combat, as with abilities, you may take this action as many times as you wish.
Example: The "Chevalier" sees its shield destroyed by wear. On the following turn, it uses its action to equip a "Pavois" (Pavise) that it had put in the bottomless bag. It also places a set-aside "Potion de vitalité" (Vitality Potion) in an empty item slot.
Endurance Recovery
When a player kills an intermediate or powerful monster, the team gains an END regeneration. The END is recovered as soon as the monster dies and may be shared out among the players as you wish. The players share:
- 1 END per intermediate monster
- 2 END per powerful monster
Basic monsters and bosses do not give any END.
A Chapter 2 Without Crystals
In chapter 2, you do not need to worry about crystals for your purchases. You gain only 1 crystal per enemy defeated if you use a hero who needs this resource, such as the "Brigand" (Bandit).
Loot
Each combat in chapter 2 may give you fixed loot as well as a number of items drawn at random from the blacksmith's common equipment pile or the alchemist's pile.
| Players | Loot |
|---|---|
| 2+ | Scutum (Shield), Fléau d'armes (Weapon) |
| 3+ | Flasque d'huile (Oil Flask, item) |
| 4+ | 1 random equipment |
| 5+ | 1 random item |
| 6 | 1 random equipment |
The table above is an example of the loot table found at the end of each combat. The number of players determines the loot gained. The more players there are, the more loot they gain. For example, a team of 4 players gains the loot of the rows "2+", "3+" and "4+".
As a reminder, all blacksmith loot is drawn from the common equipment pile, and at the alchemist, only items sold in several copies may be drawn at random (see "The Alchemist and the Blacksmith", p. 10).
Events
At each combat, you will be told which events you may trigger. Events are not kept by the MDD at the end of the combat.
| Players | Events |
|---|---|
| 2+ | Alchimiste véreux (Corrupt Alchemist), Salve de flèches (Volley of Arrows) |
| 3+ | Mutisme (Silence) |
| 4+ | Éboulement (Rockfall) |
| 5+ | Enchantement (Enchantment) |
| 6 | Objet perdu (Lost Item) |
The number of players determines the events of the combat. The more players there are, the more events increase. For example, a team of 4 players may trigger the events of the rows "2+", "3+" and "4+".
The events were chosen to reinforce the game's lore.
Without a DM: events work as in chapter 1. Mix the events of the table, taking into account the number of players, then make them into a pile. Trigger one at random when you make combat rolls of less than 5 to attack.
Events with a conditional trigger, such as "Échec critique" (Critical Failure) or "Alchimiste véreux", remain active during the combat until a player performs the action that triggers the effect.
Example: By making a 4, a player triggers the event "Échec critique". It remains active until a player makes a critical failure on a roll, which resolves the event.
As in chapter 1, the event always finds a target even if the player who triggered it cannot be targeted. Likewise, if a player triggers an event targeting several players, such as "dalle de piques" (spike slab), that player and their nearest allies are the targets.
In chapter 1, if you play without a DM, you are free to keep conditional events until they are triggered, as you would in chapter 2.
Monster Behaviour Without a DM
When you play without a DM, the monsters have rules that let you automate their behaviour. This behaviour is indicated by a pictogram on the monster's token. Also, unlike in chapter 1, you must now roll the dice for monsters' attacks and defences.
In general, the order in which you play the monsters does not matter much. If monsters get in each other's way, notably for ranged attacks, play their turns in such a way that each one can take its action.
The Basics of Automation
In general, as in chapter 1, if several players are attackable, the monster chooses at random. Roll a die to determine its target. This also includes, for example, the "Mage impur" (Impure Mage). If it can attack a player or revive an ally, it chooses the action it uses at random.
If no target is within the monster's reach, it uses its movement to try to find one. Roll a die to determine its target before its movement.
Example: Two targets are possible for this "Baroudeur". It determines its target before its movement, then takes its turn. For example, an even result for the "Chevalier" and an odd result for the "Magicien" (Magician).
Ranged Monsters
These monsters have the yellow bow icon on their token. Their behaviour is as follows:
- if a player is within attack range before its movement, the monster attacks and then moves as far away from the players as possible;
- if no player is within attack range before its movement, it moves closer to its target and then attacks if possible (see "The Basics" above).
Note that in chapter 2, since there is no longer a defender for the team, the mention "Ignore le défenseur" (Ignore the defender) no longer has any effect.
Note: you will probably find special cases that do not fit the automation rules. Do not hesitate to create challenge for yourself by choosing strategically for the monsters.
Aggressive Monsters
These monsters have the red fangs icon on their token. Monsters with this behaviour strike in melee and never disengage. If the monster is adjacent to one or more players, it will not try to move away. It attacks the adjacent players until they die or it dies itself.
Example: In the example, the "Baroudeur" will not try to move away from the "Érudit" (Scholar) or the "Chevalier". It will hold its position until the players die or it does.
Sneaky Monsters
These monsters have the green wolf icon on their token. Monsters with this behaviour attack in melee. Their particularity is that they can pass by players without ever making a roll. As a result, they may change target each turn and consider all reachable targets within the turn as attackable.
Example: The "Sylvom contrôlé" (Controlled Sylvom) can reach the "Érudit" without making a roll, even if it passes the "Chevalier". On its turn, it attacks one of the players at random.
Defender Monsters
These monsters have the blue shield icon on their token. Monsters with this behaviour attack in melee. Their particularity is that they want to protect their allies. This means they try to move in a way that blocks the line of sight to their allies positioned behind them. Once adjacent to a player, they switch to aggressive behaviour while trying to protect their allies.
Example: The "Érudit" can attack the "Arbalétrier". On its turn, the "Griveton" will attack the "Chevalier", then try to move (green arrow) to protect its ally. As a reminder, to move, it must make a roll greater than or equal to the DEF of the "Chevalier".
Note: sneaky monsters are extremely dangerous and unpredictable!
New Effects
Like poison in chapter 1, if a monster adds negative effects to its attack, you suffer those negative effects as soon as you fail your DEF roll. Even if you reduce all the damage of the attack, the negative effects are still suffered.
Effects That Inflict Damage
These new effects behave largely like poison. They disappear at the end of the combat or when the target dies. In addition, they inflict their damage at the start of the target's turn.
- Burning (Brûlure): burning can be stopped by passing your turn. This decision must be taken at the start of the turn of the burning character. If you decide to get rid of the burning, you do not suffer its damage.
- Bleeding (Hémorragie): bleeding behaves exactly like poison, except that it increases by 1 each time you suffer damage from a normal attack.
Example: On its turn, the "Chevalier" using the "Fléau d'armes" inflicts "Hémorragie 1" on a "Griveton". Then the "Magicien", using its weapon, also hits the "Griveton". The bleeding of the latter goes up to 2. The "Griveton" will therefore suffer 2 points of damage at the start of its turn.
Monsters Without a DM
If a monster cannot attack a target this turn, or if the burning kills it, it passes its turn. Otherwise, it suffers the burning and plays its turn normally.
Other Negative Effects
-
Weakening (Affaiblissement): weakening represents the players' state of fatigue. It temporarily reduces the maximum endurance of the player.
For example, a player who starts with 6 END and suffers "Affaiblissement 2" sees their maximum endurance fall to 4. When you recover from weakening, you do not recover the endurance you lost. Weakening remains between combats, and is therefore only cured by an item acting on negative effects or by a return to the rest zone.
-
Wear (Usure): this effect shows the wear suffered by defensive equipment during combats. Wear therefore does not apply to the players but rather to their armour and shields. If a player has a shield and an armour, wear always targets the shield first. As soon as the shield is broken, excess (or surplus) wear is transferred to the player's armour.
Wear never disappears on its own. In the rest zone, you may pay as much END as your equipment's wear to get rid of it, even if the item is not yet broken.
If an item suffers as much wear as its crystal value, it is broken. Like the "Brisure" (Breakage) event, a broken item is unusable, and it no longer has any sale value. However, it can be repaired by paying as much END as its crystal cost, in the rest zone or outside it using the "Kit de réparation" (Repair Kit).
Note: wear is a permanent problem that you will have to face. Do not neglect its impact on the game.
Corruption
Corruption represents the effect of the corruption of the Holy Martyrs on the players. Like a transmissible disease, it gnaws at them from the inside. Corruption is inflicted by certain monsters. It can also be self-inflicted by using "Essences de corruption" (see "Corruption Essences", p. 17).
When a player makes an attack roll or ability roll, if the value of its die is strictly lower than its corruption level, the corruption disappears from the hero. It then inflicts "Corruption 2" and 2 points of damage that ignore damage reduction, on all players within 4 squares (adjacent in chapter 1). As with ordinary attacks, obstacles protect you from the transmission of corruption.
Corruption does not disappear when the hero dies, at the end of the combat, or in the rest zone. Only effects such as that of the "graine purificatrice" (purifying seed) can get rid of it.
Concentration: Do Not Suffer Your Bad Luck
Concentration represents a player's ability to remain calm on the battlefield. In combat, when a player fails a roll of any kind, they gain "Concentration 1".
No player may have more than "Concentration 3", unless they have equipment that allows them to exceed this maximum. Concentration disappears at the end of the combat. At any time, a player may remove concentration in order to obtain a bonus on their next roll. They gain +4 for each point of concentration removed.
Several concentration tokens may be removed for the same roll. You must announce this before making your roll. Concentration will help you succeed at your rolls more often.
You may not use concentration to increase damage when the damage is determined by the result of the roll, as can be the case with the level 5 ability of the "Scelleur" (Sealer). Concentration is therefore used only to succeed at your rolls, not to amplify their effects.
You may choose not to use concentration if you want a less complex game experience.
Battlefields
Chapter 2 contains 34 battlefields. These contain specifics that we must address. Here are the icons and other markings you may find on the battlefields.
Assembling a Battlefield
Each battlefield is made of 4 to 6 tiles. To assemble a battlefield, find all the tiles bearing the same number and match the white lines on their edges.
Take into account the specifics of each battlefield before engaging in combat.
Placement of Players and Monsters
The numbered stars indicate the starting positions of the players at the start of combats (see "Combat: Setup", p. 13).
The numbered red circles indicate the starting positions of the monsters at the start of combats.
Forbidden Movement
Areas where movement is forbidden are symbolised by hexagons whose outlines are slightly faded. You may not go there. Likewise, it is forbidden to push an enemy or an ally onto one of these squares.
Elevations
Arrows appear on some battlefields, indicating a change in height on the map. If you are higher up and target an enemy located on a lower level than you, your ranged attacks have +1 range.
You may choose not to use this specific feature of the battlefields if you want a less complex game experience.
Crossings
Often representing jumps, crossings indicate movements of several squares to be made in one go. Some crossings are one-way (see below). You must have at least as many movement points as the value shown on the crossing square in order to use it. (As a reminder, arrows indicate a change of level.)
If an enemy or an ally blocks the arrival square of a crossing, move it one square when you use that crossing.
Obstructions
These obstacles, shown in dotted lines, cannot be crossed during a movement, and you cannot make a ranged attack if the projectile must pass through them.
In this particular case, there is also the possibility of placing yourself on a square inside the circle of the obstacle. Your character is then protected from ranged attacks as long as it remains in this position.
Elevated Obstructions
These obstacles, shown in tight dotted lines, cannot be crossed during a movement, and you cannot make a ranged attack through them. However, if you are on the raised part of the map, you may make a ranged attack from that point.
Walls
This continuous line, thicker than the grid, cannot be crossed during a movement. Certain monster or hero abilities allow them to pass through.
Variants
Weather
Some of you will enjoy creating your own scenarios or fighting on the maps. For more fun, at the start of the encounter, roll a 6-sided die to determine the conditions of the combat:
- Day: standard game conditions;
- Night: only targets lit by a torch can be the target of a ranged attack;
- Snowy: each turn, a player who does not move at least 3 squares suffers "Affaiblissement 1" (weakening 1);
- Fog: the range of all ranged attacks is reduced by 2;
- Shower: all movements are reduced by 1;
- Strong winds: all ranged attacks have a one-in-two chance of missing targets located 4 squares or more away. Roll a die; if the result is even, you hit.
Friendly Fire: Enabled
An interesting and complex variant would be to enable friendly fire. This means that effects within X squares would hit all targets. For example, the level 5 ability of the "Pyromancien" would deal 5 damage to allies in the area of effect.
Specific Points
The manual's specific points give you the way forward for the other special cases you may meet.
Tokens
Players have told us there was a lack of information about the use of tokens. We have corrected our mistake: an exhaustive list of the tokens and their uses is available on the official PARIA website (https://paria-edition.fr/index.php/les-jetons/).
The Assimilated
"L'Assimilé" (The Assimilated) is considered to be a single enemy. You must therefore choose which part you attack. Attacks targeting several enemies only hit one part of "L'Assimilé".
Imprégnée d'Ilhus
NIV 7: Fissure du voile (Veil Fissure). The squares where the monsters were are considered available until they reappear. If you are on one of them, you are moved in a random direction when the monster reappears.
The Order's Hunter
NIV 7: Purger l'hérésie (Purge the Heresy). The "Chasseur de l'Ordre" (Order's Hunter) and the enemy it chooses are in no way obliged to attack each other during these two extra turns. Each plays its turn as it sees fit.
Walking Through Walls
When a monster or player is allowed to pass through walls, this does not mean that it may stop inside them. You may not end your movement inside an obstacle of any kind.
Extending the Experience
The official PARIA website hosts an encyclopaedia of the game and a creation workshop. The encyclopaedia lets you learn more about the universe and has an FAQ section. The workshop lets you create your own elements for the game. In addition, you will find the creations of other players. Using these tools, you can take your game experience further.