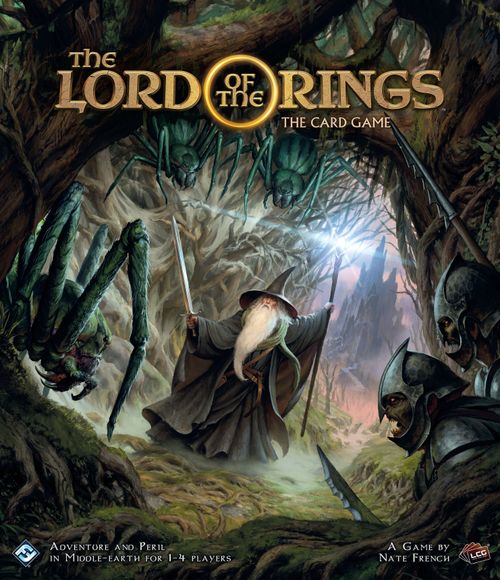
The Lord of the Rings: The Card Game – Revised Core Set
The Lord of the Rings: The Card Game – Revised Core Set Rulebook
Table of Contents
Table of Contents
- Game Overview
- Components
- Key Concepts
- Creating Decks and Scenarios for the First Game
- Game Setup
- Playing the Game
- Phase 1: Resource
- Phase 2: Planning
- Phase 3: Quest
- Phase 4: Travel
- Phase 5: Encounter
- Phase 6: Combat
- Phase 7: Refresh
- Concluding the Game
- Additional Rules
- Advanced Rules
- Scenario Overview
- Modes of Difficulty
- Deckbuilding
- Decklists
- Campaign Mode
- Scoring
- Campaign Log
- Quick Reference
Game Overview
The Lord of the Rings: The Card Game is a game of heroes, perilous journeys, and adventure set in the lands described in the epic fantasy masterpiece created by J.R.R. Tolkien, The Lord of the Rings. During this game, players assume the role of a party of heroes who are attempting to complete dangerous quests. These quests occur during a timespan of 17 years: from when Bilbo celebrated his 111th birthday (and Frodo celebrated his 33rd birthday) to days just prior to Frodo's leaving the Shire. Instead of directly retelling the classic stories that have previously been narrated, this game provides players with a variety of elements—characters, settings, enemies, events, items, artifacts, and scenarios—that allow them to embark upon new adventures and share new experiences with the beloved The Lord of the Rings characters and settings during this period of Middle-earth history.
The Lord of the Rings: The Card Game is a cooperative game in which players work together to complete a scenario. During each game, the players attempt to overcome the particular encounters, enemies, and challenges of a scenario, against which they either win or lose together. The Lord of the Rings: The Card Game can be played solo or with up to four players using only the contents of this core set.
The Living Card Game
The Lord of the Rings: The Card Game is a Living Card Game®, and the enjoyment and experience of the game can be customized and enhanced through the purchase of expansions. Each expansion provides players with new options and strategies for their decks or entirely new scenarios against which to play.
The Revised Core Set
This revised core set includes enough player cards so that up to four players can play the game simultaneously. It also includes at least one full playset of each of the player cards, so that all core deck customization options are available. Additionally, this product also introduces a set of new boon, burden, and campaign cards that are used to link the three core scenarios and create a cohesive campaign experience. For more details on Campaign Mode, see page 28.
Components
- 12 Hero Cards
- 188 Player Cards
- 84 Encounter Cards
- 10 Quest Cards
- First Player Token
- 66 Damage Tokens
- 66 Progress Tokens
- 57 Resource Tokens
- 4 Threat Dials
- 16 Boon and Burden Cards
- 3 Campaign Cards
Key Concepts
This section introduces a number of foundational concepts to keep in mind while learning and playing the game.
Heroes
Heroes are the main characters that players control during the game; players use them to attack, defend, quest, and acquire resources. Each player will begin the game with three hero cards faceup in their own play area.
Player Decks
Each player has a deck that corresponds to their heroes. A player's deck contains allies, events, and a variety of weapons and items. During the game, a player draws cards from this deck and spends their hero's resources to play those cards, each of which can aid the heroes on their adventure.
Threat Dial
Each player has a threat dial which represents the risk their heroes endure during the scenario. Game effects can cause a player's threat to increase or decrease. When this happens, the player adjusts their dial accordingly. The number displayed on a player's threat dial is sometimes referred to as that player's threat.
Winning the Game: Completing Quests
The quest deck tracks the players' progress toward the completion of their adventure. During the game, players place progress tokens onto quest cards in an attempt to advance to the next stage of the quest. If any number of players survive and advance through all stages of the quest, all players win the game!
Losing the Game: Player Elimination
Middle-earth is a dangerous place, and it is possible for a player to succumb to the danger and be eliminated from the game. A player is eliminated from the game if that player's threat dial reaches 50 or if all of that player's heroes are destroyed. If all players are eliminated from the game before completing the last stage of the quest, the players have lost the game.
Ready and Exhausted
Each player card in play exists in one of two states: ready or exhausted. A ready card indicates that the card is available to be used. All cards enter play in their ready state. Once a card has been exhausted, it cannot be used for any effect that requires the card to exhaust. The opportunity to use the card's effect is restored when the card once again becomes ready. Players ready all of their exhausted cards during the refresh phase, which is described later.
Creating Decks and Scenarios for the First Game
When playing The Lord of the Rings: The Card Game for the first time, we recommend that players use one of the core set's four starter decks and play the "Passage Through Mirkwood" scenario.
To construct the decks for the first game, players gather the cards described below.
For future games, players may continue to play with these starter decks, or they may customize their own decks as described in the "Deckbuilding" section on page 26 of this book.
Player Starter Decks
The Lord of the Rings: The Card Game core set contains the following four starter decks:
Leadership Deck. The Leadership deck is an all-purpose deck with tools for a wide range of situations. This deck also contains a number of cards that can be used to assist and support the other players in the game.
- Heroes: Aragorn, Théodred, Glóin
- Cards: All copies of cards numbered 13–27 and two copies of card 73 (card numbers can be found in the lower-right corner of each card).
Tactics Deck. The Tactics deck is all about combat, and is well-suited for both attacking and defending. The deck uses weapons and armor to bolster heroes so they can go toe-to-toe with the enemies of Middle-earth.
- Heroes: Gimli, Legolas, Thalin
- Cards: All copies of cards numbered 28–42 and two copies of card 73.
Spirit Deck. The Spirit deck focuses on its characters' willpower and their ability to successfully explore locations and make progress on their quest. It is also well-suited for resisting the various threats of the encounter deck.
- Heroes: Éowyn, Eleanor, Dúnhere
- Cards: All copies of cards numbered 43–57 and two copies of card 73.
Lore Deck. The Lore deck is good at keeping its characters alive, and providing the player a variety of options for each situation with powerful card draw effects. This deck rewards players who anticipate threats and are prepared to meet those threats when they emerge.
- Heroes: Denethor, Glorfindel, Beravor
- Cards: All copies of cards numbered 58–72 and two copies of card 73.
Intro Scenario
"Passage Through Mirkwood" is the game's introductory scenario. To set up this intro scenario, take the quest cards "Flies and Spiders" (119), "A Fork in the Road" (120), "A Chosen Path" (121), and the other "A Chosen Path" (122) and arrange them as a four-card deck with the Stage A sides placed faceup.
Quest cards always begin with Stage "A" sides placed faceup.
Each scenario has a unique encounter deck as depicted by the set icons presented on the scenario's quest card.
For the "Passage Through Mirkwood" scenario, gather all encounter cards that contain the set icons listed on the quest card. This consists of cards 74–80, and 89–100.
Game Setup
To set up a game of The Lord of the Rings: The Card Game, perform the following steps in order. For the first game, use the decks and scenario described on page 5.
- Shuffle Decks: Shuffle the encounter deck and each player deck separately. Do not shuffle the hero cards into the player decks, and do not shuffle the quest cards into the encounter deck.
- Place Heroes and Set Starting Threat: Each player places their heroes in their own play area, adds together the threat cost of each of their own heroes, and sets their threat dial to that value, referred to as a player's "Starting Threat".
- Create Token Bank: Place the damage, progress, and resource tokens in separate piles next to the encounter deck.
- Determine First Player: Select a first player. That player takes the first player token and places it in their play area. If players cannot decide who should be the first player, determine a first player randomly.
- Draw Starting Hand: Each player draws six cards from the top of their deck. If a player does not wish to keep this starting hand, that player may shuffle the six cards back into their deck and draw another set of six cards. A player must keep the second set of six cards as a starting hand.
- Place Quest Cards: Place the quest cards for the scenario near the encounter deck. The quest cards are arranged as described in the "Intro Scenario" section, with the stage "1A" side on top and each subsequent card beneath it increasing in sequence. The Quests are stacked in ascending numerical order with the lowest numbered card on the top.
- Perform Scenario Setup Instructions: Perform the "Setup" instructions presented on the stage "1A" quest card. Then, flip the card to the stage "1B" side. The game is now ready to begin.
Suggested Play Area
(One player, mid-game) The play area is arranged with the encounter deck and encounter discard pile, the quest deck, the staging area, the active location, the player's engaged enemies, the player's heroes and allies, the player's deck and discard pile, the token bank, the first player token, and the threat dial.
Playing the Game
The Lord of the Rings: The Card Game is played over a series of rounds. Each round consists of seven phases that players resolve in the following order: Resource, Planning, Quest, Travel, Encounter, Combat, and Refresh. After all seven phases have resolved, a new game round begins, starting with the resource phase.
Phase 1: Resource
The resource phase represents the heroes gathering supplies, finding allies, and obtaining information, which are represented in the game by resource tokens and cards. The heroes will use these resources to overcome the machinations of the Dark Lord.
To resolve the resource phase, players perform the following steps in order:
- Gain Resources
- Draw Cards
Each step of the resource phase is resolved by all players simultaneously. After performing the steps of the resource phase, proceed to the planning phase.
Step One: Gain Resources
For each hero a player has in play, that player takes one resource token from the token bank and places it in that hero's resource pool. Each hero has a resource pool next to it that contains that hero's resource tokens. Players spend tokens from their heroes' resource pools to play cards from their hands, which is described later.
Step Two: Draw Cards
Each player draws one card from the top of their deck and adds it to their hand of cards. (There is no hand limit.) A player's deck consists of allies, attachments, and events that can aid the heroes during the game.
Phase 2: Planning
The planning phase represents the mustering of the heroes before the next leg of their journey—preparing them with the items and allies they need for a successful quest.
During this phase, players can play ally and attachment cards from their hands. Ally cards represent friends, followers, and companions of the heroes, and attachment cards represent weapons, armor, items, artifacts, and skills that can aid the heroes during their adventure.
A card's type is indicated at the bottom of the card.
Starting with the first player and proceeding clockwise, each player may play any number of ally and attachment cards from their hand. To play a card, a player must pay the card's cost, which is described later. Then, the card is played and placed in that player's play area. After each player has had an opportunity to play cards, proceed to the quest phase.
Paying Costs
To pay a card's cost, a player must spend a number of resources equal to that cost, which is presented in the upper-left corner of the card. When a player spends a resource, that player takes a resource from one of their heroes' resource pools and places it in the token supply. A player cannot pay for a card using a resource from any pool; they must take the resources from a pool that provides a resource match. That is, the resources must be spent from heroes whose sphere of influence matches the sphere of influence of the card being played. An example of how to use resource matching to pay for a card is given on page 10.
A player can spend resources from multiple heroes' resource pools to pay for a single card if there is a resource match among that card and each pool from which resources are spent. If a card has a cost of "0," a player can play that card without spending any resources; however, the player must have at least one hero in play that matches that card's sphere of influence.
If players are using the starter decks, they will not have to worry about resource matching as all the cards in those decks are from a single sphere of influence.
Placing Cards
Each card type dictates how it is played.
When a player plays an ally card, place the card in that player's play area.
When a player plays an attachment card, attach it to another card that is already in play by placing it in a position so that the in-play card slightly overlaps the attachment.
Each attachment card describes the set of cards it can be attached to. Most are attached to hero cards, but some can be attached to other card types. For example, the "Steward of Gondor" card can only be attached to hero cards.
Spheres of Influence
Most player cards in Lord of the Rings: The Card Game are from one of the four spheres of influence. A card's sphere indicates which resources a player can spend to pay for that card. Each sphere is represented by an icon that is presented on the right side of ally, attachment, and event cards and the lower-left corner of hero cards. Each sphere has a distinct identity and play style and is represented by an icon and color.
- Leadership: The leadership sphere emphasizes a hero's charisma and influence, particularly a hero's potential to lead, inspire, and command both allies and other heroes.
- Lore: The lore sphere emphasizes the potential of a hero's mind, particularly that hero's wisdom, experience, and specialized knowledge.
- Spirit: The spirit sphere emphasizes the strength of a hero's will, particularly that hero's determination, resilience, courage, loyalty, and heart.
- Tactics: The tactics sphere emphasizes a hero's martial prowess, particularly that hero's combat effectiveness and tactical mastery.
Example: Paying for Cards
- Glóin has a leadership resource icon and three resource tokens in his resource pool. Éowyn and Eleanor each have a spirit resource icon and two resource tokens in their resource pools.
- Tom wants to play Northern Tracker from his hand. Northern Tracker has a spirit sphere icon so he can pay its cost only with resources from characters that have the spirit icon.
- Tom spends two resource tokens from Éowyn's resource pool and two resource tokens from Eleanor's resource pool, returning those tokens to the token bank. He places Northern Tracker faceup in his play area.
Phase 3: Quest
The quest phase provides the heroes with an opportunity to make progress on their journey. During this phase, the players can commit characters to advance their quest.
To resolve the quest phase, players perform the following steps in order:
- Commit Characters
- Staging
- Quest Resolution
Each step is described below. After the players have performed the steps of the quest phase, proceed to the travel phase.
Step One: Commit Characters
Starting with the first player and proceeding clockwise, each player has an opportunity to commit any number of their characters to the current quest. Each hero and each ally is a character.
To commit a character to the quest, a player must exhaust that character (if a character is already exhausted, it cannot be commited).
Step Two: Staging
After each player has had the opportunity to commit characters to the quest, each player reveals a card from the encounter deck; this is called staging, and it is used to populate the play area with new locations, enemies, and objectives. This step occurs every round, even if the players did not commit any characters to the quest.
Reveal the encounter cards one at a time. If a card's text has a "When Revealed" effect, resolve that effect by following its instructions before revealing the next card.
When an enemy, location, or objective card is revealed during this step, it is placed in the staging area, which is a play area in the center of the table, near the quest deck.
When a treachery card is revealed, resolve the text on the card, and then place it in the encounter deck discard pile, unless the card specifically states otherwise.
If there are no cards in the encounter deck during this phase, shuffle the encounter deck discard pile to create a new encounter deck.
Step Three: Quest Resolution
During this step, the players' efforts at advancing their quest are compared against the forces arrayed by the encounter deck to determine how much progress is made.
Each character has a willpower strength that is used to advance the quest. Each enemy and location has a threat strength that is used to impede a character's quest progress.
To resolve the quest, compare the total willpower of all characters committed to the quest to the total threat in the staging area:
- Successful: The total willpower is greater than the total threat.
- Unsuccessful: The total willpower is less than the total threat.
- Neither: The total willpower is equal to the total threat.
The quest resolution determines if players gain progress tokens or increase their threat. If the quest resolution is neither successful nor unsuccessful, nothing happens.
Successful Quest
If the quest is successful, a number of progress tokens equal to the difference between the total willpower and the total threat are placed on the current quest card.
Each quest card has number of quest points. When the number of progress tokens on the quest card is equal to or greater than the number of quest points, the players complete that stage of the quest, which is described later.
Sometimes there is an active location, which is a location card that is placed near the revealed quest card instead of in the staging area. A location becomes active when a player travels to it, which is described later.
If there is an active location, any game effect or ability that places progress tokens on the current quest places progress on the active location instead, up to the value of the location's quest points.
Progress tokens are placed on quest cards.
If the number of progress tokens on an active location is equal to that location's quest points, that location is explored. Discard that location and place any additional progress tokens on the current quest card as normal.
Unsuccessful Quest
When a quest is unsuccessful, increase each player's threat dial by to the difference between the total threat and the total willpower. If a player's threat dial reaches 50, that player is immediately eliminated from the game, which is described on page 20.
Example: Resolving a Quest
- Tom exhausts Éowyn to commit her to the quest. Rosie exhausts both Aragorn and the Guard of the Citadel to commit them to the quest. A Gladden Fields location card is already in the staging area.
- The players each reveal one card from the encounter deck, and add any revealed enemies and locations to the staging area.
- The players add the total committed willpower and compare it to the total threat in the staging area. The result is 7 willpower and 7 threat. Tom uses Éowyn's card ability to increase the players' willpower to eight, which allows them to place one progress token on the current quest card.
Phase 4: Travel
When players travel to a location in the staging area, that location becomes the active location.
The travel phase represents the heroes' exploration and navigation across the lands of Middle-earth.
The staging area frequently contains one or more location cards. During this phase, the players can choose to travel to one of those locations.
To travel to a location, the players choose one location in the staging area. Place that location next to the revealed quest card, indicating that it is the active location. There can only be one active location at a time. If there is already an active location, players cannot travel to a new location.
A location card's text may have a "Travel" cost, which indicates a cost that players must pay to travel to that location. If the players cannot pay the travel cost, they cannot travel to that location.
Traveling to Locations
Location cards that are in the staging area contribute their threat strength during the quest phase, making it more difficult for players to quest successfully. Players can remove those locations from the staging area by traveling to them. The active location—as it is not in the staging area—does not contribute its threat while players are questing.
When the players have placed enough progress tokens on the active location (through questing or through card abilities), they have adequately explored it and rid it of any threats. Exploring a location in this manner discards it, and this enables the players to travel to a new active location during a later travel phase.
Phase 5: Encounter
The encounter phase represents the confrontation and pursuit of enemies. During this phase, each player has an opportunity to engage an enemy in the staging area, and then enemies potentially engage the players.
To resolve the encounter phase, players perform the following steps in order:
- Optional Engagement
- Engagement Checks
After all players have performed the steps of the encounter phase, they proceed to the combat phase.
Step One: Optional Engagement
In turn order, each player has an opportunity to engage one enemy in the staging area. To engage an enemy, a player takes an enemy card from the staging area and places it in their play area, facing off against their characters.
Step Two: Engagement Checks
After each player has had an opportunity to engage an enemy, players take turns making engagement checks. Starting with the first player and continuing clockwise, each player makes an engagement check by comparing their threat to the engagement cost of each enemy in the staging area.
The enemy in the staging area that has the highest engagement cost that is equal to or lower than that player's threat engages that player. When an enemy engages a player, its card is placed in that player's play area—this is identical to when a player engages an enemy. Note that any time an engagement occurs (either by player option, by an engagement check, or by a card ability), the end result is the same: the player is considered to have engaged the enemy and the enemy is considered to have engaged the player.
Players continue making engagement checks in clockwise order until there are either no enemies remaining in the staging area or until the enemies remaining in the staging area cannot engage any of the players.
Example: Making Engagement Checks
- The first player, Tom, makes the first engagement check. The King Spider has the highest engagement cost (20) that is equal to or lower than Tom's threat of 24, so the King Spider engages Tom.
- Rosie makes the next engagement check. Ungoliant's Spawn has the highest engagement cost (32) that is equal to or lower than Rosie's threat of 35, so Ungoliant's Spawn engages Rosie.
- Tom makes the next engagement check. His threat is lower than the engagement cost of the enemies remaining in the staging area, so neither of those enemies engage Tom.
- Rosie makes the next engagement check. The Forest Spider has the highest engagement cost (25) that is equal to or lower than Rosie's threat of 35, so the Forest Spider engages Rosie.
- Tom, and then Rosie, each make another engagement check. The engagement cost of Goblin Sniper is higher than each player's threat, so it remains in the staging area at this time. Since all players have made successive engagement checks without being engaged by any enemies, the "Engagement Checks" step is now complete.
Phase 6: Combat
The combat phase represents the battles and struggles between the heroes of Middle-earth and the enemies who seek to hinder or harm them during their quest. During this phase, engaged enemies attack and potentially gain unpredictable tactics through shadow cards. Then, players can attack enemies.
To resolve the combat phase, perform the following steps in order:
- Deal Shadow Cards
- Resolve Enemy Attacks
- Resolve Player Attacks
Each step is described below. After performing the steps of the combat phase, proceed to the refresh phase.
Step One: Deal Shadow Cards
Deal one card from the encounter deck to each enemy that is currently engaged. These cards are called shadow cards. Place each shadow card facedown next to the enemy to which it is being dealt. Players cannot yet look at these shadow cards.
First, deal shadow cards to the enemies engaged with the first player, and then deal to enemies engaged with each other player in clockwise order. When dealing cards to enemies engaged with a player, those cards are dealt to enemies with the higher engagement cost before they are dealt to enemies with a lower engagement cost. If the encounter deck is depleted of cards, do not shuffle the encounter discard pile to form a new encounter deck. Any enemies that have not yet been dealt a shadow card will not receive one.
Shadow cards may have a "Shadow" effect presented on the faceup side of the card that players resolve during combat, which is described later.
If an enemy card leaves play, its shadow card is discarded. At the end of the combat phase, all shadow cards that were dealt this round are discarded.
Step Two: Resolve Enemy Attacks
After shadow cards have been dealt to each engaged enemy, resolve enemy attacks. Starting with the first player and continuing clockwise, each player performs the following steps in order for each enemy they are engaged with. The player performing the steps is referred to as the active player.
a. Choose An Enemy: The active player chooses one engaged enemy in their own play area that has not attacked yet this round.
b. Declare Defender: The active player may choose one of their ready characters as a defender. Exhaust that character. The active player may also choose not to declare any defenders.
c. Resolve Shadow Effect: The active player flips the chosen enemy's shadow card faceup and resolves any shadow effects on that card (indicated by text after the word "Shadow:" on the bottom half of the card). Any non-shadow effects on the shadow card are ignored.
d. Determine Damage: If the defender's defense strength is equal to or greater than the chosen enemy's attack strength, the defender suffers no damage. Otherwise, subtract the defense strength of the defender from the attack strength of the chosen enemy. The defender suffers damage equal to the difference. (Damage is described in detail under "Hit Points and Damage" on page 20.)
If no defender was declared, the attack is considered undefended. Assign the full damage from the attack, which is equal to the attacking enemy's total attack strength, to one of the heroes that the active player controls. The hero's defense strength does not reduce the damage assigned by undefended attacks.
Step Three: Resolve Player Attacks
After each enemy that is engaged with a player has performed an attack, the players have an opportunity to use their characters to attack the enemies. Starting with the first player and continuing clockwise, each player may perform the following steps in order for each enemy they are engaged with. The player performing the steps is referred to as the active player.
a. Declare Target of Attack, and Declare Attackers: The active player chooses one enemy they are engaged with and any number of ready characters that they control to attack the chosen enemy. Multiple characters can attack the same enemy.
b. Determine Attack Strength: The active player adds the attack strength of each of the declared attackers to determine the combined attack strength for this attack.
c. Determine Damage: If the enemy's defense strength is equal to or greater than the combined attack strength of all attackers, the defender suffers no damage. Otherwise, subtract the defense strength of the enemy from the combined attack strength of the attackers and deal this much damage to the enemy. (Damage is described under "Hit Points and Damage" on page 20.)
The active player is permitted to declare one attack against each enemy that player is engaged with, and may repeat the above steps (a–c) until all of these attacks have been declared, or until that player is unable or does not wish to declare further attacks this phase.
Phase 7: Refresh
The refresh phase represents an opportunity for the heroes to rest, recuperate, and regroup. During the refresh phase, perform the following steps in order:
- Ready: Ready each exhausted card in play.
- Increase Threat: Each player increases their threat dial by one.
- Pass First Player: The first player passes the first player token to the next player in clockwise order.
After performing the steps of the refresh phase, proceed to the next game round beginning with the resource phase. Continue to play rounds in this manner until the game reaches a conclusion.
Example: Defending against Enemy Attacks
- Rosie is engaged with two enemies, the Forest Spider and Ungoliant's Spawn. At the beginning of the combat phase, one card from the encounter deck is dealt face down to each engaged enemy, as a shadow card.
- Rosie decides to resolve the attack made by Ungoliant's Spawn first. She exhausts the Silverlode Archer, declaring it as a defender against this attack.
- To resolve the attack, Rosie flips the attacker's shadow card faceup. The shadow card is the East Bight Patrol, which gives the attacking enemy +1 attack. Rosie compares the enemy's total attack strength (6 attack) against the Silverlode Archer's defense (0 defense), and places six damage tokens on the defending character. Since the Silverlode Archer only has one hit point, it is destroyed and discarded from play.
- Rosie resolves the attack made by the Forest Spider. She declares this attack "undefended."
- To resolve the attack, Rosie first flips the attacker's shadow card faceup. The shadow card is the Enchanted Stream, which has no shadow effect. The Forest Spider's attack is 2 attack. Since this attack was undefended, Rosie must place all the damage on a single hero she controls. She places two damage tokens on Aragorn, who survives the attack with three hit points remaining.
Example: Attacking Enemies
Tom is engaged with two enemies, the Dol Guldur Beastmaster and the Dol Guldur Orcs.
- Tom declares an attack against the Dol Guldur Orcs, and exhausts Glorfindel as an attacker.
- Tom takes Glorfindel's attack (3 attack) and subtracts the Dol Guldur Orcs' defense (0 defense). Since the difference is three, Tom places three damage tokens from the token bank on the Dol Guldur Orcs. This enemy started with three hit points, so it is destroyed and discarded from play.
- Tom declares an attack against the Dol Guldur Beastmaster and exhausts both Legolas (3 attack) and the Gondorian Spearman (1 attack) as attackers.
- Tom takes his combined attack (4 attack) and subtracts the Dol Guldur Beastmaster's defense (1 defense). Since the difference is three, Tom places three damage tokens from the token bank on the Dol Guldur Beastmaster. This enemy started with five hit points, so it survives the attack with two hit points remaining. The damage tokens stay on the enemy to indicate how many remaining hit points it has.
Concluding the Game
If at least one player completes the final quest card of a scenario, the game ends and all players win. If all players are eliminated from the game before all quest cards have been completed, the game ends and all players lose.
Quest Advancement and Winning the Game
Players complete quests by placing progress tokens on the quest card. When the revealed quest card contains a number of progress tokens equal to or greater than the number of its quest points, that quest card is completed.
When a quest card is completed, players immediately remove that card from the game, revealing the next quest card for that scenario. Excess progress tokens placed on a quest card do not carry over to the next stage of the quest. When a new quest card is revealed, players follow the instructions presented on the stage A side of the card, and then flip the card to the stage B side. If players complete the final stage of a scenario, they win the game.
Player Elimination and Losing the Game
A player is eliminated from the game if that player's threat dial reaches 50 or if all of that player's heroes are destroyed.
When a player is eliminated from the game, that player's hand of cards as well as all player cards they control are discarded. Any enemies that the eliminated player was engaged with are returned to the staging area. (Enemies returned to the staging area in this manner retain their damage tokens and attachments.)
Players that are not eliminated continue playing, revealing one fewer encounter card during future quest phases for each player that was eliminated.
Additional Rules
This section contains additional rules that players need to know to play their first game of Lord of the Rings: The Card Game.
Hit Points and Damage
Characters and enemies have a number of hit points that determine the amount of damage that character or enemy can suffer before it is destroyed. When a player's character is destroyed, place it in that player's discard pile. When an enemy is destroyed, place it in the encounter discard pile.
Damage on both enemies and characters persists between rounds, and should be tracked using damage tokens. Some card effects allow a character to heal, which removes a specific number of damage tokens from that character.
Card Abilities
The text on cards contains many types of card abilities.
There are five categories of card abilities found on hero and player cards: actions, responses, keywords, constant abilities, and forced effects.
Actions
An action is an optional ability presented on cards that players can trigger during specific times of the game.
To trigger an action on a hero, ally, or attachment card, that card must be in play. Generally, players are allowed to trigger actions between phases and between the defined steps of each phase. Appendix I of the Rules Reference provides players with a comprehensive round sequence that indicates the specific times during which they can resolve actions.
Some action abilities are preceded by a specific game phase, such as "Quest Action" or "Combat Action." Such an ability indicates that a player can only trigger that action during the specified phase.
Responses
A response is an optional ability presented on cards that can be triggered immediately after a specific event has occurred during the game. For example, each time a player commits the "Aragorn" hero card to a quest, that player can trigger that card's response ability, spending one resource from that hero's resource pool to ready that card.
To trigger a response present on a hero, ally, or attachment card, that card must be in play.
Keywords
A keyword is a shorthand for a game effect or rule. Keywords are found at the top of a card's text box. The rules for each of the keywords are as follows:
Doomed X. If an encounter card that has the "Doomed" keyword is revealed (during the staging step of the quest phase or during setup), each player must increase their threat by the specified value after the word "Doomed".
Ranged. A character that has the "Ranged" keyword can attack enemies that are engaged with other players. While another player is resolving player attacks, any player can declare a character with the "Ranged" keyword that they control as an attacker, but the character must exhaust and meet all other standard requirements necessary to perform the attack.
Permanent. The keyword Permanent appears on some boon and burden cards, which are only used when playing in Campaign Mode (see page 28). The players will be instructed by Campaign cards when to add these cards to play or to the Campaign Pool. If a boon or burden with the Permanent keyword is part of the Campaign Pool at the start of a scenario, that card must be attached to the target that earned that boon or burden during setup. Permanent cards cannot be removed by player or encounter card effects for any reason.
Restricted. The "Restricted" keyword appears on some attachment cards. A character can only have a maximum of two attachments that have the "Restricted" keyword. If a character ever has three attachments with the "Restricted" keyword, immediately discard one of the attachments.
Sentinel. A player can declare a character that has the "Sentinel" keyword as a defender against enemy attacks made against another player. The defending character must exhaust and meet all other standard requirements necessary to defend the attack.
Surge. When an encounter card that has the "Surge" keyword is revealed during the staging step of the quest phase or during setup, reveal one additional card from the encounter deck. If a card has both the "Surge" keyword and a "when revealed" effect, resolve the "Surge" keyword immediately after resolving the "when revealed" effect.
Victory X. When a card with "Victory X" would be placed in a discard pile, it is placed in an out of play area called the victory display instead. For rules regarding how victory points affect scoring, see "Scoring" on page 31.
Forced Effects
A forced effect is a mandatory effect that triggers when a specific event occurs (such as an enemy engaging a player, or getting a shadow card without a shadow effect).
Since forced effects are mandatory, it is important for players to be aware of the game occurrences that trigger any forced effects that are in play. Players must resolve a forced effect each time the triggering game occurrence specified by the effect occurs.
"When Revealed," "Shadow," and "Travel" effects, which were described earlier in this document, are versions of forced effects that are resolved during common game occurrences, such as when cards are revealed.
Constant Abilities
A constant ability is a mandatory ability that continually affects the game as long that the card bearing the constant ability remains in play. Unlike actions, responses, and forced effects, constant abilities are not presented as a bold header.
Since constant abilities are always affecting the game, it is important for players to be aware of the constant abilities in play. For example, players must remember that if the "Enchanted Stream" location card is the active location, they cannot draw cards from their deck.
Traits
Traits appear in a bold, italicized typeface at the top of a card's text box. Traits have no inherent effects, but other card effects may refer to a card's traits.
Event Cards
Event cards provide players with actions and responses that they can play directly from their hands.
To play an event card, a player spends resources equal to the card's cost from their heroes' resource pools. Like playing an ally or attachment card, the player must have a resource match when paying for an event card.
After playing an event card, the player resolves the action or response on the card immediately. Then, place the card in that player's discard pile.
Unique Cards
Some cards represent specific, formally named characters, locations, and items from the Middle-earth setting. Such cards are known as unique cards and are identified by a unique icon that precedes the card's title. A player cannot play a card that shares a title with a unique card that is already in play. A player can, however, play a card that shares a title with a unique card that was removed from play and is in a discard pile.
Neutral Cards
Neutral cards are cards that do not belong to any sphere of influence. To play a neutral card, a player must spend resources equal to its cost, but a resource match is not required.
Start the First Game
This completes all the rules necessary to play a first game of The Lord of the Rings: The Card Game. We recommend playing the first game using the scenario and decks suggested on page 5 of this book. If questions arise during the game, players can consult the Rules Reference that includes detailed information about the game's mechanics.
After playing the first game, read the "Advanced Rules" section on the next page of this book to discover how to construct original decks and explore the game's other scenarios.
Advanced Rules
This section contains advanced rules that players will need to know to construct their own decks and play the game's remaining scenarios.
Objective Cards
Objective cards are a type of encounter card that is included in some scenarios. Objective cards can represent scenario-specific items, allies, or goals that heroes may need to discover and make use of during their journey.
When an objective card is revealed during the quest phase, it is placed in the staging area like all other encounter cards. Objective cards often require that the players claim them before they can progress through the scenario. Claiming an objective card usually involves paying a cost and/or defeating another encounter card and then moving that objective card into a player's play area or attaching it to a hero. In the core set, the objective cards describe how players can claim them.
Guarded
The "Guarded" keyword appears on some objective cards. After an objective that has the "Guarded" keyword is revealed and placed in the staging area, reveal the next card from the encounter deck and attach it to that objective. A player cannot claim an objective card if there are encounter cards attached to it.
Players resolve encounter cards that are attached to objective cards in the following way:
- Enemy Card: The enemy card remains attached to the objective until it is destroyed (or leaves play as a result of a card effect).
- Location: The location remains attached to the objective until it leaves play by being explored (or as a result of a card effect).
- Treachery: The treachery card is resolved as normal, and the objective card will not receive an attachment.
- Objective: Objective cards cannot be attached to other objectives. If the revealed card that would be attached to an objective card is another objective, use the next card of the encounter deck to fulfill the original keyword effect, and then resolve the guarded keyword on the second card.
Scenario Overview
There are three scenarios included in this core set. Each is introduced in this section, along with a list of encounter sets for that scenario's encounter deck.
Passage Through Mirkwood
Difficulty level = 1
Mirkwood has long been a dangerous place, and recently one of King Thranduil's patrols has uncovered disconcerting signs of a gathering menace in the vicinity of Dol Guldur. A party of heroes has been assembled to carry a message through Mirkwood, down the Anduin, and eventually to Lórien, to warn Lady Galadriel of the imminent danger.
The Passage Through Mirkwood encounter deck is built with all the cards from the following encounter sets: Passage Through Mirkwood, Spiders of Mirkwood, and Dol Guldur Orcs.
Journey Down the Anduin
Difficulty level = 4
Having survived the dangers of Mirkwood Forest, the heroes continue their journey along the banks of the Anduin river, toward Lórien, with dire news of a gathering threat in Southern Mirkwood.
The Journey Down the Anduin encounter deck is built with all the cards from the following encounter sets: Journey Down the Anduin, Sauron's Reach, Dol Guldur Orcs, and Wilderlands.
Escape from Dol Guldur
Difficulty level = 7
While exploring in the vicinity of Dol Guldur at Lady Galadriel's request, one of the heroes' companions is captured by the Necromancer's forces, and is now awaiting interrogation in a dungeon beneath the hill. Knowing their friend's time is short, the heroes decide to attempt a desperate rescue.
The Escape from Dol Guldur encounter deck is built with all the cards from the following encounter sets: Escape from Dol Guldur, Spiders of Mirkwood, and Dol Guldur Orcs.
Modes of Difficulty
The Lord of the Rings: The Card Game is intended for both casual and veteran game players. To accommodate different play styles, two modes of difficulty are available: easy and standard. These modes provide players with a simple way to adjust the difficulty of the game, creating the type of challenge they desire. In addition to the modes of difficulty, players can add scoring to either of these modes, allowing players to further adjust the game's difficulty.
Easy Mode
Easy mode is ideal for new players and for players who prefer the narrative and cooperative aspects of the game with less challenge. To play a scenario in easy mode, perform the following steps during setup of any scenario:
- Add one resource to each hero's resource pool.
- Remove any card from the encounter deck that has a gold border surrounding its encounter set icon.
Standard Mode
To play a scenario in standard mode, simply follow the normal setup instructions for that scenario.
Deckbuilding
Much of the depth and fun of The Lord of the Rings: The Card Game comes when players conceive and construct their own decks, using the cards of this core set and those found in additional The Lord of the Rings: The Card Game products.
When constructing a deck, players must obey the following rules:
- A deck must contain a minimum of 50 cards.
- A deck cannot include more than three copies of any card that have the same title.
Within these guidelines, any combination of allies, attachments, and events can be included in a deck.
Each player begins the game with three hero cards. When playing a multi-player game, remember that no two players may select the same hero, and that unique allies cannot enter play if a hero card with the same name is already in play. Therefore, players should confer prior to the start of each game to ensure that their decks will not conflict.
Deckbuilding Tips and Considerations
When building a deck, it is important for a player to consider how a player intends to pay for the cards included in the deck. It may be tempting to use the most powerful trio of heroes available, but is it worth starting the game with the high starting threat those heroes would bring? Similarly, a deck full of high-cost cards and effects might look powerful on paper, but the time it takes to build up the resources to play those cards could become rather problematic as the enemies mount their assault. A player should also make sure that all the cards in a deck belong to a sphere that matches at least one of the deck's heroes' resource icons so that player does not have cards they cannot play.
Each sphere of influence has a distinct flavor, which can be used to a player's advantage when building a deck around that sphere. For example, a deck could be built around the sphere of tactics to support its heroes with an impressive array of armor and weaponry, and then take the fight directly to the enemies that emerge from the encounter deck. As the card pool grows with additional products, each of the four basic starter decks in this core set can be developed into fully playable standard decks.
It is also possible to focus on multiple spheres when building a deck. A deck built around both the sphere of spirit and around the sphere of lore could focus on self-preservation, with numerous effects that heal hit points and reduce threat. The trick to building around multiple spheres is resource management; having the correct type of resource available at the right time becomes more difficult when a deck is built around two or three different spheres.
Another useful approach when building decks is to follow the cohesion that can be discovered by building around a trait. For example, if a player wishes to run a deck built around three different spheres, it might make sense to use Dwarf cards from all three spheres to take advantage of Dwarf synergies and card interactions.
Decklists
To help players start exploring the exciting possibilities of deckbuilding, this page includes two dual-sphere decklists for you to try. We recommend that you use the starter decks on page 5 for your first game. Once you have learned how to play, we encourage you to play a game with these dual-sphere decks.
These two decks have been built to complement each other and will work well for 1–2 players. For a single-player game, we recommend the Leadership & Spirit deck. This deck excels at putting allies into play and contributing lots of willpower to the quest. When playing a 2-player game, the Lore & Tactics deck should be used to provide additional card draw and handle most of the combat.
Leadership & Spirit Deck
Heroes: Aragorn, Théodred, Éowyn
Allies: Gandalf x3, Faramir x2, Guard of the Citadel x3, Longbeard Orc Slayer x2, Silverlode Archer x2, Snowbourn Scout x3, Son of Arnor x2, Lórien Guide x2, Northern Tracker x2, Wandering Took x3
Events: Grim Resolve x2, Sneak Attack x3, Valiant Sacrifice x3, A Test of Will x3, Dwarven Tomb x2, Stand and Fight x2, The Galadhrim's Greeting x2
Attachments: Celebrian's Stone x3, Steward of Gondor x3, Unexpected Courage x3
Lore & Tactics Deck
Heroes: Beravor, Denethor, Legolas
Allies: Gandalf x3, Gléowine x3, Henamarth Riversong x3, Daughter of Nimrodel x3, Erebor Hammersmith x3, Miner of the Iron Hills x3, Gondorian Spearman x3, Veteran Axehand x3
Events: Radagast's Cunning x3, Secret Paths x3, Blade Mastery x3, Feint x3, Quick Strike x3
Attachments: Forest Snare x2, Protector of Lórien x3, Horn of Gondor x3, Blade of Gondolin x3
Campaign Mode
Campaign mode is an exciting alternative way to play The Lord of the Rings: The Card Game that combines all of the scenarios from the core set into one epic adventure! To play Campaign Mode, the players play through each scenario in order. Players only advance to the next scenario after they have defeated the current scenario. If the players lose a scenario, there is no penalty, but they must play it again and defeat it before they can advance to the next scenario.
Campaign Log
During a campaign, the results of each scenario can affect the outcome of the next one, and the decisions made in each adventure may influence future scenarios. The Campaign Log is used to track the course and development of the entire campaign.
At the end of each scenario, players record their results by entering all of the relevant information in the Campaign Log (on pages 32-33). A copy of the Campaign Log is available for download at www.FantasyFlightGames.com.
When setting up a subsequent scenario in Campaign Mode, the players refer to the Campaign Log to make sure they are using all of the correct cards.
The Fellowship of Heroes
While playing Campaign Mode, players record the names of their heroes in the Campaign Log at the beginning of the first scenario. If a hero is in a player's discard pile at the end of the game, that hero's name is added to the list of Fallen Heroes in the Campaign Log. A hero whose name appears on the list of Fallen Heroes cannot be used by any player while playing future scenarios in that campaign.
While playing Campaign Mode, players may change the cards in their decks between games, but they must use the same heroes for each scenario with two exceptions:
- If a hero is in its controller's discard pile at the end of a scenario, that hero's name is added to the list of Fallen Heroes and its controller may choose a new hero when setting up the next game. The new hero is recorded in the Campaign Log and each player receives a permanent +1 starting threat penalty for the rest of the campaign.
- If a player wishes to trade a hero they control for a hero with a different name between scenarios, that player may replace 1 hero they control with a new hero when setting up the next game. The new hero is recorded in the Campaign Log and each player receives a permanent +1 starting threat penalty for the rest of the campaign.
If a player is required to replace a fallen hero but there are no heroes remaining in the players' collection of available heroes, that player instead takes a permanent +1 threat penalty, but removes that hero from the list of Fallen Heroes and continues to play with the hero.
Additional Card Types
There are three additional card types that are used only in Campaign Mode: campaign cards, boons, and burdens. These card types are described below.
Campaign Cards
The campaign card is a card type that serves to place a scenario within the larger campaign. While setting up a scenario in Campaign Mode, place the campaign card for that scenario next to the quest deck and follow any additional setup instructions on the card. After defeating a scenario, follow any resolution instructions found on the back side of the Campaign Card, updating the Campaign Log accordingly.
Boons
Boons are player cards (and occasionally encounter cards) that must be earned by playing through a scenario in Campaign Mode. These cards represent the beneficial consequences of player choices and outcomes throughout the course of a campaign. Players are not permitted to include these cards in a deck or game until after they are earned, unless a scenario directs them otherwise.
Burdens
Burdens are encounter cards (and occasionally player cards) that can be earned while playing through a scenario in Campaign Mode and are subsequently included in the encounter deck. Instead of an encounter set icon, burdens have a burden set icon used to identify which burden set they belong to. Because burdens do not belong to an encounter set, they are not included in an encounter deck until the players are instructed to include them.
The Campaign Pool
The list of boons and burdens that players earn as they play through a campaign is called the Campaign Pool. After defeating a scenario and recording its results in the Campaign Log, list all boons and/or burdens earned in the Campaign Pool section of the log.
When the players earn a boon or burden card, they enter that card's title in the Campaign Pool. If a card has the Permanent keyword, the players record which hero it is attached to in the notes section of the log.
While setting up future scenarios in the campaign, the boon and burden cards listed in the Campaign Pool are added to the game in the following manner:
- Boons with a player card back may be added to a player's deck. These cards do not count against a deck's minimum.
- Burdens with a player card back must be added to a player's deck. These cards do not count against a deck's minimum.
- If a boon or burden with the Permanent keyword was recorded as being attached to a specific hero, that card must be attached to the specified hero at the start of the game.
- If a boon or burden card has an encounter card back, that card must shuffled into the encounter deck when setting up the game.
If a hero is added to the list of Fallen Heroes, all boons and burdens with the Permanent keyword that had been attached to that hero are removed from the Campaign Pool.
Campaign Setup Checklist
When setting up a game for a campaign, use this list to ensure that all campaign elements are accounted for in the game:
- Check that each player is using the heroes listed in the Campaign Log. (If this is the first game of the campaign, each player lists their name and heroes in the Campaign Log.)
- Ensure that none of the heroes are listed as fallen heroes. If a player's hero is listed as fallen, that player must select a new hero. Remove any permanent boons or burdens that were attached to the fallen hero from the Campaign Pool.
- If a player wishes to voluntarily change heroes, list the new heroes in the Campaign Log and add 1 to the threat penalty area in the log for each hero changed.
- Apply threat penalty. Each player sets their starting threat, adding the amount recorded in the threat penalty area of the log to their total.
- Attach boons and burdens with the Permanent keyword listed in the Campaign Pool to their specified hero.
- Check setup cards. Put any boon or burden cards with the "Setup" keyword into the play area.
- Set player decks. Shuffle any boon or burden player cards listed in the Campaign Pool into the appropriate player decks.
- Set encounter deck. Shuffle any boon or burden encounter cards listed in the Campaign Pool into the encounter deck.
Expert Campaign Mode
Expert Campaign Mode is an alternative version of Campaign Mode for players who crave a tougher challenge. Players do not reset the hit points of their heroes in between scenarios of an expert campaign. At the end of each scenario, record the number of damage tokens on each hero in the "Notes" section of the Campaign Log. Then, when setting up the next scenario of the campaign, place a number of damage tokens on each hero control equal to the number listed in the Notes section of the Campaign Log. Each player may choose instead to heal this starting damage from a hero they control at a cost of a permanent +1 penalty to their starting threat for each hero healed in this way.
Ending a Campaign
Each campaign is its own self-contained experience. The boons, burdens, and other modifications earned in a campaign do not carry over into other games or campaigns, unless explicitly stated by a card ability (such as the Resolution effect on the Campaign Card for Escape from Dol Guldur).
Scoring
Players who enjoy playing through the same scenario multiple times can use the following scoring system to measure the success of each game.
If the players win the game, they determine their score as follows:
- Determine Initial Score: Add the following to determine the initial score.
- The final threat of each player.
- The threat cost of each destroyed hero.
- The amount of damage on each surviving hero.
- Add Round Penalty: Add 10 for each completed round of the game.
- Subtract Victory Points: Subtract the total number of victory points the players acquired during the scenario from the above total. This is the players' final score.
With this scoring system, a lower score is desirable. Scoring is a useful tool for evaluating the effectiveness of a deck or party over time or to compare different decks that have completed the same scenario. Players can use the scoring chart on page 34 to calculate their totals.
Victory Display
Some enemy and location cards award players victory points when they leave play. Cards that award victory points have a "Victory X" keyword presented in the lower-right corner of the card's text box.
When a card that has the "Victory X" keyword leaves play, it is placed in the victory display. Cards in the victory display are used when determining the final score at the end of the game.
Campaign Log
The Campaign Log (pages 32–33) records: Heroes (for Players 1–4), Fallen Heroes, Threat Penalty, Notes, Scenarios Completed (Scenario Name and Score), the Campaign Pool (Boons and Burdens), and the Campaign Total. Players may photocopy this page for their own personal use.
The scoring chart (page 34) records, per scenario: Scenario Name, Number of Players, Notes, and for each Player Name the Final Threat, Threat Cost of Each Dead Hero, Damage Tokens on Remaining Heroes, and Player Subtotal; then the Number of Rounds (tally), Combined Player Subtotals, 10 Points per Round, Victory Points Earned, and the Final Group Score.
Quick Reference
This page contains an easy-to-reference overview of the game's basic concepts and turn structure.
Round Overview
Each game round consists of the following seven phases:
- Resource Phase — a. Gain Resources; b. Draw Card
- Planning Phase
- Quest Phase — a. Commit Characters; b. Staging; c. Quest Resolution
- Travel Phase
- Encounter Phase — a. Optional Engagement; b. Engagement Checks
- Combat Phase — a. Deal Shadow Cards; b. Resolve Enemy Attacks; c. Resolve Player Attacks
- Refresh Phase — a. Ready; b. Increase Threat; c. Pass First Player
Keywords
For complete rules on a keyword, see the Rules Reference.
- Doomed X: If an encounter card with the "Doomed" keyword is revealed, each player must increase their threat by the specified "X" value.
- Guarded: After an objective with the "Guarded" keyword is revealed and placed in the staging area, reveal the next card from the encounter deck and attach it to that objective. A player cannot claim an objective if there are encounter cards attached to it.
- Ranged: A character with the "Ranged" keyword can attack enemies that are engaged with other players.
- Restricted: A character can only have a maximum of two attachments with the "Restricted" keyword.
- Sentinel: A player can declare a character with the "Sentinel" keyword as a defender against enemy attacks made against another player.
- Surge: If an encounter card with the "Surge" keyword is revealed, reveal one additional card from the encounter deck (after resolving that card's when revealed effect, if any).
Character & Enemy Statistics
- Willpower
- Attack Strength
- Defense Strength
- Threat Strength
Spheres of Influence
- Leadership
- Lore
- Spirit
- Tactics