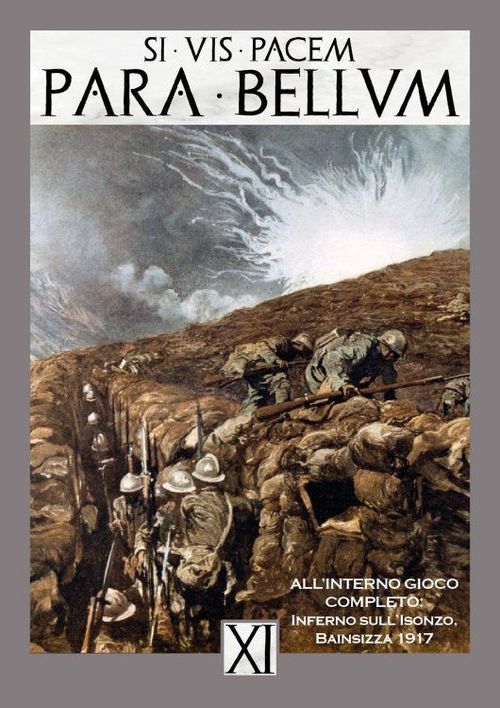
Inferno sull'Isonzo, Bainsizza 1917
Inferno sull'Isonzo, Bainsizza 1917 Rulebook
Table of Contents
Table of Contents
- Reference Charts
- 1. Introduction
- 2. The Playing Pieces
- 3. Sequence of Play
- 4. Movement
- 5. Stacking
- 6. Zones of Control (ZOCs)
- 7. Combat
- 8. Combat Procedure
- 9. Combat Results
- 10. Combat Effectiveness and Step Losses
- 11. Supply
- 12. Special Rules
- 13. Reinforcements
- 14. Battleground
- 15. Victory Conditions
- 16. Bibliography
Reference Charts
Combat Results Table (CRT)
| Dice Roll | 1:3 | 1:2 | 1:1,5 | 1:1 | 1,5:1 | 2:1 | 2,5:1 | 3:1 | 4:1 | Dice Roll |
|---|---|---|---|---|---|---|---|---|---|---|
| 2 | +1 / +1 R1 | +1 / +1 R1 | +1 / +2 R2 | +1 / +2 R2 | - / +2 R2 | - / +3 R3 | - / +3 R3 | -1 / +3 R3 | - / +4 R4 | 2 |
| 3 | +1 / R1 | +1 / +1 R1 | +1 / +1 R1 | - / +1 R1 | +1 / +2 R2 | - / +2 R2 | - / +3 R3 | - / +3 R3 |
CRT Procedure:
- Compare the opposing strengths and determine the initial Combat Odds Ratio;
- Apply any applicable Odds Column Shifts;
- Attacker rolls 2d6, cross reference the result on the proper odds ratio column and applies the results.
Odds Column Shifts:
- Flank Attack: 2 right
- Defender in friendly Trench: 1 left
CRT DRMs:
- -1 for each odds ratio over 4:1
CRT Results (apply to attacker/defender):
-= no effect+/- #= DRM modifierR#= Retreat # of hexes (See 12.5.1 for Trenches)
Loss Results Table (LRT)
| Modified Die Roll | Small (7 - steps) | Large (8 + steps) | CE Reductions |
|---|---|---|---|
| <4 | <1 | 0 | |
| 5,6,7 | 2,3,4 | 1 | |
| 8,9,10 | 5,6,7 | 2 | |
| 11,12,13 | 8,9,10 | 3 | |
| 14 + | 11,12,13 | 4 | |
| 14+ | 5 |
LRT Procedure:
- Add the number of steps for both sides involved in the combat;
- Determine the die roll modifier for each side;
- The Attacker rolls 1d6, each player modifies the result according to his DRMs, then find his own result under the appropriate magnitude column, and reads to the right to find the CE Levels lost.
LRT DRMs:
- CRT result
- Total strength of opponent's artillery value: 0: +0 | 1-2: +1 | 3-4: +2 | 5-6: +3 | 7-8: +4 | 9+: +5
- Defender Flanked: +2
- Unable to fulfill Retreat Guidelines: +2
- Unable to Retreat: +2
- Defender in friendly Trench: -2
- Attacker against enemy Trench: +2 (Exception: see 12.4)
Terrain Effects Chart (TEC)
| Terrain | MP Cost | Combat Effect | Stacking |
|---|---|---|---|
| Clear | 1 | None | 6 |
| Hill | 1 | See 7.8** | 4 |
| Low Mountain | 2 | See 7.8** | 2 |
| Swamp | 1 | AF-1** | 2 |
| River & Stream | +1 | AF-1** | NE |
| Isonzo River | Tutto | See 14.2 | NE |
| Peak | NE |
* Not in EZOC
** Units may never the attack strength decreased more by one (1)
Note: the chart prints "NE" and "Tutto" as shown; the printed footnote on attack strength reads as printed.
Movement Points Summary
| Action | MP Cost |
|---|---|
| Enter EZOC | +1 |
| Exit EZOC | +1 |
| EZOC to EZOC (but see 6.4) | +2 |
| Recover Combat Effectiveness | 4 |
1. Introduction
SCALE: 2 Km per hex, 1 day per turn.
There are 8 different levels of Hill and 2 levels of Lower Mountain on the map, which are used to calculate the altitude during the combat.
To play Inferno sull'Isonzo you need the following items:
- 1 A2 map
- 140 die-cut counters
- This Rule booklet
- The Player Aid Card
You also need three six-sided dice, two of the same color and one of another color (not included in the game).
1.1. Preparation for play
After detaching the components from the counter sheets, choose the scenario to play, sort them out, and set up the units. The set-up hex/area, or entry game turn (GT) is printed on each unit counter.
1.2. Abbreviations
- A-H: Austro-Hungarian
- AV: Artillery Value
- DRM: Die (Dice) Roll Modifier
- GT: Game Turn
- ID: Identification
- MA: Movement Allowance
- MP: Movement Points
- VP: Victory Points
- ZOC: Zone of Control
- EZOC: Enemy Zone of Control
- 1D6 (2D6): one six-sided die (two dice).
Unit ID Abbreviations:
- GR. ALP. = Gruppo Alpini
- G.D.S. = Granatieri di Sardegna
- RGF = Regia Guardia di Finanza
- BERS. = Bersaglieri
- K.J. = Kaiserjaeger
- GEBIRG = Gebirgjäger
- SCH. = Schützen
- LS = Landesschützen
1.3. Scenarios
Historically the Italians bombarded the Austro-Hungarian lines throughout August 18 and launched their offensive on the 19th. In this game there are two scenarios: one historical, and one a "what-if" where the Italians attempt a surprise attack.
- 1.3.1 The historical scenario starts on GT 2 and has no special rules.
- 1.3.2 The optional scenario starts on GT 1, but during the first turn the Italian player cannot use Artillery units.
- 1.3.3 In the scenarios the bridge on the Isonzo river between 1912-1913 and 1813-1912 start destroyed. [Transcribed as printed; the two bridge designations are given exactly as they appear in the source.]
1.4. Game Turns and Game End
Beginning on GT 8 the A-H player rolls 1d6 at the end of each turn, if the result is equal to or less than the number at the top right in the game turn table on the map the game ends, otherwise it continues for another turn.
2. The Playing Pieces
2.1. How to Read the Units
- ATTACK AND DEFENSE STRENGTH: A quantification of a unit's combat strength.
- MOVEMENT ALLOWANCE (MA): The number of Movement Points a unit has.
- ARTILLERY VALUE (AV): A measure of a unit's artillery strength and effectiveness.
- REDUCED UNIT: Some combat units' counters have a reduced value printed on the reverse side. The reduced side is indicated by a horizontal bar in the middle of the unit.
- UNIT IDENTIFIER (ID): A unit's ID is its historical designation. The first or only code is the name or number of the brigade. The second number (if any) inside a coloured box is the Corps number. Only the Corps number (or lack of) is relevant in game play – see rules 7.2 and 7.4.
- UNIT SIZE INDICATOR: X = Brigade, III = Regiment, II = Battalion.
2.2. Unit Type Summary
The unit type symbols printed on the counters are: Infantry, Bersaglieri, Mountain Troops, Artillery, Heavy Artillery, Bridge Engineer, and Infiltration Capable.
2.3. Color Scheme
- GREEN-GREY: Italian units
- LIGHT GREY: Austro-Hungarian units
2.4. Information Markers
Information Markers (front/back): Reserve Markers; Reduced Combat Effectiveness -1; Reduced Combat Effectiveness -2; Low Supply (LS) -1; Out of Supply (OOS) -2, AV=0; Destroyed bridge; Crossing river.
The number of Information Markers is limited by the size of the countersheet, but if there are not enough players can use those included in the game Inferno sugli Altipiani (Para Bellum I) or other generic markers.
2.5. Combat units
Combat units are any units with a printed Defense Strength of one or more.
Note: artillery is not considered a "Combat Unit".
Combat units have one or two step(s). Units with two steps have a reduced value on the reverse of the counter. Already reduced units or units with no printed reverse side have only one step.
The Bridge engineering battalions have special rules, see 12.2.
3. Sequence of Play
Inferno sull'Isonzo is played in Game Turns (GT). Each GT consists of two "Player Turns": an Austro-Hungarian Player Turn, followed by an Italian Player Turn.
3.1. Game Turn sequence of play
During the Italian player's Turn, the Italian player is referred to as the phasing player and the A-H player is referred to as the non-phasing player. During the A-H player turn, reverse the references.
A. ITALIAN PLAYER TURN
- A-1. SUPPLY PHASE: The phasing player checks the Supply Status of all their units (11.0), using markers to mark those that are Out of Supply or in Low Supply. Units that are Out of Supply from the previous turn may suffer Attrition (11.5).
- A-2. REINFORCEMENT PHASE: The phasing player places any available reinforcements on the map (13.0). The Italian player can release some Reserves (13.1).
- A-3. MOVEMENT PHASE: The phasing player may move (4.0) all, some, or none of their units as they wish. At this time units may be able to recover from reduced Combat Effectiveness (10.3).
- A-4. COMBAT PHASE: Units of the phasing player may attack adjacent enemy units (7.0).
After the Italian Player Turn is completed, flip the GT Marker to the Austro-Hungarian Player side.
B. AUSTRO-HUNGARIAN PLAYER TURN
The Austro-Hungarian Player Turn is identical to the Italian Player Turn.
C. ADVANCE THE GAME TURN MARKER
The Italian player rolls 1d6, and receives that number of Reserve/Replacement points (update the relative table on the map). The GT marker is advanced on the GT Track and flipped to the Italian Player Turn side.
4. Movement
4.1. Movement Allowance
Each unit has a printed Movement Allowance showing the maximum number of Movement Points (MPs) it may expend during a Movement Phase.
A unit can never enter a hex occupied by an enemy combat unit.
Remember: artillery is not considered a "Combat Unit".
4.2. How to move units
Units move by tracing a path through adjacent hexes, expending MPs for each hex entered (and hexsides crossed) according to the Terrain Effects Chart.
4.3. Minimum move
A unit may always move a minimum of one hex, regardless of MP costs. Exception: 12.3.1, and 12.5.
A unit exercising Minimum Movement cannot expend MP during the player turn.
4.4. Combat Effectiveness Recovery
Any eligible unit suffering from reduced Combat Effectiveness may expend MP (while stationary) to recover Combat Effectiveness (see 10.3).
4.5. Road Movement
Units moving along a road not adjacent to an enemy unit are not affected by other terrain effects, and pay the road MP cost. Exception: Infiltration Capable units, see 12.4.
- 4.5.1 Roads can only be used by moving along them. Road movement cannot be used to leave or enter a road hex in an EZOC – normal MP costs will be incurred here instead.
5. Stacking
Stacking is when more than one unit is in a hex.
5.1. Stacking Limits
The number of total unit steps (2.5) that can occupy a hex is written on the Terrain Effects Chart. The limit cannot be exceeded at the END of any friendly movement phase or any combat phase. One battalion size unit can stack for free per hex. Any additional battalion units count when stacking.
A hex may contain only one artillery unit, but it does not count for stacking.
A hex may contain only one Bridge Engineers unit, but it does not count for stacking.
A hex may contain both an artillery unit and a bridge engineer unit.
Information markers do not affect stacking.
Moving and retreating units can freely enter and pass through stacks of friendly units.
5.2. Overstacking Penalty
At the end of any friendly Movement Phase or retreat after combat, in any hex with units in violation of stacking limits, excess units must be eliminated (the owning player may choose which units to eliminate).
5.3. Order of Stacking
The unit with the largest attack strength (printed on the counter) must always be the top unit in a stack and is therefore the unit revealed to the opponent.
The position of a unit within a stack has no effect on play (however see Limited Intelligence 5.4).
5.4. Limited Intelligence
In no case a player may examine the strength of an opponent's units. A player may not look at any combat effectiveness or supply state markers.
Play Note: information markers are placed under the affected unit.
6. Zones of Control (ZOCs)
The six hexes that surround a combat unit constitute that unit's Zone of Control.
ZoCs affect supply and movement.
All combat units exert a ZoC. Exception: Bridge Engineers units do not exert a ZoC.
6.1. Terrain and ZoCs
ZoCs extend into and out of any hex and over any hexside, except across River hexsides, or into enemy Trench hexes.
6.2. EZoC and Supply
The presence of an Enemy ZoC (EZoC) in a hex prohibits supply from being traced through that hex.
For supply purposes, friendly units negate the presence of an enemy ZoC in the hex they occupy.
6.3. EZoC and Movement
The cost to enter or exit an EZoC is +1 MP.
To move directly from one EZoC to another EZoC costs +2 MPs.
Friendly units do not negate the presence of an EZoC in the hex they occupy, for this rule.
-
6.3.1 It is never possible to move into an enemy trench hex where there is an EZoC exerted by a unit located in a connected trench hex.
Example: An EZoC projected by a unit in 2412 prevents a move from 2413 to 2312, but the EZoC projected from 2311 would not prevent that movement.
6.4. Other EZoC Effects
- Flank Attacks: see 7.9.
- Retreat after Combat: see 9.2.1.
- Supply: see 11.3.
- Reinforcements: see 13.0.
7. Combat
During the phasing player's combat phase friendly units may attack adjacent enemy units. Attacking is voluntary, no unit is ever forced to attack.
No unit may attack or be attacked more than once per combat phase.
7.1. General rules
- An attacking unit may attack only one hex at a time; it may not target two hexes in a single combat.
- Units in the same hex may attack adjacent defenders in different hexes in separate combats.
- Attacking units from two or more attacking hexes may combine their combat strength to attack a single adjacent hex.
- No unit may split its attack strength to attack a second hex in a separate attack.
7.2. Attacker Command Limitations
The number of units that may take part in an attack is limited. The attacker's forces may include either:
- All the units attached to one corps, plus two units (independent, or attached to a different corps), or
- Three independent units.
7.3. Definition of "Defender"
- All units selected to defend in a hex defend with a single combined defending strength.
- All units in an attacked hex must participate in combat, unless unable due to Command Limitations.
7.4. Defender Command Limitations
The number of units that may take part in the defense of a hex is limited. The defender's forces may include either:
- All the units attached to one corps plus one unit (independent or attached to another corps), or
- Two independent units.
If units of more than two corps (or more of two independent units) are stacked in one hex, the excess units do not take part in the combat (7.7).
Example: Three independent units are stacked together in a hex under attack. Due to Command Limitations, one of the three units may not take part in the combat (defender's choice).
The defending units can never voluntarily not take part in combat.
7.5. Zero Combat strength
- ATTACK: A unit with a modified attack strength of zero or less cannot attack.
- DEFENSE: A unit with a modified defense strength of zero or less is eliminated.
7.6. Artillery in Combat
The artillery value influences the die roll on the Loss Results Table (See 9.4.1).
7.7. Ineligible Units
There are some cases where units may or must not take part in combat – these are "Ineligible Units".
- Ineligible Units that are stacked with attacking units are never involuntarily affected by combat results. If friendly attacking units are forced to retreat, the ineligible units can choose whether or not to retreat with the friendly units.
- Ineligible Units that are stacked with defending units are affected by retreat results (only).
Exception: If all units defending in a hex are eliminated (but did not suffer a retreat result) and this leaves only Ineligible Units, those units must retreat one hex.
7.8. Terrain Effects on Combat
The hex terrain level is the level in the hex center. If both the defender hex and its hexside affects the combat, the defender chooses whether to use the hex or the hexside effects.
Example: A defender on high ground across a river must decide to defend the river line or the hill top over it).
The maximum number of steps that can attack from each attacking hex, is the stacking limit of the defending hex.
Example: A defending hex in mountain terrain can be attacked by two steps from each attacking hex.
- Each unit attacking upslope (from a lower to a higher altitude hexside), or against a Peak, has its attack strength reduced by ONE (1).
- Each unit attacking from higher altitude than the defender, has its artillery value increased by ONE (1).
- Each unit defending in a higher altitude than all the attackers, has its artillery value increased by ONE (1).
In this case, Artillery Value of zero is considered to be one.
Streams and Rivers affect combat, see 14.1 and 14.2.
- 7.8.1 Units may never [have] the attack strength decreased more by one (1) due the terrain effect. [Printed text reads "Units may never the attack strength decreased"; the word "have" is supplied here for readability.] Exception: Isonzo river, see 14.2.
7.9. Flank Attacks
If five of the six hexes adjacent to the defender are either occupied by an enemy unit or in the ZOC of an attacking enemy unit and none of these five hexes are occupied by a friendly unit, the defender is considered "Flanked".
Important: The only significant ZoCs are those projected by the units that are actually involved in attacking the unfortunate unit. The ZoCs of units not involved in the specific combat are not considered.
Example 2: although the 55th brigade is not attacking, its presence in the hex creates a Flank Attack situation. (Diagram: No Flank Attack / Flank Attack.)
Example 3: The presence of the Mantova brigade negates the ZOC of the attacking 15th brigade. (Diagram: No Flank Attack / Flank Attack.)
-
7.9.1 Effects: If the defender is Flanked, the CRT odds column is shifted two to the right (in the attacker's favor) and the defender receives a Loss Results Table DRM of +2 (9.4.1).
-
7.9.2 Map Edge and Flank Attacks: A defender in a map-edge hex cannot be flanked.
Example 1: the 15th brigade is not participating in the attack, therefore its ZoC is not considered. However, if the 15th does join the attack, a Flank Attack situation is created. (Diagram: No Flank Attack / Flank Attack.)
8. Combat Procedure
In IsI each individual combat is resolved in five stages:
- Determine the Combat Ratio.
- Determine CRT Column Shifts.
- Attack Resolution.
- Determine the Magnitude.
- Loss Resolution.
8.1. Stage 1 – Determine Initial Combat Ratio
First the attacker identifies the attacker and defending hexes. Next, the combined attack strength of the participating attacking units is compared to the combined defense strength of the defending units (taking into consideration strength modifications due to Terrain, Combat Effectiveness reductions, and Supply Status), and this comparison is stated as a probability ratio (attacker/defender).
Divide the total attacking strength by the total defending strength to arrive at a combat odds ratio, which is rounded off, always in favor of the defender, to the nearest ratio listed on the Combat Results Table.
8.2. Stage 2 – Determine CRT Column Shifts
The Combat ratio derived in Stage One above can be shifted for Flank Attacks (7.9) or trenches (12.5). Apply eventual shifts to find the final odds ratio.
Combats with a final ratio of less than 1:3 are not allowed; combat with a final odds greater than 4:1 are resolved at 4:1, with -1 DRM on the Combat Results Table for each odds ratio over.
Example: With a ratio of 6:1, the attacker resolves the combat at 4:1 with a -2 DRM.
8.3. Stage 3 – Attack Resolution
To determine if there is a retreat and if there will be DRMs during loss determination, the players reference the Combat Results Table (9.1). The attacker rolls the 3d6 and cross references the result of the two dice of the same color with the final odds ratio column. [Printed as "3d6"; the rulebook's own dice description (introduction, and 8.5) is two dice of the same colour for the CRT and one die of a different colour for the Loss Results Table, so this is three dice in total.]
Players immediately implement the results, performing (if any) retreats (9.2) and advances after combat (9.3).
8.4. Stage 4 – Determine Magnitude
To determine the losses suffered, the combat's Magnitude must first be determined. Magnitude is determined by adding up the total number of steps (of both sides) that participated in the combat.
- SMALL: If the combat includes a total of SEVEN steps or less.
- LARGE: If the combat includes a total of EIGHT or more steps.
8.5. Stage 5 – Loss Resolution
Next the players proceed to the Loss Results Table (9.4). The attacker and defender each use the result of the third dice (the one of a different color), to applying the appropriate DRMs (9.4.1). Both players cross reference their modified result on the column corresponding to the attack's Magnitude and apply all Combat Effectiveness Reductions (9.4.2).
9. Combat Results
9.1. Combat Results Table (CRT)
The CRT is referenced during Stage Three (8.3) of the Combat Resolution Process. Results to the left pertain to the attacker, to the right to the defender.
POSSIBLE RESULTS:
-: No Effects+/-#: DRM on Loss Results TableR#: Retreat # of hexes
9.2. Retreats
All retreats are expressed in hexes, not Movement Points.
-
9.2.1 Retreating units always retreat as a stack and may not split up except in the last hex of retreat to avoid an overstack situation. If an overstack situation would occur in the last hex of retreat, some, or all, of the retreating units may retreat additional hexes, but only if avoiding an overstack.
Example: Two A-H brigades in Hills terrain, each consisting of 2 steps, receive an R1 CRT result, and are forced to retreat into a Hills hex containing a friendly brigade (2 steps). Since this would create an overstack situation (6 steps), one of the two retreating brigades must retreat an additional hex. Note that only one of the two brigades (the one "overstacked") continues its retreat, not both of them.
-
9.2.2 Retreat Guidelines: The owning player may determine the path of retreat but must abide by the following guidelines:
- Avoid entering an empty hex in an EZoC.
- Retreat toward any supply source. A unit that suffers a one-hex retreat result that does not move further from the chosen supply source is considered to have fulfilled this guideline.
Important: If a stack is unable to fulfil either one, or both, of the above guidelines it can retreat, but suffers a +2 DRM on the upcoming LRT die roll.
Units can retreat into an overstack situation, thereby causing an additional hex retreat, to comply with the Retreat Guidelines in 9.2.1 (e.g. to avoid entering an EZoC).
-
9.2.3 Retreating Across a Stream: Each unit that retreats across an unbridged Stream hexside suffers one Combat Effectiveness reduction.
-
9.2.4 Unable to Retreat: Units cannot retreat over enemy units, or across an unbridged River. If a stack is unable to retreat, it suffers an additional +2 DRM on the upcoming LRT die roll, for a total of +4 (+2 for not fulfilling the retreat Guidelines, and +2 for the inability to retreat), and remain on place.
9.3. Advance After Combat
If a defender's hex is vacated the victorious attacking units can advance into the vacated hex subject to stacking limitations.
Exception: in the case of advance after combat in a hex with an enemy trench only one unit (chosen by the attacking player) can advance.
Ineligible Units may not advance.
A victorious defender may never advance after combat.
9.4. Loss Result Table (LRT)
The LRT is referenced during Stage 5 of the Combat Resolution process.
POSSIBLE RESULTS:
-
-: No Effect -
#: # of Combat Effectiveness Reductions. -
9.4.1 Loss Results Table DRMs: The following DRMs affect final LRT results:
- CRT result (9.1).
- Opponent's Artillery Value: 0: +0 | 1-2: +1 | 3-4: +2 | 5-6: +3 | 7-8: +4 | 9: +5
- Defender Flanked: +2.
- Unable to fulfil retreat guidelines or Unable to retreat: +2 each.
- Trenches (see 12.5).
- -1 for each odds ratio above 4:1.
-
9.4.2 Reduction of Combat Effectiveness: Combat Effectiveness (CE) reduction results are assigned to individual units by the owning player. CE reductions must be equally distributed. All participating units must take one CE reduction before any one unit takes two (and so on), except if this would eliminate the unit. Ineligible Units withheld from combat may not be allocated EC reductions.
To record a Combat Effectiveness Reduction, place a "Reduced EC -1" marker on the unit. To record the second reduction, flip the marker to its "Reduced EC -2" side. When a unit suffers a third EC reduction, remove the reduced EC marker and flip (or remove) the unit, it suffers a step loss.
Reduced units, and units without reduced values on their reverse side, are one step units, and must be removed when they suffer a step loss.
10. Combat Effectiveness and Step Losses
Design Note: In Inferno sull'Isonzo Combat Effectiveness measures tangibles such as casualties and stragglers, and intangibles such as organization, training, leadership, morale and stamina.
Combat Effectiveness reductions do not affect artillery values.
10.1. Effects of Reduced Combat Effectiveness
A unit bearing a Reduced Combat Effectiveness -1 or -2 marker has its attack and defense strength reduced by 1 or 2 respectively.
10.2. Indicating Step losses
Step losses are suffered when a unit suffers its third Combat Effectiveness reduction. Flipping a unit over (while removing the EC reduction marker) indicates the unit has suffered a step loss. Units with two steps are removed from play after the second step loss. Units with only one step are removed when they lose one step.
10.3. Combat Effectiveness Recovery
Infantry (including the Bersaglieri) and Mountain type units can recover from reduced Combat Effectiveness through a process termed "Combat Effectiveness Recovery".
A unit that conducts Combat Effectiveness Recovery can remove a "Reduced EC -1" marker or flip a "Reduced EC -2" marker.
Reduced units may never recover steps.
Design Note: Effectiveness Recovery represents rest, recuperation, and incorporating replacements.
-
10.3.1 Requirements: To conduct Combat Effectiveness Recovery, a unit must be in-Supply and must expend 4MP. In addition, the unit must also be three hexes away from the nearest enemy unit (i.e. two intervening hexes).
See also 14.3.1 for the Italian army.
-
10.3.2 Eliminated Units: Units that are completely eliminated are not returned to play. Exception: see 13.2.
11. Supply
A unit is always in one of three possible supply states: In Supply, Low Supply (LS), or Out of Supply (OOS).
The supply state of a player's units is determined during the friendly supply phase, and always last until that player's next supply phase.
If a unit is in a Low or Out of Supply state, place an information marker (LS or OOS) under the unit to denote this.
11.1. Supply Effects
A unit's current supply status affects only its combat strength. In supply units are full strength; Low Supply units suffer a -1 strength reduction; OOS units suffer a -2 strength reduction AND their Artillery Value (AV) is considered to be zero for combat.
11.2. Supply Source
There are two types of Supply Sources:
- A friendly map edge with the national flag printed on it,
- A hex containing a road (any type) or railroad connected to a friendly map edge supply source hex by a continuous path of connected road/railroad hexes. The road/railroad line is blocked by enemy units or their ZOCs.
11.3. Tracing a Supply Path
A supply path is traced through contiguous hexes from the unit to the supply source.
Friendly units negate the presence of an EZoC in the hex they occupy for purposes of tracing a supply path.
A valid supply path may not pass through:
- A hex occupied by an enemy unit.
- A hex in a non-negated EZoC.
Friendly units negate the presence of any EZoCs in the hex they occupy when tracing a Supply Line.
11.4. Supply Path Range
To be "In Supply", a unit must be able to trace a valid supply path no longer than 4 hexes in length. If the path is between 5 and 8 hexes in length, the unit is in Low Supply (LS). If the path is longer than 8 hexes, or the unit is unable to trace any valid path, the unit is Out of Supply.
- 11.4.1 Supply Paths can cross Rivers over bridges without penalty; otherwise crossing a River is considered to add 3 hexes to the length of the supply path.
11.5. Attrition
If a unit that was Out of Supply during the last friendly supply phase is found once again to be Out of Supply, it suffers Attrition. (i.e. A unit OOS two or more consecutive GTs suffer Attrition).
- 11.5.1 Effects of Attrition: A unit that suffers attrition has its Combat Effectiveness reduced by 2 (This reduction is applied as if the unit had suffered losses in combat).
12. Special Rules
12.1. Mountain units
Mountain units consist of troops trained and equipped to fight in mountainous terrain, so they are more suited to combat in mountains.
When fighting against defenders in a mountain hex, Mountain Infantry units attack and defense strength are increased by 1 if the enemy has no Mountain units.
12.2. Bridge Engineers
Bridge Engineer units have no ZOC; they can't attack and can only absorb losses if they are the only unit left in the hex; they do not add their defense value to the hex if stacked with other friendly combat units.
Bridge Engineer units can build pontoon bridges or repair destroyed bridges.
To build or repair a bridge, the player must control both the river hexes to be crossed. At the end of the friendly reinforcement phase, before any movement, turn the Engineer unit onto its bridge side or remove a bridge destroyed marker.
If an enemy unit moves adjacent to a pontoon bridge the bridge unit returns to its Engineer side and is placed in a hex at the side of the bridge that is not occupied by the enemy.
A unit of Engineers on the pontoon bridge side can return voluntarily to the Bridge Engineer side at the beginning of any Movement Phase.
Pontoon bridges are not considered to be Roads, but a Supply Path can cross them without penalties.
Repaired roads or railway bridges also reactivate the road or the railway on them.
12.3. Artillery units
Artillery units are not considered Combat Units, so they have no ZOC. Each artillery unit may add its artillery value to any one non-artillery unit within two hexes in one attack or defense. The range is calculated from the Artillery unit to the defender hex.
Heavy artillery units have a range of three hexes, but only in attack. Heavy artillery units cannot add their AV in defense.
Artillery units cannot attack alone, and do not take part in combat in defense, they do however add their artillery value to the stack.
Artillery units cannot retreat after a combat, and are eliminated if forced to do so.
If artillery are the only units in a defending hex they cannot be attacked during the Combat Phase, but they are eliminated when an enemy unit enters their hex during the Movement Phase.
Artillery units that move or fire are flipped to their "Mov" side. An artillery unit not moving during a Movement Phase can be flipped to its normal side.
Artillery units on their movement side cannot support any combat.
- 12.3.1 Artillery units may cross the Isonzo river only on bridges, not on pontoon bridges. The Italian artillery units in the East of the Isonzo River can move on Road or Clear terrain hexes only.
12.4. Infiltration Tactics
Infiltration capable units (in ISI the Arditi I Assalto counter only) pay +1 MP to move from EZoC to EZoC of the same unit, they can use Roads in EZoC and ignore the rule 6.3.1.
Attacks by Infiltration capable units are always Flank Attacks.
Infiltration attacks against enemy Trench hexes do not receive the +2 DRM for the Attacker on the LRT, the Defender still receive the -2 DRM. Attacking Infiltration capable units undergo the first attacking CE reduction.
12.5. Trenches
In IsI there are two types of trenches, friends and enemies. Players receive benefits only from friendly trenches.
Defending units in friendly Trenches receive 1 column shift left.
Attacks made against enemy Trenches get a +2 DRM on the LRT for the Attacker, and a -2 DRM for the Defender.
Exception: Infiltration attacks.
- 12.5.1 Defending units in friendly Trenches can try to refuse to retreat 1 hex. To try the retreat refusal, the player, after allocating losses, roll 1d6: if the result is equal or lower than the higher Defensive Strength in the hex (if there are more units consider the unit with the greater Defensive Strength), the defender can exchange one Retreat hex with one CE reduction. If the result is higher, the defender must retreat AND take one CE reduction.
CRT Retreat results do not affect attacking units from friendly Trench hexes.
Maximum one Brigade/Regiment and one Battalion can advance after combat in an enemy Trench hex.
13. Reinforcements
Some units aren't set up on the map at the beginning of the game; they come into play as reinforcements. The GT these units enter is indicated on the relevant unit counters.
In the Reinforcement Phase of the Turn in which a unit comes into play, place the unit on the map in one of the map border hexes with a friendly flag and not occupied by the enemy.
13.1. Reserves
Several Italian brigades start the game in reserve. These units' counters have an "R" after the placement hex, the others are indicated in the Reserves box on the map. Starting from GT 2, during the Phase C1 of the sequence of game the Italian player rolls a dice and updates the result on the Ris/Rimp. Table on the map. These points can be accumulated by a turn to another, but you can never have more than 9.
In the Reinforcement Phase the player Italian can release brigades from the Reserve at the cost of 1 VP per unit. Each released brigade also costs a point on the Ris/Rimp Table.
The brigades in Reserve initially on map remove the Reserve marker, the others enter as Reinforcements.
13.2. Emergency reinforcements
From GT 7, in the Reinforcement Phase the A-H Player may take a unit from casualties and return it to play enter as a reinforcement (But with only a single step if the unit had two originally) at the cost of 1 VP.
14. Battleground
Some terrain types had a significant impact on the battle.
14.1. Rivers, streams and peaks
Units that move through a River pay 1 additional MP, and each attacking unit across a River hexside has attack strength decreased by ONE (1).
When calculating the altitude of a hex, units attacking from Stream hexes are always considered to be lower than all those in hexes adjacent.
Defending units in Peak hexes always are considered to be higher than all those in adjacent hexes (also in other Peaks).
14.2. Isonzo
The Isonzo river is particularly deep and steep, so the following rule applies instead of 14.1.
Only one Brigade/Regiment and one Battalion they can move or attack across an Isonzo River hexside in a GT.
Units can attack or cross the Isonzo using a bridge or if they start the Movement Phase stacked with a Bridge Engineer, however in this case they can only move one hex.
You can use the River Crossing river counter to record that the Isonzo hexside has been crossed.
Units can attack across the Isonzo River at half strength (round up).
Supply Paths can cross the Isonzo River over bridges, otherwise the River adds 3 hexes to the Supply Path length (11.4).
14.3. Bainsizza Plateau
This plateau was arid and dry, with a very poor road net. During the warm period of the offensive, the Italian supply network was unable to supply the offensive across a territory without water.
- 14.3.1 For any unit beyond the initial line of the Italian trenches, to recover the EoC of one own unit (10.3) the Italian player must spend one point from the Ris/Reimp Table also (per each unit).
14.4. Bridges
On map bridges exist where a road/railroad crosses a river (including the Isonzo). Bridges in a ZOC or adjacent to friendly units can be blown at the first instant an enemy unit is moved adjacent to them, rolling 1-4 with 1d6 (Mark the bridge with the Destroyed bridge marker). A success destroys all bridges in the hex.
In Phase C of the sequence of play a player can always blow-up a bridge if they control both the bridge hexes.
In the Combat Phase, friendly Artillery Units within range of any bridge or Pontoon bridges end hex can bombard the bridge instead of taking part in combat. Roll one die for each Artillery unit; if the result is equal or lower than the unit AV, the bridge is blown.
15. Victory Conditions
To determine the winner, calculate the Victory Points (VP). At the end of the game the Italian VP total determines the winning player.
Victory points are earned by conquering geographical objectives, and lost by committing Reserve units. Settlements and Peaks in enemy territory at the start of the game are Objectives. An Enemy Objective is considered captured when a friendly unit was the last to have entered the hex.
Ternova (2808), Chiapovano (2205) and Grahovo (1301) each earn 2 PV, other conquered Settlements earn 1 VP. Conquered Peaks count as 2 VPs.
The Italian player loses 1 VP for each Reserve unit released (see 13.1) and earns 1 VP for each A-H emergency reinforcement (13.2).
If at any point in the game an A-H unit enters Gorizia, there is an automatic A-H strategic victory.
- 2 OR LESS VP: Strategic Victory Austro-Hungarian
- 3-14 VP: Operational Victory Austro-Hungarian
- 15-24 VP: Draw
- 25-39 VP: Operational victory Italian
- 40+ VP: Italian strategic victory
16. Bibliography
- Gianni Pieropan, Storia della Grande Guerra sul fronte Italiano - Mursia.
- Ufficio Storico dell'Esercito Italiano, L'Esercito Italiano nella Grande Guerra (1915-18) - Ist. Poligrafico dello Stato.
- Gianni Baj-Macario, Anton von Pitreich, Prima di Caporetto. La decima e l'undicesima battaglia dell'Isonzo - LEG.
- Guido Alliney, Bainsizza 1917 - LEG.
- Giulio Primicerj, 1917 Lubiana o Trieste? - Mursia.
- Enrico Caviglia, La Battaglia della Bainsizza – Mondadori.
- Roberto Bencivenga, La Battaglia della Bainsizza - Gaspari.
- Mark Thompson, The White War - Faber & Faber.
- Edmund Glaise-Horstenau, Österreich-Ungarns Letzter Krieg, 1914-1918 - Verlag der Militärwissenschaftlichen Mitteilungen.
Games:
- Andrea Brusati, Inferno sugli Altopiani, Para Bellum magazine I.
- Michael Resch, Battle for Galicia, 1914, Oregon Consim Games.