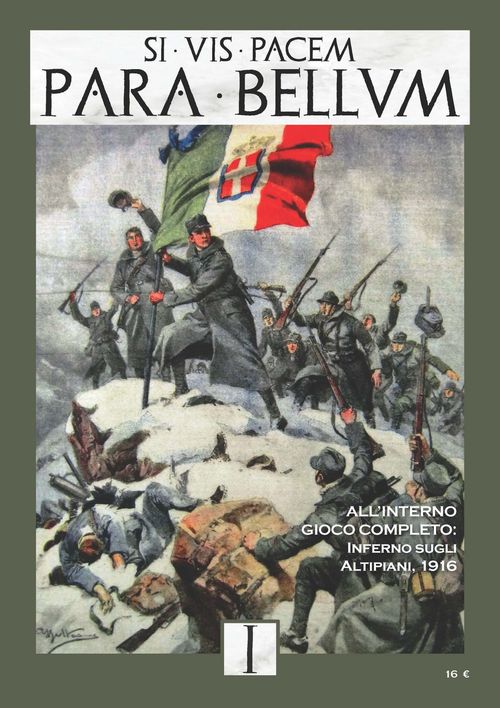
Burning Mountains 1916
Burning Mountains 1916 Rulebook
Table of Contents
Table of Contents
- 1.0 INTRODUCTION
- 2.0 THE PLAYING PIECES
- 3.0 SEQUENCE OF PLAY
- 4.0 MOVEMENT
- 5.0 STACKING
- 6.0 ZONE of CONTROL (ZOC)
- 7.0 COMBAT
- 8.0 COMBAT PROCEDURE
- 9.0 COMBAT RESULTS
- 10.0 COMBAT EFFECTIVENESS and STEP LOSSES
- 11.0 SUPPLY
- 12.0 SPECIAL RULES
- 13.0 RENFORCEMENTS
- 14.0 VICTORY CONDITIONS
- 15.0 OPTIONAL RULES
- BIBLIOGRAPHY
1.0 INTRODUCTION
Inferno sugli Altipiani is a game about the Spring 1916 Austro-Hungarian offensive on the Italian Front, aimed to drive to Vicenza and the Veneto plain, west of Venice, cutting off the whole front in Carnia and along the Isonzo river. One player controls the Austro-Hungarian forces, the other the Italian forces. Each player attempts to achieve, or maintain, geographical objectives to attain the victory.
SCALE: 2 Km per hex, 2 days per turn.
To play Inferno sugli Altipiani you need the following items:
- 1 A2 map
- 140 die-cut counters
- This Rule booklet
- The Player Aid Card
Also you need three six sided dice, two of the same color and one of another color (not included in the game).
1.1 Preparation for play
Once the components have been printed and mounted, sort out and set up the units. Each unit's set up hex or game turn (GT) of arrival is print on the unit counter.
The game begins with the Austro-hungarian (A-H) Combat Phase of GT 1. The game then proceeds following the GT sequence of play (3.0).
1.2 Abbreviations
- A-H: Austro-Hungarian
- AV: Artillery Value
- DRM: Die (Dice) Roll Modifier
- GT: Game Turn
- ID: Identification
- MA: Movement Allowance
- MP: Movement Points
- VP: Victory Points
- ZOC: Zone of Control
- EZOC: Enemy Zone of Control
- 1d6 (2d6): one six sided die (two dice).
Unit IDs abbreviations:
- V.L. + M.B. = Battalions Val Leogra + Monte Berico
- Gr. Alp. = Gruppo Alpini
- Ragg. Bers. C. = Raggruppamento Bersaglieri Ciclisti
- G.d.S. = Granatieri di Sardegna
- Ragg. RGF = Raggruppamento Regia Guardia di Finanza
- Bers. = Bersaglieri
- K.J. = Kaiserjäger
- Gebirg. = Gebirgjäger
- Sch. = Schützen
- L.Sch = Landesschützen
2.0 THE PLAYING PIECES
2.1 How to Read the Units
ATTACK AND DEFENSE STRENGHT: A quantification of a unit's combat strength.
MOVEMENT ALLOWANCE (MA): The number of Movement Points a unit can use while moving.
ARTILLERY VALUE (AV): A measure of a unit's artillery strength and effectiveness.
REDUCED UNIT: Two steps units are back printed with the reduced value. The reduced side is indicated by a horizontal bar in the middle of the unit.
[Counter diagram: labels for Unit ID, Artillery value, Attack strength, Defensive strength, Movement allowance, Set Up Hex or Reinforcement Game Turn, Unit Size, Reduced strength color band and Unit Type.]
UNIT IDENTIFIER (ID): A unit's ID is its historical designation. The first or only code is the name or number of the brigade. The second number (if any) found inside a colored box is the Corps number. Only the Corps number (or lack of) is relevant in game play – see rules 7.2 and 7.4.
UNIT SIZE INDICATOR: A unit's size is one of the following: X = Brigade; III = Regiment.
SET UP INFORMATION: This information indicates the hex the unit begins set up in or the GT the unit arrives as reinforcement.
2.2 Unit Type Summary
[Unit type symbols: Infantry, Mountain Troops, Artillery, Heavy Artillery, Fortress.]
2.3 Color Scheme
A unit's nationality is indicated by its counter's background color:
- Green-Grey: Italian
- Light Grey: Austro-Hungarian
2.4 Informational Markers
Informational Markers include (front/back):
- Reduced Combat Effectiveness -1/ Reduced Combat Effectiveness -2
- Low Supply (LS) -1/ Out of Supply (OOS) -2, AV=0
2.5 Combat Units
Combat units are any units with a printed Defense Strength of one or more.
Note: artillery is not considered a "Combat Unit".
Combat units have one or two step(s). Units with two steps have a reduced value on the back of the counter. Reduced units or units with no printed back side have only a step.
3.0 SEQUENCE OF PLAY
Inferno sugli Altipiani is played in Game Turns (GT). Each GT consists of two "Player Turns" – an Austro-Hungarian Player Turn, followed by an Italian Player Turn.
EXCEPTION: GT 1 start with A-H Combat Phase (skip the A-H Supply, Reinforcement, and Movement Phases).
3.1 Game Turn sequence of play
A. Advance the Game Turn Marker. The GT marker is advanced on the GT Track and flipped to the A-H Player Turn side.
B. Austro-Hungarian Player Turn
- Supply Phase
- Reinforcement Phase
- Movement Phase
- Combat Phase.
After the Austro-Hungarian Player Turn is completed, flip the GT Marker to its Italian Player side.
C. Italian Player Turn The Italian Player Turn is identical to the Austro-Hungarian Player Turn.
During the Austro-Hungarian player's Turn, the Austro-Hungarian player is referred to as the phasing player and the Italian player is referred to as the non-phasing player.
During the Italian player turn, reverse the references.
The PLAYER TURN
1. SUPPLY PHASE: The phasing player checks the Supply Status of all his units (11.0). Units found to be Out of Supply or in Low Supply are marked as such.
Units that are Out of Supply for two or more consecutive GTs may suffer Attrition (11.5).
2. REINFORCEMENT PHASE: The phasing player places any available reinforcements on the map (13.0).
3. MOVEMENT PHASE: The phasing player may move his units (4.0), he may move all, some, or none of his units as he sees fit. At this time units may be able to recover from reduced Combat Effectiveness (10.3).
4. COMBAT PHASE: The phasing player may attack adjacent enemy units (7.0).
4.0 MOVEMENT
4.1 Movement Allowance
Each unit has a Movement Allowance that is the maximum number of MPs it may expend during a Movement Phase.
A unit can never enter a hex occupied by an enemy combat unit.
Remember: artillery is NOT considered a "Combat Unit".
4.2 How to move units
Units move by tracing a path through adjacent hexes, expending Movement Points (MP) for each hex entered (and possibly a hexside crossed) according to the Terrain Effects Chart.
4.3 Minimum move
A unit may always move a minimum of one hex regardless of MP costs. A unit exercising Minimum Movement cannot expend MP during the player turn.
4.4 Combat Effectiveness Recovery
Any eligible unit suffering from reduced Combat Effectiveness may expend MP (while stationary) to recover Combat Effectiveness (see 10.3).
4.5 Special Movement Restrictions
No unit can cross crag hexsides.
4.6 Other Limitations on Movement
[Gap in source: the printed contents list "4.6 Other Limitations on Movement", but no section 4.6 appears in the body of the rulebook. Nothing is transcribed here.]
5.0 STACKING
Stacking is when more than one unit is in a hex.
5.1 Stacking Limits
The number of steps of combat units that can occupy a hex is written on the Terrain Effects Chart. The limit cannot be exceeded at the END of any friendly movement phase or any combat phase. Game markers do not affect stacking.
Reduced units, and units without reduced values backprinted, are one step units.
Artillery units do not count for stacking, but no more than one artillery unit may be in a hex.
Moving and retreating units can freely enter and pass through stacks of friendly units.
5.2 Overstacking Penalty
At the end of any friendly Movement Phase or retreat after combat, any hex in violation of stacking limits must eliminate any excess units (the owning player may choose which units to eliminate).
5.3 Order of Stacking
The unit with the largest attack strength (printed on the counter) must always be the top unit in a stack and is therefore the unit revealed to the opponent.
The position of a unit within a stack has no effect on play (however see Limited Intelligence).
5.4 Limited Intelligence
In no case a player may examine the strength of an opponent's units.
A player may not look at any combat effectiveness or supply state markers.
Play Note: Informational markers are also placed under the effected unit.
6.0 ZONE of CONTROL (ZOC)
The six hexes that surround a combat unit constitute that unit's Zone of Control.
ZOC affect supply and movement. All combat units exert a ZOC.
[Diagram: a combat unit surrounded by six hexes labelled ZdC (Zone of Control).]
6.1 Terrain and ZOC
ZOCs extend into and out of any hex and over any hexside with the exception the ZOCs do not extend across crag hexsides.
6.2 EZOC and Supply
The presence of an Enemy ZOC (EZOC) in a hex prohibits supply from being traced through that hex. For supply purpose, friendly units negate the presence of an enemy ZOC in the hex they occupy.
6.3 EZOC and Movement
The cost to enter or exit an EZOC is +1 MP. To move directly from one EZOC to another EZOC costs +2 MPs.
Friendly units do not negate the presence of an EZOC in the hex they occupy, for this rule.
The road are ignored in EZOC, consider the other terrain in the hex.
6.4 EZOC and Movement in Mountain Terrain
To move directly from one EZOC to another EZOC is prohibited if the EZOC is by the same enemy unit at an altitude higher than both of the EZOC hexes.
Friendly units negate the presence of an EZOC in the hex they occupy, for this rule.
6.5 Other Effect of EZOC
- Flank Attacks – see 7.8
- Retreat after Combat – see 9.2.1
- Supply – see 11.3
- Reinforcements – see 13.0
7.0 COMBAT
During a phasing player's combat phase friendly units may attack adjacent enemy units. Attacking is voluntary, no unit is ever forced to attack.
No unit may attack or be attacked more than once per combat phase.
7.1 General rules
- The attacker may attack only one hex at a time; he may not target two hexes in a single combat.
- Units in the same hex may attack adjacent defenders in different hexes in separate combats (i.e. all units in a hex that conduct an attack need not attack the same defending hex).
- Attacking units from two or more defending hexes may combine their combat strength to attack a single adjacent hex.
- No unit may split its attack strength to attack a second hex in a separate attack.
7.2 Attacker Command Limitations
The number of units that may take part in an attack is limited. The attacker's forces may include either:
- all the units attached to one corps plus two units (independent, or attached to a different corps), or
- three independent units.
Play Note: Only the Austro-Hungarian has corps. All units bearing the same corps ID number (2.1) are considered to be attached to the same corps. The Italian units have not corps, all of them are independent units (there were no organization, or planning, for extensive offensive action by Italian HQs during the period covered by the game).
7.3 Characteristics of the Defender
All units selected to defend in a hex defend as a single defending strength. All units in an attacked hex must participate in combat unless unable due to Command Limitations.
7.4 Command Limitations
The number of units that may take part in the defense of a hex is limited. The defender's forces may include either:
- All the units attached to one corps plus one unit (independent or attached to another corps)
- Two independent units.
If units of more than two corps (or more of two independent units) are stacked in one hex, the excess units must be withheld (7.7).
EXAMPLE: Three independent units are stacked together in a clear hex under attack. Due to Command Limitations, one of the three units must be withheld (defender's choice).
7.5 Zero Combat strength
- Attack: A unit with a modified attack strength of zero or less cannot attack.
- Defense: A unit with a modified defense strength of zero or less must be withheld from combat if stacked with another unit. If such units are the only units in a defending hex, they are eliminated if attacked.
7.6 Artillery in Combat
The artillery value influences the die roll for the Loss Results Table (See 9.4.1).
7.7 Withheld
In some cases units may or must be withheld from a combat.
- Units withheld that are stacked with an attacking units are never involuntarily affected by combat results. If friendly attacking units are forced to retreat, withheld units can choose to retreat with the friendly units or not to retreat.
- Units withheld that are stacked with a defending unit are affected by retreat results (only).
EXCEPTION: If all units defending in a hex are eliminated (but did not suffer a retreat result) leaving only withheld units, retreat the withheld units one hex.
7.8 Terrain Effect on Combat
- The maximum number of steps that can attack from each hex, is the stacking limit of the defending hex.
EXAMPLE: A defending hex in high mountain terrain can be attacked by two steps from each attacking hex.
- Each unit attacking upslope (from a lower to a higher altitude) have the attacking strength reduced by ONE (1).
- Each unit attacking from higher altitude than the defender, has the artillery value increased by ONE (1).
- Each unit defending in higher altitude than all the attackers, has the artillery value increased by ONE (1).
Artillery value of zero is considered one.
- No unit can attack across crag hexsides, but it is possible the artillery support.
- Each unit attacking across a stream have the attacking strength reduced by ONE (1).
Attacking units may never have tha attack strength reduced more by one (1).
7.9 Flank Attacks
If five of the six hexes adjacent to the defender are either occupied by an enemy unit or in the ZOC of an attacking enemy unit and none of these five hexes are occupied by a friendly unit, the defender is considered "Flanked".
IMPORTANT: The only significant EZOCs are those projected by the units that are actually involved in attacking the unfortunate unit. The ZOCs of units not involved in the specific combat are not considered.
[Examples 1-3 diagrams: "No flank attack" / "Flank attack situation" pairs.]
EXAMPLE 1: the 15th brigade is not participating in the attack, therefore its ZOC is not considered. In case it is attacking, a Flank Attack situation is created.
EXAMPLE 2: although the 55th brigade is not attacking, its presence in the hex creates a Flank Attack situation.
EXAMPLE 3: Mantova brigade negates the ZOC of the attacking 15th brigade.
7.9.1 Effects
If the defender is Flanked, the CRT odds column is shifted two to the right (in the attacker's favour) and the defender receives a Loss Results Table DRM of +2 (9.4.1).
7.9.2 Map Edge and Flank Attacks
A defender in a map-edge hex cannot be flanked.
8.0 COMBAT PROCEDURE
In Inferno sugli Altipiani, 1916 each individual combat is resolved in five stages:
- Determine the Combat Ratio.
- Determine CRT Column Shifts
- Attack Resolution
- Determine the Magnitude
- Loss Resolution
8.1 Stage 1 – Determine Initial Combat Ratio
First the attacker identifies the attacker and defending hexes. Next, the combined attack strength of the participating attacking units is compared to the combined defense strength of the defending units (taking into consideration strength modifications due to Combat Effectiveness and Supply Status), and this comparison is stated as a probability ratio (attacker/defender).
Divide the total attacking strength by the total defending strength to arrive at a combat odds ratio, which is rounded off, always in favor of the defender, to the nearest ratio listed on the Combat Results Table.
8.2 Stage 2 – Determine CRT Column Shifts
The Combat ratio derived in Stage One above can be shifted for Flank Attacks (7.9).
Apply eventual shifts to find the final odds ratio.
Combats with a final ratio of less than 1:3 are not allowed; combat with a final odds greater than 4:1 are resolved at 4:1 with +1 on the Loss Results Table for each odds ratio over.
8.3 Stage 3 – Attack Resolution
To determine if there is a retreat and if there will be DRMs during loss determination, the players reference the Combat Results Table (9.1). The attacker rolls the 3d6 and cross reference the result of the dice of the same color with the final odds ratio column.
Players immediately implement the results, performing (if any) retreats (9.2) and advances after combat (9.3).
8.4 Stage 4 – Determine Magnitude
To determine losses suffered, Magnitude must first be determined. Magnitude is determined by summing the total number of steps (of both sides) that participated in the combat.
- SMALL: If the combat includes a total sum of six steps or less.
- LARGE: If the combat includes a total sum of seven or more steps.
8.5 Stage 5 – Loss Resolution
Next the players proceed to the Loss Results Table (9.4). The attacker and defender using the result of the third dice (the one of different color), applying the appropriate DRMs (9.4.1). Both players cross reference their modified result on the column corresponding to the attack's Magnitude and apply all Combat Effectiveness Reductions (9.4.2).
9.0 COMBAT RESULTS
9.1 Combat Results Table (CRT)
The CRT is referenced during Stage Three (8.3) of the Combat Resolution Process. Results to the left pertain to the attacker, to the right to the defender.
POSSIBLE RESULTS:
- - : No Effects
- + / - # : DRM on Loss Results Table
- R# : Retreat # of hexes
9.2 Retreats
All retreats are expressed in hexes, not Movement Points.
9.2.1 Retreating units always retreat as a stack and may not split up except in the last hex of retreat to avoid an over-stack situation.
If an overstack situation would occur in the last hex of retreat, some, or all, of the retreating units may retreat additional hexes, but only is avoiding an overstack.
Example: Two A-H brigades in low mountain terrain, each consisting of 2 steps, receive an R1 CRT result and are forced to retreat into a low mountain hex containing a friendly brigade (2 steps). Since this would create an overstack situation (6 steps), one of the two retreating brigades must retreat an additional hex. Note that only one of the two brigades continues its retreat, not all two.
9.2.1 Retreat Guidelines
The owning player may determine the path of retreat but must abide by the following guidelines:
- Avoid entering an empty hex in an EZOC, if possible.
- Retreat must always be toward any supply source. A unit that suffers a one-hex retreat result that does not move further from the chosen supply source is considered to have fulfilled this guideline.
IMPORTANT: If a stack is unable to fulfil either one of the above guidelines it suffers a +2 DRM on the upcoming TDP die roll.
9.2.2 Units can retreat into an overstack situation, thereby causing an additional hex retreat, to comply with the Retreat Guidelines in 9.2.1 (e.g. to avoid entering an EZOC).
9.2.3 Retreating Across a Minor River
Each unit that retreats across an unbridged river hexside (remember 6.3 for EZOC effect) suffers one Combat Effectiveness reduction.
9.3 Advance After Combat
If a defender's hex is vacated the victorious attacking units can advance into the vacated hex subject to stacking limitations. Withheld units may not advance.
A victorious defender may never advance after combat.
9.4 Loss Result Table (TdP)
The TDP is referenced during Stage 5 of the Combat Resolution process.
POSSIBLE RESULTS:
- - : No Effect
- # : # of Combat Effectiveness Reductions.
9.4.1 Loss Results Table DRMs
The following DRMs affect final TdP results:
- CRT result (9.1).
- Opponent's Artillery Value: 0: +0; 1: +1; 2-3: +2; 4-5: +3; 6+: +4
- Defender Flanked: +2
- Unable to fulfil retreat priorities or Unable to retreat: +2.
- High Odds: Each odds ratio over 4:1: +1 for defender.
Example: if odds were 6:1 = +2 DRM
9.4.2 Reduction of Combat Effectiveness
Combat Effectiveness (CE) reduction results are assigned to individual units by the owning player. CE reductions must be equally distributed. All participating units must take one EC reduction before any one unit takes two (and so on), except if this would eliminate the unit. Units withheld from combat may not be allocated EC reductions.
To record a Combat Effectiveness Reduction, place a "Reduced EC -1" marker on the unit. To record the second reduction, flip the marker to its "Reduced EC -2" side. When a unit suffers a third EC reduction, remove the reduced EC marker and flip (or remove) the unit, it suffers a step loss.
10.0 COMBAT EFFECTIVENESS and STEP LOSSES
Design Note: In Inferno sugli Altipiani Combat Effectiveness measures tangibles such as casualties and stragglers, and intangibles such as organization, training, leadership, morale and stamina.
Combat Effectiveness reductions do not affect artillery values.
10.1 Effects of Reduced Combat Effectiveness
A unit bearing a Reduced Combat Effectiveness -1 or -2 marker has its attack and defense strength reduced by 1 or 2 respectively.
10.2 Indicating Step losses
Step losses are suffered when a unit undergoes the third Combat Effectiveness reduction. Flipping a unit over (while removing the EC reduction marker) indicates the unit has suffered a step loss. Units with two steps are removed from play after the second step loss. Units with only one step are removed when they lose one step.
10.3 Combat Effectiveness Recovery
Infantry (including the bersaglieri cyclists) and Mountain type units can recover from reduced Combat Effectiveness through a process termed "Combat Effectiveness Recovery".
A unit that conducts Combat Effectiveness Recovery can remove a "Reduced EC -1" marker or flip a "Reduced EC -2" marker.
Reduced units may never recover step.
Design Note: Effectiveness Recovery represents rest, recuperation and incorporating replacements.
10.3.1 Requirements
To conduct Combat Effectiveness Recovery, a unit must be in-Supply and must expend 4MP (while stationary). In addition, the unit must be either three hexes away from the nearest enemy unit (i.e. two intervening hexes).
10.3.2 Eliminated Units
Units that are completely eliminated cannot be returned in play.
11.0 SUPPLY
A unit is always in one of three possible supply states: In Supply, Low Supply, or Out of Supply. The supply state of a player's units is determined during the friendly supply phase, and always last until that player's next supply phase.
If a unit is a Low or Out of Supply state, place a supply marker under the unit to denote this.
11.1 Supply Effects
A unit's current supply status affects only its combat strength. In supply units are full strength; Low Supply units suffer a -1 strength reduction; Out of Supply units suffer a -2 strength reduction AND their Artillery Value (AV) is considered to be zero for combat.
11.2 Supply Source
There are two types of Supply Sources: (1) A friendly map edge with a supply symbol printed on it, and (2) a hex containing a road connected to a friendly map edge supply source hex by a continuous path of connected road hexes. The road line is blocked by enemy units or their ZOCs.
Friendly map edge supply sources on map edge are indicated with the national flag.
11.3 Tracing a Supply Path
A supply path is traced through contiguous hexes from the unit to the supply source. A valid supply path may not pass through:
- A hex occupied by an enemy unit:
- More than one hex in a non negated EZOC (i.e. supply can be traced through one hex in a non negated EZOC).
Friendly units negate the presence of an EZOC in the hex they occupy for purposes of tracing a supply line.
11.4 Supply Path Range
To be "In Supply", a unit must be able to trace a valid supply path no longer than 4 hexes in length. If the path is between 5 and 8 hexes in length, the unit is in Low Supply. If the path is longer than 8 hexes, or the unit is unable to trace any valid path, the unit is Out of Supply.
11.5 Attrition
If a unit that was Out of Supply during the last friendly supply phase is found once again to be Out of Supply, it suffers Attrition. (i.e. A unit Out of Supply on consecutive GTs suffer Attrition).
11.5.1 Effects of Attrition
A unit that suffers attrition has its Combat Effectiveness reduced by 2 (This reduction is applied as if the unit had suffered losses in combat).
12.0 SPECIAL RULES
12.1 Mountain units
Mountain units were made by troops trained and used to combat in mountain terrain, so they are better suited to fight in Mountain a High Mountain terrain. When fighting against normal Infantry (only), Mountain Infantry units attack and defense strength are increased by 1 in Mountain and High Mountain terrain (consider the terrain in the defender's hex).
12.2 Fortress units
Fortress units represent forts built for defensive and support role. They act like normal units, and can support with their Artillery Value like artillery units (12.3). They have no ZOC, does NOT affect stacking, and are subject to supply rule like any other unit.
Units defending with fortress units cannot be Flanked.
12.3 Artillery units
Artillery units are not Combat Units, so they have no ZOC. Artillery units may add their artillery value to any non artillery unit adjacent to it, or stacked with, both in attack and in defense.
Heavy artillery units may add their artillery value to a non artillery unit within two hexes but only in attack.
Artillery units cannot attack alone, and in defence must be withheld, but adding the artillery value to the stack.
Artillery units cannot retreat after a combat, and are eliminated if forced to do so.
If artillery are the only units in a defending hex, they are eliminated when an enemy unit enter their hex, and cannot be attacked during the Combat Phase.
Artillery units that move are flipped to their "Mov" side. An artillery unit not moving during a Movement Phase can be flipped to its normal side.
"Moved" artillery units cannot support any combat.
12.4 First Turn Special Rules
GT 1 starts with A-H Combat Phase (skip the A-H Supply, Reinforcement, and Movement Phases). On GT 1, all Italian units attacked by artillery units (also) are considered "Flanked".
Historical note: The beginning of the offensive was very well planned, and the A-H initial artillery barrage devastated the Italian front.
On GT 1 and GT 2, the following Italian units cannot move, unless attacked: Ivrea, Salerno, Lambro infantry brigades, and artillery unit set up in hex 2903. They have an orange dot beside the set up hex.
13.0 RENFORCEMENTS
Reinforcements are found on the Player Aid Card ordered by GT of arrival.
Upon the arrival, place the unit on the map in the hex specified (all multiple hex arrival listings are inclusive). If a unit's scheduled entry hex(es) is enemy occupied, the reinforcing unit may enter at the nearest unblocked friendly map edge hex.
The Italian Friendly Map Edges are the west edge south of 1015, all the south edge, and east edge south of 3906.
The A-H Friendly Map Edge is the north edge between 1501 and 2201.
14.0 VICTORY CONDITIONS
Victory Points (VP) are used to determine which player is victorious.
At the end of the game (following GT 14), the A-H VP level determines the victorious player, if any.
- 0-29: Italian strategic Victory
- 30-34: Italian Marginal Victory
- 35-40: Draw
- 41-45: Austro-hungarian Marginal Victory
- 46+: Austro-hungarian strategic Victory
There are two ways to obtain VP:
Geographical Objectives: These small towns and towns earn VP for the A-H player. The Italian player doesn't earn VP, just deny them to the A-H player. Small Towns earn 1 VP, Towns earn 5 VP and Peaks 3 VP.
Eliminated Enemy Units: For every eliminated Italian combat unit step 1 VP is added; for every eliminated A-H combat unit step 1 VP is subtracted.
VPs are marked in Victory Points & Replacement on the map.
The A-H player start with 10 PV for the control of Geografical Objectives.
15.0 OPTIONAL RULES
The following rules are optional. Players may add them upon mutual agreement.
15.1 Replacements
The player must pay 1 Replacement point each time that recover a Combat Effectiveness (10.3). The Replacement point available are indicated in Victory Points & Replacement on the map.
The players receive 1 Replacement point each time a friendly combat units suffers a step loss.
The players receive 1 Replacement point each turn also, in their Reinforcement Phase with the following exceptions:
- Italian Unpreparedness. The Italian player in his Reinforcement Phase roll a die: if the result is less than the current turn only, he receives one Replacement Point (from TG7 It is automatic).
- Brusilov Offensive. Start by turn 10, the Austro-Hungarian player roll a die in his Reinforcements Phase: if the result is 1 or 2 he stops of receiving Replacement Points for the rest of the game and by the Next Reinforcements Phase each turn he must remove a Replacement Point table from the Victory Points & Replacement on the map.
15.2 Italian improved defensive ability
Historical note: In 1916 the Italian army had not yet the experience and defensive tactical ability of the Austro-Hungarians, but during the Strafexpedition the Italian troops significantly increased their defensive capabilities.
During the Reinforcement Phase the Italian player rolls 2d6 and he adds to the result the number of the current turn. If the sum is 15 or more, From now all the Italian combat units have their defense strength increased by one.
BIBLIOGRAPHY
- Enrico Acerbi, Strafexpedition, Ed. Rossato
- Karl Schneller, 1916: Mancò un soffio, Ed. Mursia
- Vari, Atti del convegno: 1916: La Strafexpedition. Gli altipiani Vicentini nella tragedia della Grande Guerra, Ed. Gaspari
- Alessandro Massignani, Paolo Pozzato, Austriaci all'attacco, Ed. Itinera Progetti
- Gianni Pieropan, Storia della Grande Guerra sul fronte Italiano, Ed. Mursia
- Pompilio Schiarini, L'Armata del Trentino, Ed. Mondadori
- Ufficio Storico dell'Esercito Italiano, L'Esercito Italiano nella Grande Guerra (1915-18) - Vol. III, Ist. Poligrafico dello Stato
- Leonardo Malatesta, Altipiani di Fuoco, ISTRIT
- Andrea Brusati, Strafexpedition: The Spring Offensive against Italy, May-June 1916, Europa Simulazioni 2011
- Michael Resch, Battle for Galicia, 1914, Oregon Consim Games