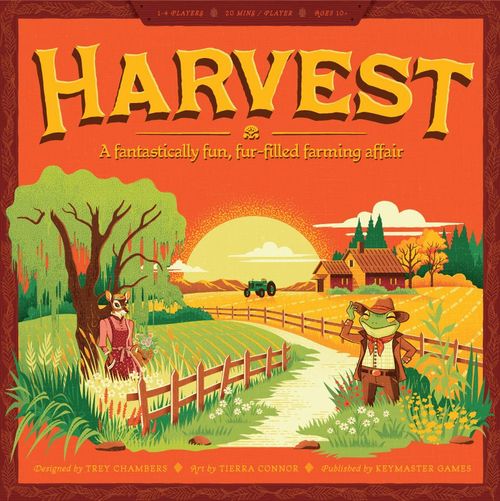
Harvest
Harvest Rulebook
Table of Contents
Table of Contents
Components
Game
- 1 Town Board
- 32 Building Tiles
- 6 Large Farmer's Market Tiles
- 5 Small Farmer's Market Tiles
- 1 "Out to Lunch" Tile
- 8 Character Cards
- 92 Seed/Crop Tiles: 12 Wheat, 14 Blueberries, 14 Blueberry Bushes, 32 Strawberries, 20 Pumpkins
- 1 Round Marker
- 16 One Cent Coins
- 8 Three Cent Coins
- 1 Forest Die
- 10 Sunrise Tiles
- 8 Gairy Tiles
- 1 Mayor Gairy Reference Card
- 1 Solo Challenge Almanac
Player
- 4 Fertilizer Tokens
- 4 Water Tokens
- 4 Bucket Tokens
- 12 Player Pieces (3 in each color)
- 4 Button Scoring Tokens
- 8 Farmhouse Tiles
- 4 Farm Boards
Game Setup
-
Place the Town Board in the middle of the play area. The Town Board is divided into 5 sections: the GENERAL STORE, the FIELDS, the WORKSHOP, the FARMER'S MARKET, and the TRADING POST. These areas and their corresponding actions are explained in detail starting on the next pages.
-
Place the Seed/Crop Tiles and Coins near the GENERAL STORE section of the Town Board. This will serve as the Supply.
-
Place the Forest Die near the WORKSHOP section.
-
Shuffle the Building Tiles and place them face-down in two stacks near the board. Deal 4 Building Tiles face-up into the WORKSHOP section of the Town Board. Two of them should go into the 3-cost row and the other two should go into the 2-cost row.
-
Shuffle the 10 Sunrise Tiles and place them face-down in a stack in reach of all players. This will be the Sunrise Tile deck.
-
Set up the FARMER'S MARKET. Shuffle the 6 Large Farmer's Market Tiles and randomly stack 3 of them on the large space of the FARMER'S MARKET section of the Town Board.
- IF PLAYING WITH 1-3 PLAYERS, place the "Out to Lunch" Tile over the small space in the FARMER'S MARKET. These ACTION SPACES will be unavailable during your game.
- IF PLAYING WITH 4 PLAYERS, shuffle the 5 Small Farmer's Market Tiles and randomly stack 3 of them on the small space of the FARMER'S MARKET section of the Town Board. Return any unused Farmer's Market Tiles to the box.
-
Place the Round Marker on the 1 space of the ROUND TRACK on the Town Board.
-
IF PLAYING WITH 1-2 PLAYERS, Shuffle the Gairy Tiles and place them in a face-down stack near the board along with a set of 3 unused Player Pieces (2 sets of 3 Player Pieces if playing Solo Mode).
If you are playing solo, visit the Solo Challenge Almanac for challenges and specific setup related to challenges.
When playing with 1-2 players, Gairy will act like another player in the game. We recommend learning the core rules for gameplay first, then visiting page 13 in the Core Rulebook as well as the Mayor Gairy Reference Card for additional instructions for 1-2 players.
Player Setup
-
Each player takes a Farm Board and its matching 3 Player Pieces and Button Token.
-
Shuffle the Character Cards and Farmhouse Tiles separately. Randomly deal each player 2 Character Cards and 2 Farmhouse Tiles. Each player selects 1 Character Card and 1 Farmhouse Tile to use this game and returns the others to the box. They then place the Character next to their Farm Board and their Farmhouse Tile in its space on the Farm Board (50 Point side down).
-
Each player takes 6 Building Tiles from the stack without looking at them, and places them face-down on their Farm Board, covering the FIELD SPACES as shown below.
-
Each player places 1 Bucket Token covering the 3 space of the WATER TRACK on their Farm Board and 1 Water Token on the 1 space of the WATER TRACK on their Farm Board.
-
Each player takes 1 Fertilizer Token and places it on the 1-space of their FERTILIZER TRACK on the Farm Board.
-
Each player collects 1 Wheat and 1 Coin and places them next to their Character Card.
-
Each player places their Button Token on the 0 space of the SCORE TRACK on the Town Board.
-
Each player draws 1 face-up Sunrise Tile and places it face-up near their Farm Board. Do not gain the benefit shown on this tile at this time. The number on these Sunrise Tiles determines the Sunrise order for the first SUNRISE PHASE.
You are now ready to play!
NOTE: Once you've got the hang of Harvest, we recommend using the Draft Variant Rules for PLAYER SETUP.
First Time Player?
Use one of these tried and true combos:
- Penny the Pig + the Farmhouse Tile granting a Bucket upgrade and a Coin
- River the Fox + the Farmhouse Tile granting a Forest Die re-roll
- Leland the Frog + the Farmhouse Tile granting two Coins
- Floyd the Beaver + the Farmhouse Tile granting Clear Land and a Coin
Draft Variant Rules
For players more comfortable with Harvest, we recommend the following setup variant for selecting your Character and Farmhouse Tile: Each player draws their Sunrise Tile before choosing a Character and Farmhouse Tile, then, reveal random Character Cards and Farmhouse Tiles equal to the number of players in the game, plus one. In Sunrise order (lowest to highest), each player chooses the Character Card or Farmhouse Tile they wish to use for this game. Then in reverse Sunrise order (highest to lowest), each player chooses again based on their previous choice. A player must choose a combination of 1 Character Card and 1 Farmhouse Tile.
Game Structure
A game of Harvest is played over the course of 4 rounds. Each round is made up of 3 phases, the SUNRISE PHASE, the ACTION PHASE, and the SUNSET PHASE. During these phases, players will take turns preparing, choosing, and resolving actions to gain resources and score Points throughout the game.
1. Sunrise Phase
Each round (including the first round) always starts with the SUNRISE PHASE.
-
Reveal 3 Sunrise Tiles to form a face-up display near the board.
-
Using their current Sunrise order (lowest to highest), one at a time, each player will choose a new Sunrise Tile from the display, replace it with their current Sunrise Tile, and then gain all their Sunrise benefits. This includes benefits on:
- The Sunrise Tile the player just chose
- Their Farmhouse Tile on their Farm Board
- Any Sunrise abilities on their Character Card.
These Sunrise benefits can be resolved in any order the player chooses, but must be resolved completely before moving on to the next player. Sunrise Tiles added to the display during this phase are available to be selected by subsequent players on their turn.
-
After all players have selected a new Sunrise Tile and resolved their Sunrise abilities, shuffle the display of Sunrise Tiles back into the Sunrise Tile deck.
You're now ready to begin the ACTION PHASE.
2. Action Phase
In Sunrise order (lowest to highest) players will take turns placing 1 Player Piece on an Open ACTION SPACE of their choice on the Town Board. Each ACTION SPACE corresponds to one or more actions that the player can take when visiting that location. When visiting ACTION SPACES with multiple actions available, the player may perform those actions in any order. Players will take turns placing their Player Pieces and immediately resolving their chosen actions until each player has placed all of their Player Pieces. See more on ACTION SPACES below.
ACTION SPACES are either OPEN or CLOSED:
- OPEN — An ACTION SPACE is Open when it does not contain a Player Piece, or it is marked by an infinity symbol. ACTION SPACES with an infinity symbol on them are always Open and can hold any number of Player Pieces.
- CLOSED — An ACTION SPACE is Closed when it contains a Player Piece, either yours or another player's. Once an ACTION SPACE is Closed, no other Player Pieces can be placed there unless a Character or Building ability allows it. An ACTION SPACE with an infinity symbol is never Closed.
NOTE: Some ACTION SPACES also have a cost requirement that must be paid in order to use that action. The cost is indicated in the red price tag near the ACTION SPACE.
3. Sunset Phase
Once all players have placed all of their Player Pieces, you are ready to begin the SUNSET PHASE.
After the 4th ACTION PHASE, the game ends! Move on to GAME END. Otherwise:
- All players retrieve their Player Pieces.
- Shift Buildings: Move all Buildings in the WORKSHOP area one row down, decreasing their cost. Buildings shifted from the 1-cost row are discarded from the current game.
- Discard the topmost tile(s) in the FARMER'S MARKET, revealing new actions for the next round.
- Move the Round Marker forward 1 space on the ROUND TRACK.
- Begin the next SUNRISE PHASE.
The General Store
When visiting an ACTION SPACE at the GENERAL STORE, the value shown on that space indicates the number of purchases you can make: 3, 2, or 1 + gain a Coin (usable this turn). You can purchase an item more than once in the same turn. Here are the items for sale at the GENERAL STORE:
Gain a Fertilizer (Free)
Move your Fertilizer Token up 1 space per Fertilizer gained on the FERTILIZER TRACK. The amount of Fertilizer you can accumulate is limited to the 9 spaces on the FERTILIZER TRACK.
Fill Your Bucket (1 Coin)
Spend 1 Coin to move your Water Token up to the highest empty WATER SPACE below your Bucket Token. Your Water Token cannot be moved onto or beyond your Bucket Token.
Purchase Seeds
Spend the number of Coins shown on the icon to place a single Seed from the Supply near your Character Card. There is no limit to the number of Seeds a player can accumulate during the game.
- WHEAT — Free
- STRAWBERRY — Costs 1 Coin
- BLUEBERRY BUSH* — Costs 2 Coins
- PUMPKIN — Costs 3 Coins
A Bit About Blueberries: Blueberries are a special type of Seed/Crop. When gaining a Blueberry Seed, place a Blueberry Bush Tile near your Character Card instead of a Blueberry. More on planting, tending, and harvesting below.
The Fields
When visiting an ACTION SPACE at the FIELDS, the value shown on that space indicates the number of Field Actions — plant, tend, or harvest — you may take. The 3 ACTION SPACE can only be taken by paying Coins equal to the current round number — 1, 2, 3, 4. The 2 action and 1 action spaces do not have a cost, and the 1 action space grants a player a Water or Fertilizer when used. The player may gain this benefit before or after the Field Action is taken. Field Actions are resolved in the FIELD SPACES of your Farm Board. FIELD SPACES refers to the small, square, brown plots on the Farm Board. The Field Action icon will always signify taking one of the following 3 Field Actions:
Plant
Plant as many Seeds as you want and are able to from your Character Card in empty FIELD SPACES. Every Seed has a cost in Fertilizer that must be subtracted from your FERTILIZER TRACK immediately upon planting that seed:
- WHEAT — Cost no Fertilizer, cover 3 FIELD SPACES
- STRAWBERRIES — Cost 1 Fertilizer, cover 1 FIELD SPACE
- BLUEBERRY BUSHES — Cost 2 Fertilizer, cover 2 FIELD SPACES
- PUMPKINS — Cost 3 Fertilizer, cover 3 FIELD SPACES
IMPORTANT: Blueberry Bushes are planted empty and will remain in the same space of your Farm Board for the rest of the game.
When a Seed is planted, it becomes a Crop. Crops may be oriented in any direction on your Farm Board when they are planted.
IMPORTANT: When taking a Plant Action, you may plant as many Seeds as you want, including different types of Seeds, provided you have the space and the Fertilizer to do so. Regardless of the quantity of Seeds planted, this still only counts as 1 Field Action.
In this example, Farmer Szeth has 6 Fertilizer and these Seeds: a Pumpkin, a Blueberry Bush, and a Wheat. Since any number of Seeds can be planted in a single Plant Action with enough Fertilizer, Farmer Szeth plants their Pumpkin for 3 Fertilizer, their Blueberry Bush for 2 Fertilizer, and their Wheat, which does not cost Fertilizer. They adjust the Fertilizer track, spending 5 Fertilizer. When planting, Szeth rotates the Seeds however they like to fit in their Field Spaces, remembering that their Blueberry Bush will remain in place the rest of the game. Once the Seeds are planted, they become Crops.
Tend
Tend as many Crops as you want on your FARM. When you tend a Crop, you will spend its Water cost to take a matching Crop of that type from the Supply and place it in an empty FIELD SPACE orthogonally adjacent to a Crop of the same type that you are tending (Blueberries act differently, see below).
Crops placed as a result of tending may be rotated in any direction provided at least 1 part of the new Crop is adjacent to at least 1 already placed Crop of the type being tended. Crops placed as a result of tending do not require Fertilizer to be placed.
You may tend a single Crop multiple times. Every Crop has a Water cost that must be spent each time you tend that Crop:
- WHEAT — Cost 1 Water to tend.
- STRAWBERRIES — Cost 1 Water to tend twice. Any time you tend Strawberries, place 2 new Strawberries instead of one.
- BLUEBERRY BUSHES — Cost 2 Water to tend. When tending, Blueberry Bushes do not spread like other Crops. Instead, any time you tend a Blueberry Bush, take 1 Blueberry from the Supply and place it on top of that Bush Tile.
- PUMPKINS — Cost 3 Water to tend.
IMPORTANT: Only 1 Blueberry Crop may be on top of each Blueberry Bush at a time. A Blueberry Bush that already has a Blueberry on it cannot be tended again until that Blueberry has been harvested.
IMPORTANT: When taking a Tend Action, you may tend as many Crops as you want, including different types of Crops, provided you have the space and Water to do so. Regardless of the quantity of Crops tended, this still only counts as 1 Field Action.
In this example, Farmer Kit has 8 Water to spend. First, they spend 3 Water to tend their Pumpkins once, placing a Pumpkin Token from the Supply so that it is adjacent to their Pumpkin already on the board. They then spend 2 more Water to tend their Blueberry Bush once (the maximum amount allowed per bush) and place a Blueberry from the Supply on top of their Blueberry Bush Tile. Finally, they spend 3 Water to tend their Strawberries 3 times, adding 6 new Strawberries.
REMINDER: Crops can not be tended diagonally, and if any Crops would be tended but do not have a legal FIELD SPACE, they are instead returned to the Supply.
Harvest
Remove all of the Crops in your FIELD SPACES to harvest them (return them to the Supply). When you harvest Crops, you will gain 1 Coin for each unique Crop type harvested plus the rewards shown for each Crop harvested:
- WHEAT — Gain 1 Point and 1 Fertilizer for each Wheat harvested.
- STRAWBERRIES — Gain 1 Point for each Strawberry harvested.
- BLUEBERRIES — Gain 4 Points for each Blueberry harvested.
- PUMPKINS — Gain 6 Points for each Pumpkin harvested.
NOTE: Blueberry Bush Tiles are not Crops and can never be harvested. They remain in your FIELD SPACES and can be tended again in the future. New Blueberry Bushes can be planted in any open FIELD SPACE, and do not have to be placed adjacent to a pre-existing Bush.
IMPORTANT: When taking a Harvest Action, you must harvest all of the Crops on your Farm Board. Regardless of the quantity of Crops harvested, this still only counts as 1 Field Action.
IMPORTANT: A diverse Harvest will yield more Coins for the future. When harvesting, don't forget to gain 1 Coin for each unique Crop type harvested!
Farmer Wren is ready to harvest their Crops! When harvesting, they return all of the Crops from their Farm Board to the Supply (remembering to leave the Blueberry Bush they planted behind) and score 4 points for their harvested Blueberry, 6 points for their harvested Pumpkin, and 1 point for their harvested Wheat.
The Wheat they harvested also grants them a Fertilizer, which is immediately adjusted on their Fertilizer Track.
Finally, they gain 3 Coins for having harvested 3 different types of Crops.
The Workshop
When visiting an ACTION SPACE at the WORKSHOP, the value shown on that space indicates the number of different actions that you may take: 3 actions, 2 actions, or 1 action + gain 2 Coins (usable this turn). Note the "not equal" symbol on the action spaces. This means a player cannot choose the same action twice. So, if you go to the 3 action slot, you may take 3 different actions. The actions you can take at the WORKSHOP are:
Upgrade Your Bucket (1 Coin)
Spend 1 Coin to move your Bucket up 1 space on the WATER TRACK. Your Water Token is unaffected by this increase and stays at its current position. Your Bucket can be upgraded 1 further than the 9 space of the WATER TRACK, allowing for 9 total Water to be gained.
Clear Land (2 Coins)
Spend 2 Coins to remove any Forest Tile from your Farm, placing it Building side-up into the Workshop row.
Place the tile on the highest available empty space in the WORKSHOP. If there are no empty WORKSHOP spaces, the new building is discarded.
Finally, roll the Forest Die to see what you found in the Forest. Gain the benefit rolled.
Build A Building (Coins)
Spend Coins equal to the cost of an available Building in the WORKSHOP (shown next to the Building row) to place that Building in the FIELD SPACES on your Farm Board.
Buildings can only be placed in any cleared 2x2 section of FIELD SPACE. You may build on top of Crops or Bushes. If you do, any covered resources are then discarded back into the Supply, scoring no Points.
If the building has a "When Built" Action, you may perform that action now.
- "WHEN BUILT" ACTION — Perform this Building's action immediately.
- "END GAME" ACTION — Perform this Building's action at the end of the game.
The Farmer's Market
The FARMER'S MARKET is made up of special action tiles that will change from round-to-round. When visiting the FARMER'S MARKET, place your Player Piece at an Open ACTION SPACE, pay any posted costs, then take the actions shown.
Farmer's Market Actions
Spend the Coins shown in the ACTION SPACE (if any) to perform the actions shown (See "Icons" on the back of the rulebook).
IMPORTANT: Actions at these spaces may be performed in any order, however, each action must be resolved entirely (including any player abilities, "When Built" actions, or other triggering effects that come into play) before resolving the next action.
The Trading Post
Trading Post Actions
When visiting the TRADING POST you may spend any 1 Seed, or 2 Fertilizer, or 3 Water to perform 1 of the following Trade Actions:
- FIELD ACTION (plant, tend, or harvest)
- CLEAR LAND without rolling the Forest Die (no additional Coin cost)
- UPGRADE A SEED AND GAIN A COIN. Upgrading a Seed allows you to change a Seed of your choice to the next highest Seed type: Wheat to Strawberry to Blueberry to Pumpkin.
The value shown on the ACTION SPACE indicates the number of Trade Actions you may take: 2 or 1. You must pay the cost again if taking more than one Trade Action. You may choose one of the other costs and/or actions the second time.
Game End
At the end of the 4th ACTION PHASE, the game ends. Perform the following steps in order:
- Each player (in Sunrise order) resolves their "End Game" Buildings in the order of their choosing. Then, score all Buildings.
- Each player scores 1 Point for each unharvested Crop in their Field Spaces (this does not include Blueberry Bushes).
- Each player scores 2 Points for each Blueberry Bush in their Field Spaces.
- Each player scores 1 Point for every 2 leftover Coins.
If a player scores more than 49 Points during a game, that player will flip their Farmhouse Tile to the 50 Point side and start their Button Token back at the 0 space on the Town Board.
The player with the most Points wins! In the case of a tie, the player with the most leftover resources (Coins, Water, Fertilizer, and Seeds) wins. If still tied, the tied players share the victory.
1-2 Player Games
In a 1-2 player game, you will play with Mayor Gairy to simulate the actions of another player blocking spaces. Use the Mayor Gairy Reference Card for easy reminders for Gairy's rules during a game. Below are detailed descriptions of the Gairy Tiles as well as some clarifications for Gairy's rules:
Sunrise Phase (Gairy)
When revealing Sunrise Tiles, reveal an additional tile and place it next to the Gairy Reference Card. This will determine Gairy's Sunrise order during the Action Phase. This tile is not part of the Sunrise Tile display, and cannot be chosen by another player.
Action Phase (Gairy)
Gairy will take turns with the players in Sunrise order (lowest to highest). On Gairy's turn reveal one tile (two tiles if playing Solo Mode) from the Gairy Deck, placing a Player Piece in the section of the board listed on the tile as follows:
- UP ARROW — Place the Player Piece in the highest value Open ACTION SPACE in that section (3, 2, 1)
- DOWN ARROW — Place the Player Piece in the lowest value Open ACTION SPACE in that section (1, 2, 3)
- LEFT OR RIGHT ARROW — Place the Player Piece in the leftmost or rightmost Open ACTION SPACE in that section
Anytime Gairy visits the WORKSHOP, draw a random unused Building and reveal it in the highest available empty space of the WORKSHOP, as if it had just been cleared from a Farm Board.
IMPORTANT: If Gairy is unable to visit the section of the Town Board as instructed by the tile drawn (due to all of the spaces being blocked), draw a replacement tile.
IMPORTANT: If Gairy visits an Always Open ACTION SPACE, the player may still use this space like normal, as any number of Player Pieces may be placed here.
Gairy visits the highest available Open ACTION SPACE at the GENERAL STORE. Since the 3 ACTION SPACE is taken, Gairy's Player Piece is placed on the 2 ACTION SPACE.
Sunset Phase (Gairy)
Remove Gairy's Player Pieces from the board along with any player's Player Pieces. Shuffle Gairy's Sunrise Tile back into the deck, he will be dealt a new Sunrise Tile during the next SUNRISE PHASE. Finally, shuffle any revealed Gairy Tiles into the Gairy deck. Gairy is ready for the next round!
Characters
JAIME the RABBIT — Hasty Herald
During each SUNRISE PHASE, gain 1 fewer Coin than listed on your chosen Sunrise Tile. After all Player Pieces have been placed in the ACTION PHASE, but before the SUNSET PHASE begins, you may move 1 of your placed Player Pieces to another Open ACTION SPACE and take that action as normal.
REMI the DEER — Gregarious Gatherer
During each SUNRISE PHASE, choose to gain the non-Coin benefit shown on your chosen Sunrise Tile a second time or gain 1 more Coin than is listed on your chosen Sunrise Tile.
MICK the BADGER — Savvy Supervisor
Any time you take 1 or more Field Actions during the ACTION PHASE, take an extra Field Action of any type. This may only happen once per turn.
RIVER the FOX — Mischievous Merchant
When paying a Coin cost, you may spend Fertilizer, Water, and/or Coins in any combination.
FLOYD the BEAVER — Ace Architect
Any time you build a Building, you do not pay the Coin cost required for constructing that Building.
PENNY the PIG — Curious Cultivator
All Crops require 1 fewer Fertilizer for you to plant than listed (minimum of 0):
- Wheat & Strawberries: 0 Fertilizer
- Blueberry Bushes: 1 Fertilizer
- Pumpkins: 2 Fertilizer
ROSE the WOODPECKER — Humble Handybird
During each SUNRISE PHASE, you may choose to do one of the following in addition to your other Sunrise abilities: Clear Land (without rolling the Forest Die), Upgrade your Bucket one space, or Build a Building (paying building costs as usual).
LELAND the FROG — Water Wrangler
At the start of the game, your Bucket begins on the 6 space of the WATER TRACK instead of the 3 space.
"When Built" Buildings
- BACKYARD SHED — When built, perform the action of a 2-action space, regardless of whether it is Closed or not.
- BARN — When built, fill your Bucket and take a Field Action (plant, tend, or harvest).
- BAKERY — When built, upgrade your Bucket and gain a Wheat Seed.
- CIDERY — When built, fill your Bucket and gain a Strawberry Seed.
- COMPOST BIN — When built, gain 3 Fertilizer.
- GARDEN BEDS — When built, gain a Fertilizer and a Blueberry Bush.
- GREENHOUSE — When built, perform a Seed Upgrade Action and take a Field Action (plant, tend, or harvest).
- LONGHOUSE — When built, take 2 Field Actions (plant, tend, or harvest).
- LOOKOUT TOWER — When built, roll and gain the benefit of the Forest Die 3 times. NOTE: This is not a Clear Land Action.
- MERCANTILE — When built, gain 3 Coins.
- PRINTING PRESS — When built, choose any one of your placed Player Pieces and perform the action(s) on its space again, paying any costs for that space as normal.
- REED POND — When built, take a Clear Land Action (do not roll the Forest Die) and fill your Bucket.
- SAWMILL — When built, take a Clear Land Action (do not roll the Forest Die) and a Field Action (plant, tend, or harvest).
- SCARECROW — When built, gain a Pumpkin Seed.
- SILO — When built, plant any Seed in your player supply for free (no Fertilizer required).
- SMITHY — When built, gain 1 Coin and build a Building (paying building costs as usual).
- STOREHOUSE — When built, perform 3 Seed Upgrade Actions.
- WATER TOWER — When built, upgrade your Bucket twice.
- WATERMILL — When built, fill your Bucket and gain 1 Coin.
- WEATHER VANE — Tend one of your planted Crops once for free (do not pay its Water cost).
- WELL — When built, upgrade your Bucket and fill your Bucket.
- WINDMILL — When built, gain the benefit of one of your previously built "When Built" Buildings again.
"End Game" Buildings
- BED & BREAKFAST — This building is worth 5 Points at the end of the game instead of 2.
- CAFÉ — At the end of the game, score 1 Point for every 2 Coins remaining in your supply in addition to their regular scoring.
- COLD STORAGE — At the end of the game, score 3 Points for each unique type of Crop orthogonally (not diagonally) adjacent to this Building.
- FAIRGROUNDS — At the end of the game, score 2 Points for each different Crop type still planted in the FIELD SPACES on your board.
- FLOWER SHOP — At the end of the game, score 2 Points for each unique Seed type in your player supply.
- GATEHOUSE — At the end of the game, score 2 Points for each "End Game" Building on your board (including this one).
- LIBRARY — At the end of the game, take a Field Action (plant, tend, or harvest).
- OUTDOOR SHOWER — At the end of the game, score 4 Points if your Bucket is full of Water (it does not need to be fully upgraded).
- OUTHOUSE — At the end of the game, score 1 Point for each leftover Fertilizer on your board.
- TREEHOUSE — At the end of the game, score 2 Points for each Forest Tile left on your board.
Icon Reference
- GAIN a SEED — Take a Seed of the kind shown from the Supply and place it near your Character Card. REMINDER: Blueberry Bush Tiles are taken instead of Blueberries when gaining a Seed.
- FERTILIZER — Increase or decrease the value of your Fertilizer by 1. Any time you gain or spend Fertilizer, immediately move the Fertilizer Token on your FERTILIZER TRACK accordingly.
- ANY SEED — Denotes a Seed of any kind.
- UPGRADE a SEED — Exchange a Seed in your player supply for the next highest Seed type: Wheat to Strawberry to Blueberry to Pumpkin.
- UPGRADE your BUCKET — Increase the value of your Bucket by 1. Your Water Token is unaffected by this increase and stays at whatever value it had previously.
- FILL your BUCKET — Place your Water Token on the highest empty space below your Bucket on the WATER TRACK.
- WATER — Increase or decrease the value of your Water by 1. Any time you gain or spend Water, immediately move the Water Token on your WATER TRACK accordingly (never onto or above your Bucket).
- BUILD — Take an available Building from the WORKSHOP, paying the cost shown in that Building's row (3, 2, or 1 Coins) and place that Building on any cleared FIELD SPACE on your Farm Board.
- SUNRISE ACTION — Gain the benefits shown during the SUNRISE PHASE.
- FIELD ACTION — Perform any one Field Action: plant, tend, or harvest.
- PLANT: Place any number of seeds from your Player Supply into the Field Spaces on your Farm Board, paying their Fertilizer cost.
- TEND: Choose 1 or more Crops already planted in your Field Spaces and place new Crops adjacent to them, following the rules for their Crop type and paying their Water Costs.
- HARVEST: Remove all Crops from your Field Spaces, scoring them according to their type and gaining 1 Coin for each unique type harvested.
- ALWAYS OPEN ACTION SPACE — An ACTION SPACE that is always Open and can hold any number of Player Pieces.
- UNEQUAL ACTION SPACE — An ACTION SPACE where you may not take the same action twice.
- GAIN a COIN — Take one Coin per icon shown.
- PAY COINS — This action costs the number of Coins shown.
- PAY COINS EQUAL TO ROUND — This action costs Coins equal to the current round you are in: 1, 2, 3, or 4.
- GAIN POINTS — Gain the number of Points shown.
- CLEAR LAND — Remove a face-down (forest side up) Building Tile from your Farm Board. Reveal that Building and place it face-up into the topmost empty space.