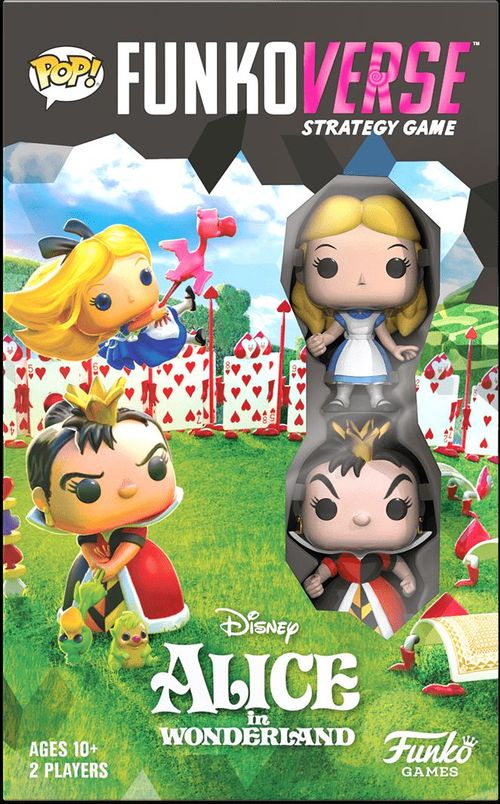
Funkoverse Strategy Game: Alice in Wonderland 100
Funkoverse Strategy Game: Alice in Wonderland 100 Rulebook
Table of Contents
Table of Contents
Components
- 2 characters (Alice, Queen of Hearts), 2 character bases (dark and light), 2 character cards
- 2 basic characters (Kitten, Playing Card) and 2 basic character cards
- 1 Queen of Hearts status card (Temper)
- 2 cooldown tracks (numbered 1 to 4)
- 6 dice
- 4 ability tokens (red, yellow, blue, gray types)
- 4 point markers (A, B, C, D) and 11 points
- 4 exhausted markers
- 1 first player marker
- 2 flag/leader markers, 2 check markers
- 4 wicket markers
- 2 ball tokens
- 1 White Rabbit minion token
- 1 double-sided map (Tea Party / Croquet Court)
- 2 double-sided scenario cards (Territory on the Tea Party map; Croquet on the Croquet Court map)
- Green Flamingo Mallet and Pink Flamingo Mallet (items) with 2 item cards
Understanding Components
Character Cards
A character card shows: NAME, DEFENSE (the number inside the shield), ABILITY COST and ABILITIES, a TRAIT, and ABILITY DOTS.
- Name: This is your character's name.
- Ability Cost: This shows the type of ability token required to use an ability and where you place it on the cooldown track.
- Abilities: Choose from these abilities when your character does an ability action.
- Defense: The number inside the shield shows how many dice you roll when your character is challenged.
- Trait: This is a rule unique to your character.
- Ability Dots: The colored dots indicate which ability tokens you take into your pool during setup. Yellow dot = yellow token, gray dot = gray token, blue dot = blue token, red dot = red token.
Basic Characters
Basic characters are simplified characters you can use until your Funkoverse collection grows. They follow the rules for characters, but they do not have abilities or traits, and they cannot hold items. When a basic character is knocked down, flip it over in its square so that the "knocked down" side is face-up. (Kitten and Playing Card each have a defense of 2.)
Cooldown Tracks
Each player has a cooldown track. You'll use it to keep track of when things, such as spent ability tokens and knocked-out characters, return to play after being removed.
At the end of each round, both players shift everything on their cooldown tracks down one number. Things that shift off the 1 return to play. When shifting off the cooldown track, characters return to your starting area, ability tokens return to your ability token pool, and item cards return to the characters holding those items. This will be explained in more detail in other sections of these instructions.
Your First Game
Welcome to Funkoverse! For your first game, jump in as quickly as possible. To help with this, these instructions are organized so you don't need to read everything to get started. Once you get to Stop Reading and Play! (page 7), you'll know enough of the basics to start playing!
First-Game Objective
Knock down an opponent's character, and then knock out that character to win.
Setup
- Set aside the points, ball tokens, the Pink Flamingo Mallet, the Green Flamingo Mallet, item cards, and the scenario cards. You won't use them in your first game; you'll learn how to use them in The Full Experience (page 8).
- Place the map with the Tea Party face up.
- Both players will use the dice. Place them beside the map.
- Each player takes a cooldown track and two exhausted markers.
- One player takes the dark character base and the basic character that matches their base color. The other player takes the light character base and the basic character that matches their base color.
- Each player chooses a character and puts the character on their base. Your two characters are allies. Your opponent's two characters are rivals.
- Each player takes the cards for their character and basic character.
- Your character card has colored dots in the bottom right corner. Take one ability token to match each of the colored dots. Combine all your ability tokens together to form your ability token pool.
- The player controlling the Queen of Hearts takes the Queen of Hearts status card. The player controlling Alice takes the White Rabbit minion token.
- Flip the First Player marker to see who goes first. If your base color matches the color that lands face up, take the First Player marker. You'll start the game.
- The Tea Party starting areas are marked with base colors. The player with the First Player marker places their characters on squares in their starting area. Then, the other player places their characters in their starting area.
Example First-Game Setup
Each player has in front of them: their cooldown track, two exhausted markers, their character card and basic character card, and their ability token pool. The Queen of Hearts player also has the Queen of Hearts (Temper) status card; the Alice player also has the White Rabbit token. The dice and the First Player marker sit beside the map, and each player's characters stand in their starting area.
Playing the Game
Each round, players take turns choosing a character to do actions. When all characters have gone, the round ends, and a new round begins.
Taking a Turn
- Choose a character. Choose one of your characters without an exhausted marker. (No characters have exhausted markers at the start of the round.)
- Do two actions. Do up to two actions with your chosen character. Actions can be basic or special, and a character may do the same action twice. If the character you've chosen to act is knocked down, see Rally (step 3) below.
Basic Actions (all characters can do these actions)
- Move: Move up to 2 squares in any direction.
- Basic Challenge: Roll 2 dice to challenge an adjacent target.
- Assist: Stand up an adjacent ally that has been knocked down.
Special Actions (all characters except basic characters can do these actions)
- Ability: Spend an ability token to do an ability by placing it on your cooldown track on the number matching the ability's cost.
- Use Item: This action is not used in your first game. Some items require an action to use.
- Interact: This action is not used in your first game. You'll use it in scenarios.
- Rally. If the character you've chosen to act is knocked down, they cannot do the actions above. Instead, the character can stand up by using both of their actions.
- Exhaust your character. Place an exhausted marker on the character card of the character you chose. This character cannot take another turn this round. Once you exhaust a character, it's the other player's turn.
- Next player takes a turn. The next player follows the steps listed above, beginning with Choose a Character.
(Basic character cards list: Move - move up to 2 squares; Challenge - roll 2 dice to challenge an adjacent rival; Assist - stand up an adjacent ally; Interact - this action differs depending on the scenario; Rally - use two actions to stand up.)
Ending a Round
When both players have exhausted all their characters, the round ends.
- Cooldown: The player with the First Player marker shifts everything on their cooldown track down one number. Then the other player does the same. Things that shift off the 1 return to play. When shifting off the cooldown track, characters return to your starting area, ability tokens return to your ability token pool, and item cards return to the characters holding those items.
- Refresh: Remove the exhausted markers from all character cards.
- New First Player: Pass the First Player marker to the other player. That player starts the next round by taking a turn with one of their characters.
Doing a Move
When you move a character, you may move it straight into the next square or diagonally. However, you cannot move through standing rivals or obstructions. See Moving (page 12) for the complete move rules.
Doing a Challenge
Challenges allow you to knock down and knock out rivals. Remember that every character may do a basic challenge against adjacent rivals.
When you challenge a rival with a basic challenge, roll 2 dice. When using an ability to challenge, you roll a number of dice equal to the number that follows "challenge." Your opponent then rolls a number of dice equal to their target character's defense, which is the number inside the shield on that character's card. You want to get more successes than your opponent.
- As the challenger, you get 1 success for each burst symbol and 3 successes for each triple-exclamation symbol.
- Your rival gets 1 success for each shield symbol and 3 successes for each triple-exclamation symbol.
If you have more successes than your rival, your character wins the challenge, and your rival loses. If you do not, your character loses the challenge. Unless otherwise specified by an ability, nothing happens if there is a tie or if the challenger loses the challenge.
When a standing rival is challenged and loses the challenge, the rival is knocked down. Tip the character over in the square where they stood. If a rival that is knocked down is challenged and loses, the rival is knocked out. Remove the character from the map and place the character on the 1 of that player's cooldown track. See Challenges (page 14) for the complete challenge, knocked down, and knocked out rules.
Doing an Ability
When a character does an ability action, follow these steps:
- Choose an ability from that character's card.
- Spend an ability token of the appropriate type from your pool to pay the ability's cost, placing it on your cooldown track on the number shown in the ability's icon. If you do not have the appropriate ability token available in your pool, you cannot use the ability.
- Follow the rules of the ability in the order written on the card. See Abilities (page 16) for the complete ability rules.
Stop Reading and Play!
The above rules cover what you need to know to start playing your first game! When you try to do something you have not done before, or you have a question about how something works, refer back to these instructions or read the detailed sections that follow.
Winning Your First Game
For your first game, play until one player has knocked out one of their rivals. After that, keep reading to learn how to play through the full Funkoverse experience by using scenario cards, and items, and by mixing games!
The Full Experience
Now that you've played your first game, you're ready for the full Funkoverse experience by using scenarios! You can also take it to the next level by mixing Funkoverse games or playing against a friend who has their own Funkoverse game!
Scenarios: Where the Objectives Get Interesting!
Each Funkoverse game comes with a double-sided map and two double-sided scenario cards. Scenarios are associated with specific maps, and each combination provides a unique way to play the game and new strategies to explore!
When you play a scenario, use the Playing the Game (page 6) rules. Instead of winning by knock out, you play to gain points. Each scenario describes different ways players can gain points.
Scenario Setup
- Agree on a map and one of its associated scenarios. Place the point markers on the setup squares, as shown on the scenario card.
- Both players will use dice and points. Place them beside the map.
- Each player takes a cooldown track.
- Each player picks a base color. Flip the First Player marker. If the side matching your base color lands up, take the First Player marker and place it in front of you.
- Each player chooses a character and takes the basic character matching their base. (If you are mixing Funkoverse games or are playing against a friend who has their own Funkoverse game, choose three characters and one item each. If both players have Funkoverse collections, choose characters and items in secret.)
- Take the character cards, item card, and any status cards or tokens associated with your characters. Each player takes one exhausted marker for each of their characters.
- Your character cards have colored dots in their bottom right corners. Take one ability token to match each of the colored dots. Combine all your ability tokens together to form your ability token pool.
- Check the scenario card for additional setup rules.
- Your starting area is marked with your base color on the map on the scenario card. The player with the First Player marker places their characters on squares in their starting area. Then, the other player places their characters in their starting area.
Point Markers
In addition to the ways to gain points described by scenarios, players may always gain extra points from point markers. When a character is adjacent to a point marker on the map or in its square, the character may do the interact action to immediately gain a point. Place the point marker, letter-side up, on the 4 of their cooldown track. When a point marker shifts off a cooldown track, place it back on the map in the corresponding letter's setup square. In subsequent turns, players may gain points by interacting with point markers that have returned to the map.
Winning a Scenario
Determine the winner according to the scenario's rules by counting the points each player has at the end of a round. If there is a tie, play more rounds until one player has more points. If you run out of points to take, use something else to keep track of the points each player gains.
Play with Items
This game contains items, the Pink Flamingo Mallet and the Green Flamingo Mallet, that you can use when mixing Funkoverse games or playing against a friend who has their own Funkoverse game. Both players must have an item before you can play with an item. Try using items with different characters and with different combinations of characters on your side to discover new strategies. Both players must use the same number of items.
Item Setup
Each player chooses one item and gives it to a character by putting it in that character's hand before starting the game. Place the item card near that character's card to remind you of the rules. Basic characters cannot be given items.
Item Rules
When a character has an item, the character gains a new option for an action or a new trait as described on the item card. Read the rules as you would for an ability. An item remains with the same character for the whole game.
While an item is on the cooldown track, it cannot be used. When a round ends, shift all item cards down the cooldown track. When an item card shifts off the 1, it returns to the character holding the item and may be used again.
Doing the Use-Item Action
If the item has the use-item icon, the character holding the item must do the use-item action to use it. After your character uses the item, place the corresponding item card on the cooldown track at the number indicated in the icon.
If the item does not have that icon, the item functions as a character trait and does not require an action to use.
Items That Have Challenge Actions
Some items provide a way to challenge targets, but doing the use-item action is only considered a challenge action if it has a burst symbol after the item name. Otherwise, it is considered a non-challenge action.
Items in This Game
- Pink Flamingo Mallet (cost 2): Move 1. Challenge 3.
- Green Flamingo Mallet (cost 2, challenge action): Challenge 3. Move the target 1 square.
More Players
Play the game with one or two players per side and with each player controlling at least one character. Each side works like a single player as described in the rules. Players of the same side decide which of their characters takes a turn when it is their side's turn. Characters on the same side are allies just as if they were all controlled by a single player. Players of the same side use the same cooldown track and ability token pool.
Mixing Games
Choose characters, items, and scenarios from any Funkoverse game and mix them up to discover powerful character combinations and to devise new strategies. Pit your collection against your friend's collection to see who can make the best combination.
If you and your opponent have the same game, everyone can play with their favorite characters. If you play with more than one Funkoverse game of the same type, characters with the same name cannot be allies. (The Queen of Hearts cannot ally with another The Queen of Hearts.)
A recommended game of Funkoverse uses three characters and one item per side, but you can experiment with more items and more characters as your collection grows!
Using the Map
The map that comes with this game has the Tea Party on one side and the Croquet Court on the other. Each side is unique, and the position of obstructions changes how games are played.
Obstructions
Obstructions on each side share the same appearance. Other objects on the map are not obstructions. An obstruction on the border between otherwise adjacent squares is a "wall". If an area of the map is fully surrounded by an obstruction, it cannot be entered for any reason.
- On the Tea Party map, an obstruction is a thick black line paired with magenta outer lines, and is a wall.
- On the Croquet Court, an obstruction is a thick black line paired with a magenta outer line. Characters cannot enter the enclosed area.
- The paint brush on the map is not bordered by the lines as in the other examples. It is not an obstruction.
What Your Character Can See
When determining if your character can see a square, draw an imaginary line from the center of your character's square to the center of the square in question. Then, use the following rules:
- Rule 1: If an obstruction interrupts this line, your character cannot see that square.
- Rule 2: If the line passes through any part of a square occupied by a standing rival you can see, your character cannot see past that rival's square.
- Rule 3: If the line passes through any part of a square occupied by an ally, your character can see past that ally's square.
- Rule 4: If the lines passes through where four corners meet, and your opponent's characters occupy one or two of those squares, your character can still see past that corner.
Adjacency
In Funkoverse a square is adjacent if it is straight beside or diagonal to your character and your character can see that square.
Obstructions and Adjacency
If an obstruction is between your character and another square, your character cannot see that square and is therefore not considered adjacent. This includes obstructions on the corner of squares blocking diagonal adjacency.
Adjacency example: Ally A is adjacent to rival Z, but it is not adjacent to rival Y or the rival Basic Character.
(Note: the booklet's diagrams are for reference and may not match the map included in this game.)
Examples of What Your Character Can See
- Ally A and rival Z cannot see each other (rule 1).
- Ally A can see rival Z but not rival Y (rule 1).
- Ally A cannot see ally B because the rival Basic Character is blocking its view (rule 2).
- Ally A can see ally B because rivals Y and Z do not block the sight line that passes through where corners meet (rule 4).
- Rival Z is knocked down, so ally A can see ally B. Ally A cannot see the rival Basic Character because rival Y is blocking its view (rule 2).
- Ally A can see rival Z through the square occupied by ally B (rule 3).
- Ally A can see the rival Basic Character. Rival Z would normally block its view of that square, but in this example it does not because ally A cannot see rival Z (rules 1 and 2).
Moving
When you move something (such as a character or a token), you may move it straight into the next square or diagonally.
Basic Moves
If a character moves by doing a basic action, the character can move up to 2 squares.
Special Moves
If something moves because of an ability, trait, or item, it is a special move. You can move it up to the number of squares specified by the ability, trait, or item.
How to Move Something
When moving something, use the following rules.
- Rule 1: You cannot move things through obstructions.
- Rule 2: You can move something into a square partially occupied by an obstruction but only if the obstruction does not occupy the center of the square.
- Rule 3: If an obstruction is on a corner of a square, you cannot move something diagonally through that corner.
- Rule 4: You can move something through a square occupied by one of your allies.
- Rule 5: You cannot move something through a square occupied by a standing rival.
- Rule 6: You cannot end something's move in a square occupied by an ally or rival.
Moving Examples
- Ally A is in a square that is partially occupied by an obstruction. However, Ally A cannot move through the obstruction (rules 1 and 2).
- Ally A can move through ally B, but not through rival Z (rules 4 and 5).
- Ally A is in a square that is partially occupied by an obstruction. Ally A cannot move diagonally through the obstructed corner (rules 1, 2, and 3).
- Straight moves: Ally A can move 1 or 2 squares, but not to squares occupied by another character or blocked by an obstruction (rules 1 and 6).
- Cannot move: Ally A cannot move because it is blocked by rival Z, the rival Basic Character, and an obstruction (rules 1 and 5).
- Diagonal moves: Ally A can move diagonally to squares not occupied by another character or blocked by an obstruction (rules 3 and 6).
- Moving between rivals: Ally A cannot move diagonally through the corner that is obstructed, but may move between rivals Y and Z, as the corner is not obstructed (rule 3).
- Combining straight and diagonal moves: Ally A can move through squares occupied by ally B (rule 4). Ally A cannot move through an obstruction. Ally A uses two basic move actions to go around it (rule 1).
(Note: the booklet's diagrams are for reference and may not match the map included in this game.)
Challenges
The rules provide many ways to challenge targets. Usually your target is a rival, but you might target other things, such as tokens. Unless a rule says otherwise, you challenge only one target at a time. You cannot challenge an ally.
Basic Challenge
A character doing a basic challenge rolls 2 dice and must be adjacent to their target.
Challenge (Number)
The word "challenge" followed by a number means you challenge an adjacent target, and you roll the number of dice equal to the number that follows "challenge."
Range (Number) Challenge (Number)
The word "range" followed by a number means the target must be within that number of squares. The challenger must be able to see the target. Roll the number of dice equal to the number that follows "challenge."
Defense
The number inside the shield on the target character's card shows how many dice the defender rolls when that target is challenged. Tokens that you can challenge show their defense on the token.
Resolving a Challenge
Declare your target and roll a number of dice as specified by the rules for your challenge. Your opponent then rolls a number of dice equal to the target's defense.
- You want to get more successes than your opponent.
- As the challenger, you get 1 success for each burst symbol and 3 successes for each triple-exclamation symbol.
- Your rival gets 1 success for each shield symbol and 3 successes for each triple-exclamation symbol.
If you have more successes than the defender, your character wins the challenge. If you do not, your character loses the challenge. When you challenge and lose, nothing happens.
Knocked Down
If a character that is standing is challenged and loses, it is knocked down. Tip the character over in the square where the character stood. (When a basic character is knocked down, flip it over in its square so that the "knocked down" side is face up.) A character that is knocked down cannot use actions, but can rally. However, another character can do the assist action to stand that character up. See Assist and Rally (page 6).
Knocked Out
If a character that is knocked down is challenged and loses, it is knocked out. Remove the character from the map and place the character on the 1 of their player's cooldown track. A character that has been knocked out and is on the cooldown track can still be chosen to take a turn and become exhausted; however, they may not do any actions. In some instances, it might be beneficial to delay taking a turn with a character in play; choosing to take a turn and exhaust a knocked-out character allows you to do this.
Multiple Challenges
Some abilities allow a character to challenge more than one target. Declare and resolve each challenge one at a time. Make separate challenge rolls for each target, whether you are challenging multiple targets or a single target more than once. The defender rolls dice to defend for each challenge as it is declared and made.
Example: A Basic Challenge
- Ally A challenges rival Z as a basic action. Rival Z has a defense of 2, so each character rolls two dice.
- Ally A, the challenger, gets 3 successes. Rival Z, the defender, gets 2 successes. Ally A wins the challenge. Rival Z is knocked down.
Example: Knocking Out a Target
- Ally A challenges rival Z with a challenge 3 ability. Ally A rolls 3 dice. Rival Z has a defense of 2, so they roll 2 dice.
- Ally A, the challenger, gets 2 successes. Rival Z, the defender, gets 1 success. Ally A wins the challenge. Rival Z is knocked down.
- Ally B challenges rival Z, who is already knocked down. Ally B gets more successes and wins. Rival Z is knocked out and moves to the 1 of their cooldown track.
Example: A Ranged Challenge
- Ally A uses a range 3, challenge 2 ability, and challenges rival Z, who can be seen and is within 3 squares.
- Ally A rolls 2 dice to challenge. Rival Z has a defense of 2, so they roll 2 dice.
Note: Rival Y is also in range but cannot be challenged because an obstruction blocks ally A from seeing them.
Abilities
When you choose to have a character do an ability action, follow these steps:
- Choose an ability from that character's card.
- Spend an ability token of the appropriate type from your pool to pay the ability's cost, placing it on your cooldown track on the number shown in the ability's icon. If you do not have the appropriate ability token available in your pool, you cannot use the ability.
- Follow the rules of the ability as written on the card.
If the ability has multiple rules, follow the rules in sequence. When ability rules conflict with the rules written in the instructions, the ability rules take precedence.
Ability Types
There are a variety of types of abilities in Funkoverse. The characters in this game use three of the ability types (yellow, red, and blue). Other games have characters that use different combinations of ability types. Each ability type is associated with various qualities:
- Blue: Characters with these abilities exhibit finesse, agility, and coordination. Such abilities often provide ways for characters to be faster or more flexible.
- Red: Characters with these abilities exhibit forcefulness, strength, and fortitude. Such abilities often provide ways for characters to be mighty or more resilient.
- Gray: Characters with these abilities exhibit cunning, ingenuity, and deception. Such abilities often provide ways for characters to trick or inhibit rivals.
- Yellow: Characters with these abilities exhibit leadership, charisma, and willpower. Such abilities often provide ways to bolster allies or give them actions.
Abilities That Are Challenge Actions
Many abilities let you challenge targets, but doing the ability action is only considered a challenge action if it has a burst symbol after the ability name. Otherwise, it is considered a non-challenge action. If there is no possible target, you cannot do a challenge action.
Traits
The rules explained for abilities also apply to traits. However, you do not need to spend an ability token to use a character's trait. Instead, it applies all the time. Unless the trait says otherwise, its rules also work when a character is knocked down or knocked out.
Characters, Items, and Scenarios in This Game
(Card text as shown in the instruction booklet's component and setup illustrations.)
Alice (defense 2)
- Curiouser and Curiouser (cost 1): Choose a token within 3 squares that Alice can see and place her adjacent to it.
- Grow Larger (cost 3): Do a challenge 2 to each adjacent rival. Push each adjacent rival and token 1 square.
- Grow Smaller (cost 2): Move 2. This may move Alice through rivals and obstructions.
- Trait - Follow the White Rabbit: When Alice becomes exhausted, you may place the White Rabbit minion token in a square Alice can see, then Alice may do a move 1 towards the White Rabbit.
Queen of Hearts (defense 2)
- Off With Their Heads! (cost 3, challenge action): Challenge 4. If the Queen is angry decrease this ability cost by 2.
- All Ways Are My Ways (cost 2): Move 1. An ally does a move 2, then if the Queen is angry they do a challenge 2.
- Her Imperial Majesty (cost 2): Choose a rival or token the Queen can see within 2 squares, move them 2 squares.
- Trait - Get to the Part Where I Lose My Temper: At the start of the game, give the Queen the Temper status card. After a rival the Queen can see does an interact or assist, place the Temper status card on the 2 of your cooldown track and do a basic move or challenge.
- Temper (status card): While the Temper status card is on your cooldown track, the Queen is angry. This status cannot be discarded.
Scenario: Territory (Tea Party map)
Oh no! Someone planted white roses in the red rose garden! Quick, take control of the area before things get out of hand.
- Setup: See Scenario Setup in the instructions. Ignore this when playing with two characters per side. (Disclosure: this card is partly hidden behind the Croquet card in the booklet's illustration; the Setup text is read from the booklet's text layer and may be incomplete.)
- Gaining Points:
- If one or more of your characters is in the scoring area at the end of a round, gain 1 point.
- If you have the most characters in the scoring area at the end of a round, gain an extra point.
- If you knock out a rival, gain 1 point.
- If you interact with a point marker, gain 1 point. See Point Markers in the instructions.
- Winning: If playing with two characters per side, gain 6 points to win. If playing with three characters per side, gain 10 points to win.
Scenario: Croquet (Croquet Court map)
You have been invited to play a game of croquet with your rivals. Unfortunately, it looks like the match may not be as friendly as you thought it would be...
- Setup: See Scenario Setup in the instructions. Each player takes their check marker, then place the ball tokens and wicket markers as shown.
- Rules:
- Characters may challenge their team's ball. Push the ball in a straight line a number of squares equal to the successes rolled. You may not choose to move less than the full amount of successes rolled.
- If a ball would enter a square with an obstruction, then end its movement.
- If a ball would enter a square with another ball or character, end its movement. Then move the other ball or character the remaining distance in the same direction.
- Balls may not be removed from the map for any reason.
- If your ball moves through a wicket without your check marker, place your check marker on that wicket.
- Gaining Points:
- If you place your check marker on a wicket, gain 1 point.
- If you interact with a point marker, gain 1 point. See Point Markers in the instructions.
- If you knock out a rival, gain 1 point.
- Winning: If playing with two characters per side, gain 6 points to win. If playing with three characters per side, gain 10 points to win.
Glossary
This glossary includes terms used throughout all Funkoverse games. Some terms do not apply to characters in this game (AIW100). Terms not used in this game are marked with an asterisk (*).
- *ADDING RANGE: When a rule adds range, the squares you count for a ranged challenge increase by the stated amount. If you add range to a challenge that is not ranged, it becomes a ranged challenge with a range equal to the number stated plus 1.
- ALLY: The characters and minion tokens you control are allies. If you play with three or four players, characters and minion tokens controlled by players of the same side are allies to each other.
- AWAY: Some abilities specify moving something away from something else (sometimes written as "push"). When moving something away from something else, you move it up to the stated number of squares according to the Moving rules (page 12), except that each square to which you move it must be farther away.
- CHALLENGE ACTIONS: An action is considered a challenge action if it is a basic challenge or it has a burst symbol after the ability or item name.
- CHALLENGING A TOKEN OR MINION TOKEN: If a token (including minion tokens) has a defense, then it can be challenged. For the purposes of challenges treat the token as a rival. Tokens are never knocked down or knocked out. Instead, remove the token from the map when it loses a challenge. Tokens do not award points when they are removed.
- *CONTROLLING A RIVAL: A rule might specify that you control a rival. When you have that rival do actions, treat the rival as allied to your character rather than your opponent's character when doing moves and challenges and when determining what the rival can see.
- COST: When a character does an ability, the cost is the number in the ability icon next to that ability's name. This shows where on the cooldown track to place the matching ability token.
- DECREASING AN ABILITY COST: A rule might decrease the cost of an ability. When that happens, place the ability token on the number of the cooldown track that corresponds with the new number. If the cost is decreased below 1, an ability token is no longer required to use the ability.
- *DISCARD A STATUS CARD: When you discard a status card, it is taken from the character it was given to and becomes available to play again.
- *INCREASING AN ABILITY COST: A rule might increase the cost of an ability. When that happens, place the ability token on the number of the cooldown track that corresponds with the new number. If the cost is increased above 4, place the token on the 4 instead.