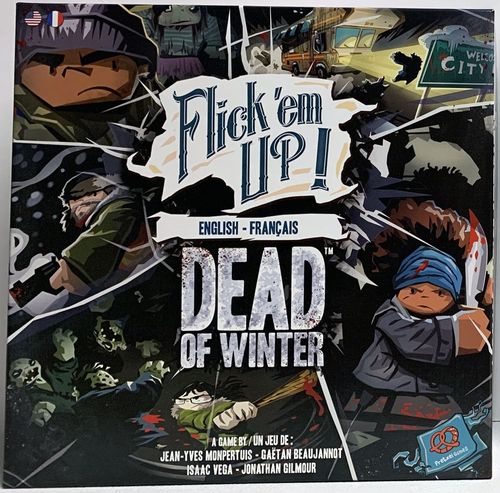
Flick 'em Up!: Dead of Winter
Flick 'em Up!: Dead of Winter Rulebook
Table of Contents
Table of Contents
- Material
- Assembly
- The World has changed!
- Overview of a game
- The flick
- Using a weapon
- Take / Drop off
- Zombies' reaction!
- Zombie Rush
- End of the round
- Game end
- Glossary
- The Scenarios
- Scenario 1 — Get Outta Town!
- Scenario 2 — They're everywhere!
- Scenario 3 — Tend to the Wounded
- Scenario 4 — Starvation
- Scenario 5 — Separated
- Scenario 6 — Tensions Rise!
- Scenario 7 — Cornering the Market
- Scenario 8 — Strength in Numbers
- Scenario 9 — Home
- Scenario 10 — At Each Other's Throats
Material
11 Survivor figures (with stickers)
11 back packs (with stickers)
11 SURVIVOR BOARDS
18 zombies
6 buildings
- 1 Grocery store
- 1 Police station
- 1 Library
- 1 Gas station
- 1 Hospital
- 1 School
4 vehicles
- 1 RV
- 1 Car
- 1 Pickup truck
- 1 Ice cream truck
various tools
- 1 shotgun template
- 1 sniper RIFLE template
- RIFLE
- 1 Acid
1 Zombie Tower (in 3 parts + 8 set of screws), made up of a zombie bin, a roof, and roof support
6 INVASION MARKERS (6 stands)
1 TIME MARKER
2 barricades
3 STREET lamps
4 city limits (in 2 parts each)
63 CARDS
- 7 FIGHT cards
- 30 Crossroads cards
- 20 Objective cards
- 6 Betrayer's Objective cards
102 Tokens
- 40 life
- 8 foods
- 8 fuel
- 8 medicine
- 6 "not allowed"
- 4 survivors
- 4 guns
- 4 zombies
- 2 baseball bats
- 2 knives
- 2 shot guns
- 2 snipers
- 2 extra actions
- 2 flares
- 1 pretzel
- 1 key
- 6 crossroads
37 Other pieces
- 14 support blocks
- 3 barrels (with stickers)
- 3 boxes (with stickers)
- 1 white movement disc (with sticker)
- 2 black bullets
- 6 small white bullets
- 1 baseball bat
- 1 knife
Assembly
The rulebook's assembly page is presented entirely as diagrams. It illustrates, without accompanying text:
- Zombies — stickers on both sides of the zombie figures.
- Movement disc — one sticker on one side.
- Barrels — one sticker per barrel.
- Survivors — (A) sticker on one side, (B) backpack on the other side. Note: each survivor is numbered. Attach the corresponding backpack.
- Boxes — stickers on each side, one number per box.
- Vehicles (except RV) — slot into a plastic stand.
- Buildings and RV — add 2 support blocks.
- City limits — assemble the two parts.
- City lamps — slot into a plastic stand.
- Zombie Tower — (A) build the tower, (B) build the bin, (C) assemble A + B.
The World has changed!
It's high time you got used to it. The world you once knew is no more. All that's left is a sprawling wasteland ravaged by hordes of zombies. You can run. You can even hide. But the only way to survive this mess and create a new future for the human race is to face the problem head on. You're going to have to take chances and trust your instinct. Your survival depends on it!
Before playing
Before playing, you must choose:
- A playing surface
- A scenario
- Your teams (scenarios 6 - 10)
Playing surface
Flick'em Up! Dead of Winter can be played on most flat surfaces, big or small: table, floor, etc. The surface you choose must allow the pieces to slide well and be accessible from all sides. The surface must have sufficient space to place all the necessary pieces.
The 4 city limits markers define the space in which the game is played, otherwise referred to as the city.
Choose a scenario
You will find a booklet of 10 scenarios, each of which provides an original adventure and a new city for you to explore.
Each scenario is explained in detail, including any additional rules required to enjoy the adventure.
Survivors
Each survivor has their own board which matches their plastic figure and backpack number. This board displays the contents of their backpack, otherwise known as their inventory. This inventory is divided into a number of spaces.
- Each survivor has a default weapon which may not be covered, unless a scenario or Crossroads card instructs the player to do so.
- Each survivor's life points are stacked on the top right space of their inventory.
- Each survivor has 2 additional inventory spaces they may use to store other tokens, such as weapons, scenario tokens, etc.
The illustrated inventory shows: the survivor's life point space, weapon space, and 2 storage spaces.
Place the survivor boards in a group outside of the city limits. If there is more than one team of survivors, place the survivor boards in separate groups, ideally on opposite sides of the city.
1 TEAM or 2 TEAMS (Team A vs. Team B) — the survivor boards are grouped accordingly.
Note: If you are unable to see a survivor's backpack (fallen / in a building), turn or flip the survivor so that their backpack is visible.
Overview of a game
Rounds
Each game of Flick'em Up! Dead of Winter consists of a number of rounds, depending on the chosen scenario.
Each round represents half a day (either day or night), and is tracked on the camper's awning. Days are blue and Nights are black.
Each round consists of a number of turns. Each turn, an available survivor will be used.
A turn:
- Use an available survivor belonging to your team (p. 6).
- Execute the zombies' reaction (p.10).
When no available survivors remain, the round ends. Prepare for a new round (p. 11).
Backpacks
Each survivor has their own rotating backpack which indicates whether or not the survivor is available to be used in the current round.
A survivor is available to be used when the color on the top of their backpack matches the current round.
The illustration shows a survivor's backpack BEFORE and AFTER being used — it is rotated to show that the survivor is no longer available.
Using a survivor
The active player chooses an available survivor and stands it up if it is fallen. The chosen survivor is now the active survivor.
The active survivor may perform up to 2 of the following actions:
- Move
- Use a weapon
- Take / Drop Off
A player may choose to perform the same action twice. It is also possible for the player to choose to perform only one action, or even none at all.
Regardless of how many actions the player performs, once their turn is complete, they must rotate the backpack of the used survivor. This survivor is no longer available for this round.
Losing life
A survivor may loose life tokens during the game for different reasons (like in a Zombie Rush p. 11).
When a survivor loses their last life token:
- The survivor is removed from the game.
- Any tokens on the survivor's board are placed face up in the grocery store.
The flick
Most of your actions involve flicking, as that is how survivors both move and shoot.
A 'flick' is performed as illustrated below, with a finger but without the resistance of your thumb (weaker, but more controlled than a standard 'flick').
Move
Once a player has chosen to move a survivor, he replaces the survivor figure with the movement disc (line on top). The player then attempts the movement by flicking the movement disc (as described above).
If the disc:
A does not touch any object, figure, or building, or leave the city limits:
- The movement is successful. The survivor figure replaces the movement disc on the table.
B touches any object, figure, or building, or leaves the city limits:
- The movement is unsuccessful.
- The survivor figure is returned to the position it occupied before the movement flick.
If moving is the player's last action, the survivor must be oriented in the direction of the movement disc's orientation line. Otherwise, the survivor may be oriented in the direction of the player's choice.
Any object disturbed by the movement disc are returned to the position they occupied before the movement flick.
Too close!
Any survivor figure standing next to a standing zombie (within the space of a movement disc) immediately loses 1 life token and is placed fallen on the table.
Exception: The active survivor is immune to this rule during their turn (e.g.: between two actions).
Entering and exiting a building
To enter a building, a player must flick the movement disc between the support blocks of the building they wish to enter during a movement flick.
A building may only be entered from the front.
A building is successfully entered when any portion of the movement disc has entered the building's door.
A building's door is an invisible line that is flush with the front facing edges of that building's support blocks.
To mark that a survivor has entered a building, it's figure is placed on either of that building's support blocks.
To exit a building, a player must place the movement disc behind the building, and flick the movement disc through the building's door.
A building is successfully exited when the entirety of the movement disc has exited the building's door.
All movement rules apply (e.g. touching objects, figures, etc.) when entering or exiting a building, with one exception: touching the support block of the building the movement disc enters or exits is allowed.
Note: If a building's entrance is blocked by an object, that object may be temporarily set aside during an attempt to enter or exit the building.
Note: The Camper follows the same rules as buildings. Survivors may enter and exit the Camper as they would any other building.
Using a weapon
Each survivor starts each scenario with at least 1 weapon. It is possible to gain additional weapons during the game.
Here are the 3 most common weapons:
Baseball bat
The baseball bat can be used to quietly knock over a zombie or enemy survivor while moving. It does not cause figures it touches to become wounded, however it does make less noise than a gun (explained later).
To use the baseball bat, the player replaces their survivor figure with the baseball bat, flat on the table, pointed in the direction of their choice. Then, the player flicks the knob (bottom of the handle) of the baseball bat towards the target of their choice.
Note: The knob may be flicked so that the bat moves straight forward or so that it spins as it moves.
If the bat:
A first touches a zombie or enemy survivor:
- The movement is successful, regardless of whether or not the touched figure falls.
- All other components that fell as a result of the flick are returned to standing.
B first touches an object, building, or friendly survivor:
- The movement is unsuccessful, and the active survivor is returned to the position it occupied before the flick.
- All components that fell as a result of the flick are returned to standing.
If using the baseball bat was a survivor's last action, the survivor must be oriented in the direction of the bat's length. Otherwise, the survivor may be oriented in the direction of the active player's choice.
Note: Causing a zombie to fall is advantageous, as it will prevent it from participating in a future Zombie Rush. However, causing an enemy survivor to fall only prevents it from being wounded.
Entering or exiting a building
A player may enter/exit a building by using a baseball bat. The rules for doing so are identical to those for using a movement disc.
Knife
The effect of throwing a knife is almost identical to that of firing a gun. However, instead of flicking a bullet, you flick the knife. It also makes less noise than a gun (explained later).
To use a knife, the player stands the knife upright to the left or right of the active survivor at a distance of one bullet.
The player then flicks the knife at the target of their choice.
The rules for throwing a knife are otherwise identical to firing a gun (see page 8).
Short distance kill
Any weapon can be used at short distance to kill a zombie. If the active survivor is next to a zombie, you may spend 1 action to kill the zombie without flicking a weapon.
Note: This counts as using the weapon, for the purpose of determining the zombies' reaction (page 10).
Gun
To fire a gun, a player places a bullet (black disc) to the left or right of the active survivor, at a distance of one bullet.
The player then flicks the bullet at the target of their choice (as described above).
If the bullet:
A First touches an object, a building, a fallen figure, or a standing figure that does not fall:
- All figures and objects remain in their new position.
- All objects that fell as the result of the flick are returned to a standing position.
B First touches a figure and causes it to fall - the figure is wounded:
- If it is a zombie, it is placed in the zombie bin.
- If it is a survivor, its remains fallen and loses 1 life token.
- All other figures and objects that fell as a result of the bullet are not affected. They remain in their new position and are returned to standing.
C Touches nothing:
- Nothing happens. The action is lost.
Shooting with 2 guns
If a survivor has 2 or more guns, they may shoot 2 bullets with the same action. To do so, the player places a bullet on each side of the survivor and flicks them one after the other, according to the rules above. The two bullets may be shot at the same or different targets.
Note: A survivor with 3 guns may not shoot 3 times.
Shooting from inside a building
A survivor may fire a gun from inside of a building at targets outside of the building. To do so, the player places the bullet behind the building and fires it between the 2 support blocks of the building. All rules regarding the shoot action apply in the same manner as described above.
Note: A survivor may not fire a gun from inside of a building occupied by one or more zombies.
Take / Drop off
When inside of a building, the active survivor may spend an action to take and/or drop off a token (weapon, food, fuel, medicine, etc.).
Take: Choose a token on the building's support block and add it to the active survivor's inventory.
Drop off: Remove a token in the active survivor's inventory and place it on the building's support block.
Note: You may exchange tokens by taking a token and dropping off a token in a single action.
When a survivor takes a face down token, they look at it and decide whether to add it to their inventory or to leave it off face up in the building. In either case, only one action is spent.
Zombies' reaction!
Once a player has completed all the actions they wish to perform with their chosen survivor, they must execute the zombies' reaction, if any.
The zombies' reaction depends on the loudest type of noise made by the survivor's actions. Only one of the following zombie reactions should be executed. Determine the survivor's loudest action and execute the corresponding zombie reaction.
| Survivor action | Zombie reaction |
|---|---|
| If the survivor made a LOUD noise (whether successful or unsuccessful): Fired any type of gun | Turn the closest standing zombie, if any, to face the active survivor. Place the zombie tower directly behind that zombie. Remove that zombie, plus 2 more (the 2 standing zombies closest to the active survivor, if any) for use in the Zombie Rush. Stand all zombies remaining in the city. Execute the Zombie Rush (see page 11). |
| If the survivor made a QUIET noise (whether successful or unsuccessful): Used a non-gun weapon, or Moved — and the zombie closest to the active survivor is fallen | Stand that zombie. (no Zombie Rush) |
| If the survivor made a QUIET noise (whether successful or unsuccessful): Used a non-gun weapon, or Moved — and the zombie closest to the active survivor is standing | Turn the closest standing zombie to face the active survivor and place the zombie tower directly behind that zombie. Remove that zombie from the city for use in the Zombie Rush. Execute the Zombie Rush (see page 11). |
| If the survivor was SILENT: did not perform any movement or weapon actions. | None |
IMPORTANT:
- The zombie bin always stays in the position illustrated in the scenario. This component doesn't move with the zombie tower.
- The zombie tower is designed to be placed over top of most game components without needing to move them. However, if a component (building, etc.) would block the tower, simply set that component to the side for the duration of the Zombie Rush.
- If there is a building between the newly positioned zombie tower and the active survivor, rotate the tower so that its exit faces the side of the building closest to the active survivor.
Zombie Rush
Follow these 3 steps to perform the rush.
- Ensure the roof support is in place.
- Pick up the zombie(s) being used for the rush and place it on the roof, according to its number. If the number is occupied, place it on the number of your choice.
- Remove the roof to execute the Zombie Rush.
After the Zombie Rush:
- Each survivor that fell as a result of the Zombie Rush loses 1 life token, regardless of which figure or object caused them to fall.
- All objects that fell during the Rush must be returned to standing, in their new position.
- All zombies simply remain in their new position.
- All figures pushed outside of the city must be placed just inside of the city limits (approximately where they left the city) in a fallen position.
- Finally, return the zombie tower to its home on the top of zombie bin.
Zombies entering a building
It is possible for zombies to enter a building during the game:
A zombie may only enter a building if both of the following are true:
- At least one survivor or token is inside.
- Fewer than 2 zombies are inside.
A zombie enters a building when:
- Any part of a fallen or standing zombie has entered a building's door.
- A standing zombie is within a movement disc's width of a building's support block (i.e. a movement disc will not fit between the zombie and a support block).
End of the round
When there are no more survivors whose backpack color matches the current round color, the round ends and a new round begins.
To prepare for the next round, perform the following:
- Move the day marker forward one space on the RV's awning. If the marker reaches the skull, the game ends. Otherwise, proceed to step 2.
- Stand all zombies currently in play.
- Add new zombies to the city (as described below).
A new horde arrives!
Before each day begins, a number of zombies equal to the zombie bin's daytime invasion marker. Likewise, before each nighttime invasion marker, a number of zombies equal to the night token must be added to the city. These new zombies will be arrive by way of a Zombie Rush.
To add new zombies to the game:
- Ensure the zombie tower is in its home position on top of the zombie bin.
- Take a number of zombies equal to the corresponding invasion marker on city. These new zombies will be arrive by way of a Zombie Rush.
- Execute the Zombie Rush.
If there are not enough zombies in the zombie bin to add the required number of zombies, the game ends immediately. The city has been overrun and the survivors have lost.
Game end
The game ends when:
- A group of survivors completes their objective – that group of survivors wins!
- A certain number of survivors are dead (scenario specific) – the survivors lose.
- There are not enough zombies in the zombie bin to add the required number of zombies – the survivors lose.
- The round marker reaches the skull - consult the scenario to find out who wins/loses.
Glossary
Standing: Any figure that is on their feet.
Fallen: Any figure that is lying on its side on the table.
In the city: Any and all space within the designated city limits.
In a building: Any component on the support blocks of a building is IN that building.
Active player: The player whose turn it is.
Active survivor: The survivor being used by the active player.
Door: An invisible line flush with the front facing edges of a building's support blocks.
Figure: All plastic figures (survivors, zombies).
Object: Obstacle components such as barrels, cars, city lights, boxes, etc.
Friendly survivor: A survivor belonging to the same team.
Next to: Components less than the width of movement disc apart are considered NEXT TO one another.
The Scenarios
This section of the booklet contains 10 original scenarios to play and replay as written, or modified to include your own personal touch.
If this is your first time in this zombie infested world, we suggest enjoying the scenarios in numerical order.
If you're an experienced survivor, we encourage you to use the various components of Flick 'em up! Dead of Winter to modify the existing scenarios and to create your own so that you can share them with others!
Modifying a scenario is simple. For example, you can replay a scenario and change the following:
- use a different team of survivors
- give special powers to some or all of the survivors (flip their survivor's tile)
We invite you to share your scenarios, cities, and other ideas with us at this address: [email protected].
Each scenario includes the following information:
- The storyline
- Which survivors to use
- The number of life tokens
- The objective(s)
- A map of the city
- Setup instructions
- Where the day/night marker begins
- Game end conditions
- Additional rules for the scenario
Pay special attention to the additional rules introduced in these scenarios, as they add to those provided in the rule book. We also suggest playing the scenarios in order, as the later scenarios use rules that are introduced in earlier ones. Some additional rules have a symbol associated with them so you can easily note whether or not that rule is in effect in a later scenario.
The Set Up page that follows illustrates, in icon form, each of the 6 buildings, the RV, ice cream truck, truck, car, and zombie tower, along with the icons used throughout the scenario pages: materials position, new rules icons, backpack starting position, round marker starting position, zombie/survival markers face down, city limits, street lamps, barrel, box, barricades, on the support block, in front of the building, fuel, foods, guns, survivors, knives, crossroads, key, zombie, medicine, life, snipers, "not allowed", baseball bats, shot guns, pretzel, number of zombies added each day/night, and number of zombies that begin in the zombie bin.
Cooperative scenarios
- S1 - Get Outta Town! (1 to 10 players) — p. 16
- S2 - They're Everywhere! (1 to 10 players) — p. 18
- S3 - Tend to the Wounded (1 to 10 players) — p. 20
- S4 - Starvation (1 to 10 players) — p. 22
- S5 - Separated (1 to 10 players) — p. 24
Competitive scenarios
- S6 - Tensions Rise! (2 to 10 players) — p. 26
- S7 - Cornering the Market (2 to 10 players) — p. 28
- S8 - Strength in Numbers (2 to 10 players) — p. 30
- S9 - Home (6, 8 or 10 players) — p. 32
- S10 - At Each Other's Throats (6, 8 or 10 players) — p. 34
Ways to play
Flick'em Up! Dead of Winter may be played by 1 to 10 players.
There are 2 different ways to play:
COOPERATIVE: All players belong to the same group of survivors. The players must determine the turn order: first player, second player, etc. On a player's turn, they may choose to use any available survivor to execute their turn. Once each player has had a turn, play continues from the beginning of the turn order (i.e.: the first player).
COMPETITIVE (Vs.): Each team must determine their own team's turn order. The first player of the team holding the pretzel takes the first turn of the game, followed by the first player of the opposing team. Turns alternate between teams, with each team following their own team's turn order. Players are divided into 2 or more teams. The number of players per team does not matter.
Before beginning the game, players must determine their turn order, as described above.
The survivor whose inventory holds the pretzel must be used first in each round.
The pretzel may change hands from one survivor to another during the game.
If the survivor holding the pretzel loses their last life token, the pretzel is given to the closest remaining survivor (of either team).
Note: Teams with different numbers of players will restart their turn order at different times. Example: Team A has 4 players and Team B has 3 players. Each new round is started by the team holding the pretzel.
Scenario 1 — Get Outta Town!
1 - 10 players
Your group of survivors has to leave the city as quickly as possible!
The zombies in the streets are few for the moment, but your scouts have discovered a horde of them are headed for your camp. You're going to have to clear a path so that you can drive the RV straight outta town.
OBJECTIVE
Have a survivor in the RV and have 3 or fewer zombies in the city.
SPECIAL RULES
Survivors can not enter buildings. Zombies can not enter buildings or the RV.
The first survivor to enter the RV becomes the driver. The driver is not available to be used for the remainder of the scenario.
INSTANT DEFEAT
If a zombie touches the RV or either of its support blocks, the survivors lose immediately.
GAME END
The survivors win if they complete their objective. The survivors lose if 3 or more survivors are dead or if the round marker reaches the skull.
SET UP
The scenario map lays out the city with the Police station, Library, Hospital, RV, School, Ice cream truck, Truck, Car, Gas station, Zombie Tower, and Grocery store, along with markers for the round starting position, zombies beginning in the zombie bin, and zombies added each day/night.
Survivors: 2 Anita, 2 John, 2 Thomas, 2 Loretta, 2 Kevin.
New Rules
SHOTGUN
When shooting with the shotgun, the player must use the shotgun barrel.
To use a shotgun:
- Place the shotgun template next to the active survivor, on their left or right, and orient it in the direction you wish to shoot.
- Place 4 shotgun bullets (1/2 the size of the normal bullets) in the barrel so that they are not perfectly aligned with each other (see illustration).
- Hold the template and shoot!
Injuries:
- Any figure (zombie or survivor) knocked over by a shotgun bullet is wounded, even those hit by a ricochet.
SNIPER RIFLE
Like the regular gun, but with better aim. Perfect for shooting at distant targets.
To use a sniper rifle:
- Place the sniper rifle template next to the active survivor, on their left or right, and orient it in the direction you wish to shoot.
- Place a bullet in the template, hold the template, and shoot!
Scenario 2 — They're everywhere!
1 - 10 players
You've run out of resources. You're going to have send a group of survivors to explore the surrounding area in order to secure food and fuel.
It's not going to be easy. The city is crawling with zombies. But as Rosa always says, "We can either die crying or die trying!".
OBJECTIVE
Have 2 gas and 2 food in the RV.
SET UP
Shuffle the following tokens face down: 1 baseball bat, 1 knife, 1 sniper, 1 shot gun.
Place 1 face down token in each of the following buildings: School, Hospital, Police Station, Library.
GAME END
The survivors win if they complete their objective. The survivors lose if 3 or more survivors are dead or if the round marker reaches the skull.
SET UP (map)
The scenario map lays out the city with the Zombie Tower, School, Library, Ice cream truck, Gas station, Police station, Car, Truck, Grocery store, Hospital, and RV.
Survivors: 3 Elijah, 3 Lily, 3 Mike, 2 Rosa, 3 John.
New Rules
FIGHT: SURVIVOR VS ZOMBIE
A fight between a survivor and a zombie happens when:
- A survivor enters a building containing at least one zombie (fallen zombies stand up when a survivor enters the building they occupy).
- A survivor in a building containing at least one standing zombie wishes to perform an action (take an object, move, etc.).
FIGHT
Stage the fight outside of the city limits:
- Place the survivor and the zombies facing each other, 75-90 cm apart.
- Shuffle the zombie fight cards to create a face down movement deck.
- The survivor chooses a weapon to use during the fight (the rules for resolving fight depend on the type of weapon the survivor uses).
USING A GUN OR KNIFE:
Each round of a fight consists of two steps: the survivor attacks, then the zombie moves.
- THE SURVIVOR ATTACKS: Flick the bullet or knife at the zombie.
If the flicked weapon causes the zombie to fall:
- The zombie is returned to the zombie bin, and the fight ends immediately. Otherwise…
- THE ZOMBIE MOVES: Reveal the top card of the fight deck, place it in front of the zombie, and execute the corresponding action.
WALK: Move the zombie to the opposite end of the card. The survivor shoots again.
ATTACK: The fight ends immediately. The survivor loses 1 life token and may not perform any further actions this turn.
USING A BASEBALL BAT:
Place the baseball bat on one side of the table, and the zombie on the opposite side.
When using the baseball bat, each round of a zombie attack consists of one of two actions: Wait OR Attack the zombie.
- WAIT: Reveal the top card of the fight deck, place it in front of the zombie, and execute the corresponding action.
WALK: Move the zombie to the opposite end of the card. The survivor chooses to Wait or Attack the zombie.
ATTACK: The fight ends immediately. The survivor loses 1 life token and may not perform any further actions this turn.
- ATTACK THE ZOMBIE: Flick the baseball bat at the zombie.
If the zombie falls, place the fallen zombie on one of the building's support blocks. The zombie attack ends immediately.
Otherwise, the survivor falls and loses 1 life token.
2 VS. 1
The above rules apply. Place the 2 survivors or 2 zombies side by side, at least 10cm apart.
Additional rules:
- A pair of zombies walk together. Each movement card indicates the action of both zombies.
- Survivors use their weapons one after the other.
- The fight continues until only survivors or zombies are left standing.
If you fight 2 zombies and only have a baseball bat... good luck!
Scenario 3 — Tend to the Wounded
1 - 10 players
You can hear a fellow survivor in distress! But where are the shouts coming from? It's hard to know for sure given the chaos in the streets. Your group has launched a rescue operation.
Quickly - find the wounded survivor and bring her to what remains of the hospital. It's not what it used to be, but it should have everything you need to tend to the wounded… if you can find her in time.
OBJECTIVE
Escort the wounded survivor to the Hospital with no zombies inside.
SET UP
Shuffle the following tokens face down: 1 survivor token, 1 knife, 2 medicine, 2 baseball bats, 2 shot guns.
Place 1 token face down under each vehicle. Place 1 token face down in each building except the Hospital.
SPECIAL RULE
The wounded survivor, Anita, cries in pain as you escort her through the streets. Each action performed by the survivor escorting Anita is considered to be a LOUD noise when determining the zombies' reaction. Anita, the wounded survivor, has only 2 life tokens.
GAME END
The survivors win if they complete their objective. The survivors lose if Anita dies or if the round marker reaches the skull.
SET UP (map)
The scenario map lays out the city with the Gas station, School, Ice cream truck, Grocery store, Car, Library, Truck, Hospital, Police station, RV, and Zombie Tower.
Survivors: 3 Gabriel, 3 Mike, 3 Olivia, 3 Thomas, 3 Kevin.
Special Rules
RESCUING ANITA
When a survivor reveals the survivor token, they immediately become Anita's escort. Place the revealed token next to the survivor's name on their survivor board. Place Anita on the building's support block with her escort.
TAKE, DROP, EXCHANGE IN THE CITY (VEHICLES, BARRELS, BOXES, ETC.)
A survivor may perform a take, drop, or exchange action to move tokens to or from an object (vehicle, barrel, box, etc.) in the city. To do so, the survivor must be within a movement disc's width of the object they wish to interact with. The rules for doing so are otherwise identical to the rules for Take / Drop / Exchange.
New Rules
RESCUED FIGURE
A rescued figure moves with its escort. While in the streets, the rescued figure must be positioned within a movement disc's width of its escort at all times. As such, after the escort completes a move action, the rescued figure must be repositioned. If the escort enters a building, Anita is placed in the building, too.
If the escort falls for any reason, it and the rescued figure become separated. The nearest standing survivor becomes the new escort. Reposition the rescued figure next to its new escort, and move the survivor token to the new escort's survivor board. If there is no standing survivor in the rescued figure's vicinity (the street, same building, etc.), the rescued figure remains in its position, and the survivor token is placed to the side for now. The next survivor to end its movement next to the rescued figure becomes its new escort.
Scenario 4 — Starvation
1 - 10 players
There is nothing to eat, and morale is the lowest it's ever been. But, you may have gotten lucky. Rumor has it that the Grocery store in the next town over still has plenty of canned food. The trouble is getting to it, as the shop seems to have been boarded up. Those barricades were likely meant to keep the zombies at bay, but now they're just keeping you from eating. One thing is clear, if you don't eat by nightfall, you won't be able to fend off the hordes, and you'll become food yourself.
OBJECTIVE
Bring 4 food to the RV.
SET UP
Place 2 barricades in front of the Grocery store's door and 4 food tokens in the Grocery store.
Shuffle the following markers face down: 2 "not allowed", 1 knife, 1 medicine, 1 baseball bat.
Place 1 face down in each building, except the Grocery store.
SPECIAL RULE
When the round marker reaches 2 and 1, the group must decide to eat or go hungry. To eat, discard a food token from one of the survivor's inventories. If you are unable to do so, or choose not to, the group goes hungry: each survivor loses 1 life token.
GAME END
The survivors win if they complete their objective. The survivors lose if 3 or more survivors are dead or if the round marker reaches the skull.
SET UP (map)
The scenario map lays out the city with the Library, RV, Gas station, Hospital, Truck, Zombie Tower, Car, School, Police station, and Grocery store (with 4 barricade markers on it).
Survivors: 3 Elijah, 3 Lily, 3 Rosa, 3 Loretta, 3 John.
New Rules
BARRICADES
A barricaded building can not be entered. A building is considered barricaded as long as one or more barricade tokens block any portion of the building's entrance.
Players may attempt to remove barricades from play by using the move or use a weapon actions to flick various discs and weapons at the barricade tokens.
Barricade tokens are removed from the game once they no longer block the entrance (i.e.: no portion of the barricade token occupies the space between the building's support blocks).
If a movement disc or baseball bat causes the last of a building's barricades to removed, the active survivor enters the building. Otherwise, the survivor is returned to the spot they occupied before the flick, as normal.
Any action where a flicked component touches a barricade token is considered to have made a LOUD noise.
Exception: You may not attempt to remove barricades from behind a building.
Scenario 5 — Separated
1 - 10 players
It's been days now since anyone in the group last saw a zombie. It's an unfamiliar peace that lets you feel relaxed for the first time in months.
But when the group's mood lifts, its guard begins to fall. You and the others crack jokes while searching for fuel and other supplies in a small, but seemingly deserted town. But it's far from deserted. Your carelessness allows a horde of zombies to separate the group, and you're brought crashing back to reality. Get the fuel you need and regroup with the others before it's too late.
OBJECTIVE
Find the 2 separated survivors and have 2 fuel in the RV.
SET UP
Shuffle the following tokens face down: 2 survivor tokens, 2 fuel, 5 crossroads, 1 knife, 1 baseball bat, 1 shot gun.
Place 2 face down tokens in each building.
SPECIAL RULE
When you take a survivor token, immediately add that survivor to your team. Place the survivor's figure in the building in which the token was found. New survivors start with 2 life tokens.
GAME END
The survivors win if they complete their objective. The survivors lose if 2 or more survivors are dead or if the round marker reaches the skull.
SET UP (map)
The scenario map lays out the city with the Grocery store, Library, RV, Car, Police station, Ice cream truck, Truck, Zombie Tower, Hospital, Gas station, and School. Found survivors start with 2 life points.
Survivors: 2 Anita, 2 Gabriel, 2 Thomas, 2 Kevin.
New Rules
CROSSROADS
Shuffle the Crossroads cards and place them outside of the city.
When a survivor take a Crossroads token he immediately reveals it and draws a Crossroads card and reads it aloud. The player must execute the effect of the card, if possible.
When a card mentions "the survivor", the effect applies to the active survivor. When a card mentions "a survivor", the effect applies to any survivor who matches the conditions listed on the card.
When a crossroad card mentions NEW zombies, those zombies must be taken from the game box, if possible. If more zombies are required than those left in the game box, take zombies from the zombie bin to fulfill the requirement.
Scenario 6 — Tensions Rise!
Vs. 2-10 players
For some time now, the group has lived in relative comfort in an established colony. Regular trips into the neighboring cities provided the colony with all the supplies it needed for the group to survive. Until now. Resources have become scarce, and rising tension regarding the group's next move has splintered the group into two. Not only that, the zombies have found a way into the colony. Only one of the groups is driving out of here alive. Now where the heck did we put the keys to the RV?
OBJECTIVE FOR BOTH GROUPS
Have at least 2 of your survivors, the key, and at least 1 fuel in the RV.
SET UP
Shuffle the following 9 tokens face down: 1 key, 3 fuel, 2 crossroads, 3 shot guns.
Place 2 face down tokens in each of these buildings: Gas Station, Grocery, School. Place 1 face down token in each of these buildings: Police Station, Library, Hospital.
SPECIAL RULE
When taken, the key, fuel, and X tokens are placed face down in survivors' inventories, in order to be kept secret from the opposing team. Crossroads tokens are immediately revealed as normal.
GAME END
A team of survivors wins if they complete their objective. Both teams lose if the round marker reaches the skull.
SET UP (map)
The scenario map lays out the city with the Library, Zombie Tower, Police station, RV, Gas station, Ice cream truck, Truck, School, Hospital, Car, and Grocery store.
Team A survivors: 3 Elijah, 3 Gabriel, 3 Mike, 3 Loretta.
Team B survivors: 3 Anita, 3 Rosa, 3 Kevin, 3 Thomas.
New Rules
STEALING TOKENS
When a survivor falls due to any attack, a face down token may be stolen from their inventory. Identify the standing survivor with free space in their inventory closest to the fallen survivor (within the city or in the same building). That standing survivor may look at one face down token in the fallen figure's inventory before deciding what do with it.
They may:
- add the token to their own inventory.
- Leave the token in the fallen survivor's inventory.
- remove it from the game if it is an X token.
When a survivor enters the RV, they reveal their face down tokens. If the survivor is holding the key or any fuel, those tokens are immediately removed from the survivor's inventory and placed in the RV (no action is spent to do so).
FIGHT: SURVIVOR VS SURVIVOR
When survivors of opposing team occupy the same building, a fight breaks out.
THE FIGHT
Stage the fight outside of the city limits:
- Place the survivors facing each other, 75-90 cm apart.
- Each survivor chooses the weapon they wish to use during the fight.
The active survivor attacks (flicks their weapon) first.
If an attack causes the opposing survivor to fall:
- The fallen survivor loses 1 life token.
- The player who won the fight flicks the fallen survivor out of the building. Place the survivor behind the building's entrance and flick it out into the city.
If an attack does not cause the opposing survivor to fall:
- The opposing survivor advances one step (the width of a movement disc) forward.
- The opposing survivor attacks.
The players take turns advancing and attacking until one of the two survivors falls.
If the flicked bat causes the opposing survivor to fall:
- The fallen survivor is flicked from the building, as described above, but does not lose a life token.
- If the flicked bat does not cause an opposing survivor to fall, the attacking survivor loses 1 life token, and is flicked from the building by an opposing player.
2 VS 1
Survivors belonging to the same team are placed side by side, at least 10 cm apart.
All the above rules apply. Additionally:
- Survivors of the same team use their weapons one after the other.
- The fight continues until only one team remains in the building.
SURVIVOR(S) VS SURVIVOR VS ZOMBIE(S)
The fight between the two teams is resolved first, as described above. Once the fight is resolved, the remaining survivor(s) fight the zombie(s). Good luck!
USING THE BASEBALL BAT
A survivor that chooses to fight using a baseball bat may only attack once, but may wait to do so. When it is their turn to attack, they may choose to wait or attack.
If a survivor using a baseball bat chooses to wait, the opposing survivor attacks and advances, as normal. If a survivor using a baseball bat chooses to attack, they replace their figure with the baseball bat and flick the bat at the opposing survivor.
Scenario 7 — Cornering the Market
Vs. 2-10 players
This city is well stocked with the tools needed for survival, but it's also infested with zombies! One group got their hands on a stockpile of food, while the other has found a handsome supply of fuel. Not so long ago, the wise idea would've been to band together and pool your resources. But those days are gone. Whichever group can corner the market on either food or fuel will have an easy time of pushing the other out of town.
OBJECTIVE FOR BOTH GROUPS
Team A: Have all 3 fuel tokens or all 4 food tokens in the RV at the end of a round.
Team B: Have all 3 fuel tokens or all 4 food tokens in the gas station at the end of a round.
SET UP
Mix 10 tokens face down: 2 "not allowed", 2 medicine, 3 fuel, 1 knife, 1 baseball bat, 1 shot gun (4 food).
Place them face down in the following buildings: 1 at the library, 2 each at the police station, the school and the hospital and 3 at the grocery store!
GAME END
A team of survivors wins if they complete their objective. If the round marker reaches the skull, the team with the most fuel and/or food tokens in their base wins. In case of a tie, the team whose survivors are holding more fuel and/or food tokens wins.
SET UP (map)
The scenario map lays out the city with the Grocery store, RV, Library, School, Police station, Hospital, Ice cream truck, Truck, Car, and Gas station. Power side face up.
Team A survivors: 3 Elijah, 3 Lily, 3 John, 3 Kevin, 3 Olivia.
Team B survivors: 3 Gabriel, 3 Rosa, 3 Mike, 3 Thomas, 3 Loretta.
Scenario 8 — Strength in Numbers
Vs. 2-10 players
If you've learned one thing about fighting other groups of survivors, it's that the more people you have on your side, the stronger you are.
Upon entering a new city, you see signs of human life. Perhaps you can persuade more survivors to join your group. But, looking down the road, you see a rival group has found their way here, too. And they don't look like they're willing to share.
OBJECTIVE FOR BOTH TEAMS
- Control three more survivors than the opposing team at any time
OR
- Control more survivors than the opposing team when the round marker reaches the skull.
SET UP
Shuffle these tokens face down: 3 knives, 3 baseball bats, 3 shot guns, 4 survivor tokens. Remove one at random. Place 1 face down token in each of the buildings not blocked by an X token. Place the remaining 8 face down tokens in a supply outside of the city.
GAME END
A team of survivors wins if they have at least 3 more survivors than the opposing team. If the round marker reaches the skull, the team with more survivors wins. In case of a tie, play another round.
SET UP (map)
The scenario map lays out the city with the Ice cream truck, Grocery store, Hospital, Library, RV, School, Truck, Police station, Car, and Zombie Tower. Power side face up.
Team A survivors: 3 Anita, 3 Rosa, 3 Thomas.
Team B survivors: 3 Elijah, 3 Mike, 3 Kevin.
Special Rules
AVAILABLE BUILDINGS
Buildings blocked by an "X" token cannot be entered.
NEW X TOKENS
Whenever the last survivor in a building exits that building (move action, losing a zombie fight, etc.):
- The active player takes an "X" from the building of their choice and places it in front of that building.
- The active player takes 1 token from the supply outside of the city and places it face down in the building from which the X had been removed.
NEW SURVIVOR
When a survivor token is revealed, it is placed face up on the same support block. The active player takes an unused survivor board at random, and places it outside of the city (normal side up) with 2 life tokens.
The next survivor to exit the building using a move action (i.e. not ejected after losing a fight) will add the new survivor to their team. Upon exiting the building using a move action, the active player adds the new survivor board to those belonging to their team. Place the new survivor's figure next to the active survivor, and remove the survivor token from the game.
Rotate the new survivor's backpack so that it matches the color of the current round.
Scenario 9 — Home
Vs. 6, 8 or 10 players
It's been far too long since you've had a place you could call your own. It's taken weeks of work, but you and the group – your friends – have managed to convert this school into a place you can all stay long term. Home, if you will. But this isn't a world where you can have nice things without others wanting to take them from you. A renegade group likes the look of your new place, but you're not going down without a fight.
OBJECTIVE
Team A: Prevent Team B from completing their objective.
Team B: Control the School by having 1 or more survivors in the building at the end of a round holding at least 2 of the following tokens: food, fuel, medicine.
SET UP
Separate players into 2 even teams. Each player then chooses 1 survivor to play as in this scenario.
Shuffle these tokens face down: 4 foods, 4 fuel, 4 medicine, 3 baseball bats. Place them face down in the following locations: 4 in the Grocery Store; 2 each in the Police Station, Library, Gas Station, Hospital; 1 on top of each box.
Remove the betrayer cards from the secret objective deck. Shuffle the remaining objective cards and create 2 piles: one for each team, with a number of cards equal to the number of players on a team. Shuffle 1 betrayer card into each team's pile. Finally, deal 1 card from a team's pile to each player on that team, and remove the single card remaining in each team's pile from the game.
GAME END
Team B wins if they complete their objective. Team A wins if the round marker reaches the skull.
SET UP (map)
The scenario map lays out the city with the Library, Zombie Tower, Truck, RV, Ice cream truck, School, Hospital, Police station, Grocery store, Gas station, and Car. Each team box holds 3 to 5 survivors.
New Rules
SECRET OBJECTIVES
Each player has a secret objective. In order for each individual player to win, they must complete the objective on their card AND be on the winning team. Players on the winning team who have not completed their objective have lost.
One of the players might be a betrayer. The betrayer wins if their own team fails to complete their objective (i.e. they want the other team to win).
The active player may spend an action to accuse a player on their team of being the betrayer. After a brief discussion, all players on the team vote thumbs up or down. If there are more thumbs up than thumbs down, the accused player must show their objective card to the rest of their team. Otherwise, nothing happens.
If the accused player IS the betrayer:
- They are removed from the team. They are now a team unto themselves.
- If the betrayer has more than 1 life token, they lose 1 life token.
- The betrayer's figure is placed fallen. The accused player flicks the figure in the direction their choice.
- The betrayer discards their objective cards and draws a new secret objective from the Betrayer's objective deck. The betrayer must now complete this new objective in order to win.
- The betrayer takes an X token (explained shortly).
- The accusing player flips their survivor board, allowing them access to their special power.
If the accused player is NOT the betrayer:
- The accused player discards their objective card and draws a new one.
- The accused player then decides whether to stay with their current clan or to join the opposing clan.
A - STAY WITH THEIR ORIGINAL CLAN
- If the ACCUSED player has more than 1 life point, they lose 1 life point.
- If the ACCUSING player has more than 1 life point, they lose 1 life point.
B - JOIN THE OPPOSING CLAN
- The ACCUSED player places their survivor board with those of the opposing team.
- The ACCUSING player flips their survivor board, allowing them access to their special power.
THE LONE BETRAYER
The betrayer is a third team that plays third in team order. On their turn, the betrayer may flip their X token to pass their turn. Flip the X token face up at the beginning of each round.
DEAD AND GONE!
When a survivor has no life tokens left, they are removed from the game, as normal. The player to whom that survivor belonged is also out of the game, as they have nothing left to do.
Scenario 10 — At Each Other's Throats
Vs. 6, 8 or 10 players
It's no use. You've tried time and again to come to some sort of agreement, but there's simply no reasoning with them. And they're not about to leave you alone. It's truly unfortunate that it's come to this. You and the people you now call family will never know peace as long as these rivals of yours continue to draw breath. Only one of you can live in this town now and it's time to find out who that is.
Time... for war!
MAIN OBJECTIVE FOR BOTH TEAMS
Kill all survivors of the opposing team or have one of your survivors enter the opposing colony while holding 2 fuel tokens.
SET UP
Players must split up into 2 even teams. Each player then chooses 1 survivor to play as in this scenario.
Mix these 23 tokens face down: 6 foods, 6 fuel, 6 medicine, 5 baseball bats. Place face down at each building except the Hospital.
Set the betrayer's secret objective cards aside. Shuffle the remaining secret objective cards and create 2 piles: one for each team, with a number of cards equal to the number of players on a team. Shuffle the betrayer's secret objective cards and add 1 to each team's pile. Each team shuffles their own pile and deals 1 card to each player on their team, removing the remaining card from the game without looking at it.
GAME END
- If one team has no more survivors, the opposing team wins. Congratulations! You've eliminated your rivals.
- A team wins if one of their survivors enters the opposing team's colony holding 2 fuel tokens. Congratulations! You've destroyed your rival's base.
If the round marker reaches the skull, the team with more remaining survivors wins. In case of a tie, play another round.
SET UP (map)
The scenario map lays out the two colonies (Team A's and Team B's) with the RV, School, Car, Police station, Ice cream truck, Truck, Library, Zombie Tower, Gas station, and Grocery store. Each team box holds 3 to 5 survivors.