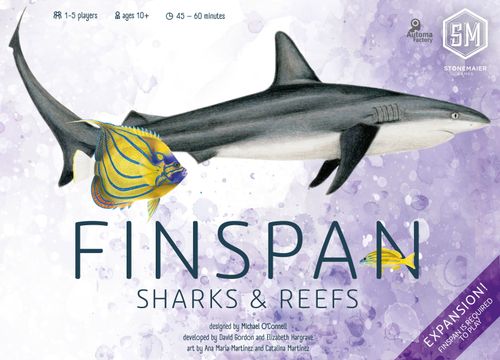
Finspan: Sharks & Reefs
Finspan: Sharks & Reefs Rulebook
Table of Contents
Table of Contents
Components
- 5 coral reef overlays
- 5 starter fish cards
- 1 achievement board
- 3 achievement tiles
- 90 coral tokens
- 1 scorepad
- 75 fish cards
- 5 player aids
The solo mode components are listed in the Nautoma rulebook. Replacement parts can be requested via the form at stonemaiergames.com/replacement-parts.
Setup
Initial Combining of Previous and New Components
- Shuffle the new fish cards into the fish deck.
- Shuffle the new starter fish cards in with the other starter fish.
- Replace the original achievement board and scorepad with their new versions.
- Shuffle the new achievement tiles in with the original tiles.
Global & Player Setup
After standard Finspan setup, perform the following:
- A: Place the coral tokens in the general supply.
- B: If using side B of the achievement board, randomly select 1 tile per matching slot. Important: Always ensure that the chosen tiles' week-number lines match the lines on the board. (The board is marked "ALIGN WEEK-NUMBER LINES.")
- C: Each player places either side of any coral reef overlay on their ocean mat, covering the existing twilight zone.
- D: Each player gains a Sharks & Reefs player aid.
You can skip the rulebook and instead watch a rules video at stonemaiergames.com/games/finspan/rules-faq.
Achievement Board
END OF WEEK
At the end of weeks 1 through 3:
- Score points for this week's achievement tile.
- The player (or players) who received the most points from this week's achievement tile also scores 3 additional points.
- Retrieve all divers.
- Rotate the first-player token clockwise.
Activate any "GAME END" abilities on fish in your ocean (in any order). Then go to scoring.
SCORING
- GAME END points.
- Points printed on visible fish.
- Eggs and/or young: 1 point each.
- Schools: 6 points each.
- Consumed fish: 1 point each.
- Coral: 1 point each + bonus points for complete reefs.
Total points.
Coral Reefs
Gaining Coral
You may grow your coral reefs using coral from diving as well as from fish abilities. A dive site may never have more than 6 coral in it.
Whenever your diver moves onto your coral reef overlay during a dive, if that dive site has fewer than 6 coral and if you discard the indicated item (egg, young, or card), then you may place 1 coral from the supply into the reef at that dive site. You may do this at most once per dive.
Whenever you gain coral as a benefit from a fish ability, you do not need to pay anything for it. Simply gain the coral from the supply and place it in a coral reef (as instructed by the card).
Coral Iconography
The colors of the coral icons on the fish cards (blue, purple, or green) indicate the dive site where coral must be present (as a requirement) or where coral may be placed (as a benefit). The multicolor coral icon (blue, purple, and green together) indicates "any dive site."
Coral Requirements
Reef fish require 1 or 2 coral (as specified on the card) to already be present in the dive site before you play them there. Reef fish may only be played in the Sunlight Zone (as shown on their card).
Whenever a fish card indicates a coral requirement, that coral must be present at the same dive site (unless otherwise stated).
- The indicated requirement is a minimum; you may have more coral than required to play a reef fish or gain a benefit.
New Fish Abilities
Some fish have two-part abilities with coral requirements. When you activate one of these abilities, start by choosing whether to gain the first benefit. Then, if you meet the coral requirement, you may gain the second benefit. If you do not meet the coral requirement, you may still gain the first benefit. Similarly, if you choose not to gain the first benefit, you may still gain the second (if you have enough coral in that dive site). However, you only gain the second benefit after you gain or decline the first.
Ability Iconography
- Coral requirement and benefit (multicolor coral icon): As a requirement: You may only play this fish in a dive site that has at least the number of coral shown. As a benefit: If there are fewer than 6 coral in the indicated dive site, place 1 coral from the supply there (at no cost).
- Coral icons: Single-color coral icons indicate a specific dive site; multicolor icons indicate "any single dive site" in your ocean instead.
- Consume: A fish in your ocean consumes a shorter fish from your hand (tuck it underneath).
- Play for free (characteristic icon): Choose a fish from your hand with the characteristic shown (if any), and play it for free (do not pay its cost).
- As a cost (no-cost icon): Play this fish for free (it has no cost).
- Discard a school: Discard a school token from your ocean, then place 1 young in each of four different slots. If you do not have a school token to discard, place 1 young instead.
- Adding one of the scattered young here allows you to make a new school. (Printed beside the school example.)
Scoring
Coral tokens in your ocean are worth 1 point each at the end of the game. If you have a complete reef of 6 coral in a particular dive site, also gain the bonus points shown on the overlay for that dive site: Score 6 points for blue (left), 8 points for purple (center), and 5 points for green (right). These bonus points vary based on the difficulty of gaining coral in the different dive sites.
Example: At the end of the game, this player will gain 11 points for their coral tokens, plus an additional 6 points for filling the blue (left) reef, for a total of 17 points.
Achievement Tile Details
FISH BETWEEN 1–3 POINTS
Forage fish, printed on your ocean mat, do not have points, so they don't count for scoring this tile.
UNIQUE TAGS AMONG FISH
Count all the unique types of tags on fish in your ocean. Just as predator and über predator, the electrolocation and electric discharge tags should be treated as unique tags.
All unique tags: bioluminescent, camouflage, active electrolocation, electric discharge, predator, über predator, venomous.
This collection of fish has 6 unique tags: bioluminescent, active electrolocation, electric discharge, predator, über predator, and venomous.
Commonly Overlooked Rules
- If you gain the "recover a card from your discard pile" benefit and your discard pile is empty, gain the top card of the deck instead.
- If you choose to gain a "play a card" benefit (typically for a specific place on your ocean mat), you must pay the card's cost and follow its placement rules.
- For the dive site benefits (at the top of each zone), you gain the benefit once (not once per fish) if you have at least 1 fish in the dive site within the same zone. (Printed as "dive sight".)
- You may place a played fish on top of a shorter fish (card or forage) either by choice or to satisfy a consume cost. In other words, as long as the fish you're playing is bigger than the fish you want to play it on top of, you may play it there. This is most often done to cover the preprinted forage fish, which aren't worth any points by default (hence why they don't have the same white background of fish cards).
Solo Play: Nautoma Update
This is the official Stonemaier Games solo rules update for Sharks & Reefs (Nautoma rulebook r4, 2025). It is a delta: all rules from the Finspan: Nautoma rulebook are unchanged except as described here, so it modifies the base Nautoma rules rather than standing alone. The replacement Nautoma decision cards (Card IDs 1, 2, and 6), the three replacement Nautoma achievement cards, and the Nautoma player aid card are printed as card artwork and are not reproduced in this text; use the printed cards for their contents.
Components to Replace
This expansion comes with several replacement cards for Nautoma which add necessary information for playing this expansion. Before your first game, permanently replace the Nautoma achievement cards and 3 of the decision cards (Card IDs: 1, 2, and 6) from the base game, with the ones provided here.
In future games where you don't include this expansion, simply skip the action associated with coral.
How Nautoma Scores Points
In addition to earning points from fish, schools, young, eggs, and achievements, Nautoma also scores points from coral with this expansion.
A Nautoma Turn
This expansion adds one new action, Add Coral.
Action: Add Coral
In this action, Nautoma will gather coral to compete with your growing collection.
Convert 1 egg to 1 or 2 coral: If Nautoma has at least 1 egg, return 1 egg from her play area to the general supply. Then take 1 coral (2 coral for difficulty 4, 5) from the general supply and place them in her play area. If she doesn't have an egg, nothing happens. Note: This conversion only happens at most once per turn, even if she has more than 1 egg.
Scoring Achievements
Nautoma can never have more of an achievement than would be possible for you to have.
For example, the base game has 7 unique tags, and this expansion does not add any new tags. Therefore, for the "unique tags" achievement, Nautoma may not have more than 7.
Changes to End of Game and Scoring
At the end of the game, calculate Nautoma's score as described in the Finspan Nautoma rulebook and then add the following:
- 1 point for each coral (all difficulty levels); and
- 5 additional points for every 6 coral (difficulty 3, 5)
Changes to the Ravel Mode Variant
Coral provides an additional scoring condition for Ravel mode, based upon the coral on your ocean mat.
(The source prints this heading as "Ravel Mode Varient"; corrected here to "Variant".)
Setup for Ravel mode as normal. There are no additional setup steps.
End of Week Scoring
During the end of week, after resolving the points Nautoma gains from the Ravel mode scoring card, calculate any points that Nautoma gains or loses from coral. Compare how many coral you have in each diving site and calculate the additional points that Nautoma will gain and lose, as follows:
- Nautoma gains points: Count the coral difference between the diving sites with the most and the 2nd most coral and multiply this number by X, the Ravel strength. Nautoma gains these many points. If 2 sites have the most coral, the result is 0.
- Nautoma loses points: Count the coral difference between the diving sites with the least and 2nd least coral and multiply this number by 2. Nautoma loses these many points. If 2 sites have the least coral, the result is 0.
Note: Unlike the scoring from the Ravel mode scoring cards, Nautoma can lose points from coral.
Examples
Example 1: Your most coral are 5 (right) and your 2nd most coral are 4 (left), a difference of 1 coral. You are playing Ravel strength 3, where X = 3, so Nautoma will gain 3 points (1x3). Your 2nd least coral are 4 (left) and your least coral are 1 (middle), a difference of 3 coral. Nautoma will lose 6 points (3x2). Overall, Nautoma loses 3 points (3-6).
Example 2: Your most coral are 3 (middle) and your 2nd most coral is 1 (left or right), a difference of 2. You are playing Ravel strength 3, where X = 3, so Nautoma will gain 6 points (2x3). Your 2nd least coral is 1 and your least coral is 1, a difference of 0. Nautoma will lose 0 points (0x2). Overall, Nautoma gains 6 points (6-0).