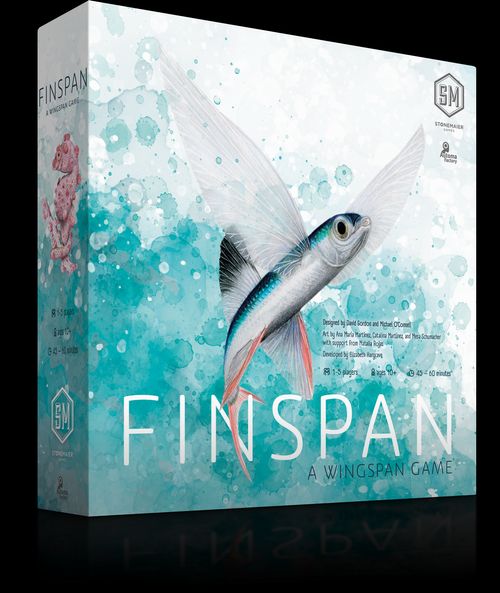
Finspan
Finspan Rulebook
Table of Contents
Table of Contents
Overview and Goal
In Finspan, the fish you discover over 4 weeks will generate a series of benefits as you dive deeper into the ocean. Each dive site specializes in a key aspect of expanding your research:
- Grow your collection of fish.
- Discover freshly laid eggs.
- Hatch eggs into young, and nurture the young into schools.
The winner is the player with the most points gained from fish, eggs, young, schools, and achievements.
Components
- 5 ocean mats
- 9 achievement tiles
- 30 divers (6 of each color)
- 1 first-player token
- 125 fish cards
- 10 starter fish cards
- 5 player aids
- 90 egg/young tokens (double sided: egg on one side, young on the other)
- 40 school tokens
- 1 achievement board
- 1 week tracker token
- 1 scorepad
The solo mode components are listed in the Nautoma rulebook. Replacement parts can be requested via the form at stonemaiergames.com/replacement-parts.
Setup
Global Components
- Place all egg/young and school tokens within reach of all players to form the general supply.
- Shuffle the 10 starter fish cards and place them face down near the general supply. These 10 cards have dark gray corners and a different back than other fish cards.
- Shuffle the deck of 125 fish cards and place it face down next to the starter fish cards.
- Place the achievement board near the general supply.
- For any game with a first-time player, use side A.
- Otherwise, you may use either side. (Side B uses random achievement tiles and awards a 3-point bonus to each player who gains the most achievement points that week.) If using side B, randomly select a Week 1 tile, a Week 2 tile, and a Week 3 tile and place them on the achievement board, ensuring that the tiles' week-number lines match the lines on the board.
Player Setup
A. Place an ocean mat (your "ocean") in front of you. B. Choose a player color and gain the 6 divers of that color. C. Place 1 egg token on each of the 2 starting egg slots (printed on forage fish) in your ocean. Forage fish are the three fish printed on your ocean mat. D. Place 1 young token on the starting young slot. E. Gain 2 random starter fish cards. Place them face up in a vertical line beside your ocean mat (as shown) to form your hand. Return any unused starter fish cards to the box. F. Draw 3 fish cards from the deck and add them face up to your hand. All unplayed fish in your hand are public knowledge. G. Randomly select the first player and give them the first-player token.
You can skip the rulebook and instead watch a rules video at stonemaiergames.com/games/finspan/media-reviews or use a Dized interactive tutorial.
Gameplay Overview
Each turn, you will either play a fish or dive into your ocean. You will take 6 turns during each of the 4 weeks (a total of 24 turns per player during the entire game).
You will typically spend the beginning of the game playing low-cost fish cards and laying eggs, the middle of the game playing higher-cost fish cards and hatching eggs into young, and the end of the game playing powerful "WHEN PLAYED" fish cards and gathering young to form schools.
On Your Turn
Place an available diver onto your ocean mat to either (A) play a fish card into your ocean or (B) dive at a dive site to gain various benefits.
Play a Fish Card
Playing a fish involves choosing a fish card from your hand, paying its cost, and placing it on your ocean mat. Thematically, this represents you discovering this fish in an area of your ocean.
Follow these steps to play a fish card:
- PLACE A DIVER. Place an available diver in the gray box at the upper left of your ocean.
- PAY THE COST. Choose a fish card from your hand and pay the cost noted on the upper left corner of the card.
- Many costs include discarding 1 or more additional cards (cards) from your hand as payment. Cards discarded in this way are placed face up in your personal discard pile.
- Some costs include paying eggs or young from anywhere in your ocean. (Place the tokens back in the general supply.)
- Other costs involve consuming a fish in your ocean. When you play a fish with such a cost, it must cover a shorter fish (card or forage) already in your ocean.
- PLACE THE FISH. Choose an empty or occupied slot in your ocean and place the fish there, following these rules:
- ZONES: Each fish has 1 or more zones where it may be placed (Sunlight, Twilight, and/or Midnight), as indicated in the left sidebar of the card.
- DIVE SITES: Fish with blue, purple, or green color bands may only be placed in their matching dive sites (columns). Other fish without a blue, purple, or green color band may be placed in any dive site.
- COVERING EGGS AND YOUNG: If a fish is placed on top of egg or young tokens, transfer those tokens to the newly played fish.
- CONSUMING FISH: You may place the fish on top of a shorter fish (card or forage) either by choice or to satisfy a consume cost.
- The played fish must have a longer length (shown at the bottom left) than the fish it consumes.
- Any tokens (egg, young, or school) on the consumed fish transfer to the played fish. Any fish cards under the consumed fish also remain.
Fish Card Anatomy
- When played (cost example): When playing a fish, you must pay its cost. For example, a fish may require you to remove 2 young from anywhere in your ocean. Also, this fish must consume (cover up) a shorter fish in your ocean. Other fish may require you to remove eggs or schools from your ocean and/or discard cards from your hand.
- Zones: The left sidebar shows the zone(s) where a fish may be played: Sunlight, Twilight, or Midnight.
- Points: Fish worth points show the value in the card (e.g., a fish worth 10 points).
- Length: The number at the bottom left is the fish's length. Large fish have a large tail icon, medium fish have a medium tail icon, and small fish have a small tail icon.
- Über Predator: A fish with two predator tags is an Über Predator. Über Predators count for all predator achievements and abilities. Predators have an ability that affects all players when played.
- Ability: The vertical area on the right shows the fish's ability. Some fish abilities are activated when you play the fish (WHEN PLAYED), others when you dive at that fish's dive site (brown IF ACTIVATED abilities), and others are used at the end of the game (yellow GAME END abilities). See the player aid for details about each ability type. Benefits are optional for each affected player.
- Some fish abilities reference estuaries (top row) or deepwater (bottom row).
Dive
Diving involves choosing a dive site (1 of the 3 columns on your ocean mat) and moving a diver from top to bottom, gaining benefits along the way. Thematically, this represents observing and studying fish in their habitats.
Follow these steps to dive:
- Select a dive site. Place an available diver at the top of a column.
- Check the topmost dive site bonus. You may gain the bonus printed at the top of the column if you have at least 1 fish (card or forage fish) in the same column of the Sunlight Zone.
- Draw: Draw a fish card from the deck.
- Egg: Put an egg on a fish (in your ocean) that doesn't already have one. Each fish can hold at most 1 egg.
- Hatch: Hatch one of your eggs. (Flip over the egg token so the young side is face up.)*
- Move down the dive site. As the diver moves down—one row at a time—you may gain "IF ACTIVATED" benefits on fish cards as well as other dive site bonuses. You always move your diver through all 3 zones to the bottom of your ocean, even when you don't have fish in one or more zones of the dive site.
- "IF ACTIVATED" BENEFIT: If the fish has an "IF ACTIVATED" ability, you may gain the benefit. If the benefit says, "all players," each player may decide whether to gain the benefit.
- DIVE SITE BONUS: Just like the topmost dive site bonus, there is a dive site bonus you may gain above the Twilight Zone (if you have a fish in the same column there), and above the Midnight Zone (if you have a fish in the same column there).
- Gain the bottom bonus. One of two things happens when a diver reaches the bottom of your ocean mat:
- a. If this is the first time a diver reached the bottom of this dive site this week, place the diver in the "3" slot and you may gain the bottom bonus.
*If hatching an egg results in 3 or more young sharing the same slot in your ocean, form a school (unless there is already a school on the slot). See Important Notes for more details about schools.
For explanations of the various benefits on cards, see the Ability Iconography section or the player aids.
Sample Dive Turn
You place a diver at the top of the middle dive site to select it as your dive location. Starting at the top and moving down the column, you evaluate each zone's dive site bonus and activate the fish in that column.
- Gain the topmost dive site bonus, since you have at least 1 fish in the Sunlight Zone. (Place 1 egg on any fish that doesn't already have an egg.)
- Gain the benefit from the Porkfish (1 egg).
- Gain the benefit from the Skipjack Tuna (hatch 1 egg into a young). Because this fish's ability affects all players, each other player may also do this (even if you choose not to).
- The Shortspine Spurdog has no brown "IF ACTIVATED" ability, so you don't gain any benefit.
- Gain 1 egg from the Twilight Zone dive site bonus, since you have a fish in that zone.
- The Showy Bristlemouth has no brown "IF ACTIVATED" ability, so you don't gain any benefit.
- Ignore the Midnight Zone dive site bonus, since you do not have a fish in that zone.
- Place the diver in the empty slot at the bottom of the dive site (column) and gain the bottom bonus (1 egg). (If you dive in this column again this week, you will ignore the bottom bonus and instead, place that turn's diver in the bottom gray box.)
End of Week
The week ends after each player has taken 6 turns (used all their divers). At the end of weeks 1, 2, and 3, players simultaneously perform each step in order:
-
Gain points based on this week's achievement (points for each instance of the item), noting the points on the scorepad.
EXAMPLE: At the end of week 1, if you have 5 eggs and 2 young in your ocean, gain 7 points. At the end of week 2, if you have 3 rows filled with fish (cards and forage), gain 6 points. At the end of week 3, if you have 4 schools, gain 8 points.
-
If you're using side B of the achievement board, the player(s) who gained the most achievement points this week also gain a 3-point bonus.
-
Retrieve all your divers from your ocean.
-
If you have the first-player token, pass it clockwise to the next player.
The week tracker token indicates the current week. At the end of week 4, proceed directly to the end-of-game steps. Otherwise, the player with the first-player token begins the next week.
Achievements—Side A
- Week 1: Eggs and/or young
- Week 2: Rows of fish
- Week 3: Schools
- Week 4: Activate any "GAME END" abilities on fish in your ocean (in any order). Then go to scoring.
End of Game
The game ends after the completion of week 4. After activating (in any order) "GAME END" abilities on fish in oceans that don't award end-game points, players simultaneously perform each step in order:
- GAME END (YELLOW): Gain any "GAME END" points on fish in your ocean (in any order). Do not gain GAME END points on consumed fish.
- FISH: Gain points printed on visible fish in your ocean. Do not gain points printed on consumed fish.
- CONSUMED FISH: Gain 1 point for each consumed fish (cards and forage) in your ocean.
- EGGS AND YOUNG: Gain 1 point for each egg and 1 point for each young in your ocean.
- SCHOOLS: Gain 6 points for each school in your ocean.
Add these points to those already on the scorepad (week 1–3 achievements).
The winner is the player with the most points. In case of a tie, the tied player with the most fish cards in hand is the winner. If players are still tied, they share the victory.
EXAMPLE: First, activate any end-game fish that don't reward points (there are none in this ocean). Then score each of the other categories:
- Score 3 points for the yellow ability on the Abyssal Anglerfish.
- Score 46 points for the printed points on all visible fish.
- Score 4 points for all consumed fish (3 forage fish and 1 fish card under the Atlantic Wolffish).
- Score 7 points for all eggs and young.
- Gain 18 points for all schools.
Add these points to your previously noted achievement points to calculate your final score.
Important Notes
School Tokens
A school forms whenever 3 or more young share the same slot in your ocean. When this occurs, immediately return 3 young from that slot to the supply and replace them with 1 school token.
- You may never have more than 1 school in the same slot. If you have 3 or more young in a slot with a school, nothing happens.
- If you have 3 or more young in a slot with a school and then move that school, 3 of those young immediately form another school where they are.
- If you attempt to move a young through a slot that has 2 young in it (and no school), a school will form (and that move will end).
- A school may not enter or move through a slot that already has a school in it.
Schools are worth 6 points each at the end of the game (as opposed to young, which are only worth 1 point each). Once a school has been formed, it may not be broken up into individual young again.
Personal Discard Piles
Whenever you pay cards from your hand as a cost to play a fish, place those cards face up into your personal discard pile. (There is no shared discard pile.)
- The main function of your discard pile is for the "gain a card from your discard pile" benefit, which allows you to gain any card from your discard pile to your hand.
- Turn your discard pile sideways (as shown) and place it on the opposite side of your ocean mat, so you don't accidentally confuse it with your open hand of cards.
- The cards in discard piles are public knowledge for all players.
- The order of your discard pile does not matter; you may reorder it whenever you'd like.
- EMPTY FISH DECK: In the unlikely event that the global fish deck is ever empty, shuffle all players' discard piles together to form a new deck.
Fish Abilities
The vertical area on the right side of fish cards shows the fish's ability. Benefits from fish abilities are optional for each affected player.
- WHEN PLAYED: Gain this benefit when you play a fish (after all other "play a fish" steps).
- IF ACTIVATED: Gain this benefit during a dive turn when your diver moves onto this card.
- GAME END: Gain this benefit at the end of the game.
- ALL PLAYERS: Each player may decide whether to gain the benefit (others may gain the benefit even if you choose not to).
Forage Fish
The fish printed on your ocean mat are forage fish. They count as fish for dive site bonuses and achievements, and they may be consumed by fish cards (either by choice or as a cost requirement). Consumed forage fish count as consumed fish for achievements and end-of-game scoring.
Tags
Many fish have one or more tags beside their common name to indicate special features of that fish. Some achievement tiles provide bonus points for specific tags on fish in your ocean.
- BIOLUMINESCENT: These fish emit light from their bodies. Bioluminescence is common in the deep sea, where sunlight is scarce.
- CAMOUFLAGE: These fish have developed a means to hide or to blend in with objects in their surroundings to protect themselves and/or as a means of ambushing their prey.
- ACTIVE ELECTROLOCATION: Many types of fish have passive electrolocation, but these fish actively use electrolocation, generating weak electric fields to find food, navigate, and perhaps even communicate.
- ELECTRIC DISCHARGE: These fish can deliver a strong electric discharge that stuns prey or repels predators. Many also possess active electrolocation. They count for all electrolocation achievements and abilities.
- PREDATOR: Nearly all fish are predatory to some degree, but these fish are more predatory by nature than most.
- ÜBER PREDATOR: These predators are so fearsome and/or so large, they face little to no competition in their preferred habitat. They count for all predator achievements and abilities.
- VENOMOUS: These fish produce natural toxins as a means of defending themselves.
Other Icons
- ESTUARIES: The slots in the very top row on your ocean mat are estuaries. These represent the tidal mouth of a large river, where the saltwater sea or ocean meets freshwater. This creates brackish water, saltier than freshwater, but not as salty as seawater. Some marine life can thrive in brackish water, or even freshwater. Some fish cards in future expansions may only be played here, but you can place any Sunlight Zone fish here.
- DEEPWATER: Some fish can thrive at extreme depths. This icon indicates the slots in the very bottom row of your ocean mat. Some fish cards may only be played here, but you can place any Midnight Zone fish here.
Marine Science
Throughout the design of this game, we have made every effort to be true to the science of marine biology. We carefully selected fish to represent the broad diversity that exists in the oceans, and we consulted with marine biologists. However, we did take some artistic license on some aspects for the sake of gameplay.
Here are a few caveats and explanations for some of those aspects:
- ZONES: The designation of Sunlight (0 to 200 meters), Twilight (200 to 1,000 meters), and Midnight (1,000+ meters) are actual classifications, but the habitable zones of many fish are often not entirely known.
- CONSUMING OTHER FISH: While size is a major contributor, it isn't the only factor involved in determining which fish may eat another. Some fish even prey on others that are many times their own size. (And some don't eat other fish at all.) For ease of gameplay, we simply went with length to designate a fish's size, even though many fish are larger than others that are longer than they are.
- EGGS: Many fish give birth to live young or lay eggs in special egg cases (colloquially called a "mermaid's purse"). We have used eggs to represent all these processes.
- SCHOOLS: Many species of fish, especially deep-sea fishes, live a more solitary life and do not form schools. The young in the game are not necessarily the offspring of the fish card on which they reside.
Ability Iconography
- Play a fish: Play a fish from your hand on an empty or occupied slot on your ocean mat after paying its cost.
- Discard/draw a card: As a cost: Discard a fish card from your hand. As a benefit: Draw a fish card from the deck.
- Egg: As a cost: Discard an egg from a fish. As a benefit: Put an egg on a fish (in your ocean) that doesn't already have one.
- Hatch: Hatch one of your eggs. (Flip over the egg token so the young side is face up.)
- Young: As a cost: Discard a young from your ocean. As a benefit: Put a young on any fish or open slot in your ocean.
- School: A school forms when 3 young are on the same slot (replace the young with a school token). As a cost: Discard a school token from your ocean.
- Consume: As a cost: The card being played must be placed on top of a shorter fish (card or forage). As a benefit: This fish consumes a shorter fish from your hand (tuck it underneath).
- Gain from discard: Gain any card from your discard pile to your hand. If you have none remaining, draw the top card of the deck instead.
- Egg on each fish: Put an egg on each of your fish that doesn't already have one in the location shown or with the characteristic shown (at least one icon).
- Move young or school: Move 1 young or 1 school any number of slots in a straight line in your ocean. A school may not enter or pass through a slot with another school.
© 2025 Stonemaier LLC. Finspan is a trademark of Stonemaier LLC. All Rights Reserved.