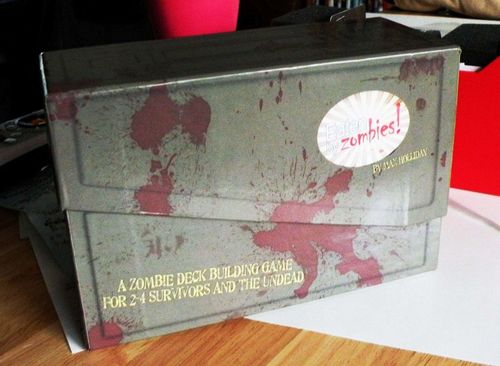
Eaten by Zombies!
Eaten by Zombies! Rulebook
Table of Contents
Table of Contents
Starting Deck
Each player starts the game playing the role of one Survivor: June, Bob, Mary or Barney. Begin by grabbing up your Survivor's unique starter deck containing twelve items Scavenged from your Survivor's house: heavy sticks (5), a couple of sandwiches (2), and some raw nerve (or terror?) in the form of Hide cards (5). Players shuffle their twelve cards and draws six cards from the top of their decks to form their hands, while the remaining six cards stay face down as a personal "draw pile." These twelve starting cards represent your 'Safe House' or deck of cards. Each turn you will venture forth from your Safe House to brave the Zombie Horde in an attempt to collect the Swag you need to survive.
The Setup
The Swag piles represent items players can acquire during the game to beef up to their Survivor's deck. Place the three starting Swag piles—Binoculars, Rifle, and A Good Book—face up in the center of the table. In addition to the starting Swag piles, select two Swag piles at random for each player and set them face up next to the starting piles, or use some suggested starting setups at the back of the instruction book. The Swag not selected are not available this game. The player with the least convincing Zombie moan goes first.
The Zombies
For a two-player game, create the Zombie Deck by combining 5 Level One Zombies, 4 Level Two Zombies, 3 Level Four Zombies, 2 Level Six Zombies and 1 Level Eight Zombie. If more than two players are playing, add five more Zombies to the Zombie Deck (one of each level) for each additional player. Shuffle the Zombie Deck and place it in the center of the table. As the Zombies are drawn and enter play, they increase the Horde of Zombies which players must face each turn.
Turn Sequence
Add to the Zombie Horde
Before playing any cards, players must choose to Fight or Flee!
Fight
- Play any Swag from your hand with Draw or Fight icons
- Attack Zombies swarming you on that turn
- If you succeed in vanquishing ALL Zombies, Scavenge for Swag and place it in your hand
- Clean Up and place conquered Zombies in your discard pile
- If you do not conquer ALL ZOMBIES, lose cards to Attrition and disperse the entire Horde
Flee
- Play any Swag from your hand with Draw or Flee icons
- If you Flee successfully, Scavenge for Swag and place it in your hand
- Clean up
- Lose cards to Attrition, whether you Flee successfully or not!
- Dissipate the closest single Zombie if successful, or disperse the entire Horde if not
Draw back up to six cards
Turn Sequence Explained
Add to the Zombie Horde
There is no existing Zombie threat until the first player turns over the top Zombie from the Zombie deck and begins to form the Horde. Each subsequent turn, players will begin their turn by adding one Zombie to the Horde, whether there are existing Zombies in the Horde or not. Any Zombies added to the Horde are placed to the right of the first Zombie card, the new card representing the "closest" Zombie to the player for Fight purposes.
After the Horde has been added to, each opponent, in reverse turn order, may add one Zombie from his or her hand to the Zombie Horde. In a two player game you may add any number of zombies to the Horde. Zombies being added by players to the Horde must always have an Attrition (Flee) value higher than the number of Zombies currently in the Horde. For example, if there are two Zombies in the Horde on Jerry's turn, then Jane cannot add a Zombie with an Attrition value of less than "3."
Keep in mind that conquered Zombies end up in your personal discard, and will eventually end up in your hand as you play through your deck and recycle your discard pile. The only way to rid your hand of Zombies is to play them on other players, adding them to the attacking Horde, Consequently you can never rid your hand of a Zombie with a "1" Attrition (Flee) value. Be careful how you manage these Zombies in your hand, so you don't become all but powerless, or worse INSANE!
If the Zombie Deck is ever depleted, shuffle the Zombie Discard pile and start the Zombie Deck anew. After the first shuffle, draw two Zombies from the Zombie Deck and add them to the Zombie Horde. Each time the Zombie Deck is shuffled, add one to the number of Zombies drawn at the start of each Survivor's turn. Yes, there will continue to be more and more Zombies until there is only a single Survivor left.
Fight Sign, Draw Sign, Flee Sign
Choose 'Fight or Flight'
You must choose Fight or Flee before you play any Swag cards from your hand. If you have enough Fight cards in your hand to defeat the Zombies, you should probably Fight, but remember, tougher Zombies are much easier to Flee from. Fleeing has its own drawbacks too as you will lose some of your Swag each time you "bravely run away," even if successful. Draw cards in your hand may make the difference between success and failure, but you must decide to Fight or Flee before playing any draw cards.
Exception to Fight/Flee Action: If you cannot play any cards from your hand you must immediately reveal your hand, showing six Zombies. The game ends IMMEDIATELY and all undead players win as the remaining Survivors have gone insane! Yes Killing Zombies can blow your mind.
a. Fight
Play Fight or Draw Cards:
- Play Attack or Draw cards from your hand. Additional attack or Draw cards drawn under instructions from cards played may also laid down in the same turn. If your draw pile runs out of cards, shuffle your discard pile and place it face down to form your new draw pile. After you have played all the cards you can or want to play, add up the attack value on all the cards you played. If you choose to play a card you must resolve ALL effects on that card, even if it would draw your deck out and make you lose the game, unless the card specifically allows you a choice.
Attack Zombies:
- If your Fight value is greater than the closest Zombie's Level, then you kill that Zombie. Place the Zombie card in your discard pile. The Zombie is now a part of your deck. Reduce your calculated Fight value by the value of the killed Zombie. If your Fight value is still greater than zero, you can keep killing Zombies as long as your current Fight value is greater than the Zombie's Level. All Zombies conquered this way are placed in your discard pile.
Scavenge for some Swag:
- If you have killed ALL the Zombies in the Horde, Scavenge Swag from the Swag piles. You may Scavenge any combination/number of cards for a value up to your initial Fight value plus or minus your Scavenge value. You may be restricted by cards with stated limits such as the Trash Bin (which prohibits you from finding another Trash Bin on any turn in which you play a Trash Bin). The Swag you Scavenge goes directly into your hand, so you CANNOT Scavenge Swag if it would swell your hand to more than six cards.
- You may not Scavenge if you did not kill ALL the Zombies in the Horde.
Clean up:
- Slaughtering Zombies is a messy enterprise. Place all the cards you've played and all the Zombies you've killed this turn into your discard pile.
Lose Cards to Attrition and Disperse the Horde:
- If you could not kill all the Zombies in the Horde, lose cards either from the top of your deck (Zombies discarded go to the bottom of the Zombie pile) or Swag cards from your hand (no discarding Zombies from your hand) equal to the Attrition (Flee) value of all the Zombies left in the Horde. Any cards lost go back into the Swag piles from whence they came, or create new Swag piles for Heavy Stick/Sandwich/Hide cards.
- If you are unable to kill all Zombies, they weaken you, causing you to lose cards, but they are placated and dispersed. Discard the entire Horde to the Zombie discard pile.
b. Flee
Play Flee or Draw Cards:
- Play Flee or Draw cards from your hand, as well as any Draw or Flee cards your initial play may allow you to pull from your pile. After you have played all the cards you can or may play, add up the Flee value on all the cards you have in play. If your Flee total is greater than or equal to the combined Attrition (Flee) value of the entire Horde, then you have successfully fled the Horde. If your Flee total is less than the total Attrition (Flee) value of the entire Zombie Horde, you are unsuccessful and do not get to Scavenge for Swag. If you choose to play a card you must resolve ALL effects on that card, even if it would draw your deck out and cause you lose the game, unless the card specifically allows for a choice.
Scavenge for some Swag:
- You may Scavenge for Swag ONLY if you fled successfully. You may Scavenge any combination/number of cards for a value up to your Flee value plus or minus your Scavenge value. You may be restricted by cards with stated limits, such as the Trash Bin, which prohibits you from finding another Trash Bin on any turn in which you play a Trash Bin. The Swag you Scavenge goes directly into your hand, so you CANNOT Scavenge Swag if it would place more than six cards in your hand.
Clean up:
- Surviving in the Zombie apocalypse is an untidy business. Place all the cards you've played this turn into your discard pile.
Lose Cards to Attrition:
- Let's face it, when you're Fleeing from a Zombie Horde, holding onto your Swag is not on the top of your list. Even if you fled successfully, discard cards equal to half the Attrition value of the entire Horde, rounded up. Lose cards from your hand (no Zombies) or your draw pile (Zombies discarded from your draw pile go back to the bottom of the Zombie deck). Any cards lost go back into the Swag piles from whence they came, or create new swag piles for Heavy Stick/Sandwich/Hide cards.
- If you failed to Flee from the Horde, you must lose cards from the top of your deck (Zombies go back to the bottom of the Zombie deck), Swag cards (no Zombies) from your hand or Swag cards (no Zombies) from your discard equal to the full Attrition value of the Horde. Any cards lost go back into the Swag piles from whence they came, or create new Swag piles for Heavy Stick/Sandwich/Hide cards.
Dissipate a Zombie or Disperse the Horde:
- If you succeed in Fleeing, Zombies remain in the Horde to be faced by the next player. One of them does lose interest though, place the bottom or oldest Zombie into the Zombie discard pile.
- If you failed to Flee, the Horde weakens you (you lose cards) but the Zombies are placated and dispersed. Discard the entire Horde to the Zombie Discard pile.
Draw back up to six cards
Draw cards from your draw deck until you have a hand of exactly six cards. If you have more than six cards in your hand you must discard to your discard pile until you have exactly six cards.
Hunger for Brains
If you ever need to draw a card and cannot because there are no remaining cards in your deck or discard pile (from repeatedly losing Flee or Fight actions), then the Zombie Horde overtakes you and eats you. You not only die and lose the game, but you become a Zombie and begin to influence the Horde on your next turn, craving the brains of the other Survivors. Once you have become a Zombie, reveal the cards in your hand, return all Swag cards to their Swag Piles, and return any Zombies to the Zombie Deck's discard pile. During your next turn, you have the following Zombie actions:
- Draw at least one and up to four cards from the top of the Zombie Deck. Remember if all Zombies are gone from the Zombie Deck/Zombie Discard area, the Survivors immediately win so be careful how many you draw!
- Add a Zombie from your hand to the Zombie Threat area (only active after the first player dies). If there are already three Zombie cards in the Threat area, then discard the bottom or oldest Zombie to the bottom of the Zombie Draw pile. (See 'The Zombie Threat!' section below.)
- You may return up to three cards from your hand to the top of the Zombie Deck.
- Dissipate a Zombie from the Horde just as you would on a Survivor's turn.
As a Zombie you may still add Zombies to the Horde during a Survivor's turn, but only to the Survivors to your left and right. If a neighboring player dies and becomes a Zombie you may look past him or her and add Zombies on the turn of the next closest Survivor.
The Zombie Threat
When a Survivor becomes a Zombie, the rest of the Horde quickly discovers something is afoot. This Zombie "ESP" is called the Zombie Threat. The Zombie Threat is a small pile of up to three cards laid out much like the Horde. On each Zombie Player's turn he/she must add one Zombie Card from their hand to the Zombie Threat, removing the oldest if needed since there can't be more than three cards in the Zombie Threat area. Every Zombie's unique level has a different effect on the game when added to the Zombie Threat. These effects help any Zombie Players to drive the remaining Survivors into madness. As a Zombie your goal is to push the other players to madness by forcing them to have six Zombies in their hands at some point, or to kill off those players who had a hand in your own demise.
Game Over
The winner is the last Survivor left alive. The game also ends if the Zombie Deck is ever depleted (ie. as soon as the last card is revealed or otherwise is removed the game immediately ends). To determine the winner, each player counts the cards in their deck (draw deck, discard pile and hand), and the player or players with the most cards wins.
If a player cannot play any cards then he/she must immediately reveal his/her hand, showing six Zombies. The game ends IMMEDIATELY and all undead players win as the remaining Survivors have gone insane! Yes killing Zombies can blow your mind.
Recommended Game Types
Please note the (2p) means 2 player set up, add the (3p) and (4p) for 3 and 4 player setup.
"First Night": Initial Decks: (Binoculars, Rifle, and A Good Book) plus Shotgun (2p), Crowbar (2p), TV Dinner (2p), Box of Ammo (2p), Satchel (3p), Hunting Rifle (3p), Fist Full of Lead (4p), A Good Friend (4p)
"Perhaps it will confuse them if we run away some more?" or "No, I was only foolin'. We are going to die after all!": Initial Decks: (Binoculars, Rifle, and A Good Book) plus Up A Tree (2p), Satchel (2p), Trash Bin (2p), TV Dinner (2p), I Remember You (3p), Grandma's Pantry (3p), Coffin Nails (4p), Gruddy Ground Grippers (4p)
"That this group must somehow form a family": Initial Decks: (Binoculars, Rifle, and A Good Book) plus Grandma's Pantry (2p), Grandpa's Shed (2p), A Good Friend… (2p), I remember you… (2p), I Saw It First… (3p), Saturday Night Special (3p), Hunting Rifle (4p), Fist full of Lead (4p)
"Father Knows Best": Initial Decks: (Binoculars, Rifle, and A Good Book) plus Hunting Rifle (2p), Saturday Night Special (2p), Thompson Typewriter (2p), Shotgun (2p), Fist Full Of Lead (3p), Box of Ammo (3p), Old Slabsides (4p), Crowbar (4p)
"Draaawww": Initial Decks: (Binoculars, Rifle, and A Good Book) plus Coffin Nails (2p), Grandpa's Shed (2p), TV Dinner (2p), I Saw It First (2p), Shotgun (3p), Box of Ammo (3p), A Good Friend (4p), Grandma's Pantry (4p).
Remember there are "randomizer" cards, just pick two per player at random and play almost unlimited variations!