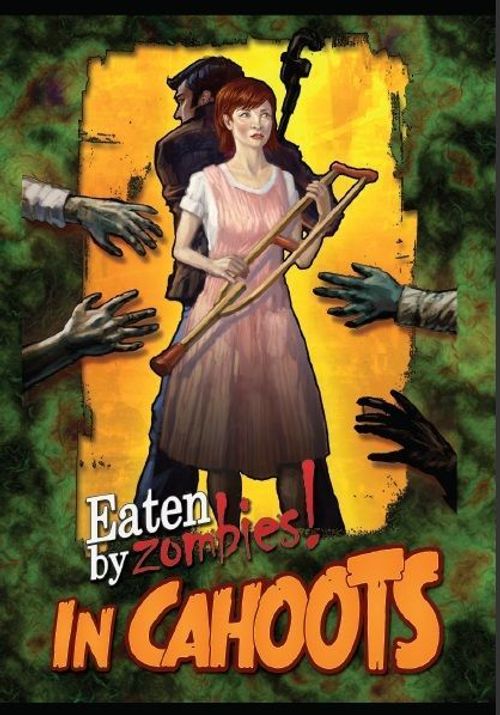
Eaten By Zombies!: In Cahoots
Eaten By Zombies!: In Cahoots Rulebook
Table of Contents
Table of Contents
Contents
- 99 Cards
- 11 Swag Piles (5 cards each)
- 2 Starting Decks (12 cards each)
- 15 Basic Zombie cards
- 1 'In Cahootes' Zombie Set (5 cards)
Basic Zombie Cards and Zombie Sets
In every game of Eaten By Zombies! you will start with a Zombie Deck comprised of the same 15 zombie cards (five Level 1; four Level 2; three Level 4; two Level 6; and one Level 8).
A Zombie Set is a group of 5 zombie cards with a unique set of abilities. In larger games you add a Zombie Set for each player beyond the first two players, or whenever you want a more challenging game.
The In Cahoots Zombie Set is made up of 5 unique zombies: one Level 3; and four others with the Reveal Sign. Look in the "Zombie Cards" section for more information about how this sign works in game play.
There are 5 Basic Zombie cards; you use 15 in any 2 player game.
There are 5 unique zombie cards in the In Cahoots Zombie Set.
Game Set-up
- To start you must discover what Swag you'll be able to find around town. Take one copy of each of the 11 Swag piles and randomly pick 6 to play with. Take all the cards from the Swag piles you picked and place them face up in the center of the table. Return the rest to the box; they won't be available this game.
- Shuffle all the basic zombie cards together and place them face down in the center of the table. This becomes the Zombie Deck.
- Place the Zombie Deck in the center of the table between each player.
- Each player takes one of the Starting Decks. Each deck will have 12 cards in it: 5 'HeavyStick', 5 'Hide', 2 'Sandwich'. Illustrated with Dean or Nancy, although otherwise each starting deck is identical. Shuffle the starting decks and place them face down in front of you to form your Safe House. Draw 6 cards from the top to make up your first hand.
- Decide who is going outside first.
Once you have picked the 6 Swag cards you are going to play with, return the others with the Randomizer Divider back to the box, and pull out the rest of the Swag piles. Place each Swag pile in the center of the table between each player.
Turn Sequence
Each player's (a.k.a. Survivor's) turn happens in a turn sequence.
Note: You can find a quick reference to the Turn Sequence on the Dividers for the two Survivors' Starting decks.
Each Survivor's turn starts by revealing the Horde.
Reveal the Horde
Each Survivor begins a turn by revealing the top card(s) of the Zombie Deck and adding them to the Horde (one at a time). Then the other player may choose to add zombies from their hands to the Horde, and/or play special cards from their hand. They may not add a zombie card if its Attrition is equal to or lower than the number of zombie cards already in the Horde. Any zombies that are revealed or added by a player are added to the right of the Horde.
Note: If there are two zombies in the Horde on Dean's turn, then Nancy cannot add a zombie with an Attrition less than '3'.
If the Zombie Deck is ever depleted, shuffle the Zombie Discard to replace it. Each time you shuffle the Zombie Discard, you must reveal an additional zombie from the Zombie Deck on each player's turn for the remainder of the game. You will soon have to face more and more zombies each turn... until someone is dead. The Survivor left alive wins for now... However, if you ever need to reveal a zombie from the Zombie Deck only to find the Zombie Discard is empty, the game ends and both Survivors win!
Choose Fight or Flee
Before you can play any cards, you must choose to either Fight the Horde or Flee from it. When choosing to Fight, you may only play Swag cards with a Fight Sign in the upper left. When you choose to Flee, you may only play Swag cards with the Flee Sign in the upper left. You may play a Swag with the Draw Sign on either turn, no matter what other Signs the Swag card may have.
Note: You cannot play any Swag cards before you choose to Fight or Flee unless a card's text specifically states that you can. Swag that can be discarded may be discarded at any point.
Fight
Play Swag cards from your hand
When you choose to Fight, you may play any Swag card in your hand as long as it has a Fight or Draw Sign. You may play as many cards as you wish, but whenever you play a card with a card draw, you must draw the card(s) from the top of your Safe House (deck). If you ever need to draw a card from the top of your Safe House (deck), but find it has emptied out, shuffle your Discard Pile and place it face down to form your Safe House (deck). Continue drawing. If you need to draw but have run out of cards in both your Discard Pile and your Safe House... You Die.
Total your Fight & kill the zombies in the Horde
If the total Fight Value of all the Swag you played this turn is equal to or greater than the Level of the last zombie revealed or added to the Horde, you kill it. Continue killing zombies in the order they were revealed or added to the Horde until there are no more zombies remaining, or you do not have enough Fight left in you to kill the next in line. Any zombies you kill are placed in your Discard Pile.
Note: you must kill zombies in the order they were revealed or added to the Horde.
If you killed all the zombies in the Horde, scavenge for Swag
If you killed or removed all the zombies in the Horde, you may scavenge for Swag cards from any of the Swag piles. You may scavenge Swag cards with a Find value equal to your total Fight, plus any Scavenge bonuses you may have on the cards you played. Any cards you scavenge go into your hand. You cannot scavenge a Swag card if it would cause you to exceed your Hand Limit of 6.
Note: Some cards may have a Find modifier in the Text Area. This will often limit the number of copies you can Find in the same turn, but may have other effects.
Clean up
Slaughtering zombies is messy business. Place all the cards you've played into your Discard Pile.
If you couldn't kill the Horde, lose cards to attrition
If you could not kill or otherwise remove all the zombies in the Horde, you cannot scavenge for Swag and must lose cards from your Safe House (deck) or Hand. You must lose cards equal to the total of all the zombies left in the Horde's Attrition values. You may choose to lose any non-zombie cards from your hand, and you may also reveal cards from the top of your Safe House and lose them.
Note: You may lose some cards from your Hand and some from the top of your Safe House (deck) on the same turn. Also, you may not choose to lose a zombie from your hand but you may lose a zombie card from the top of your Safe House (deck).
Return any cards lost to their Swag Pile on the table or to the Zombie Discard.
Last, remove all the remaining zombies in the Horde.
Flee
Play Swag cards from your hand
When you choose to Flee, you may play any Swag card in your hand as long as it has a Flee or Draw Sign. You may play as many cards as you wish, but whenever you play a card containing a card draw action, you must draw the card(s) from the top of your Safe House (deck). If you ever need to draw a card from the top of your Safe House (deck) and find it empty, shuffle your Discard Pile and place it face down to form your new Safe House (deck). Continue drawing. If you need to draw but have run out of cards in both your Discard Pile and your Safe House... You Die.
If the total Flee value on all the Swag cards you have played is equal to or greater than the Horde's Attrition value (i.e. the total Attrition on all the zombies in the Horde), then you successfully Flee from the Horde and may scavenge for Swag. Otherwise, if your total Flee is less than the Horde's Attrition value, you do not get to scavenge and must skip to the "Lose cards to Attrition" phase.
Total your Flee; if you can escape the Horde, scavenge for Swag
If your total Flee was at least equal to the Horde's Attrition, you may scavenge for Swag cards from any of the Swag piles. You may scavenge Swag cards with a Find value equal to your total Flee plus any Scavenge bonuses you may have on the cards you played. Any cards you scavenge go into your hand. You cannot scavenge a Swag card if it would exceed your Hand Limit of 6.
Note: Some cards may have a Find modifier located in the Text Area. This will often limit the number of copies you can Find in the same turn, but may have other effects.
Clean up
Slaughtering zombies is messy business. Place all the cards you've played into your Discard Pile.
Lose any cards you must lose to attrition
| Successfully Fled | Unsuccessfully Fled |
|---|---|
| You must lose cards from your hand, the top of your Safe House (deck) or from your Discard Pile equal to half the Horde's Attrition. | You cannot scavenge for Swag and you must lose cards equal to the Horde's Attrition. |
You may choose to lose any non-zombie cards from your hand, Discard Pile and/or you may reveal cards from the top of your Safe House (deck) and lose them.
Note: You may lose some cards from your hand and some from the top of your Safe House (deck) on the same turn. Also, you may not choose to lose a zombie from your hand or Discard Pile but you may lose a zombie card from the top of your Safe House (deck).
Return any cards lost to their Swag Pile on the table or to the Zombie Discard.
Last, remove all the remaining zombies in the Horde.
Note: If you failed to kill all the zombies or failed to flee from the Horde, then all the zombies in the Horde would have been removed.
Dissipate a Zombie
Remove the oldest zombie from the Horde if any zombies remain in the Horde.
Draw up to your Current Hand Size
Draw cards from the top of your Safe House (deck) until you have 6 cards in your hand. If for any reason you have more than 6 cards in your hand, you must discard cards until you only have 6.
The End
- The game ends once you die! You die whenever you need to draw a card but have nothing left in either your Safe House (deck) or Discard Pile. The surviving player wins.
- The game can also end if a Survivor ever reveals a hand composed (or should we say decomposed) of nothing but 6 zombie cards. The strain has proven too great and has unlocked all the doors to both your houses, admitting a gang of ghouls hungry for a snack... of you! In this case the zombies win and both players lose.
- If you ever need to reveal a zombie and there are no zombie cards left in both the Zombie Discard and the Zombie Deck, the game immediately ends. Do not finish the turn! You both win! You could total the number of zombies you killed, and how much Swag you each scored in your Safe House, hand & Discard Pile, but that would just be petty...
Icon Key
Swag Cards
- Draw sign: The Draw sign conveys how many cards you must draw when you play this card from your hand. It also indicates that you may play this card on any turn you choose to Fight or Flee.
- Fight sign: The Fight Sign conveys how much Fight you add to your total when you play this card from your hand. You may play this card on a turn you choose to Fight, even if it does not add any Fight to your total.
- Flee sign: The Flee Sign conveys how much Flee you add to your total when you play this card from your hand. You may play this card on a turn you choose to Flee, even if it does not add any Flee to your total.
- Scavenge sign: The Scavenge Sign conveys how much of a Scavenge bonus you add to your total Scavenge when you play this card from your hand. If you could not scavenge for Swag this turn, this has no effect.
- Find sign: The Find Sign conveys the card's Scavenge cost, a.k.a. the card's Find value. (Find Modifier and Play Restrictions appear in the card's text area.)
- Text Area: A card's Text Area explains all of a card's specific effects when played or scavenged.
Zombie Cards
- Level: The Zombie's Level is the Fight value you must meet or beat in order to kill this zombie.
- Reveal sign: The first time each turn when a zombie card with the Reveal Sign is added from the top of the Zombie Deck (not when it is added by a player), immediately turn over an additional card from the top of the Zombie Deck and add it to the Horde. Only do this once each turn.
- Attrition sign: The zombie's Attrition is the total Flee value you must meet or beat in order to successfully flee from this zombie. The zombie's Attrition is the number of cards you must lose if you fail to Fight or Flee. You must also lose half this number (rounded up) if you successfully flee from the Horde. You may not add a zombie to the Horde if there are already a number of zombies in the Horde equal to that zombie's Attrition.
- The Horde's Level is the total Levels of all the zombie cards included in the Horde.
- The Horde's Attrition is the total of all the zombie Attrition values included in the Horde.
FAQ
What is the 'key' symbol on the 'Greaser's key' and how does it work?
The Key effect applies only when playing with the Vehicle pile. Vehicle cards will be found in forthcoming Eaten by Zombies! expansion sets.
What are the 'First-aid' effects of the 'Medical Journal' and 'Bandages' and how does it work?
Some cards in upcoming expansions of Eaten by Zombies! can give you Wound tokens that have a negative effect on you for the rest of the game unless First-Aid is played. For now just ignore this portion of the card's text.
Can I play In Cahoots! with more than 2 players?
Not by itself, as each player must have his or her own Starting Deck. But In Cahoots! can be combined with the 4-player Eaten by Zombies! game to accommodate up to 6 players.
What is the purpose of the list of Zombie Levels and Abilities on the back of the Survivor Turn Sequence dividers?
These are used in a game with three or more players. When a player is killed by the Horde he or she flips over the Survivor card and plays the rest of the game as a zombie. You can find a more in-depth explanation of how playing as a Zombie Player works in the rules of the 4P Eaten by Zombies!
In the 4P Eaten by Zombies! there are three Basic Swag (or Starting Swag) cards with a Yellow Find Sign, where are they in this game?
There are no Basic Swag cards in In Cahoots! because...
"With In Cahoots! I wanted to design a game that would work great as a two-player, but also added new cards for players who had already purchased Eaten by Zombies! games. In the 2P version it's more fun if you start with 3 Swag cards for each player rather than using the Basic Swag cards." — Max Holliday