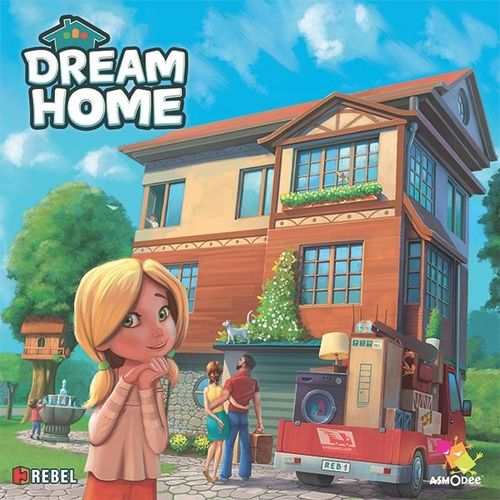
Dream Home
Dream Home Rulebook
Table of Contents
Table of Contents
Goal of the Game
You get to design your own custom dream home from scratch! The game lasts twelve rounds. During each round, you add rooms to your home and decorate them with all kinds of accessories. When the deck of cards runs out, the game ends, and the player with the most points wins!
Contents
- 1 Game Board
- 1 First Player Marker
- 4 Home Boards
- 1 Score Pad
- 10 Décor Tokens
- 4 Reference Tiles
- 60 Room Cards
- 48 Resource Cards
Reference Tile
POINTS FOR ROOF: 3 points for a complete roof (4 cards). 5 extra points if your roof is uniform (same color cards).
HOME FUNCTIONALITY: 3 points for having a bathroom on each of the top two floors. 3 points for having a bathroom, kitchen, and bedroom.
Setup
- Each player receives a home board and a reference tile.
- Place the game board in the center of the table.
- Shuffle the resource cards and place the deck facedown on the board A. Draw 4 resource cards and place 1 faceup on each of the 4 rightmost spaces along the top row. (The leftmost space is the first-player space and must always be empty.)
- Shuffle the room cards and place the deck facedown on the board B. Draw 5 room cards and place 1 faceup on each of the spaces along the bottom row.
- Place the décor tokens near the game board.
- The youngest player receives the first player marker.
You are now ready to play the game!
FIRST PLAYER SPACE — This space is always empty.
Playing the Game
The game is played over 12 rounds. Each round, the player with the first player marker takes the first turn and play proceeds clockwise.
During a player's turn, he chooses a column on the game board and takes the pair of cards in that column (one room and one resource). If a player chooses the leftmost column, he takes the card in the bottom space and the first player marker. Immediately place the chosen room card onto your home board, ideally placing it next to similar types of rooms (see "Placing Room Cards" on page 6). Resource card effects are explained on page 5.
If no one chooses the leftmost column, the current first player keeps the first player marker and will take the first turn next round.
After each player has taken a turn, the cards on the board are reset: discard any cards still on the board and refill each row (4 resource cards on the top row; 5 room cards on the bottom row).
When the decks are empty, the game ends and players add up their points. The player with the most points wins.
Room Cards
NORMAL ROOM CARDS — These cards represent the main rooms in your home. They are placed on any of the ten spaces which make up the top two floors of your home board.
UNIQUE ROOM CARDS — These cards represent non-essential rooms you can add to your home (after all, it is your dream home, isn't it?). Like normal rooms, unique rooms are placed on the top two floors of your home board. Be sure to read the card's text, as some unique rooms have special scoring requirements!
BASEMENT ROOM CARDS — These cards represent the basement rooms in your home and can be placed only on the two spaces on the bottom floor of your home board. You can tell basement cards apart from other room cards by their dark border and their name and point value are placed at the top of the card.
Example room cards: Living room — worth 1 / 4 / 9 points for one / two / three cards. Sauna — "Worth 3 points if next to a bathroom." (unique room, 3 points). Pantry — "Worth 3 points if next to a kitchen." Garage — a basement room worth 0 / 4 points for one / two cards. Storage room — a basement room worth 1 point.
Resource Cards
Different types of resource cards each have their own specific rules:
ROOF CARDS — Roof cards are stacked facedown on the roof space of your home board. Once you have placed a roof card on your stack, you cannot look at it again until the end of the game. There are four different types of roof cards.
DÉCOR CARDS — When you take a décor card from the game board, you place its corresponding token on one of your rooms. You must place the token on a room that does not already have a décor token and matches the room type indicated on the décor card, and then discard the card. If all of your rooms of the indicated type already have a décor token or if you do not have a room of the indicated type, you cannot place the token, and you simply discard the card. Placing a décor token on a room card finishes that room (see "Placing Room Cards" on page 6).
TOOL CARDS — Tool cards are placed faceup near your home board. The text on each tool card explains when and how it is played.
HELPER CARDS — Helper cards are placed faceup near your home board. Helper cards are used at the end of the game during scoring, except for the Interior Designer, which is also used during the game.
To make it easier to score certain helper cards, we recommend keeping the discarded room cards and the discarded resource cards separate.
Rule Changes for 2–3 Players
In a two- or three-player game, follow the setup steps as normal. At the beginning of each round, before the first player takes his turn, he chooses a column of cards and discards that pair of cards. The first player cannot choose to discard the leftmost column.
Note: For younger players, you may wish to simplify the game by ignoring this discard rule.
Placing Room Cards
After taking a room card from the board, you place it on your home board. After you have placed a room card, you cannot move it unless a specific tool card or helper card allows you to do so. There can be empty spaces between rooms that are on the same floor. Also, players are not required to place cards from left to right or in any particular order as long as you follow these rules:
[A] A room card cannot have an empty space directly below it.
[B] Basement cards must be placed on one of the two basement spaces. Normal room cards and unique room cards must be placed on spaces in the top two floors.
[C] When expanding a room, you cannot exceed the maximum size specified on the room card. (For more about expanding rooms, see page 7.)
(The leftmost column of the home board is the space for roof cards.)
If you cannot place a room card, or if you do not want to place a particular room card, place it facedown on an empty space of your home board. This creates an empty room, which is worth 0 points at the end of the game. An empty room, like all rooms, cannot have an empty space directly below it. Empty rooms can be placed adjacent to each other, but they do not expand.
[C] The bedroom has a limit of two cards, so you cannot place a third bedroom card beside them.
Expanding Rooms
Rooms can be expanded horizontally to earn additional points. Each room has a limit of one, two, or three cards, as shown by these icons: one card, two cards, or three cards. A room made up of its maximum number of cards, or a room that contains a décor token, is finished and cannot be expanded further. You cannot place a room card beside a finished room of the same type; if you have no other space available for placing that room card, you must place it facedown as an empty room (worth 0 points).
Note: Rooms that are vertically adjacent are not on the same floor, so they are considered to be separate rooms and score points separately.
Susan has taken a bathroom card from the game board. A bathroom has a maximum size of only one card. If Susan places her new bathroom card on the indicated space, which happens to be beside her existing bathroom, then it must be placed facedown as an empty room.
William has taken a kitchen card and has only two possible spaces for it. He could place it beside his existing living room (which would prevent further expansion of that living room), or he could place it facedown as an empty room adjacent to his existing kitchen because the kitchen has its maximum of two cards and is already finished.
When a décor token is placed on a room, that room is finished and cannot be expanded further. Remember, if you place a room card adjacent to a finished room of the same type, the room card must be placed facedown as an empty room (worth 0 points). Empty rooms can be adjacent to each other, but they cannot be expanded.
William decides to add a piano to his living room (which only has one card so far). Placing the piano token finishes the room, preventing it from being expanded further. (A piano is a very delicate instrument, so you can't just freely renovate around it!)
Game End and Scoring
After the 12th round, each player's home will have 12 rooms. Determine your home's value by adding up your points. Score sheets are included to help add up the scores. Be sure to admire all of the beautiful homes that were built during the game!
When scoring, remember to use the effects of the Supplier, Handyman, and Roofer.
You score points for your:
- rooms
- décor
- home functionality
- roof
Points for Rooms
Most rooms score points based on the number of cards that make up the room, which is based on horizontal adjacency. The room's point value is displayed on the bottom of the card.
A two-card bedroom is worth 4 points.
A one-card living room is worth 1 point, a two-card living room is worth 4 points, and a three-card living room is worth 9 points! The icons displayed at the bottom of the room cards show the points earned for a room made up of one, two, or three cards.
A one-card garage is worth 0 points, but a two-card garage is worth 4 points.
Points for Décor
Each décor token has a point value. A player with the Interior Designer scores 1 extra point for each décor token. (See "Helper Cards" on pages 12-13.)
William's home has a one-card bedroom. During his turn, he takes a cat house décor card and decides to put the cat house token on this bedroom. This finishes the bedroom, so he cannot place another bedroom card adjacent to it. During his next turn, he takes the Canopy Bed décor card and token, which can only be placed on a bedroom. If William does not have a second bedroom on his home board, he must discard the canopy bed card because a room can have only one décor token.
Points for Home Functionality
There are two ways your home can earn points for functionality:
- A home with a bathroom on each of the top two floors is worth 3 extra points.
- A home with a bathroom, kitchen, and bedroom is worth 3 extra points.
Points for Roof
Whenever you take a roof card, you place it facedown on the roof space of your home board. During the game, you cannot look at your facedown roof cards. At the end of the game, you reveal your roof cards and choose four to build your home's roof. Your roof is worth points based on its uniformity:
- A complete, uniform roof (four roof cards that are all the same color) is worth 8 points.
- A complete, mismatched roof (four roof cards that are not all the same color) is worth 3 points.
- An incomplete roof (fewer than four roof cards) is worth 0 points.
- Any extra roof cards beyond the four you choose to use are worth 0 points.
A roof card is placed facedown on a home board.
A Mismatched Roof: 3 points
A Uniform Roof: 8 points
Additionally each window in a complete roof is worth 1 extra point. A window appears on only one of each type of roof card.
A Mismatched Roof with Two Windows: 5 points (3 points for roof + 2 points, 1 for each window)
The Maximum Possible Roof Score: 9 points (8 points for a uniform roof + 1 point for one window)
Winning the Game
The player with the most points wins. In case of a tie, the tied players search their own home for kids depicted in their rooms' artwork (you may need to look closely as some of the children are hiding with only an arm or leg visible). The tied player with the most kids in their home wins. If there is still a tie, the tied players share the victory.
Detailed Description of Resource Cards
Décor
When you take a décor card from the game board, you place its corresponding token on one of your rooms. You must place the token on a room that does not already have a décor token and matches the room type indicated on the décor card, and then discard the card. When a décor token is placed on a room card, that room is finished and cannot be expanded further.
A room (meaning the entire room, which could be a single room card or possibly multiple cards side-by-side) can have at most one décor token. A décor token cannot be placed on an empty room (a facedown room card).
The treehouse and birdhouse are special décor items. When either of these décor cards is taken, the player takes the corresponding token and places it near his home board. It is possible to own both the treehouse and the birdhouse.
Example décor cards: Hot Tub — Décor. "Place the hot tub token on a bathroom card." Canopy bed — Décor. "Place the canopy bed token on a bedroom card."
Helpers
Helpers are used at the end of the game during scoring. (The exception to this is the Interior Designer, who also assists you during the game.) This section explains each helper card's effect in more detail.
ROOFER (Helper — "At the end of the game, before you look at your roof cards, you may take 1 roof card from the discard pile."): At the end of the game, you may select one roof card which was discarded during the game and add it to your stack of roof cards.
Note: You must use the Roofer before you look at your own facedown roof cards.
SUPPLIER (Helper — "At the end of the game, before scoring, you may switch 1 room card on your home board with 1 room card in the discard pile."): At the end of the game, you may select one room card which was discarded during the game and exchange it with any room card on your home board (including an empty room). The incoming room card must obey all rules for placing room cards. If you remove a room card with a décor token on it, the token is also removed and you do not score points for it.
ARCHITECT (Helper — "Each empty room on your home board is worth 1 point. Your home functionality bonuses are worth 4 points instead of 3."): At the end of the game, you score 1 additional point for home functionality. (A home with a bathroom on each of the top two floors scores 4 points instead of 3; a home with a bathroom, kitchen, and bedroom scores 4 points instead of 3.) You also score 1 point for each empty room on your home board—the Architect can easily convert them into something useful.
HANDYMAN (Helper — "At the end of the game, before scoring, you may switch 2 room cards on your home board."): At the end of the game, you may switch places of any two room cards on your home board. Both cards must obey all rules for placing room cards (basement cards must be placed on one of the two basement spaces, you cannot expand a room that has already reached its maximum size, etc.).
If an empty room is switched, it remains facedown and is still worth 0 points. If you switch a card that contains a décor token, the token moves with the card.
You can use the Handyman's ability to expand a room that already contains a décor token, as long as you don't exceed the maximum size of that room.
If this switch causes a room to contain more than one décor token, you must discard all but one of the tokens (Remember, a room can contain only one décor token.)
Susan uses the Handyman to switch the living room card on the second floor with the playroom card on the first floor to expand her living room.
INTERIOR DESIGNER (Helper — "Décor tokens do not finish your rooms. At the end of the game, each décor token on your home board is worth 1 extra point."): During the game, when you place a décor token, it does not finish the room, but your rooms are still limited to having only one décor token. Any of your rooms that were considered finished because of décor tokens before you had the Interior Designer can now be expanded (unless they have also reached their maximum size). This card's ability applies as soon as you take it. At the end of the game, each of your décor tokens is worth 1 additional point.
Tools
Tool cards are placed faceup near your home board (except Scaffolding, which is placed on an empty space on your home board). Tool cards are used during your turn unless specified otherwise. After you use a tool card, discard it. If you take a tool card in the final round, you will not be able to use it, and it has no effect.
DRILL (Tool — "Before you take cards, discard this card to switch 1 room card on your home board with 1 room card on the game board."): At the start of your turn, immediately before you choose which column of cards to take, you can discard the Drill to switch places of any room card on the game board with a room card on your home board. The incoming room card must obey all rules for placing room cards. You cannot switch an empty room from your home board to the game board.
Switching a study card to get a third living room card.
JACKHAMMER (Tool — "Before the first player's turn, discard this card to take 1 room card from the game board. Skip your turn this round."): At the start of a round, before the first player chooses which column of cards to take, you can discard the Jackhammer to immediately take one room card of your choice from the game board and place it on an empty space of your home board. Discard the resource card above your chosen room card; if you choose the leftmost room card, you do not become first player. After taking and placing your one room card, play resumes with the first player taking his turn and continuing clockwise around the table. You must skip your normal turn this round.
CONCRETE MIXER (Tool — "Before you take cards, discard this card to switch 2 room cards on the game board."): During your turn, before you choose a column of cards to take, you can discard the Concrete Mixer to switch places of two room cards on the game board.
In the image above, William is the second player in the round, and he has four columns to choose from. He wants the living room card and the red roof card with a window which are not in the same column, so he discards his Concrete Mixer to switch places between the living room and pantry. Now that the two cards he wants are in the same column, he chooses that pair of cards and adds them to his home board.
SCAFFOLDING (Tool — "When you take this card, place it on an empty space on your home board. You may place a room card above Scaffolding. You must replace this card with a room card before the game ends."): When you take the Scaffolding, place it on an empty space of your home board that does not have an empty space below it. You can place a room card directly above the Scaffolding. Before the end of the game, you must replace the Scaffolding with a room card, which could be an empty room. You may place the Scaffolding before or after your room card.
In the image above, William has just taken his pair of cards for the turn: his third living room card and a Scaffolding card. He first places the Scaffolding on the empty space of his basement which allows him to then place his third living room card and expand the living room above it. William knows he must take another basement room card before the end of the game…or he'll be forced to replace the Scaffolding with an empty room!
Scoring Example
Rooms
- Playroom: 2 points
- Living Room: 4 points
- Bathroom: 1 point
- Dressing Room: 1 point
- Bathroom: 1 point
- Bedroom: 1 point
- Kitchen: 1 point
- Pantry: 3 points (next to a Kitchen)
- Kitchen: 1 point
- Garage: 0 points
- Empty room: 0 points
15 points
Décor
- Piano: 3 points
- Cat House: 1 point
Home Functionality
- A bathroom on each of the top two floors: 3 points
- Bathroom, kitchen, and bedroom: 3 points
Roof
- Complete, mismatched roof: 3 points
- Window: 1 point
FINAL SCORE: 29 POINTS