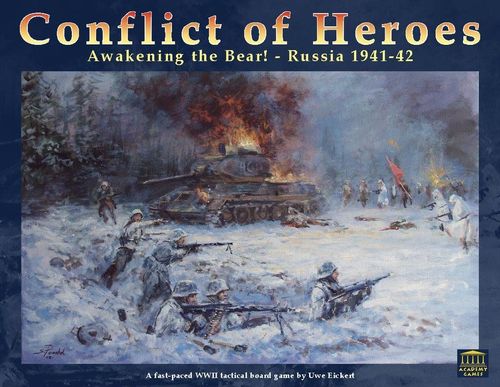
Conflict of Heroes: Awakening the Bear! – Russia 1941-42
Conflict of Heroes: Awakening the Bear! – Russia 1941-42 Rulebook
Table of Contents
Table of Contents
- Game Overview
- Section 1
- 1.0 Game Setup
- 2.0 Pre-Turn Sequence
- 2.1 Roll for Initiative
- 2.2 Taking Actions
- 2.3 Turn Over
- 2.4 Game End and Victory
- 3.0 Unit Activation and Action Points (APs) Allocation
- 3.01 Variable AP Allocation (Optional Rule)
- 3.1 Opportunity Actions
- 3.2 Command Action Points (CAPs)
- 3.21 Supplement an Activated Unit's APs
- 3.22 Command Actions
- 3.23 Modify Any Die Roll
- 3.24 New Turn Die Roll
- 4.0 Terrain
- 5.0 Foot Unit Movement
- 5.01 Foot Units Movement Penalty (Optional Rule)
- 5.02 Foot Units Moving Cautiously (Optional Rule)
- 5.1 Unit Reinforcements and Leaving the Game
- 5.2 Facing
- 5.3 Pivoting
- 6.0 Line of Sight (LOS)
- 6.1 Arc of Fire
- 7.0 Combat
- 7.1 Attack Value (AV)
- 7.2 Defense Value (DV)
- 7.3 Destroyed Units and CAP Track Adjustments
- 7.4 Hits
- 7.41 Secret Hit Status (Optional Rule)
- 7.5 Rally
- 7.51 Rally Die Roll Modifiers
- 7.6 Range
- 7.61 Long Range Firing
- 7.62 Short Range Firing
- 7.63 Close Combat (CC)
- 7.7 Stacked Units and Combat
- Section 2
- Section 3
- Section 4
- 14.0 Vehicle Movement
- 14.1 Immobilization
- 15.0 Armored Defense Rating and Firepower
- 15.01 Rounding Down
- 15.1 Multiple Munitions
- 15.2 Vehicle Hits
- 15.3 Optional Rule – Secret Vehicle Unit Status
- 15.4 Range Effects on Combat
- 16.0 Turreted Vehicles
- 17.0 Truck and Wagon Units
- 18.0 Anti-Tank and Infantry Gun Units
- 19.0 Loading, Transporting, and Unloading Units
- 19.1 Firing at Transported Units
- 20.0 Armored Personnel Carrier (APC) Units
- 21.0 Vehicles as Cover
- Section 5
- Section 6
- Designer's Notes
- Index Table
- Abbreviations
- Unit Reference (Component Notes)
- Action Card Reference (Component Notes)
Game Overview
Conflict of Heroes is a tactical World War II game of platoon-sized engagements that pits players against each other in epic battles. Tactics used by the Germans and Soviets are introduced and must be employed to win. The engagements are presented as firefights with different objectives. Many last less than 60 minutes and can include anywhere from 2-4 players. During the game, players use their army's units to fight for those objectives. Whichever side meets the firefight's victory conditions wins.
Players take turns activating units. When a player activates a unit, it receives 7 action points (APs). These APs are tracked on the green unit action points track on the player's track sheet.
The counter shows: Tank Forward Facing, AP Cost to Fire, Firepower (FP) = Explosive (Red) & Armor-Piercing (Blue), Range, AP Cost to Move, Armored Flank Defense Rating (Blue), Armored Front Defense Rating (Blue).
The unit takes actions by expending these action points. Each action costs APs. For the tank shown, it costs 2APs to fire or 1AP to move. The firepower (FP) of this tank is marked in the lower left corner of the counter. Red FP represents its machine guns and high explosive shells and blue FP its armor-piercing shells. The tank's defense ratings (DR) are marked on the lower right side of the counter. Again, blue means armored, red means non-armored.
In combat, a player rolls two 6 sided dice (2D6) and adds the result to his firepower to determine his attack value. (If the PzIIf above rolled a 9, his total attack value would be 13.) He then compares this number to the defender's defense rating. He hits if his attack value is greater than or equal to the defender's defense value. A unit's defense rating is modified by the terrain it is in. So if the PzIIf were in woods, its defense would be modified by +2 (for the extra woods protection) for a total front defense value of 17 (15 + 2). A unique feature of the game is the simplicity of armored vs non-armored combat. A red firepower attack against a blue defense is halved, since bullets did little damage to armored tanks. A blue firepower attack against a red defense is halved, again since armor-piercing shells did little damage against a squad of dispersed unarmored men. A simple, but effective system.
When a unit is hit, the owning player pulls a hit counter and places it under the unit. Hit counters affect units in different ways, depending on which is pulled. A unit may be instantly killed, immobilized, paralyzed, not affected at all, etc.
There are three hit-counter examples shown: Foot Killed! ; Foot Pinned (Rally 7, ⊘); Vehicle Gun Damaged (No Rally, ⊘).
Each time the active player takes an action with any of his units, the reacting player may take an action with any unit. He reacts by using command action points (CAPs), which are marked on the blue track of the track sheet, taking opportunity fire, or playing an action card. Players receive few action cards each turn, so they must be used sparingly. Yellow action cards are played immediately and may signal a premature end to the game or other events.
Victory points are won during the game when your opponent loses units or when objectives are taken and held. Victory conditions are listed on each firefight card. Awakening the Bear! comes with 10 firefights, which never play the same and are difficult to master. (Firefight 3, General Petrov, is shown.)
A player could lose most of his command, but still win the game if he has met his victory conditions and has more victory points than his opponent.
Learning the Game
This rule book was written to facilitate a programmed instruction approach to learning the rules. This means that you will learn one section of the rules at a time and then play a firefight to reinforce your understanding of those rules. As you read further, you will learn new rules that will build upon what you have already learned. This way you can begin playing the game as quickly as possible.
Ex: Throughout the rule book, you will see numerous examples of the rules printed in this color (red). An example is always inserted directly below the paragraph containing the relevant rules, unless the example is a larger example of play incorporating a number of different rules.
Designer's Note: Throughout the rule book, you will also see numerous designer notes printed in this color (blue). These notes will give you insight into why some of the rules work the way they do as well as discuss some of the history that influenced the game. You can skip them if you like, but often understanding why something works makes remembering how it works a bit easier.
Section 1
In this section you will learn how to set up a firefight, play through a game turn, and manage command resources to wage war.
1.0 Game Setup
The firefights provided in Conflict of Heroes represent historically relevant situations for you and your friends to battle through. For each session of Conflict of Heroes, you follow the steps below before playing.
1. Choose one of the firefights to play. The firefight sheet describes the map setup, unit setup, starting command action points (CAPs) level for each side, the action cards used, and the victory conditions.
2. Place the turn marker on the turn 1 box of the firefight sheet and sort out the units to be used in the game.
3. Configure the maps as described by the firefight.
4. Decide who will play each force and place the starting forces on the map as specified by the firefight.
Unit setup locations are designated by the map coordinates as follows: Map # - Row Letter and Column.
Ex: 2-J10 would be map #2, hex J10, the gray stone house.
Units may be set up on full hexes only. Half hexes are not playable at any time in the game.
5. Each player takes a track sheet and places a yellow victory point marker on 0 victory points. Each player also marks their starting CAPs level with their blue CAPs marker and places their green action point (AP) marker on the "7" space.
6. Sort the vehicle and foot hit counters into two piles, keeping the value modification side face down (you may want to put them into 2 opaque cups). These counters will be randomly drawn throughout the game, when units take hits.
7. Sort the action cards specified by the firefight. Shuffle and deal each player the listed number of cards.
8. Some firefights allow hidden units or artillery barrages during setup. On a piece of paper, write down the map locations of the hidden units and artillery targets.
2.0 Pre-Turn Sequence
At the beginning of every turn, the following steps must be taken in order before play begins. Each step is later described in detail.
- Flip Counters to their unused sides. (2.3)
- Reset CAPs - Deduct one per casualty. (7.3)
- Action Cards - Take card(s) if called for in the firefight. (8.0)
- Smoke - Reduce or remove smoke counters. (13.0)
- Target Off-Board Artillery for next turn's resolution. (12.3)
- Resolve Off-Board Artillery targeted last turn. (12.3)
- Prepare Reinforcements called for by each firefight. (5.1)
- Roll for Initiative (2.1)
2.1 Roll for Initiative
At the beginning of each turn, the players each roll 2 six-sided dice (notated as 2D6) for initiative. In the case of a tie, re-roll. The high roller wins initiative and begins the turn as the active player. The other player begins as the reacting player.
2.2 Taking Actions
Active player status will switch back and forth between players during a turn. The active player may take actions with his units in four different ways.
- Unit Activation: Activate one unused unit and take one action by spending its allocated action points (APs). A player may activate only one unit each time he is the active player (exception - group activation 9.1). If the unit has APs remaining after taking its initial action, the player may take additional actions with it by spending more of its APs. Mark the activated unit as used after spending all of its APs.
- Opportunity Action: Take an opportunity action with any unused unit that is not currently activated. Mark the unit as used after it has taken its opportunity action.
- Command Action: Take a command action with any used, unused, or currently activated unit by spending command action points (CAPs). The unit is not marked as used by taking a command action.
- Play an Action Card: Play an appropriate action card on any used, unused, or currently activated unit. The unit is not marked as used by playing the action card.
After each action the active player takes, the reacting player may take an opportunity action, command action, or play an action card (he may not activate units however). To facilitate this process, the active player should pause slightly between each of his actions to give the reacting player a chance to decide if he wants to take an action.
The active player may take as many actions as he wishes before giving up active player status, as long as he has the resources necessary to do so and activates no more than one unit. Once the active player cannot or decides not to take additional actions, he passes and his opponent immediately becomes the active player.
Ex: The German player is active and activates squad A spending its APs by taking an action moving a hex towards a Soviet MMG position. The Soviet reacts by opportunity firing with the MMG at squad A before it moves any further. The German then takes a command action with a mortar by firing at the MMG. The Soviet does not react. The German then continues with unit A, using up the rest of its APs. The German passes, and Soviet becomes the active player.
CAPs can be used to:
- Supplement an activated unit's APs.
- Execute a command action.
- Modify any die roll.
Designer's Note: The strength, functionality, and effectiveness of a company relies on its logistics and leadership structure. Leaders, from sergeants on up, coordinate attacks, keep the morale high in the company, direct fire groups, and much more. The logistical command structure makes sure that the support system works flawlessly, from supplying food and ammo to the front line troops, evacuating wounded soldiers, to communicating with the HQ command. Individual leader counters are not present, since the leadership and command structure seldom hinged on individuals, but on the training and logistics of the entire company. When a 2nd lieutenant fell, the sergeant took his place, and so on. If a position had to be held, extra ammunition, spare parts, and men were sent to reinforce the defending crew or squad. These command and logistical structures are abstracted in the game through the use of CAPs.
Designer's Note: APs are the standard used in the game to measure the effort it takes to carry out specific actions. More involved actions cost more APs.
2.3 Turn Over
The turn ends when both players, one after the other, pass active status without taking any actions. At this point, all used counters are flipped to their unused side. The turn marker is moved forward one space on the firefight sheet and the pre-turn sequence is followed. The firefight is over after the last turn is played or when the firefight conditions are met.
Designer's Strategy Note: Suppose a German player needs to take a Soviet stronghold position. The German has two unused units remaining on the board. He activates one and plays through its actions. When the German passes, the Soviet player with 4 unused units becomes the active player, but immediately passes. He wants to see what further actions the German will take. The German is now in a dilemma. If he activates his last unit, he will not have any unused units left, the Soviet however will have four unused units left and may be able to overwhelm the German with a counter attack. If the German passes, the turn is over and he wasted a unit's activation. The Soviet does not care if he wastes activations, because as the defender, he wants turns to end as quickly as possible. So the German must decide if he should continue with a weak attack and face a possible strong counter attack or end the turn.
2.4 Game End and Victory
Each firefight sets the game length and victory conditions and notes special firefight rules that may overrule regular game rules. The player with the highest victory point total at the end of the game wins. Typically, victory points are earned by destroying opposing units or controlling victory hexes during scoring turns. Controlling a victory hex means being the last player to have had a unit solely on that hex. If both opponents have units in the same hex, it is contested and nobody controls it. Control markers are placed on victory hexes with the side of the controlling army face up.
3.0 Unit Activation and Action Points (APs) Allocation
As stated in 2.2, only the active player can activate a unit. To activate a unit, the active player chooses any unused unit on the map and advances the green unit action point (AP) marker on the green track of the track sheet to 7APs. The active player now spends the APs of the activated unit, taking 1 action at a time. (The costs to take different actions are listed throughout the rules.) As actions are taken, the AP track is adjusted down to show how many APs the unit has remaining.
Once the active player has spent all of an activated unit's APs taking actions, it is marked as used by flipping it to its used side (the side with the red bar in the middle). The active player may also flip an activated unit to its used side when it still has APs left, but the remaining APs are wasted.
Note that the active player may intersperse the actions he takes with his activated unit with actions taken by other friendly units using opportunity actions, command actions, and action cards. Even the activated unit may take command actions or have action cards played on it. In all cases, no more than one unit can be activated per active player status.
Ex: The active player activates a unit, spends 2 of its APs to take a single action, takes a command action with a completely different unit, comes back to the original unit and plays an action card on it, takes an opportunity action with a third unit, and comes back to the original unit and spends the rest of its APs on another unit. Between each of these actions, the reacting player could have taken an opportunity action, command action, or played an action card.
3.01 Variable AP Allocation (Optional Rule)
Instead of a unit automatically receiving 7APs when activated, roll 2D6 to determine how many APs the unit will receive. It is recommended you play the game at least once with the standard rule before using this option.
Designer's Note: In battle, all plans fall apart upon contact with the enemy. This optional rule adds an element of uncertainty to the game that forces you to adjust your plans and go with the unexpected. This rule is highly suggested for solitaire play.
3.1 Opportunity Actions
Both the active player and reacting player can take an opportunity action with any unused unit. Any one action, such as firing, moving, or rallying, may be taken as an opportunity action. This action does not cost the player APs or CAPs, but the unit is marked as used after completing the action.
Ex: In figure 1, the active player (German) activates squad A and receives 7APs. He plans to move squad A forward two open hexes, which would represent 2 actions, one for each hex. Immediately after A moves into the first hex though, the Soviet executes an opportunity action with squad C, by firing at A. C misses and its counter is flipped to its used side (see figure 2). The German moves squad A forward another hex, has now used up a total of 2APs (one for each open hex moved into), and has reduced the squad's APs on the track sheet accordingly to 5APs. The Soviet doesn't react to this second move and so squad A fires at squad C for 3APs and misses. This leaves him 2APs.
Designer's Strategy Note: As you can see, taking an opportunity action with an unused unit is less efficient than waiting to activate the unit when you are the active player. However, sometimes it makes tactical sense to take an opportunity action now than to activate a unit later. One of the challenges in Conflict of Heroes is developing a sense of when it is more lucrative to take an opportunity action now than activating a unit later.
Ex: Continuing the previous example in figure 2, squad A had 2APs left, but it needs 3APs to fire again. It has 5CAPs at its disposal for the turn. It fires at squad C again by using the remaining 2APs plus 1CAP. The CAPs marker is moved down the blue CAPs track to show 4CAPs remaining for the turn. The Soviet passes. The German declares that he is done with this activation and flips squad A to its used side.
3.2 Command Action Points (CAPs)
An army's available command resources are marked with the CAPs marker on the blue track on the track sheet. Each firefight lists the starting CAPs for each player. This limited number of CAPs is shared by all units during the entire turn and is not replenished until the beginning of the next turn. CAPs left over from one turn are not carried over into the next turn.
3.21 Supplement an Activated Unit's APs
If a unit does not have enough APs to execute an action, the player may use CAPs to supplement his remaining APs on a 1 to 1 basis. A player may spend as many CAPs as desired this way.
Ex: Continuing the previous example in figure 2, squad A had 2APs left, but it needs 3APs to fire again. It has 5CAPs at its disposal for the turn. It fires at squad C again by using the remaining 2APs plus 1CAP. The CAPs marker is moved down the blue CAPs track to show 4CAPs remaining for the turn. The Soviet passes. The German declares that he is done with this activation and flips squad A to its used side.
3.22 Command Actions
Command actions are actions funded purely by an equivalent number of CAPs for APs. Command actions can be taken with a unit that is currently activated or another unit on the map that is used or unused. An unused unit that takes a command action is not marked as used.
Ex: In figure 3, the Soviet now becomes the active player, activates squad D, and marks the AP track with 7APs. D moves forward one hex for 1AP. Immediately, German squad B takes a command action, deducts 2CAPs from its CAP track (leaving 2CAPs for the rest of the turn), and fires at D. It misses. Squad B is not marked as used, since it only used CAPs. Squad D deducts 4APs from its AP track and fires at B, scoring a hit. The German player pulls a hit counter, places it under his squad and passes. The Soviet squad D counter is flipped to its used side and the remaining 1AP is lost. The German player now becomes the active player, but passes. If the Soviet player would decide to pass also, the turn would be over.
3.23 Modify Any Die Roll
All rolls may be modified up to 2 points. You must state all CAP die roll modifications before rolling. You may never modify an opponent's die rolls.
Ex: The Soviet player needs to roll a 9 to hit a unit. Before rolling, he declares that he will spend 2CAPs to positively modify his roll. He now only needs to roll a 7 to hit. (7 + 2CAPs = 9)
3.24 New Turn Die Roll
CAPs may be spent to modify initiative rolls. The player with the most CAPs announces how many he will spend to modify his die roll. (In case of ties, the Soviet player must decide first.) Then his opponent announces how many CAPs he will spend. Each player may only announce once what they will spend. Both players deduct the stated CAPs (up to two maximum), then roll, adding the modifications to the die total. If tied, the players re-roll and the original CAPs are not counted. A player may spend more CAPs for re-rolls, if desired.
Ex: At the beginning of a new turn, the German player has the most available CAPs to modify his roll and decides to use 2 of his 7 CAPs to modify his roll. The German player scores a 6 (4 die roll + 2 modifier). His opponent rolls a 7. The Soviet player goes first, but the German player still has only 5CAPs left for the rest of the turn for all of his units to draw from.
4.0 Terrain
The battle is played on a map made up of hexes representing 40-50 meters of ground. On these hexes you will see various types of terrain. Each hex has a dot in the middle. Whatever terrain type surrounds the dot dictates the entire hex's terrain type.
Bridges/Roads: Any prepared surface intended for vehicles. Bridges are roads that cross water areas.
Open Terrain: Rolling fields with intermittent clumps of brush & low crops.
Water Terrain: Includes lakes and larger rivers. Passable only by squads and boats.
Walls: Medium height mortared brick walls or piled stone pasture boundaries.
Stone (Gray) Buildings: Bigger & sturdier structures, such as barns & farms, built of stone/wood mixes or bricks.
Light Woods: Overgrown areas with light tree and brush cover.
Wooden (Brown) Buildings: Consists of small wooden residential buildings.
Woods: Large, well developed trees, with undergrowth.
Designer's Note: A building pictured in a hex means that the hex is developed and does not represent just one individual building.
Terrain may give your units cover, make it impossible for them to see other units, or slow their movement. The Foot Unit Movement and Terrain Table details how certain terrain types affect a foot unit's movements, defensive modifiers (DMs), and line of sight (LOS) restrictions. The costs to move vehicles are introduced later.
Foot Unit Movement & Terrain Table
| Terrain | Additional AP Cost to Move into a Hex | Terrain Defensive Modifier (DM) | Hex Blocks LOS? |
|---|---|---|---|
| Open Terrain / Road | +0 AP | +0 DM | No |
| Buildings-Stone | +1 AP | +2 DM | Yes |
| Buildings-Wood | +1 AP | +1 DM | Yes |
| Walls | +1 AP | +1 DM | No |
| Water | +4 AP | -1 DM | No |
| Woods | +1 AP | +2 DM | Yes |
| Light Woods | +0 AP | +1 DM | Yes |
| Move Backwards | +1 AP | - | - |
Movement AP Costs & Defensive Modifiers are cumulative.
Optional Movement Rules
| Additional AP Cost | Terrain DM | ||
|---|---|---|---|
| Unit is Moving Normally | +0 AP | -1 DM | - |
| Unit is Moving Cautiously | +1 AP | +0 DM | - |
Terrain defensive modifiers (DMs) for multiple terrain obstacles are cumulative and apply only to the units in that hex.
A wall gives a unit +1DM protection (in addition to the hex's normal terrain type protection) for all incoming fire, from all levels, across a wall bordering the hex the unit is in.
5.0 Foot Unit Movement
Foot units are those units that have a red movement cost number in the top right corner of the counter. To move a foot unit into a hex, the unit must spend the movement cost number in APs. Some terrain types cost more to move into and these costs are listed on the movement and terrain table. These costs are added to the unit's movement cost and are cumulative.
Ex: A MMG unit with a 2AP movement cost would pay 3APs to move into a woods hex (2APs unit movement cost + 1AP for wood movement).
Roads negate hex restrictions and movement costs of terrain that covers the center of the hex. Units must follow the roads from hex to hex to gain the road advantage. Bridges function as roads over water. Roads do not affect the DM of the hex.
Each foot unit move into a new hex is considered a separate action. Units may move into and through hexes occupied by both friendly and enemy units. (Of course, an enemy unit may engage you in close combat if you move into its hex!)
5.01 Foot Units Movement Penalty (Optional Rule)
It is much easier to hit a moving foot unit than a stationary one. Therefore, all foot units moving into a new hex under their own power are penalized -1DM. This penalty is applied only to an immediate reaction fire. Transported foot units are not penalized this way.
5.02 Foot Units Moving Cautiously (Optional Rule)
The movement penalty in 5.01 can be negated by moving cautiously. Foot units move cautiously by adding +1AP to the regular movement cost listed on the movement table.
Ex: A wood building adds a +1DM to a non-moving unit. A rifle squad moving through a wood building pays 2APs per hex, but would also incur a penalty of -1DM. Its total DM would be 0 (+1DM for the wood building -1DM for moving). By moving cautiously and paying 3APs per building hex, the movement penalty is negated and the squad receives the full +1DM building modifier.
Designer's Strategy Note: A player must weigh the extra APs paid for cautious movement against the benefits of a higher DM, when using these optional rules.
5.1 Unit Reinforcements and Leaving the Game
When a firefight calls for reinforcements, these units may come into the game on that turn or any turn thereafter.
Units may never move off of a map, unless called for in the setup rules of an individual firefight.
5.2 Facing
All units have a forward facing represented on their counters with an arrow. At all times, a unit's facing arrow must face a hex side (as opposed to the corner). Units may move forward into any one of their 3 front hexes without having to change their facing. The front hexes include the hex right in front of the facing arrow and the hexes facing the front right and front left corners of the counter. Units may change their facing to any hex side at no AP cost, after they move into a new hex and before any opposing player reaction.
Flank hexes are simply those hexes that are not front hexes. A foot unit may move backwards into one of its 3 flank hexes without changing facing, but must pay a +1AP backward movement penalty in addition to all other movement costs. After the unit moves backwards into a new hex, it may immediately change its facing for free.
Designer's Note: Facing is critical for a unit. Facing involves a unit's "focus" or attention as much as taking up positions to deal with that focus. While deployed behind a wall, against an embankment, etc., a unit is very vulnerable to fire coming from its flank. Not only is the unit often more exposed, but flank attacks can be psychologically devastating. "Where did the enemy come from? Are we surrounded? Can we get away?" The natural instinct is often to either just run away or to hunker down. A unit's experience and leadership plays a vital role in assessing the new threat and how to react to it.
5.3 Pivoting
Units may pivot and change their facing to any hex side without moving or before moving into a new hex by paying 1AP.
Pivoting is considered an action.
6.0 Line of Sight (LOS)
Units have to see each other in order to fire at each other. Blocking LOS hexes are listed on the Foot Unit Movement and Terrain Table. If a line drawn from the center dot of the attacking hex to the center dot of the target hex is free of any such obstacles, LOS is established. Units can see into a blocking LOS hex, but not through one. So LOS is blocked if any part of the LOS line cuts across any part of a blocking hex. All LOS rules apply in both directions, so if unit A cannot see unit C, C cannot see A.
Ex: In figure 5, the squad in hex A can see into wood hex B, but not C and D because the LOS passes through wood hexes.
If LOS passes exactly along the edge of two hexes, it is always affected by the hex with the lesser obstacle.
Ex: In figure 5, the LMG in hex F can see into hex G, because the LOS follows the hex edge between the woods and open hex. The LOS is not blocked, because the open hex LOS applies.
Units do not block LOS.
6.1 Arc of Fire
The front 3 hexes extended outward from a unit's facing arrow represent the unit's arc of fire. Units may only shoot at targets in their arc of fire.
Ex: In figure 7, the German squad moves into hex A. It was in its front arc, so it moved in without changing its facing. The Soviet could reaction fire, since the German is in its arc of fire, but passes. The German moves to hex B and again the Soviet could react. The German now moves to hex C and changes its facing for free. The Soviet cannot reaction fire, because the German is now outside of its arc of fire. The Soviet could pivot for 1CAP, but then could not immediately reaction fire, since pivoting counts as an action. The Soviet could also reaction move into hex D for 2CAPs (+1CAP penalty for backwards movement) or into hex E for 1CAP. In both cases, after moving into the new hex, it could immediately change its facing for free.
7.0 Combat
Combat involves one unit firing its weapons at another unit. The attacking unit must have the target in its arc of fire and range.
The black number in the top left corner of the counter shows the number of APs the unit must spend to attack. Each attack is considered a separate action.
When your unit fires at an enemy, you compare your unit's attack value (AV) to the defender's defense value (DV).
If the AV is greater than or equal to the DV, the defender takes one hit. If the AV is greater than the DV by 4 or more, the defender takes two hits and is destroyed.
A unit may be attacked an unlimited number of times in a turn.
7.1 Attack Value (AV)
AV is calculated by adding the attacking unit's firepower (FP), located in the lower left corner on the counter, to a 2D6 dice roll. Remember, you can modify your attack dice roll by adding up to 2CAPs.
Ex: In figure 5, the Soviet squad B with a 3FP is firing at squad A. The player rolls a 9 and scores a 12AV (3FP + 9 dice roll).
7.2 Defense Value (DV)
DV is calculated by adding either a unit's front or flank defense rating (DR), depending where the attack came from, to the hex's terrain DMs. Hexes not in a unit's arc of fire are considered flank hexes. Fire originating from a flank hex is resolved against the unit's weaker flank DR. The unit's flank DR is printed above the unit's front DR on the counter. If only one DR is listed, the unit's defense rating is the same all around.
Ex: In figure 8, the yellow lines represent flank shots, because the fire originates from outside the squad's arc of fire.
Defenders may never add CAP modifiers to their unit's DVs.
Ex: A player needs a 6 to hit his opponent's unit and rolls a 10. The opponent's unit suffers 2 hits and is destroyed.
7.3 Destroyed Units and CAP Track Adjustments
A unit is immediately destroyed when an un-hit unit takes 2 hits or a unit with a hit counter takes another hit. Destroyed units are taken out of the game and are placed on the destroyed unit box of the owning player's track sheet.
At the beginning of each turn, the total number of CAPs a player receives decreases by 1 for every unit lost up to that point. This CAP reduction never occurs during the turn.
Ex: A player starts a firefight with 9CAPs and loses 2 units on turn one. He would start turn two with only 7CAPs at his disposal. The 7CAPs would decrease in future turns if he lost more units.
Designer's Note: As units are killed, the loss of front line leaders affect a force's combat and command structure effectiveness.
7.4 Hits
When an un-hit unit is hit, a hit counter is randomly pulled by the opponent, shown to the opponent, and placed face up under the hit unit. A unit's stats and abilities are modified by the amounts printed on the hit counter.
Ex: A Soviet rifle unit pulls a BERSERK hit counter. The unit's stats are modified as follows: • The cost to fire lowers from 4 to 3. • Movement is not affected, since the movement area on the hit counter is blank. • The firepower increases from 3 to 4. • The total range drops to 1. • The flank DR increases from 11 to 12. • The front DR increases from 12 to 14. • The unit may rally and remove the hit counter on a 2D6 roll of 8 or higher.
Some counters have a ⊘ symbol, which negates a unit's ability.
Ex: A pinned unit cannot move, but none of its other stats are affected. Ex: A stunned unit cannot do anything except rally. Its defense ratings however are not affected.
Foot units can remove hit counters only by successfully rallying (See 7.5).
The hit counters are listed below, including how many of each are available. (x5) means five of these counters are included in the game.
- Foot BERSERK (x1): Costs -1AP to fire. FP increases by 1. Range drops to 1. DR increases. 8 needed to rally.
- Foot Cowering (x2): Cost +2AP to fire. +1AP per hex to move. Range drops to 1. DR increases. 8 needed to rally.
- Foot KILLED! (x1): The unit is killed on the first hit. Immediately remove it from the map.
- Foot Panicked (x2): Unit cannot fire. Flank DR increases. Front DR decreases. 8 needed to rally.
- Foot Pinned (x5): Unit cannot move. This includes pivoting. 7 needed to rally.
- Foot Stunned (x2): Unit cannot take any action other than rally. 7 needed to rally. (Ability lost.)
- Foot Suppressed (x5): Costs +1AP to fire. FP decreases by 2. 7 needed to rally.
- Foot Unnerved (x2): No stats affected. If hit again, the unit is destroyed. 7 needed to rally.
⊘ = Ability is lost.
Designer's Note: Taking a hit does not necessarily mean that men are killed. In battle, units often hit the dirt when fired at and could not fire back. Other times they would panic, forget about firing, and run away. These various effects are simulated through the hit counters without adding tons of complicated rules!
7.41 Secret Hit Status (Optional Rule)
The player that pulled the hit counter keeps the results secret and places the hit counter face down under his unit. Only when the player uses the unit's affected stats is the hit counter revealed to his opponent. He shows the counter to his opponent and then immediately hides it again. The killed hit counter is always immediately revealed and the affected unit is removed from the map.
7.5 Rally
Hit units can try to remove their hit counter by rallying. A successful rally indicates that the men have calmed down or their leaders have spurred their will to fight.
All units may attempt to rally at the cost of 5APs.
To successfully rally, the unit must roll 2D6 greater than or equal to the rally number marked on the hit counter. If the unit rallies successfully, the hit counter is removed from the unit, shown to the opponent, and then is placed back into the hit counter pile. If a rally attempt fails, nothing happens and the unit keeps the hit counter. A unit can attempt multiple rallies as long as it has enough APs, CAPs, or action cards. Each rallying attempt is considered a separate action.
Units in a hex with enemy units cannot rally.
7.51 Rally Die Roll Modifiers
Units in cover add a +1 rally die roll modifier to their rally attempt. The unit must be in a hex which provides at least +1DM of cover to receive this bonus. Walls do not count for this modifier.
Units stacked with other un-hit units receive an additional +1 rally die roll modifier per un-hit unit in the same hex.
7.6 Range
A unit's range is the number of hexes away the unit may fire and is found on the middle bottom of the counter inside of the country symbol. Blocking terrain naturally limits this range.
Units may attack with a 0 or negative FP.
7.61 Long Range Firing
If a target is further away than an attacking unit's range, but less than or equal to double the range, the attacking unit subtracts 2 from its FP.
Designer's Note: The ranges on the counters represent the combat distances that the units historically shot at, not their true maximum ranges which were usually much further.
7.62 Short Range Firing
If a target is within 1 hex of an attacking unit, the target is considered to be at short range, and the attacking unit adds +3 to its FP.
Ex: In figure 9, squad C moves into the hex next to the Soviet MMG unit D. The MMG reaction fires. Since the German is in the adjacent hex, the MMG adds +3FP, increasing from 3FP to 6FP.
7.63 Close Combat (CC)
Enemy units in the same hex may, but do not have to, attack each other. If they do attack, they engage in CC. A unit can engage in CC no matter which direction he is facing. CC is the same as regular fire combat except for the following differences:
- All CC is resolved against the opponent's flank DR.
- Occupied fortifications only benefit the defending units (23.0).
- The FP of units in CC is modified. These modifications are:
+4FP for all infantry squads (rifles, pioneers, SMGs), tanks, armored cars, and APCs. -2FP for all MGs, guns, mortars, wagons, and trucks.
When an advancing unit moves into an enemy hex, the defending unit can immediately react as normal. If the defending unit decides to move out of the hex, it may not retreat into the hex, or either of the two adjacent hexes, from which the advancing unit had just moved out of.
Outside units can fire into a hex, resolving fire against all units in the hex, friends and foes alike. Terrain modifiers and individual flank facings apply for fire originating from outside the hex.
Units in the same hex as enemy units cannot attack outside that hex.
7.7 Stacked Units and Combat
There are no stacking limits. When a hex with more than one unit in it gets shot at, the attacker rolls separately for each unit to see if it was hit. The more units in a hex, the better the chances are that an attacker will hit one of them. This does not cost the attacker any extra resources and is considered to be 1 action. An opponent may react only after fire has been resolved against all of the units in the target hex.
Ex: In figure 10, the Soviet MMG unit A fires at squads B and C for 3APs. Both defenders have a 12DV. The MMG rolls first against squad C for a total 8AV and misses. It then rolls again for free against squad B. The Soviet player decides to add 2CAPs to his roll and scores a 14AV (3FP + 9 die roll + 2CAPs). Unit B is hit and a hit counter is pulled and placed under this unit. Only now may the German player react.
Designer's Note: The AP cost for a unit to fire takes many factors into account and does not represent just one shot, but the total firepower output of the unit during a two to three minute time frame. This involves targeting acquisition time, ammo replenishment, orders being screamed to crew members, and so on.
Regarding the stacking rule, having two tanks nicely lined up for an anti-tank gun is a fire fest. But if they were spaced out, the gun would have to reorient itself between shots. Therefore, the more targets in a hex, the easier they are to fire at and hit. In WWII, units were trained to spread out and not bunch up for these reasons. Concentrated forces were easier to manage, but could be devastated by mortar and MG fire.
The examples below (Figures 11-14) further illustrate close combat, retreat restrictions, command action fire, and rallying, continuing directly from the rules above.
Ex: In figure 11, German squad C cautiously moves onto the Soviet unit in the woods hex for 3APs. The Soviet could now retreat, fire the MMG, or even react with unit E, but instead passes to save his resources. (If D had fired, its modified CC FP would have been 1FP (3FP - 2FP CC modifier). D could also have retreated only into hexes 1, 2, or 3. (Note: section 7.63 states that a unit may not retreat into the hex or the two adjacent hexes from which an enemy just advanced.) Squad C chooses to CC unit D for a cost of 3APs. It scores a CC AV of 11 (2FP + 4CC modifier + a die roll of 5). Unit D has a 13DV (11 flank DR +2DM for the woods hex) and squad C misses.
In figure 12, Soviet squad E decides to react with a command fire into the CC hex for 4CAPs. Since E is in an adjacent hex, its 3FP increases to 6FP. It must roll once for each unit in the target hex against the German squad for a total 14AV (8 + 3FP + 3 short range modifier). The German has a 14DV (12DR + 2DM for woods). It is hit and pulls a hit counter. The Soviet rolls again against his own unit. He is firing at the MMG's flank, so it has a 13DV (11 flank DR + 2DM for woods). He rolls a 4 for a total 10AV, which misses. German squad C still has 2APs left, but it would cost 3APs to fire again and the German wants to conserve CAPs. It could move away, but decides to stay, ends its activation and the unit is flipped to its used side. Both squad C and unit D stay in the same hex.
In figure 13, squad E activates and cautiously moves into the hex with units C and D. German squad C could immediately retreat or reaction CC fire, but decides to pass. The Soviet units could group CC fire (see group firing 9.12), but they decide not to. Squad E scores a 15AV (3FP + 4CC modifier + 8 die roll). The German has a 13DV (11 flank DR + 2 woods modifier), thus takes its 2nd hit and is destroyed. The Soviet squad unit ends its activation phase and is flipped to its used side.
Ex: In figure 14, the Soviet is the active player and activates squad D, marking its AP track to 7APs. Squad D fires at squad B for 4APs. It is at long range, so its 3FP is reduced to 1FP. It scores a 10AV. Unit A has a 12DV, so C misses. Unit A immediately command action fires at D for 2CAPs. Unit A uses 2 additional CAPs to modify its combat die roll and scores a 13AV (4FP + 7 die roll + 2CAPs). Squad D has woods cover for a 14DV (12 front DR + 2 woods). Unit A misses. D has 3APs left, fires again by adding 1CAP, and misses. The German player passes and so the Soviet ends his activation and marks squad D as used.
The German player activates unit A. It can fire up to three times, given its low AP cost to fire. It fires at unit C the first time, rolls a 3 for a total 7AV and misses. It fires again at unit C and rolls a 9, resulting in another miss. The German player is frustrated and declares that he will use 2CAPs to modify his die roll. He scores a 14AV for a hit (4FP + 8 die roll + 2CAPs). The Soviet player pulls a suppressed hit counter. After each attack action taken by the LMG, any Soviet unit could have reacted.
The German decides to command action move unit A backwards into the light woods for 2CAPs (1CAP unit movement cost + 1CAP for moving backwards).
The Soviet activates suppressed MMG unit C. He decides to rally for 5APs and needs to roll only a 6, since the MMG is in woods cover. It rolls a 9 and removes the hit counter. It then moves forward one hex for 2APs. Luckily, the German player passes. The Soviet player has no APs left for unit C and marks C as used.
The German player activates squad B and starts to move towards the Soviet MMG unit. After B moves 2 hexes for 2APs, the Soviet MMG command fires at B, declares he will modify his roll by 2CAPs, and then scores a 16AV (3FP + 11 die roll + 2CAPs). B has an 11DV (12 front DR - 1DM for failing to move cautiously). B takes two hits and is destroyed. The German player will lower his CAPs by 1 at the start of the next turn. The Soviet increases his victory total by 1, as specified in the firefight.
Both players now pass and the turn is over.
You are now ready to play Firefight 1. Play this firefight before continuing on with the rules.
Firefight 1 Hints: Be careful with your CAPs. CAP management is a core component of the game. As the German player, attack aggressively. As the Soviet player, conserve your CAPs for when the Germans rush your positions.
Section 2
In this section you will be introduced to cards that add uncertainty and army specific tactics to the game and learn how to coordinate the efforts of your units.
8.0 Action Cards
Actions cards are played as an action. They add an element of uncertainty to the game, since they are held secretly. The effects of the cards are numerous and descriptions for each card are given on page 11. Some cards are played at no cost, while some cost APs or CAPs to use.
There are three types of action cards:
1. Green Cards – Give you APs, CAPs, or allow you to take certain actions. The firefight specifies which of these cards are to be used. It does this by identifying the relevant cards by the number in the bottom right corner of the card.
2. Yellow Cards – Initiate victory point scoring or events such as reinforcements entering the game. Each firefight specifies how these cards are to be used.
A firefight's specified green and yellow cards are mixed together into one deck at the beginning of a game. Each turn, each player draws one or more cards as specified by the firefight from the top of the deck. Yellow cards must be played immediately. Green cards may be kept secretly in a player's hand as long as he chooses. Unused units that take free actions with green cards are not marked as used.
Ex: A Soviet unit is hit and draws a pinned hit counter. The Soviet player has an Auto-Rally card in his hand and immediately plays it as a reaction. The hit counter is removed and the Soviet unit is not marked as used.
3. Gray Cards – These represent German and Soviet weapons that are not represented by counters on the map. The cards may be played as an action by any friendly unit on the map. A card lists a weapon's range, how it is used, and the activation costs needed to use the weapon. Each firefight specifies which of these cards may be used. Gray cards are held openly by the respective players.
Ex: A T-34 tank moves onto a hidden German squad which reacts by attacking with the Tellermine card.
Only one green or gray card may be played per action. There is no limit to the number of green or gray cards a player may play in a turn or hold in his hand. Once a card is used, it is discarded.
9.0 Group Actions
Several units may group actions to group move, create fire groups, rally, etc. Group actions may be taken by:
- Unused units grouping their activations.
- Unused units grouping opportunity actions.
- Used, unused, or activated units grouping command actions.
- Used, unused, or activated units grouping the results of an action card.
Units may execute group actions if they are in the same or continuous adjacent hexes. A player must pay 1CAP per group action if units taking the group action are not in the same hex (this is in addition to any other CAP costs).
Designer's Note: The 1CAP takes into account the extra logistical coordination required to execute a more complicated group action.
An opponent may react to a group action only once and only after all participating units have completed the group action.
9.1 Group Activations
Multiple unused units may group their activations to take group or separate actions, but must share just one group pool of 7APs (the points pool may vary if the variable APs option 3.01 is used). Units that group activations may execute any combination of actions such as group movement (9.11), forming a fire group (9.12), group rallying, or transporting units (19.0), etc.
If a unit that has grouped its activation with others decides to take a separate action, it still uses up APs from the same limited AP group pool. Each separate action still counts as an action that an opponent can react to.
At the end of an activation, all participating group units are marked as used.
9.11 Group Movement
Units that group move pay only the movement rate of the unit with the highest movement cost.
Ex: In figure 15, four Soviet rifle squads group activate and then group move towards the German LMG. Three squads move into open terrain, but the fourth squad moves into woods, so the group must pay the costlier 2AP woods movement. In addition, the Soviet player must pay the multi-hex 1CAP penalty. Had all units moved into open hexes, the group move would have only cost 1AP plus 1CAP.
Only after all Soviet squads have group moved may the German react once. He does so by firing at the center Soviet rifle unit and destroying him.
In figure 16, the Soviet player has 5APs remaining in the group pool and his next action could be to either group move the two adjacent squads or move the lone squad in the woods. He may not group move all three, since they are not all adjacent. He decides to group move the group of two for 2APs (1AP open move + 1AP for moving over the wall) plus 1CAP. The German does not react. The Soviet has 3APs left and moves the single squad forward one woods hex for 2APs. Note that all of these moves (group and single) shared the same original 7AP group pool.
Ex: A Soviet MMG unit (with a 2AP movement rate) and a rifle squad are stacked together. They group move into a woods hex. The total cost for the move is 3APs (2APs for the slower MMG movement plus the woods movement modifier). Note that the Soviet player did not have to pay an extra 1CAP, since the units were stacked together.
Group movement does not change movement restrictions!
Ex: A truck may not group move with an infantry squad into a stone building.
9.12 Group Firing
Units in the same or continuous adjacent hexes may group fire to increase their firepower. To group fire, two or more units designate one as the fire leader. The group pays only the firing cost of the fire leader. Each supporting unit increases the FP of the fire leader by 1FP as long as they are in range (even long range) and LOS of the target. None of the units in the firing group may have a hit marker that affects their FP.
Ex: In figure 17, an unused German LMG and an unused rifle squad group activate and as their first action group fire at a target. The LMG is designated the fire leader and pays 2APs. His FP increases from 4FP to 5FP, due to the support of the rifle squad. If these two units had been in adjacent hexes, the group fire action would have cost an additional 1CAP.
9.2 Group Opportunity Actions
Multiple unused units in the same or continuous adjacent hexes may take group opportunity actions. All units are marked as used after the group action is taken.
Ex: An unused German LMG unit and an unused anti-tank gun are being overrun by a Soviet T-34 tank. The two German units react by initiating a group close combat opportunity fire group, in a desperate attempt to increase the odds of scoring a hit on the tank. After the one attack, both units are marked as used.
9.3 Group Command Actions
Multiple used, unused, or activated units in the same or continuous adjacent hexes may take group actions using only CAPs to move, fire, or rally, etc. Unused units are not marked as used.
Ex: An activated rifle squad moves into a hex with an inactivated LMG unit. The two group fire for 2CAPs (the LMG is the fire leader). The rifle unit then moves on using what remains of his AP pool. The LMG is not marked as used.
9.4 Group Action Card Resolutions
Multiple used, unused, or activated units in the same hex only may group the results of an action card. Unused units are not marked as used.
Ex: A German rifle squad moves into the same hex as an unused LMG unit. The German plays a hasty defense card on both units for his next action. Both units receive a hasty defense counter. The LMG unit is not marked as used.
Ex: Two hit squads are in the same hex, one used, the other unused. An auto-rally action card is played on both units for the 2CAP cost listed no the card. Both units lose the hit counters and the one squad is still unused.
Ex: In figure 18, German LMG unit A activates and moves onto rifle squad B for 1AP. The Soviet passes.
In figure 19, both units group move forward one hex for 1CAP. The German uses a CAP instead of an AP, because he does not want to activate the rifle squad. Again the Soviet passes. Now both German units group fire with the LMG as the fire leader, and fire at unit C for 2CAPs. The LMGs FP increases from 4 to 5FP, rolls an 8 and hits. The Soviet randomly pulls a pinned hit counter.
In figure 20, the LMG moves into the light woods for 1AP. The LMG still has 5APs left and could either fire twice more, continue moving, etc. At the end of the activation, the rifle squad is not flipped to its used side since only group command actions were utilized for all of its actions.
Ex: Figure 18. This time both German units group their activations. The LMG moves onto the rifle for 1AP and then both group move forward for another 1AP. In figure 19, they group fire for 2APs. The LMG moves into the light woods for 1AP and the units now have 2APs left in their group AP pool. The LMG decides to fire again without group fire (the German player does not want to spend an extra CAP) and misses. The Soviet passes, and the German ends the activation marking both units as used.
10.0 Hidden Units
A firefight will state if and how many units start the game hidden. Hidden units are kept off of the map and their locations are written on a separate sheet of paper. The opponent has no idea where these units are since no counters are put on the map. Anything can be hidden including bunkers, foxholes, tanks, and so on. Hidden units are revealed if:
- The hidden unit takes any action.
- The hidden and friendly non-hidden units are in the same hex.
- A hidden unit is fired upon and hit.
- Enemy units move onto or near the hidden unit.
Hidden unit takes an action. If a hidden unit takes any action, even if out of all enemy LOS, such as pivoting, moving, rallying, or firing, it and all other hidden units in the same hex are immediately revealed and placed on the map (exception - 10.1 Concealed Movement).
Hidden units are immediately revealed when they are in the same hex as a non-hidden friendly unit.
Hidden units are revealed if they are fired upon and hit. Sometimes an attacker will shoot at a promising hex hoping to reveal an enemy. Hidden units can only be hit by red FP (blue FP is explained later in the rules). If multiple hidden units are in a hex, the attack is only resolved against the unit with the lowest front DR. Front DR ratings are always used except when attacked by artillery or mortar fire, which is always resolved against the lowest flank DR.
Attacks against hexes with potential hidden units are resolved, even if there are no hidden unit in the hex. If a hidden unit is hit, all hidden units in the hex are revealed and placed on the map.
Ex: A Soviet rifle unit is hidden in a woods hex for a red 14DV (12 front DR + 2DM for woods). A German 4FP LMG unit fires at the hex because he thinks it may be a good place to hide a unit. In this case he guessed correctly, but does not know it yet. He scores a 13AV and misses. The German player does not know if he simply missed the target or if there was no target to begin with. The Soviet player promptly ridicules the German for thinking that there could be a hidden unit in that hex.
An enemy unit moves into the same hex or near it. Units hidden in terrain with a +1 or higher DM stay hidden until an enemy unit moves onto the same hex. Walls apply in this situation if the LOS from the enemy unit to the hidden unit passes over the wall.
Units hidden in open terrain hexes stay hidden until an enemy unit moves within 2 hexes of their unit.
Revealed hidden units may be placed facing any direction.
10.1 Hidden Movement
Hidden squads (rifles, pioneers, and SMGs), MG, and mortar units may move one hex for 7APs and remain hidden, no matter what the terrain type. They may move into or within enemy LOS. They may move adjacent to an enemy unit and still remain hidden, as long as they stay in a minimum +1DM or greater terrain type (walls do not count as cover in this case). Thus, a hidden unit would be revealed if it moved into open terrain that was within 2 hexes of an enemy unit.
To move hidden units a player states that he is activating a hidden unit(s), pays 7APs, and then marks the new location on a separate sheet of paper for future reference.
Rule 10.1 is an exception to rule 10.0.
10.2 Hiding Units During a Game
Squads (rifles, pioneers, and SMGs), MG, and mortar units that are out of all enemy LOS may spend 7APs per unit to hide themselves within a 2 hex radius of their current position. All hexes, between and including the original hex and the new hiding spot hex, must be out of enemy LOS. The units are taken off of the map and their new hex position is secretly written on a separate sheet of paper. Units may hide as a group, using the group action rules.
You are now ready to play Firefight 2. Play this firefight before continuing on with the rules.
Section 3
In this section you will learn how to deal with changes of elevation on the game map and we introduce mortars, artillery, and rules for using smoke to protect your units.
11.0 Hills
Hills are depicted on the map in colored contours and come in levels that abstractly represent the height of the hill. All non-hill green open terrain is considered to be level 0 (L0). Light brown hills are level1 (L1) and dark brown hills are level 2 (L2). A bare hill hex, with no terrain on it (such as buildings or woods), is considered open terrain.
Moving up a hill incurs a +1AP movement penalty per level to the moving unit.
Ex: In figure 21, rifle squads moving from hex L to M pay 2AP (1AP for normal open movement +1AP for moving up one level). If there were woods in the higher level hex, the cost would be 3APs (2APs for woods movement +1AP for moving up a level).
11.1 Steep Terrain Movement
When the terrain in a single hex raises 2 levels, it is considered to be steep terrain. Movement into such a hex carries a +2AP movement penalty. Vehicles may not climb steep terrain.
Ex: In figure 21, moving from hex P to Q or P to R would cost a squad +2AP for a total movement cost of 3AP.
11.2 Higher Elevation Bonuses
Units on a higher level attacked by units at a lower level receive a +1DM. Units at a higher level firing at units on a lower lever receive a +1FP modifier.
11.3 Elevation and Line of Sight (LOS)
An elevation level covering the center dot of a hex fills the entire hex, even if the artwork does not (just like other terrain). Units can fire into a lower into a higher elevation hex, but not beyond it at hexes of equal or lesser level.
Designers note: When looking up at a hill that has a flat plateau beyond it, you can see the crest of the hill, but not the flat plateau.
Ex: In figure 21, unit A on L0 (ground level) can fire at higher hexes B and D, but not at hex C or any hexes beyond D.
The same goes in reverse; a unit can fire at a target on an equal level hex, but not thru and beyond it at a target on a lower level hex.
Ex: In figure 21, L1 hex C has clear LOS to hex B, but not to the lower level L0 hex A.
For LOS purposes, buildings, woods, and light woods act as L1 obstacles that may block LOS. Walls do not block LOS.
L1 obstacles (such as woods) add to elevation levels regarding LOS. So a L1 woods on a L1 hill hex equals a L2 obstacle.
Ex: In figure 21, the light woods hex K acts as a L2 obstacle for the purpose of checking LOS (L1 hill + L1 woods). Units on L2 hex H can see into hex K, but not beyond it at L1 or lower hexes.
If LOS follows the edges of two hexes with different levels or obstacles, the least obstructive hex affects the LOS.
Ex: In figure 21, B can see hex E, even though hex F is L2, because the LOS also follows the edge of L1 hex C.
11.4 Blind Spots
Hexes at lower elevations, directly behind obstacles, are blind spots to units at higher elevations. Hexes directly beyond hills are not blind spots to units from higher elevations on the same slope of the hill.
Ex: In figure 22, hex 1 can see into hexes 2 and 3, but hexes 4, 5, and 6 are blind spots and thus out of LOS.
Ex: Hex 1 can see hex 7, but not 8. Hex 1 can see 11, 12, and 13. Walls are not obstacles. Hex 1 cannot see anything beyond hex 9, because 9 is also L2 and considered the same level.
12.0 Mortar Units
Mortar units represent teams of 2-6 men that fire explosive shells directly or indirectly. When a mortar can see its target, it fires directly.
Some mortars can fire indirectly over obstacles at targets not in the mortar's LOS. These mortars have an AP indirect fire cost marked on the counter in parentheses. To fire indirectly, the mortar unit must be within 2 hexes of a non-enemy occupied hex with a clear LOS to the target. This hex is referred to as the spotting hex. An enemy unit may occupy the hex between the mortar and the spotter.
Designer's Note: Mortar units sent spotter teams out, who directed the fire for the mortar units. These teams are simulated in the game by the spotting hex. The proximity between the spotting hex and the mortar team is necessary, since the spotter had to signal instructions to the mortar team. Very few platoon and company mortars had radios at this time. Some firefights may alter this rule for larger mortars, since some company level mortars ran telephone wires or had radio contact.
Mortars may fire from woods and building hexes. (Mortars were often set up in yards, alleyways or small woodland clearings.)
Mortars may not fire at targets that are closer than their minimum range and must fire at targets in their arc of fire.
12.1 Mortar and Artillery Fire Resolution
All mortar and artillery fire is resolved against the flank defense rating of all target units (including hidden units). The defender gets the benefit of all other terrain DMs (exception - 12.2 Air Bursts).
12.2 Mortar and Artillery Air Burst
Unarmored units in a woods (not light woods) hex that are subject to mortar or artillery fire do not receive the woods +2DM.
Designer's Note: Usually artillery exploded upon impact with the ground. But when artillery shells hit dense tree cover, the shells would burst in the air sending shell and tree fragments raining down upon units on the ground and in fox holes. This effect was devastating.
12.3 Off-Board Artillery
Off-board artillery is described on the gray action cards and each firefight states if any is available. Off-board artillery has a 1 turn delay. A player secretly writes down a target hex during the current pre-turn sequence and resolves that artillery strike during the next pre-turn sequence. The mechanics for resolving off-board artillery are exactly like on-board mortar fire, except that off-board attacks are resolved against the target hex and the 6 hexes surrounding it. A separate attack is resolved against each of these 7 hexes. Of course, if there are multiple units in a hex, the off-board fire would be resolved separately for each unit. Off-board artillery uses one of the units in the game as a designated spotter or has pre-designated spotter hexes as specified in the firefight setup rules.
Designer's Note: Artillery fire was usually shot from kilometers away at pre-registered targets and was either called in by radio, field telephone, or pre-arranged signals such as flares. The pre-registered targets were marked on maps (or more likely, tissue overlays placed over the map) and were usually easily identifiable terrain features such as crossroads, built up areas, or high ground. The Soviets usually had indirect artillery support only when defending or attacking a fixed front line. On the move, any field guns in a Soviet force fired only over open sights providing direct heavy artillery fire. The German Army could call in fire on the move using reference points on a map and call for the fire by radio from a command tank or APC.
13.0 Smoke
Smoke is used by units to create a screen to cover their movements. Smoke does not affect units firing out of the smoke hex. Smoke affects all levels of LOS into or passing through it.
When a unit fires smoke, a 1st Turn +2DM smoke counter is placed. +2DM smoke counters block all LOS through the hex the counter is in. LOS and fire attacks may originate and end in a +2DM smoke hex, but not go through it. A defender in a +2DM smoke hex adds +2DM to its DR.
At the beginning of every new turn, all +2DM smoke counters are flipped to their +1DM side and all +1DM smoke counters are removed.
+1DM smoke counters screen LOS, but do not block it. Units may see and fire through a +1DM smoke hex. Such fire adds a +1DM to all units targeted into or through the smoke.
Smoke effects are cumulative. Two +1DM smoke counters in a hex act as a +2DM smoke screen and block all LOS through the hex. Two +2DM counters add +4DM for the hex, and so on.
Smoke never damages units.
13.1 Unit Smoke Capability
Mortars that are 8cm and larger and off-board artillery may fire smoke. Off-board artillery places +2DM smoke counters on the target hex and in each of the surrounding 6 hexes.
Pioneer squads may fire and place +2DM smoke up to a range of one hex or they may place smoke on their own hex.
As specified in a firefight, certain squads, tanks, and anti-tank or infantry guns may fire +2DM smoke rounds. The smoke is fired like any other round and automatically hits the hex at which it is aimed.
Squads may only place smoke on their own hex.
Designer's Note: Many German tanks were outfitted with smoke dischargers that could disperse smoke around themselves for cover.
You are now ready to play Firefight 3. Play this firefight before continuing on with the rules.
Section 4
This section explains how vehicles, both tracked and wheeled, move, transport and fight.
14.0 Vehicle Movement
Vehicles are either tracked units (like tanks) or wheeled units (like trucks and cars). Tracked units have a blue movement cost and wheeled units have a green movement cost in the top right corner of their counters. This is the cost to move one open terrain hex. Certain terrain types add to these costs and are listed in the vehicle movement table. These costs are cumulative.
Vehicles have open/road movement bonuses, which are represented on their counters by colored wheels below the movement cost number. For each wheel printed, the vehicle may move one additional open terrain or road hex for free.
Vehicle Movement Costs
| Terrain | Wheeled Vehicle | Tracked Vehicle |
|---|---|---|
| Open Terrain | +0AP Bonus per ○ | +0AP Bonus per ○ |
| Road | +0AP Bonus per ○ +1 bonus hex | +0AP Bonus per ○ |
| Buildings-Wood | NA | +2AP |
| Buildings-Stone | NA | +3!AP |
| Barbed Wire | +2!APs | +0APs |
| Marsh | NA | +2!APs |
| Road Block | NA | +1D6APs |
| Wall | NA | +1AP |
| Water | NA | NA |
| Woods | NA | +2AP |
| Light Woods | +2AP | +1AP |
| Vehicle | +1AP | +0AP |
| Move Backwards | +1AP | +1AP |
| Uphill | +1AP | +1AP |
Movement AP costs are cumulative. ! = Check immobilization: 2D6 ≥ 6 is safe. ○ = Move an extra open/road hex. NA = Not accessible.
Ex: A tank with a 1AP movement cost and one blue wheel could move 2 open hexes per 1AP spent.
Wheeled vehicles moving from one continuous road hex to another receive a bonus hex of free road movement per AP spent.
Ex: A truck with a 1AP movement cost and one green bonus wheel could move up to 3 road hexes per 1AP spent. (One extra hex for the wheel on the counter and one for the road movement bonus.)
The free open/road movement bonus may not be saved if the vehicle moves onto another terrain type. The appropriate number of APs must be spent for the movement into the new terrain hex.
Ex: In figure 23, the PzIIIe moves along the white arrow path over two open terrain hexes for 1AP. He then moves into a woods hex for 3APs. If the tank had moved along the yellow arrow path, it would still have cost 1AP, because excess bonus moves are lost and are not saved for future moves.
A vehicle movement action includes open/road movement bonuses. An entire multiple hex movement action must be completed before an opponent may react.
Ex: In figure 24, a T-34 tank with a two open terrain movement bonus can move 3 open hexes per 1AP spent. The T-34 moves 3 open hexes up a hill. The total cost is 3APs (1AP for the move + 1AP for each uphill level traversed). The three hex move counts as only one action and an opponent could not react until the tank had reached the top of the hill.
It costs a vehicle a penalty of +1AP to move backwards, added to the normal movement cost of the terrain. Furthermore, any movement bonus for open and road terrain does not apply when moving in reverse.
Roads negate hex restrictions and movement costs of terrain that covers the center of the hex. Units must follow the roads from hex to hex to gain the road advantage. So a wheeled vehicle, which is usually restricted from entering a woods hex, can follow a road into woods, paying the road movement cost only. A tracked vehicle treats roads like open hexes for movement purposes.
Ex: In figure 23, the tank moves from the wooded hex onto the road hex, paying another 3APs. Only when he is on the first road hex and moves to the next road hex does he get the advantage of the lower road movement rate.
Designer's Note: A unit's movement cost takes into account the time it took to give orders, study maps, set for sighting, and so on. The unit's movement allowance is an abstraction of these processes. Even though a truck full of men could reach 100 kph, seldom did it travel so fast over the bumpy and muddy roads of Russia.
14.1 Immobilization
Vehicles can be immobilized while moving over certain terrain such as stone buildings and marsh. After moving into terrain whose movement cost is followed by an "!" on the Vehicle Movement Table, the vehicle must check for immobilization. The player must roll 2D6 and score a 6 or higher to prevent his unit from being immobilized. He may modify this roll with CAPs.
Immobilized vehicles may not move or pivot for the rest of the game. Tanks may still fire outside of their arc (16.0).
15.0 Armored Defense Rating and Firepower
Until now we have only considered unarmored units, such as infantry and various support teams. These unarmored units have front and flank DRs marked in red on their counters. These units usually fire bullets or high explosive ammunitions, marked by red FP values on their counters.
The counter shows: Tank Forward Facing, AP Cost to Fire & Assault, Firepower (FP) Explosive (Red) / Armor-Piercing (Blue), Range, Movement Cost, Open/Road Movement Modifiers, Flank DR Armored (Blue), Front DR Armored (Blue).
An armored unit's front and flank DR is marked in blue on its counter. Similarly, certain units have munitions such as armor-piercing rounds. The armor-piercing FP is marked in blue on their counters. Red FP (high explosive munitions) has reduced effect on those units with blue DRs. The same is true for blue FP affecting those units with red DRs. This difference is represented by the following rules:
Red FP applied against a blue DR is halved. Blue FP applied against a red DR is halved.
15.01 Rounding Down
Whenever the rules require you to take a fraction of a number, round all remainders down. Always add all modifiers before rounding down.
Ex: Half of 5 = 2. Half of 1 = 0.
Ex: A Soviet MMG with a red 3FP fires at a tank with a front blue 16DR in an adjacent hex. The MMG unit's 3FP is increased to 6FP due to a short range modifier. This red 6FP is then halved to 3FP due to the blue tank armor.
Designer's Note: When developing the tank FP values and DRs, round penetration and armor thickness were not the only factors taken into account. This would have generated distorted values. Targeting equipment, crew training, tank maintenance, rate of fire, armor slope, relative armor thickness, round "stick" factors, steel quality, radio access, movement speed, and more were considered for the system to yield historical combat results. On paper, the Soviet T-34 outclassed any German tank available in mid-1941. However a T-34 tank crew was ill-trained, often the tank commander had a very limited field of vision, many tanks had very few armor-piercing rounds on board, and often the transmissions broke down within days of rolling off the assembly line with no spare parts available. These and other factors gave the Germans their 7:1 tank kill ratio.
The ranges on the counters represent the distances at which the units historically shot, not their true maximum ranges. For example, the Panzer III 50L had a range of over 1800m, but knocked out over 70% of its victims at less than 500m!
15.1 Multiple Munitions
Some units, mostly tanks, have both a red FP (representing MGs and high explosive rounds) and a blue FP (representing armor-piercing rounds). These units may fire with either their red or blue FP, never with both, in the same action.
Ex: A tank firing at a hex containing a tank and an infantry squad must decide wether to fire red or blue ammo. If it decides to fire red, the infantry will be vulnerable, but the tank will be fairly impervious.
15.2 Vehicle Hits
Hits against vehicles are resolved in a manner similar to hits against foot units. A hit vehicle counter is drawn blindly and the effects are shown to the opponent. In some cases, vehicles cannot rally and are marked No Rally. When a vehicle is destroyed, it is removed from the map.
- Vehicle DESTROYED (x2): Immediately remove the affected unit from the map.
- Vehicle Gun Damaged (No Rally, ⊘): Either the Blue or Red FP ability is damaged and cannot be used to attack.
- Light Damage (No Rally, x4): Unit stats are not affected in any way.
- Vehicle Immobilized (No Rally, x5): Unit may not move. Front DR decreases by 1. Flank DR increases by 1.
- Vehicle Panicked (Rally 9, x1): Unit may not fire. Front DR decreases by 4. 9 needed to rally.
- Vehicle Stunned (Rally 10, ⊘, x1): Unit may not move, fire or take any action other than rally. 10 needed to rally.
- Vehicle Suppressed (Rally 9, x5): Costs +1AP to fire. FP decreases by -2 for red and -3 for blue. 9 needed to rally.
- Back of Hit Counters: All vehicle hit counters shown have the same back art.
⊘ = The ability is lost. Black means all, blue or red is specific to a type.
15.3 Optional Rule – Secret Vehicle Unit Status
The player that pulled the hit counter keeps the results secret and places the hit counter face down under his unit. Only when a hit unit's affected stats are used is the hit counter are revealed to his opponent. The killed hit counter is always immediately revealed and the affected unit is removed from the map.
Designer's Note: Vehicles sometimes cannot rally, because most of the damage to them was of a physical nature that could not be readily repaired in the heat of battle. Secondly, if things became too desperate for a crew, they usually bailed out of the tank and fled.
15.4 Range Effects on Combat
Combat ranges for vehicles and their effect on FP are identical to that of foot units covered in section 7.6.
16.0 Turreted Vehicles
Tanks and some armored cars have turrets. The turreted gun can rotate 360 degrees without the vehicle changing its facing. Thus, vehicles with turreted guns are the only units that can fire at targets outside their arcs of fire, which they may do for an additional 1AP cost to fire. The tank's facing does not change when doing so and it does not constitute an additional action. A player could instead pivot the turreted vehicle before firing, but pivoting would constitute an additional action to which the opponent could react.
Designer's Note: Most tanks kept their turret firing action within the front 120 degree arc rotational. If a tank was threatened by an enemy, the crew would try to face the threat, thus offering the smallest target silhouette with the highest armored area, while protecting the treads of the tank. Often tactical logic was overcome by the sheer psychological stress and panic of taking flank shots. I designed this combat occurrence into the game mechanics, dispensing complicated turret rules. The rotation speed, crew training and reaction speed, command visibility, and targeting capabilities are calculated into the "AP Cost to Fire" for each unit type.
17.0 Truck and Wagon Units
Truck and wagons represent vehicles designed to move other units and supplies over road systems. Trucks and wagons utilize green movement making them good for roads.
Trucks have a 1FP and a range of 0, so they may attempt feeble CC attacks.
Wagon units are useful for moving other units. They were slow, but horses were the only things that were fueled on grass. (Horses may not attack other units.)
18.0 Anti-Tank and Infantry Gun Units
These units represent teams of 2-6 men with anti-tank or infantry guns that fire armor-piercing or high explosive shells. 76mm and smaller guns can move into building hexes and fire normally.
19.0 Loading, Transporting, and Unloading Units
All vehicles may transport one foot unit, pull one gun, or pull one immobilized vehicle. Wagons, cars, and trucks may not pull tanks.
Loading, transporting, and unloading a unit utilizes the group movement rules (9.11). The vehicle moves onto the same hex as the unused unit it wishes to transport and pays the loading unit's movement cost.
While being transported, the unit counter is put on top of the vehicle counter, facing the same direction. Transported units receive no vehicle cover from the vehicle they are being transported by (exception - 20.0 APCs). Transported units may not fire. A vehicle does not suffer a movement penalty for moving while loaded.
To unload a transported unit, the vehicle must pay the loaded unit's movement cost. The unloaded unit is now placed under the vehicle facing any direction. The units may continue to take actions and are marked as used as per the group action rules (9.0).
Ex: In figure 25, a truck transporting a PaK36 Gun group moves two open hexes for 1AP. The truck moves another 2 hexes for an additional 1AP, unloads the gun for 3APs, and moves on. The gun and the truck are marked as used after they spend their remaining APs.
Ex: A German APC transporting a rifle squad moves next to a Soviet unit for 1AP. The APC fires point blank for 2APs hitting the Soviet. The Soviet does not react, so the German unloads the rifle squad for 1AP and for their next action the units group fire at the Soviet for 2APs.
Ex: A truck transported a PaK36 gun last turn, but did not unload it. This turn the player begins his activation by unloading the gun for 3CAPs and then moves the truck on. The gun remains unused and can still be activated later in the turn.
19.1 Firing at Transported Units
Incoming fire is resolved simultaneously against a vehicle and its transported unit. Attacks are rolled individually for each unit. Both the vehicle and the transported unit receive the hex's terrain modifier. If a transporting vehicle is destroyed, a surviving unit is placed on the map facing the same way the vehicle was facing when destroyed. Transported units do not receive extra damage if the vehicle is destroyed. The transported unit has the same facing as the vehicle.
20.0 Armored Personnel Carrier (APC) Units
APC units represent vehicles designed to transport and protect other units. All units transported by an APC receive a +2DM. Towed guns and mortar units also receive this bonus, since the gun crew rides in the APC. All other transportation rules apply.
Incoming fire is resolved simultaneously against the APC and any units being transported. Attacks are still rolled individually for each unit. If the APC is destroyed, transported units still receive the APC's +2DM for that attack.
21.0 Vehicles as Cover
All vehicles offer +1DM per vehicle to all non-transported squads (rifles, pioneers, and SMGs) in the same hex.
Ex: A rifle squad and a tank group move towards an enemy position. The squad is not being transported, so it is placed under the tank as they move forward and receives a +1DM from the tank.
Ex: In figure 26, The German 251 APC, transporting an infantry squad with group movement, moves up from the south and has 5APs left. It drops off the German squad for 1AP. The Soviet AT gun reacts by pivoting in the hex towards the new threat for 1CAP. The squad then moves into the wooden building for 2APs. The Soviet MMG reaction fires at it for 3CAPs and misses. The APC backs up out of LOS for 2APs and ends its activation. Both it and the infantry squad are marked as used since they used group movement.
In figure 27, the Soviet player passes. The German activates the PzIII and moves forward to engage the AT gun in close combat. The Soviet cannot react until after the tank is in the same hex, since the tank receives two hexes of open movement per 1AP. The Soviet still does not react and plays no action card. Close combat always uses the defender's flank DR, which in the case of the AT gun is a red 10. The PzIII has a 7FP for close combat (3FP + 4CC modifier). The tank needs to roll a 3 to hit. He rolls a 10 = 2 hits, the AT gun is destroyed and taken off the map. The PzIII is marked as used and the German receives a victory point.
In figure 28, the Soviet activates the hit rifle squad. He plays an auto-rally action card for 2APs, removing the hit counter. The German does not react. The Soviet rifle then moves onto the tank for 1AP. The tank reacts for 3CAPs and CC attacks with 7FP. The Soviet only has an 11DV. The German rolls a 2 and misses! The rifle squad's FP is increased to 7FP, but halved to 3FP, since the tank's flank 14DV is blue. The Soviet modifies his roll with 1CAP, now needs a 10 to hit and succeeds! The tank pulls a vehicle red gun disabled hit counter. The Soviet rifle has 0APs left and passes. The German plays a command action card. The tank can only fire with its blue FP, since it has a red gun disabled hit counter. The tank CC fires at the Soviet rifle with 4FP (5 blue FP +4 CC modifier x 1/2 since blue is firing at a red defense). The Soviet has an 11DV, so the German must roll a 7 to hit. He rolls an 8 and the Soviet pulls a Pinned hit counter. The Soviet rifle squad attacks the tank with 4CAPs, modifies its roll with 1CAP and hits the tank again destroying it. The tank is removed from the map and the Soviet receives a victory point. The German passes.
In figure 29, the Soviet activates the MMG and fires at the German rifle squad whose DV is 13. The Soviet misses. The German reacts by paying 3CAPs and moves backwards out of the building into the light woods, out of all Soviet LOS. The Soviet MMG has 4APs left, but decides to pass. Both players then pass active status and the turn is over. Turn victory points are awarded and a new turn begins with the pre-turn sequence.
You are now ready to play Firefight 4. Play this firefight before continuing on with the rules.
Section 5
This section introduces fortifications and hindrances.
22.0 Fortifications
Fortifications include hasty defenses, bunkers, and trenches. They are represented by counters placed on the map. Units move into fortifications at no cost and are always placed under the fortification counter and receive the cumulative benefit of the terrain DM and the fortification and each unit. If the fortification is destroyed, units still receive the fortification's DM for that attack.
Units in fortifications defend with their flank defense against flank, artillery/mortar, and CC attacks.
A player may attack a fortification that has no units in it in an attempt to destroy it.
Ex: Soviet artillery with a red 6FP fires at 2 rifle squads under a trench counter with a 16DV. The artillery rolls a 10 for a total 16AV and the trench counter is removed. The Soviet rolls against the first rifle's 13DV (11 flank DR +2DM for the trench) scores a hit. For the second rifle squad, the Soviet rolls a 12AV and misses.
Occupied fortifications only benefit the defending unit(s) in close combat situations.
Two or more fortifications may not be placed in the same hex.
22.1 Hasty Defense
Foot units (only) may create a hasty defense in any terrain, including buildings (this represents fortifying the position). They may not be used to improve other fortification counters, but may improve terrain and buildings. A hasty defense may be part of a firefight setup, set by an action card, or be dug by a unit for a cost of 8APs. A hasty defense counter is placed over the unit that prepared it and adds a +1DM the unit's DR.
Hasty defense counters are removed when the unit that made it pivots, moves, is killed, or if the hasty defense is destroyed (22.3).
22.2 Trenches and Bunkers
Firefights start with trench and bunker counters on the map. They may not be built during the course of a game. Units move under these counters at no additional movement cost. The DR of units under these counters are increased by the amount marked on the bottom left corner of the counters, plus any other terrain modifiers.
Trenches and bunkers may be used by all foot units, with some restrictions. Mortars may move into bunkers and trenches, but may fire only from trenches. 50mm and smaller anti-tank/infantry guns may move into bunkers and trenches and fire normally. Wheeled vehicles are not allowed in trench hexes and the trench counter is marked as such with the green symbol in the upper right hand corner.
Multiple units may be placed under trench or bunker counters, unless stated otherwise in the firefight setup.
Units in trenches may face, and subsequently fire, in all directions.
Bunkers have an arc of fire similar to other units, which cannot change. Units outside of a bunker's arc of fire are out of LOS and not seen by units inside the bunker. Bunkers do not block LOS.
22.3 Fortification Destruction
Fortifications can be hit and destroyed. Fortifications have red defense ratings (DR) printed on the bottom right hand corner of their counters. The DR of a fortification is modified by any terrain DM, such as woods or smoke. When a fortification is hit, it is removed from the game.
Incoming fire is resolved simultaneously against the fortification and each unit. If the fortification is destroyed, units still receive the fortification's DM for that attack.
22.4 Barbed Wire
Wire counters may be placed on any hex and affect foot units that want to move into the hex from any direction. Foot units that wish to move into a wire hex must:
- Announce their intent to move into the wire hex.
- Roll 1D6 to determine a movement penalty cost.
- Add the movement penalty to the normal terrain movement cost.
If after rolling for the penalty cost, an activated unit does not have enough APs/CAPs to move into the wire hex or if the player does not wish to pay the additional APs/CAPs to move into the hex, the unit loses all of its remaining APs. This attempt counts as an action. The activated unit may still take further actions utilizing CAPs and action cards.
Ex: A German rifle unit occupies an open hex with a wire counter on it. A Soviet unit wishes to move into the German hex in order to initiate close combat. The Soviet has 4APs and 2CAPs left. He states his intent, rolls 1D6 for a 4 and so must pay 5APs total to move into the wire hex with the German (the 4 rolled + 1AP open terrain movement cost). The Soviet may either pay 4APs + 1CAP to move in or not move in and lose his remaining 4APs.
Wire does not affect tracked units with blue movement values, such as tanks and APCs. They just pay the normal terrain costs while crossing the wire. Wire counters are automatically destroyed and removed when a unit with blue movement value moves into the hex.
Wheeled green units add a +2 movement penalty to move into a wire hex and the wire is not removed. A wheeled unit must check for immobilization when it moves into a wire hex (14.1).
Wire may be destroyed with an attack equal to or greater than its red 15DR, which is printed on the bottom right hand corner of the counter. The DR of wire is modified by any applicable terrain DM.
Incoming fire is resolved simultaneously against the wire and any other units in the hex. All foot units may CC wire, even if there are enemy units in the same hex.
Wire does not block LOS.
22.5 Road Block
Road block counters may be placed in any hex and affect vehicles that want to move into the hex from any direction. Road blocks do not affect foot units. Wheeled green units may not enter a road block hex. Tracked vehicles that wish to move into a road block hex must:
- Announce their intent to move into the road block hex.
- Roll 1D6 to determine a movement penalty cost.
- Add the movement penalty to the normal terrain movement cost.
If after rolling for the penalty cost, an activated unit does not have enough APs/CAPs to move into the road block hex or if the player does not wish to pay the additional APs/CAPs to move into the hex, the unit loses all of its remaining APs. This attempt counts as an action. The activated unit may still take further actions utilizing CAPs and action cards.
Road blocks can be built and placed during the game by infantry squads or as specified by the firefight setup rules. It costs a unit 8APs to build and placed a road block.
Road blocks may be with an attack equal to or greater than its 15DR, which is printed on the bottom right hand corner of the counter. The DR of a road block is modified by any applicable terrain DM.
Incoming fire is resolved simultaneously against the roadblock and any other units in the hex. All units may CC roadblocks, even if there are enemy units in the same hex.
Road blocks do not block LOS.
22.6 Land Mines
Mines may be placed on any hex, openly or hidden, as specified by a firefight. If a hidden mine is moved on, a mine counter is placed in the hex. Mines attack units that move into a mined hex, that pivot while in a mined hex, or that conduct CC while in a mined hex. If a new unit moves into a mined hex with an existing unit in it, only the new unit is affected by the mine attack.
Mines attack with a blue 8FP. All units attacked by land mines defend with their flank DR. Terrain and fortification DMs do not affect mine attacks.
Land mines are cleared with an attack equal to or greater than its red 15DR, which is printed on the bottom right corner of the counter. The DR of a land mine is modified by any applicable terrain DM.
23.0 Pioneers
Pioneer units behave exactly like other infantry units, except for the following abilities.
- Pioneers do not trigger non-hidden land mine attacks.
- Pioneers can fire +2DM smoke up to 1 hex distance for 2APs.
You are now ready to play Firefight 5. Play this firefight before continuing on with the rules.
Section 6
This section introduces rules for playing with more than 2 players and solitaire play.
24.0 Three to Four Player Games
Certain firefights are designed for more than 2 players. For these firefights, each player has his own track sheet and units to command. Play progresses with all players from one side individually stating if they will accept active status or pass. The active players then take their actions (at the same time or consecutively, if things get too hectic). The reacting players may each react once after every action that each opponent takes. They may both react against the same unit if they so wish. When both active players have passed, the reacting players become the new active players or pass. When all but 1 player from both sides pass active status in a row, the turn is immediately over.
Ex: The 2 Soviet players pass. Then one of the Germans passes, while the other German player wants to activate a unit. Unfortunately, the turn is immediately over.
Action cards may not be traded between teammates.
25.0 Solitaire Play
All of the firefights can be played solitaire. When doing so, it is recommended that you use the Variable APs optional rule (see 3.01). It is also recommended that you use the Solitaire Action Cards optional rule (see 25.1).
25.1 Solitaire Action Cards (Optional Rule)
When playing solitaire, do not draw action cards at the beginning of each turn. Instead, ready a game deck with 4 command action cards, 2 auto-rally cards, 2 hasty defense cards, and 4 +1D6 AP cards. When you decide that you would like to take a specific action that would necessitate a card, draw from the pile and use it immediately if you can. If the card does not match the action you wanted to take, it is discarded and you are out of luck. Only one card may be drawn per unit activation. Reshuffle the deck and all discards at the beginning of each turn.
Ex: A Soviet MMG wants to reaction fire with a command action card. You draw the top card from the deck, but it is a Rally card and so must be discarded. The Soviet may not draw another card for the remainder of the opponent's activation.
26.0 Equalizing Play
If a game is out of balance because the opponents have different levels of experience, you can equalize the firefight by increasing the disadvantaged player's starting CAP level by one or two points.
You are now ready to play the rest of the firefights. Have fun!
Designer's Notes
Modern day tactics used by most of today's advanced armies find their roots in early WWII doctrine. The tactics employed evolved (and sometimes slipped) throughout the conflicts and wars that followed in Korea, Vietnam, Bosnia, Afghanistan, and Iraq. I designed CoH to follow this evolution in tactics in a series of games, the first of which is Awakening the Bear! Russia 1941-42. The system fulfills the need for a fast and fluid playing board game that is easy to learn, but tactically realistic for every unique time period portrayed.
In developing any new system, there is the temptation to add more and more rules in an attempt to make the game more "realistic". Unfortunately, this often can have the opposite effect as the big picture becomes lost in a forest of heavy detail. I wanted a system that stressed the flow of battle and quick reaction to adversities and opportunities. It had to contain just the right level of abstraction, so more time could be spent fighting the opponent and exploring unique tactics than fighting the rules. Staying true to these goals was quite challenging as the developers constantly came up with new ideas. In the end, we relied on a rule of thumb that required a proposed rule to apply in more than 5% of relevant situations and add important period flavor to be included in the rules. We operated under the belief that mountains of detail do not make a good game; clean and easily implemented core systems do.
How we decided to portray command structure in the game is an example of our efforts to make core game play elements as robust and easy to use as possible. Command structure was the all important force that kept units together in the face of brutality. In CoH, the probabilities of successful attacks were purposefully calculated to make hits very difficult without CAP modifications. Often, Soviet peasant units were handed rifles (if they were lucky) and pushed towards a battle without training. They were very brave, but just did not know what to do tactically when confronted by a German MG nest. So in this case, they would not start a firefight with many CAPs. This highlights the incredible importance a good command structure played. Therefore, successful play is dependent on management of CAPs. Carefully designed systems like these subtly affect game play tactics and are the backbone of Conflict of Heroes.
The CoH rules system has been finely tuned, but one cannot foresee all possibilities in a game with so many variables. If there is a conflict in the rule interpretations, use common sense and come to a friendly agreement on how to resolve the situation with the other player. Then, when you get a chance, e-mail us with your questions at the Academy Games web site.
The series will be expanded to cover other WWII theaters and other conflicts such as Vietnam and Iraq. It will also include rules for airplanes, boats, paratroopers, and much more.
So find some friends, set up a game, and have fun!
Uwe Eickert
Special thanks to the following people who helped in the development of the game. I appreciate the numerous ideas, hours of historical research, and stimulating discussions.
Nicholas Warcholak (editing and game development) Dave Kimmel (game and tactics development) Gunter Eickert (game and firefight development) Bevan Ferreira (game & statistical modeling development) Stephen Paschal (original cover artwork, www.stephenpaschal.com) 19th Century Miniatures (counter miniatures, www.19thcentury.com) Die 5. Gebirgsjäger Div. Historical Reenactment Unit (pictures) Rolf Werner for the many hours of storytelling and allowing me to use part of his poem at the beginning of the rules. Rolf, leb wohl!
Printed by Game Plan Printing & Packaging, Fremont, Ohio USA 419-332-8896
Copyright © 2008 Academy Games
The latest rule version, examples, additional firefights and game modules can be found online at: www.ConflictofHeroes.com and www.Academy-Games.com
Index Table
| Topic | Section | Topic | Section |
|---|---|---|---|
| Action Cards | 8.0 | Load Unit/Gun | 19.0 |
| Actions | 2.2 | Long Range Fire | 7.61 |
| Action Points (APs) | 3.0 | Marsh | 4.0 |
| Anti-Tank (AT) Gun | 18.0 | Mines | 22.6 |
| Arc of Fire | 6.1 | Mortars | 12.0 |
| Air Burst | 12.2 | Movement | 5.0 |
| Armor | 15.0 | — Infantry | 5.0 |
| Armored Personnel Carrier (APC) | 20.0 | — Cautious | 5.02 |
| Artillery | 12.3 | — Vehicles | 14.0 |
| Attack Value (AV) | 7.1 | Opportunity Action | 3.1 |
| Barbed Wire | 22.4 | Pioneers | 23.0 |
| Blind Spots - LOS | 11.4 | Pivoting | 5.3 |
| Bunkers | 22.2 | Players-Multiple | 24.0 |
| Cards | 8.0 | Rally | 7.5 |
| Casualties | 7.3 | Range | — |
| Close Combat | 7.63 | — Short | 7.62 |
| Combat - Foot | 7.0 | — Long | 7.61 |
| Combined Actions | 9.0 | Roads | 4.0 |
| Command Actions | 3.22 | Road Block | 22.5 |
| Command Action Points (CAPs) | 3.2 | Short Range Fire | 7.62 |
| Defense Value (DV) | 7.2 | Smoke | 13.0 |
| — From Mortar Fire | 12.1 | Solitaire Play | 25.0 |
| Die Roll Modifier | 3.23 | Stacking Limits | 7.7 |
| Facing | 5.2 | Steep Terrain |
Abbreviations
1D6 - 1 Six-sided Die 2D6 - 2 Six-sided Dice APs - Action Points APC - Armored Personnel Carrier AT Gun - Anti-Tank Gun AV - Attack Value (AV = FP + 2D6) CAPs - Command Action Points CC - Close Combat CoH - Conflict of Heroes DM - Defense Modifier DR - Defense Rating DV - Defense Value (DV = DR + DM) FP - Firepower LMG - Light Machine Gun LOS - Line of Sight MG - Machine Gun MMG - Medium Machine Gun NA - Not Accessible SMG - Sub-Machine Gun
Unit Reference (Component Notes)
The following notes describe each counter type included in the game, transcribed from the rulebook's final page.
German Rifle Squad (x8), 1939-1945 — 7 men and officers armed with rifles and some sub-machine guns. This unit was part of a standard squad in 1941.
LMG Unit (x7), 1939-1945 — Light machine gun units were a standard part of a squad, laying down heavy suppression fire for the rifle units.
HMG Unit (x2), 1939-1945 — A LMG 34 mounted on a tripod made the machine gun very lethal and accurate. Fired over 300 rounds / min.
Pioneer Squad (x2), 1939-1945 — Specially trained squads of 8-10 men that assaulted fortified positions, laid mines, and set traps.
50mm Light Mortar (x2), 1939-1942 — The 50mm mortar proved to be under-powered and was later supplemented with the 81mm mortar.
81mm Mortar (x2), 1939-1945 — 3 man units had to often hand carry heavy boxes of ammo, which made firepower supply limited.
7.5cm Infantry Gun (x2), 1939-1945 — This gun was used for close support against soft targets and fired high-explosive shells.
Anti-Tank Gun PaK36 (x2), 1939-1942 — The Germans were totally unprepared for the Soviet T-34 tank and the PaK36 shells literally bounced off of its armor.
Anti-Tank Gun PaK38 (x2), 1941-1945 — The PaK38 replaced the PaK36 in a desperate attempt to penetrate Soviet tanks. The guns were still underpowered.
Anti-Air Gun FlaK18 88mm (x1), 1939-1945 — This gun was converted into one of the most effective anti-tank guns of the war. It could penetrate any armor.
Trucks (x2), 1939-1943 — Opel trucks were numerous in the German army, but many trucks were commandeered Soviet Fords.
Armored Carrier (x2), 1939-1943 — Heavy duty armored troop transporter that could keep up with the tanks. Armed with two mounted LMG 34s.
Panzer 38t (x1), 1940-1942 — This Czech tank was slated to be a main battle tank, but proved to be vulnerable and underpowered.
Panzer IIf (x3), 1940-1943 — The main battle tank in the Polish campaign, this tank proved to be of use only against other light tanks.
Panzer IIIe (x2), 1939-1941 — Intended to be the main German battle tank, the puny 37mm gun proved to be useless against most Soviet tanks.
Panzer IIIh (x1), 1941-1942 — Panzer IIIe tanks were retrofitted with 50mm guns and much thicker armor to protect against the T-34 tank.
Panzer IIIj (x1), 1942-1943 — In an attempt to counter the devastating T-34 tank, this upgraded tank was already obsolete when introduced.
Panzer IVd (x2), 1939-1943 — An infantry support tank that sported a short 75mm barrel effective against soft targets only. Useless against other tanks.
Panzer IVf2 (x1), 1942-1943 — Upgraded to a 75mm anti-tank gun, making it the new main battle tank for the Germans, replacing the aging PzIIIs.
Soviet Rifle Squad (x12), 1939-1945 — 10 men and officers armed with rifles. Though not as tactically trained as the Germans, they had greater firepower.
Maxim MMG Unit (x3), 1939-1945 — The model 1910 was a heavy and cumbersome water cooled medium MG dating back to the Czarist days.
SMG Squad (x4), 1941-1945 — The PPSh was a mean short range sub-machine gun. 34% of all Soviet hand weapons were comprised of SMGs!
50mm Light Mortar (x2), 1939-1943 — The 50mm mortar proved to be too underpowered to have any great effect on the battlefield.
82mm Mortar (x2), 1939-1945 — Highest produced mortar used by the Soviets. Some had wheels affixed to the base for easier movement.
45mm Anti-Tank Gun (x2), 1939-1942 — Upgraded from the German PaK36, this gun was very versatile, firing armor-piercing and high-explosive ammo.
Wagons (x4), 1639-1945 — A majority of both armies were supplied and moved by horses. Wagons out-numbered all other vehicles combined.
GAZ Trucks (x2), 1939-1943 — A Ford copy manufactured in Russia, the GAZ 2x4 wheel truck was the workhorse for the Soviets.
BA-10 Armored Car (x2), 1939-1943 — Used mostly for reconnaissance, the BA-10 had light armor, good speed, a 45mm turreted main gun, and a MG.
BT-7 Light Tank (x2), 1939-1943 — Lightly armored, the BT-7 was obsolete by 1941. Its design was a precursor of the T-34 though.
T-26b Light Tank (x4), 1940-1942 — Redesigned sloping sides were not enough to improve this under-armored tank.
KV1a Heavy Tank (x2), 1940-1943 — The most powerful serial-made tank at the beginning of the war, its thick armor was almost impenetrable.
KV2a Heavy Tank (x1), 1940-1943 — The "Tank Buster" provided close support for the KV1a. Its main drawback was its slooow speed.
T-34a Medium Tank (x4), 1940-1942 — Considered the most successful tank series of WWII, it sported well-shaped and thick armor, small size and speed.
T-34b Medium Tank (x2), 1941-1943 — The gun was upgraded from the T-34a and the overall design simplified to make manufacturing simpler.
Action Card Reference (Component Notes)
Action cards may be played by active or reacting players. Cards paid for with APs must be played on the active unit or group that paid for it. Free cards or cards paid for with CAPs may be played on any unit.
Command Action (x12), Card #2 — As an action, any used or unused unit may execute one action. Cost: 0APs or CAPs.
Auto-Rally (x2), Card #3 — As an action, any used or unused unit may immediately rally. Certain vehicle hit counters have no rally option and thus may not use this card. Cost: 2APs or CAPs.
Rally Attempt (x2), Card #4 — As an action, any used or unused unit must roll to attempt to rally. Cost: 0APs or CAPs.
Move 2 Hexes (x2), Card #5 — As an action, any used, unused, pinned, or hidden unit may move up to 2 hexes. Concealed movement rules apply. May not be used on immobilised vehicles. Cost: 0APs or CAPs.
Mark as Used (x2), Card #6 — As an action, flip any enemy unit to its used side. Affected activated units lose any remaining APs. Cost: 2AP or CAP.
+1D6 APs (x4), Card #7 — As an action, an activated unit only may roll for additional APs. Cost: 1CAP.
+1D6 CAPs (x2), Card #8 — As an action, an activated unit only may roll 1D6 for additional CAPs. Add die result to the CAP track, which may be used by other units. Cost: 2APs.
+2 Firepower (x2), Card #9 — Play in conjunction with any attack. Add to a unit's FP after all other modifier calculations and before the die roll. Playing this card does not constitute an action. Cost: 0APs or CAPs.
Dual Attack (x2), Card #10 — A player may take two actions in a row, skipping any opponent reaction. Playing this card does not constitute an action. A player must announce use before the first action. Cost: 1CAP.
Hasty Defense (x2), Card #11 — As an action, any used or unused unit may place a hasty defense marker. Cannot play if in CC. Cost: 0APs or CAPs.
Sniper (x2), Card #13 — Play as action. Opponent loses CAPs immediately: Roll 1 = 0CAPs; Roll 2-3 = 1CAP; Roll 4-5 = 2CAPs; Roll 6 = 3CAPs.
Stop Vehicle (x1), Card #20 — As an action, immobilize any used or unused unit. Immobilization counter is removed at turn's end. Cost: 0APs or CAPs.
Reveal Hidden (x2), Card #30 — As an action, choose any one of your units and your opponent must reveal all hidden units within 2 hexes of it, even if out of LOS. Cost: 1AP or CAP.
Lay Land Mine (x2), Card #40 — As an action, any used or unused foot unit may lay a mine, including on its own hex, but not an enemy occupied hex. The mine may be placed as hidden, if out of enemy LOS. Cannot play if in CC. Cost: 2APs or CAPs.
Diffuse Land Mine (x1), Card #41 — As an action, any used or unused foot unit may remove a mine counter from its own hex or within one hex of its position. Cannot play if in CC. Cost: 2APs or CAPs.
Weapon Cards (x6) — Resolve weapon cards as an action by any unit on the map.
- Hand Grenade (x3) — Used as an infantry weapon. No close combat FP modifiers. Resolve against flank DR. Cost: 0AP or CAP.
- Molotov Cocktail (x2) — Used as an infantry/anti-tank weapon. No close combat FP modifiers. Resolve against flank DR. Terrain modifiers apply. Cost: 0AP or CAP.
- Tellermine (x1) — May be used by foot units to attack an enemy in the same hex or it may be placed as a land mine within one hex of the unit's position. Same rules as the Lay Land Mine.
Off-Board Artillery (x2) — The artillery weapon cards represent off-board resources available to the players. Their firepower is listed in the grey box. German 10.5cm Field Howitzer (x1). Soviet 122mm Field Howitzer (x1).
Game Ends (x1) — This card is used only if specifically called for in the firefight setup rules. When pulled, the game ends immediately. Both players add up their victory points.
Objectives 1-4 (x4) — The objective card is kept secret and usually dictates a secret objective or directive as specified by the firefight.