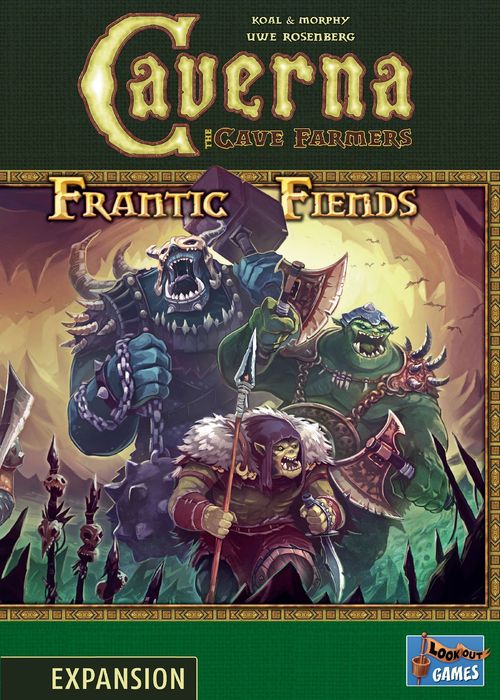
Caverna: Frantic Fiends
Caverna: Frantic Fiends Rulebook
Table of Contents
Table of Contents
Game Idea
In this second expansion for Caverna, you must each face the threat of four invading orcs by either sending your armed dwarves into battle or bribing the invaders to go the other way, or both. Either way, you must get rid of the orcs as quickly as possible lest they break into your cave, robbing you of your riches and taking your family hostage. Plus, the sooner you defeat them, the better the reward. And yet, not all orcs are bad by nature—if you really get to know them, they might turn out to be friendly after all …
Compatibility
This is a standalone expansion: It requires the base game to play, but it is not compatible with the first expansion, The Forgotten Folk, and should not be combined with it. The quirks of the different folk in the first expansion might put certain players at a major disadvantage when playing with the second expansion.
Components
- 60 playing cards:
- 27 movement cards (9 each of range 1, 2, and 3)
- 7 "Orc Strength" maintenance cards
- 7 new "Expedition Loot" overview cards
- 7 new "Harvest Time/Rubies" overview cards
- 8 action space cards
- 4 milestone cards (for the solo campaign only, see page 14)
- 28 orc markers (marked A-D, in the seven player colors)
- 1 additional orc marker
- 109 additional weapon strength markers (22 of "1/2"; 14 each of "3/4", "5/6", "7/8", "9/10", and "11/12"; 7 of "13/14"; 4 of "15/16", 3 of "17/18", 2 of "19/20", and 1 of "21/22")
- 6 bribe markers
- 8 new harvest markers (of which 4 show an orc symbol)
- 25 new furnishing tiles
- 30 trap tiles
- 4 orc event boards
- 2 reward board frame pieces (one top and one bottom piece)
- 7 long reward board strips
- 7 short reward board strips
- 1 supply board base
- 9 supply board extensions
Setup
Common Playing Area
-
Set up the game boards with action spaces according to the base game rules. a. Cover the "Housework" action space with the "Housework" action space card from this expansion. b. Cover the "Ore Mining" action space with the appropriate side of the "Ore Mining" action space card from this expansion. (One side is for 1-3 players; the other is for 4-7 players.) c. Turn the "Armory" action space card from this expansion to the appropriate side and place it on the game board:
- With 1-3 players, cover the "Wood Gathering" action space with it. Return the "Logging" and "Imitation" action space cards from this expansion to the game box—you will not need them.
- With 4-7 players, use the "Armory" and "Logging" action space cards from this expansion to cover "Imitation", "Logging", and "Forest Exploration" on the game board, and place the "Imitation" action space card from this expansion nearby. d. Using the new "Ore Mine Construction", "Ruby Mine Construction", and "Wish for Children" action space cards from this expansion in place of their base game counterparts, prepare the stack of action space cards according to the base game rules. (Remember to exclude the "Exploration" action space card from the stack in games with 1-2 players.)
-
Do not use the base game harvest markers. Instead, distribute the harvest markers from this expansion on the game board as follows: a. Place a harvest marker with orc symbol each on round spaces 3 and 6, face up. b. With 1-2 players, return one harvest marker without orc symbol to the game box. c. Shuffle the remaining harvest markers and distribute them, face down, on round spaces 7-12, skipping space 9 in games with 1-2 players.
-
Do not use the base game "Harvest Events" card. Instead, do the following: a. Place the 4 orc event boards in a line near the game boards. b. Shuffle the 6 bribe markers and place one face up on the appropriate space of each orc event board. (Return the remaining two bribe markers to the game box—you will not need them.)
-
Do not use the base game supply boards. Instead, do the following: a. Place the new supply board base near the game boards. b. Select one supply board extension per player at random and place the selected extensions next to the base, forming one large supply board. (Return the remaining extensions to the game box—you will not need them.) c. Place the depicted furnishing and trap tiles on the appropriate spaces of the supply board. Place all dwellings and, for each other tile of which there is more than one copy, place one such tile per player.
Personal Playing Areas
-
Set up your personal playing areas according to the base game rules.
-
Do not use the base game overview cards. Instead, take one each of the new "Expedition Loot" and "Harvest Time/Rubies" overview cards from this expansion.
-
Take the four orc markers in your color. Place "Orc A" on the top left, "Orc B" on the top middle, and "Orc C" on the top right forest space of your home board. Keep the "Orc D" marker close by for now; it will come into play later.
-
Take an "Orc Strength" maintenance card. Decide together which side of the card you want to use for this game. Then place weapon strength markers on the spaces of the card, as depicted on them. (One side features orcs with strengths of 5, 7, 9, and 12; the other one features more challenging orcs with strengths of 7, 9, 11, and 14.)
Tip: If you like, you can handicap more experienced players by letting only them turn their maintenance card to the more challenging values.
-
Determine the start player and take your starting food as detailed in the base game rules.
Overview
At the start of the game, there are three orcs occupying the top three forest spaces of your home boards. These orcs will move around during each of the four orc events, removing your animals and crops. Eventually, the orcs may find their way into your cave, stealing ore and rubies from your mines and taking your dwarves hostage. At the end of the second orc event, the orcs will be joined by a fourth orc—the mightiest of them all.
Luckily for you, there are three ways to deal with the orcs:
- During an expedition, you can send an armed dwarf, accompanied by any number of dogs, into battle to fight against an orc.
- You can lay traps in your forest and meadows for the orcs to step in.
- During each orc event, you can bribe the orcs with resources; if offered enough, they will go away.
When an orc leaves your home board, you will get a bonus from the reward board. Fighting the orcs, however, is not the only way to neutralize the threat. Capturing an orc in a holding trap and providing them a room to live in, you can convince them to join your ranks and work with you in the remaining rounds.
Aside from the orcs, this expansion changes how mines work. When placing a mine in your cave, the resources you would normally get alongside the mine (ore or ruby) are now placed inside the mine, i.e., on the tile. The modified "Ore Mining" action space allows you to place additional resources in your mines. To retrieve the resources, you must have donkeys in the mines during the new mining phase of the harvest.
Course of Play
Caverna: Frantic Fiends can be played with 1-7 players. Unless stated otherwise, play the game according to the base game rules. The following rules apply to all player counts (including solo). Solo players should also note the additional campaign rules on pages 14-15.
Action Space Changes
Armory. The "Armory" action space replaces the "Wood Gathering" and "Forest Exploration" action spaces, accumulating 1 wood per round in games with 1-3 players and 1 food per round in games with 4-7 players. Additionally, it allows an unarmed dwarf using this action space to "forge" a weapon from wood (i.e., carve a club), by spending up to 4 wood to get a weapon of equal strength. Unlike the action spaces that let you forge a weapon from ore, Armory does not come with an immediate expedition.
Note: In games with 1-3 players, you can use the newly gained wood from this action space for its "Forge a Weapon" action at the bottom.
Ore Mine Construction. After you place the ore mine in your cave, take 3 ore from the general supply and place them on the tile (not in your supply). You can move the ore to your supply during the mining phase of the harvest if there is a donkey in that mine (see page 13 for details); you cannot spend the ore as long as it is in the mine.
Ruby Mine Construction. After you place the ruby mine on a deep tunnel, take 1 ruby from the general supply and place it on the tile (not in your supply). You can collect the ruby during the mining phase of the harvest if there is a donkey in that mine (see page 13 for details); you cannot spend the ruby as long as it is in the mine.
Note: Do not place a ruby in the mine if you place it on a regular tunnel.
Ore Mining. Take the ore that has accumulated on this space and place it in your supply. Additionally, you can restock your mines as follows.
Restocking Mines. Place 2 ore from the general supply in each of up to 2 ore mines and 1 ruby from the general supply in each of up to 2 ruby mines. The mines need not be empty to receive additional resources; simply add the new ones to those present. There is no limit to the number of resources in a mine.
Housework. Take a dog from the general supply and place it on your home board. Additionally, you can either furnish a cavern or lay a trap.
Furnishing a Cavern. When furnishing a cavern, you have access to all the tiles available in the top and middle row of the supply board. After you defeat (and/or befriend) all four of the orcs on your home board, you can also access all the yellow furnishing tiles on the reward board.
Laying a Trap. Pay the cost of an available trap in the bottom row of the supply board and place it, with the active (front) side up, on an empty forest or meadow space on your home board. Unlike double tiles, the trap need not be adjacent to the cave entrance or another tile. You can, however, place future tiles next to the trap. If you cover a food or wild boar symbol with a trap, you immediately get the respective bonus.
Wish for Children. Either furnish a cavern, or lay a trap, or take the "Family Growth" action. You can acquire any furnishing tile available to you, not just a dwelling like you used to in the base game. (For details on the available furnishing tiles and how to lay a trap, see the boxes above.)
Urgent Wish for Children. Either furnish a cavern, or lay a trap, or take 3 gold. Afterward, if you chose to furnish a cavern or lay a trap, you can also take the "Family Growth" action. When furnishing a cavern, you can acquire any furnishing tile available to you, not just a dwelling like you used to in the base game. (For details on the available furnishing tiles and how to lay a trap, see the boxes above.)
New Expedition Loot
As shown on the new "Expedition Loot" overview cards provided with this expansion, there are three new options that you can choose from during an expedition:
Fighting an Orc (loot at 1)
Important! If chosen, this expedition loot item must be the last one you choose.
If you can defeat an orc, you can send the dwarf undertaking this expedition to fight one. The dwarf can bring any number of dogs with them, even one that they have just acquired from the same expedition. Each dog adds +1 to the fighting dwarf's strength.
To defeat an orc, the combined strength of the dwarf and their accompanying dogs must be equal to or greater than the orc's strength. If not, you must choose a different orc to fight against or a different expedition loot item after all.
When an orc is defeated, reduce the weapon strength of the fighting dwarf by the orc's strength. For each dog that you spend, reduce the weapon strength by one less. If the weapon strength is lower than the orc's strength, you must spend dogs to cover the difference. If you have that many dogs, you can spend a number equal to the orc's strength to keep your dwarf's weapon intact. You may not spend more dogs than the orc's strength.
Notes:
- Even if the fighting dwarf and their dogs are strong enough to defeat two or more orcs at once, you cannot fight more than one orc per expedition.
- If your dwarf is left with no weapon after the fight, they will not benefit from the free weapon upgrade after the expedition. (There is no increase from 0 to 1.)
- If you spend dogs that were watching over sheep, you must accommodate the sheep immediately or exchange them for food.
- Even though there is a strength marker for Orc D on your maintenance card from the start, you cannot fight Orc D before the start of round 7. (Orc D will enter your home board at the end of round 6.)
Finally, you get a reward for defeating the orc. Take the reward after increasing your dwarf's weapon (if they still have one). (See "The Reward Board" below for details.)
Example: You send a dwarf with a weapon of strength 4 and 3 dogs, i.e., a total strength of 4+3=7, against Orc A whose strength is still 5. You now have three options:
- Spend 1 dog and lose the weapon. Consequently, your dwarf will be unarmed and will not get the usual +1 weapon upgrade after the expedition.
- Spend 2 dogs and reduce the weapon by 3, resulting in a weapon of strength 1, which will immediately increase to 2, thanks to the automatic weapon upgrade.
- Spend all 3 dogs and reduce the weapon by 2, resulting in a weapon of strength 3 after the automatic weapon upgrade.
Laying a Trap (loot at 5)
See the "Laying a Trap" box on page 5.
Restocking Mines (loot at 12)
See the "Restocking Mines" box on page 5.
Traps
Traps are another way to deal with orcs and are placed in the forest section. They are not considered furnishing tiles and can only be placed via the "Laying a Trap" action. For this purpose, the "Housework", "Wish for Children", and "Urgent Wish for Children" action spaces allow you, among other things, to either furnish a cavern or lay a trap. Additionally, there is a new expedition loot item at 5 for laying traps. (See the "Laying a Trap" box on page 5 for details on how to lay a trap.)
There are three types of traps:
- Defeating traps, i.e., traps that instantly defeat an orc: These traps have a maximum strength and will only go off if an orc of equal or lower strength enters them. When this happens, you get a reward as usual. (See "The Reward Board" below for details.)
- Weakening traps, i.e., traps that reduce an orc's strength: These traps make it easier to defeat the orcs. Some of the weakening traps are even capable of defeating an orc if the orc is low on strength already. (See "The Reward Board" below for details on what happens when an orc is defeated.)
- Holding traps, i.e., traps that stop an orc's movement immediately and hold it in place until the next movement phase. With these and an appropriate dwelling, it is possible to befriend the orc, so it works with you rather than against you. (See "Friendly Orcs" below for details.) Each holding trap can stop and hold at most one orc. Every additional orc in the same space is not considered held by the trap (and it will not be unless it actively walks into the trap after the previously held orc frees itself).
There are 12 trap tiles of three types (defeating, holding, and weakening). Each trap's effect and building cost are given in the Trap Index in the Appendix below.
Traps placed on your home board remain there until the end of the game. You cannot build over them, not even after they become inactive. The space they occupy is considered used even if the trap does not go off. Traps only go off if an eligible orc enters them. If an orc is too strong to trigger a trap, the trap remains active for the next eligible orc to enter it.
Except for the "Permanent Trap" (see below), all traps are single use. When a trap becomes inactive, turn it to the other side; inactive traps are worth 2 gold points during scoring, as printed on the back of the tile. Defeating and weakening traps become inactive when they go off, i.e., when an eligible orc enters them; holding traps, on the other hand, become inactive only when you befriend the orc held by them (by providing a room in your cave). If the orc frees itself during its next movement, the holding trap stays active for the next orc to enter it (which could be the same orc if it enters the trap again).
Example: Pitfall can instantly defeat an orc if its strength is at most 8. The depicted orc is too strong, so the trap stays active.
Notes:
- Only inactive traps are worth points during scoring; traps that do not go off until the end of the game are worth nothing. Because the space occupied by a trap is considered used, you do not lose a point for that space, regardless of whether the trap goes off or not.
- The Permanent Trap stays always active, reducing the strength of every orc that enters it by three. As a consequence, you will not get any points for the Permanent Trap during scoring, because it will never become inactive.
The Reward Board
When an orc is defeated, return the orc's strength marker on the maintenance card to the supply. Also, remove the orc marker from your home board and either place it on the reward board, claiming a bonus, or get gold equal to the amount printed on the back side of the orc marker (1 or 2 gold).
If you choose the reward, place the defeated orc on an unoccupied reward space on the left of the reward board, in an eligible column, as indicated by the top frame piece:
- Orc A can be placed only in the first column.
- Orc B can be placed in any of the leftmost two columns.
- Orc C can be placed in any of the leftmost three columns.
- Orc D can be placed in any of the four reward columns.
It does not matter on which space within a column you place the orc—you can freely choose among the unoccupied spaces. Note that there are not enough spaces for all orcs. If there are no eligible spaces left, you must take gold for the defeated orc.
Example: You have just defeated Orc B; it is time to claim your reward. You decide to place the orc marker on "Merchant" in the third row of the second column, gaining 1 grain and 1 vegetable from the general supply. If all spaces in the first and second column of the reward board were occupied, you would get only 1 gold for the defeated orc, as printed on the back side of the orc marker.
The reward board is assembled from two frame pieces, up to five long strips, and an equal number of short strips, depending on the number of players. The rewards printed on the long strips are listed in the Reward Index in the Appendix below. The four spaces of each long strip are the reward spaces in one row, and the columns are the eligibility columns described above.
Yellow Furnishing Tiles
The right side of the reward board features two columns of yellow furnishing tiles, providing bonus points during scoring. You cannot acquire these tiles unless you get rid of all four hostile orcs on your home board—by defeating them (in battle or with bribes, see page 11) and/or by befriending them (see "Friendly Orcs" below).
As soon as you remove the last weapon strength marker from your maintenance card, you gain access to all unoccupied furnishing tiles that are left on the reward board. To acquire one, you must take a "Furnish a Cavern" action as normal.
Note: It does not matter whether you have placed any of the defeated orcs on the reward board or not. Because you must get rid of all four hostile orcs, you cannot gain access to the yellow furnishing tiles before round 7, because you cannot get rid of Orc D before it enters play (at the end of round 6).
Example: In the previous rounds, you successfully defeated Orcs A and B and you managed to befriend Orc C via a holding trap. It is time to defeat Orc D so you can finally get your hands on some yellow furnishing tiles. You pay a ruby to take the level 4 expedition before another player does. First, you pay 1 wood to build a pasture where your dog is watching your sheep. Then you take another dog and one cattle, which you immediately turn into 3 food. Finally, you fight Orc D by spending your two dogs and your weapon. Because you lost two dogs, you must immediately accommodate your sheep or turn them into food: you decide to keep two sheep in the newly gained pasture, placing the new dog and remaining sheep on the now unoccupied meadow. As a reward, you choose to use an unoccupied action space, selecting Housework to immediately build a yellow furnishing tile.
Friendly Orcs
Another way of getting rid of hostile orcs is to capture them in a holding trap (see "Traps" above) and furnishing a room for them in your cave, like the "Orc Dwelling", which is available in every game with the expansion. Additional orc dwellings with a special ability for the orc living in them may be available in the top row of the supply board extensions.
An orc held by a holding trap will immediately move into an available orc dwelling, becoming a so-called friendly orc. If there is no available orc dwelling when an orc is captured, you have until the next orc event to build one. (Orcs will free themselves of holding traps the next time they move.) If you build an orc dwelling before capturing an orc, the next orc that is captured by the trap will immediately move in.
As soon as you have a friendly orc, you can place it as an additional worker, even in the same round it moves in. If it moves in during an orc event, you can place the orc starting from the next round. Either way, when an orc becomes friendly, remove its weapon strength marker from your maintenance card.
Example: You have successfully captured an orc in the Trap Net. It is time to build a room so the orc can join you. As soon as you place the Orc Dwelling, the captured orc moves in and is ready for work immediately, i.e., you can place it during that round already!
Note: You do not get a bonus from the reward board when an orc becomes friendly, nor do you get any gold for that orc. Friendly orcs are, however, worth 1 gold point during scoring like dwarves.
Placing Friendly Orcs
Friendly orcs come last in the play order: first, you place your unarmed dwarves, then your armed dwarves in increasing order of strength, and finally, your friendly orcs in an order of your choice. As always, you can spend a ruby to ignore this rule and place a friendly orc early.
Example: In a 3-player game, Anna (the start player), Bridget, and Christie have the depicted dwarves and orcs. The round goes as follows:
- 1st turn: Anna (dwarf #1), Bridget (1 ruby → dwarf #3), Christie (dwarf #1).
- 2nd turn: Anna (dwarf #2), Bridget (dwarf #1), Christie (dwarf #2).
- 3rd turn: Anna (orc), Bridget (dwarf #2), Christie (orc).
- 4th turn: Bridget (orc).
Friendly orcs have still a lot to learn about the dwarven ways, which is why they are only capable of collecting goods that have accumulated on an action space. Except for the orc living in the "Orc Worker Dwelling", friendly orcs cannot carry out any of the other actions provided by an action space.
Example: You place a friendly orc on Drift Mining to collect the four stone that have accumulated on the space. Unfortunately, you do not get to place the double tile, unless that orc lives in the "Orc Worker Dwelling".
Note: For details on orcs with special abilities, see the appendix on pages 16-17.
Feeding Friendly Orcs
Friendly orcs require 1 food each during the feeding phases, regardless of whether they have special abilities or not.
Note: If you manage to befriend an orc before the end of round 4, you must feed that orc 1 food during the special feeding phase at the end of round 4.
Orc Events
There are 8 harvest markers on the game board, of which 4 are orc events. This is when the orcs on your home board move and wreak havoc. The first and second orc events always happen at the end of rounds 3 and 6, respectively. The third and fourth orc events happen sometime between rounds 7-12, when the remaining harvest markers with orc symbol show up.
There are four orc event boards beside the game board, detailing what happens during each orc event and how the subsequent harvest is affected. They also show which resources you need for bribing or pushing the orcs. This information is available from the start. The orc event boards are activated in numerical order by the harvest markers with orc symbol (the first harvest marker activating board #1, the second activating board #2, etc.).
| Orc Event board | Bribe (any number of times, -1 strength) | Push (at most once, 1 space) | Harvest Time |
|---|---|---|---|
| #1 | [pictured resource] | [pictured resource] | mining and feeding phase only (no field and breeding phase) |
| #2 | [pictured resource] | [pictured resource] | complete harvest; then randomly place Orc D (see "Orc D") |
| #3 | [pictured resource] | [pictured resource] | no harvest, instead: special feeding phase (see below) |
| #4 | [pictured resource] | [pictured resource] | "The remaining orcs breach!" skip the field and mining phase or the breeding phase |
Transcriber's note: the bribe and push costs on the orc event boards are pictured resource icons, not text, and are shown above as placeholders. Check the printed boards for the exact resource in each cell.
During each orc event, the orcs are activated one after the other, in alphabetical order. For each hostile orc remaining on your home board, you must carry out the following three steps in this order:
- Draw a movement card.
- Bribe or push the orc.
- Move the orc.
You must complete all three steps for one orc before proceeding with the next orc. Most of the time, all players can carry out these steps simultaneously. If need be, carry them out in turn order, beginning with the player currently holding the start player token. (This may be necessary if multiple players can defeat an orc with bribes or traps, see below.)
1. Drawing a Movement Card
Shuffle the appropriate movement deck, as indicated by the current orc event board, and let each player draw a card from it. If the active orc is no longer in your forest, you do not need to draw a movement card for it. Place the drawn card face up in front of you; it shows the movement pattern of the active orc; the deck number indicates how many steps comprise that pattern. Rotate the card so that the illustration of a mountain is on the right side of the card.
Example: During the first orc event, Orc A moves 3 spaces, so each player draws one movement card each from the "3" deck to preview that orc's movement pattern.
Note: You must shuffle the respective movement card deck for each orc individually. Then each player draws their own card—the orcs do not synchronize their movement.
If the active orc is already inside your cave (from a previous breach, see below), skip this step and immediately proceed with the next one.
Important! Do not move the orc yet; you can bribe or push an orc before it moves.
2. Bribing or Pushing the Orc
Before the orc carries out its movement pattern, you can bribe it or push it to another space.
Bribing. To bribe the orc, pay any number of goods of the type shown on the bribe marker on the current orc event board and reduce the active orc's strength by an equal amount, replacing its weapon strength marker on the maintenance card accordingly. If you reduce its strength to 0, the orc is considered defeated, and you get the usual benefits: a bonus from the reward board or gold (see "The Reward Board" above for details). If multiple players defeat an orc, they take their rewards in turn order.
Example: The current bribe token shows stone. You spend 3 stone to reduce Orc A's strength from 5 to 2. Orc A will still move, but at least it is now easier to defeat later.
Note: You can bribe the active orc even if it is already inside your cave (from a previous breach, see below).
Pushing. Additionally, or alternatively, if the active orc is still in your forest, you can pay the pushing cost printed on the current orc event board to push the orc at most one space in any direction, including diagonally.
- If you push the orc into an eligible trap, the trap goes off immediately with the usual consequences (see "Traps" above for details). If multiple players defeat an orc with this, they take their rewards in turn order.
- If you push the orc into a space with animals or crops, the orc will remove them (see also "Moving the Orc" below).
- If you push the orc into a space with another orc, nothing happens—orcs can occupy the same space on your home board.
- If you push the orc into your cave (through the entrance), the orc will immediately occupy a space in your cave according to the "Breach" rules (see below).
Example: Of course, you drew the only movement card in the "3" deck that allows Orc A to circumvent the trap that you have placed right in front of them … So, you decide to spend 1 wood, as per the current orc event board, to give that orc a little nudge downwards, right into the trap. (This will defeat Orc A—see "Poisoned Arrows" in the appendix on page 18.)
Note: Unlike bribing, you can push each orc only once per orc event. You cannot push orcs that have breached your cave and are now inside of it.
If either of these actions (bribing and/or pushing) results in the orc being removed from your home board or pushed into an eligible holding trap, return the movement card to the deck and skip the next step.
3. Moving the Orc
Finally, if the active orc is still in the forest and has not been captured by a holding trap, you must move the orc according to the movement pattern shown on the drawn movement card. Movement always starts at the orc's current position. You must carry out each step of the pattern individually, one after the other, according to the following rules:
- The orc can move into any space in the forest, even if it is occupied by another orc. Orcs do not interact with each other in any way.
- The orc cannot leave the boundaries of the forest and they can only move into your cave through the entrance. If a step shown on the movement card is illegal in that regard, instead, move the orc one space down or—if this, too, is not possible—one space to the right.
- If the orc moves into a planted field, immediately remove all crops from the field and return them to the general supply.
- If the orc moves into a pasture or a space containing animals, immediately remove all animals from that pasture or space and return them to the general supply. You are not allowed to move your animals during an orc event.
- If an orc moves into a double pasture, all animals in that pasture are lost.
- The orc does not destroy any of your structures: fields, meadows, pastures, and stables remain on your home board, even if an orc moves into them.
- If the orc moves into an eligible trap, the trap goes off immediately, with the usual consequences (see "Traps" above for details). If the orc is defeated or held by the trap, their movement ends immediately, and any remaining steps are ignored.
- If the orc moves into your cave, they will immediately occupy a space in your cave according to the "Breach" rules (see below).
Example: A little later in the game, you are supposed to move Orc B according to the shown pattern: two steps to the left. You carry out the first step, but the second one is not possible. So, instead, the orc moves one space down, destroying the planted grain in the field, leaving you with an empty field. The dog and sheep in the meadow are safe, for now.
After completing the orc's movement, return the movement card to the deck and proceed with the next orc, if any. If the active orc is already inside your cave (from a previous breach, see below), reevaluate their position inside your cave according to the "Breach" rules.
Orc D
At the end of the second orc event, Orc D will randomly appear in the top row of the forest. To determine where exactly, take all cards of any one of the movement decks (1, 2, or 3) and shuffle them. Deal one card to each player, which will determine the space in which the orc appears, as indicated by the symbol in the top left corner of the card:
- Place the orc on the left space in the top row of the forest.
- Place the orc on the middle space in the top row of the forest.
- Place the orc on the right space in the top row of the forest.
Once placed, return the movement card to the deck.
Breach
At the end of the fourth orc event, after their final movement, all orcs remaining in your forest will enter your cave and occupy a space. This breach is inevitable and will take place regardless of the orcs' final movement, even if the orc has just been captured by a holding trap.
Note: Orcs can breach earlier, during the second or third orc event, if they move into the cave naturally, through the entrance. (Due to the starting positions of the orcs, it is impossible for an orc to breach during the first orc event.)
For each breaching orc, in alphabetical order, determine a space in your cave that is not occupied by another orc, according to the following preference list:
- The ruby mine with the most rubies (including 0).
- The ore mine with the most ore (including 0).
- The furnishing tile with the most printed points.
- Any empty cavern.
- Any empty tunnel, preferably a deep one.
In case of a tie, the orc will preferably occupy a space housing an animal, dwarf, or friendly orc. If still tied, or if there are no animals or dwarves in the tied space, you may decide which one will be occupied.
When an orc occupies a space in your cave, you lose all benefits from that space:
- If there are resources and/or a donkey in an occupied mine, return them to the general supply.
- If there is a dwarf or friendly orc in an occupied dwelling, the hostile orc will take them hostage, i.e., you cannot place them. (They are considered non-existent.)
- If there are multiple dwarves in an occupied dwelling, the orc will take the weakest of them hostage, but at most one dwarf.
- If an occupied furnishing tile has an effect, you cannot use it any longer.
- If an empty cavern or tunnel is occupied, you cannot place a tile on it.
If there are more breaching orcs than eligible spaces in your cave, all additional orcs will occupy the entrance dwelling, without taking any additional hostages. (In other words, you will always have at least one dwarf left to place.)
Example: It is the last orc event. You have defeated all orcs but Orc D. First, according to the movement card you drew, the orc moves down one space, onto an empty field. Lucky you: had it moved down to the right, your sheep would have been no more. Then it breaches your cave, moving onto the empty ruby mine. If there were no ruby mine, the orc would have moved into the ore mine, removing both the ore and donkey from it.
Note: Any hostile orcs remaining in your cave will breach one more time immediately before scoring to lower your final score as best as they can (see "Game End and Final Scoring" below).
Modified Harvest Time
After the first, third, and fourth orc event, there is a modified harvest, as detailed on the respective orc event board.
- 1st orc event: The field and breeding phases will be skipped; only the mining and feeding phases will take place.
- 2nd orc event: Normal harvest (including the new mining phase).
- 3rd orc event: No harvest; instead, there is a special feeding phase, in which armed dwarves require 2 food each and everyone else, including newborns and friendly orcs, requires 1 food each.
- 4th orc event: Each player may choose individually if they want to skip the field and mining phases or the breeding phase. (So, you either carry out the field, mining, and feeding phases, or you carry out only the feeding and breeding phases.)
Mining Phase
The mining phase takes place between the field phase and the feeding phase of the harvest. From each mine with a donkey, move all the ore and rubies on the tile to your supply.
You may not move your donkeys during the mining phase. If a mine has resources but no donkey, the resources remain there—you cannot simply empty the mine with a donkey from another mine. You can, however, relocate the donkey after the mining phase so it can haul the resources during the next mining phase.
Example: You have two mines with resources, an ore mine with 3 ore and a ruby mine with 1 ruby, but only one donkey. Unless you get yourself a second donkey, before the next mining phase, you must choose whether you need the ore or the ruby most. If the donkey stays in the ruby mine, it will haul only the ruby; if it moves to the ore mine, it will haul only the ore. You cannot get both with a single donkey.
Game End and Final Scoring
The game ends after (11 or) 12 rounds as normal.
Immediately before scoring, the remaining hostile orcs will reevaluate the tiles they occupy in your cave based on the point values alone, occupying the most valuable tiles. For this purpose, donkeys, dwarves, and friendly orcs on a tile are added to its value. (In other words, if any hostile orcs remain, they will make sure your final score is as low as it can get.) As always, if an orc moves into a mine with a donkey, return the donkey to the general supply.
Example: Before scoring, the remaining orc moves from the ruby mine, worth 4 gold points, to the Ore Storage, which would have been worth 6 gold points. Now, it is worthless.
Determine your scores as normal. Dwarves and friendly orcs are worth 1 gold point each unless they are taken hostage. (The value printed on the back of a friendly orc does not matter.) Any tiles occupied by a hostile orc are worth nothing; the same applies to ore and rubies left in mines.
The player with the most points wins. In case of a tie, the player who has the least hostile orcs left in their cave breaks the tie. If still tied, the players share the win.
Solo Campaign
The regular solo game is played according to the base game and expansion rules. The solo campaign is a series of five solo games with increasing difficulty. Your goal is to win all five games in the series. Scores carry over from game to game and you can spend points to buy bonuses for later games in the series.
Setup
Set up the game as normal, with the following changes:
- Randomly choose one of the four milestone cards, with a random side facing up. It will show a side goal for the current game, which allows you to save gold points when buying bonuses for future games (see "Discounts from Milestones" below).
- Do not re-use any supply board extension, milestone card side, and long and short reward board strip from any previous game in the series: Each game will have a different set of tiles, rewards, and milestones.
- In the first game, decide which side of the orc strength maintenance card to use (either 5/7/9/12 or 7/9/11/14). At the start of every subsequent game, add 2 to the starting strength of every orc as compared to the previous game. (In other words, add 2/4/6/8 to each orc's strength in games 2/3/4/5.)
Note: You start every game with 1 food as normal.
Winning the Campaign
To win a game, you must defeat and/or befriend all four orcs. To win the campaign, you must win five consecutive games. If any hostile orc remains at the end of a game, you lose the entire campaign and have to start over from scratch. Your score at the end of the fifth game is your campaign score.
Spending Points for Bonuses
Your scores carry over from one game to another. At the end of every game, you can spend points from your running total (thus decreasing it) for bonuses. You can buy every bonus either as a one-time or permanent bonus:
- One-time bonuses apply only to the next game. If you need the same bonus in a later game, you need to pay its cost again.
- Permanent bonuses cost double, but they persist until the end of the series, i.e., you pay only once and then start out every subsequent game with them. We recommend you mark your active permanent bonuses, as a reminder.
You can buy any number of bonuses any number of times, if you can pay for them with gold points (GP). The following table displays all bonuses and their costs:
| Cost to get the bonus once | Cost to get the bonus in every game | Bonus |
|---|---|---|
| 10 GP | 20 GP | 1 wood or 1 stone or 1 ore |
| 15 GP | 30 GP | 1 grain or 1 dog |
| 20 GP | 40 GP | 1 vegetable or 1 sheep or 1 boar or 1 donkey |
| 30 GP | 60 GP | 1 cattle or 1 ruby |
| 40 GP | 80 GP | 1 double tile (of any type) |
| 50 GP | 100 GP | 1 basic trap at no cost (i.e., from the supply board base) |
| 60 GP | 120 GP | 1 basic functional tile at no cost (i.e., from the supply board base) |
| 70 GP | 140 GP |
Note: Do not confuse "gold points" with "gold"! You spend actual points (e.g., points you gained from animals or tiles) to buy bonuses, not just the gold you collected. The above table is also shown on the tracking sheet (see below), for quick reference.
Example: Three games into the challenge, you have just completed a game with a whopping 72 GP, thanks to the dwelling you bought yourself last game. Seeing how good of a choice this was, you decide to buy another one for next game. Of course, had you saved up your points to buy the dwelling as a permanent bonus, you'd be better off in the long run, but who knows if you'd even manage to score 140 GP total over three games if you had not purchased that dwelling for game #3!
Discounts from Milestones
If you meet the condition shown on the current milestone card, you get the corresponding discount on the total of gold points spent on bonuses. This discount does not get added to your running total—if you do not use it all, the rest is lost.
The milestone cards show a condition (a number of pictured goods, e.g., sheep) and a discount. One side of the card shows the thresholds 5, 6, and 7 with discounts of 5, 10, and 20 GP; the other side shows 7, 9, and 11 with discounts of 5, 10, and 20 GP.
Example: At the end of the game, you have 8 sheep so you apply for the 5 GP discount. You decide to buy an extra stone for the next game, paying only 5 GP (instead of the normal 10 GP). If you had not spent any GP, the discount would be lost.
The Tracking Sheet
Pages 19 and 20 of this rule book show a tracking sheet for the solo campaign that you can cut out and photocopy, to keep track of your progress during the campaign. One side shows the smaller starting strengths of 5/7/9/12; the other shows the higher ones of 7/9/11/14.
The sheet allows you to keep track of your running totals and expenses for bonuses and which short and long reward board strips, supply board extensions, and milestone card sides have been used. Additionally, it shows the bonus table, with checkboxes for permanent bonuses that you bought.
Transcriber's note: the tracking sheet on pages 19-20 is a printable play aid and is not transcribed.
Appendix
This appendix comprises three parts: a reward index, a furnishing tile index, and a trap index, explaining all new elements in detail.
Reward Index
The reward board is assembled from two frame pieces, up to five long strips, and an equal number of short strips, depending on the number of players. This index explains the various rewards printed on the long reward board strips, sorted by the index numbers on their backs.
Transcriber's note: the source prints the heading of the fourth strip group as "L3" in the appendix text layer, after the third strip group (L3). The strip index numbers run L1 to L7 on the tracking sheet, so the Ore Miner group is labelled L4 here.
L1
| Farmer | Shepherd | Seasonal Worker | Mercenary |
|---|---|---|---|
| Immediately take 3 food from the general supply. | Immediately take 2 sheep from the general supply and accommodate them on your home board. | Immediately take 1 wood, 1 stone, 1 ore, 1 food, and 2 gold from the general supply. | Immediately take a "Level 4 Expedition" action with a strength equal to the defeated orc. * |
L2
| Woodcutter | Pig Farmer | Foreman | Casanova |
|---|---|---|---|
| Immediately take 3 wood from the general supply. | Immediately take 2 wild boar from the general supply and accommodate them on your home board. | Place 2 ore in each of up to two ore mines and 1 ruby in each of up to two ruby mines. | Immediately take a "Furnish a Dwelling" action and afterward, or alternatively, take a "Family Growth" action. |
L3
| Stonemason | Cowherd | Soldier | Counterfeiter |
|---|---|---|---|
| Immediately take 3 stone from the general supply. | Immediately take 1 cattle from the general supply and accommodate it on your home board. | Immediately take a "Level 3 Expedition" action with a strength equal to the defeated orc. * | Immediately carry out the actions of an occupied action space. |
L4 (labelled "L3" in the source, see note above)
| Ore Miner | Merchant | Outfitter | Herald |
|---|---|---|---|
| Immediately take 3 ore from the general supply. | Immediately take 1 grain and 1 vegetable from the general supply. | Immediately equip an unarmed dwarf of yours with a weapon of strength 5 at no cost. You can equip a dwarf that is yet to be placed. | Immediately carry out the actions of an unoccupied action space. |
L5
| Goldsmith | Jeweler | Beggar King | Trapper |
|---|---|---|---|
| Immediately take 2 gold from the general supply. | Immediately take 1 ruby from the general supply. | Immediately return 1 begging marker and/or take 3 gold from the general supply. | Immediately lay a trap, ignoring its printed cost. |
L6
| Pack Mule | Grocer | Master Trader | Breeder |
|---|---|---|---|
| Immediately take 1 donkey from the general supply and accommodate it on your home board. | Immediately take 2 gold and 1 food from the general supply. | Immediately exchange any number of one type of building resource (wood, stone, ore) for another at a 1:1 ratio. | Immediately take 1 sheep, 1 donkey, 1 wild boar, 1 cattle, and 1 dog from the general supply and accommodate them on your home board. |
L7
| Strays | Scavenger | Orc Doctor | Major Contributor |
|---|---|---|---|
| Immediately take 2 dogs from the general supply and place them on your home board. | Immediately take 1 wood, 1 stone, and 1 ore from the general supply. | If you have an unclaimed orc dwelling, you can immediately place the additional orc marker in it and use the orc from this round. | Immediately take 2 food for each adult dwarf and 1 food for each newborn dwarf and friendly orc you have from the general supply. |
* Consider the value printed on the weapon strength marker you just removed from your maintenance card, not the orc's starting strength. You cannot fight an orc with this, and your dwarf's weapon will not increase afterward.
Furnishing Tile Index
This expansion features 13 new furnishing tiles: 9 (orange) dwellings, 1 (green) functional tile, and 3 (yellow) tiles for bonus points. The following explains these new tiles in alphabetical order:
Battle Dog School (Building cost: 1 wood). Each dog adds +2 (instead of +1) to your weapon strength when fighting an orc during an expedition. For each dog that you spend after battle, reduce your weapon strength by two less. You may cover an odd orc strength entirely with dogs, to keep your dwarf's weapon intact. (It will not increase from overspending with dogs.)
Camouflage Dwelling (Building cost: 4 stone, 3 ore). This dwelling provides room for 1 dwarf. Additionally, you can place your armed dwarves with a weapon of strength 3 or less even before your unarmed dwarves. (You do not need to spend a ruby to do so.)
Copy Dwelling (Building cost: 2 wood, 2 stone, 2 ore). This dwelling provides room for 1 dwarf. Immediately after you build it, you can equip one of your unarmed dwarves with a weapon of strength equal to the strongest available weapon in play (of all players) at no additional cost.
Dog Parlor (Building cost: 2 wood, 1 ore). During scoring, you get 1 bonus point for every 2 dogs on your home board (in addition to the usual points for animals), rounded down.
Family Parlor (Building cost: 1 ruby). During scoring, you get 3 bonus points for each friendly orc in your cave (in addition to the usual 1 gold point). This does not apply to friendly orcs that are taken hostage.
Guest Dwelling (Building cost: 3 wood, 3 stone). This dwelling provides room for 1 dwarf or 1 friendly orc. You can change the person living in it if you have another room for the previous occupant.
Offspring Dwelling (Building cost: 4 wood, 5 stone). This dwelling provides room for 1 dwarf. Immediately after you build it, you can take a "Family Growth" action, placing the newborn dwarf with the dwarf taking this action.
Orc Captain Dwelling (Building cost: 2 wood, 2 stone, 2 ore). This dwelling provides room for 1 friendly orc. The orc living here can only collect goods that have accumulated on an action space. If it collects building resources (wood, stone, ore), you get 1 additional resource from the general supply of one of the collected types.
Orc Dwelling (Building cost: 2 wood, 2 ore). This dwelling provides room for 1 friendly orc. The orc living here can only collect goods that have accumulated on an action space. (There are seven copies of this dwelling.)
Orc Miner Dwelling (Building cost: 2 wood, 2 stone, 2 food). This dwelling provides room for 1 friendly orc. The orc living here can only collect goods that have accumulated on an action space. Additionally, in each mining phase, this orc can haul ore from exactly one ore mine (as though it were a donkey). If it does, you get 1 additional ore from the general supply.
Orc Worker Dwelling (Building cost: 4 wood, 3 ore). This dwelling provides room for 1 friendly orc. That orc can carry out all actions on an action space, except "Family Growth" and "Forging a Weapon" (neither from wood nor ore). Unless you spend a ruby, you must still place this orc after your dwarves.
Trap Chamber (Building cost: 1 gold). During scoring, you get 2 bonus points for each trap in your forest, regardless of whether it went off or not.
Warrior Dwelling (Building cost: 8 building resources total of all types). This dwelling provides room for 1 dwarf. To build it, you must spend 8 building resources (wood, stone, ore) in total, spending at least one of each type. Immediately afterward, you can spend up to 8 (additional) ore or up to 4 (additional) wood to equip one of your unarmed dwarves with a weapon of corresponding strength; the resources spent to build this dwelling do not count. You can equip a dwarf that is yet to be placed. (There are seven copies of this dwelling.)
Trap Index
There are a total of 12 traps of three types (defeating, holding, and weakening). The following explains them in alphabetical order:
Bear Trap (Weakening; building cost: 2 wood, 2 ore). When an orc enters this trap, immediately reduce its strength by half, rounding the resulting strength up (e.g., a strength of 9 becomes a strength of 5).
Booby Trap (Weakening; building cost: 1 ruby). When an orc enters this trap, you can choose up to 2 orcs anywhere on your home board and reduce their strength by 3 each. You can choose the orc entering this trap, but you do not have to. You can choose the same orc multiple times (i.e., you could choose a single orc and reduce its strength by 6).
- If you defeat an orc with this, claim a reward or get gold as usual.
- If you defeat more than one orc with this, resolve them one after another, in an order of your choice.
Feed Trap (Weakening; building cost: 3 food). When an orc enters this trap, you can pay any amount of food (no limit) to reduce that orc's strength by an equal number. The trap goes off, becoming inactive, even if you cannot or do not want to spend any food when an orc enters it.
- If you defeat an orc with this, claim a reward or get gold as usual.
Noose Trap (Holding; building cost: 4 wood, 1 sheep). Immediately stops an orc of strength 10 or less, when it enters this trap, and holds that orc until the next orc event. An orc held by this trap can become friendly if you build an orc dwelling for it.
- This trap has a diminished effect during the fourth orc event, because the orc held by it will breach anyway.
Permanent Trap (Weakening; building cost: 4 gold). When an orc enters this trap, immediately reduce its strength by 3. This trap stays active indefinitely and will weaken every orc entering it.
- If you defeat an orc with this, claim a reward or get gold as usual.
- Because this trap is always active, you will not get any points for it during scoring.
Pitfall (Defeating; building cost: 4 wood, 1 stone). When an orc of strength 8 or less enters this trap, it is immediately defeated.
Poisoned Arrows (Weakening; building cost: 2 wood, 2 gold). When an orc enters this trap, you can choose up to 3 orcs anywhere on your home board and reduce their strength by 2 each. You can choose the orc entering this trap, but you do not have to. You can choose the same orc multiple times (i.e., you could choose a single orc and reduce their strength by 6).
- If you defeat an orc with this, claim a reward or get gold as usual.
- If you defeat more than one orc with this, resolve them one after another, in an order of your choice.
Rockfall (Weakening; building cost: 2 wood). When an orc enters this trap, you can pay any number of stone, up to a maximum of 8, to reduce that orc's strength by an equal number. The trap goes off, becoming inactive, even if you cannot or do not want to spend any stone when an orc enters it.
- If you defeat an orc with this, claim a reward or get gold as usual.
Spear Trap (Defeating; building cost: 3 ore, 1 donkey). When an orc of strength 10 or less enters this trap, it is immediately defeated.
Steel Trap (Weakening; building cost: 3 ore, 1 dog). When an orc enters this trap, immediately reduce its strength by half, rounding the resulting strength up (e.g., a strength of 9 becomes a strength of 5).
Stone Trap (Holding; building cost: 4 stone). Immediately stops an orc of strength 10 or less, when it enters this trap, and holds that orc until the next orc event. An orc held by this trap can become friendly if you build an orc dwelling for it.
- This trap has a diminished effect during the fourth orc event, because the orc held by it will breach anyway.
Trap Net (Holding; building cost: 3 wood, 1 wild boar). Immediately stops an orc of strength 8 or less, when it enters this trap, and holds that orc until the next orc event. An orc held by this trap can become friendly if you build an orc dwelling for it.
- This trap has a diminished effect during the fourth orc event, because the orc held by it will breach anyway.