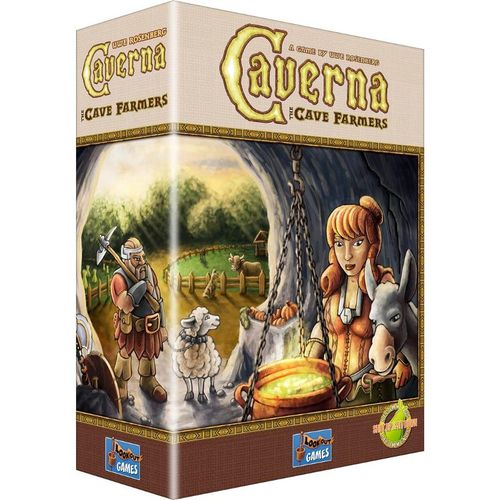
Caverna: The Cave Farmers
Caverna: The Cave Farmers Rulebook
Table of Contents
Table of Contents
Components
- 20 light brown Dog tokens, 35 white Sheep tokens, 30 grey Donkey tokens, 30 black Wild boar tokens, 30 brown Cattle tokens
- 45 brown Wood tokens, 25 grey Stone tokens, 45 black Ore gems, 20 red Ruby gems, 40 yellow Grain tokens, 35 orange Vegetable tokens
- 1 yellow Starting player token, 7×3 Stables (in different colors), 7×5 Dwarf discs (in different colors)
- 16 game boards: 7 large Home boards (Forest on the left, Mountain on the right); 1 two-sided basic board with Action spaces for 1–3 / 4–7 players; a small basic board with 3 Action spaces and Round spaces 1–3; a large basic board with Round spaces 4–12; 1 large additional board (5 players / 6–7 players); 1 small additional board (3 players / 7 players); 4 supply boards
- Counter sheet pieces: Gold coins (20×"1", 24×"2", 5×"10"); 1 "Additional dwarf" marker; 88 "1 Food" markers; 7 round Harvest markers; 52 Weapon strength markers (1×"1", 1×"2", 4× each of "3"–"13", 6×"14"); 8 Multiplication "4x" markers (other side: Begging markers "-3 Gold"); 8 Goods markers; 2 "8 Animals" markers
- Furnishing and landscape tiles: 17 identical "Dwelling" tiles; 47 other unique Furnishing tiles; 8 single "Tunnel/Cavern" tiles; 16 single "Ruby mine/Field" tiles; 16 single "Meadow/Small pasture" tiles; 24 twin "Ore mine-Deep tunnel / Large pasture" tiles; 40 twin "Cavern-Tunnel / Cavern-Cavern" tiles; 40 twin "Meadow-Field / Small pasture-Field" tiles
- 29 Playing cards (1 "Harvest events" card, 12 Action space cards for rounds 1–12, 7 "Expedition loot" Overview cards, 2 Dwarf cards for solo/2-player, 7 "Rubies/Harvest time" Overview cards), plus scoring pad, bags, rule book and appendix
Number of components: Only the 5 Dwarfs and 3 Stables of each player (and the unique Furnishing tiles) are purposely limited. Any other components are unlimited — if you run out, use the Multiplication markers (put a good token on a "4x" marker to indicate 4 of that type) or improvise.
Setup
(Rules are for 2 to 7 players; solo rules are at the end.)
Personal playing areas. Each player chooses a color and takes the Home board, 5 Dwarfs and 3 Stables of that color. Place 2 of the 5 Dwarfs side by side in the "Entry-level dwelling" on your Home board. Keep the remaining 3 Dwarfs and Stables as your personal supply. Take one of each of the 2 different Overview cards.
Starting player & Food. Randomly determine the player who gets the Starting player token. The Starting player and the player to his left each get 1 Food. The third player gets 2 Food. Each other player gets 3 Food.
Game boards with Action spaces. Place the two single-sided basic game boards with Round spaces 1–3 and 4–12 next to each other. Shuffle the 7 Harvest markers and place them face-down (grey rune symbol up) on Round spaces 6 to 12, one per space. Place the "Harvest events" card next to the game boards. Place the third basic game board to the left, turned to the appropriate side (1–3 or 4–7 players).
- 2 players: Remove one of the Harvest markers with a green leaf. Distribute the remaining 6 markers among Round spaces 6–12, leaving space 9 empty.
- Additional boards: In games with 5–7 players, use the larger additional board (5, or 6–7 side). The smaller additional board is used in games with 3 or 7 players. Place required additional boards to the left of the basic ones.
Supply boards and Furnishing tiles. The supply boards are double-sided (Introductory game / Full game — the Full game has a larger variety). Place the Furnishing tiles on the appropriate spaces. There is more than one ordinary "Dwelling" tile (costing 4 wood and 3 stone); place some on the supply board and keep the rest as reserve. (With 6 or 7 players, start with the Full game to ensure enough Furnishing tiles.)
Action space cards. Shuffle the 12 Action space cards face-down. (2 players: only 11 cards are used — remove the "Exploration" card with the "Level 4 expedition"; cover unused Round space 9 with a Dwarf card.) Rearrange the shuffled cards into a face-down stack: put the three stage 4 cards at the bottom, then the three (or two) stage 3 cards, then the two ordinary stage 2 cards, then the card for round 4 ("Wish for children"), and finally the three stage 1 cards on top.
Landscape tiles. Sort the landscape tiles by type into separate stacks (3 types each of single tiles and twin tiles). Separate building materials, animals and Weapon strength markers into piles.
Goal of the Game
Your Home board has two parts: a Forest on the left (which you cut down) and a Mountain on the right with an entrance to your cave system (currently two Caverns — the furnished "Entry-level dwelling" for 2 Dwarfs and a pair of animals, and one empty Cavern). Fields and Meadows (upgradable to Pastures) can be placed on Forest spaces; Caverns and Tunnels (upgradable to Mines) can be placed on Mountain spaces.
Each of your Dwarfs may take one action per round. You place your Dwarfs, one at a time in clockwise order, on Action spaces until all players have placed all their Dwarfs. Each Action space may only be occupied by a single Dwarf. The goal is to collect Food for your Dwarfs and to develop your Home board to be worth a lot of Gold points at the end of the game. At the end of the game, the player with the most Gold points wins.
Scoring Overview
- Each animal (Dogs, Sheep, Donkeys, Wild boars, Cattle) is worth 1 Gold point.
- You lose 2 points for each type of Farm animal (Sheep, Donkey, Wild boar, Cattle) that you are missing.
- Pastures: Small pasture 2 points, Large pasture 4 points.
- Mines are worth the number of points printed on them (Ore mine 3, Ruby mine 4).
- Furnishing tiles are worth the number of points printed on them. Dwellings score 3 points each; simple dwellings 2.
- Vegetables, Rubies and Gold are each worth 1 Gold point. Grain is worth ½ Gold point (rounded up), harvested or not.
- Each Dwarf is worth 1 Gold point.
- You lose 1 point for each unused space of your Home board.
- Some Furnishing tiles award additional (Bonus) points.
A score of 80 Gold points is realistic; advanced players will easily crack 100.
Flow of Play — The Course of a Round
Each of the 12 rounds goes through five phases in order. (In the 2-player game, there are only 11 rounds.)
1. Add a New Action Space
Turn over the top Action space card from the stack and put it on the empty Round space with the lowest number. The new Action space adds to the available actions and can be used by any player in this and all subsequent rounds. From the start of round 6, also turn the Harvest marker on that Round space face-up (leave it on the grey rune space): a green leaf means a normal harvest at the end of the round; a red question mark means the harvest will be played differently (see "Which rounds end with a harvest?").
Special cases: The "Wish for children" card always comes into play in round 4, placed with the "Wish for children" side up. Turn it to "Urgent wish for children" as soon as you add the "Family life" card in stage 3. (2 players: round 9 — the last of stage 3 — is skipped, as the "Exploration" card was removed.)
2. Replenish Accumulating Spaces
On many Action spaces there is an arrow and a background illustration indicating an "accumulating space" that must be replenished every round, even if goods remain from previous rounds. ("3 Wood" and an arrow means put 3 Wood on that space every round.) Exception: "3 (1) Wood" means put 1 Wood every round, unless the space is empty, in which case put 3 Wood. Similarly, "1 Grain (1 Vegetable)" means put 1 Grain if empty, else 1 Vegetable. Take replenished goods from the general supply; there is no upper limit on an accumulating space.
3. Work Phase
Beginning with the Starting player and in clockwise order, take turns to pick up a single Dwarf from your cave and place it on an unoccupied Action space, then carry out the depicted action immediately. Play continues until all Dwarfs of all players have been placed.
- Play order of Dwarfs: You must place your Dwarfs in ascending order of their Weapon strength, beginning with your unarmed Dwarfs (those without a Weapon), followed by your armed ones.
- Each Action space can only be used by one Dwarf in a round. You may not place a Dwarf on an Action space without performing at least one of its actions.
- You can only place Dwarfs from your cave, not from your personal supply. On your turn you can only place one Dwarf at a time. If a player runs out of Dwarfs during a round, that player is skipped.
- Some Action spaces require you to choose one of several options ("either … or"). Others allow you to take any number of the available actions ("and/or", "and then/or"). Two Action spaces have a mandatory primary action and an optional follow-up action ("and then"). On the "Urgent wish for children" space, you must use the first action to use the second.
- When you take building materials, Grain, Vegetables, Food or Rubies, place the tokens in your personal supply. Animals may not be placed in your supply; they must be placed directly on your Home board (or converted into Food immediately if you cannot or do not want to accommodate them).
4. Return Home
Remove your Dwarfs from the game boards and return them to their Dwellings. It does not matter how you distribute Dwarfs among the Dwellings. You may never have more Dwarfs in play than available room in your cave.
5. Harvest Time
During Harvest time, players sustain their families. Some rounds do not end with a harvest. A harvest goes through three sub-phases in order:
Sub-phase 1 — Field phase. Remove 1 Grain or Vegetable token from each sown Field on your Home board and place it in your personal supply.
Sub-phase 2 — Feeding phase. Feed your Dwarfs by paying 2 Food per Dwarf in your cave. Offspring born during the current round from a "Family growth" action only consume 1 Food this round (2 in future). If you do not have enough Food, you may convert goods into Food, or take Begging markers.
- Begging markers: Take 1 Begging marker for each missing Food. You may not give up Dwarfs to avoid feeding. Each Begging marker costs you 3 Gold points at the end of the game; they cannot be returned.
Sub-phase 3 — Breeding phase. If you have at least 2 Farm animals of the same type, you get exactly 1 additional (baby) animal of that type — but only if it can be accommodated on your Home board. You get at most one animal per type each harvest. Dogs are not Farm animals and do not breed. Animals breed regardless of where the parents are placed. Baby and parent animals may not be converted into Food immediately after birth.
Which rounds end with a harvest?
- Rounds 1–4: Only one harvest, at the end of round 3. Rounds 1 and 2 have no harvest. At the end of round 4, there is no harvest but you pay 1 Food per Dwarf (even offspring); no Field or Breeding phase.
- Rounds 5–12: By default a harvest at the end of each. This may change with a red-question-mark Harvest marker: at the first question mark revealed, no harvest; at the second, pay 1 Food per Dwarf instead of a harvest; at the third (and after), you choose individually whether to play the Field phase or the Breeding phase (not both, but still play the Feeding phase). Track resolved question marks on the "Harvest events" card.
Food Conversion Rules
You may convert goods into Food at any time. There is a conversion table on your Home board:
- Buy Food with Gold: pay one more Gold than the amount of Food (1/2/3 Food cost 2/3/4 Gold).
- Sheep = 1 Food, Wild boar = 2 Food, Cattle = 3 Food. A single Donkey = 1 Food, but 2 Donkeys = 3 Food.
- Grain = 1 Food, Vegetable = 2 Food.
- Rubies convert into 2 Food directly.
- Dogs, Wood, Stone, Ore and Dwarfs are not worth any Food.
The Actions
1. Action Spaces for Twin Tiles
At the end of the game, you lose 1 point for each unused space on your Home board (a space with no tile or Stable).
Excavation and Drift mining. These accumulate Stone (take all Stone tokens when taking the action). Additionally, you may place a "Cavern/Tunnel" twin tile on two adjacent empty Mountain spaces (must connect to your cave system). If you place a tile on an underground water source, immediately take the indicated 1 or 2 Food. Difference: with "Excavation" you may choose either side of the twin tile (Cavern/Tunnel or Cavern/Cavern); with "Drift mining" you must use the "Cavern/Tunnel" side. If you have no adjacent empty Mountain spaces, you may not place a tile (and may not place a single tile instead). In 5–7 player games there is a "Small-scale drift mining" space (1 Stone + a Cavern/Tunnel tile); in 7-player games an "Extension" space (1 Stone + a Cavern/Tunnel tile, or alternatively 1 Wood + a Meadow/Field tile).
Clearing, Sustenance and Slash-and-burn. Besides depicted goods, you can get a "Meadow/Field" twin tile here. You must place it on two adjacent Forest spaces; the first such tile has to be placed in front of the cave entrance, and any subsequent tiles adjacent to an existing Field, Meadow or Pasture. When covering a Wild boar preserve, immediately take 1 Wild boar; when covering the water source in your Forest, immediately take 1 Food. "Clearing" also provides Wood, "Sustenance" provides crops, and "Slash-and-burn" provides an additional "Sow" action.
The Sow action. To sow Grain, take 1 Grain from your personal supply, put it on an empty Field, then take 2 Grain from the general supply on top (a newly sown Grain field has 3 tokens). To sow Vegetables, take 1 Vegetable from supply, put on an empty Field, then put 1 Vegetable from the general supply on top (2 tokens). With one "Sow" action you can sow Grain and Vegetables up to 2 times each. You cannot sow a crop if you have none in your personal supply (unless you have Rubies). A fully harvested Field can be sown again.
2. Action Spaces for Family Growth
Furnish a cavern (on the "Housework" space). Choose an available Furnishing tile, pay the building costs indicated (most often Wood and/or Stone), and place it on an empty Cavern space in your Mountain. Every Furnishing tile has an ability shown at the bottom. Dwellings are special Furnishing tiles that provide room for additional Dwarfs. You cannot furnish if you have no empty Cavern. You may not place a Furnishing tile on a Tunnel, Mine or empty Mountain space (but you may place one on the pre-printed empty Cavern). Once placed, a tile cannot be removed or built over. There is only one copy of each Furnishing tile except the ordinary Dwelling (unlimited).
Furnish a dwelling (on the round-4 card, "Wish for children" / "Urgent wish for children"). Take a Dwelling tile, pay its building costs, and place it on an empty Cavern. There are 6 different types of Dwellings; every Dwelling provides room for one or two Dwarfs.
Family growth (on "Family life", "Wish for children", "Urgent wish for children", and — with 4+ players — the "Growth" space). You can only use it if you have more room for Dwarfs in your Dwellings than you have Dwarfs. Put a Dwarf disc from your personal supply on top of the Dwarf taking the action. The new Dwarf cannot take an action this round; it is accommodated in the Return home phase. Dwarf families are limited to 5 Dwarfs (unless you build the "Additional dwelling", which provides room for a sixth). You get one Family growth per Action space, but may occupy more than one.
3. Action Spaces for Goods and Mines
Supplies and Growth (available from the start). Provide 1 Wood, 1 Stone, 1 Ore, 1 Food, and 2 Gold. In 4–7 player games, you can take a "Family growth" action instead on "Growth".
Ore mine construction (stage 1). If there are two adjacent ordinary Tunnel spaces, place an "Ore mine/Deep tunnel" twin tile on top of them and take 3 Ore. Additionally or alternatively, undertake a Level 2 Expedition. Deep tunnel tiles have a darker background and show staircases. The twin tiles can only be placed on ordinary Tunnels (not Deep tunnels). An Ore mine is worth 3 Gold points and can hold 1 Donkey.
Ruby mine construction (stage 2, round 5 or 6). If you have at least one empty Tunnel space, place a Ruby mine on top. If (and only if) you place it on a Deep tunnel, immediately get 1 Ruby. A Ruby mine is worth 4 Gold points and can hold 1 Donkey.
Ore mining, Ore delivery, Ruby mining, Ruby delivery. Ore mining is available from the start; Ruby mining, Ore delivery and Ruby delivery become available in stages 2, 3 and 4. Take all the Ore and Ruby tokens from the space. On Ore mining/Ore delivery, take 2 additional Ore for each Ore mine you have. On Ruby mining, take 1 additional Ruby if you have at least 1 Ruby mine; on Ruby delivery, take 1 additional Ruby if you have at least 2 Ruby mines (only ever 1 additional). (2-player game: no Rubies accumulate on Ruby mining in the first two rounds.)
Rubies. Rubies are a wild card. You can exchange them at any time at 1:1 for animals, building materials, Grain, Vegetables and Gold (exception: 1 Cattle costs 1 Ruby plus 1 Food). You can spend 1 Ruby for a single "Field" or "Meadow" tile (placed immediately on an empty Forest space adjacent to an existing Field/Meadow/Pasture, or in front of the cave entrance if none exist), 1 Ruby for a single "Tunnel" tile, or 2 Rubies for a single "Cavern" tile (placed immediately on an empty Mountain space adjacent to your cave). You can also spend 1 Ruby to play an armed Dwarf out of order (ignoring the play order for one Dwarf).
Ore trading (stage 4). Exchange 2 Ore for 2 Gold and 1 Food, up to 3 times.
Weekly market (5–7 players, from the start). Get 4 Gold, then spend Gold to buy goods: any building material, Sheep or Donkey = 1 Gold; Wild boar or Dog = 2 Gold; Cattle = 3 Gold; Grain = 1 Gold; Vegetable = 2 Gold. Only one token of each type per action. You may spend more or fewer than 4 Gold; you get change.
4. Action Spaces for Animals
Sheep farming and Donkey farming (stages 1 and 2). They accumulate Sheep and Donkeys respectively. Before taking the animals, you can turn Meadows into Pastures and/or build exactly 1 Stable. You must accommodate the animals on your Home board (or convert them into Food). There is no "Wild boar farming" or "Cattle farming" space — get Wild boars by building over the two preserves, and get Cattle (and Wild boars) as Expedition loot or in exchange for Rubies.
Build fences (on "Sheep farming", "Donkey farming" and "Fence building"). Turn exactly one Meadow into a Small pasture (pay 2 Wood) and/or exactly two adjacent Meadows into a Large pasture (pay 4 Wood, place a "Large pasture" twin tile on top). You can only fence Meadows (not Field, Forest or Mountain spaces). Pastures are permanent. You can build 1 Small and/or 1 Large pasture per action.
Build stables (on "Sheep farming" and "Donkey farming"). Pay 1 Stone to build a Stable on any Forest, Meadow or Pasture space. Stables are permanent; 1 Stable per action; limited to 3 Stables in your color. Each Home board space outside your Mountain can have at most 1 Stable (Large pastures cover 2 spaces, so up to 2 Stables). Stables allow you to keep more animals.
Rules on Animal Husbandry
You may rearrange your animals whenever you like, abiding by:
- On Pastures, keep Farm animals: each Pasture space holds up to 2 Farm animals of the same type (Small pasture 2, Large pasture 4).
- A Stable on a Pasture doubles its capacity (Small pasture + Stable = 4; Large pasture + one Stable = 8; + two Stables = 16).
- A Stable on a Meadow holds any 1 Farm animal. A Stable on an uncovered Forest space holds exactly 1 Wild boar.
- Each Ore or Ruby mine holds 1 Donkey. The entry-level room holds 2 Farm animals of the same type. Certain Furnishing tiles (e.g. "Breakfast room" holds up to 3 Cattle) provide extra room.
- Dogs wander around and can be kept on any spaces. Alternatively, on a Meadow or Pasture, you can keep one more Sheep than there are Dogs on it (1/2/3 Dogs watch 2/3/4 Sheep). Dogs can only watch Sheep, not on Forest spaces or Fields, and not on a space that also holds another type of Farm animal. If you use Dogs to watch Sheep on a space with a Stable, you may not use the Stable.
5. Action Spaces for Weapons
Forge a weapon (on "Blacksmithing" in stage 1, and "Adventure" in stage 4). Only an unarmed Dwarf can forge a Weapon. Spend a number of Ore tokens (no more than 8) and take a Weapon strength marker equal to the number of Ore spent; place it on the Dwarf. A newly forged Weapon has initial strength at most 8; this can be increased to a maximum of 14 over the game.
- Each Dwarf can bear only a single Weapon. You cannot forge with an already armed Dwarf or upgrade/replace a Weapon with Ore. Weapons are bound to their Dwarfs and cannot be handed over or discarded. An unarmed Dwarf cannot undertake an Expedition. You cannot use Weapons to attack other players.
The Expeditions. Undertake an Expedition with an armed Dwarf on various Action spaces. Expeditions have one of four levels (1–4); the level determines how many different loot items you may choose from the "Expedition loot" Overview card (choose one by one, in any order). Each loot item has a Minimum strength value; you may only choose items with a Minimum strength ≤ your Dwarf's Weapon strength. Each item may be chosen only once per Expedition. At the end of each Expedition, the Weapon strength of the Dwarf increases by 1 (regardless of level). You can spend a Ruby to bypass the play order for a specific Dwarf.
6. Starting Player
The Starting player token is not passed at the end of the round. To become Starting player, use the "Starting player" action (if no one does, the token stays). You also get all the Food tokens accumulated on that space, plus 2 Ore (1–3 players) or 1 Ruby (4–7 players).
7. Imitation
The "Imitation" Action spaces are available with at least 3 players and cost 0, 1, 2 or 4 Food depending on the space. Pay the required Food and choose an Action space currently occupied by an opponent's Dwarf; use it as if you had placed your Dwarf there (your Dwarf stays on "Imitation"). The only space that cannot be imitated is "Starting player". When imitating an accumulating space, you do not get any of the accumulated goods (already taken by your opponent). You cannot imitate a space occupied by your own Dwarf. In 5–7 player games there are multiple "Imitation" spaces.
End of the Game and Scoring
The game ends at the end of round 12. Use the scoring pad. The player with the most Gold points wins (ties: multiple winners).
- +1 Gold per Farm animal and Dog (Dogs count 1 but are not Farm animals).
- -2 Gold per missing type of Farm animal (Sheep, Donkey, Wild boar, Cattle).
- ½ Gold per Grain (rounded up), counting supply and Fields.
- +1 Gold per Vegetable, counting supply and Fields.
- +1 Gold per Ruby.
- +1 Gold per Dwarf.
- -1 Gold per unused space on your Home board (the two pre-printed Caverns count as used; unfurnished Caverns count as used).
- Gold for Furnishing tiles, Pastures and Mines: Small pasture 2, Large pasture 4; Ore mine 3, Ruby mine 4; each Furnishing tile's value is printed on it.
- Bonus points for Parlors, Storages and Chambers (yellow name tag) depending on their conditions.
- Gold coins and Begging markers: add up your Gold coins, then subtract 3 Gold points for each Begging marker.
Details on Bonus points: Bonus points for the Weaving parlor, Milking parlor, Fodder chamber, Food chamber and Treasure chamber are awarded as "Bonus points" (e.g. the Weaving parlor scores Sheep both in "1 Gold per Farm animal" and as Bonus points). The Writing chamber reduces minus points in the "-2 per missing type", "-1 per unused space" and "Begging markers" categories (prevents up to 7 negative points). Bonus points for the Hunting parlor, Beer parlor, Blacksmithing parlor and Spare part storage let you exchange goods for Gold before scoring.
Rules for the Solo Game
The solo game uses the rules for 2–7 players with these exceptions:
- In the Work phase, place one Dwarf after another (no opponents to wait for). The goal is the highest score you can (try to beat the "magical score" of 100). You start with 2 Food.
- Use the game boards for the 2-player game and cover some Action spaces with Overview cards as indicated.
- Place the Action space cards face-down on the empty spaces as follows: 1 Blacksmithing, 2 Sheep farming, 3 Ore mine construction, 4 Wish for children, 5 Donkey farming, 6 Ruby mine construction, 7 Ore delivery, 8 Family life (Wish for children / Urgent wish for children), 9 —, 10 Ore trading, 11 Adventure, 12 Ruby delivery.
- Use a Dwarf card to cover the "Wish for children" card; at the beginning of round 4, remove it (make sure it shows "Wish for children"). There are no Harvest events in the solo game; from round 5 on, there is a harvest at the end of every round. As in the 2-player game, the "Exploration" card is removed and round 9 is skipped; unlike the 2-player game, Rubies accumulate on "Ruby mining" from round 1.
- Refilling accumulating spaces: before refilling, remove all goods from any space with more than 6 goods (return to supply). For each Ruby you spend, you can prevent this for one such space.