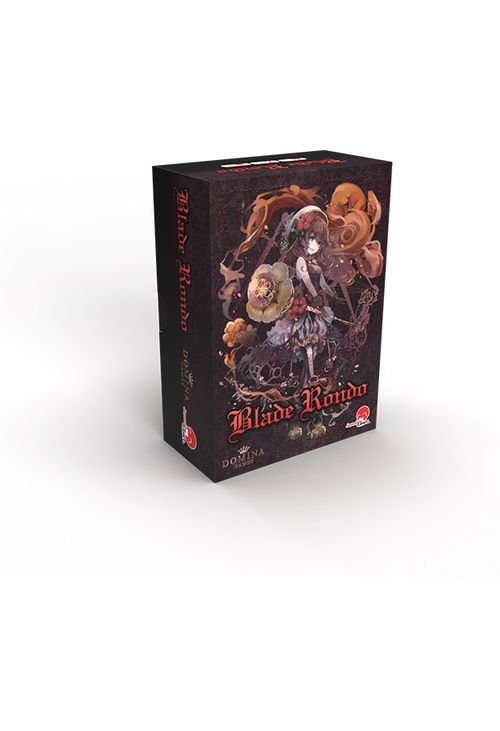
Blade Rondo
Blade Rondo Rulebook
Table of Contents
Table of Contents
Contents
- Rulebook × 1
- Cards × 65
- Parameter boards × 2
- Parameter dice × 6
- Life stones × 2
Objective of the Game
This is a card battle game for 1–2 players. You fight using seven "Swords" that you have chosen as your hand, and you win by reducing your opponent's life to 0. The two-player rules are explained first; if you are playing solo, please still read them first, in this order.
Preparing the Game
1. Each player prepares their own play area, as shown below.
- Parameter dice: Set each die to show its 0 face, and place it inside the correspondingly colored circle. The die above ATTACK represents attack power, the die below VOLTAGE represents voltage, and the die below DEFENCE represents defence power.
- Life stone: Place it on top of 15 on the life track (numbered 8–14 on the top row and 1–7 on the bottom row).
- Parameter board: Set it up so both you and your opponent can easily see it, with the top edge facing your opponent.
- Breathing Method cards: Place one "Heating Method" and one "Guarding Method" card face up in front of you.
If this is your first time playing, please read "Your First Battle" on page 17 first.
2. Shuffle the 40 sword cards face down and deal 15 to each player. The remaining 10 cards are not used; set them aside face down and unrevealed.
3. Each player chooses 7 of their 15 dealt cards to form their hand. The remaining 8 cards are not used; set them aside face down and unrevealed.
4. Decide who goes first and who goes second by any random method. The second player takes the "Pulse Method" card and places it in front of them, and additionally sets their attack power to 1. Once this preparation is complete, the battle begins.
If you'd rather fight with swords of your choosing… If each player owns one copy of this game, each player may instead use a hand of 7 cards prepared in advance to face off. Up to two copies of the same card may be included in a hand. In this case, steps 2 and 3 above are skipped.
Flow of the Game
Until one player wins, the first player and the second player alternately take turns, following the sequence below.
Processing at the Start of the Turn
- Increase your voltage by 1. If your voltage would exceed 9, it does not go higher than 9; instead, if it is already 9, you Burst, and lose 1 life.
- Process any "at the start of your turn" effects that have been granted to you.
- Process any "at the start of your turn" effects of your subordinates.
Action
- Use any number of cards, as long as their total cost does not exceed your voltage.
To use a card: Choose one Breathing Method card in front of you, or one Sword card in your hand, and put it into play. If that card has a "Response (Z)" symbol, you may instead put it into play face down without revealing it; otherwise it must be put into play face up. When you do this, you pay the cost written at the top left of the card — for cards with "Response (Z)" this is 1 cost, and for "Guarding Method" this is a cost you decide for yourself. Paying a cost never reduces your voltage itself. Afterward, resolve the effect of the card you put into play face up. The place where used cards are put is called your Play Area.
Processing at the End of the Turn
- For each of your own face-up cards in your Play Area, process as follows:
- A card with the Limited icon: it becomes a discard.
- A Sword card: it returns to your hand.
- A Breathing Method card without the Limited icon: it returns to its place in front of you.
- If there is a face-down card in your opponent's Play Area, it returns to their hand.
When a parameter or life changes: Move the top face of the parameter die, or the position of the life stone, to the corresponding value. The upper limit for each parameter is 9, and the upper limit for life is 15. However, attack power and defence power may temporarily exceed their upper limit through the effect of a Sword card; in that case, you do not need to change the top face of the parameter die.
The Play Area
Each player's play area consists of:
- Set Area — the place where subordinates and cards granted to you are placed.
- The place where your own Breathing Method cards are kept.
- Play Area — the place where used cards are placed.
In the center of each player's area sits their parameter board, with the ATTACK, VOLTAGE, and DEFENCE dice, and the life track running 8–14 on top and 1–7 on the bottom with the life stone marking the current life total.
How to Read a Card
Breathing Method cards and Sword cards display information as follows:
- Card Name — the name of the card.
- Cost — the cost required to use this card.
- Limited icon — a card bearing this icon becomes a discard at the end of the turn it is used (only when it is in the Play Area at the end of the turn).
- Symbol — indicates the card's type (see Card Types below).
- Text — the effect of the card when it is used.
- Flavor text — an outline of the story or legend concerned. It is not used in play.
Other information at the bottom of the card, such as the card number and the name of the person depicted in the artwork, has no bearing on gameplay.
Card Types
This game is played with five types of cards. These classifications do not impose any conditions on when a card may be used.
- Breathing Method — An art that strengthens yourself. A card that raises your own parameters; it is kept in front of you. Every player must always have "Heating Method" and "Guarding Method"; the second player also receives "Pulse Method."
- Physical (Sword) — The basic form of attack. A card whose power varies with your attack power, carrying a "Physical Attack" effect.
- Magic (Sword) — A guaranteed strike that ignores defence. A card that deals damage while ignoring the opponent's defence power, carrying a "Magic Attack (X)" effect.
- Support (Sword) — A supporting effect that turns the fight in your favor. A card that carries effects such as life recovery, raising parameters, or summoning a subordinate with "Summon (Y)."
- Foreshadow (Sword) — Preparedness against the enemy's attack. A card that carries a "Response (Z)" effect, usable in reaction to the opponent's action.
Keyword Abilities
Some effects on a card are abbreviated and shown as a keyword.
Physical Attack Deal damage to the opponent equal to your (or your subordinate's) attack power minus the opponent's defence power.
Magic Attack (X) Deal X damage to the opponent.
Summon (Y) After this card is used, it becomes a subordinate with the parameters and text described below it, and is placed in your Set Area. Even if it has the Limited icon, it does not become a discard at the end of the turn.
Response (Z) When you use this card, place it face down in your Play Area so your opponent cannot see its front. This card does not return to your hand at the end of your own turn, nor does it become a discard. If, during your opponent's turn, an action bearing the Z symbol is performed, you may turn it face up. Process its effect once it is revealed this way. If multiple "Response (Z)" cards have had their conditions met at the same time, you may reveal them in whichever order you choose and process them. A card whose effect has been processed becomes a discard at the end of the opponent's turn. A card that remains face down, unprocessed, until the end of the opponent's turn returns to your hand.
Addition This effect is processed only if the card's effect dealt 1 or more damage to the opponent.
Price When you use this card, process this effect at the same time as paying its cost. This effect must be processed; it cannot be declined.
Glossary
You The player who used that card, or the player to whom that card has been granted.
Subordinate A card placed in a Set Area through the effect of "Summon (Y)."
Action A general term for cards, and for the effects written on a card, that carry a symbol.
Attack A general term for effects, within an action, that carry a Physical or Magic symbol.
Example: a card showing "Bull's Might — Physical Attack" that a subordinate performs at the start of your turn is an action, and it is an attack.
Nullify To cancel the effect of a card or an action, other than by its "Price." A nullified card's cost is not refunded, and if it carries the Limited icon it becomes a discard at the end of the turn.
Ignore To treat a target's parameter value as 0, or to nullify a target's effect.
Deal (or Receive) Damage To reduce a target player's life. This is distinct from "lose life."
Respond During the opponent's turn, when a card (or a subordinate, etc.) with a Z symbol, or an action carrying a Z symbol, is used, to turn face up a "Response (Z)" card that you had placed face down in your Play Area, and to resolve its effect before the opponent's card.
Grant To place this card in the Set Area of the target player. While it remains there, the target player is subject to the text written below, for as long as it remains. A granted card does not become a discard at the end of the turn even if it carries the Limited icon.
Revive When the life of a target player reaches 0, to change that player's life to the specified value instead of that player being defeated.
Detailed Rules
This page records the game's finer rules. There is no need to read it before your first game — refer to it as needed when questions come up during play.
1. Hand "Hand" refers only to the Sword cards held in hand. Breathing Method cards, and cards placed in the Play Area, are not considered part of your hand.
2. Parameters Attack power and defence power may, through a card's effect, exceed the upper limit of 9. Example: if Player A, whose attack power is 9, uses "Sunlit Guiding Counter," Player A's attack power becomes 11 until the end of the turn.
3. Damage 3.1 If no damage would be dealt, this is treated as dealing 0 damage. Example: 1. Player A, whose attack power is 0, uses "Fang of Malice." 2. Player B, whose defence power is 2, receives 0 damage. 3. Player A uses the effect of "Phosphorescence." In this example, "Fang of Malice" is treated as having dealt 1 damage to the opponent, and the "Phosphorescence" effect that triggers on "Fang of Malice" is processed.
3.2 Losing life is not the same as receiving damage. Losing life to a "Burst" or to "Poison" cannot be reacted to using "Phosphorescence."
4. Response 4.1 When processing the effects of cards with "Response (Z)" that were placed face down, turn them face up one at a time and process each one's effect before deciding whether to process the effect of another "Response (Z)" card.
4.2 The effect of a card with "Response (Z)" may only be processed during the opponent's turn.
4.3 Unless specifically stated otherwise, a card without "Response (Z)" cannot interrupt an action to be processed first.
4.4 A card without "Response (Z)" cannot be placed face down in the Play Area. (This does not apply to an Outer Draw during solo play.)
5. Order of Processing for Effects with a Choice of Whether to Use Them 5.1 "Phosphorescence" lets you decide whether to use it each time damage occurs. When damage occurs from a Response action, the decision of whether to use "Phosphorescence" is made only after all the Response's processing has finished.
5.2 When both players simultaneously have an effect available that lets them choose whether to use it, the turn player chooses first. Example: 1. Player A uses "Fang of the Poison Air." 2. Player B uses "Lutile of Moonlight" as a Response. 3. Player A uses the effect of "Phosphorescence." 4. Player B uses the effect of "Phosphorescence." In this example, Player A first confirms that Player B will not use "Phosphorescence," and only then uses the effect of "Phosphorescence."
6. Granted Effects 6.1 The same effect may be granted multiple times.
6.2 There are cases where a granted effect cannot be placed in its normal location. In such cases, the granted effect is still processed. Example: Player A uses "Fang of the Poison Air," and Player B responds with "Sealing Agate." Player B takes 1 damage from the effect of "Fang of the Poison Air." In this example, "Fang of the Poison Air" is placed beneath "Sealing Agate," and Player B is treated as having been granted "Poison."
6.3 A card placed beneath "Sealing Agate" cannot be used again, effective immediately. Example: 1. Player A uses "Dance Sword." 2. Player B responds with "Sealing Agate." In this example, "Dance Sword" cannot be used again through the effect of "Sealing Agate."
6.4 When the effect of "Sealing Agate" is processed against Player Y's attack, Player Y can no longer perform any action for the rest of the battle that is placed beneath "Sealing Agate," including any card of the same name that has been granted to that same player.
7. Subordinates A reference to "the opponent" does not refer to subordinates. Example: 1. Player A's "Bull Man" uses "Bull's Might." 2. Player B responds with "Fog-Spun Pearl." In this example, if Player A pays 1 cost, "Bull's Might" is not nullified.
The World of Idea
When you came to your senses, you were inside a story. This is the tale of the Ideas' betrayal. An Idea is the embodiment of an ideal that lives within legend. Were it not for the Sword, it would cast a shadow over the world — the Ideas were once allies to the Sodia as well. To evade the destined tragedy, the Sodia must challenge the powerful Ideas. Fortunately, you too can borrow the strength of the Swords who dwell within the story, in this manner well suited to you.
Should the need arise, you may also borrow the power of a Sodia who dwells in the story. There is no telling how many times you will be asked, or what you will be given — fate takes its own course.
Preparing for Solo Play
1. Prepare your own play area, as in the diagram on page 3, "Preparing the Game."
2. Shuffle the 40 Sword cards face down to form the "Sword deck," and shuffle the 20 Idea cards face down to form the "Idea deck."
3. Deal 15 cards from the "Sword deck," and choose 7 of them to be your hand. Combine the remaining 8 cards back into the "Sword deck" and shuffle.
4. Set aside the top 15 cards of the "Sword deck" face down, unrevealed. From now on, this pile of 15 cards is called the Outer Pile.
5. Draw 1 card from the "Idea deck," and set up the Idea's parameter board according to its initial parameters. However, the Idea has no voltage, so do not place a die for voltage.
6. Begin the battle. If you win, repeat step 5 above and begin the next battle. You clear the game if you win 5 battles in a row, but the game is over the moment you lose even once.
The Baptism of Cremière For your first attempt, try taking the seven cards "Piercing Sword," "Sword of Darkness," "Fang of the Poison Air," "Mana Tick Lupinas," "Sealing Agate," "Ultimate Doom Diamond," and "Fog-Spun Pearl" into your hand, and battling the original Idea, "Cremière." Can you win this first battle without using the power of "Outer Draw"?
How to Read a Card (Idea)
Idea cards, used only in solo play, display information as follows:
- Card Name — the name of the card.
- Startup Turn — the turn on which the Idea begins to act.
- Initial Parameters — the initial values of the Idea's attack power and defence power.
- Flavor Text — the Idea's spoken line. It is not used in play.
- Text — a silver-bordered box holds text describing the Idea's action. If a black-bordered box of text appears below it, it is processed under the following condition:
- Opening Effect — processed automatically at the start of the battle.
- Persistent Effect — an effect that is continuously in play throughout the battle.
Other information at the bottom of the card, such as the card number and the name of the person depicted in the artwork, has no bearing on gameplay.
Solo Play Rules
As a rule, you go first, and you and the opposing Idea take turns alternately. However, the Idea does not act until its Startup Turn is reached. For the flow of a turn, refer to "Flow of the Game" on page 4.
Rules that apply to the Idea
- The Idea does not use "Pulse Method."
- The Idea does not act until its Startup Turn is reached. (For example, "Shannu" begins acting once your 3rd turn has ended. Normally its voltage would need to be at least equal to its Startup Turn to act, but this rule may be broken if "Accelerating Rondo" has been used.)
- Each turn, the Idea performs every action written on it, in order from top to bottom, and its turn then ends. (For example, "Veronika" performs, in order each turn, "Guardian Vow," "Flavipiscus," and "Ignoscosmos.")
- The Idea's actions have no cost, but if a "Price" is written, it is subject to that effect.
- Once the Idea has performed an action bearing the Limited icon, that action is never performed again.
- When the same action would occur consecutively, its text is omitted; in that case, the action is performed as many times as stated by its number of repeats.
- If the Idea has "Response (Z)," it processes that effect once each time its condition is met, whenever possible.
- When you defeat an Idea, your attack power, defence power, and voltage return to 0, your life returns to 15, and your hand returns to the 7 cards you first chose.
- Rarely, you will encounter an Idea with a golden background. This means it is an Idea widely known throughout legend, and possesses especially great power.
Rules that Apply to You
Some of the effects on the Sword cards you use are changed as follows:
Fang of Shattered Will [Limited] Physical Attack Addition: choose one of the Idea's actions. That action will not be performed during the Idea's next turn.
Sealing Agate [Limited] Response An attack of that name will not be performed during the Idea's next turn.
Fog-Spun Pearl [Limited] Response If that attack is the last attack of the turn, nullify it.
During your battle against an Idea, you may pay 2 cost to perform an "Outer Draw."
Outer Draw When you perform an "Outer Draw," reveal the top 3 cards of the "Outer Pile," and place 1 of them, as an "Outer Card," next to your Breathing Method cards. Return the other 2 to the game box face down, removing them from the game; their use is recorded as costing 2 cost twice. An "Outer Card" is treated the same as an ordinary Sword card, but with the following differences:
- It is treated as having a cost of 0. (A cost cannot become 0 from "Dance Sword" being used twice.)
- It may be used even if your voltage would ordinarily not be enough to pay for it.
- It can only be used during that battle. Regardless of whether it was used, it is removed from the game after the battle ends.
- A card with the Limited icon becomes a discard at the end of the turn it is used. A card without the Limited icon returns to beside your Breathing Method cards at the end of the turn it is used, and can be used again on a later turn. (This holds even for a card that has been placed as a subordinate, granted, or sealed — it remains bearing the Limited icon until the battle ends.)
Your First Battle
Maria and Sonya, forever at odds like cat and dog, spend their days fighting with swords of legend in hand. Why not begin by borrowing their favorite swords for a first battle?
1. Player A receives Maria's 10 cards; Player B receives Sonya's 10 cards.
Maria's Cards
- No.01 Piercing Sword
- No.03 Sword of Darkness
- No.04 Fang of the Poison Air
- No.07 Ignoscosmos
- No.08 Gaura Mazuma
- No.09 Flavipiscus
- No.10 Mana Tick Lupinas
- No.12 Ember-Lit Etude
- No.17 Ultimate Doom Diamond
- No.18 Lutile of Moonlight
Sonya's Cards
- No.02 Dance Sword
- No.05 Fang of Shattered Will
- No.06 Ultimate Doom
- No.11 Tribute Lily
- No.13 Whisper of Mercy
- No.14 Sunlit Guiding Counter
- No.15 Accelerating Rondo
- No.16 Raging Cadenza
- No.19 Sealing Agate
- No.20 Fog-Spun Pearl
2. Each player shuffles their 10 cards and forms a hand of 7 cards chosen at random. Set the remaining 3 cards aside, unrevealed.
3. Perform steps 1 and 4 of "Preparing the Game" (page 3), and begin the battle.
4. Once the outcome is decided, this time choose your own 7 cards from the 10 cards you received in step 1, and try battling again.