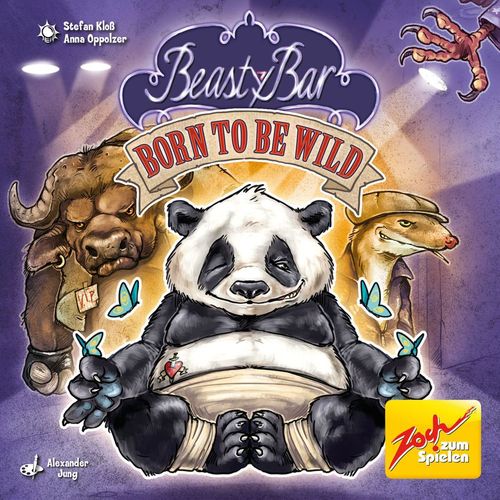
Beasty Bar 3: Born to Be Wild
Beasty Bar 3: Born to Be Wild Rulebook
Table of Contents
Table of Contents
- Combo: Beasty Bar + Beasty Bar – New Beasts in Town + Beasty Bar – Born to Be Wild
- Components
- Set up
- Play
- Game end and victory
- The animal cards
- The animal actions
- 12: The elephant ... never forgets how to count to twelve
- 11: The camel ... casts a shadow over the smaller animals
- 10: The buffalo ... pokes one after the other with its horns
- 9: The eagle ... hovers above – until there are five
- 8: The okapi ... is half giraffe and half zebra
- 7: The sloth ... is so lazy that even the animal behind it nods off
- 6: The Zen panda ... brings balance to the jostling area
- 5: The coyote ... persuades another animal to reenter the line
- 4: The weasel ... darts nimbly past the bigger animals
- 3: The gazelle ... flees to the bar at the first sign of trouble in its rearview mirror
- Reference Sheet
Combo: Beasty Bar + Beasty Bar – New Beasts in Town + Beasty Bar – Born to Be Wild
- You can combine the animals from all three Beasty Bar games in any way. Everyone can build his deck as he likes, as long as it contains exactly one card of each strength (1–12).
For example, if you select your buffalo (Beasty Bar 3 – strength 10), return your crocodile (Beasty Bar 1 – strength 10) and your tiger (Beasty Bar 2 – strength 10) to their boxes!
- Decide together before the game whether you'll all play with or without a Tasmanian devil (strength 0).
Components
- 52 animal cards (13 animals in 4 colors)
- 2 x Heaven's Gate / Bounced (front side / back side)
- 1 Beasty Bar card
- 1 THAT'S IT card
- 2 Overview cards
Set up
Place one Heaven's Gate (front side) and one Bounced (back side) in the middle of the table. Leave enough room between them for five cards. This is the jostling area.
Place the Beasty Bar card next to Heaven's Gate and the THAT'S IT card next to Bounced. Shuffle your 12 or (when including the Tasmanian devil) 13 animals and place them as a face-down deck. Draw four cards.
Play
Play goes clockwise. On your turn, carry out the following steps in order:
- Play animal
- New animal's animal action
- <Recurring> animal actions
- Five-animal check
- Draw new card
1. Play animal
Place one animal from your hand face up in the first free space (counting from Heaven's Gate) in the jostling area. This means you place your animal as close to Heaven's Gate as you can, but always at the end of the line.
Example 1: The red player plays his buffalo to the jostling area. The buffalo goes to the end of the line.
2. New animal's animal action
Carry out your newly-placed animal's animal action (see "The animal actions"), if and as far as you can.
Example 2: The buffalo (strength 10) is stronger than the flamingo (strength 2) and pokes it with his horns. THAT'S IT for the flamingo.
If you move several animals to the THAT'S IT card at the same time, you decide their order.
3. <Recurring> animal actions
Three animals have <recurring> actions. The animal actions of the camel, the buffalo and the okapi are carried out again on every subsequent turn of every player, if possible. Begin with the <recurring> animal closest to Heaven's Gate and finish with the one nearest Bounced.
Example 3: The <recurring> okapi passes the weaker armadillo. Suddenly the armadillo finds itself in front of the buffalo. The buffalo, however, has just been played and has already tossed the flamingo onto the THAT'S IT card. It won't poke another animal with its horns this turn and will only start <recurring> its action in the next player's turn. (The armadillo has no <recurring> animal action.)
Whenever there are gaps in the jostling area, all animals in it slide forward, maintaining their order.
4. Five-animal check
Perform the five-animal check once you've carried out all animal actions. Are there at least five animals in the line?
Normally, there are never more than five animals in the jostling area once all <recurring> animal actions have been carried out. However, the Tasmanian devil can create exceptions (see Example 20).
- Negative result: If there are fewer than five animals, nothing happens (go to 5. Draw new card).
- Positive result: If there are at least five animals, put the two nearest Heaven's Gate face down in the bar and the one nearest Bounced face up on the THAT'S IT card. The remaining animals in the jostling area move towards Heaven's Gate without changing their order.
Example 4: After all animal actions, there are five animals in the jostling area. The okapi and the buffalo are at Heaven's Gate and enter the bar face down. The armadillo is at the very back, right next to Bounced. THAT'S IT for the armadillo.
Animals are always face down in the bar and face up on THAT'S IT.
5. Draw new card
End your turn by refilling your hand to four cards. If your deck is empty, don't draw any.
Game end and victory
The game ends as soon as everyone has played all his animals. You win, if your animals in the Beasty Bar are worth the most points. If drawn, the victory is shared.
| 2 Points | 3 Points | 4 Points |
|---|---|---|
| 11 Camel | 12 Elephant | 6 Zen panda |
| 9 Eagle | 10 Buffalo | 5 Coyote |
| 7 Sloth | 8 Okapi | 2 Flamingo |
| 3 Gazelle | 4 Weasel | 1 Armadillo |
| 0 Tasmanian devil |
The animal cards
You have the same 12 (or 13) animals as the other players. The overview cards summarize what each animal does. Use the animal cards' symbols as additional reminders.
Each animal card shows:
- Its strength (for example, strength 8).
- Its <permanent> animal action — continuously active.
- Its <recurring> animal action — active in every turn of every player.
- Its shield symbol — blocks and protects.
- Its points — what it is worth if in the bar (for example, 3 points).
- Its animal action, explained below.
Symbols
- <Recurring> animal action: Active in every turn of every player.
- <Permanent> animal action: Continuously active.
- Big Bruiser: Strong and dangerous.
- Little Bully: Not strong, but still dangerous.
- Doppelganger: Makes use of another animal action.
- Trampler: Pushes forcefully forward.
- Shield: Blocks and protects.
The animal actions
12: The elephant ... never forgets how to count to twelve
The elephant passes animals in front of it whose combined strength is twelve or less.
It could be just one other elephant!
Example 5: The elephant moves past the gazelle (strength 3) and the okapi (strength 8) as 3 + 8 ≤ 12. It stays behind the buffalo (strength 10) as 3 + 8 + 10 > 12.
11: The camel ... casts a shadow over the smaller animals
The camel is a Trampler. It jostles on top of the animal directly in front of it, as long as that animal is weaker (< 11) and casts a shadow over it.
The camel carries its action out <recurringly> in every subsequent turn of every player, releasing any previous victim before jumping onto the next.
As long as an animal is in the camel's shadow, it doesn't take part in the game and instead "shares the camel's fate." If the camel goes to the bar or if it goes to the THAT'S IT card, it will take the animal in its shadow with it (see Example 13).
Example 6: The green player played his camel. It jostles on top of the (weaker) flamingo, casting a shadow over it.
Example 7: The five-animal check is positive. The two camels are nearest Heaven's Gate and enter the bar, taking the armadillo and the coyote with them. The buffalo is nearest Bounced and goes to THAT'S IT. The flamingo and the elephant move towards Heaven's Gate without changing their order.
10: The buffalo ... pokes one after the other with its horns
The buffalo is a Big Bruiser. It pokes the animal directly in front of him as long as it's weaker (< 10). THAT'S IT for that animal (see Example 2).
The buffalo carries out its action <recurringly> in every subsequent turn of every player. It only ever pokes one animal a turn.
9: The eagle ... hovers above – until there are five
The eagle flies over the jostling area. THAT'S IT for this eagle, if there is one in the air already.
There can only be one king of the skies!
As long as the eagle is in the air, other animals' actions don't affect it. Neither does the eagle count in the five-animal check when it's aloft.
The coyote can't persuade it to reenter the line, the armadillo doesn't bowl it over and the Tasmanian devil doesn't mix it up.
The eagle is a Big Bruiser. If, after all animal actions, the five-animal check is positive, the eagle swoops down on the weakest animal in the jostling area. If there are several weakest (of the same strength), it swoops on the one nearest Heaven's Gate. THAT'S IT for this animal, if it's weaker than the eagle (< 9). The eagle then takes its place. If no animal is weaker, then THAT'S IT for the eagle.
When the eagle swoops down, turn its card upside down!
An eagle in the jostling area doesn't prevent a player from playing an eagle into the air. There can be many eagles in the jostling area, but only one in the air.
Example 8: The eagle flies straight up. The five-animal check is negative.
Example 9: The yellow player played his okapi, which has passed the weasel. The five-animal check is positive. The eagle swoops down on the flamingo and takes its place. THAT'S IT for the flamingo. (Double luck for the yellow weasel that the eagle would otherwise have attacked!) Then the yellow weasel and the elephant enter the bar. THAT'S IT for the blue weasel.
8: The okapi ... is half giraffe and half zebra
The okapi passes the animal directly in front of it, if that animal is weaker (< 8) (see Example 9).
It stays behind a stronger or equally strong animal.
The okapi carries out its action <recurringly> in every subsequent turn of every player. It never passes more than one animal a turn (see Example 3).
The okapi is also <permanently> active. It is a Shield. It <permanently> blocks Tramplers (camels) and Big Bruisers (buffaloes and eagles). These animals can't pass it or cause it to be bounced (see Example 4).
Example 10: The blue player has played his camel. It wants to jump on top of the animal directly in front of it in the jostling area. However, this animal is the okapi, which, although weaker than the camel, <permanently> blocks this Trampler. The okapi also protects the eagle from the camel.
7: The sloth ... is so lazy that even the animal behind it nods off
The sloth moves in front of any animal with a <recurring> or <permanent> animal ability (camel, buffalo, okapi, gazelle), but not another sloth.
The sloth is a Shield, so as long as it is in front of such an animal, it negates that animal's <recurring> and <permanent> animal actions (except for the sloth's).
The sloth doesn't negate the animal actions of any newly placed animals (see 2. New animal's animal action).
Example 11: The green player plays his sloth, which then moves in front of the okapi. The okapi can't pass the sloth with its <recurring> animal action. Instead, the okapi now finds itself in the camel's shadow, as it can no longer block the camel's <recurring> action. Provided the next player doesn't do anything to counter this, in the next turn the sloth will negate the camel's animal action and prevent it from advancing.
Example 12: The yellow player has played his buffalo. It pokes the sloth with its horns.
6: The Zen panda ... brings balance to the jostling area
The Zen panda is a Little Bully. It moves between two animals of its choice in the jostling area and defines the middle of the line.
If there are more animals on one side of the panda than on the other, the extra animals (farthest from the panda) disturb the balance. THAT'S IT for all animals that disturb the balance.
If there is just one other or no other animal in the jostling area, the Zen panda sits at the very back and does nothing.
Example 13: The blue player plays his panda, which can then move to one of three places. If it moves between the green camel and the yellow gazelle, no animals disturb the balance and the five-animal check is positive. (In total four animals enter the bar, unfortunately none blue like the panda.)
Example 14: If the panda moves between the two camels it has one animal to its left, so to maintain balance there can only be one to its right. THAT'S IT for the gazelle and the flamingo. The green camel jostles on top of the panda with its <recurring> animal action. The five-animal check is negative.
5: The coyote ... persuades another animal to reenter the line
The coyote is a doppelganger. It persuades another animal to reenter the line and use its animal action again as though it had just been played.
If its animal action offers any choices, the persuaded animal does not get to choose itself. Instead, the coyote makes all the choices.
Coyotes can't persuade coyotes!
Example 15: The coyote persuades the red camel to reenter the line. The armadillo shares the camel's fate.
Example 16: The persuaded camel carries its animal action out as though it were just played and casts its shadow over the coyote. The armadillo does nothing.
4: The weasel ... darts nimbly past the bigger animals
The weasel sneaks past all stronger animals (> 4). It stops behind a weaker or equally strong animal, or when it reaches Heaven's Gate.
Example 17: The weasel sneaks past the camel (strength 11) and the panda (strength 6). It stops behind the armadillo (strength 1). The camel then <recurringly> casts its shadow over the panda.
3: The gazelle ... flees to the bar at the first sign of trouble in its rearview mirror
The gazelle jumps over the last animal in the line.
It doesn't do this <recurringly>!
The gazelle also has a <permanent> animal ability though: If it would be sent to the THAT'S IT card by a Big Bruiser (buffalo or eagle), it flees directly to the bar instead.
This doesn't apply during the turn in which the gazelle was played – in this case it would be THAT'S IT for the gazelle.
The gazelle needs a turn "to take out its mirror."
Example 18: The blue player has moved his sloth in front of the buffalo. Therefore, the five-animal check is positive. The eagle swoops on the gazelle, who flees to the bar. THAT'S IT for the eagle. The sloth and the buffalo enter the bar.
2: The flamingo ... sets the rhythm that the other animals must follow
The flamingo moves between the two animals in front of it and swaps them into each other's place. If there is just one other or no other animal in the jostling area, the flamingo stays at the back of the line and does nothing.
Example 19: The flamingo flutters in between the elephant and the buffalo, then swaps their positions. Soon the buffalo will poke the armadillo with its horns.
1: The armadillo ... barrels towards the entrance, knocking its rivals aside
The armadillo is a Little Bully. It rolls straight up to Heaven's Gate, bowling over all animals of a single strength. THAT'S IT for all animals of the chosen strength.
An armadillo that knocks other armadillos out will itself remain in the jostling area!
0: The Tasmanian devil ... spins the entire line into confusion
The Tasmanian devil barrels straight to Heaven's Gate. The rest of the animals stay in the line, but are shuffled into a random order.
Don't forget to carry out any <recurring> animal actions afterwards (see 3. <Recurring> animal actions)!
Example 20: The Tasmanian devil spins to Heaven's Gate and all the other animals are sent reeling. The five-animal check is positive. The Tasmanian devil and the weasel enter the bar. THAT'S IT for the gazelle. The elephant, the camel and the earthbound eagle step towards Heaven's Gate.
Reference Sheet
| Strength | Animal | Ability |
|---|---|---|
| 12 | Elephant | Passes animals who, combined, aren't stronger than itself (≤ 12). |
| 11 | Camel | <Recurringly> jumps on top of the animal (< 11) in front of it. That animal "shares the camel's fate." |
| 10 | Buffalo | <Recurringly> pokes the animal (< 10) in front of it with its horns. THAT'S IT for this animal. |
| 9 | Eagle | Soars above the jostling area. THAT'S IT for this eagle, if there is one in the air already. Positive five-animal check: The eagle swoops down on the weakest animal. THAT'S IT for this animal (< 9). |
| 8 | Okapi | <Recurringly> passes the animal (< 8) in front of it. <Permanently> blocks Tramplers and Big Bruisers. |
| 7 | Sloth | Moves in front of an animal (not a sloth) with a <recurring> or <permanent> animal ability. Negates the <recurring> and <permanent> animal abilities of the animal (not a sloth) directly behind it. |
| 6 |