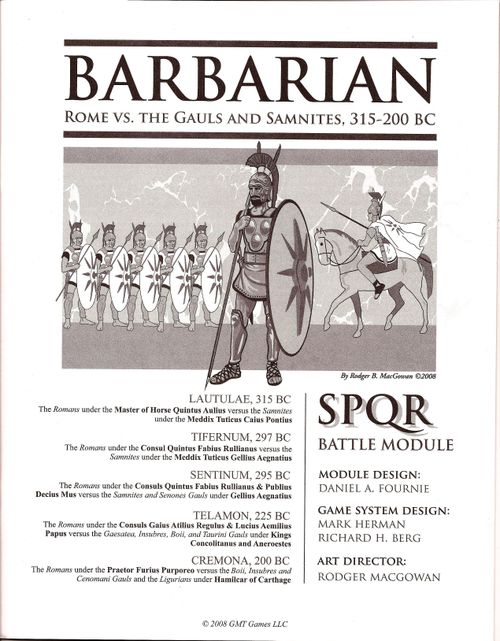
Barbarian: Rome vs. The Gauls and Samnites, 315-200 BC – SPQR Battle Module
Barbarian: Rome vs. The Gauls and Samnites, 315-200 BC – SPQR Battle Module Rulebook
Table of Contents
Table of Contents
- Components
- Changes/Additions to the GBoH Rules in SPQR
- Simple GBoH Version
- The Battle of Lautulae, 315 BC
- The Battle of Tifernum, 297 BC
- The Battle of Sentinum, 295 BC
- The Battle of Telamon, 225 BC
- The Battle of Cremona, 200 BC
- Sources for Barbarian
Components
This module includes:
- 1 map, back-printed
- 1 sheet of 140 counters
- This rulebook
The Counters
The module uses the Roman counters and markers from SPQR. The Samnite and most of the Gallic counters are provided with the Barbarian module. The counters from this module are indicated with a (Barb); those from SPQR with a (SPQR). The unit counter color scheme is:
- Samnite legio linteata: White
- Samnite Cohorts: Red
- Campanian Cavalry: Tan
- Gauls: Dark Green
The Samnite LG Type infantry is further differentiated by Class, given their position in the battle line: Van (Van Cohort) and Main (Main Line Cohort).
The BARBARIAN module introduces the Barbarian Infantry (BI) Type to SPQR.
The Maps
Maps for Sentinum and Telamon are included with the module. The remaining scenarios make use of SPQR maps as indicated.
Changes/Additions to the GBoH Rules in SPQR
All of the rules in SPQR 4th Edition are used (where applicable, to be sure), unless specifically stated otherwise below. Any additional rules are also listed with the respective scenario.
Note: Though all direct references are to the 4th edition rules, the following changes are compatible with the 3rd and 2nd edition rules as well.
(6.2) Terrain
(6.22) Barbarian Infantry (BI) units do not incur Cohesion Hits for crossing or entering any type of passable terrain.
(6.5) Orderly Withdrawal
(6.51) Barbarian Infantry (BI) units cannot use Orderly Withdrawal.
(6.6) Stacking
The Samnites use the same stacking rules as the Romans. The Samnites have two "colors" (the white legio linteata; red Regular) equivalent to different Legions. The Samnite LG Type has two "different" Classes: Van and Main. These are equivalent to the Roman Hastati and Principes for purposes of the stacking charts. The Samnite Light Infantry (LI) are treated as Velites for stacking purposes.
(6.7) Column Movement
Barbarian Infantry (BI) units cannot use Column Movement.
(6.8) Barbarian Impetuosity
At the start of a battle, the Gauls usually worked themselves into a fevered pitch, which translated into an all-out charge. To reflect this, at the start of a game, all Barbarian Infantry (BI) have their Movement Allowance increased by one (+1). Leaders that command Barbarian Infantry units subtract one (–1) from all first-try Momentum die rolls. Impetuosity lasts until at least two Barbarian Infantry units of a Leader's command enter an enemy ZOC, at which point Impetuosity continues for the rest of the turn. It does not exist the following turn. Only the Barbarian Infantry units in that command are affected.
(7.1) Facing
(7.13) Barbarian Infantry (BI) units do not incur Cohesion Hits for changing facing in Rough Terrain.
(8.1) Missile Fire
(8.14) Samnite Light Infantry (LI) are treated as Velites for the purposes of Missile supply. Samnite LG units are automatically out of missiles (MISSILE NO) after the first time they fire.
(8.3) Shock Combat
(8.33) Samnite LG units do not make a Pre-Shock TQ check when attacked frontally by Light Infantry (LI).
(8.6) Barbarian Ferocity
Design note: This rule represents the feared, initial charge of tribal-style warfare, into which the locals seemed to inject all their pent-up anger, determination and initial enthusiasm. Tribal tactics were simple: a big rush designed to swiftly break the back of their opponent. It was usually quite effective, except against a disciplined, professional army.
(8.61) All Barbarian Infantry (BI) units (only) start the game with Ferocity. Ferocity brings the following die roll modifiers for the Charge (Pre-shock) TQ check (see 8.33) as long as it remains in effect (see below):
- Defending units add two (+2) to their Pre-Shock TQ die roll.
- Attacking Gaul Barbarian Infantry (BI) units subtract one (–1) from their pre-Shock TQ die roll.
(8.62) Ferocity continues until the Barbarian Infantry unit's Leader (as given in the scenario setup) fails a Ferocity check. The leader makes a Ferocity Check each time a Barbarian Infantry unit he commands Routs. At the instant that a unit routs the player rolls the die:
- If the die roll is equal to or less than the Leader's Initiative Rating, then units under his command retain their Ferocity.
- If the die roll is greater than the Leader's Initiative, Ferocity is lost at the instant it occurs.
Once lost, Ferocity never can be regained. The loss of Ferocity for the units under one leader has no effect on the Ferocity of units under the command of different leaders.
(9.2) Skirmishers, Velites, And Light Infantry
(9.22) Samnite LI are treated as Velites for this rule.
(9.6) Roman Manipular Legion
Sections 9.61–9.65 (only) apply to the Samnite LG and LI units.
(9.7) Roman Triarii Tactical Doctrine
The Roman player uses this rule unless stated otherwise in the scenario special rules.
(9.8) Gallic Chariots
Design note: The chariots used by the Gallic tribes were not, in any way, weapons systems. They were used only for transport. Their only resemblance to the war chariots of "days gone by" was that they had wheels. Thus, ignore the reference to Chariots on the Combat Tables. However, the tribes were quite adept at using them to whatever advantage they did offer. In this module, chariots make an appearance at Sentinum and Telamon.
(9.81) Chariots have only a Movement Allowance. They have no Size and no TQ Rating. Each Chariot may carry one Light Infantry (LI) unit. It does not cost a LI unit any MP (or Cohesion Hits) to either get on, or leave, a chariot. However, when the LI leaves the Chariot, the latter stops and may move no further. LI may dismount into an adjacent hex regardless of how far the LI+CH combination moved. However, the LI may continue to move only if the LI+CH combination moved less than the MA of the LI alone. The number of MP allowed is equal to the difference. Conversely, a LI mounting a CH can continue to move (as a LI+CH) up to the MA of the Chariot unit less than the number of MP the LI used prior to mounting the Chariot.
(9.82) Chariots may not move at all—including Orderly Withdrawal—unless they carry a LI unit. If an enemy combat unit (of any type) moves adjacent to an unoccupied Chariot, the latter is immediately eliminated. LI riding in Chariots do not suffer Cohesion hits for moving a second (and third) time in a turn as long as they spend the entire Orders Phase mounted in the Chariot, nor do they incur Cohesion hits for terrain while mounted. Chariots expend only 1 MP per vertex shifted.
(9.83) LI may fire their javelins while in chariots and may use Harassment and Dispersal as if they were cavalry while so mounted. LI that do so never run Ammo Low (or No). They are only in danger of doing that when not in their chariots. Mounted LI cannot Shock attack, but defend normally as LI. Dismounted LI Shock attack as any other LI.
(10.1) Unit Cohesion
(10.17) Barbarian Infantry (BI) units can only remove one Cohesion Hit per Recovery Order.
(10.2) Unit Rout And Rally
(10.21) Depleted Barbarian Infantry (BI) units do not Rout but are instead eliminated.
(11.0) Army Withdrawal And Victory
(11.2) Chariots are worth 0 RP. Tribunes, Prefects, and Replacement leaders are worth their Initiative Rating, not 5 times their Initiative Rating.
Simple GBoH Version
The information provided here contains the necessary information to adapt the Barbarian module to the Simple GBoH rules. The individual Simple GBoH scenario descriptions follow the same format: Deployment, the Formation Charts, Seizure Ratings, and Reduced Side availability for each side, Army Withdrawal levels, and the Scenario special rule modifications.
Deployment
Simple GBoH uses the original deployments in all scenarios with one important exception: the player may place his leaders in any hex with a unit that the leader is eligible to command per the Formation Chart.
Formation Charts
Both players have a Formation Chart that describes the overall organizational capabilities of that army. Each row of the chart lists the units in the Formation and the leader(s) eligible for activation in a single Player Turn. If more than one type of unit is given for a single Formation, all units of those types must activate unless the phrase "and/or" appears in that Formation entry. In this case, the player can activate any combination of the unit types listed. However, if a given type is activated, all units of that type must activate. Formations without a Formation Commander are treated as Auxiliaries. Leaders eligible to use Turn Seizure are listed in the Formation Chart with a number to the right of the slash (/) indicating the number of attempts which that Commander may make per game. Although some leaders command more than one Formation, each has one Turn Seizure rating applicable for the entire game, regardless of which Formation they choose to activate after seizing the turn.
Seizure Ratings
Leaders eligible to use Turn Seizure are listed with the number of attempts they are allowed to make per game.
Army Withdrawal Levels
Simple GBoH retains the same withdrawal levels as the original game. They are repeated for the players' convenience.
Simple GBoH Special Rules
Each scenario has a set of Special Rules unique to it. The Simple GBoH special rules are listed first, followed by the original scenario rules. The order of the original has been retained. In all scenarios, ignore the sections pertaining to Retreat Direction. There is no Rout Movement in Simple GBoH.
The following special rules are applicable to all battles included in the BARBARIAN module.
(5.1) Movement Allowances And Restrictions. Samnite LG and LI units are treated as Roman LG and LI units for Movement cost purposes.
(5.3) Stacking. (5.33) Samnite LG of the same Class (Van or Main) and Legion (linteata or red Regular) may stack two to a hex.
(7.1) Missile Fire. (7.18) Samnite J armed LG may not Missile Fire.
(7.5) Shock Attack Resolution. (7.52) Samnite J armed LG qualify for the Roman LG/CO Special Weapons System DRM. The Samnite Main Class LG do not.
(9.0) Army Withdrawal. Roman Tribunes and Prefects are worth 0 RP. Chariots are worth 0 RP.
(10.5) Gallic Chariots. Ignore the Simple GBoH 10.5 Chariot rule and the Chariot section of the Unit Capability Chart. The Simple GBoH Terrain Effects is used with the exception that Mounted Chariots expend only 1 MP per vertex shifted. Use instead the standard rule 9.10 above with the following modifications:
- Mounted Chariots ignore all h results. They must spend the extra MPs on the (h) result.
- Ignore references to second and subsequent moves.
- Treat as Mounted Javelins for all Missile Combat.
- Mounted Chariots are not required to Shock attack, nor may they do so. Mounted Chariots may Retreat Before Shock using the Chariot MA, however, the LI must make a TQ check. If Shock attacked, mounted Chariots are treated as LI. However, if forced to Retreat, the Chariot component is eliminated.
- Mounted Chariots may use Hit & Run Tactics as if they were cavalry.
(10.6) Barbarian Impetuosity. At the start of a game, all Barbarian Infantry (BI) have their Movement Allowance increased by one (+1) and can move adjacent to an enemy unit even if Out of Command. Impetuosity lasts until at least two BI in the Formation move adjacent to an enemy unit at which point Impetuosity continues for the rest of the Player Turn, but is not used on any subsequent Player Turn.
(10.7) Barbarian Ferocity.
(10.71) All Barbarian Infantry (BI) units (only) start the game with Ferocity. A BI unit with Ferocity has one (+1) added to the Shock Resolution die roll when attacking.
(10.72) Ferocity continues until the Barbarian Infantry unit's Commander fails a Ferocity check. The Commander makes a Ferocity check whenever one or more of the BI units in his Formation Routs and/or is eliminated for any reason. At the instant that a unit Routs/is eliminated, the player rolls the die. If the die roll is equal to or less than the Formation commander's Initiative Rating, all BI in that Formation retain their Ferocity, otherwise Ferocity is lost immediately for that Formation's units. Once lost, Ferocity never can be regained.
Competitive Play Notes
Rout Point Bid: For competitive play, we suggest using the Rout Point Bid method to determine who plays the favored side in the scenario. Each player secretly writes his bid (in Army rout point equivalents) down and then simultaneously reveals the amount. The winner of the bid plays the side of his choice and reduces his army rout level by the bid amount. The Rout Point bid method works well with either the standard or simple versions of the rules.
Notional Leaders
Other than the names of the Gallic kings at Telamon (Aenorestes and Concolitanus), all other Gallic leaders were assigned "notional" names. The names used are usually from some famous member of the tribe from a different time. Likewise, only the Samnite overall commanders are known, their subordinates also have "notional" names.
The Battle of Lautulae, 315 BC
Samnite Meddix Tuticus Caius Pontius vs. Roman Master of Horse Quintus Aulius—Samnium, 315 BC
Historical Background
The Romans invaded Samnium with two armies and seized Luceria, Satricum, and Saticula in 316. In the following year, Quintus Fabius Rullianus was named dictator and he appointed Quintus Aulius as his deputy, or Master of Horse. Both generals commanded one of the new double legions, or about 9,000 troops. The Romans were determined to continue their offensive. Fabius advanced south with his legion by an inland route, while Aulius marched along the coast. Aulius failed to reconnoiter or scout his route.
The Samnite Meddix Tuticus had marched forward to confront Aulius' army while it was separated from the dictator's command. The Samnite army was smaller, with about 7,000 men. The Meddix Tuticus chose the rough, mountainous ground of the Lautulae defile to launch his attack. As Aulius' army approached Tarracina through the pass of Lautulae, the Romans were surprised and suddenly beset by the Samnite army. The Roman legionnaires, although far more mobile than their fathers of an earlier generation, were still at a disadvantage compared to the lighter Samnite infantry. Though hard-pressed, Quintus Aulius rallied his men and began to break through the Samnite lines. However, the Master of Horse, exposing himself in the very van of the Roman army, was cut down by the fierce Samnite warriors. The death of Aulius led to the collapse of the entire Roman army. In the panic stricken retreat from Lautulae, most of the Roman legionnaires were slain, and only a few hundreds managed to escape. The Samnites had once again demonstrated their superiority in fighting in mountainous terrain.
Map
Use the Eastern Half of the Cynoscephalae map from SPQR. Hexes west of xx17 are unplayable and considered off the map.
Difficulty And Balance
Balance: The Romans have been caught on the march with Samnites on two sides. The Samnites have better position and better quality units even though outnumbered. The Samnites are favored though the extent depends on how aggressively the Samnite player manages the first few activations.
Tactical Difficulty: This half map battle, with a relatively small number of counters and not much in the way of special rules, makes a good introduction to the module. The tactical situation, however, still makes for an interesting challenge for the Roman player.
Playing Time: About 2–3 hours
Initial Deployment
The Samnite Army under the Meddix Tuticus Caius Pontius
The Eastern Force faces Northwest; the Western Force Northeast.
| Eastern Force | Hex(es) | Source |
|---|---|---|
| Herennius | 2934 | Barb |
| Legio Linteata LI (a) | 2933 | Barb |
| Legio Linteata Van (a–b) | 2934 (2) | Barb |
| Legio Linteata Main (a–b) | 3035 (2) | Barb |
| Samnite LC (a–b) | 3135, 3136 | Barb |
| Western Force | Hex(es) | Source |
|---|---|---|
| Pontius [OC] | 2625 | Barb |
| Statius | 2724 | Barb |
| Samnite LI (a–b) | 2725, 2925 | Barb |
| Samnite Van (a–d) | 2724 (2), 2924 (2) | Barb |
| Samnite Main (a–d) | 2825 (2), 3025 (2) | Barb |
| Legio Linteata HC (a) | 2625 | Barb |
The Roman Army under the Master of Horse Quintus Aulius
The Romans use the V Legion and Ala. All units face South.
| Van | Hex(es) | Source |
|---|---|---|
| Q. Aulius [OC] | 2829 | Barb |
| V VE (a–c) | 2527, 2530, 2429 | SPQR |
| AS/V RC (a–b) | 2629, 2729 | SPQR |
| AS/V CE | 2829 | SPQR |
| AS/V CO (a–b) | 2929 (2) | SPQR |
| Hastati/Principes | Hex(es) | Source |
|---|---|---|
| Tribune Antonius | 3130 | SPQR |
| V HA (a–d) | 3030 (2), 3130 (2) | SPQR |
| V PR (a–d) | 3231 (2), 3331 (2) | SPQR |
| Triarii | Hex(es) | Source |
|---|---|---|
| Tribune Cassius | 3532 | SPQR |
| V TR (a–c) | 3432 (2), 3532 | SPQR |
| AS/V TR (a–b) | 3633 (2) | SPQR |
| Cohorts | Hex(es) | Source |
|---|---|---|
| Prfct Soc Plautius | 3934 | SPQR |
| AS/V CO (a–h) | 3733 (2), 3834 (2), 3934 (2) | SPQR |
| Rear | Hex(es) | Source |
|---|---|---|
| Prfct Eqt Falco | 4035 | SPQR |
| V RC | 4035 | SPQR |
| AS/V VE (a–b) | 4136, 4235 | SPQR |
Line Command Eligibility
| Romans | Samnites |
|---|---|
| 1. *Velites (VE) | 1. *Light Infantry (LI) |
| 2. *Hastati (HA) and Ala Cohorts (CO/CE) | 2. *Van (LG) |
| 3. *Principes (PR) and Ala Cohorts (CO/CE) | 3. *Main (LG) |
| 4. Triarii (TR) | 4. Cavalry |
| 5. Cavalry |
* = May form lines with one intervening vacant hex; see 4.24.
Special Rules
Surprise: Roman leaders cannot automatically issue a Line Command on the first game turn; 4.33 does not apply.
Roman Triarii Tactical Doctrine: Ignore 9.7.
Retreat Edge: Romans retreat to the North edge. The Samnite Eastern Force retreats to the East edge; the Western force the West edge.
Victory
Samnite Army withdraws when units with Rout Points totaling at least 60 have been eliminated. Roman Army withdraws when units with Rout Points totaling at least 85 have been eliminated.
Size and Troop Quality
| Army | Units | Size | Rout Points | Rout Ratio | Avg TQ |
|---|---|---|---|---|---|
| Samnite | 18 | 72 | 119 | 50% | 6.6 |
| Roman | 30 | 85 | 171 | 50% | 5.7 |
The Samnites fielded an army of 6,000 infantry and 1,000 cavalry. The Roman force included 7,600 infantry and 900 cavalry.
Simple GBoH Version: Lautulae (315 BC)
Deploy both armies as indicated. The scenario special rules modifications are noted below.
Playing Time: About an hour
Balance: The Samnites are favored
Samnite Formation Chart
| Commander | Formation |
|---|---|
| Caius Pontius [OC]/3 | Legio Linteata HC |
| Herrenius/2 | Eastern Force Foot or Eastern Force Cavalry |
| Statius | Western Force Foot |
Roman Formation Chart
| Commander | Formation |
|---|---|
| Master of Horse Quintus Aulius [OC]/3 | Van |
| Tribune Antonius | Hastati/Principes |
| Tribune Cassius | Triarii |
| Prfct Soc Plautius | Cohorts |
| Prfct Eqt Falco | Rear |
Army Withdrawal Levels
Samnite: 60 Rout Points
Roman: 85 Rout Points
Simple GBoH Special Rules
First Player: The Roman player goes first. There is no die roll. However, the Roman units activated on the first turn are automatically Out of Command.
The Battle of Tifernum, 297 BC
Samnite Meddix Tuticus Gellius Aegnatius vs. Roman Consul Q. Fabius Rullianus—Campania, 297 BC
Historical Background
Despite the defeat at Lautulae, and a concurrent war with the Etruscans, the Romans gained the upper hand over the Samnites through a series of invasions over the next decade. The Samnites were forced to accept a disadvantageous peace treaty with Rome in 304, but they still had plenty of fight left in them. The Third Samnite War broke out just six years later, in 298. Some of the Etruscan city-states also took the field against Rome once more. The first year's fighting was inconclusive. Rome then elected two of her most experienced commanders for the campaign of 297, Quintus Fabius Rullianus (consul for the fourth time) and Publius Decius Mus (consul for the third time). Each general commanded a consular army of two legions and allies, about 20,000 men. Initially, the senate expected to continue fighting a two-front war with both Samnium and Etruria. However, last-minute diplomatic efforts brought a temporary peace treaty with the Etruscans, allowing both consuls to march south.
The General-in-Chief of the Samnite Confederation, Gellius Statius, commanded an army of about 25,000 troops. He could hope to defeat one consular army, but not two, in the open. Relying on cunning, Gellius Statius laid an ambush in a valley near Tifernum, along the route Fabius was marching. Had he successfully ambushed Fabius, he could then have turned on Decius. The plan miscarried though, due to effective scouting by Fabius' army. The Romans had been ambushed a few times too many, and were becoming more cautious. Fabius declined to enter the valley, instead threatening to bypass the Samnite army. Gellius Statius decided to come down onto the plain and fight in the open with Fabius, before Decius could reinforce his colleague. Fabius accepted the challenge, and both armies formed in line of battle. Displaying a bit of Roman craftiness, Fabius also ordered Lucius Cornelius Scipio to withdraw the hastati of the XIV legion and execute a wide flanking march.
The infantry lines clashed, and hard fighting erupted all along the front. The Romans expected to overcome the lighter Samnite infantry on this open plain, but instead the Samnite foot fought the legionnaires to a standstill. Fabius ordered Marcus Valerius and his son Maximus to lead a cavalry charge against the open flank of the Samnite army. In the event, Gellius Statius' horsemen countered the Roman charge, and the issue remained in doubt. The failure of the Roman cavalry charge encouraged the Samnite infantry even more, and they began to force back the Roman line. At this critical juncture, Scipio emerged with his detachment in the hills to the rear of the Samnite line. Fabius disingenuously announced that this was the vanguard of Decius' army, and as the shouts spread along the Roman line, it simultaneously revitalized his army's morale while filling the Samnites with dismay. Gellius and his cohorts lost their nerve, and the Samnite army collapsed and fled. Fortunately for the Samnites, the Roman army had nearly been beaten and was in no shape to press its pursuit. Only 3,400 of the Samnites were slain, 830 made prisoners and 23 standards captured. This minor Roman victory could not break the Samnite nation, and so the Third Samnite War would go on. Ominously for Rome, the Samnites would no longer be fighting alone.
Map
Use the South-Southeast half of the Cannae map from SPQR. Hexes North-Northeast of xx18 are unplayable and considered off the map.
Difficulty And Balance
Balance: The Samnites are favored though the timely arrival of the Flanking Force can save the day for the Romans.
Tactical Difficulty: This half map battle is a straight up set piece affair with the arrival and impact of the Roman Flanking Force providing the drama.
Playing Time: About 3–4 hours
Initial Deployment
The Samnite Army under the Meddix Tuticus Gellius Aegnatius
Units are faced Southwest.
| Units | Hex(es) | Source |
|---|---|---|
| Gellius Aegnatius [OC] | with any friendly unit | Barb |
| Skirmish Line | Hex(es) | Source |
|---|---|---|
| Statius | 3030 | Barb |
| Legio Linteata LI (a–d) | 3032, 3034, 3036, 3038 | Barb |
| Samnite LI (a–d) | 3028, 3030, 3040, 3042 | Barb |
| Van Line | Hex(es) | Source |
|---|---|---|
| Herennius | 3334 | Barb |
| Legio Linteata Van (a–h) | 3332 (2), 3334 (2), 3336 (2), 3338 (2) | Barb |
| Samnite Van (a–h) | 3328 (2), 3330 (2), 3340 (2), 3342 (2) | Barb |
| Samnite MI (1–2) | 3326, 3327 | SPQR (Red) |
| Main Line | Hex(es) | Source |
|---|---|---|
| Legio Linteata Main (a–h) | 3531 (2), 3533 (2), 3535 (2), 3537 (2) | Barb |
| Samnite Main (a–h) | 3527 (2), 3529 (2), 3539 (2), 3541 (2) | Barb |
| Mercenary HO/HI (1–2) | 3525, 3526 | SPQR (Red) |
| Cavalry | Hex(es) | Source |
|---|---|---|
| Pontius [a] | 3324 | Barb |
| Legio Linteata HC (a–b) | 3224, 3324 | Barb |
| Samnite LC (a–c) | 3223, 3322, 3323 | Barb |
a = Pontius is a subordinate leader in this battle. Ignore the Strategy Rating on the counter.
The Roman Army under the Consul Quintus Fabius Rullianus
The Romans use the III and V Legions and Alae. Units are faced Northeast.
| Units | Hex(es) | Source |
|---|---|---|
| Fabius Rullianus [OC] | with any friendly unit | Barb |
| 2 Tribunes | with any infantry | SPQR |
| 2 Prfct Soc | with any AS infantry | SPQR |
| 1 Prfct Eqt | with any cavalry | SPQR |
| Velites | Hex(es) | Source |
|---|---|---|
| AS/III VE (a–b) | 2225, 2227 | SPQR |
| III VE (a–c) | 2229, 2231, 2233 | SPQR |
| AS/V VE (a–b) | 2235, 2237 | SPQR |
| V VE (a–c) | 2239, 2241, 2243 | SPQR |
| Hastati Line | Hex(es) | Source |
|---|---|---|
| AS/III CO (a–f) | 1928 (2), 1930 (2), 1932 (2) | SPQR |
| V HA (a–d) | 1934 (2), 1936 (2) | SPQR |
| AS/V CO (a–f) | 1938 (2), 1940 (2), 1942 (2) | SPQR |
| Principes Line | Hex(es) | Source |
|---|---|---|
| AS/III CO (g–i), AS/III CE | 1727 (2), 1729 (2) | SPQR |
| III PR (a–d) | 1731 (2), 1733 (2) | SPQR |
| V PR (a–d) | 1735 (2), 1737 (2) | SPQR |
| AS/V CO (g–i), AS/V CE | 1739 (2), 1741 (2) | SPQR |
| Triarii Line | Hex(es) | Source |
|---|---|---|
| AS/III TR (a–b) | 1529, 1530 | SPQR |
| III TR (a–c) | 1531–1533 | SPQR |
| V TR (a–c) | 1534–1536 | SPQR |
| AS/V TR (a–b) | 1537, 1538 | SPQR |
| Cavalry | Hex(es) | Source |
|---|---|---|
| V RC | 1825 | SPQR |
| AS/V RC (a, b) | 1823, 1824 | SPQR |
| III RC | 1925 | SPQR |
| AS/III RC (a, b) | 1923, 1924 | SPQR |
| Flanking Detachment | Hex(es) | Source |
|---|---|---|
| 1 Tribune / III HA (a–d) | Special Entry at 3644–3743, 4232–4233 or 4223–4224 | SPQR |
Line Command Eligibility
| Romans | Samnites |
|---|---|
| 1. *Velites (VE) | 1. *Light Infantry (LI) |
| 2. *Hastati (HA) and Ala Cohorts (CO/CE) | 2. *Van (LG) and MI ** |
| 3. *Principes (PR) and Ala Cohorts (CO/CE) | 3. *Main (LG) and HI ** |
| 4. Triarii (TR) | 4. Cavalry |
| 5. Cavalry |
* = May form lines with one intervening vacant hex; see 4.24. ** = The MI/HI must be adjacent to a Van/Main cohort or an MI/HI to be part of the line; no intervening hexes.
Special Rules
Flanking Force: The Roman player must secretly write down which of the 3 entry areas he has chosen for his flanking detachment. Beginning on turn 2, the Roman player rolls one die, on a roll of 6 or higher, the detachment may enter. On each successive turn, the required die roll is reduced by one (5 on turn 3, 4 on turn 4, etc). The units enter the map when their Tribune is activated. The units enter play individually with the first unit placed in an entry hex paying 1 MP, these second unit 2 MP, etc.
At the conclusion of the Orders Phase in which the Flanking Force enters play, the Samnite player conducts a TQ check for every unit within 10 hexes of a Flanking Force unit. If the die roll is the same or more than the unit's TQ, the unit incurs a number of Hits equal to the difference, with a minimum of one hit. If any unit reaches its TQ Rating in Cohesion hits, it immediately Routs. A Routed unit that fails this TQ check is eliminated.
At the start of Fabius' initial Orders Phase in the game turn the Flanking Force enters, The Roman player may immediately remove two cohesion hits from any/all Roman units within Fabius' Command Range and 1 hit from all Roman outside his Command Range.
Retreat Edge: The Romans, other than the Flanking Force, retreat toward the Southeast edge of the map. The Roman Flanking Force retreats toward its entry area. The Samnites retreat toward the Northeast map edge.
Victory
Samnite Army withdraws when units with Rout Points totaling at least 120 have been eliminated. Roman Army withdraws when units with Rout Points totaling at least 150 have been eliminated.
Size and Troop Quality
| Army | Units | Size | Rout Points | Rout Ratio | Avg TQ |
|---|---|---|---|---|---|
| Samnite | 49 | 200 | 293 | 40% | 6.0 |
| Roman | 62 | 186 | 378 | 40% | 6.1 |
The Samnites fielded an army of 18,000 infantry and 2,000 cavalry. The Roman force included 16,800 infantry and 1,800 cavalry.
Simple GBoH Version: Tifernum (297 BC)
Deploy both armies as indicated.
Playing Time: About 2 hours
Balance: The Samnites are slightly favored
Roman Formation Chart
| Commander | Formation |
|---|---|
| Fabius Rullianus [OC]/4 | None |
| Any Tribune or Prfct Soc | Velites [a] |
| Any Tribune or Prfct Soc | Hastati Line [a] |
| Any Tribune or Prfct Soc | Principes Line [a] |
| Any Tribune or Prfct Soc | Triarii Line [b] |
| Prfct Eqt | Cavalry |
| Tribune | Flanking Force |
a = A contiguous line may have one intervening vacant hex between each unit.
b = The Roman player may not activate this formation until either an enemy combat unit is within three hexes, all its units are at least six hexes from all other Roman LG type units, or the Roman army has rout points equal to at least one half of its Withdrawal Level. Furthermore, the units may not move adjacent to an enemy unit until the Roman army has rout points equal to at least one half of its Withdrawal Level.
The Roman player may activate the Hastati Line and Principes Line Formations together if each of the Formations has its commander stacked with or adjacent to a unit in the Formation AND both commanders are within the Overall Commanders' Command Range. That Overall Commander may move with this activation. See 4.14 Multiple Formations. However, the Roman player may only place the units in one of the Formations In Command.
Samnite Formation Chart
| Commander | Formation |
|---|---|
| Statius | Skirmish Line [a] |
| Herrenius/1 | Van Line [a] |
| Gellius Aegnatius [OC]/4 | Main Line [a] |
| Caius Pontius/1 | Cavalry |
a = A contiguous line may have one intervening vacant hex between each unit.
Army Withdrawal Levels
Samnite: 120 Rout Points
Roman: 150 Rout Points
Simple GBoH Special Rules
First Player: By die roll.
Flanking Force: Use the standard scenario special rule. Begin rolling beginning with the 4th Roman player turn and reduce the die roll limit by one on every fourth Roman player turn thereafter (8th, 12th, etc.). Once the Flanking Force is able to enter, it may do so in any Roman player turn and in conjunction with one other Formation. Once in play, this Formation is activated per the Formation Chart. The Samnite player makes his TQ checks at the start of his next activation. To use Fabius' special ability, the Roman player must activate Fabius (and Fabius alone) in his next player turn otherwise the ability is lost. Fabius may move (normal MA) after the hits are removed.
The Battle of Sentinum, 295 BC
Samnite and Senones Gauls under Gellius Aegnatius vs. Roman Consuls Q. Fabius Rullianus and P. Decius Mus—Umbria, 295 BC
Historical Background
As the 3rd Century dawned in Italy, it became apparent that no peninsular power could face Rome alone. The Etruscans were fractured by disunity, as parties of appeasement vied for political power with anti-Roman parties in the many city-states. Samnium, on the other hand, remained united and firm in their opposition to Roman domination. The Samnite search for allies in the south proved fruitless, as all the remaining states were too weak, or too fearful, to oppose Rome. The Samnites turned to Etruria as a natural ally, "the enemy of my enemy." Nevertheless, the Etruscans were at first reluctant. Finally, in 296, the General-in-Chief of the Samnite Confederation, Gellius Aegnatius, broke out of Samnium with his army and marched into Etruria. This general obtained an audience with the Concilium Duodecim Populorum, the federal governing body of the Etruscan League of Cities. After receiving a logical and impassioned plea from Gellius Aegnatius, the Etruscans ultimately voted to form an anti-Roman coalition with the Samnites. Meanwhile, the Etruscan diplomats had not been idle. Soon thereafter they announced that the Etruscans had reconciled with their ancient enemies, the Senones Gauls, to oppose Rome. Upon their arrival in Etruria, the Senones host overwhelmed and annihilated a garrison legion under the command of the pro-praetor Scipio Barbatus at Camerinum. This Gallic tribe joined the Samnite-Etruscan coalition, and the Umbrian tribes soon followed. This four-way coalition commanded vast forces much more powerful than those Rome could put in the field. Continuing Roman success had finally led to the realization of her greatest fear. Four of the great powers of the Italian peninsula had joined forces against her. Yet, Rome still enjoyed the advantages of unity of command and central position over the Coalition.
Gellius Aegnatius based his army in Picenum, to facilitate coordination with his new allies. Repeated Roman invasions of the Samnite heartland could not force Aegnatius to withdraw from the north. In the spring of 295, the four allied armies rendezvoused at Sentinum (modern Sassoferrato) in Umbria. The vast force numbered nearly 80,000 soldiers—including about 10,000 cavalry. The Samnites numbered about 25,000 troops (with 2,000 mounted), the Senones added another 25,000 warriors (including 5,000 horsemen and charioteers), the Etruscans contributed about 20,000 troops (with 2,000 cavalry), while the Umbrians brought some 10,000 fighters (with about 1,000 on horseback). For logistical reasons, such a large army could not camp in one location. Instead, the Senones were brigaded with the Samnites, while the Etruscans combined with the Umbrians some distance away.
The Romans were not blind to the threat. The Roman people once again elected the two veteran commanders of 297—Quintus Fabius Rullianus (consul for the fifth time) and Publius Decius Mus (consul for the fourth time). For the campaign of 295 extreme measures were also taken to levy troops. Eight of the new manipular legions and strong allied forces were raised. Fabius was assigned I and III legions, while Decius received the V and VI legions, each with strong contingents of allied horse and foot in support. Apprehensive about the strong mounted arm of the Senones contingent, the Romans further reinforced the consul's cavalry with a picked band of 1,000 Campanian knights. The Campanians were considered the finest amongst all of the horsemen of the Roman alliance. The two consuls were directed to operate together against the main Coalition army in Umbria. In addition to this main effort, the proconsul Lucius Volumnius, with the II and IV legions, was sent south against Samnium. Finally, the VII and VIII legions were held in reserve near Rome, under the command of the pro-praetors Gnaeus Fulvius and Lucius Postumius Megellus. The double consular army of Fabius and Decius numbered 40,000 men—including about 35,000 foot and 5,000 horse. The four Roman legions accounted for 17,000 infantry and 1,200 cavalry, while the allies contributed 18,000 foot and 3,800 horse. Nevertheless, this unusually large Roman army was still heavily outnumbered by the Coalition forces. Undaunted, the two consuls led their army directly to Sentinum, to confront the Coalition army. However, being experienced commanders, Fabius and Decius did not immediately offer battle. Instead, they fortified a strong camp and began skirmishing against the enemy to develop the situation.
Upon the arrival of the Roman army, the Coalition commanders held a conference. The four allied commanders decided that the Samnite-Senones army, under the command of Gellius Aegnatius, would form for battle and confront the Roman army head-on. These forces were recognized as being the fiercest fighters in the Coalition, and numbered about 50,000 in all—43,000 foot and 7,000 horse. While the Samnites and Senones engaged the Romans in battle, the Etruscan-Umbrian force would swing around and overwhelm the Roman camp. Their combined strength amounted to about 30,000 troops—27,000 foot and 3,000 horse. Once the camp had been stormed, the Etruscans and Umbrians would fall upon the rear of the Roman army. Unfortunately for the anti-Roman Coalition, three Etruscan officers from Clusium still secretly favored alliance with Rome. These captains deserted from the Coalition camp and surrendered to the Roman pickets. Being brought before the consuls, the traitors revealed the Coalition battle plan to the Romans. The Roman consuls had by now already decided it would be inadvisable to face the combined Coalition army in battle. With the advice of the Etruscan deserters, they hit upon a plan to splinter the enemy army. The consuls ordered the propraetors Fulvius and Postumius to strike into the Etrurian and Umbrian homelands. Their orders were to loot and pillage, but keep always on the move, so that the small size of their columns would not be immediately revealed. Learning that their homelands were under attack, the Etruscans and Umbrians abandoned their allies and marched off to defend their homes. The 18,000 Roman troops of the VII and VIII legions lured off a full 30,000 enemy troops.
The Roman army of 35,000 infantry and 5,000 cavalry now faced an allied Samnite-Senones force of about 43,000 foot and 7,000 horse. Fabius and Decius desired to fight while the Etruscans and Umbrians were absent. The consuls led out their army for battle on three consecutive days. Gellius Aegnatius had good reason to delay the battle in hopes his allies might return. However, the Senones Gauls had not come to watch and wait. The barbarous Gauls would brook no more delay and clamored for blood. Since his army still enjoyed some numerical superiority, Gellius Aegnatius decided to accept the fight. On the third day, the Samnite general led his army out to face the waiting Romans. The Romans had deployed with Fabius' I and III legions on the right, and Decius' V and VI legions on the left. The left was more suitable for cavalry, and the bulk of the more numerous allied cavalry, some 2,800 horsemen, were posted on this flank with Decius. The 1,200 Roman horsemen guarded the right, under Fabius. Each consul also kept a squadron of 500 of the crack Campanian knights under their personal command.
Gellius Aegnatius responded by placing his Samnite army on his left, facing Fabius. He deployed his Gallic allies on his right, facing Decius. This put the strong Senones cavalry and chariot force on the open flank, where they could exploit their superior numbers and mobility. On his left, he had his Samnite cavalry. Just as the battle was about to begin, a wolf chased a hind between the opposing battle lines. Such events were considered important; both armies paused to watch. At the center of the battle line, the two animals ended their chase and fled in opposite directions. The wolf headed for the Roman side, and a passage was opened to allow the beast through. The hind ran towards the Gauls, where he was immediately killed. A Roman hastati called out "the way of flight and slaughter is marked by where you see the slain deer, sacred to Diana; but on this side the wolf of Mars has passed unhurt, to remind us of our Martian race" which was somehow encouraging (Hmmm?) What the Gauls said was not recorded, but may have been something like "hey boys, barbecue after the battle!"
The battle began with a furious assault by the battle-crazed Senones infantry. Decius responded by hurling his hastati into an equally reckless headlong attack. In contrast to the frenzied fighting between Decius and the Gauls, Fabius and Aegnatius conducted more deliberate, ordered attacks. In his sector, Decius was dissatisfied with the bloody but indecisive infantry battle. He committed his second line infantry to the fray. When his principes failed to break the Senones line, Decius gathered his cavalry and personally led an audacious charge, accompanied by his crack Campanians. The Romans forced back the Gallic cavalry, but did not break through. Regrouping his horse troopers, Decius launched a second vigorous charge, and this time broke clean through the Senones cavalry. However, the Roman cavalry were brought to a halt by some companies of Gallic charioteers. Now the Senones reserve cavalry force struck the spent Roman horse. Caught at a standstill, the Roman cavalry were driven back in panic. Crashing back through their own lines, the Roman troopers disordered the V and VI legions and spread panic throughout the army. The Senones infantry joined the assault, and began to rout the Roman line.
At about this point, the consul Decius was slain. There are two explanations for the cause and effect of his death. The first viewpoint is legendary. Livy tells us that when Decius saw the battle turning against him, he offered a prayer of devotio, to sacrifice his own life so that the gods would turn against the enemy. His father had reportedly sacrificed himself in the same way at the Battle of the Veseris in the Latin War. Turning over command of his army to the Pontifex Maximus Marcus Livius (a high priest—and likely a veteran commander) Decius spurred his horse into the thickest part of the enemy line and perished in a hail of missiles and sword strokes. Immediately following his death, the Senones Gauls were struck numb and confused by the gods. The Romans, suddenly rejuvenated by divine aid, were able to reform their lines and annihilate the stunned foe. The second viewpoint is more rational. The impetuous consul Decius fell while leading a reckless and failed cavalry charge. The result was to contribute to the collapse of his army.
Meanwhile, on the other side of the battle the fighting between the Samnites and Romans had gradually grown in intensity. As neither opponent could turn this flank, it remained a head-to-head fight. The battle was evenly contested. Then Gellius Aegnatius, rallying his men forward from the front line, was struck down by the Romans. The loss of their commander demoralized the Samnites, and their lines began to recoil. Fabius pressed hard and drove the Samnite battle line back. Seeing certain victory on his wing, Fabius took decisive action to save the collapsing left wing of the Roman army. First he ordered the tribune Lucius Cornelius Scipio to lead the right wing triarii to the support of Decius' army. Continuing his attack on the now routing Samnites, Fabius found that his army had passed behind the flank of the Senones line. The consul Fabius immediately launched his reserve of 500 Campanian knights into the rear of the Gallic army. Then Fabius directed the tribune Caius Marcius to lead the principes of the I legion after the Campanians, and attack the Senones where the cavalry charge had left them weak and disordered. The attack of the Campanians and the I legion principes in their rear was too much for the Gauls, and the Senones army broke and joined the Samnites in flight. Fabius drove on to the enemy camp, storming and capturing it. The Roman victory was complete.
It had not been a bloodless victory by any means. The army of Decius suffered 7,000 killed, while Fabius' legions lost another 1,700 men. Of their enemies, the Romans counted the bodies of 25,000 slain Samnites and Gauls on the field, and took another 8,000 captives. Only about 12,000 of the Samnites and Gauls scattered and escaped to fight another day. Although the Battle of Sentinum had sealed the fate of the Samnites, they kept up the struggle for a few more years. After a series of defeats, the Samnites finally accepted Roman domination in 290, ending the Third Samnite War. However, these hill tribes rose again during the Pyrrhic War (281–272), which could also be considered a Fourth Samnite War. In the end, Rome again prevailed over the Epirotes and their Samnite allies. All the peoples of Italy were incorporated into the Roman commonwealth, adding their manpower to Rome's army. All the peoples of Italy, save the Gauls, that is. These barbarians remained independent, and hostile.
Map
Use the Sentinum map included with this module. Players may optionally use the Zama map from SPQR to extend the southeast map edge. Place the Sentinum map over the Zama map aligning Sentinum xx45 hex row with the Zama xx40 hex row. Only hex rows xx41 through xx44 are playable on the Zama map.
Difficulty And Balance
Balance: This one is fairly even with perhaps a slight nod to the Samnites and Senones.
Tactical Difficulty: This scenario includes all three of the army types featured in the module. In many respects it's two battles in one with victory on one wing not necessarily guaranteeing victory over all. Holding a reserve on each side of the field should an opportunity or threat arise from the adjacent engagement is an important player consideration.
Playing Time: About 4 hours
Initial Deployment
The Samnite-Gallic Coalition Army under Gellius Aegnatius
All units face Southwest.
| Samnite/Allied Army | Hex(es) | Source |
|---|---|---|
| Gellius Aegnatius [OC] | with any friendly unit | Barb |
| Herennius | with any Legio Linteata unit | Barb |
| Statius | with any Samnite Van, Main, or LI | Barb |
| Skirmish Line | Hex(es) | Source |
|---|---|---|
| Cretan SK (1) | 2304 | SPQR (Red) |
| Samnite LI (a–d) | 2306, 2308, 2310, 2312 | Barb |
| Legio Linteata LI (a–d) | 2314, 2316, 2318, 2320 | Barb |
| Van Line | Hex(es) | Source |
|---|---|---|
| Merc HI (1–3) | 2102–2104 | SPQR (Red) |
| Samnite Van (a–h) | 2106 (2), 2108 (2), 2110 (2), 2112 (2) | Barb |
| Legio Linteata Van (a–h) | 2114 (2), 2116 (2), 2118 (2), 2120 (2) | Barb |
| Main Line | Hex(es) | Source |
|---|---|---|
| Samnite MI (1–2) | 1902, 1903 | SPQR (Red) |
| Lucanian MI (1) | 1904 | SPQR (Red) |
| Samnite Main (a–h) | 1906 (2), 1908 (2), 1910 (2), 1912 (2) | Barb |
| Legio Linteata Main (a–h) | 1914 (2), 1916 (2), 1918 (2), 1920 (2) | Barb |
| Reserve Line | Hex(es) | Source |
|---|---|---|
| Betinius | with any Reserve Line unit | Barb |
| Lucanian MI (2) | 1709 | SPQR (Red) |
| Bruttian MI (1–2) | 1710, 1711 | SPQR (Red) |
| Sabine MI (1–2) | 1712, 1713 | SPQR (Red) |
| Italy MI (1–2) | 1714, 1715 | SPQR (Red) |
| Cavalry | Hex(es) | Source |
|---|---|---|
| Pontius [a] | 1901 | Barb |
| Legio Linteata HC (a–b) | 1900, 1901 | Barb |
| Samnite LC (a–c) | 2000–2002 | Barb |
| Senones Army: Van Line | Hex(es) | Source |
|---|---|---|
| Ducarius | 2436 | Barb |
| Senones Noble BI | 2436 | Barb |
| Gaul (TQ 6) BI (17–25) | 2423–2431 | Barb |
| Gaul (TQ 7) BI (1–7) | 2432–2435, 2437–2439 | Barb |
| Senones Army: Main Line | Hex(es) | Source |
|---|---|---|
| Cavarinus [OC] | with any Senones unit | Barb |
| Gaul (TQ 6) BI (26–32) | 2323–2329 | Barb |
| Gaul (TQ 7) BI (8–16) | 2330–2338 | Barb |
| Senones Army: Chariots | Hex(es) | Source |
|---|---|---|
| Brennus [b] | 2141 | Barb |
| Gaul CH (1–5) | 2139–2143 | Barb |
| Gaul (TQ 6–j) LI (1–5) | mounted on Chariots | Barb |
| Senones Army: Cavalry | Hex(es) | Source |
|---|---|---|
| Cotus | 2542 | Barb |
| Senones Noble LN | 2542 | Barb |
| Celts (TQ 7) LN (1–5) | 2441–2444, 2541, 2543 | SPQR (Green) |
| Celts (TQ 7) LN (6–10) | 2340–2343 | SPQR (Green) |
a = Pontius is a subordinate leader in this battle. Ignore the Strategy Rating on the counter.
b = Brennus can only command Chariots and their Light Infantry.
The Roman Army under Consuls Q. Fabius Rullianus and P. Decius Mus
The Romans use the III, VII, V, and XIV Legions and Alae. All units face Northeast.
| Consular Army of Q. Fabius Rullianus | Hex(es) | Source |
|---|---|---|
| Fabius Rullianus [OC] | 4005 | Barb |
| 1 Tribune | with any III or V Legion infantry | SPQR |
| 2 Prfct Soc | with any AS/III or AS/V Ala infantry | SPQR |
| 1 Prfct Eqt | 3401 | SPQR |
| Velites | Hex(es) | Source |
|---|---|---|
| AS/V VE (a, b) | 3403, 3405 | SPQR |
| V VE (a–c) | 3407, 3409, 3411 | SPQR |
| III VE (a–c) | 3413, 3415, 3417 | SPQR |
| AS/III VE (a, b) | 3419, 3421 | SPQR |
| Hastati Line | Hex(es) | Source |
|---|---|---|
| AS/V CO (a–f) | 3602 (2), 3605 (2), 3607 (2) | SPQR |
| V HA (a–d) | 3609 (2), 3611 (2) | SPQR |
| III HA (a–d) | 3613 (2), 3615 (2) | SPQR |
| AS/III CO (a–d) | 3617 (2), 3619 (2) | SPQR |
| Principes Line | Hex(es) | Source |
|---|---|---|
| AS/V CO (g–i), AS/V CE | 3804 (2), 3806 (2) | SPQR |
| V PR (a–d) | 3808 (2), 3810 (2) | SPQR |
| III PR (a–d) | 3812 (2), 3814 (2) | SPQR |
| AS/III CO (e–i), AS/III CE | 3818 (2), 3820 (2) | SPQR |
| Triarii Line | Hex(es) | Source |
|---|---|---|
| AS/V TR (a, b) | 4007, 4008 | SPQR |
| V TR (a–c) | 4009–4011 | SPQR |
| III TR (a–c) | 4012–4014 | SPQR |
| AS/III TR (a, b) | 4015, 4016 | SPQR |
| Cavalry | Hex(es) | Source |
|---|---|---|
| III RC | 3400 | SPQR |
| V RC | 3401 | SPQR |
| VII RC | 3500 | SPQR |
| XIV RC | 3501 | SPQR |
| Campanian HC (a) | 4005 | Barb |
| Consular Army of P. Decius Mus | Hex(es) | Source |
|---|---|---|
| Decius Mus [OC] | 3843 | Barb |
| 2 Tribunes | with any VII or XIV Legion infantry | SPQR |
| 1 Prfct Soc | with any AS/VII or AS/XIV Ala infantry | SPQR |
| 1 Prfct Eqt | 3443 | SPQR |
| Velites | Hex(es) | Source |
|---|---|---|
| AS/VII VE (a, b) | 3223, 3225 | SPQR |
| VII VE (a–c) | 3227, 3229, 3231 | SPQR |
| XIV VE (a–c) | 3233, 3235, 3237 | SPQR |
| AS/XIV VE (a, b) | 3239, 3241 | SPQR |
| Hastati Line | Hex(es) | Source |
|---|---|---|
| AS/VII CO (a–d) | 3423 (2), 3425 (2) | SPQR |
| VII HA (a–d) | 3427 (2), 3429 (2) | SPQR |
| XIV HA (a–d) | 3431 (2), 3433 (2) | SPQR |
| AS/XIV CO (a–f) | 3435 (2), 3437 (2), 3439 (2) | SPQR |
| Principes Line | Hex(es) | Source |
|---|---|---|
| AS/VII CO (e–i), AS/VII CE | 3622 (2), 3624 (2), 3626 (2) | SPQR |
| VII PR (a–d) | 3628 (2), 3630 (2) | SPQR |
| XIV PR (a–d) | 3632 (2), 3634 (2) | SPQR |
| AS/XIV CO (g–i), AS/XIV CE | 3636 (2), 3638 (2) | SPQR |
| Triarii Line | Hex(es) | Source |
|---|---|---|
| AS/VII TR (a, b) | 3826, 3827 | SPQR |
| VII TR (a–c) | 3828–3830 | SPQR |
| XIV TR (a–c) | 3831–3833 | SPQR |
| AS/XIV TR (a, b) | 3834, 3835 | SPQR |
| Cavalry | Hex(es) | Source |
|---|---|---|
| AS/III RC (a–c) | 3442–3444 | SPQR |
| AS/V RC (a, b) | 3342, 3343 | SPQR |
| AS/XIV RC (a, b) | 3842, 3844 | SPQR |
| AS/VII RC (a, b) | 3742, 3743 | SPQR |
| Campanian HC (b) | 3843 | Barb |
Line Command Eligibility
| Romans | Samnites/Senones |
|---|---|
| 1. *Velites (VE) | 1. *Gaul missile-armed LI and CH |
| 2. *Hastati (HA) and Ala Cohorts (CO/CE) | 2. Barbarian Infantry (BI) |
| 3. *Principes (PR) and Ala Cohorts (CO/CE) | 3. Celts Cavalry |
| 4. Triarii (TR) | 4. *Samnite LI and SK |
| 5. Cavalry | 5. *Samnite Van, Legio Linteata Van, and HI*** |
| 6. *Samnite Main, Legio Linteata Main, and MI*** | |
| 7. MI | |
| 8. Samnite Cavalry |
* = May form lines with one intervening vacant hex; see 4.24. ** = Units in the line must be from the same Consular Army; see Roman Command special rule. *** = The MI/HI must be adjacent to, or within one hex of a Van/Main cohort or adjacent to (no intervening hexes) another MI/HI to be part of the line.
Design note: Fabius gets the III and V Legions and Decius the VII and XIV to better reflect the quality distribution of the Roman troops at this battle.
Special Rules
Samnite/Senones Command
The Samnite/Senones have two Overall Commanders. Gellius Aegnatius is the Overall Commander for all Samnite units. Cavarinus is the Overall Commander of the Senones. Samnite leaders can only command units of their army, while the Senones leaders can only command units of their army.
There is only one command, the Senones, for purposes of Ferocity and Impetuosity. Use Cavarinus for all Ferocity Checks.
Roman Command
The two Roman Consular armies although under the command of Fabius Rullianus acted independently during the battle. Both Fabius and Decius are Overall Commanders, however, they may only command units/leaders assigned to their army. Furthermore the Tribunes and Prefects selected during deployment can only command units in the army they are deployed with.
Campanian Knights
The two Campanian HC are under the direct personal command of the two Roman Consuls. Fabius Rullianus has the "a", while Decius Mus has the "b' unit. These units can only be given Orders/Line Commands by their respective Consuls.
The Devotio (Optional)
During any Decius activation, Decius may declare devotio and move into any hex with a Gallic combat unit. Decius is killed; the Gallic unit is struck with 5 cohesion hit points. All Gallic units one hex from the target suffer 4 cohesion hit points, two hexes from the target suffer 3 cohesion hit points, three hexes away suffer 2 hit points, and four hexes away suffer 1 hit point. The Roman player does not incur a RP loss for Decius when he is killed in this manner.
Triarii Doctrine
The Triarii of each army are released separately based on the Rout Points incurred by their respective armies.
Map Edge Mentality
Both armies are pretty much pushed to the edge of the map. With cavalry on both flanks, this presents no problem in terms of inability to flank, as opposing cavalry would simply react to any attempt to do so. However, if the last row of the northwest or southeast edge of the map is controlled or occupied by an enemy infantry unit, opposing cavalry may move around that unit, off the map, using the border as if it had hexes, and ignoring any possible ZOC that infantry would extend. Units using such "border" movement may never go past any flank/edge "guarded" by cavalry. Ignore this rule when using the optional map extension.
Retreat Edge
The Romans retreat toward the Southwest map edge. The Samnites and Gauls retreat toward the northeast map edge.
Victory
The Samnite/Senones withdraw when Samnite units with Rout Points totaling at least 120 AND Senones units with Rout Points totaling at least 110 have been eliminated.
The Romans withdraw when units from Fabius' army with Rout Points totaling at least 130 AND units from Decius' army with Rout Points totaling at least 120 have been eliminated.
If one of a player's armies exceeds its Withdrawal Level, the other army immediately incurs a 20 Rout Point loss. There is no effect on the army that exceeds its Withdrawal Level.
Size and Troop Quality
| Army | Units | Size | Rout Points | Rout Ratio | Avg TQ |
|---|---|---|---|---|---|
| Samnite | 59 | 249 | 341 | 35% | 5.8 |
| Senones | 49 | 236 | 321 | 35% | 6.6 |
| Fabius | 61 | 184 | 371 | 35% | 6.1 |
| Decius | 65 | 191 | 343 | 35% | 5.3 |
The Samnites fielded an army of 23,000 infantry and 2,000 cavalry. The Senones has 18,500 infantry, 4,600 cavalry, and about 500 Chariots. The Roman force included 33,600 infantry and 4,900 cavalry.
Simple GBoH Version: Sentinum (295 BC)
Deploy both armies as indicated.
Playing Time: About 3 1/2 hours
Balance: Romans slightly favored
Samnites/Senones Formation Chart
| Commander | Formation |
|---|---|
| Statius | Samnite/Allied Skirmish Line [a] |
| Herrenius | Samnite/Allied Van Line [a] |
| Gellius Aegnatius [OC]/4 | Samnite Allied Main Line [a] |
| Caius Pontius/1 | Samnite/Allied Cavalry |
| Betinius | Samnite/Allied Reserve Line |
| Ducarius | Senones Van Line |
| Cavarinus [OC]/2 | Senones Main Line |
| Cotus/1 | Senones Cavalry [a] |
| Brennus | Senones Chariots [a, b] |
a = The Samnites/Senones player may activate the Senones Chariot Formation in conjunction with the Senones Cavalry Formation if Brennus is within Cotus' Command Range. See 4.14, Multiple Formations. However, the Samnites/Senones player may only place the units in one of these Formations In Command. The units in the other Formation are automatically Out of Command. Furthermore, the Senones Chariots cannot be activated in a turn Seized by Cotus.
b = A contiguous line may have one intervening vacant hex between each unit.
Roman Formation Chart
| Commander | Formation |
|---|---|
| Fabius Rullianus [OC]/4 | Campanian HC |
| Any Tribune or Prfct Soc | Fabius Velites [a] |
| Any Tribune or Prfct Soc | Fabius Hastati Line [a] |
| Any Tribune or Prfct Soc | Fabius Principes Line [a] |
| Any Tribune or Prfct Soc | Fabius Triarii Line [b] |
| Prfct Eqt | Fabius Cavalry |
| Decius Mus [OC]/3 or Prfct Eqt | Decius Cav and Campanian HC |
| Any Tribune or Prfct Soc | Decius Velites [a] |
| Any Tribune or Prfct Soc | Decius Hastati Line [a] |
| Any Tribune or Prfct Soc | Decius Principes Line [a] |
| Any Tribune or Prfct Soc | Decius Triarii Line [b] |
a = A contiguous line may have one intervening vacant hex between each unit.
b = The Roman player may not activate this formation until either an enemy combat unit is within three hexes, all its units are at least six hexes from all other Roman LG type units, or the respective Roman army has rout points equal to at least one half of its Withdrawal Level. Furthermore, the units may not move adjacent to an enemy unit until the respective Roman army has rout points equal to at least one half of its Withdrawal Level.
The Roman player may activate the Hastati Line and Principes Line of Fabius' Consular Army together if each of the Formations has its commander stacked with or adjacent to a unit in the Formation AND both commanders are within Fabius' Command Range. Similarly, the Roman player may activate the Hastati Line and Principes Line of Decius' Consular Army together if each of the Formations has its commander stacked with or adjacent to a unit in the Formation AND both commanders are within Decius' Command Range. The group's commander, either Fabius or Decius, and their Campanian HC may move with this activation. See 4.14 Multiple Formations. However, the Roman player may only place the units in one of the Formations In Command. The units in the other Formation are automatically Out of Command.
Fabius and Decius may use a successful Seizure only to activate Formations in their respective Consular Armies.
Army Withdrawal Levels
Samnites: 120 Rout Points
Senones: 110 Rout Points
Fabius: 130 Rout Points
Decius: 120 Rout Points
Simple GBoH Special Rules
Victory: Use standard scenario rule.
First Player: The Samnite/Senones player goes first, there is no die roll.
Samnite/Senones Command: See Samnite/Senones Formation Chart.
Roman Command: See Roman Formation Chart.
Campanian Knights: The two Campanian HC units may activate whenever their Consul is eligible to move.
Devotio (Optional): Use standard scenario rule.
Triarii Doctrine: See Formation chart notes.
Map Edge Mentality: Use standard scenario rule.
The Battle of Telamon, 225 BC
Roman Consuls G. Atilius Regulus and L. Aemilius Papus vs. Gallic Kings Concolitanus and Aneroestes—Etruria, 225 BC
Historical Background
The rout of the Senones at Sentinum greatly weakened this tribe. Still, the Senones managed to launch another invasion in 284 and scored some initial successes. However, Curius Dentatus led a Roman army into the Senones' heartland and inflicted such a severe defeat that the tribe never recovered. Another tribe from farther north in the Po valley, the Boii, responded with a massive invasion in 283. The Boii army was crushed by Publius Cornelius Dolabella at the Battle of Lake Vadimone, only 50 miles short of Rome. A second Boii army, reinforced by the last hostile Etruscans, was defeated at Populonia in 282. A peace treaty was forced on the Boii.
Much to the advantage of Rome during the Pyrrhic and First Punic Wars, the Gauls remained quiet for the next five decades. For her part, Rome did nothing to provoke the Gauls over these fifty years. The situation changed in 232. Having defeated Carthage and absorbed Sicily, Sardinia and Corsica, Rome once again turned her attention to the north. The senate began distributing the lands captured from the Senones to Roman settlers. This provocative act ended the long truce. Word soon reached Rome that the Gauls were planning a massive invasion. The thought of hordes of wild barbarians swarming out of the North once again unnerved the Senate and people of Rome. There was something about a Gallic invasion that chilled the nerve of even the toughest of Rome's legionnaires. The capture of Rome by the Gauls some 160 years before seemed a recent memory. However, the rumors of the invasion did not prove true, at least not immediately. The Romans were kept on tenterhooks, constantly raising and deploying armies, then letting down their guard. This Roman preoccupation with the Gauls allowed Hamilcar Barca a free hand to carve out his empire in Spain.
Then the Gauls finally came in 225. For the campaign of 225, Rome levied five armies. As usual, a consular army of two legions with strong allied contingents (25,000 men in all) was assigned to both of the consuls. In addition, a praetorian army of two legions supported by Etruscan and Sabine allies guarded the frontier of Etruria in the northwest. Another praetorian army of two legions with Umbrian and Sarsinate allies was posted in Picenum in the northeast. The fifth army was composed of the two urban legions and allies and posted as a reserve in Rome under the urban praetor. These three praetorian armies each numbered about 20,000 men. There were also double legions, of about 10,000 men each, serving as garrisons in Sicily and Tarentum, obviously to guard against Carthage, not the Gauls. The total force mobilized was around 130,000 troops, with about 90,000 of these soldiers initially deployed in the north. As the Gauls did not launch their invasion in the early spring, one of the consular armies, under the consul Gaius Atilius Regulus, was dispatched to suppress an uprising in Sardinia. The second consular army, under Lucius Aemilius Papus, took up a precautionary blocking position along the Adriatic at Ariminum.
Meanwhile, a force of Gallic warriors from Transalpine Gaul (modern France) crossed the Alps to join their brethren in Cisalpine Gaul (Northern Italy, the valley of the Po River). These Transalpine Celts were called the "Gaesatae," from a Celtic word for mercenaries. Two kings, Concolitanus and Aneroestes, commanded this horde. In Cisalpine Gaul, they were joined by the local Boii, Insubres, and Taurini tribes. However the Boii and Insubres were no longer the fierce nomadic warriors of old. Long occupation of the fertile lands of the Po valley had softened these barbarians, and exposure to the Etruscans and Romans had had a civilizing effect. The Taurini, a mountain tribe, retained more of the old virtues. Yet it was the Gaesatae who now provided the real offensive punch for this Gallic host. Meanwhile, the Romans rallied to their side 20,000 warriors from the Cenomani Celts and the Veneti, tribes at the head of the Adriatic. Adding these tribal auxiliaries to the praetorian army of Umbria, a diversionary attack was launched against the homelands of the Boii and Insubres. A portion of the Gallic invasion army had to be sent back to defend these rear areas. The force that invaded Italy reportedly numbered 50,000 foot and 20,000 horse. These numbers, especially for the mounted contingent, were probably exaggerated. The Gallic army probably numbered no more than 40,000 infantry and 10,000 cavalry. The Kings Concolitanus and Aneroestes struck west of the Apennines. This move by-passed the defending praetorian army, and the Gauls eagerly laid waste the unprotected farms and villages of Etruria. They headed towards Rome, reaching Clusium, only a three-day march from the Eternal City. There the pursuing army of the praetor finally caught up with them. Concolitanus and Aneroestes cleverly feigned retreat in the direction of Faesulae, moving their infantry into an ambush position during the night. The Etruscans, seeing only the enemy cavalry before them, took this force for a rear guard. The praetor's army pursued with great haste and little caution. The fleeing Gallic cavalry led the unsuspecting Romans into the ambush. Over 6,000 legionnaires were killed, the remainder routed. Most of the fugitives took refuge on a nearby hill, which the Gauls quickly encircled.
The praetor's army might have been forced to surrender, were it not for the timely arrival of the consul Aemilius Papus with his army. The Gallic leaders held a council of war. Here the true strategic objective of the Gallic invasion was revealed—there wasn't any! King Aneroestes proposed that, since they already had amassed more booty than they could carry, they should avoid a second battle and return to Gaul. The other Gallic leaders readily concurred. The great invasion turned out to be nothing more than a raiding party on a vast scale! The Gallic force headed north along the Etruscan coast. Aemilius Papus, after collecting the remnants of the praetor's army, followed warily. With the ambush at Clusium fresh in his mind, Aemilius was reluctant to follow too closely on the heels of the Gallic army. The Gauls were well on their way to a safe withdrawal from Italy, when fortune smiled on Rome. The second consul, Atilius Regulus, had won a battle and suppressed the Sardinian rebels. He then shipped his army back to Italy at Pisae. Unaware of the course of the Gallic invasion, Regulus led his army south, down the coastal road towards Rome. This was, of course, the same road on which the Gauls were moving north!
The inevitable collision took place at Telamon, near the sea. The Celts, with an enemy army behind them, had a strong rear guard, but only a light screen to the front. Regulus' vanguard captured some of the Gallic scouts. The prisoners revealed that their army was close behind, followed in turn by another Roman army. Regulus surmised this second army must be that of his colleague, Aemilius Papus. Regulus immediately put his legions and allies into line of battle. While the heavy infantry advanced under the command of his tribunes, Regulus took personal command of his cavalry and Velites and rode ahead to seize a commanding hilltop on the eastern flank of the road. When Regulus and his cavalry appeared on their flank, the Celts initially believed that Aemilius Papus' cavalry had somehow maneuvered around them. The Celtic horsemen hurtled into action, and soon discovered they were trapped between two Roman armies. Concolitanus and Aneroestes adopted an unconventional formation. A double line was formed, facing in opposite directions. The booty was stacked on a hill, guarded by a small reserve force. The south-facing line was composed of the fierce Gaesatae, who had formed the rearguard against Aemilius' pursuit. These barbarians chose to fight naked. The Gaesatae were supported by a second line formed by the Insubres. The Boii and Taurini formed the main battle line facing north. The western flank was anchored on the sea, while the eastern flank was the site of a massive cavalry battle. Regulus' northern army enjoyed high morale after its successful campaign in Sardinia, though it was no longer at full strength. Aemilius' army, on the other hand, was unsteady. The failure to engage the Gauls had weakened its morale, and the dispirited remnants of the defeated praetor's army had spread fear and dismay in the ranks.
When Aemilius' scouts reported a cavalry battle in progress, he realized it could only be Regulus' army back from Sardinia. The Consul Aemilius reacted quickly, sending his cavalry to join the battle for the hill, while he led his legions forward at the double. The cavalry battle was hotly contested. Regulus attacked nearly 10,000 Gallic horsemen and charioteers with just 2,500 Roman cavalry and 3,500 Velites. Aemilius Papus' army joined in with an additional 3,500 horse and 4,500 Velites. The Consul Regulus was slain by the Gallic horsemen, and his head was displayed on a lance to dismay the Romans and encourage the Gauls. However, the Roman cavalry did not break and with the support of the Velites eventually drove the Gallic horsemen from the hill. Meanwhile, the infantry lines clashed. The Gallic army could not be flanked, and they fought with the desperate courage of surrounded troops. The wild dancing of the naked Gaesatae was impressive, but they proved to be easy prey for the Roman pila (javelins). The Roman battle lines advanced from north and south and a bitter hand-to-hand melee ensued. The Gauls, with no option of retreat, fought almost to the last man. Reportedly, nearly 40,000 Gauls were killed while 10,000 were captured, including King Concolitanus. Only King Aneroestes and a handful of his followers managed to escape. When the magnitude of their defeat became clear, Aneroestes and his party committed suicide. Roman losses were also very heavy, probably over 10,000 killed and many thousands wounded. But Rome was safe. In the years following the Battle of Telamon, the Romans launched a series of punitive invasions against the Gauls in the valley of the Po. The Gauls were systematically driven back, and their lands given to Italian peasant settlers.
Map
Use the Telamon map provided in this module.
Difficulty And Balance
Balance: The Romans have the position and the numbers so are favored here.
Tactical Difficulty: With 100+ units on each side, this is one the larger battles in SPQR series. Furthermore, the battle features the largest cavalry engagement to date. Tactically, the Gauls are in a difficult situation caught between two Roman armies. The Gauls must hold one Roman army at bay while using the bulk of their army to crush the other and exit the map. The Gauls will have no room to run if the legions succeed in squeezing them from both sides. The outcome of the cavalry fight will often determine the overall victor.
Playing Time: About 4 hours
Initial Deployment
The Gallic Army under Kings Concolitanus and Aneroestes
The following units are faced Northwest:
| Boii | Hex(es) | Source |
|---|---|---|
| Magalos | 2912 | Barb |
| Boii Noble MI | 2912 | Barb |
| Celts (TQ 5) MI (1–12) | 2904–2909, 2916–2921 | SPQR (Green) |
| Celts (TQ 6) MI (31–35) | 2910–2911, 2913–2915 | Barb |
| Taurini | Hex(es) | Source |
|---|---|---|
| Taurinus | 3013 | Barb |
| Taurini Noble BI | 3013 | Barb |
| Gaul (TQ 6) BI (17–32) | 3005–3012, 3014–3021 | Barb |
| Boii and Insubres | Hex(es) | Source |
|---|---|---|
| Cotus | with Boii or Insubres Noble LN | Barb |
| Boii Noble LN | within 2 hexes of 2932 | Barb |
| Insubres Noble LN | within 2 hexes of 2932 | Barb |
| Celts (TQ 6) LN (11–17) | within 2 hexes of 2932 | Barb |
| Brennus | Hex(es) | Source |
|---|---|---|
| Brennus | with any Chariot | Barb |
| Gaul CH (1–5) | within 1 hex of 2736 | Barb |
| Gaul (TQ 6–j) LI (1–5) | mounted on Chariots | Barb |
The following units are faced Southeast:
| Gaesatae | Hex(es) | Source |
|---|---|---|
| Concolitanus [OC] | 2311 | Barb |
| Gaesatae Noble BI | 2311 | Barb |
| Gaul (TQ 7) BI (1–16) | 2302–2310, 2312–2318 | Barb |
| Liguria MI (1–6) | 2319–2324 | SPQR (Green) |
| Insubres | Hex(es) | Source |
|---|---|---|
| Ducarius | 2413 | Barb |
| Insubres Noble MI | 2413 | Barb |
| Celts (TQ 5) MI (13–21) | 2404–2407, 2418–2422 | SPQR (Green) |
| Celts (TQ 6) MI (22–30) | 2408–2412, 2414–2417 | Barb |
| Gaesatae | Hex(es) | Source |
|---|---|---|
| Aneroestes | with Gaesatae Noble LN | Barb |
| Gaesatae Noble LN | within 2 hexes of 2331 | Barb |
| Celts (TQ 7) LN (1–10) | within 2 hexes of 2331 | SPQR (Green) |
The Northern Roman Army under the Consul G. Atilius Regulus
The Northern Roman Army uses the III and VII Legions and Alae. Units are faced Southeast.
| Units | Hex(es) | Source |
|---|---|---|
| Atilius Regulus [OC] | with any Northern Army Velites | Barb |
| Tribune Marcius | with any Northern Army infantry | Barb |
| 1 Tribune | with any Northern Army infantry | SPQR |
| 2 Prfct Soc | with any Northern Army AS infantry | SPQR |
| 1 Prfct Eqt | with any Northern Army cavalry | SPQR |
| Hastati Line | Hex(es) | Source |
|---|---|---|
| AS/VII CO (a–d) | 3818 (2), 3820 (2) | SPQR |
| VII HA (a–d) | 3814 (2), 3816 (2) | SPQR |
| III HA (a–d) | 3810 (2), 3812 (2) | SPQR |
| AS/III CO (a–d) | 3806 (2), 3808 (2) | SPQR |
| Principes Line | Hex(es) | Source |
|---|---|---|
| AS/VII CO (e–h) | 4019 (2), 4021 (2) | SPQR |
| VII PR (a–d) | 4015 (2), 4017 (2) | SPQR |
| III PR (a–d) | 4011 (2), 4013 (2) | SPQR |
| AS/III CO (e–h) | 4007 (2), 4009 (2) | SPQR |
| Triarii Line | Hex(es) | Source |
|---|---|---|
| AS/VII TR (a–b) | 4217–4218 | SPQR |
| VII TR (a–c) | 4214–4216 | SPQR |
| III TR (a–c) | 4211–4213 | SPQR |
| AS/III TR (a–b) | 4209–4210 | SPQR |
| Cavalry | Hex(es) | Source |
|---|---|---|
| III RC, VII RC | within 2 hexes of 4039 | SPQR |
| AS/III RC (a, b, ex) | within 2 hexes of 4039 | SPQR |
| AS/VII RC (a–c) | within 2 hexes of 4039 | SPQR |
| Velites Line | Hex(es) | Source |
|---|---|---|
| AS/VII VE (a–b) | 3834–3835 | SPQR |
| V VE (a–c) | 3831–3833 | SPQR |
| AS/VII CE | 3830 | SPQR |
| AS/III CE | 3829 | SPQR |
| III VE (a–c) | 3826–3828 | SPQR |
| AS/III VE (a–b) | 3824–3825 | SPQR |
The Southern Roman Army under the Consul Aemilius Papus
The Southern Roman Army uses the V and XIV Legions and Alae for Papus' Consular army and the XV and XIX Legions and Alae for the remnants of Praetor Purporeo's Consular army. Units are faced Northwest.
| Units | Hex(es) | Source |
|---|---|---|
| Aemilius Papus [OC] | with any Southern Army unit | Barb |
| Furius Purporeo | with any XV or XIX Legion/Ala unit | Barb |
| 2 Tribunes | with any Southern Army infantry | SPQR |
| 1 Prfct Soc | with any Southern Army AS infantry | SPQR |
| 1 Prfct Eqt | with any Southern Army cavalry | SPQR |
| Hastati Line | Hex(es) | Source |
|---|---|---|
| AS/XIX CO (a–b) | 1425 (2) | SPQR |
| XIX HA (a–b) | 1423 (2) | SPQR |
| XV HA (a–b) | 1421 (2) | SPQR |
| AS/XV CO (a–b) | 1419 (2) | SPQR |
| AS/XIV CO (a–d) | 1415 (2), 1417 (2) | SPQR |
| XIV HA (a–d) | 1411 (2), 1413 (2) | SPQR |
| V HA (a–d) | 1407 (2), 1409 (2) | SPQR |
| AS/V CO (a–d) | 1403 (2), 1405 (2) | SPQR |
| Principes Line | Hex(es) | Source |
|---|---|---|
| AS/XIX CO (c–d) | 1226 (2) | SPQR |
| XIX PR (a–b) | 1224 (2) | SPQR |
| XV PR (a–b) | 1222 (2) | SPQR |
| AS/XV CO (c–d) | 1220 (2) | SPQR |
| AS/XIV CO (e–h) | 1218 (2), 1216 (2) | SPQR |
| XIV PR (a–d) | 1214 (2), 1212 (2) | SPQR |
| V PR (a–d) | 1210 (2), 1208 (2) | SPQR |
| AS/V CO (e–h) | 1206 (2), 1204 (2) | SPQR |
| Triarii Line | Hex(es) | Source |
|---|---|---|
| XIX TR (a) | 1020 | SPQR |
| XV TR (a–b) | 1018–1019 | SPQR |
| XIV TR (a–c) | 1015–1017 | SPQR |
| AS/XIV TR (a–b) | 1013–1014 | SPQR |
| V TR (a–c) | 1010–1012 | SPQR |
| AS/V TR (a–b) | 1008–1009 | SPQR |
| Cavalry | Hex(es) | Source |
|---|---|---|
| V RC, XIV RC, XV RC | within 2 hexes of 1242 | SPQR |
| AS/V RC (a, b, ex), AS/XIV RC (a–c) | within 2 hexes of 1242 | SPQR |
| AS/XV RC (ex) | within 2 hexes of 1242 | SPQR |
| AS/XIX RC (a–b) | within 2 hexes of 1242 | SPQR |
| Velites Line | Hex(es) | Source |
|---|---|---|
| AS/XIV VE (a–b) | 1438–1439 | SPQR |
| XIV VE (a–c) | 1435–1437 | SPQR |
| AS/XIV CE | 1434 | SPQR |
| AS/V CE | 1433 | SPQR |
| V VE (a–c) | 1430–1432 | SPQR |
| AS/V VE (a–b) | 1428–1429 | SPQR |
Telamon Special Rules
Roman Command
The Romans have two Overall Commanders: Atilius Regulus is the OC for the Northern Army and Aemilius Papus is the OC for the Southern Army, including the remnants of the Praetor's army. They may use their OC ability only with the units of their army. Furthermore, the subordinate leaders in the respective armies can only command units in those armies. In addition, the Praetor Purporeo can give Orders only to units in the XV and XIX Legions/Ala. He however can issue Line Commands to any eligible Line except for cavalry and Velites.
Gallic Command
Concolitanus is the Overall Commander and thus can give Orders/Line Commands to any Gallic unit. The Gallic subordinate leaders are restricted as follows:
- Gaesatae: Aneroestes can issue Orders and Line Commands to any Gaesatae unit.
- Boii: Magalos can only issue Orders and Line Commands to the Boii units.
- Taurini: Taurinus can only issue Orders and Line Commands to the Taurini units.
- Insubres: Ducarius can only issue Orders and Line Commands to the Insubres units.
- Cotus can only issue Orders and Line Commands to the Boii and Insubres cavalry units.
- Brennus can only issue Orders and Line Commands to the Chariot/LI units.
There Gaesatae and Taurini are the only two commands eligible for Ferocity and Impetuosity. Use Concolitanus for the Gaesatae Ferocity Checks and Taurinus for the Taurini Ferocity Checks.
Gallic Leader Replacements
The Gallic player uses the Carthaginian replacement leaders to replace his eliminated Subordinate Commanders.
Gallic Rout
The Gauls do not have a Retreat Edge. When Routed, Gallic units retreat two hexes in a direction away from the nearest Roman unit. Routed Gauls do not use Rout Movement in the Rout Movement segment of the Rout & Reload (D/2); they are eliminated instead.
Retreat Edge
The Northern Roman Army retreats toward the Northwest edge. The Southern Roman Army retreats to the southeast edge.
Line Command Eligibility
| Romans | Gauls |
|---|---|
| 1. *Velites (VE) | 1. *Gaul missile-armed LI and CH |
| 2. *Hastati (HA) and Ala Cohorts (CO) | 2. Taurini |
| 3. *Principes (PR) and Ala Cohorts (CO/CE) | 3. Boii |
| 4. Triarii (TR) | 4. Insubres |
| 5. Cavalry | 5. Gaesatea and Liguria Infantry |
| 6. Gaesatae Cavalry | |
| 7. Boii and Insubres Cavalry |
* = May form lines with one intervening vacant hex; see 4.24. ** = Roman units in any line must be from either the Northern or Southern Army; see Roman Command special rule.
Telamon Victory
The Gallic Army withdraws when units with Rout Points totaling at least 220 have been eliminated. The two Roman Armies have separate withdrawal levels. RPs must be calculated separately. The Northern Roman Army withdraws when units with Rout Points totaling at least 145 have been eliminated. The Southern Roman Army withdraws when units with Rout Points totaling at least 150 have been eliminated.
When a Roman army withdraws, the Roman player removes all remaining units from that army from the map.
The Roman player wins by forcing the Gallic army to withdraw.
The Gallic player wins by accomplishing either of the following:
- By forcing BOTH Roman armies to withdraw; OR
- By forcing one Roman army to withdraw and exiting 30 combat units (Chariots/Leaders don't count) from that army's retreat edge after that Roman army has withdrawn.
Telamon Size and Troop Quality
| Army | Units | Size | Rout Points | Rout Ratio | Avg TQ |
|---|---|---|---|---|---|
| Gauls | 102 | 501 | 629 | 35% | 6.2 |
| North. Army | 62 | 186 | 361 | 40% | 5.8 |
| South. Army | 84 | 258 | 495 | 30% | 5.8 |
The Gauls fielded an army of 40,800 infantry and 8,300 cavalry, and about 500 chariots. The Northern Roman Army had 16,200 infantry and 2,400 cavalry, while the larger Southern Army had 23,200 infantry and 3,600 cavalry.
Simple GBoH Version: Telamon (225 BC)
Deploy both armies as indicated. Atilius Regulus must be placed with a Northern Roman Army Velites unit. The Northern Army Prfct Eqt and the Tribune/Prfct Soc given the Northern Army Velites Line must be placed within Regulus' Command Range.
Playing Time: About 3 hours
Balance: Romans are slight favorites
Gallic Formation Chart
| Commander | Formation |
|---|---|
| Concolitanus [OC]/3 | Gaesatae and Liguria Infantry |
| Aneroestes/2 | Gaesatae Cavalry |
| Ducarius | Insubres |
| Magalos | Boii |
| Cavarinus | Taurini |
| Cotus/1 | Boii and Insubres Cavalry |
| Brennus | Chariots and LI [a] |
a = A contiguous line may have one intervening vacant hex between each unit.
Concolitanus may activate any subordinate commander with a successful Seizure Attempt. Cotus may activate either his Formation or the Chariot and LI Formation with a successful Seizure attempt.
Roman Formation Chart: Northern Army
| Commander | Formation |
|---|---|
| Atilius Regulus [OC]/4 | None |
| Any Northern Army Tribune or Prfct Soc | Velites Line [a] |
| Northern Army Prfct Eqt | Cavalry |
| Any Northern Army Tribune or Prfct Soc | Hastati Line [a] |
| Any Northern Army Tribune or Prfct Soc | Principes Line [a] |
| Any Northern Army Tribune or Prfct Soc | Triarii Line [b] |
Roman Formation Chart: Southern Army
| Commander | Formation |
|---|---|
| Aemilius Papus [OC]/3 | None |
| Southern Army Tribune or Prfct Soc | Velites Line [a] |
| Southern Army Prfct Eqt | Cavalry |
| Southern Army Tribune or Prfct Soc or Purporeo | Hastati Line [a] |
| Southern Army Tribune or Prfct Soc or Purporeo | Principes Line [a] |
| Southern Army Tribune or Prfct Soc or Purporeo | Triarii Line [b] |
a = A contiguous line may have one intervening vacant hex between each unit.
b = The Roman player may not activate this formation until either an enemy combat unit is within three hexes, all its units are at least six hexes from all other Roman LG type units, or the respective Roman army has rout points equal to at least one half of its Withdrawal Level. Furthermore, the units may not move adjacent to an enemy unit until the respective Roman army has rout points equal to at least one half of its Withdrawal Level.
Both Regulus and Papus are treated as Overall Commanders. The consuls may only activate subordinate commanders within their own army with a successful Seizure Attempt.
The Roman player may activate the Hastati Line and Principes Line Formations of one army together if each of the Formations has its commander stacked with or adjacent to a unit in the Formation AND both commanders are within the army's Overall Commander's Command Range. However, the Roman player may only place the units in one of the Formations In Command. The units in the other Formation are automatically Out of Command. The Overall Commander may move with this activation. See 4.14 Multiple Formations.
The Roman player also has the option to activate the Velites Line and the Cavalry Formations of one army together if each of the Formations has its commander stacked with or adjacent to a unit in the Formation AND both commanders are within the army's Overall Commander's Command Range. The Overall Commander may move with this activation. Both Formations may be placed In Command. See 4.14 Multiple Formations.
The Roman player may use the Praetor Purporeo rather than Papus to activate either of these two Multiple Formations of the Southern Army.
Army Withdrawal Levels
Gallic Army: 220 Rout Points
Northern Roman Army: 145 Rout Points
Southern Roman Army: 150 Rout Points
Victory: Use the original scenario rule to determine the winner.
Simple GBoH Special Rules
First Player: The Roman player is the first player; there is no die roll. The Roman player must use his first turn to activate the Northern Army combined Cavalry and Velites Formations.
Roman Command: See the Formation charts.
Gallic Command: See the Formation charts.
Gallic Replacements: The Gallic player uses the Carthaginian replacement leaders to replace his eliminated leaders.
Gallic Rout: Ignore.
The Battle of Cremona, 200 BC
Roman Praetor Furius Purporeo vs. Carthaginian Hamilcar—Cisalpine Gaul, 200 BC
Historical Background
The defeat at Telamon was avenged by the Gauls in a final burst of glory at the Battles of the Trebbia River, Lake Trasimene and Cannae. But not under the command of Celtic Kings—instead they were fighting for Carthage under the command of her greatest general, Hannibal. However, perhaps the greatest Gallic victory over Rome since Allia took place in 215 in the Litana forest. Despite the dramatic defeats Hannibal inflicted, Rome was able to maintain a praetorian army of two legions in Cisalpine Gaul to keep the barbarians in check. In 216, the command fell on Aulius Postumius, a veteran commander who had already served as consul. His army of two legions was reinforced with local militia from the Adriatic coast up to a strength of 25,000 men.
The Gauls had remained quiet since Hannibal had departed some two years earlier. Nevertheless, Postumius judged he must make a show of strength in the Boii heartland in order to further pacify the province. The Roman commander selected a route that led through the desolate and wild Litani forest. The peacefulness of the Boii Gauls was more apparent than real. Although their most adventurous warriors had joined Hannibal's expedition, there were still plenty of fighters left behind. The Boii secretly mobilized an army. When their scouts reported the approach route of the Roman army, the Boii chieftains conceived an ingenious plan to ambush and destroy the invaders. First, they chose a long stretch of the road bound by heavy woods as the site of the ambush. Working swiftly, the Gauls turned their steel against the trees lining the forest track. They did not sever the tree trunks entirely, instead leaving the trees standing precariously. When the time came, a simple push would be all that was needed to send each tree crashing across the road. Then, when the Roman army moved into the trap, hundreds of trees came crashing down on the stunned legionnaires. The battle crazed Boii slaughtered the dazed legionnaires with reckless abandon. According to Livy, out of 25,000 men only ten escaped to tell the tale. When the Boii found the body of Postumius, they stripped it of arms and armor, and then removed his head. They brought the spoils, and the head, to their most hallowed Druidic grove. The Druids then cleaned out the skull and gilded it with silver and gold. Thereafter, Postumius' skull was used as a sacred vessel to pour libations and as a drinking cup for the Druids. The Boii were free at last. Unfortunately for Hannibal, the Gallic army did not press its advantage with an invasion of Italy, instead dispersing to their homes to celebrate with drinking and singing.
Since the Gauls did not exploit their great victory at Litana in 215, the following year another Roman praetorian army arrived to occupy the lower Po valley. The Roman occupation force, however, was not aggressive, and the Gauls also remained quiet. The Gauls finally rallied again in 207 to join the invading army of Hasdrubal. This Gallic contingent shared in the decisive defeat at the Metaurus River, though most of these warriors were able to escape and return to their homes. In 203, Mago Barca, the third son of Hamilcar, invaded Cisalpine Gaul from Liguria. His army of African and Spanish troops was reinforced by large numbers of Gauls and Ligurians. Mago suffered a hard-fought defeat at the Battle of the Po River and his army was forced to retreat first to Liguria, and ultimately Africa. However, Mago left behind Hamilcar, one of his senior staff officers. Mago ordered Hamilcar to foment another insurrection of the Gallic and Ligurian tribes.
Hamilcar spent the next three years secretly operating in Gaul and Liguria, under the very nose of the Roman praetors. Though Hannibal was defeated at Zama in 202 and Carthage accepted a peace treaty in 201, Hamilcar steadfastly continued on his assigned mission. By 200 he had masterminded a grand coalition of the Boii, Insubres and Cenomani Gauls combined with the Celine and Ilvate Ligurians. This was a tremendous diplomatic success, for not only were these tribes usually at each other's throats, but the Cenomani had been loyal to Rome throughout the Second Punic War. Hamilcar rallied a vast army reportedly numbering 40,000 tribesmen. The softening of the Cisalpine Gauls had continued, and these barbarians had become far less barbarous and fierce than their forefathers. Nevertheless, the Gauls were still willing to fight for their freedom. Hamilcar's army struck by surprise at Placentia. Amazingly, this colony, which had withstood numerous Gallic assaults and a siege by Hasdrubal Barca in 207, was overwhelmed, sacked and burned in one stroke. Of a population of over 20,000, only 2,000 survivors escaped with their lives to nearby Cremona. This colony, at least, had warning and was able to repulse the first of Hamilcar's assaults. The Gauls placed Cremona under a tight blockade, and awaited the Roman response.
The senate in Rome was caught completely off guard by the uprising and the unexpected sack of Placentia. All eyes had been focused on Macedon, and the developing war there with King Philip V. In all the north of Italy there were stationed only 5,000 allied troops under the praetor Furius Purporeo at Ariminum. Furius reported that it would be suicidal to march to the aid of Cremona with the small force at his disposal. The senate ordered the army of the incoming consul, Caius Aurelius, to muster at Ariminum. This army, composed of the V and X legions, had originally been intended for Arretium in Etruria, so the praetor Furius was ordered to send his 5,000 men to Arretium as soon as the two legions arrived. These legions, though newly raised, were no longer the raw levies that had traditionally begun Rome's wars. The Second Punic war was just three years past. Only the Velites may have been green recruits—the legionnaires, and especially the centurions, were all hardened veterans of the war with Hannibal.
The consul Aurelius ordered Furius to take command of his army and immediately march to the relief of Cremona, so that no time might be lost. This delegation of authority, quite unusual for a Roman noble, may have saved Cremona. Anxious for the fate of Cremona, Furius led his army by forced marches to the scene. Arriving at mid-day, he had no chance to construct a camp, as Hamilcar brought his tribal forces up to meet the Romans while still in column of march.
Hamilcar probably left as many as 10,000 Gauls behind to continue the blockade of Cremona. The stay-behind Carthaginian general probably led about 26,000 foot and 4,000 horse against the advancing Roman army. Furius' column was marching with the extraordinaire and the V alae sociorum in the lead, then the V and X legions, and finally the X alae sociorum bringing up the rear. The praetor's brother Marcus Furius commanded the vanguard V alae sociorum, Marcus Caecilius commanded the two Roman legions while Lucius Valerius Flaccus commanded the cavalry. The brunt of the Gallic attack struck the leading V alae sociorum. The Gauls at first massed in depth against this formation. Meanwhile, Hamilcar began trying to organize an enveloping move. Furius responded by bringing up the V legion on the right, and the X legion on the left. The praetor ordered Valerius to cover this advance with the Roman cavalry on the right and the allied horsemen on the left. The attempted envelopments by Furius and Hamilcar collided head on. Hamilcar shifted more and more of his strength to the wings. Furius saw that the Gallic center was being weakened, and brought up his X alae sociorum to reinforce the middle. A strong push by the fresh allied cohorts broke the Gallic center. Once their line was ruptured, the barbarian host disintegrated in flight.
The Romans pursued aggressively and a great slaughter ensued. Livy recorded that 35,000 tribal warriors were slain or captured, and less than 6,000 succeeded in escaping alive. Seventy standards were taken and 200 carts loaded with spoils were also captured. In this fierce battle, Hamilcar and three Gallic kings died fighting. In addition, 2,000 Roman prisoners from Placentia were freed and restored to their homes. The victory had not been bloodless as 2,000 Romans and allies were slain and many thousands more wounded. Most of the losses fell upon the leading V alae sociorum. The Battle of Cremona was the last great gathering of the Cisalpine Gallic tribes to contest Roman aggression. This unity was apparently only made possible by the diligent efforts of the Carthaginian general Hamilcar. After this battle, desultory fighting continued for another decade, but the Cisalpine tribes never again seriously threatened the Romans. By 191, the struggle of two centuries ended in the total defeat of the Cisalpine Gallic tribes, the colonization of the Po River valley, and the Romanization of the Gallic survivors.
Map
Use the eastern portion of the Beneventum map from SPQR. Hexes west of hex row xx17 are unplayable and considered off the map.
Difficulty And Balance
Balance: This battle is fairly even though much depends on how the players manage the first few turns.
Tactical Difficulty: There is no time for much maneuvering on either side, but particularly for the Romans, who will be challenged to deploy effectively. The Gauls need to make the most of their initial impetuosity and ferocity to disrupt the Roman army and prevent it from concentrating for a counterattack.
Playing Time: 3 to 4 hours
Initial Deployment
The Gallic Army under Hamilcar
The Gallic player sets up after the Roman player. Units are faced as indicated below.
| Boii/Ligurians—Units are faced Southwest | Hex(es) | Source |
|---|---|---|
| Magalos | within 3 hexes of 3036 | Barb |
| Boii Noble MI | within 3 hexes of 3036 | Barb |
| Celts (TQ 6) MI (22–35) | within 3 hexes of 3036 | Barb |
| Liguria MI (1–6) | within 3 hexes of 3036 | SPQR (Green) |
| Insubres—Units are faced Northwest | Hex(es) | Source |
|---|---|---|
| Hamilcar [OC] | within 3 hexes of 1932 | Barb |
| Insubres Noble MI | within 3 hexes of 1932 | Barb |
| Gaul (TQ 7) BI (1–5) | within 3 hexes of 1932 | Barb |
| Gaul (TQ 6) BI (17–32) | within 3 hexes of 1932 | Barb |
| Cenomani—Units are faced Northwest | Hex(es) | Source |
|---|---|---|
| Taurinus | within 3 hexes of 2340 | |
| Celts (TQ 5) MI (1–21) | within 3 hexes of 2340 | SPQR (Green) |
| Boii Cavalry—Units are faced Southwest | Hex(es) | Source |
|---|---|---|
| Cotus | within 1 hex of 3635 | Barb |
| Boii Noble LN | within 1 hex of 3635 | Barb |
| Celts LN (11–13) | within 1 hex of 3635 | Barb |
| Insubres Cavalry—Units are faced Northwest | Hex(es) | Source |
|---|---|---|
| Ducarius | within 1 hex of 1326 | Barb |
| Insubres Noble LN | within 1 hex of 1326 | Barb |
| Celts LN (14–17) | within 1 hex of 1326 | Barb |
The Roman Army under the Praetor Furius Purporeo
The Roman player uses the V and X Legions and Alae. The Roman player sets up first. Units are faced as the player wishes.
| Units | Hex(es) | Source |
|---|---|---|
| Praetor Furius Purporeo [OC] | with any friendly unit | Barb |
| Vanguard | Hex(es) | Source |
|---|---|---|
| 1 Prfct Eqt | with any Legion cavalry | SPQR |
| V VE (a–c) | 2629, 2830, 3031 | SPQR |
| AS/V VE (a–b) | 2428, 3232 | SPQR |
| V RC | 2126 | SPQR |
| X RC | 2227 | SPQR |
| V Alae Sociorum | Hex(es) | Source |
|---|---|---|
| 1 Prfct Soc | with any AS/V infantry | SPQR |
| AS/V CE | 2829 | SPQR |
| AS/X CE | 2829 | SPQR |
| AS/V CO (a–h) | 2628 (2), 3030 (2), 2828 (2), 3029 (2) | SPQR |
| AS/V TR (a–b) | 2827, 2927 | SPQR |
| V Legion | Hex(es) | Source |
|---|---|---|
| 1 Tribune | with any V infantry unit | SPQR |
| V HA (a–d) | 2124 (2), 2325 (2) | SPQR |
| V PR (a–d) | 2224 (2), 2425 (2) | SPQR |
| V TR (a–c) | 2223, 2323, 2424 | SPQR |
| X Legion | Hex(es) | Source |
|---|---|---|
| 1 Tribune | with any X infantry unit | SPQR |
| X HA (a–d) | 3428 (2), 3629 (2) | SPQR |
| X PR (a–d) | 3427 (2), 3628 (2) | SPQR |
| X TR (a–c) | 3526, 3627, 3727 | SPQR |
| X Alae Sociorum | Hex(es) | Source |
|---|---|---|
| 1 Prfct Soc | with any AS/X infantry | SPQR |
| AS/X CO (a–h) | 2923 (2), 3124 (2), 3023 (2), 3224 (2) | SPQR |
| AS/X TR (a–b) | 3122, 3223 | SPQR |
| Rear Guard | Hex(es) | Source |
|---|---|---|
| 1 Prfct Eqt | with any AS cavalry | SPQR |
| X VE (a–c) | 3423, 3523, 3624 | SPQR |
| AS/X VE (a–b) | 3121, 3222 | SPQR |
| AS/V RC (a, ex) | within 1 hex of 3724 | SPQR |
| AS/X RC (a, ex) | within 1 hex of 3724 | SPQR |
Line Command Eligibility
| Romans | Gauls |
|---|---|
| 1. *Velites (VE) and CE | 1. Boii MI and Liguria MI |
| 2. *Hastati (HA) and Ala Cohorts (CO) | 2. Insubres BI |
| 3. *Principes (PR) and Ala Cohorts (CO) | 3. Cenomani MI |
| 4. Triarii | 4. Cavalry |
| 5. Cavalry |
* = May form lines with one intervening vacant hex; see 4.24.
Special Rules
Gallic Command
Hamilcar is the Overall Commander and thus can give Orders/Line Commands to any Gallic unit. The Gallic subordinate leaders are restricted as follows:
- Magalos can only issue Orders and Line Commands to the Boii and Ligurian MI units.
- Taurinus can only issue Orders and Line Commands to the Cenomani MI units.
- Ducarius can only issue Orders and Line Commands to the Insubres cavalry units.
- Cotus can only issue Orders and Line Commands to the Boii cavalry units.
Gallic Leader Replacements
The Gallic player uses the Carthaginian replacement leaders to replace his eliminated Subordinate Commanders.
Roman Triarii Tactical Doctrine
Ignore 9.8.
Retreat Edge
The Romans retreat toward the west edge and the Gauls retreat toward the east map edge.
Cremona Victory
The Gallic Army withdraws when units with Rout Points totaling at least 130 have been eliminated. The Roman Army withdraws when units with Rout Points totaling at least 150 have been eliminated.
Cremona Size and Troop Quality
| Army | Units | Size | Rout Points | Rout Ratio | Avg TQ |
|---|---|---|---|---|---|
| Gauls | 73 | 354 | 427 | 30% | 5.8 |
| Romans | 60 | 180 | 373 | 40% | 6.2 |
The Gauls fielded an army of 26,100 infantry and 3,800 cavalry. The Roman Army had 16,800 infantry and 1,800 cavalry.
Simple GBoH Version: Cremona (200 BC)
Deploy both armies as indicated.
Playing Time: Under 2 hours
Balance: Fairly even
Gallic Formation Chart
| Commander | Formation |
|---|---|
| Hamilcar [OC]/4 | Insubres |
| Magalos | Boii/Ligurian |
| Cavarinus | Cenomani |
| Cotus | Boii Cavalry |
| Ducarius | Insubres Cavalry |
Roman Formation Chart
| Commander | Formation |
|---|---|
| Praetor Furius Purporeo [OC]/4 | None |
| Any Prfct Soc | V Alae Sociorum [a] |
| Any Tribune | V Legion [b] |
| Any Tribune | X Legion [b] |
| Any Prfct Soc | X Alae Sociorum [a] |
| Prfct Eqt | Vanguard [c] |
| Prfct Eqt | Rear Guard [c] |
a = A contiguous line may can be formed with one of the following Cohorts or Triarii. Units of the other line must be within Command Range to be placed In Command. A contiguous line may have one intervening vacant hex except for Triarii which must be adjacent.
b = A contiguous line may can be formed with one of the following Hastati/Cohorts, Principes/Cohorts, or Triarii. Units of the other lines must be within Command Range to be placed In Command. A contiguous line may have one intervening vacant hex except for Triarii which must be adjacent.
c = A contiguous line may have one intervening vacant hex between each Velites unit. Cavalry must be within the Command Range to be In Command.
The Roman player may activate the Legion and Alae Formations of the same Legion together if their commanders are within Purporeo's Command Range.
The Roman player may selectively activate the separate components of each of the Formations. For the Legions, the Roman player may activate the Hastati/Cohorts, Principes/Cohorts, and/or Triarii; for Alae, Cohorts and/or Triarii; and for the Van/Rear Guard the Velites and/or Cavalry.
Army Withdrawal Levels
Gallic Army: 130 Rout Points
Roman Army: 150 Rout Points
Simple GBoH Special Rules
First Player: The Roman player goes first. There is no die roll. However, the Roman units activated on the first turn are automatically Out of Command.
Gallic Command: See the Formation charts.
Gallic Replacements: The Gallic player uses the Carthaginian replacement leaders to replace his eliminated leaders.
Sources for Barbarian
The history of the Roman conquest of Italy comes mainly from Livy with additional material provided by Diodorus and Polybius. Good secondary accounts include Nicholas Sekunda's Caesar's Legions; T. J. Cornell's The Beginnings of Rome; and T. A. Dodge's Hannibal.
- Lautulae: Livy 9:23 (1-5); Diodorus 19:72 (6-7). Livy and Diodorus give conflicting accounts of this battle. This scenario follows Diodorus' version of the Roman rout. Sekunda gives a good description of the probable organization of the Samnite army and the evolution of the Roman army.
- Tifernum: Livy 10:14. Livy narrates the order of battle, the campaign and the course of this battle. Sekunda's work is used as above.
- Sentinum: Livy 10:26(14)-29; Polybius 2:19(6). Livy provides a thorough description of the dispositions and course of the battle. Sekunda's work is used again, as above. The exact site of this battle is unknown, so the map is an approximation of the general ground in the area, with terrain to match the armies' dispositions.
- Telamon: Polybius 2:27-31(2). Polybius gives a detailed description of the campaign, armies, dispositions and course of this unusual battle. T. A. Dodge produced a schematic map, based on Polybius' account.
- Cremona: Livy 31:10, 21. Livy gives a good description of the campaign and the course of this battle.