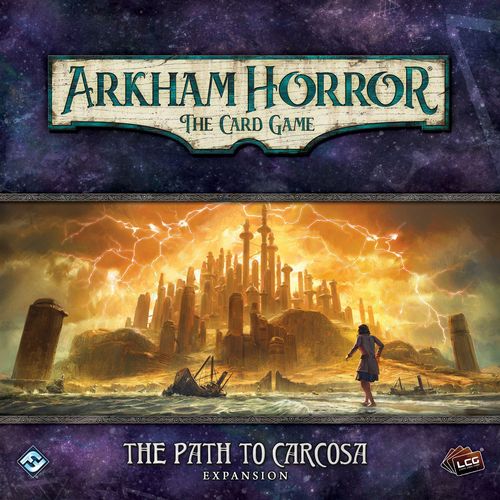
Arkham Horror: The Card Game – The Path to Carcosa: Expansion
Arkham Horror: The Card Game – The Path to Carcosa: Expansion Rulebook
Table of Contents
Table of Contents
Additional Rules and Clarifications
New Keyword: Hidden
Some encounter cards in The Path to Carcosa campaign have the "hidden" keyword. Hidden cards have Revelation abilities that secretly add them to your hand. This should be done without revealing that card or its text to the other investigators. While a hidden card is in your hand, treat it as if it were in your threat area. Its Constant abilities are active, and abilities on it can be triggered, but only by you. A hidden card counts toward your hand size, but it cannot be discarded from your hand by any means except those described on the card.
When discarded, hidden cards are placed in the encounter discard pile. They do not remain a part of your deck like weaknesses do. For the best experience, players are encouraged to stay "in character" and not share information about hidden cards in their hand.
Lola and "Roles"
As a renowned actress, Lola Hayes can play many different roles. At the beginning of each scenario, after investigators draw opening hands, Lola Hayes must choose a role (Neutral, Guardian, Seeker, Rogue, Mystic, or Survivor). Lola can only play cards, commit cards to skill tests, or trigger [trigger icon 1], [trigger icon 2], or [trigger icon 3] abilities on Neutral cards or cards whose class matches her role. This restriction only applies to player cards, not to encounter cards or weaknesses. Note that Constant and Forced abilities remain active on cards whose class does not match Lola's role.
Transcription note: the three trigger icons in this rule are pictures in the printed guide and do not survive its text layer, so they are shown as bracketed placeholders here. Their glyphs are on page 1 of the printed guide.
Doubt and Conviction
Some story resolutions and interludes in The Path to Carcosa campaign instruct the players to "Mark one Doubt" or "Mark one Conviction" in their Campaign Log. This is done by filling in one of the boxes next to "Doubt" or "Conviction" at the bottom of the Campaign Log.
Later in the campaign, some scenarios may be changed or altered depending on whether the investigators "have more Doubt than Conviction" or "have more Conviction than Doubt." The investigators have more Doubt than Conviction if the number of boxes filled in next to Doubt is greater than the number of boxes filled in next to Conviction (and vice versa). Doubt and Conviction are shared among all of the investigators, and they are not tied to any specific investigator. Doubt and Conviction have no game effect except when explicitly referenced by the Campaign Guide or by a card effect.
Story Cards
Story cards are a new card type in The Path to Carcosa campaign. These cards serve as an avenue for additional narrative and typically appear as the reverse side of another scenario card. When you are instructed to resolve a story card, simply read its story text and resolve its game text, if any.
Story card example: "Sickening Reality"
Constance laughs as the skin begins to slough off her body. Blood trickles from her shedding skin, leaving a trail of crimson on the carpet where she walks. One might expect her to cease functioning with her ribs and organs exposed, but she barely seems to notice.
Each investigator at Constance Dumaine's location takes 1 horror.
Move each clue from Constance Dumaine to her location.
Flip this card to its enemy side, and switch it with the Bystander asset version of Constance Dumaine, removing that version from the game.
Expansion Icon
The cards in The Path to Carcosa campaign can be identified by this symbol before each card's collector number: [expansion icon: black silhouette of a stylized head]
Campaign Setup
To set up The Path to Carcosa campaign, perform the following steps in order.
- Choose investigator(s).
- Each player assembles his or her investigator deck.
- Choose difficulty level.
- Assemble the campaign chaos bag.
- Easy (I want to watch the play): +1, +1, 0, 0, 0, –1, –1, –1, –2, –2, skull, skull, skull, [chaos token icon: "§2"], [chaos token icon: eye-in-star].
- Standard (I want to read the signs): +1, 0, 0, –1, –1, –1, –2, –2, –3, –4, skull, skull, skull, [chaos token icon: "§2"], [chaos token icon: eye-in-star].
- Hard (I want to speak the oath): 0, 0, 0, –1, –1, –2, –2, –3, –3, –4, –5, skull, skull, skull, [chaos token icon: "§2"], [chaos token icon: eye-in-star].
- Expert (I want The King in Yellow): 0, –1, –1, –2, –2, –3, –3, –4, –4, –5, –6, –8, skull, skull, skull, [chaos token icon: "§2"], [chaos token icon: eye-in-star].
Transcription note: the two non-skull chaos token icons in each bag line are pictures in the printed guide; they are shown as bracketed descriptions. The same two tokens end every difficulty's bag.
You are now ready to begin at the Prologue.
Prologue
[Read-aloud narrative omitted.]
If Lola Hayes was chosen as an investigator for this campaign: That investigator reads Lola Prologue (out loud).
Otherwise: Proceed to Scenario I: Curtain Call.
Lola Prologue
[Read-aloud narrative omitted.]
Proceed to Scenario I: Curtain Call.
Scenario I: Curtain Call
[Read-aloud narrative omitted.]
Setup
- Gather all cards from the following encounter sets: Curtain Call, Evil Portents, Delusions, Hauntings, Cult of the Yellow Sign, Striking Fear, Rats. These sets are indicated by the following icons: [seven encounter set icons, one per set listed above]
- Set the following cards aside, out of play: The Man in the Pallid Mask, Royal Emissary, each copy of Lobby Doorway, and each copy of Backstage Doorway.
- Put the Theatre, Lobby, Balcony, and Backstage locations into play. Each investigator begins play at the Theatre.
- If Lola Hayes was chosen as an investigator for this campaign, she begins play at Backstage, instead.
- Shuffle the remainder of the encounter cards to build the encounter deck.
Suggested Location Placement: Balcony above; Lobby, Theatre, and Backstage in a row beneath it.
Do Not Read Until the End of the Scenario
DO NOT READ until the end of the scenario.
If no resolution was reached (each investigator was defeated):
[Read-aloud narrative omitted.]
- In your Campaign Log, record that the Stranger is on to you. Add The Man in the Pallid Mask weakness to the lead investigator's deck (does not count towards deck size). For the remainder of this campaign, any time the bearer of The Man in the Pallid Mask leaves the campaign for any reason, choose a new investigator to become the bearer of The Man in the Pallid Mask weakness, and add it to that investigator's deck.
- In your Campaign Log, under "Chasing the Stranger," place one tally mark for each time The Man in the Pallid Mask was defeated during this scenario. For the remainder of the campaign, keep a running tally of the number of times The Man in the Pallid Mask is defeated during a game. Each tally will bring you one step closer to the truth.
- Each investigator earns experience equal to the Victory X value of each card in the victory display.
Resolution 1
[Read-aloud narrative omitted.]
- Did you really think the police would help you?
- In your Campaign Log, record that you tried to warn the police. Mark one Conviction in your Campaign Log.
- If you "stole from the box office," record in your Campaign Log that the police are suspicious of you.
- In your Campaign Log, record that the Stranger is on to you. Add The Man in the Pallid Mask weakness to the lead investigator's deck (does not count towards deck size). For the remainder of this campaign, any time the bearer of The Man in the Pallid Mask leaves the campaign for any reason, choose a new investigator to become the bearer of The Man in the Pallid Mask weakness, and add it to that investigator's deck.
- In your Campaign Log, under "Chasing the Stranger," place two tally marks. For the remainder of the campaign, keep a running tally of the number of times The Man in the Pallid Mask is defeated during a game. Each tally will bring you one step closer to the truth.
- Each investigator earns experience equal to the Victory X value of each card in the victory display.
Resolution 2
[Read-aloud narrative omitted.]
- Do you think it was wise not to warn anyone?
- In your Campaign Log, record that you chose not to go to the police. Mark one Doubt in your Campaign Log.
- In your Campaign Log, record that the Stranger is on to you. Add The Man in the Pallid Mask weakness to the lead investigator's deck (does not count towards deck size). For the remainder of this campaign, any time the bearer of The Man in the Pallid Mask leaves the campaign for any reason, choose a new investigator to become the bearer of The Man in the Pallid Mask weakness, and add it to that investigator's deck.
- In your Campaign Log, under "Chasing the Stranger," place two tally marks. For the remainder of the campaign, keep a running tally of the number of times The Man in the Pallid Mask is defeated during a game. Each tally will bring you one step closer to the truth.
- Each investigator earns experience equal to the Victory X value of each card in the victory display.
Scenario II: The Last King
[Read-aloud narrative omitted.]
Setup
- Gather all cards from the following encounter sets: The Last King, Hastur's Gift, Decay & Filth, The Stranger, Ancient Evils. These sets are indicated by the following icons: [five encounter set icons, one per set listed above]
- Put all 6 locations into play (Foyer, Courtyard, Living Room, Ballroom, Dining Room, and Gallery). See below for suggested placement. Each investigator begins play in the Foyer.
- Shuffle the 5 Bystander assets depicted here (Constance Dumaine, Jordan Perry, Ishimaru Haruko, Sebastien Moreau, and Ashleigh Clarke) and randomly place one in each location except for the Foyer. Place 1 clue on each of these assets, plus 1 additional clue per investigator.
- Note: These cards are double-sided and have story cards on their other side. For the best experience, do not look at the other side unless an effect instructs you to do so.
- Set the Dianne Devine enemy aside, out of play.
- Place the 5 "Sickening Reality" story cards underneath the scenario reference card.
- Note: These cards are double-sided and have encounter cards on their other side. For the best experience, do not look at the other side unless an effect instructs you to do so.
- Shuffle the remainder of the encounter cards to build the encounter deck.
Suggested Location Placement: Dining Room and Gallery in the top row; Ballroom, Courtyard, and Living Room in the middle row; Foyer in the bottom row.
Standalone Mode
If you are playing in Standalone Mode and do not wish to refer to any other setup/resolutions, you may use the information below when setting up and playing this scenario:
- Assemble the chaos bag using the following tokens: +1, 0, 0, –1, –1, –1, –2, –2, –3, –4, skull, skull, skull, [chaos token icon: "§2"], [chaos token icon: eye-in-star].
- Randomly choose one of the following tokens: [chaos token icon: hooded figure], [chaos token icon: second hooded figure], or [chaos token icon: bug]. Add 2 of the chosen token to the chaos bag.
- The lead investigator adds The Man in the Pallid Mask weakness (The Path to Carcosa #59) to his or her deck.
Do Not Read Until the End of the Scenario
DO NOT READ until the end of the scenario.
- If no resolution was reached and at least one investigator resigned: Go to Resolution 1.
- If no resolution was reached because each investigator was defeated: Go to Resolution 2.
Resolution 1
[Read-aloud narrative omitted.]
- In your Campaign Log, under "VIPs Interviewed," record the name of each character you "interviewed."
- In your Campaign Log, under "VIPs Slain," record the name of each unique Lunatic enemy in the victory display.
- Each investigator earns experience equal to the Victory X value of each card in the victory display.
- For every 2 clues that were on the act deck when the game ended, choose an investigator to earn 1 additional experience point. Experience from this reward must be divided as evenly among the investigators as possible.
- Proceed to Interlude I: Lunacy's Reward.
Resolution 2
[Read-aloud narrative omitted.]
- In your Campaign Log, under "VIPs Interviewed," record the name of each character you "interviewed."
- In your Campaign Log, under "VIPs Slain," record the name of each unique Lunatic enemy in the victory display.
- Each investigator earns experience equal to the Victory X value of each card in the victory display.
- For every 2 clues that were on the act deck when the game ended, choose an investigator to earn 1 additional experience point. Experience from this reward must be divided as evenly among the investigators as possible.
- Remove all [chaos token icon: hooded figure], [chaos token icon: second hooded figure], and [chaos token icon: bug] tokens from the chaos bag. Then, add 1 [chaos token icon: hooded figure] token, 1 [chaos token icon: second hooded figure] token, and 1 [chaos token icon: bug] token to the chaos bag.
- Skip Interlude I: Lunacy's Reward, and proceed directly to Scenario III: Echoes of the Past.
Resolution 3
[Read-aloud narrative omitted.]
- In your Campaign Log, under "VIPs Interviewed," record the name of each character you "interviewed." Then, cross off each of those names, since you forgot everything that happened that night.
- In your Campaign Log, under "VIPs Slain," record the name of each unique Lunatic enemy in the victory display.
- Each investigator earns experience equal to the Victory X value of each card in the victory display.
- For every 2 clues that were on the act deck when the game ended, choose an investigator to earn 1 additional experience point. Experience from this reward must be divided as evenly among the investigators as possible.
- Remove all [chaos token icon: hooded figure], [chaos token icon: second hooded figure], and [chaos token icon: bug] tokens from the chaos bag. Then, add 1 [chaos token icon: hooded figure] token, 1 [chaos token icon: second hooded figure] token, and 1 [chaos token icon: bug] token to the chaos bag.
- Skip Interlude I: Lunacy's Reward, and proceed directly to Scenario III: Echoes of the Past.
Interlude I: Lunacy's Reward
- The investigators must decide (choose one):
- Things seem to have calmed down. Perhaps we should go back inside and investigate further. Proceed to Lunacy's Reward 1.
- I don't trust this place one bit. Let's block the door and get the hell out of here! Proceed to Lunacy's Reward 2.
- If these people are allowed to live, these horrors will only repeat themselves. We have to put an end to this. We have to kill them. Proceed to Lunacy's Reward 3.
Lunacy's Reward 1
[Read-aloud narrative omitted.]
- Why would you go back inside?
- In your Campaign Log, record that you intruded on a secret meeting. Mark one Doubt in your Campaign Log.
- Remove all [chaos token icon: hooded figure], [chaos token icon: second hooded figure], and [chaos token icon: bug] tokens from the chaos bag. Then, add 2 [chaos token icon: bug] tokens to the chaos bag.
- The story continues in Scenario III: Echoes of the Past.
Lunacy's Reward 2
[Read-aloud narrative omitted.]
- That door isn't going to stop them.
- In your Campaign Log, record that you fled the dinner party.
- Remove all [chaos token icon: hooded figure], [chaos token icon: second hooded figure], and [chaos token icon: bug] tokens from the chaos bag. Then, add 2 [chaos token icon: second hooded figure] tokens to the chaos bag.
- The story continues in Scenario III: Echoes of the Past.
Lunacy's Reward 3
[Read-aloud narrative omitted.]
- You did what had to be done… Right?
- In your Campaign Log, record that you slayed the monsters at the dinner party. Mark one Conviction in your Campaign Log.
- In your Campaign Log, under "VIPs Slain," record the names of all five "VIPs," if not already recorded there: Constance Dumaine, Jordan Perry, Ishimaru Haruko, Sebastien Moreau, and Ashleigh Clarke.
- Remove all [chaos token icon: hooded figure], [chaos token icon: second hooded figure], and [chaos token icon: bug] tokens from the chaos bag. Then, add 2 [chaos token icon: hooded figure] tokens to the chaos bag.
- The story continues in Scenario III: Echoes of the Past.
Transcription note: this file ends at Interlude I. Scenario III (Echoes of the Past) and the later scenarios and interludes of the campaign belong to the Mythos Packs and are not part of this expansion.