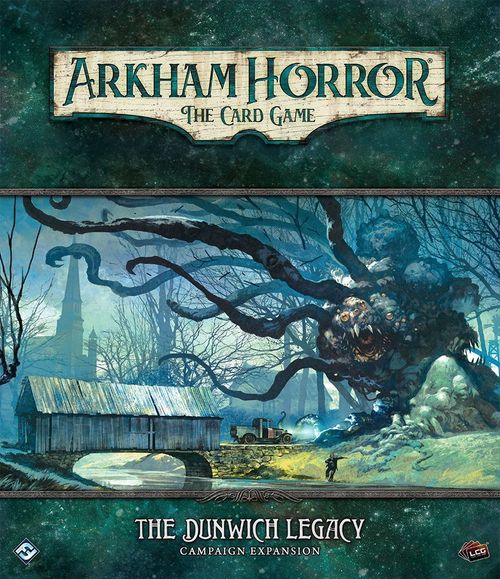
Arkham Horror: The Card Game – The Dunwich Legacy: Campaign Expansion
Arkham Horror: The Card Game – The Dunwich Legacy: Campaign Expansion Rulebook
Table of Contents
Table of Contents
- Campaign Setup
- Additional Rules and Clarifications
- Prologue
- Scenario I–A: Extracurricular Activity
- Scenario I–B: The House Always Wins
- Interlude I: Armitage's Fate
- Scenario II: The Miskatonic Museum
- Scenario III: The Essex County Express
- Scenario IV: Blood on the Altar
- Interlude II: The Survivors
- Scenario V: Undimensioned and Unseen
- Scenario VI: Where Doom Awaits
- Scenario VII: Lost in Time and Space
- Epilogue
Campaign Setup
To set up The Dunwich Legacy campaign, perform the following steps in order.
- Choose investigator(s).
- Each player assembles his or her player deck.
- Choose difficulty level.
- Assemble the campaign chaos bag.
- Easy (I want to experience the story): +1, +1, 0, 0, 0, –1, –1, –1, –2, –2, skull, skull, [symbol 2], [symbol 3], [symbol 4].
- Standard (I want a challenge): +1, 0, 0, –1, –1, –1, –2, –2, –3, –4, skull, skull, [symbol 2], [symbol 3], [symbol 4].
- Hard (I want a true nightmare): 0, 0, 0, –1, –1, –2, –2, –3, –3, –4, –5, skull, skull, [symbol 2], [symbol 3], [symbol 4].
- Expert (I want Arkham Horror): 0, –1, –1, –2, –2, –3, –3, –4, –4, –5, –6, –8, skull, skull, [symbol 2], [symbol 3], [symbol 4].
You are now ready to begin at the Prologue.
Additional Rules and Clarifications
"Exile"
Some player cards in The Dunwich Legacy cycle must be exiled when they are used. When a card is exiled, it is removed from the game and returned to your collection. During campaign play, a card that has been exiled must be purchased again with experience points (between scenarios) if you wish to re-include it in your deck.
If exiling 1 or more cards would reduce your deck below your investigator's deck size, when purchasing cards between scenarios, you must purchase cards so that a legal deck size is maintained (when purchasing cards in this manner, you may purchase level 0 cards for 0 experience cost until a legal deck size is reached).
Expansion Icon
The cards in The Dunwich Legacy campaign can be identified by the expansion icon (a small barn-and-silo symbol) before each card's collector number.
Prologue
The investigators must decide (choose one):
- Professor Warren Rice was last seen working late at night in the humanities department of Miskatonic University. Let's search for him there. Proceed with "Scenario I–A: Extracurricular Activity" if you wish to find Professor Warren Rice first.
- Dr. Francis Morgan was last seen gambling at the Clover Club, an upscale speakeasy and gambling joint located downtown. Let's go talk to him. Proceed with "Scenario I–B: The House Always Wins" if you wish to find Dr. Francis Morgan first.
Scenario I–A: Extracurricular Activity
Setup
- Gather all cards from the following encounter sets: Extracurricular Activity, Sorcery, The Beyond, Bishop's Thralls, Whippoorwills, Ancient Evils, Locked Doors, and Agents of Yog-Sothoth. (These sets are indicated by their icons.)
- Depending on the following circumstances, a different version of Faculty Offices should be used in this scenario.
- If Extracurricular Activity is the first scenario of the campaign, use Faculty Offices (The Night is Still Young). Set it aside, out of play. Remove Faculty Offices (The Hour is Late) from the game.
- If you have completed The House Always Wins, use Faculty Offices (The Hour is Late). Set it aside, out of play. Remove Faculty Offices (The Night is Still Young) from the game.
- Set the following cards aside, out of play: "Jazz" Mulligan, Alchemical Concoction, The Experiment, Professor Warren Rice, Dormitories, and Alchemy Labs.
- Put the Miskatonic Quad, Orne Library, Humanities Building, Student Union, Science Building, and Administration Building locations into play. Each investigator begins play at the Miskatonic Quad.
- Shuffle the remainder of the encounter cards to build the encounter deck.
Suggested Location Placement: Orne Library, Miskatonic Quad, and Science Building in one row; Humanities Building, Student Union, and Administration Building in a second row.
Resolutions
DO NOT READ until the end of the scenario.
If no resolution was reached (each investigator resigned or was defeated):
- In your Campaign Log, record that Professor Warren Rice was kidnapped.
- In your Campaign Log, record that the investigators failed to save the students. You are haunted by guilt. Add 1 [symbol 5] token to the chaos bag for the remainder of the campaign.
- Each investigator earns experience equal to the Victory X value of each card in the victory display. Each investigator earns 1 experience as he or she reflects on the night's events.
- If this is the first scenario of the campaign, proceed to Scenario I–B: The House Always Wins. Otherwise, proceed to Interlude I: Armitage's Fate.
Resolution 1:
- In your Campaign Log, record that the investigators rescued Professor Warren Rice. Any one investigator may choose to add Professor Warren Rice to his or her deck. This card does not count toward that investigator's deck size.
- In your Campaign Log, record that the investigators failed to save the students. You are haunted by guilt. Add 1 [symbol 5] token to the chaos bag for the remainder of the campaign.
- Each investigator earns experience equal to the Victory X value of each card in the victory display.
- Proceed to Scenario I–B: The House Always Wins.
Resolution 2:
- In your Campaign Log, record that Professor Warren Rice was kidnapped.
- In your Campaign Log, record that the students were rescued.
- Each investigator earns experience equal to the Victory X value of each card in the victory display.
- If this is the first scenario of the campaign, proceed to Scenario I–B: The House Always Wins. Otherwise, proceed to Interlude I: Armitage's Fate.
Resolution 3:
- In your Campaign Log, record that Professor Warren Rice was kidnapped.
- In your Campaign Log, record that the Experiment was defeated.
- Each investigator earns experience equal to the Victory X value of each card in the victory display.
- If this is the first scenario of the campaign, advance to The House Always Wins. Otherwise, advance to Interlude I—Armitage's Fate.
Resolution 4:
- In your Campaign Log, record that the investigators were unconscious for several hours.
- In your Campaign Log, record that Professor Warren Rice was kidnapped.
- Each investigator earns experience equal to the Victory X value of each card in the victory display. Each investigator earns 1 experience as he or she reflects on the night's events.
- In your Campaign Log, record that the investigators failed to save the students. You are haunted by guilt. Add 1 [symbol 5] token to the chaos bag for the remainder of the campaign.
- If this is the first scenario of the campaign, advance to Scenario I–B: The House Always Wins. Otherwise, advance to Interlude I: Armitage's Fate.
Scenario I–B: The House Always Wins
Setup
- Gather all cards from the following encounter sets: The House Always Wins, Bad Luck, Naomi's Crew, Rats. (These sets are indicated by their icons.)
- Set the Hideous Abominations and Striking Fear encounter sets aside, out of play. (These sets are indicated by their icons.)
- Put the Clover Club Lounge, Clover Club Bar, Clover Club Cardroom, and La Bella Luna locations into play. Each investigator begins play in La Bella Luna.
- Put Clover Club Pit Boss into play in the Clover Club Lounge.
- Set the following cards aside, out of play: Darkened Hall, Peter Clover, Dr. Francis Morgan, and each copy of Back Hall Doorway.
- Shuffle the remainder of the encounter cards to build the encounter deck.
Note: At the start of this scenario, agenda 1a grants each Criminal enemy the aloof keyword, which stops those enemies from automatically engaging you. At some point, those enemies may lose the aloof keyword. Remember that enemies who are no longer aloof will automatically engage investigators at their location, as per normal.
Resolutions
DO NOT READ until the end of the scenario.
If no resolution was reached (each investigator resigned before Act 3 or was defeated): You barely made it out of the club alive. Go to Resolution 1.
Resolution 1:
- In your Campaign Log, record that the O'Bannion gang has a bone to pick with the investigators.
- In your Campaign Log, record that Dr. Francis Morgan was kidnapped.
- If any player "cheated," add 1 [symbol 6] chaos token to the chaos bag for the remainder of the campaign.
- Each investigator earns experience equal to the Victory X value of each card in the victory display. Each investigator earns 1 experience as he or she reflects on the night's events.
- If this is the first scenario of the campaign, proceed to Scenario I–A: Extracurricular Activity. Otherwise, proceed to Interlude I: Armitage's Fate.
Resolution 2:
- In your Campaign Log, record that the O'Bannion gang has a bone to pick with the investigators.
- In your Campaign Log, record that the investigators rescued Dr. Francis Morgan. Any one investigator may choose to add Dr. Francis Morgan to his or her deck. This card does not count toward that investigator's deck size.
- If any player "cheated," add 1 [symbol 6] chaos token to the chaos bag for the remainder of the campaign.
- Each investigator earns experience equal to the Victory X value of each card in the victory display.
- Proceed to Scenario I–A: Extracurricular Activity.
Resolution 3:
- In your Campaign Log, record that Naomi has the investigators' backs.
- In your Campaign Log, record that Dr. Francis Morgan was kidnapped.
- If any player "cheated," add 1 [symbol 6] chaos token to the chaos bag for the remainder of the campaign.
- Each investigator earns experience equal to the Victory X value of each card in the victory display.
- Proceed to Interlude I: Armitage's Fate.
Resolution 4:
- In your Campaign Log, record that the O'Bannion gang has a bone to pick with the investigators.
- In your Campaign Log, record that Dr. Francis Morgan was kidnapped.
- If any player "cheated," add 1 [symbol 6] chaos token to the chaos bag for the remainder of the campaign.
- Each investigator suffers 1 physical trauma.
- In your Campaign Log, record that the investigators were unconscious for several hours.
- Each investigator earns experience equal to the Victory X value of each card in the victory display. Each investigator earns 1 experience as he or she reflects on the night's events.
- If this is the first scenario of the campaign, proceed to Scenario I–A: Extracurricular Activity. Otherwise, proceed to Interlude I: Armitage's Fate.
Interlude I: Armitage's Fate
Check Campaign Log. If the investigators were unconscious for several hours: Read Armitage's Fate 1. Otherwise, skip to Armitage's Fate 2.
Armitage's Fate 1:
- In your Campaign Log, record that Dr. Henry Armitage was kidnapped.
- Each investigator earns 2 bonus experience as reading Wilbur's journal gives them insight into the hidden world of the Mythos.
- The story continues in Scenario II: The Miskatonic Museum.
Armitage's Fate 2:
- In your Campaign Log, record that the investigators rescued Dr. Henry Armitage. Any one investigator may choose to add Dr. Henry Armitage to his or her deck. This card does not count toward that investigator's deck size. It can be found in the Armitage's Fate encounter set, indicated by its icon.
- The story continues in Scenario II: The Miskatonic Museum.
Scenario II: The Miskatonic Museum
Check Campaign Log.
- If Dr. Henry Armitage was kidnapped: Proceed to Part 1.
- If the investigators rescued Dr. Henry Armitage: Skip to Part 2.
Part 1: Proceed to Setup.
Part 2: Proceed to Setup.
Setup
- Gather all cards from the following encounter sets: The Miskatonic Museum, Bad Luck, Sorcery, The Beyond, Chilling Cold, and Locked Doors. (These sets are indicated by their icons.)
- Put one of the two Administration Office locations and one of the two Security Office locations into play at random. Remove the other versions of Administration Office and Security Office from the game. Then, put the Museum Entrance and Museum Halls locations into play. Each investigator begins play at the Museum Entrance.
- Set the 6 "Exhibit Hall" locations aside as a separate "Exhibit Deck." To do this, perform the following:
- Shuffle the Exhibit Hall (Restricted Hall) and 2 other random Exhibit Hall locations together to form the bottom 3 cards of the Exhibit Deck, unrevealed side faceup.
- Then, place the other 3 Exhibit Hall locations on top, in a random order. All 6 cards of the Exhibit Deck should be showing only the unrevealed side, so that the players do not know which Exhibit Hall is the Exhibit Hall (Restricted Hall).
- Set the following cards aside, out of play: Harold Walsted, Adam Lynch, The Necronomicon (Olaus Wormius Translation), and Shadow-spawned.
- Shuffle the remainder of the encounter cards to build the encounter deck.
Standalone Mode: If you are playing in Standalone Mode and do not wish to refer to any other setup/resolutions, you may use the information below when setting up and playing this scenario.
- Assemble the chaos bag using the following tokens: +1, 0, 0, –1, –1, –1, –2, –2, –3, –4, skull, skull, [symbol 2], [symbol 5], [symbol 6], [symbol 3], [symbol 4].
- Dr. Henry Armitage was kidnapped.
"The Void": Some cards in this scenario reference an area called "the void." The void is an out-of-play area next to the act and agenda deck which the Hunting Horror enemy can enter and leave via card effects. While the Hunting Horror is in the void, it is considered out of play and cannot be affected by player cards or investigator actions.
Resolutions
DO NOT READ until the end of the scenario.
If no resolution was reached (each investigator resigned or was defeated):
- In your Campaign Log, record that the investigators failed to recover the Necronomicon.
- Each investigator earns experience equal to the Victory X value of each card in the victory display.
Resolution 1:
- In your Campaign Log, record that the investigators destroyed the Necronomicon.
- Each investigator earns experience equal to the Victory X value of each card in the victory display.
Resolution 2:
- In your Campaign Log, record that the investigators took custody of the Necronomicon.
- The investigators have earned The Necronomicon (Olaus Wormius Translation) card. Any one investigator may choose to add The Necronomicon (Olaus Wormius Translation) to his or her deck. This card does not count towards that investigator's deck size.
- You have given in to the temptation of power. Add 1 [symbol 6] chaos token to the chaos bag for the remainder of the campaign.
- Each investigator earns experience equal to the Victory X value of each card in the victory display.
Scenario III: The Essex County Express
Setup
- Gather all cards from the following encounter sets: The Essex County Express, The Beyond, Striking Fear, Ancient Evils, Dark Cult. (These sets are indicated by their icons.)
- Put one of the three Engine Car locations into play at random. Remove the other versions of Engine Car from the game. Then, put six of the eight Train Car locations into play at random, in a straight line to the left of the Engine Car. Remove the remaining two Train Car locations from the game.
- Reveal the leftmost Train Car. Each investigator begins play in that location. (If that location has a "forced" effect that triggers upon entering that location, ignore it.)
- Set all 4 copies of Across Space and Time aside, out of play.
- Based on your difficulty level, add the following chaos token(s) to the chaos bag, for the remainder of the campaign:
- Easy: –2.
- Standard: –3.
- Hard: –4.
- Expert: –5.
- Shuffle the remainder of the encounter cards to build the encounter deck.
Moving on the Train: "Left" and "Right"
During this scenario, locations are lined up from left to right, with the Engine Car as the rightmost location. Whenever a card effect refers to "the location to the left," or "the location to the right," it refers to the location immediately to your location's left or right. Any card effects that reference a direction (left or right) should be interpreted from the perspective of the diagram on the previous page (the printed "Location Placement" diagram).
Train Car is connected to the locations to the left and right of it. You cannot enter Train Car unless all of the clues on the location to its left have been discovered. Engine Car is connected to the location to the left of it. You cannot enter Engine Car unless all of the clues on the location to its left have been discovered.
Standalone Mode: If you are playing in Standalone Mode and do not wish to refer to any other setup/resolutions, you may use the information below when setting up and playing this scenario.
- Assemble the chaos bag using the following tokens: +1, 0, 0, –1, –1, –1, –2, –2, –3, –3, –4, skull, skull, [symbol 2], [symbol 5], [symbol 6], [symbol 3], [symbol 4].
- If an investigator with the Dr. Henry Armitage card, the Professor Warren Rice card, or the Dr. Francis Morgan card in his or her deck was defeated, in your Campaign Log, record that the character in question was kidnapped. The associated card must be removed from that investigator's deck.
- If no resolution was reached (each investigator was defeated): Go to Resolution 2.
Resolutions
DO NOT READ until the end of the scenario.
Before resolving any other resolution, if at least 1 investigator was defeated: The defeated investigators read Investigator Defeat first.
Investigator Defeat: Each investigator who was defeated has acquired the Across Space and Time weakness and must add 1 copy of it to his or her deck. This card does not count toward that investigator's deck size.
- Each investigator who was defeated earns 1 bonus experience as his or her experience beyond the gate grants them insight into the cosmos.
- If an investigator with The Necronomicon (Olaus Wormius Translation) in his or her deck was defeated, in your Campaign Log, record that the Necronomicon was stolen. The Necronomicon (Olaus Wormius Translation) must be removed from that investigator's deck.
Resolution 1:
- Each investigator earns experience equal to the Victory X value of each card in the victory display.
Resolution 2 (read Investigator Defeat first!):
- In your Campaign Log, record that the investigators were delayed on their way to Dunwich.
- Each investigator earns experience equal to the Victory X value of each card in the victory display.
Scenario IV: Blood on the Altar
Setup
- Gather all cards from the following encounter sets: Blood on the Altar, Dunwich, Whippoorwills, Nightgaunts, and Ancient Evils. (These sets are indicated by their icons.)
- Put Village Commons into play. Each investigator begins play in the Village Commons.
- Remove one of the two copies of each other location from the game at random. Then, choose one of the six remaining locations at random, and remove it from the game as well. Put the remaining locations into play. (See suggested placement below.)
- Check Campaign Log. Gather the cards for each character who "was kidnapped" according to your Campaign Log. Form a facedown pile of "potential sacrifices," consisting of each of those cards, along with the Zebulon Whateley card and the Earl Sawyer card.
- Set the following cards aside, out of play: Silas Bishop, The Hidden Chamber, Key to the Chamber, and Powder of Ibn-Ghazi.
- Check Campaign Log. If the investigators were delayed on their way to Dunwich: Add 1 doom to agenda 1a.
- Shuffle the remainder of the encounter cards to build the encounter deck.
- Check Campaign Log. If the O'Bannion gang has a bone to pick with the investigators: Seeking vengeance, the gang from the Clover Club has followed you to Dunwich. Gather all cards from the Naomi's Crew encounter set and shuffle them into the encounter deck. (This set is indicated by its icon.)
- Take the previously set-aside The Hidden Chamber and Key to the Chamber cards, along with the top 3 cards of the encounter deck. Shuffle them and randomly deal 1 card facedown underneath each location in play except Village Commons.
The Hidden Chamber: This scenario includes a single-sided location (The Hidden Chamber) which has been dealt facedown underneath a random location. The Hidden Chamber only has a revealed side, and has a Revelation effect that puts it into play when drawn. When put into play, a single-sided location is put into play with its revealed side faceup, because it has no unrevealed side. Otherwise, it functions as a normal location in every other way.
Suggested Location Placement: Arrange the locations as shown in the printed guide's diagram (House in the Reeds, Schoolhouse, Congregational Church, Village Commons, Osborn's General Store, Burned Ruins, and Bishop's Brook). Note: One of the below locations will not be in play.
Standalone Mode: If you are playing in Standalone Mode and do not wish to refer to any other setup/resolutions, you may use the information below when setting up and playing this scenario.
- Assemble the chaos bag using the following tokens: +1, 0, 0, –1, –1, –1, –2, –2, –3, –3, –4, skull, skull, [symbol 2], [symbol 5], [symbol 6], [symbol 3], [symbol 4].
- When building the pile of "potential sacrifices," use all five of the following characters: Dr. Henry Armitage, Dr. Francis Morgan, Professor Warren Rice, Zebulon Whateley, and Earl Sawyer.
- The investigators were not delayed on their way to Dunwich.
- The O'Bannion gang does not have a bone to pick with the investigators.
- Do not read Interlude II—The Survivors.
- Try to save as many potential sacrifices as you can!
Resolutions
DO NOT READ until the end of the scenario.
If no resolution was reached (each investigator resigned or was defeated):
- In your Campaign Log, record that the ritual was completed.
- If there were any potential sacrifices remaining at the end of the game, place them underneath the agenda deck.
- In your Campaign Log, under "Sacrificed to Yog-Sothoth," record the names of each unique card that is underneath the agenda deck. Each of those cards are removed from all players' decks and can no longer be included in any players' decks for the remainder of the campaign.
- If an investigator with The Necronomicon (Olaus Wormius Translation) in his or her deck was defeated, in your Campaign Log, record that the Necronomicon was stolen. The Necronomicon (Olaus Wormius Translation) must be removed from that investigator's deck.
- Each investigator earns experience equal to the Victory X value of each card in the victory display. Each investigator earns 2 bonus experience as he or she gains insight into the hidden world of the Mythos.
- Proceed to Scenario V: Undimensioned and Unseen.
Resolution 1:
- In your Campaign Log, record that the investigators put Silas Bishop out of his misery.
- In your Campaign Log, under "Sacrificed to Yog-Sothoth," record the names of each unique card that is underneath the agenda deck. Each of those cards are removed from all players' decks and can no longer be included in any players' decks for the remainder of the campaign.
- If an investigator with The Necronomicon (Olaus Wormius Translation) in his or her deck was defeated, in your Campaign Log, record that the Necronomicon was stolen. The Necronomicon (Olaus Wormius Translation) must be removed from that investigator's deck.
- Each investigator earns experience equal to the Victory X value of each card in the victory display. Each investigator earns 2 bonus experience as he or she gains insight into the hidden world of the Mythos.
- Proceed to Interlude II: The Survivors.
Resolution 2:
- In your Campaign Log, record that the investigators restored Silas Bishop.
- In your Campaign Log, under "Sacrificed to Yog-Sothoth," record the names of each unique card that is underneath the agenda deck. Each of those cards are removed from all players' decks and can no longer be included in any players' decks for the remainder of the campaign.
- Each investigator earns experience equal to the Victory X value of each card in the victory display. Each investigator earns 2 bonus experience as he or she gains insight into the hidden world of the Mythos.
- Proceed to Interlude II: The Survivors.
Resolution 3:
- In your Campaign Log, record that the investigators banished Silas Bishop.
- In your Campaign Log, under "Sacrificed to Yog-Sothoth," record the names of each unique card that is underneath the agenda deck. Each of those cards are removed from all players' decks and can no longer be included in any players' decks for the remainder of the campaign.
- If an investigator with The Necronomicon (Olaus Wormius Translation) in his or her deck was defeated, in your Campaign Log, record that the Necronomicon was stolen. The Necronomicon (Olaus Wormius Translation) must be removed from that investigator's deck.
- Each investigator earns experience equal to the Victory X value of each card in the victory display. Each investigator earns 2 bonus experience as he or she gains insight into the hidden world of the Mythos.
- Proceed to Interlude II: The Survivors.
Interlude II: The Survivors
Check Campaign Log. For each of the following 5 characters who are not listed under "Sacrificed to Yog-Sothoth," read their associated passage. When you are done, proceed to Scenario V: Undimensioned and Unseen.
If Dr. Henry Armitage is not listed under "Sacrificed to Yog-Sothoth":
- In your Campaign Log, record that Dr. Henry Armitage survived The Dunwich Legacy. If the Dr. Henry Armitage card is not already in an investigator's deck, any one investigator may choose to add that card to his or her deck. It does not count toward that investigator's deck size.
- If the Powder of Ibn-Ghazi card is not already in an investigator's deck, any one investigator may choose to add that card to his or her deck. It does not count toward that investigator's deck size.
If Professor Warren Rice is not listed under "Sacrificed to Yog-Sothoth":
- In your Campaign Log, record that Professor Warren Rice survived The Dunwich Legacy. If the Professor Warren Rice card is not already in an investigator's deck, any one investigator may choose to add that card to his or her deck. It does not count toward that investigator's deck size.
If Dr. Francis Morgan is not listed under "Sacrificed to Yog-Sothoth":
- In your Campaign Log, record that Dr. Francis Morgan survived The Dunwich Legacy. If the Dr. Francis Morgan card is not already in an investigator's deck, any one investigator may choose to add that card to his or her deck. It does not count toward that investigator's deck size.
- If the Powder of Ibn-Ghazi card is not already in an investigator's deck, any one investigator may choose to add that card to his or her deck. It does not count toward that investigator's deck size.
If Zebulon Whateley is not listed under "Sacrificed to Yog-Sothoth":
- In your Campaign Log, record that Zebulon Whateley survived The Dunwich Legacy. Any one investigator may choose to add the Zebulon Whateley card to his or her deck. It does not count toward that investigator's deck size.
If Earl Sawyer is not listed under "Sacrificed to Yog-Sothoth":
- In your Campaign Log, record that Earl Sawyer survived The Dunwich Legacy. Any one investigator may choose to add the Earl Sawyer card to his or her deck. It does not count toward that investigator's deck size.
Scenario V: Undimensioned and Unseen
The investigators must decide (choose one):
- You try to calm down the townsfolk in order to learn more. Proceed to Part 1.
- You try to warn the townsfolk and convince them to evacuate. Skip to Part 2.
Part 1:
- Record in your Campaign Log that you calmed the townsfolk.
- Continue to Setup.
Part 2:
- Record in your Campaign Log that you warned the townsfolk.
- Continue to Setup.
Setup
- Gather all cards from the following encounter sets: Undimensioned and Unseen, Whippoorwills, Beast-thralls, Dunwich, and Striking Fear. (These sets are indicated by their icons.)
- Put one of the two versions of each of the following locations into play at random: Dunwich Village, Cold Spring Glen, Blasted Heath, Ten-Acre Meadow, Devil's Hop Yard, and Whateley Ruins. Remove the other versions of each of those locations from the game. Each investigator begins play in Dunwich Village. (See suggested placement below.)
- Check the number of names recorded under "Sacrificed to Yog-Sothoth" in your Campaign Log.
- If there are 4 or more names listed, set 2 copies of Brood of Yog-Sothoth aside, out of play. Then, remove the final 3 copies of Brood of Yog-Sothoth from the game.
- If there are exactly 3 names listed, put 1 copy of Brood of Yog-Sothoth into play in Cold Spring Glen, and set 2 copies of Brood of Yog-Sothoth aside, out of play. Then, remove the final 2 copies of Brood of Yog-Sothoth from the game.
- If there are exactly 2 names listed, put 1 copy of Brood of Yog-Sothoth into play in Cold Spring Glen, and set 3 copies of Brood of Yog-Sothoth aside, out of play. Then, remove the final copy of Brood of Yog-Sothoth from the game.
- If there are 1 or fewer names listed, put 1 copy of Brood of Yog-Sothoth into play in Cold Spring Glen, put 1 copy of Brood of Yog-Sothoth into play in Blasted Heath. Then, set the final 3 copies of Brood of Yog-Sothoth aside, out of play.
- Set each copy of Esoteric Formula aside, out of play.
- An investigator with the Powder of Ibn-Ghazi in his or her deck may search his or her deck for it and put it into play.
- Each investigator searches the collection for a random basic Madness, Injury, or Pact weakness and adds it to his or her deck for the remainder of the campaign.
- Shuffle the remainder of the encounter cards to build the encounter deck.
Suggested Location Placement: Arrange the locations put into play during setup as shown in the printed guide's Suggested Location Placement diagram (Blasted Heath, Devil's Hop Yard, Dunwich Village, Ten-Acre Meadow, Cold Spring Glen, and Whateley Ruins).
Choosing a Random Location: During this scenario, you will often be instructed to choose a random location. This should be done by shuffling together the 6 locations removed from the game during setup (the versions of each location in play not currently being used) and drawing 1 at random.
Standalone Mode: If you are playing in Standalone Mode and do not wish to refer to any other setup/resolutions, you may use the information below when setting up and playing this scenario.
- Assemble the chaos bag using the following tokens: +1, 0, 0, –1, –1, –1, –2, –2, –3, –3, –4, skull, skull, [symbol 2], [symbol 5], [symbol 6], [symbol 3], [symbol 4].
- 3 characters were sacrificed to Yog-Sothoth.
- Do not include the Powder of Ibn-Ghazi in any player's deck.
- Do not take any additional weaknesses as instructed in this scenario's Setup.
- Dr. Henry Armitage has been sacrificed to Yog-Sothoth.
- Try to slay as many Brood of Yog-Sothoth as you can!
Resolutions
DO NOT READ until the end of the scenario.
If no resolution was reached (each investigator resigned or was defeated): Go to Resolution 1.
Resolution 1:
- In your Campaign Log, record that X brood escaped into the wild. X is the total number of Brood of Yog-Sothoth still in play or set aside.
- If an investigator's deck contains the Powder of Ibn-Ghazi card, remove it from that investigator's deck.
- Each investigator earns experience equal to the Victory X value of each card in the victory display.
Resolution 2:
- In your Campaign Log, record that no brood escaped into the wild.
- If an investigator's deck contains the Powder of Ibn-Ghazi card, remove it from that investigator's deck.
- Each investigator earns experience equal to the Victory X value of each card in the victory display.
Scenario VI: Where Doom Awaits
Check Campaign Log.
- If Naomi has the investigators' back: Proceed to Part 1.
- Otherwise: Skip to Setup.
Part 1:
- The lead investigator gains a clue from the token bank (2 clues instead if there are 3 or 4 investigators in the game).
- Proceed to Setup.
Setup
- Gather all cards from the following encounter sets: Where Doom Awaits, Beast-thralls, Sorcery, Bishop's Thralls, Striking Fear, Ancient Evils, Chilling Cold. (These sets are indicated by their icons.)
- Put Base of the Hill, Ascending Path, and Sentinel Peak into play. Each investigator begins play at Base of the Hill.
- Remove 1 copy of Diverging Path from the game, at random. Set the other 3 copies of Diverging Path aside, out of play.
- Remove 1 copy of Altered Path from the game, at random. Set the other 3 copies of Altered Path aside, out of play.
- Set Seth Bishop aside, out of play.
- Based on your difficulty level, add the following chaos token(s) to the chaos bag for the remainder of the campaign:
- Easy: –3.
- Standard: –5.
- Hard: –6.
- Expert: –7.
- Depending on the following circumstances, a different version of Act 2 should be used in this scenario. Each other version of Act 2 is removed from the game.
- Check Campaign Log. If the investigators restored Silas Bishop, use Act 2—Ascending the Hill (v. I).
- If the above is not true, check Campaign Log. If the investigators failed to recover the Necronomicon, or if the Necronomicon was stolen, use Act 2—Ascending the Hill (v. II).
- If neither of the above are true, use Act 2—Ascending the Hill (v. III).
- Check Campaign Log. For each Brood of Yog-Sothoth that escaped into the wild, add 1 doom to agenda 1a.
- Check Campaign Log. If the investigators put Silas Bishop out of his misery, remnants of the creature's body have mutated and grown at Sentinel Hill. Put 1 "Conglomeration of Spheres" enemy from the Hideous Abominations encounter set into play at Ascending Path. Shuffle the rest of that set into the encounter deck. (This set is indicated by its icon.)
Standalone Mode: If you are playing in Standalone Mode and do not wish to refer to any other setup/resolutions, you may use the information below when setting up and playing this scenario.
- Assemble the chaos bag using the following tokens: +1, 0, 0, –1, –1, –1, –2, –2, –3, –3, –4, –5, skull, skull, [symbol 2], [symbol 5], [symbol 6], [symbol 3], [symbol 4].
- Use Act 2—Ascending the Hill (v. III) in this scenario. Remove each other version of Act 2 from the game.
- Naomi does not have the investigators' back.
- No Brood of Yog-Sothoth escaped into the wild.
- The investigators did not put Silas Bishop out of his misery.
Resolutions
DO NOT READ until the end of the scenario.
If no resolution was reached (each investigator resigned or was defeated): Go to Resolution 2.
Resolution 1:
- In your Campaign Log, record that the investigators entered the gate.
- Each investigator earns experience equal to the Victory X value of each card in the victory display.
Resolution 2:
- In your Campaign Log, record that Yog-Sothoth tore apart the barrier between worlds, and became one with all reality.
- Each investigator is driven insane.
- The investigators lose the campaign.
Scenario VII: Lost in Time and Space
Setup
- Gather all cards from the following encounter sets: Lost in Time and Space, Sorcery, The Beyond, Hideous Abominations, Agents of Yog-Sothoth. (These sets are indicated by their icons.)
- Put Another Dimension into play. Each investigator begins play in Another Dimension.
- Set the following cards aside, out of play: The Edge of the Universe, Tear Through Time, and Yog-Sothoth.
- Shuffle the remainder of the encounter cards to build the encounter deck.
Locations in the Encounter Deck: This scenario includes several single-sided locations that are shuffled into the encounter deck along with the rest of the gathered encounter sets. These locations only have a revealed side, and have a Revelation effect that puts them into play when drawn. When put into play, a single-sided location is put into play with its revealed side faceup, because it has no unrevealed side. Otherwise, it functions as a normal location in every other way.
Standalone Mode: If you are playing in Standalone Mode and do not wish to refer to any other setup/resolutions, you may use the information below when setting up and playing this scenario.
- Assemble the chaos bag using the following tokens: +1, 0, 0, –1, –1, –1, –2, –2, –3, –3, –4, –5, skull, skull, [symbol 2], [symbol 5], [symbol 6], [symbol 3], [symbol 4].
- Throughout this scenario, there may be additional instructions or narrative on agenda cards that reference events in the Campaign Log. None of these events happened. Ignore these instructions in their entirety.
- Do not read the campaign epilogue, even if you win the scenario.
Resolutions
DO NOT READ until the end of the scenario.
Before resolving any other resolution, if at least 1 investigator was defeated: The defeated investigators read Investigator Defeat first.
Investigator Defeat:
- Each defeated investigator is killed.
- If another resolution was reached, the other investigators read that resolution.
- If no resolution was reached (each investigator was defeated) and the investigators were at Act 4 when the scenario ended, go to Resolution 2.
- If no resolution was reached (each investigator was defeated) and the investigators were at Act 1, 2, or 3 when the scenario ended, go to Resolution 4.
Resolution 1:
- In your Campaign Log, record that the investigators closed the tear in reality.
- Each investigator suffers 2 physical trauma and 2 mental trauma, as he or she never fully recovers from his or her time spent outside the realm of reality.
- Each investigator earns experience equal to the Victory X value of each card in the victory display. Each investigator earns 5 bonus experience, as he or she saved the world from being torn apart.
- The investigators win the campaign!
Resolution 2:
- The investigators win the campaign…and are never seen or heard from again.
Resolution 3:
- In your Campaign Log, record that Yog-Sothoth has fled to another dimension.
- Each investigator is killed.
- The investigators win the campaign…and are never seen or heard from again.
Resolution 4:
- In your Campaign Log, record that Yog-Sothoth tore apart the barriers between worlds, and became one with all reality.
- Each surviving investigator is driven insane.
- The investigators lose the campaign.
Epilogue
Read the following only if the investigators won the campaign.
Check Campaign Log.
- If you calmed the townsfolk: Read Epilogue 1.
- If you warned the townsfolk: Skip to Epilogue 2.
The Epilogue 1 and Epilogue 2 narrative passages are story text and are not transcribed here.