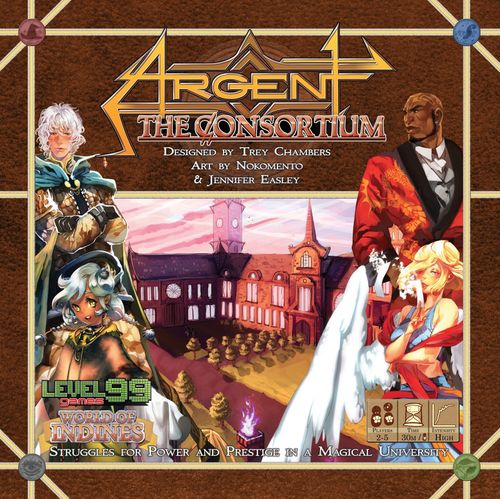
Argent: The Consortium
Argent: The Consortium Rulebook
Table of Contents
Table of Contents
- Game Materials
- Core Ideas
- University Room Tiles
- Candidate Sheet
- Bell Tower Offerings
- Round Cards
- Mage Power Cards
- Consortium Voter Cards
- Spell Cards
- Vault Cards
- Supporter Cards
- Loyalty Badges
- Merit Badges
- Game Setup
- First-Game Recommended University Setups
- Player Office Setup
- Gameplay
- 1. Place a Mage
- 2. Cast a Spell
- 3. Use a Vault Item
- 4. Use a Supporter
- 5. Take a Bell Tower Card
- Resolution Phase
- Game End
- Common Effects
- Resources in Argent
- Options and Extras
- Frequently Asked Questions
- The Candidates
- Larimore Burman, Dean of Sorcery
- Rikhi Kanhamme, Head of Applied Sorcery
- Exhufern Le Marigras, Dean of Natural Magick
- Mannheim Wildern, Director of University Development
- Byron Krane, Vice Dean of Mysticism
- Jesca Renetton, Curriculum Planner
- Rheye Cal, Vice Dean of Divinity
- Monad Riverime, University Auditor
- Xal Ezra, Dept. of Planar Studies Senior Researcher
- Lavanina, Dean of Planar Studies
- Trias Blackwind, Student Body President
- Jion Erjon, Honor Court Chief Justice
- Room Clarifications
- Resource Reference
Game Materials
- 36 Oversized Spell Cards
- 6 Candidate Starter Spells
- 25 Spell Cards
- 5 Legendary Spells
- 108 Standard Sized Cards
- 36 Supporter Cards
- 38 Vault Cards
- 18 Consortium Voter Cards
- 5 Bell Tower Offering Cards
- 6 Round Cards
- 5 Mage Power Reference Cards
- 15 double-sided University Board Tiles
- 6 double-sided Candidate Sheets
- Consortium Board and Influence Tracker
- 40 Plastic Coins: 30 Silver Coins (1 Gold), 10 Golden Coins (5 Gold)
- 50 Plastic Mana Crystals, represented by a Potion icon in the game.
- 35 Mage Pawns, represented by their hats in the icons in the game. From left to right:
- 1 Archmage's Apprentice
- 4 Neutral Mages
- 6 Planar Studies Mages
- 6 Divinity Mages
- 6 Mysticism Mages
- 6 Natural Magick Mages
- 6 Sorcery Mages
- 27 Intelligence Tokens
- 19 Merit Badge Tokens
- 27 Wisdom Tokens
- 42 Loyalty Badges, 7 each in 6 different colors
- 60 Marks, 10 each of 6 different colors
- 1 Astronomy Tower Marker
- 1 First Player Marker
- 4 Room Lock Markers
- 6 Influence Tokens
Argent: the Consortium is part of the World of Indines
The World of Indines is a growing fantasy world with a cast of vibrant, recurring characters. Many of the characters in Argent: the Consortium appear elsewhere in the games in this series. Duel against Byron Krane in BattleCON, have Rheye Cal lead your forces into battle in Pixel Tactics, and more! Visit www.worldofindines.com to learn more about the complete collection!
Core Ideas
There are a few big ideas at work in Consortium. Take a moment to look over them before you dive in.
Overview
The goal of the game is to acquire the most votes from Consortium Voters. After the fifth round, each of the voters will cast their vote according to a specific criteria, such as most Mana, most Gold, most Spell Research, and so forth.
During the game rounds, you will need to send out your Mages to learn the secret voting criteria, then carry out these goals to the best of your ability. The player who is able to acquire the most votes wins!
Secret Voters
At the end of the game, the Consortium votes to see who will be the next Chancellor of Argent.
Marks (Mark icon) then Influence Points (IP icon) are the tiebreakers for votes, but votes are what determine the actual winner.
However, the membership of the Consortium is kept a secret–you will have to use your Spells and your Mages to spy and find out who the voters are and how they will vote, then use that information to your advantage.
Mages
The best and most important way to get ahead of your rivals is by using Mages loyal to you to perform Errands. The number of Mages that can perform each task is small, so you will often be fighting with your opponents over these limited slots. Placing Mages is the most common action you will take on your turns.
Each kind of Mage has a different power, and you can get any kind of Mage to work for you, even if they are not from the department your candidate represents.
Spells & Vaults & Supporters
There are three types of cards in the game: Spells, Vaults, and Supporters. Each of these are acquired in different ways, but all have special effects that will give you an edge against rivals.
Variable Round Length
On each turn you will be able to take any action, including taking an offering from the Bell Tower near the University Board. Once the last Bell Tower offering is taken, the round ends and your Mages perform their errands.
Personal Discard Piles
Each player will manage their own discard pile during the game. Certain cards you use will go to your personal discard, so they will still count towards your victory at the end, even after you use them!
University Room Tiles
Each room of the University works differently, but most rooms will have slots for you to send your Mages on Errands. Through these Errands you will win the votes of the members of the Consortium and become the next Chancellor!
- Name – The room's name. If the room takes effect instantly, it will have an Instant Room (Instant icon) Icon beside it.
- Errand Slots – These places hold a single Mage, who will carry out that errand at the end of the round.
- Shadow Errand Slots – These slots hold a single shadowing Mage, which can be placed via special effects.
- Errand Effects – These are the effects of each slot.
- A/B Side - Every room has two sides. The A sides are generally more straightforward than the B sides.
University Central
The three University rooms with white borders are called University Central (Council Chamber, Library, and Infirmary). These three rooms are in every game. The rest of the rooms in a given game are decided randomly, by shuffling the tiles together and dealing them out.
A and B Sides
Each room in the University has two sides. For a more straightforward game (or for your first game), you should use just the A sides. Once you are experienced at the basics of Argent, you can randomly shuffle the tiles and use any combination of A and B sides, or even create your own 'pre-made' layouts to facilitate specific styles of play.
Candidate Sheet
Your Candidate Sheet contains all relevant information for your Candidate. It has a few notable parts:
- Name – The Candidate's name and current position at the University.
- Starting Items – This section shows what gold, mana, stats, and Mages that you begin the game with.
- Player Aid – This section explains the round progression, as well as what you can do on your turn.
- Department Icon – This is the Icon associated with your candidate's Department.
- Personal Discard Pile - Consumable Vault Cards and Supporters go into this pile after you use them. Everything in this pile is face-down, and cannot be checked by your opponents later. You can always look through your own discards.
- Mage Waiting Area - Mages who are not yet on the board can wait on your Candidate Sheet. This makes it easy for other players to tell how many Mages you have left to place.
Candidate Starting Spell
Each candidate also comes with a Starting Spell. The starting Spell works just like an ordinary Spell, except that it does not count for any votes at the end of the game and cannot be lost by any means.
Optional Open Discards
If your group prefers a more open-information game setting, you can play with face-up discards. In this case, the only face-down cards in the discard are those that are gained face-down (such as "Secret Supporters", explained later). Other players can look through the face-up portion of your discard pile at any time.
Bell Tower Offerings
Bell Tower Offerings represent favors earned from the University. A player may spend an action to gain one of these Offerings that haven't been claimed instead of sending a Mage on an Errand or casting a Spell. Once the last Bell Tower Offering is taken, players will no longer be able to take actions in the round, and the phase of play will move to resolving the placement of the Mages.
- Offering Name – This is the name of the Offering.
- Effect – This is the effect the player will gain by taking this Offering.
Round Cards
These cards are used to keep track of the current round in the game, but they have no specific special effects. They are reference cards only, and are not controlled by any player.
At the start of each round, reveal a new round card. At the end of the 5th Round, the game ends!
Mage Power Cards
These cards remind players of the different powers that Mages have, and can be placed beside the board or passed around for easy reference during gameplay. They are reference cards only, and are not controlled by any player.
You should keep each Mage Reference on its 'A' side, unless playing with the advanced 'B' Mage Powers.
Consortium Voter Cards
Members of the Consortium cast their votes at the end of the game to determine who will become the new Chancellor of Argent University. Each one votes based on a very specific criteria. Knowing and meeting these criteria will be the key to victory.
Marks are a special resource that let you look at Consortium Voters. When you gain a Mark, place it onto one of the Consortium Voters and secretly look at that Voter's card. You can reference the card again in the future if you forget.
- Title - The title of the card's voting criteria.
- Criteria - The Consortium member's voting criteria.
White-bordered Consortium Members are always in the game, and are face-up at the start of the game. The rest of the voters are drawn from a pool, and each may or may not be in play in any given game.
Spell Cards
Spell cards are used to cast Spells, which give you significant advantages during the Errand Phase. Each Spell has three different levels that increase in power.
- Intelligence/Wisdom Slot – Place a token into this space to learn the Spell or to level it up. This is called Research.
- Spell Level Title – The title of the Spell. This will show an icon as well if the Spell is a Reaction (Reaction icon) or a Fast Action (Fast Action icon) (explained on page 11).
- Mana Cost – The amount of Mana you must spend to activate the Spell.
- Effect – The effect that will take place when you cast the Spell.
- Department Icon – Each Spell belongs to one of Argent's departments of magic. Learning and advancing Spells will give you more influence in the department it comes from.
Spells are learned and upgraded through a process called Research. Research is awarded by many rooms in the University, as well as by Supporters. Research is explained in detail on page 17.
Legendary Spells
Legendary Spells are acquired from the Vault Deck, and are not shuffled into the Spell Deck at game start.
These Spells have a different back than regular Spells. Once in play, they work just like normal Spells.
You can obtain these with the "Sealed Scroll" Vault card.
Vault Cards
You can send your Mages exploring to recover valuable gear from the University's vaults, or purchase these items from the university stores.
These treasures offer great power or rewards. There are even a few Spells that have been sealed away because they were deemed too dangerous in the hands of the university's power-hungry professors...
- Name - The name of the Vault Card.
- Type - The type of the card, either Treasure (Treasure icon) or Consumable (Consumable icon). Consumables can be used only once. Treasures stay in play and can be activated once per round and are not discarded, only exhausted after use.
- Effect - The effect the Vault Card provides when it is used from your office.
- Gold Cost - The gold value of the card for purchase.
- Timing Icon - If the Vault Card is used as a Reaction (Reaction icon) or a Fast Action (Fast Action icon), it will have a timing Icon.
Supporter Cards
Many Consortium voters will vote based on who the influential students and faculty members of the University favor. You can get these supporters onto your side by gaining their cards.
- Name - The Supporter's name and position.
- Effect - This is the effect the Supporter provides when you use them from your office. They are discarded into your personal discard after use.
- Department - Each supporter card counts towards Departmental Control Votes on the symbol in its top left corner. Many Consortium Voters care about control of the various departments.
Loyalty Badges
Loyalty Badges are symbols your Mages wear so that they can identify each other as allies in your conspiracy to claim the Chancellorship. Whenever you place a Mage, attach one of your Loyalty Badges onto to bottom of its base. When rewards are claimed during the resolution phase, you can return that Mage to your Office and claim the rewards for yourself.
Merit Badges
Many errands and effects in the University will give you Influence Points. In addition to helping you win the Most Influence Vote, every 7 points of Influence you accumulate will give you a Merit Badge.
Merit Badges are an additional cost to use some of the best mage errand slots in the game (see the section on Merit slots on page 12).
Game Setup
Follow these steps to set up your game of Argent...
1. Set up Player Offices
The First Player is the one who most recently attended a university class. Give this player the Key Token to show that he will go first.
- In player order, each player chooses one of the available candidate sheets, or is dealt one randomly. Each player takes all the Marks and Loyalty Badges associated with their color.
- Choose a candidate side (side A is recommended for your first game) and claim the Starter Spell that has your candidate's picture on it.
- Take 2 Mages associated with your department (indicated by your candidate card).
- Take 6 Gold Tokens
- Take 2 Mana Tokens
- Take 2 Intelligence Tokens
- Take 2 Wisdom Tokens
- Candidates from the Department of Students (Students icon) also begin the game with an extra Merit Badge. These candidates are recommended for advanced players.
2. Set up the Consortium Board
Stack markers on the Influence Point (IP) track on the spot that represents 5 Influence. Stack these markers in reverse clockwise turn order starting from the last player, with the First Player's Marker at the top of the stack.
Place the two white-bordered Voters (who vote for most Supporters and most Influence) in their appropriate positions on the Consortium Board. Shuffle the Consortium Deck and deal 10 additional Voter cards face-down onto the Consortium Board.
3. Prepare the University
In every game, the white-bordered University Central tiles (Infirmary, Council Chambers, and Library) will be included somewhere in the University Board. The other rooms will be added randomly, depending on the number of players. Refer to the diagram on page 10 in order to setup the board.
For your first game, some specific University layouts are provided. These contain less complex rooms and effects, making them ideal for first-time players.
4. Place Mage Power Cards
Place the Mage Power reference cards to the side of the board. These are not used during the game, but they form a handy reference for what powers your Mages have.
Put reserves of Gold, Tokens, Merits, and Mana near the board for later use.
5. Set up the Bell Tower
Set up the Bell Tower Cards in a row below the Consortium Board, based on the number of players in the game. For example, in a 3-player game, all of the 2+ Bell Tower cards are included, but the 4+ and 5+ cards will be left out.
6. Set up Round Cards
Order the five Round Cards so that '1' is on the top and '5' is on the bottom, and place them near the Consortium Board. The '6' card is used in a Variant Game, and will not be included by default (see the Epic Variant, page 18).
7, 8, 9. Create Decks and Tableaus
There are 3 different kinds of cards in the game: Spells (7), the Vaults (8), and Supporters (9). Each of these has two parts.
Each Deck is shuffled and placed face-down beside the game area (remember to also set aside the Legendary Spells, which have a different back). Each deck also has a number of cards revealed and placed face-up beside it as a Tableau. Different effects will have you draw from the Deck or Draft from the matching Tableau. Note that you will always Draw from a deck and always Draft from a Tableau.
The Spell and Vault Tableaus each have 3 cards revealed. The Supporter Tableau has 5 cards revealed.
When you draft from the Spell or Vault Tableau, the empty space you create is filled in immediately from the top of the corresponding deck. The Supporter Tableau is only refreshed during the start of the round.
10. Draft Mages
Place all the remaining Mages in the center of the table. Starting with the last player and going in counter-clockwise order, each player drafts one Mage.
You may draft a Mage from any department, but you can never draft a Mage if you already have two of its type.
After drafting once counterclockwise, draft again clockwise from the Start Player, then once more counter-clockwise starting from the last player, so that each player has 5 Mages total. These Mages will remain in your service over the course of the game. Attach one of your colored Loyalty Badges onto each of your Mage's bases.
11. Place Starting Marks
In turn order, each player should choose and place a Mark on one of the face-down Consortium Voters. No two players may mark the same Voter in this way during this Setup step.
After you Mark a Voter, you are allowed to look at it. Now you have some idea of where to start on your conspiracy to control Argent!
Now you're ready for the first round!
First-Game Recommended University Setups
Note: All first-game setups use the A sides of each room. A 3- or 4-Player game is recommended for your first game.
The setup for two players can be found in the Options and Extras section on page 18. It is recommended for players who have played Argent before.
3 Players - 8 Rooms: Training Fields, Courtyard, Catacombs, Guilds, Vault, Council Chamber, Library, Infirmary
4 Players - 10 Rooms: Training Fields, Courtyard, Chapel, Catacombs, Guilds, Vault, Student Stores, Council Chamber, Library, Infirmary
5 Players - 12 Rooms: Training Fields, Courtyard, Chapel, Catacombs, Guilds, Adventuring, Vault, Student Stores, Council Chamber, Astronomy Tower, Library, Infirmary
In later games, you can use these basic University layouts, or create more complex ones.
The rules for resolution remain unchanged by the shape of your University, but room adjacency does matter for certain Spells and effects.
Player Office Setup
All of your assets are collectively called your 'office'. This is what your office should look like right before the start of the first turn.
- Your Mages waiting to be placed stand on your reference sheet.
- Future Spells, Vaults, and Supporters will be placed here beside your board.
- Reserves of Loyalty Badges, Marks, Gold, Mana, INT, and WIS Tokens.
- Your reference sheet, containing an empty personal discard pile.
- Your starting Spell.
Gameplay
Gameplay proceeds over a series of 5 rounds leading up to the election of the new Chancellor. At the end of the fifth round, all of the Consortium Voters are revealed and whoever has earned the most votes will win the game. Remember that whatever else happens, votes are the only thing that matter at the end of the game.
Over the course of the game, you will be trying to complete the objectives of as many Consortium Voters as possible. You will do this primarily by sending your loyal Mages out on errands.
A Mage sent to one of the errand spots on the board will bring back rewards for you at the round's end. This reward may be in the form of Influence in the University, research towards your Spells, treasures from the vaults, Supporters from among the staff and students, or additional resources like Gold and Mana.
Some turns might also consist of casting a Spell or utilizing one of the Vault cards or Supporters that you acquired on earlier rounds to give yourself an advantage or hinder other players.
When you have nothing left to do (or if you just think your position is better than everyone else), you can take Bell Tower Offerings. After all the Bell Tower Offerings are gone, the round ends immediately.
Each Round is divided into these three steps:
- Setup Phase
- Errands Phase
- Resolution Phase
1 - Setup Phase
Perform the following to set up each new round (you can skip this on the first round of the game):
- Refresh (turn vertical) any exhausted Spell and Vault cards. Unflip any spent Merit Badges.
- Return all Tableau Cards to the bottom of their respective decks (the order of the returned cards is not important). Reveal 3 cards to form the Spell and Vault Tableaus, and reveal 5 cards to form the Supporter Tableau. Return Bell Tower Offerings to their place.
- Perform any other Room-specific setup effects.
2 - Errands Phase
This is where most of the action in a round happens. Starting with the First Player and going in clockwise order, each player may take one Fast Action, then must take any one of these actions: (described in detail on the next pages)
- Place a Mage
- Cast a Spell
- Use a Vault Card
- Use a Supporter Card
- Take a Bell Tower Offering Card
The Errands Phase ends immediately as soon as the final Bell Tower Offering card is taken. Remember that taking a Bell Tower Offering ends your turn immediately, regardless of any other effects in play (such as extra actions granted by Spells).
Fast Actions
Fast Actions are used during the Errands Phase, but do not take up your turn. You can use one Fast Action before you take a regular Action.
You may not use a Fast Action after you take your Regular Action. Also, you may not use a Fast Action in place of a Regular Action (that is, taking two Fast Actions instead of a Fast + Regular).
Most Fast Actions work identically to the Regular Actions listed in the following pages. Spells, Vaults, Mages, and Supporters that grant Fast Actions are marked with a 'Fast' symbol (Fast Action icon) and will say "Fast Action: ..." instead of "Action: ..."
Reactions
Reactions are used in response to a specific action by an opponent–usually one that harms you or your Mages. The reaction can be triggered as soon as the action it responds to is completely resolved. Each player can only react once to a specific action, and reactions are used in turn order from the current player. Reactions cannot be reacted to.
In the case of reactions to Spells, the spell is cast and resolved, then relevant reactions are allowed to be played. In the case of the Mysticism Mage A power, this happens after the Spell is cast and reactions are taken.
3 - Resolution Phase
Starting with the top left room in the University and moving left to right across each row, remove Mages from their assigned errand slots and perform the stated effects of those slots.
If for some reason, a Mage is unable to complete the errand (usually due to a lack of Merit Badges) or if you just do not wish it to claim the depicted reward, then the Mage can accept 1 Influence Point instead as a consolation. In either case, the Mage returns to its owner's office.
Next Round
If this was the fifth round, proceed to the end of the game (page 15). Otherwise, reveal the next round card and start the next round with the Setup Phase.
1. Place a Mage
The rooms of the University contain many slots for Mages to be sent on errands. To send a Mage on an errand, pick up the Mage and place it into an empty slot.
Each of the six kinds of Mages has a special ability, depending on their associated department, which is signified by their color and represented by an icon.
The 'A' sides of each Mage are described here. The more advanced 'B' sides are used in an alternate game mode (see page 18).
- Off-White (Neutral) - Off-White Mages are Mages who aren't formally studying in any of the departments yet. They don't have any special powers, but you're going to need all the help you can get to reach the top!
- Red (Sorcery) - Red Mages are part of the department of Sorcery, and excel at destructive Spells. When placing a Sorcery Mage, you may choose to spend 1 mana to Wound a Mage and take their slot.
- Grey (Mysticism) - Grey Mages are part of the department of Mysticism, and are adept at summoning Spells. Whenever you take the 'Cast a Spell' action during the Errands Phase, you may also place a Mystic after the Spell is completed.
- Green (Natural Magick) - Green Mages are part of the department of Natural Magick, and are exceptionally tough. Nature Mages can never be Wounded, making them a great choice for holding important slots.
- Purple (Planar Studies) - Purple Mages are part of the department of Planar Studies, and are adept at time and space magic. They may be deployed as a Fast Action, so they can be used to grab powerful spots early, or fill in gaps before the last Bell Tower Offering is taken.
- Blue (Divinity) - Blue Mages are part of the department of Divinity, and are versed in protective magic. Divinity Mages can never be affected by Spells cast by rival candidates (they are still susceptible to Sorcery Mages, Vault Cards, and Supporters).
Only Regular Action Spells allow you to place a Mysticism Mage. Fast Action and Reaction Spells do not grant this opportunity.
Types of Errands
- Regular Errands - Regular Errands are carried out at the end of the round, during the Resolution Phase.
- Immediate Errands - Immediate Errands are carried out as soon as you place your Mage in the slot (after any reactions are carried out). Immediate Errands do not resolve again during the Resolution Phase or when moving within the room or into the room. Rooms with these Errands will have a Symbol near their names.
- Sympathy Bonus - These appear in the Infirmary, and you gain this bonus immediately whenever one of your Mages is wounded by an opponent.
Types of Errand Slots
- Regular Slot - This slot can be used to place a Mage normally. There are no special restrictions on this slot.
- Merit Slot - The best slots in the game require Merit to activate them. You will need to expend one of your Merit Badges by flipping it over at the moment that you claim this slot's rewards. You can also take the default benefit of 1 IP if you can't or don't wish to use a Merit Badge.
- Shadow Slot - These slots can be occupied by a Mage who uses a Shadow effect when placing. Shadowing is provided by many Spells, supporters, and Vault Cards. The Shadow Slot activates right after the regular slot next to it.
- Shadow Merit Slot - These slots are both Shadow and Merit slots, meaning that a shadowing Mage must spend a Merit Badge to claim rewards. A Shadow Merit Slot activates after the regular Merit slot next to it.
- Wound Slot - These slots appear only on Infirmary side B. You can send your Mages to one of these slots when they are wounded, instead of to the general infirmary.
Example: Jen places a Blue Mage into an empty slot. During the Resolution Phase, she will be able to gain her choice of 6 Gold or 3 Mana, provided that her Mage isn't knocked out before then.
Example: Trey places a Red Mage and activates the Red Mage power. This power allows him to spend 1 Mana to Wound another Mage and take its slot. Jen's Mage is sent to the Infirmary, while Trey's Mage remains in the slot.
2. Cast a Spell
To cast a Spell, pay the required amount of mana from your office and turn the Spell 90 degrees on its side to show that it has been exhausted. An exhausted Spell cannot be cast again that round (unless it is refreshed by another effect and turned back to normal).
You may cast any researched level of the Spell, but no matter what level is cast, the entire Spell card becomes exhausted.
After casting a Spell, perform the effects of the Spell as detailed on the card. Most Spell effects are explained in the Common Effects section (page 15).
Example: Trey casts 'Wave'. He rotates the Spell 90 degrees to show it is exhausted, then pays the required mana and performs the effects on the Spell (banish a Mage). He could not cast higher levels of the Spell, as they are not researched yet.
3. Use a Vault Item
The text on a Vault card will indicate when it can be used and will specify whether or not it takes an action to do so.
If the Vault Card is a Consumable, after using it and gaining the benefit, place the card in your personal discard pile.
If the Vault Card is a Treasure, rotate it 90 degrees to show that it is exhausted, like you would a Spell. During the Setup Phase each turn, exhausted Treasures refresh and can be used again.
Vaults utilize many of the same common effects as Spells.
Example: Brad uses the 'Spellblade' to wound another Mage, then place his own Mage in its slot. This item is a treasure, so he rotates it 90 degrees to show that it is exhausted. If this were a Consumable instead of a Treasure, he would discard it to his personal discard pile instead of exhausting it.
4. Use a Supporter
Supporter cards usually have special effects that you can call on later during the game, and so they stay in your office just like Spells and Vault Cards until you choose to use them.
After a supporter uses its effect, it goes into your personal discard, and counts for control of its Department, as well as for the Most Supporters vote at the end of the game.
Supporters utilize many of the same common effects as Spells.
Example: Eunice uses the 'Alumis' Supporter as her action. She marks 2 voters, then places the card face-down in her personal discard pile. She won't be able to use Alumis again, but the card will still count towards winning Voters at the game's end.
5. Take a Bell Tower Card
Taking a Bell Tower Offering speeds up the end of the round and gives you a small reward. Place this card in your Office, face-up. You gain the bonus described on the Bell Tower Card. Bell Tower Cards go back to the Bell Tower at the start of each new round.
Taking a Bell Tower Card immediately ends your turn, even if you do it as an extra action granted by an effect. You can never take more than one Bell Tower Card per turn, and you can never take a Bell Tower Card as part of a Reaction.
Even after you take a Bell Tower Card, you can still take other actions later in the round on future turns, including taking more Bell Tower Cards!
Example: Trey takes the 'Popularity' Offering Card and instantly gains its effect (gain 1 IP). If this were the last Offering Card, the round would end immediately.
Resolution Phase
When the final offering is taken from the Bell Tower, the round ends immediately. Players then resolve the rooms, starting with the top-left room and moving right across the top row, resolving the slots in each room from top to bottom. When the end of the current row of rooms is resolved, moved down a row and continue resolving rooms, starting with the left-most room in that row and moving right as before. Continue this until all rooms are resolved. When a Mage is resolved, remove that Mage from the room and place him back into his owner's office.
Once all rooms are resolved, continue on to the next round, or to the Game End if it is the 5th round.
Instant rooms and the Infirmary also have mages on them returned to owner's offices. Their effects have resolved previously in the round. They won't resolve again now.
Resolving Errands
Except for Instant rooms and the Infirmary, errands resolve at the end of the round.
To resolve an errand, pay any costs associated with the errand (including Merits), perform the effect or gain the resources listed on the slot, then remove the Mage in the errand slot, returning it to your office.
Most errand effects are explained in the 'Common Effects' section (pg. 15-16). Many errands also grant resources (pg. 17).
You can also forego any normal rewards and costs (even Merit costs) a slot offers to simply gain 1 IP. This can be especially useful if you are pushed into a slot that you don't have the resources to utilize, or you find yourself falling behind in the IP race.
Now you are ready to move on to the next round!
Game End
The game ends at the end of the 5th round. At this point, reveal all of the remaining Consortium voter cards one by one. Determine who receives the vote from each Consortium member.
When determining the winner of a particular voter, the player with a mark on that voter breaks ties. If multiple players have a mark, Influence breaks ties. The player at the bottom of the stack (the one who reached the value first) wins the tie if there is also a tie for Influence. If no player has any of something that a voter looks for, no one wins that voter.
At the end of the game, the player with the most votes wins! In the case of a tie for Votes, the player with the most Influence wins!
There are five major categories of voters...
Most of a Resource
Voters like Most Influence, Most Mana, Most Gold, and the like count the amount of the relevant resource that you have at the end of the game, after final resolution.
Most Intelligence/Wisdom counts all INT and WIS points that have been assigned to Spells as well as all unassigned points.
Most Marks counts the number of Marks placed on the Consortium Board to look at Consortium Voters.
Most of a Card Type
Voters like Most Consumables, Most Treasure, and Most Supporters count the number of cards you have of their type. This includes cards in your personal discard pile, and those still in your office. Even used cards count towards these totals.
Most Departmental Control
Voters like Most Planar Studies, Most Sorcery, and Most Natural Magick count up the number of corresponding icons on all cards and Spells you control. Each supporter typically has one departmental control icon. Each Spell has between one and three control icons, depending on the amount of research invested in that Spell. A Spell that is at Level 3 is worth 3 icons for departmental control, while one that is at Level 1 is worth only 1 icon.
Supporters in your Personal Discard Pile count towards these totals as well.
Your Mages, Candidate, and Starter Spell are all associated with a department, but these things do not give you any additional benefit to claim Departmental Control Voters. Only the Supporters and Spells learned during the game count towards these Voters.
Most Research
The Most Research Voter votes for the total combined levels of all Spells a player has mastered. So a player with a Level 3, Level 2, Level 3, and Level 1 Spell would have a total score of 9 for this voter.
Most Diversity
The Most Diversity Voter votes on the total number of different symbols in your Supporter collection, plus the number of different symbols in your Spell collection. As usual, cards in your Personal Discard Pile also count towards these collections.
The maximum total you can have for this Voter is ten: five different Supporter types and five different Spell types.
Common Effects
Many Spells, Vault Cards, and Supporters use similar terminology and effects. Here are descriptions of the most common effects and how they work.
Moving
Moved Mages are sent from one slot on the University Board to another empty slot. The Spell will tell you whether the Mage stays in the same room or if it moves to an adjacent room.
If a room is full, then it is not possible to move more Mages into that room. You can move rival Mages onto a Merit slot, especially if you think the player won't be able to utilize the Merit slot during resolution.
Slots that give instant rewards do not reward moving Mages into them (regardless of who does the moving), they only reward regular placement.
Wounding
Wounded Mages are sent immediately to the Infirmary. These Mages will remain in the Infirmary for the rest of the round unless they are healed or banished by a Spell or special effect.
The Infirmary provides a sympathy bonus that you can claim immediately when one of your Mages reaches the Infirmary. Candidates who send their own Mages to the Infirmary receive no such bonus.
Banishing
Banished Mages are sent back to the office of their Candidate. Banishment allows a Mage to be placed again later in the round, so it is usually not as devastating as Wounding. There is no sympathy bonus when your Mage is banished, however.
Place a Mage
Many Spells or effects let you place a Mage. This works just like regular placement, except that Mage Powers that work during placement (like the Red Mage Power) can't be used when placing like this.
Buy
Gaining a Buy allows you to buy a card from the Vault Tableau by paying the appropriate amount of Gold from your office. The Vault card you gain goes directly to your office and is ready for use. Vault cards are replaced instantly when bought.
Draw a Card
Drawn cards come from the top of their respective decks and go straight into your office, face-up for all to see and ready to use. If you draw a Spell into your office, you may Research it immediately. If you cannot or choose not to Research a drawn Spell, it is discarded to the bottom of the Spell Deck.
Locking
Locking affects an entire room at once. Place a Lock Token on the room, and no Mages can be moved into, out of, or within the room. Locking protects a room and its occupants from all Spells and effects, except for those which 'unlock' the room.
Locked Rooms still resolve as normal, and automatically unlock at the end of the Resolution Phase.
Healing
Healing returns a Mage from the Infirmary to your office. These effects can only target Mages in the Infirmary.
Discard a Card
Discarded cards return to the bottom of their respective decks. Discarding a card is different from using it.
Used cards (like Consumables and Supporters) go to your personal discard. Only effects that specifically discard will cause cards to go back to their decks.
Gain a Secret Supporter
Secret Supporters are drawn from the Supporter Deck and immediately go into your personal discard pile face-down. These supporters won't help you during the game, but they will count for your totals during scoring.
Shadowing
Many effects (especially Planar Studies Spells) will let Mages 'shadow' other Mages. Shadowing Mages occupy another dimension parallel to the real one, and carry out the errand of the slot they occupy immediately after the slot's actual occupant. Here are a few rules for interacting with Shadowing Mages:
- Shadowing Mages act after the Mage they were Shadowing, copying their action and spending a Merit Badge if necessary to do so.
- A Shadowing Mage may not be moved or harmed by any method except Spells and Vault cards that specifically refer to Shadowing Mages.
- Shadowing Mages lose their innate powers (so you cannot wound while shadowing with a Red Mage, for example, and Shadowing Blue Mages are still vulnerable to Spells).
- You may not Shadow your own Mages or an empty slot unless the Spell or effect specifically allows you to.
- You may not use a Spell to Shadow Mages protected from Spells (such as Blue Mages).
Draft a Card
Drafted cards come from their respective Tableaus and go straight into your office, face-up for all to see and ready to use. Remember that Vaults and Spells are replaced instantly when drafted. Supporter Cards are only replaced at the end of a round.
Resources in Argent
Influence
Many actions will give you Influence Points. Influence determines your popularity and control in Argent, and is used to break ties (after Marks) and acquire Merit Badges.
When moving up the Influence Track, the player who reached a space last places their influence disc on top of other discs. The disc that is lowest on the stack wins ties of Influence (the person who reached that space first has the advantage).
Mana
Mana is the power used to cast Spells. Acquired Mana goes into your office, and you can have any amount of Mana. Mana you own can be used to cast Spells or pay the costs associated with some Mage Powers. Used Mana is discarded back to a common pool.
Gold
Gold is used to perform many errands within Argent University, and its uses will vary greatly by the rooms included in the University. Acquired Gold goes into your office, and you can have any amount of Gold. Used Gold is discarded back to a common pool.
Intelligence
Intelligence determines the number of Spells you can memorize. Gained Intelligence goes into your office. It is rare to lose Intelligence, and only unused Intelligence can be lost (INT on Spells is safe).
Wisdom
Wisdom determines the number of Spell levels you can possess. Gained Wisdom goes into your office. It is rare to lose Wisdom, and only unused Wisdom can be lost (WIS on Spells is safe).
Marks
A Mark represents knowing the criteria of a Consortium voter. When you gain a Mark, you are allowed to place it on a Consortium voter. Now and at any time for the rest of the game, you are allowed to look at the voter.
Note: Resources like Gold, Mana, Wisdom, Intelligence, Merit Badges, and Marks are unlimited. If you somehow run out of these items, use an appropriate marker as a substitute.
Merit Badges
Many of the slots in the University Rooms will have a Merit mark inside them. To claim the rewards these slots provide during resolution, you will need to exhaust a Merit Badge.
When you reach a Merit threshold on the Influence track, you immediately gain an additional Merit Badge. You may place Mages speculatively, in hopes that you can score additional Merit during resolution.
Merit Badges refresh every round just like Spells, so you will be able to use each Merit you possess once per round.
Merit slots are extremely powerful. Try to keep your influence rising constantly, so you'll be able to take increasing advantage of them during the game!
Research
Research is a resource that allows you to move INT and WIS tokens from your personal supply onto Spells.
When you gain a Research, you may either learn a new Spell by drafting it from the Spell Tableau, or upgrade an old Spell.
When you learn a new Spell, you must place an INT token from your personal supply onto the Spell's 'Learn' slot. If you do not have any available INT tokens, you cannot learn a new Spell.
When you upgrade a Spell, place a WIS token from your personal supply onto the Spell's next 'Advance' slot. If you do not have any available WIS tokens, you cannot upgrade a Spell.
If you do not have any available INT or WIS when you gain a Research, or if you choose not to use the Research when you gain it, it is lost. Once you commit your INT or WIS by Researching, those points cannot be moved or lost!
Research Example: Brad has 2 Research from a room effect. He spends the first Research to draft a Spell from the Tableau and place an Intelligence from his supply on it. He spends the second Research to place a Wisdom Marker on the Spell and upgrade to level 2. Now he can use either Malaise or Haunt.
Options and Extras
There's more than one way to become the Chancellor of the world's most prestigious magical university! Here are some alternate game options that you can use once you are familiar with how to play!
Each variant will require new strategies and styles of play to become victorious!
Epic Variant
For players wanting a longer game to develop their Spell engines further, you may choose to play a 6th Round. Just place the 6th Round card onto the bottom of the Round Deck. Beware, as things can get crazy in a 6th round!
B-Side Rooms
You may choose to use all or some of the B-sides of the University room tiles. Create random mixes for new University setups that require new strategies to master!
Build the University
At the start of the game, before Mage Drafting, set up University Central (the three white-bordered rooms) in a single column in the center of the University Area. Players take turns choosing their favorite tiles and adding them to the University one-by-one, choosing side and position, until the correct number of rooms for the player count is reached. This may cause an irregular-shaped University, but the rules for resolving rooms remain unchanged.
Alternate Mage Powers
You may choose to play the game with all or some of the alternate Mage Powers. Just flip the Mage reference card to its B-side to show that these Mages have alternate powers. Another option is for each candidate to decide which power the Mages of their department have, and then let the rest be decided randomly.
Diversity Requirement
Instead of drafting Mages during step 10 of setup or receiving starting Mages of your department, give each player one Mage of each department for their starting five Mages. This is a great option if you want to offset potential departmental advantages with a certain board setup.
Argent for Two
Playing Argent with two players is a bit different than usual. Here are some changes to setup:
- Play with 9 University rooms in a 3x3 square.
- Draft Mages until each player has 7 Mages.
- Don't use Great Hall A or Dormitory in your setup.
- Always use Infirmary Side B in your setup.
- Remove the 2nd Most Influence and 2nd Most Supporters Voters before dealing the Voters.
Frequently Asked Questions
Q: Can I announce who the members of the Consortium are when I look at them?
A: You are allowed to say anything at any time, but you are never allowed to 'prove it' by showing the actual Consortium Voter cards to other players. Beware of bluffers!
If your group prefers, you can rule at the start of the game to ban all discussion of the board members.
Q: What happens if I cannot fulfill all requirements of a card's effect?
A: In this case, you fulfill as much of the effect as you can. For example, if a Spell says to wound all Mages in a room, and there are green Mages that can't be wounded and blue Mages that aren't affected by Spells, then other Mages will be wounded while these remain.
If a card says "do X to do Y", you must perform the first part in order to carry out the second part.
Q: What happens if I lose a Merit Badge?
A: If your IP drops below a Merit point on the board, then you must give up a Merit Badge. Unspent Merit Badges are taken away first, if you have any.
Q: Can I get more than two Mages of a single type if I gain them through special rooms? Can I have more than 7 Mages?
A: No. No effect can allow you to have more than 2 Mages of a single type under any circumstances. You can never have more than 7 Mages at a time (this limit does not include temporary mages like Trias Blackwind's "Living Image" or the Archmage's Apprentice).
Q: Can I place Mages from anywhere?
A: No, "place a Mage" refers specifically to placing a Mage from your office. Also, you may only place your own Mages unless specifically instructed to do otherwise by a Spell or other Effect.
Q: Does the "Power" Bell Tower card reduce the costs of rooms and Vaults Cards that require mana to activate?
A: No. "Power" only reduces the Mana costs of Spells.
Q: Can I take 1 IP instead of using an immediate errand slot when I place there?
A: Yes, you choose to do this immediately instead of gaining the slot's benefit.
Q: What order do Spell effects target Mages?
A: When playing with Infirmary B, the order your Spells affect other players' Mages can be important. In this case, Mages are affected in turn order.
Q: Is there a way for players to leave mid-game?
A: Life happens, and sometimes players may need to leave a game early. The player who is leaving should choose two rooms other than University Central. At the end of the round, these will be removed from the game. Play out the current round as normal, skipping over the leaving player. At the end of the round, remove the selected rooms and shrink the board as necessary.
Q: Do WIS/INT on your Spells still count as yours for purposes of Voters and other effects?
A: Yes. Things that key off of INT/WIS also count the ones you've placed on your Spells via Research.
Q: Can players draft neutral mages during the draft?
A: Yes, but there is no reason to unless an expert player wants to handicap themselves on purpose.
Q: Can players draft the Archmage's Apprentice during the draft at the beginning of the game? Or obtain him by some other means other than the Archmage's Study?
A: Definitely not. Nice try, though!
Q: Can you Banish and Wound your own mages?
A: Yes, unless the card says to do it to "an opponent's mage".
Q: Can you Heal an opponent's mage?
A: If you want to, for some nefarious reason.
Q: In the Astronomy Tower do you HAVE to pay to move the marker?
A: Yes. You cannot take the action the marker is on for free. If the marker on Side B reaches the end of the track you may take that reward. You don't have to pay to move it in this case, you'll just get the reward for free.
Q: Can you have more than 2 neutral mages?
A: Yes, since they have no power associated with them you may have more than two (usually this would only happen if a player playing a neutral character buys a neutral mage).
Q: If I use a Supporter that gives me a colored mage, but I already have two of that color or there are no more mages of that color, what happens?
A: You would receive a Neutral mage instead. If there are no more neutral mages, you cannot receive a mage from this Supporter.
Q: Can I banish/wound/move my own Shadowing mage?
A: Not unless the thing you are using specifically lets you target a Shadowing mage. They are off limits except for things which directly target Shadowing mages.
Q: Can things that "refresh" refresh themselves?
A: No.
Q: If determining the Most Influence or Supporter voter was determined by a tie, how would you evaluate the "Second-most" Influence or Supporter voter?
A: The player who was tied but did not win Most would win Second-most.
Q: Does "adjacent" include diagonal rooms?
A: No, orthogonal only.
Q: If I react to being Wounded in a way that saves me from going to the Infirmary, do I still get the Infirmary bonus too?
A: No. You don't go to the Infirmary, so you won't get the bonus.
Q: If using the B Side Mysticism Mage power to reduce a mana cost for a spell, it is reduced to a minimum of one. Can I use other effects to reduce the spell cost to zero mana?
A: Yes. As long as Mysticism mages aren't the only thing providing the discount.
Q: Can temporary mages ever become permanent or vice-versa?
A: No, temporary mages must remain temporary, permanent must remain permanent. You may swap their colors, but their permanent/temporary nature cannot change.
Q: If I take a Bell Tower card but I don't want to or cannot make use of it, what happens?
A: Nothing, but it still counts towards ending the round. Using the card is not mandatory, it is meant to be a benefit to you.
Q: Can you steal the Archmage's Apprentice if someone already has it?
A: No, they keep it for the full round.
Q: Can you go through a player's discard pile to look at their card backs and count their number of Vault and Supporter cards?
A: Not unless you are playing with the Open Discard rule (see page 5 of the rulebook), in which case you can not only know how many, but what type they are as all but their Secret Supporters will be face-up for you to look at. Secret Supporters may never be looked at or counted. They're secret.
Q: If I cast Repeating Hex but I have upgraded that spell, what happens to my WIS tokens when I swap it?
A: The player that cast Repeating Hex keeps their WIS tokens, but loses the research (so the WIS returns to their Office, but can be spent later).
Q: If one has a card that allows one to react and go to the Shadow spot after being banished/wounded/etc, what happens if that shadow spot is already occupied?
A: You must suffer the consequence (banish/wound/move) because there is no longer a place for you to Shadow. You do not push the previous occupant out.
Q: If I am at my 7 Mage limit, but I gain another mage, can I swap it out with one of my current Mages?
A: Yes, as long as it doesn't put you over the limit of 2 per color.
Q: Do I have to gain beneficial effects if I don't want to?
A: You may gain only the benefits of Spells, Supporters, Vault, and Bell Tower cards that you want. For example, you use a card that gives you a Mana and a Research and only accept the Mana (if for some reason you could not or did not want Research). Benefits are never mandatory, but negative effects and costs always are.
Q: What if two players are tied for IP with the Most or 2nd Most Influence Voters?
A: Among players who Marked the voter AND are tied on Influence, whoever's Influence tracker was there first wins the voter.
The Candidates
Larimore Burman, Dean of Sorcery
A dragon who has retired from his days of fighting heroes, Burman lives under a human guise and teaches the ancient secrets of war magic to the mages at Argent. His spells are deadly, and his mages possess combat magic that they won't hesitate to use at his command.
Rikhi Kanhamme, Head of Applied Sorcery
One of the least liked professors in Argent, Rikhi has given up teaching and turned her focus to experimental pursuits, often with disastrous results for the students who work under her. Transfer to one of Rikhi's research groups is often threatened as an incentive for students who can't keep up with their peers.
Exhufern Le Marigras, Dean of Natural Magick
Exhufern is a thousand-year-old dryad whose life tree is at the heart of the university campus. When her tree sheds its coat every hundred years, Exhufern reincarnates into a new body. Her magic is as old and deadly as the elements, and her mages have a toughness that makes them difficult to push aside.
Mannheim Wildern, Director of University Development
An old druid who has watched over Argent for most of his life, Mannheim has decided to take a more active role in university affairs. As Chancellor, he hopes to expand the campus and extend the influence of Argent over the surrounding lands, as well as set up programs to extend practical magical education to younger and older groups than the university currently serves.
Byron Krane, Vice Dean of Mysticism
An ancient wizard who cast off his mortality and humanity ages ago, Byron has tried and failed several times to rule the world. He possesses an uncanny understanding of the nature of magic, and his mages work tirelessly to fulfill his schemes as he prepares ever more dangerous curses in his laboratory.
Jesca Renetton, Curriculum Planner
Argent's eccentric curriculum planner, Jesca consults all manner of fortune telling devices, spirits, and even divinities to set out the curriculum at Argent. Never once has she asked for a professor's opinion on the matter, and it is much to the wonder of professors that the curriculum remains surprisingly relevant despite this.
Rheye Cal, Vice Dean of Divinity
A servant of the Divines who hails from the Celestial Plane, Rheye is relentless, ruthless, and unscrupulous in the pursuit of her masters' goals. Rheye's magic keeps her mages in the game longer by healing their wounds and sending them back into the fray.
Monad Riverime, University Auditor
After traveling the land of Indines, Monad has retired from his adventures and taken up a post as University Auditor at Argent. Appointed directly by the Chancellor, Monad's job is to ensure the safety of students and staff by cracking down on dangerous research, corrupt professors, and all other manner of villainy.
Xal Ezra, Dept. of Planar Studies Senior Researcher
The Department of Planar Studies is the university's newest, but has rapidly gained fame due to the convenience and practical application of its work. Xal's magic allows him to operate in multiple dimensions at once, getting twice as much done as his rivals. His mages can manipulate time to move instantly.
Lavanina, Dean of Planar Studies
A terrifying alien from the far reaches of the universe that wears a mask of flesh, Lavanina has come to Argent on pure whimsy, or so she says. She wields Planar Magic far beyond what is taught at Argent, but holds back on using her full talents to 'even the playing field' with other candidates.
Trias Blackwind, Student Body President
Trias is an adventurer from the subcontinent of Amalao. After numerous adventures on the high seas and in faraway lands, Trias has come to Argent to unravel the secrets of the mysterious Cithara he has discovered, within which is imprisoned the spirit of his ancient ancestor. Seeing the corruption at Argent, Trias has resolved to return the university to the control of its students.
Jion Erjon, Honor Court Chief Justice
A student of law, honor, and divinity from the west, Jion leads the student Honor Court in investigating student infractions. As a parallel in position to the University Auditor, Jion keeps tabs on the students at Argent and protects them from one another, as well as dispensing justice to those who violate the school's code.
Room Clarifications
This page contains answers to some commonly asked questions about the more complex rooms.
Adventuring (A Side)
If you draw a Spell Card with this room's effect, you may immediately Research it. If you choose not to, it is discarded back to the Spell Deck.
Adventuring (B Side)
When you place in this room, you get to choose a card from any deck to place in it. When you resolve the room, draft its contents.
If you draft a Spell in this way, you may immediately Research it. If you are unable or choose not to, it is discarded back to the Spell Deck.
Archmage's Study (A & B)
The Archmage's Apprentice is a special Mage pawn that has all Mage powers.
Gaining this pawn is only temporary–it leaves your service at the end of the current round.
Astronomy Tower (A Side)
The Astronomy Tower Marker starts on the leftmost space. You can only claim rewards once per slot, no matter how far you move the Marker.
The Marker stays in place between rounds.
Astronomy Tower (B Side)
The Astronomy Tower Marker resets to the far left every round.
You can only claim rewards once per slot, no matter how far you move the Marker.
Council Chamber (B Side)
You cannot choose the same effect more than once if you are using one of the top three slots.
Great Hall (A & B)
You can place up to 3 Mages in this room as a single action. This only works with the regular action 'Place a Mage', not with Mage placements granted by Spells, Supporters, or Mage Powers, and not with Mages placed as a Fast Action.
Infirmary (A & B)
This room cannot be placed in directly. This room can never be locked. Mages in this room cannot be wounded. Mages in this room can be banished (this is effectively healing them!)
Infirmary (B Side)
When your Mage is sent here, you can place it into one of the top two slots instead of the central area, if those slots are still open. Note that you still won't get a reward for wounding your own Mages, even if you use these slots.
Student Stores (B Side)
No matter how many Buys you have, you can only cycle the Vault Tableau once, and this does not consume your Buy. This only applies to Buys in the Student Stores, not to Buys granted by other sources. The Merit slot's discount applies to both Buys.
Vault (A Side)
Three Vault cards are revealed and drafted from the deck. Any unselected cards go back to the bottom of the deck.
Resource Reference
Influence Points (IP)
How to use it:
- Breaks ties for individual Consortium Voters (after Marks) and for the final score in votes
- Unlocks Merit Badges
- Wins the Most Influence and 2nd Most Influence Votes
How to get it:
- Various Rooms, Spells, Supporters, and Vault Cards
- Infirmary Bonus (University Central)
- Skip any errand you have assigned a Mage to perform to take 1 IP.
Mana
How to use it:
- Expended to cast Spells
- Expended to carry out errands in some rooms
- Wins the Most Mana vote
How to get it:
- Various Rooms, Spells, Supporters, and Vault Cards
- Infirmary Bonus (University Central)
Gold
How to use it:
- Expended to carry out errands in some rooms
- Expended to gain favors from some Supporters
- Wins the Most Gold vote
How to get it:
- Various Rooms, Spells, Supporters, and Vault Cards
- Infirmary Bonus (University Central)
Research
How to use it:
- Immediately learn a Spell from the tableau or upgrade an existing Spell by spending either Intelligence or Wisdom
- Wins the Most Research vote
How to get it:
- Various Rooms, Spells, Supporters, and Vault Cards
- Library (University Central)
Intelligence (INT)
How to use it:
- Applied (not expended) to learn new Spells
- Wins the Most Intelligence vote
How to get it:
- Various Rooms, Spells, Supporters, and Vault Cards
- Library (University Central)
Wisdom (WIS)
How to use it:
- Applied (not expended) to upgrade Spells
- Wins the Most Wisdom vote
How to get it:
- Various Rooms, Spells, Supporters, and Vault Cards
- Library (University Central)
Marks
How to use it:
- Breaks ties for individual Consortium Voters
- Allows you to look at Consortium Voters
- Wins the Most Marks vote
How to get it:
- Various Rooms, Spells, Supporters, and Vault Cards
- Council Chamber (University Central)
Vault Cards
How to use it:
- Use during the Errands Phase for various benefits.
- Wins the Most Treasures vote
- Wins the Most Consumables vote
How to get it:
- Various Rooms, Spells, Supporters, and Vault Cards
- Library (University Central)
Supporter Cards
How to use it:
- Use during the Errands Phase for various benefits.
- Wins the Most Departmental Influence Votes
- Wins the Most Supporters and 2nd Most Supporters Vote.
- Wins the Most Diversity vote
How to get it:
- Various Rooms, Spells, Supporters, and Vault Cards
- Council Chamber (University Central)
Spells
How to use it:
- Use during the Errands Phase for various benefits.
- Wins the Most Departmental Influence Votes
- Wins the Most Diversity vote
How to get it:
- When you gain Research, you can acquire a new Spell from the Spell Tableau.
Merit Badges
How to use it:
- Use once per resolution to take advantage of Merit slots.
How to get it:
- One is unlocked for every 7 IP you accumulate.