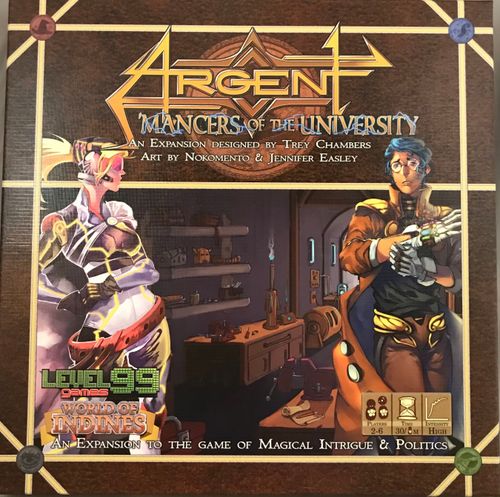
Argent: Mancers of the University
Argent: Mancers of the University Rulebook
Table of Contents
Table of Contents
What's a Module?
Modules are small additions to gameplay that you can add to the basic game as you like to change it. You might want to play with some, all, or none of the extra modules in any given game. Most of the modules in this book are intended for players who are already familiar with the basic game, and we recommend not including them when you are teaching new players how to play.
This is your game, so explore the possibilities and play it your way!
Module #1 - The Department of Technomancy
The Department of Technomancy focuses on creating devices that work on the principles of science, guided and bent where necessary by magic. Its students are skilled in their pursuit of knowledge and endlessly creative in the ways they exploit that knowledge to create new spells and devices.
Required Materials
- 7 Orange Technomancy Mages
- 1 Double-Sided Candidate Board
- 7 Orange Loyalty Badges
- 12 Orange Marks
- 1 Influence Token
- 8 Oversized Spell Cards
- 1 Candidate Starter Spell (Double-Sided)
- 6 Spell Cards
- 1 Legendary Spell
- 10 Standard Sized Cards
- 8 Supporter Cards (Technomancy)
- 1 Voter Card ("Most Technomancy")
- 1 Mage Power Reference Card
Rules
The Department of Technomancy works just like any other Department in the University. It has Mages which are available to draft, candidates that can be played, Spells that can be learned, and a set of Supporters that can be added in. Just mix all the listed components with their matching regular components and play as normal!
Technomancy focuses on rapid research and the acquiring and using of Vault Cards. Thus, it is very handy to play with the extra Vault Cards included in this box as well.
If you wish, you can also substitute Technomancy for another department and remove that department entirely by taking out its Spells, Supporters, Mages, and Candidates.
- Sorcery focuses on Spell improvement.
- Divinity focuses on safety and retaliation.
- Mysticism focuses on Marks and disruption.
- Natural Magick focuses on controlling the board.
- Planar Studies focuses on acceleration.
Removing a department will vastly alter how Argent plays. Experiment and try it out!
Technomancy Mage Powers
Technomancy Mage Power (A): Places: Spend 3 Gold when placing this Mage to gain a Research.
Technomancy Mage Power (B): Places: When you place into a room with another player's Mage, you may pay 3 Gold to Mark a Voter that player has marked.
Module #2 - Visiting Archmage
Archmage Kimbhe has lost her staff somewhere on campus and is searching for it. If Kimbhe is on the Consortium Board, she will cast her vote for whichever player is able to acquire her staff. In the meantime, and regardless of whether she is on the board or not, whoever holds the staff can use its powers to their advantage!
Required Materials
- 1 "Archmage's Staff" Card (Spell Sized)
- 1 Voter Card ("Archmage's Staff")
Setup
The "Archmage Kimbhe" Voter card is shuffled in with the rest of the Voters during setup. The Archmage's Staff Card is placed beside the University, not under the control of any player.
Rules
The Archmage's Staff is a new kind of card with a Mage Errand Slot on it. A Mage placed on the staff will move the staff to its owner's office during the errands phase. The staff is resolved after all rooms in the university are finished resolving.
The player who owns the staff can use it by exhausting it (just like a spell). Using the staff is a normal action, and it can be used even if there is an opponent's Mage currently assigned to it.
If no Mage is assigned to the staff at the end of the round, its current owner retains it for the next round.
Archmage Kimbhe always gives her vote to the player who owns the staff at the end of the game. If no player owns the staff, she does not cast a vote.
A Mage standing on the staff loses its Mage Powers. This means even Mages who are normally immune to wounding or spells can be attacked while they stand here!
The staff has an A and B side, so you can choose from two effects when setting up the game!
Archmage's Staff Card (Side A, "The Will to Power")
Gain Control of the staff at the end of the round. A Mage here loses all Mage Powers.
Action: Gain your choice of 3 Mana, 2 Research, 1 INT, or 1 WIS.
The printed rulebook shows only the side A face of the Archmage's Staff card. The side B text is printed on the card and is not reproduced here.
Module #3 - Synthesis Workshop
Synthesis is a powerful and mysterious new method of Artifice that binds magic and treasures together to create new items.
Required Materials
- 1 "Synthesis Workshop" Room Tile
- 6 Synthesis Item Cards
Setup
Place the Synthesis Workshop Room Tile into the stock of available rooms and build the University as normal. If the Synthesis Workshop is placed into the University during setup, then Synthesis Items are available.
Rules
Synthesis Items are extremely powerful and can be obtained by using the Synthesis Workshop. When you use the Workshop, you gain the specific item depicted by the room from the stack of Synthesis Items. If you sacrifice a spell on side B, take back all INT and WIS from the spell. If you sacrificed a supporter on side A, that supporter must be in your office (and not your discard pile).
Synthesis Items count as Treasures and help you win the "Most Treasures" Voter.
Synthesis Workshop Room (Side B)
- Swap a Treasure and a Spell for a Synthesis Item.
- Swap a Treasure, a Spell, and 3 Mana for a Synthesis Item.
- The type of Spell you swap determines which Synthesis Item you will receive.
Synthesis Item: Hourglass of Fate
Synthesis Treasure. Reaction: When the last Bell Tower Offering is taken by another player, you may place a Mage.
The printed rulebook shows only the Hourglass of Fate card face. The text of the other five Synthesis Item cards is printed on those cards and is not reproduced here.
Module #4 - Scenarios
The world doesn't stop for a new Chancellor! Scenarios add new ways to play the game by giving special events and conditions to the Round Cards, as well as altering final scoring.
Required Materials
- 6 Scenarios, each with:
- 1 Scenario Explanation Card
- 5 Scenario Round Cards
Setup
Switch out the regular Round Cards with the Scenario-specific Round cards for your chosen scenario. Place the Scenario Explanation Card near the Voter board, and read it aloud to all players, performing any extra setup steps as instructed.
Rules
The Scenario Explanation Card will explain any new rules for the scenario.
Round Cards will either have an "Ongoing" effect that lasts for the entire round, or an "End" effect that occurs at the end of the round (after resolving all university errands). Read each card aloud at the start of the new round.
The Six Scenarios
'Mancers contains 6 new scenarios for you to explore...
The Well of Souls. Opening the gate to the Afterworld, Vice Dean Byron Krane floods Argent with raw magical power, but what costs come with this new power? A game that focuses heavily on mastering and using spells.
Talismans of Magic. The Department of Technomancy has given the various department heads a collection of powerful new items to field test, as well as opened its vaults wide. A game that focuses heavily on Vault Items and asymmetric starting advantages.
Dimensional Rift. An experiment gone wrong in the Department of Planar Studies is shifting portions of Argent in and out of a parallel dimension! A game that forces players to adapt to an ever-changing university.
Political Struggle. Factions divide the election board, and you will need to choose sides. Beware, as half of the election board will be given more votes than the other half. A game that introduces more negotiation and politics.
Key to the University. A campus-wide election for Chancellor, open to students and professors alike. In this mode, Consortium Votes convert to IP instead of being the final scoring. A game for players who like more traditional Victory-Point scoring.
Assassins. Desperate for power, the candidates have stooped to employing assassins to fix the election in their favor. A game for players who want more direct control of the scoring criteria.
Module #5 - Bell Tower Renovation
Argent's new Bell Tower is a masterwork of Technology that changes tones daily and provides new musical arrangements for students to enjoy between classes.
Required Materials
- 17 Additional Bell Tower Cards
Setup
At the start of the game, deal out a number of random Bell Tower cards equal to the number of players. The Initiative card must always be one of these dealt.
Rules
At the start of every round, shuffle the Bell Tower Cards together and deal out a new set of Bell Tower Offerings as required by your game size. The Initiative card must always be one of these dealt.
The Bell Tower Offering card texts are printed on the cards and are not reproduced in the rulebook.
Module #6 - Sixth Player
With a 6th department, now the race for the Chancellorship is even more competitive!
Required Materials
- None
Setup
You must play with the Department of Technomancy (for a total of 6 departments) during a 6-player game.
- You will use 6 Bell Tower Cards.
- You will play with a 15-room University, setup in a 5x3 configuration (5 tiles each across 3 rows).
Aside from these changes, gameplay and rules remain unchanged.
When playing a 6-player game, it is recommended that all of the players be experienced with the basic gameplay of Argent and any modules you will be using.
Module #7 - More Stuff
Expanded Materials
- 5 Oversized Spell Cards
- 40 Standard Sized Cards
- 5 Supporter Cards (1 per base game department)
- 23 Vault Cards
- 6 Extra Mages & Loyalty Badges (1 per base game department)
- 8 Merit Badges
- 6 Intelligence Tokens
- 6 Wisdom Tokens
- 14 Golem Temporary Loyalty Markers (2 per department)
- 12 Marks (2 per base game department)
- 5 University Board Tiles
'Mancers comes with a number of extra Supporters and Vault Cards. You can mix these in with your base game components and expand the basic game with new opportunities. Regardless of what modules you choose to play with, the new Vault Cards and the new Supporter Cards for the 5 standard departments do not need to ever be separated from your base game components.
Room Clarifications
This page contains answers to some commonly asked questions about the more complex rooms. The Synthesis Workshop is explained in more detail under Module #3.
Research Archive (A & B)
The Research Archive lets you 'move Research'. This moves INT and WIS tokens from one spell to another, or back to your office. You cannot remove INT from a spell that has any WIS on it. If you choose to remove all Research from a spell, it is discarded. This effect cannot be used to move INT and WIS tokens from your office onto a Spell or to Research new spells.
Research Archive (A) room slots:
- Gain 1 INT, Gain 1 WIS, and Rearrange your Research freely.
- Gain 2 Research, then move up to 3 Research.
- Gain a Research, then move up to 2 Research.
University Tavern (B Side)
Auctioning: Players make offers of Gold and/or Mana. The auctioneer chooses which offer to take, and gains these resources. He only keeps his own auction if there are no offers.
University Tavern (B) room slots:
- Look 3, Pick 1: Look at the top 3 Supporters of the deck. Auction one and discard the others to the bottom of the deck.
- Look 2, Pick 1: Look at the top 2 Supporters of the deck. Auction one and discard the others to the bottom of the deck.
- Reveal the top card of the Supporter deck and auction it.
The Auctioneer does not have to choose the best bid, but he does have to choose a bid if any bid is made (he can't keep the supporter for himself if there is a bid). Players can continue bidding for as long as they want. It's up to the Auctioneer to decide when to stop the bidding and award the supporter.
Golem Lab (A & B)
Instantly creates a new mage to carry out your errands. Mages granted by the Golem Lab are removed from play at the end of the turn, instead of being returned to your office. Mark Golems with the Temporary Loyalty Markers by placing them under the Golem's base, department side up. Remove it when it is removed from play. There are no Shadow slots in the Golem Lab.
Golem Lab (A) room text: Temporary Mages work for you, but are returned at the end of the round after errands.
- Immediately pay 1 Mana to place a Temporary Mage and Lock its room.
- Immediately place a Temporary Mage into any Shadow Slot.
- Immediately pay 3 Mana to place a Temporary Mage and take another action.
The printed rulebook shows only the side A text of the Golem Lab. The side B text is printed on the room tile and is not reproduced here.
Frequently Asked Questions
Q: What are the intended uses for the temporary loyalty markers with golem icons? A: To mark your Temporary Mages. You can also use these to mark Temporary Mages granted by effects from the base game, such as Living Image. These markers are not intended to be used with the Technomancy Legendary spell, as this spell does not create Temporary Mages.
Q: Golem Lab B Merit slot lets you place a temporary mage of any type. Does that mage have placement powers? A: Yes, it functions as a normal mage placement, but the mage itself it is temporary.
Q: For the second two slots in Golem Lab B, can the mages in those slots target themselves or other mages in the room? A: No, you must choose slots in other rooms in the University.
Q: Can I affect opponent's Synthesis Treasures with Spells like Disintegrate? A: No, that card references "Treasure" cards, but Synthesis Treasures are so powerful they cannot be affected by such means. They DO count towards the Treasure voter, however.
Q: In the Dimensional Rift scenario, can I exhaust cards but not use their effect in order to simply stall? A: No, if you exhaust a card you must take the action. If you cannot, then you cannot exhaust the card.
Q: How does "Shift" work with instant rooms and the Infirmary? A: Like other movement effects, this Swap would not give either Mage a reward from an Instant Room. However, if you use this Spell to send an opponent to the Infirmary, they would still receive the compensation from that room.
Q: What happens to Shadowing mages when Devastation is cast? A: They are wounded along with everyone else. This is not specifically mentioned, but it does say to ignore all Mage powers and their spell immunity is a power of a Shadowing mage.
Q: What happens to Shadowing mages when Flux is cast? A: They may still be rearranged on the new side of the tile, and mages may be brought into and out of Shadow freely. You cannot break the rules about Shadowing empty slots or your own mages, however.
Q: Is the Archmage's Apprentice every mage type for purposes of the Lab? Or does it just have all of their powers? A: It only has all of their powers. It cannot receive multiple rewards in the Lab and can only receive one reward (of the player's choice) or 1 IP.
Q: Can I use Possession on a golem or give up a golem to steal a normal mage using Possession? A: No, golems are animated objects and have no souls to possess.
Q: Can I use placement powers of Mages on the Archmage's Staff slot? A: Yes, you just can't use any passive abilities.
Q: When playing with the Bell Tower Renovation module, should I leave the Start Player card in every round? A: According to the rules, no. You treat it as any other Bell Tower card. But some people like having that be an option every Round, so you may leave it in as a group decision.