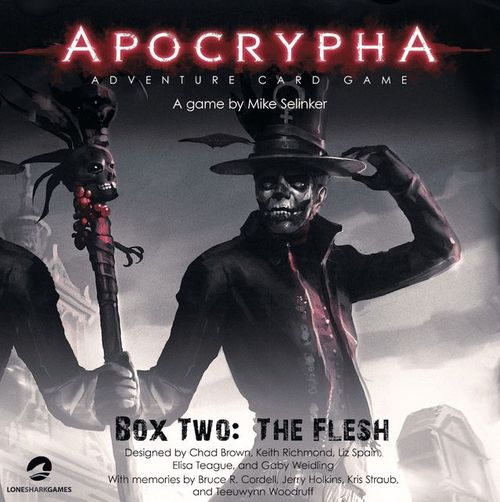
Apocrypha Adventure Card Game: Box Two – The Flesh
Apocrypha Adventure Card Game: Box Two – The Flesh Rulebook
Table of Contents
Table of Contents
Components
This is the second box of the Apocrypha Adventure Card Game. You need The World components to play The Flesh, which contains:
- The Book of the Deathless—98 cards, generally with white borders: 1 saint, 4 nexuses, 4 mutations, 9 omens, 8 Mind gifts, 12 Body gifts, 9 Soul gifts, 11 Rage gifts, 17 threats, 14 true threats, and 9 missions and fragments
- The Book of the Fae—101 cards, generally with purple borders: 1 saint, 5 nexuses, 4 mutations, 9 omens, 10 Mind gifts, 9 Body gifts, 12 Soul gifts, 10 Rage gifts, 16 threats, 16 true threats, and 9 missions and fragments
- The Book of the Golems—96 cards, generally with gray borders: 1 saint, 4 nexuses, 4 mutations, 9 omens, 12 Mind gifts, 9 Body gifts, 9 Soul gifts, 10 Rage gifts, 16 threats, 13 true threats, and 9 missions and fragments
- The Book of the Physicians—118 cards, generally with brown borders: 1 saint, 4 nexuses, 6 mutations, 9 omens, 10 Mind gifts, 11 Body gifts, 9 Soul gifts, 10 Rage gifts, 18 threats, 21 true threats, 1 structure, 9 missions and fragments, and 9 symptoms
- 4 saint pawns
- A storybook for The Book of the Deathless, The Book of the Fae, The Book of the Golems, and The Book of the Physicians
How to Play with The Flesh
Add the cards, pawns, dividers, and rules for The Flesh into the box for The World. To play a chapter from The Flesh, combine the chapter you wish to play with Base cards before you begin setup.
Chapter Powers
Some powers are specific to a chapter and may be modified from how they work in The World. These powers only apply when you are playing in the specified chapters or playing a card with these powers.
- Deathless: the divider The Well, unstashing Sustenance, and the powers for gravebound gifts, death type cards, improved boosts, and reanimation.
- Fae: unstashing Good Karma and the powers for carnival games and rolling doubles and triples.
- Golems: the keywords Drones, Clones, and ZOnes, unstashing Judgment, and the powers for rampage, universality, and meeting Aleph.
- Physicians: the structure And Pestilence Reigns, symptom cards, the keyword Malady, unstashing Comfort, and the powers for nexus mutations and metastasis.
Between Games
After each mission, you still reconstruct your deck the same way as in The World. You may keep any cards you earned from chapters in The Flesh, even if you switch to a different chapter. If you cannot construct a valid deck from the cards your choir has available, for each card you are missing, draw 1 new matching Alpha gift.
Fortuitously Answered Queries
Since we released The World, several nagging issues have troubled us in our dreams. We aim to set them aright here, so we can get a decent night's rest for once.
How many structures do I need for a mission? Typically three—a clock, a goal, and a nexus structure. Enter Here uses only Incarnate, and the Physician missions add And Pestilence Reigns.
What does it mean to "use" a virtue? It means you have set that virtue as a target. You're using Rage only when, in the Target step, you chose a Rage target. You're not using Rage when you add a Rage die to your Soul check. A power can change what virtue you're using, and thereafter you're using that virtue. But it doesn't change your target, or the type and amount of damage you'd suffer from failing the check.
What type of check can I boost? During the Assemble step, you may boost your (and only your) check using the virtue specified on the boosting card. You can't boost a check if you're not using the virtue, whether or not it would save your life.
When a virtue is followed by a parenthetical skill, what does that mean? It means two things, and it should only mean one. The thing it should mean is when you attempt a check using that virtue, you may add your dice from only the listed skill if you have it; if multiple skills are listed, you may choose only one. The thing it should not mean is totaling the number on your virtue and next to your skill; in this set's cards we'll use a plus sign rather than parentheses. In The World, imagine Rock Solid's #4 said "Mind + Study" and Unseen's #4 and #5 said "Mind + Sense."
Do I pay a cost before I trigger the cost's power? Always. For example, if you discard a card to heal some cards, you might heal the card you discarded. And you don't get out of following a card's instructions just because you can no longer see it. You're smart. You can remember these things.
Are threat powers always mandatory? Unless they say "you may," they're mandatory. The exception is when you're given a chance to do something to cause something else to occur. So, the Base threat Spy says "Recycle 1 Mind or Hack gift to keep 4 dice." You don't have to recycle the gift to keep 4 dice if you don't want, so there's an implied "you may" there.
Why does the minion A rule on structures always say "May go to Sanctify" rather than "Seal"? When you're told to go to Sanctify vs. a minion, you enter that step. You skip Guard and Escape since you only guard vs. masters and only masters escape. Then you can attempt to seal.
Can copies of minions let me go to Sanctify? No. Copies cease to exist without letting you go to any other step.
Do Lycanthropy cards count against my hand size? They do. When you draw cards, draw all the required cards, then deal with the Lycanthropy cards afterward.
What's my minimum hand size? It's 1. In theory, a card like the Deathless threat Haugbui could decrease your hand size to 0. But that's no fun at all, so we're capping the floor at 1 card.
What do I change when I go from Act 1 to Act 2? Nothing the mission doesn't tell you to change.
When a card has a display power, what does it affect? A display power affects whatever it is displayed at. If it's displayed by a saint's deck, it affects that saint. If at a nexus, it affects saints or cards at that nexus. If whatever it's displayed by is sacrificed, the displayed card is also sacrificed.
What are mutation dice? The dice rolled to get a number from 1-6 on a mutation card.
Do I die if I ever get a ninth death? Immediately, permanently, and, with luck, heroically.
In the example on page 21, why does Frank seal the nexus that Ophelia should just seal after she wins vs. Gryla? He shouldn't. The sentence "Now, with Frank at the same nexus as you and able to bury a card to seal Main Street, you remove it and all of its cards." should just be "Now you seal the nexus automatically, removing it and all of its cards."
Doesn't Ophelia make a math error in that example? She does. A 6, a 3, three 2s, and a 1 should really total to 11 on the three highest dice.
In the example on page 17, Zeez uses a Love Battery's cost-lowering power in Support. Should that be possible? It is… with the Love Battery in the Golems chapter in this box.
In a While Danger Remains mission, is my first investigation free? What if a threat goes into a nexus that isn't mine? Your first investigation is free and mandatory. If a threat you confronted would go into your nexus, it goes into the clock instead. But if it would go into another nexus, sacrifice it. Otherwise, a threat like Lost Soul would be unkillable!
Can the mission The Sugar Trap ever have a 5th Watchdog? No, it can only have at most 4 Watchdogs.
If I have Resist 2, and The Venom lets me gain Resist 1, which of those is my skill? Whichever you want. You probably want Resist 2.
A couple of other card notes would be nice. That's not a question, but sure. If we had The World to do over, we might say that:
- The Base nexus Farm should say "the Base true threat Hay Man" so you know what set the Hay Man is in.
- The Base gift Love Battery should specify that it lowers the cost of gifts "by 1."
- The Base gift Streetsweeper should have the symbol # before "End."
- The Base true threat Dust Bunny should say "this threat's archetype" should get shuffled into your nexus, rather than shuffling in the true threat card itself.
- The Base fragment The Garden Party should just say "Draw their hand size."
- The Candlepoint fragment The Swimming Hole should replace "that number of cards" with "the number of cards ~ discarded."
- The Skinwalker fragment The Commandment should have the symbol ~ before "Flip 1 die."
We might slightly adjust a few other cards if given the chance, but the changes are trivial, so we don't feel like bothering you with them. You're welcome.
The Book of the Deathless
Deathless: New Rules for This Chapter
- Unstashing: When you win a mission in this chapter, unstash every omen Sustenance.
- Death types: Some fragments, gifts, and threats in this chapter also have the death card type listed to the right of their main card type. When slotted, a card of this type functions as a death. Where the card goes at the end of the mission depends on its main type, not the death type.
- The Well: This chapter has a divider called the Well. It functions as a divider next to which you add cards during the first eight missions of this chapter. At the end of the mission, do not put them back in their card type dividers; however, if the number of cards of a type exceeds the number of cards in the Well's deck list, sacrifice random cards of that type from the Well until you reach the number of listed cards. During the seven gates and The Way Down Low, the Well's rules are still active according to your nexus' orientation, but it is not a nexus. When you play Welcome Oblivion, the Well becomes a nexus, and the cards you added to the Well will come back to haunt you.
- Gravebound gifts: Some gifts have powers that activate when they are the top card of your discard pile. After resetting your hand, you may reorganize your discard pile and put 1 of these cards on top. While a gravebound gift is on top of your discard pile, you cannot intentionally change the order of your discard pile. Powers that cause you to discard cards or shuffle your discard pile may cause gravebound gifts to leave the top of your discard pile.
- Improved boosts: Some gifts can be recycled for their boost power, rather than discarded.
- Reanimation: If you would fade, you may slot a new death to heal all discarded and buried cards, shuffle your deck, and reset your hand.
Deathless: Chapter Structure
You may complete the first seven Gate missions in any order. You must complete all of them to reach The Way Down Low, and complete that mission to reach Welcome Oblivion.
Gate of Hunger
Structures:
- Withstand Famine Wherever There's Trouble While Danger Remains. Use a number of minion B archetypes equal to the number of nexuses.
Nexuses:
- (1+) Farm (Blood Tribelands), (1+) Ice Fields (The White), (1+) Woods (Stony Mountain Wildland), (3+) Tent City (New Day Hostel), (4+) Shelter (Food Bank [Closed]), (5+) Hospital (Alberta Health Services), (6) Main Street (Downtown Hangingstone)
Master: Wendigo
Minion B: Famine (1-7)
Powers:
- $ Evaluate vs. a non-Deathless card: Trash 1 die. In Lose, add the card to the Well.
- $ End: You may recycle 1 card.
Gate of Mercy
Structures:
- Gather Helpless Children Wherever There's Trouble As the Hours Pass. Seed random omens and the master's archetype, if the master is not stashed, into the nexuses, then seed 2 minion B archetypes into each nexus. Do not seed minion A archetypes into nexuses.
Nexuses:
- (1+) Lake (Calling Lake), (1+) Manor (Grandma's House), (1+) Nowhere (The Long Walk), (3+) Fun Park (The Swings), (5+) Refinery (Pelican Portage Lumber Mill), (6) Power Station (Relief Generator)
Master: Grandmother Death
Minion A: Snow Angel
Minion B: Helpless Child (1-12)
Powers:
- When a Helpless Child archetype leaves your hand, add 1 new death to the Well.
- @ Damage: ^ May suffer the damage for them; if ^ cannot discard a damaged card, they bury the top card from their deck instead.
- $ Win vs. Helpless Child: Confront the true threat Snow Angel.
- $ Win vs. Grandmother Death: % May sacrifice 1 or more deaths to stash the threat.
Gate of Pestilence
Structures:
- Corner The Messenger Wherever There's Trouble As Things Get Strange And Pestilence Reigns. Seed the master and the minion A archetypes into the nexuses. Then shuffle 7 minion B archetypes into the clock. This mission uses the Physicians true threat The Spindles (ignore its malady keyword), the structure And Pestilence Reigns, and the symptom rules from the Physicians chapter on page 33.
Nexuses:
- (1+) Clean Room (Quarantine Field), (1+) Hospital (Protection Medical Services), (1+) Meat Locker (Town Morgue), (2+) Operating Theater (Triage), (3+) Refinery (Samples Lab), (5+) Shelter (Relatives Waiting Area), (6) Terminal (Medevac Crash Site)
Master: The Messenger
Minion A: Vector Outbreak (1-6)
Minion B: The Spindles (10-16)
Powers:
- $ Play a healing power: Add 1 non-Deathless healed card to the Well.
Gate of Silence
Structures:
- Duel The Lethe Wherever There's Trouble As Things Get Strange. Seed the master and minion A archetypes. When building the clock, use only 14 random omens, then shuffle 7 minion B archetypes into the clock.
Nexuses:
- (1+) Cemetery (Athabasca Memorial), (1+) Nowhere (The Endless Night), (1+) Ossuary (McMurray Mausoleum), (2+) Theatre (The Marceau Theatre), (3+) Chapel (Our Lady of Perpetual Silence), (5+) Bibliothèque (The Book Nook), (6) Museum (Memory Lane Antiques Hut)
Master: The Lethe
Minion A: Patch (1-6)
Minion B: Patch (10-16)
Powers:
- If @ speaks, they suffer 1 Soul damage.
- $ Evaluate vs. a Deathless threat: For each displayed archetype, add +1.
- $ Damage: You may add 1 fragment to the Well to decrease Rage or Soul damage by 5.
- $ Win vs. minion A: Display its archetype next to the mission.
- $ End: If @ spoke on your turn, add 1 new Omen of Doom to the Well.
Gate of the Crossroads
Structures:
- Cleanse Papa Ghede Wherever There's Trouble As the Hours Pass.
Nexuses:
- (1+) Bar (Nightrun Liquors), (1+) Motel (Hangingstone B&B), (1+) Refinery (The Evaporators), (3+) Nowhere (The Highway of Death), (4+) Woods (Timberlea), (5+) Cemetery (Athabasca Cemetery), (6) Ossuary (The Baron's Boneyard)
Master: Papa Ghede
Minion A: Zombie (1-6)
Powers:
- $ Win vs. Zombie: Add a new non-Deathless threat to the Well.
- $ Lose vs. a Deathless threat: Shuffle 1 new minion A archetype into a random other nexus.
- $ Sanctify: Shuffle any of the nexus's minion A archetypes back into the nexus. If the nexus is not empty, it cannot be sealed.
Gate of the Void
Structures:
- Corner the Mandurugo Wherever There's Trouble As the Hours Pass.
Nexuses:
- (1+) Lot (Tanker Truck Lot), (1+) Ossuary (Mass Grave), (1+) Quarry (Subsidence Pit), (2+) Shelter (Omamori Station), (3+) Sewers (Water Tanks), (5+) Meat Locker (Winter Storage), (6) Back Alley (Behind the Poutinerie)
Master: Mandurugo
Minion A: Kyonshi (1-6)
Powers:
- $ Start: If at a Hope nexus, heal 1. If at a Doom nexus, draw 1 card and roll 1 die; on a 4, add 1 card from your hand to the Well.
Gate of Tranquility
Structures:
- Cleanse Torpor Along the Trail As the Hours Pass.
Nexuses:
- (1+) Lake (Wandering River Basin), (1+) Ice Fields (Peaceful Snowbanks), (1+) Ossuary (Caribou Poaching Ground), (3+) Quarry (Dried-Up Copper Mine), (4+) Cemetery (Athabasca Memorial), (5+) Sewers (Underground Wellspring), (6) Nowhere (Complete Desolation)
Minion A: Torpor (1), Haugbui (2-7)
Powers:
- $ Initiate vs. a Deathless card: You may suffer 1 Soul damage; otherwise, draw 1 new non-Deathless threat and add it to the Well.
- $ End: If you did not investigate this turn, add 1 new death to the Well.
- $ Lose vs. a Deathless card: Shuffle 1 random card from the Well into your nexus.
The Way Down Low
Requirements: You must complete all seven gates before you attempt this mission.
Structures:
- Cleanse The King of Sunset Along the Trail As the Hours Pass.
Nexuses:
- (1+) Ice Fields (Safety Barrier), (1+) Power Station (Pad 192), (1+) Refinery (The Rigs), (1+) Repair Shop (The Dog House), (3+) Quarry (Tank Farm), (5+) Woods (Timberline), (6) Factory (Central Processing Plant)
Minion A: The King of Sunset (1-7)
Powers:
- $ Win vs. a Deathless threat: You may investigate your nexus.
- $ Lose vs. a gift: Add the gift to the Well; if it is a Deathless gift, shuffle it back into the nexus instead.
Welcome Oblivion
Requirements: You must complete The Way Down Low before you attempt this mission.
Structures:
- Duel Ereshkigal At the Stronghold As The Hours Pass. Shuffle the Well's cards and all minion B archetypes into a nexus deck for the Well. Set aside minion archetypes 11-16 for the Physician true threat The Spindles.
Nexuses:
- (1+) the divider The Well (Irkalla)
Master: Ereshkigal
Minion B: The King of Sunset (1), The Lethe (2), Torpor (3), Mandurugo (4), Papa Ghede (5), Wendigo (6), The Messenger (7)
Powers:
- All gifts and threats are Deathless.
The Book of the Fae
Fae: New Rules for This Chapter
- Unstashing: When you win a mission in this chapter, unstash every omen Good Karma.
- Carnival games: This chapter's cards offer physical challenges that represent chaos. You might spin a card, balance dice on your head, or throw your cards in the air. These actions introduce randomness, though you may use physical skill to attempt to control that randomness. However, if you know the outcome of an action before you do it, stop what you're doing and try something different. (If you cannot or would prefer not to play one of these games, you may substitute any activity that more represents a carnival game you want to play.)
- Doubles and triples: Before you keep dice, you've rolled doubles when at least 2 dice show the same number, no matter how often that happens. You roll triples when at least 3 dice do so.
Fae: Chapter Structure
You may complete the missions in any order. However, to attempt Season Close, you must have the fragments The Bone Trick, The Open House, and The One Man's Trash in your saints' haloes.
Wheels Up
Structures:
- Outmaneuver Jaeger Along the Trail As the Hours Pass.
Nexuses:
- (1+) Bar (The Rubberburn Saloon), (1+) Lake (Barebutt Creek), (1+) Lot (Deadhead Drive), (1+) Motel (Crusaders Inn), (1+) Power Station (McFuel Propane), (1+) Rally (Scooptown Main Drag)
Master: Jaeger
Minion A: The Wild Hunt (1-6)
Powers:
- Each threat is a trophy.
- $ Start: If you have more cards in your trophy pile than the master, you gain this power; otherwise, the master gains this power:
- Evaluate: If you rolled doubles, add +1.
- $ Investigate: You may confront Jaeger instead of the top card of your nexus.
The Oncoming Storm
Structures:
- Corner Nimhbus Wherever There's Trouble As Things Get Strange. Shuffle 6 minion B archetypes into the clock.
Nexuses:
- (1+) Farm (Uncle Hank's Farm), (1+) Shelter (The Tonganoxie Split), (1+) Silo (Wamego Silo), (3+) Compound (Compound 1080), (4+) Island (Sunflower Island), (5+) Woods (Firefly Forest), (6) Lake (St. Jacob's Well)
Master: Nimhbus
Minion A: Twister (1-6)
Minion B: Twister (11-16)
Powers:
- During this mission, you may build your discarded cards into a card tower; no horizontal card may rest upon the table or another horizontal card. You cannot touch your tower during an investigation.
- $ Evaluate: For each card beyond the 3rd that stands in your card tower at the end of Evaluate, add +1.
The Burning Eye
Structures:
- Withstand the Triath Boar Wherever There's Trouble As Things Get Strange. Loop the nexuses in a circle. Build the clock out of 12 omens and all the master and minion archetypes. Display the true threat Wicker Man at the nexus Lot.
Nexuses:
- (1+) Compound (High Mountain Freeway), (1+) Festival (Wicker Grove Mainstage), (1+) Lot (The Festival Fire), (1+) Park (Powerbridge Rock), (1+) Rally (YesterLand), (1+) Silo (The Big Ball Pit), (1+) Tent City (Sodapop City)
Master: Triath Boar
Minion A: Draw and confront 1 new Fae threat (1-11)
Powers:
- $ Start: Move the Wicker Man to the left. ~ Suffers 1 Body damage. Then sacrifice the top card of each unoccupied nexus.
- $ Damage: You may roll a number of dice to decrease damage by 1 for each die rolled. Sacrifice the top card of your nexus for each odd die.
- $ End: You may shuffle any number of omens from your hand into your nexus.
The Lost Prince
Structures:
- Corner The Ram Prince Wherever There's Trouble As the Hours Pass. After building the nexuses, shuffle 1 new Soul gift into each nexus. All nexuses begin Hope side up.
Nexuses:
- (1+) Farm (Eldon Farm), (1+) Lair (The Gothic Woodhouse), (1+) Silo (Wapello Storage), (3+) Bar (Chompy's Grill), (4+) Lake (Lake McKeeby), (5+) Nowhere (The Endless Cornfields)
Master: The Ram Prince
Minion A: Fomori (1-5)
Powers:
- $ Assemble vs. a Fae threat: You may bury 1 Ally gift to add 2 bonus dice.
Carnival at the End of the World
Structures:
- Hunt Frakshus Kreef Wherever There's Trouble As Things Get Strange. When building the clock, remove 2 random omens for each saint, then add 1 minion B archetype for each saint. This mission uses the Golem true threat Ball-Jointed Doll.
Nexuses:
- (1+) Festival (The Midnight BallyHoo), (1+) Fun Park (The Joints), (1+) Tent City (The Midway Plaisance), (3+) Lot (Roustabout Trailers), (5+) Stadium (The Big Top)
Master: Frakshus Kreef
Minion A: Red Marion (1-4)
Minion B: Ball-Jointed Doll (5-10)
Powers:
- At any time, $ may play cards from the hand of ].
- If $ suffers damage, ] also suffers the damage.
- If a power affects the cards in the hand of $, it also affects the hand of ].
- If you are the only saint when you start the mission, ignore the powers above; you gain the powers of the fragment on the back of this mission until Mission End.
Forty Miles of Bad Road
Structures:
- Cleanse the Dullahans Along the Trail As the Hours Pass. Display the novem Maxeh by the mission.
Nexuses:
- (1+) Rally (Scooptown Bike Rally), (1+) Quarry (Crook City), (2+) Main Street (Downtown Spearfish), (3+) Theatre (Sundance Mummer's Play), (1+) Bear Lodge (The Tower), (4+) Nowhere (The Cinnamon Sky)
Minion A: Dullahan (1-6)
Powers:
- When you would target Mind, use Body instead. When you would target Soul, use Rage instead.
- $ Lose vs. a Fae threat: Flip Maxeh facedown. When a nexus is sealed, flip Maxeh faceup.
Let Slip the Havocs
Structures:
- Cleanse the Band of Havocs Wherever There's Trouble As Things Get Strange. Seed 1 minion A archetype into each nexus; set the rest aside. Build the clock out of 17 random omens and 7 minion B archetypes. Display the novem Nemain by the mission.
Nexuses:
- (1+) Cul de Sac (Party at the Center of America), (1+) Main Street (Downtown Belle Fourche), (1+) Mega Mart (Wall Drug), (2+) Repair Shop (Badland Harleys), (3+) Power Station (Jolly Dump), (5+) University (Black Hills State), (6) Zoo (The Brontosaur)
Minion A: Band of Havocs (1-9)
Minion B: Band of Havocs (10-16)
Powers:
- $ Win vs. Band of Havocs: Display its archetype by Nemain. Once there are 7 archetypes displayed, a saint may confront Nemain when they investigate instead of investigating a card from their nexus.
- $ Win vs. Nemain: Win the mission.
- $ Lose: Shuffle 1 minion A archetype into your nexus.
Until Dawn
Structures:
- Cleanse the Stone Sirens Wherever There's Trouble As the Hours Pass. Display the novem Baev by the mission. Seed 1 minion A and 1 minion B into each nexus.
Nexuses:
- (1+) Bear Lodge (The Tower), (1+) Island (Mystic Isle), (1+) Lair (Sleepy Hollow), (2+) Tent City (Scar City), (3+) Quarry (Savageton), (5+) Woods (Yellowstone National Park), (6) Lake (Pathfinder Reservoir)
Minion A: Stone Sirens (1-7)
Minion B: Stone Sirens (8-14)
Powers:
- When a nexus is sealed, ~ may confront the novem Baev. If they win vs. Baev, they sacrifice 1 slotted archetype.
Season Close
Requirements: The saints must have the fragments The Bone Trick, The Open House, and The One Man's Trash in their haloes to attempt this mission.
Structures:
- Cleanse the Morrígan Along the Trail As Things Get Strange. When building the clock, exchange 5 random omens with 5 new Soul gifts. Display the novem Baev, Maxeh, and Nemain by the mission. Build a pile of 9 omens plus a number of threats equal to three times the number of saints. Shuffle 3 cards from this pile into each nexus and set the rest aside facedown.
Nexuses:
- (1+) Rally (The End of the Hunt), (1+) Festival (The Final Rave), (1+) Tent City (The Last Remaining Shelter from the Storm)
Powers:
- When a nexus is sealed, @ may confront 1 faceup novem. Each time you draw a Soul gift from the clock, choose 1 faceup novem to confront.
- $ Win vs. a novem: Flip the novem facedown and keep the Soul gift if you drew it from the clock.
- $ Lose vs. a novem: If you drew a Soul gift, you may shuffle it into the clock.
- Mission Win: If all novem are facedown, each saint may choose 1 new Fae fragment.
The Book of the Golems
Golems: Chapter Structure
To play a Golem mission, follow the instructions given on the Finite State Machine.
Keywords: A Golem threat will have one of three keywords—Clone, Drone, and ZOne. Each is a branch of missions listed on the chapter divider.
- Clone: Robotic animals and people, built out of man's fascination with replicating himself.
- Drone: Robotic vehicles, weapons, and implements, eschewing organic forms for improved functionality.
- ZOne ("zero-ones"): Incorporeal programs. They exist as bugs, as viruses, and as discrepancies in the system.
Golems: New Rules for This Chapter
- Unstashing: When you win a mission in this chapter, unstash every omen Judgment.
- Universality: Golem non-true threats are all black-bordered cards. The first time you play a mission from this chapter, shuffle all of them into the Base cards and do not remove them when you switch chapters. As you make your way through the Golems chapter, you will periodically be told to stash some of these threats, removing them from the Base cards.
- Rampage: Rampage is the scale of how aggressive or friendly the Golems are at the moment, and it responds to your efforts, successes, and failures. During Golem missions, Rampage changes all targets to win vs. Golem threats. There are two effects that adjust Rampage during play; Rampage +1 increases Rampage (but not above +3), while Rampage -1 decreases it (but not below -3).
Each time you begin a mission, get the Rampage divider from the box, and get the sum of the current marked +1 and -1 boxes on the missions you've completed so far. This tells you where Rampage will start in that mission; for your first mission, it will start at 0.
During every Golem mission, these two powers affect Rampage, reflecting your friendly or hostile efforts:
- When any saint fails a Body or Rage check to win vs. a Golem threat, Rampage +1.
- When any saint succeeds at a Mind or Soul check to win vs. a Golem threat, Rampage -1.
At the end of the mission, make note of the current Rampage. If it is greater than 0 (1, 2, or 3), then check the +1 Rampage register box for that mission. If it is less than 0 (-1, -2, or -3), then check the -1 Rampage register box for that mission. Each mission may only have one register box checked at a time, so if you replay a mission, adjust the checked box to reflect the most recent result at the end of that mission.
- Meeting Aleph: At Mission Start, you may use the power on the true threat Aleph to reset all Rampage values.
Golems: Finite State Machine
This flowchart governs the order of Golem missions. It is titled "Finite State Machine" in the storybook.
STATE 0: Choose an open branch. The branches are [CLONES], [DRONES], and [ZONES].
- YES: Go to STATE 1.
STATE 1: Play the first mission in the branch. Did you win?
- YES: Go to STATE 2.
- NO: Choose another open branch, or this branch if all other branches are closed, then [GOTO STATE 1].
STATE 2: Play another mission in the branch. Did you win?
- YES: Go to STATE 3.
- NO: Go to STATE Z.
STATE Z: Win any mission in another chapter, then [GOTO STATE 2].
STATE 3: Play the remaining mission in the branch. Did you win?
- YES: You've completed the branch! Increment loop register; [CLOSE THIS BRANCH].
- NO: If the current Rampage is greater than 0, then # must sacrifice 1 fleeting fragment. [GOTO STATE 3].
CLOSE A BRANCH:
- If the current Rampage is less than 0 (-1, -2, or -3), each saint may draw 1 new gift of a chosen type.
- If the current Rampage is equal to -3, each saint may stash 1 new threat of this branch.
Are there any open branches?
- YES: Go to STATE 0.
- NO: Go to EVALUATE RAMPAGE.
EVALUATE RAMPAGE:
- If all 3 Rampage registers for a branch are -1 / friendly, then you may stash all threats of that branch.
- You may replay any Golem mission, then adjust that mission's Rampage register. (If the mission's fragment is in any saint's halo, that saint must first sacrifice it.)
- After a replay is complete, re-evaluate final Rampage.
Golems: Clone Missions
Welcome to the Dollhouse
Structures:
- Corner the Ball-Jointed Doll Wherever There's Trouble As the Hours Pass.
Nexuses:
- (1+) Cul de Sac (Phinney Ridge), (1+) School (Green Lake Elementary), (1+) Zoo (Woodland Park Zoo), (3+) Lake (Green Lake), (4+) Motel (Ravenna Rental), (5+) Shelter (Kidhaven)
Master: Ball-Jointed Doll
Minion A: Action Figures (1-5)
Powers:
- $ Initiate vs. Action Figures: Roll 1 die and add the current Rampage. If the result is less than 4, you may avoid the minion and choose 1: Draw 1 new omen or examine 1.
- $ Lose vs. Action Figures: Shuffle 1 new threat into a random nexus.
Retropolis
Structures:
- Cleanse the Maschinengeist Along the Trail As the Hours Pass. Leave an area for a Friendly pile and Hostile pile.
Nexuses:
- (1+) Fun Park (Underground Seattle), (1+) Shelter (Pioneer Square Pergola), (1+) Skyscraper (Smith Tower), (2+) Terminal (King Street Station), (3+) Park (Olympic Sculpture Park), (4+) Mega Mart (Pike Place Public Market), (5+) Gangland (Skid Road), (6) Stadium (The Clink)
Minion A: Maschinengeist (1-8)
Powers:
- $ Win vs. Maschinengeist: If you used Mind or Soul, display its archetype in the Friendly pile; otherwise, display it in the Hostile pile.
- Mission End: If the Friendly pile has more cards than the Hostile pile, you may uncheck any Clones mission's +1 Rampage from the Rampage table.
Electric Mayhem
Structures:
- Gather the Clones Wherever There's Trouble As the Hours Pass. Seed 2 minion C archetypes into each nexus. Set the remaining archetypes aside. Shuffle the true threats into a Clones pile and set it by the mission.
Nexuses:
- (1+) Mega Mart (Condor General), (1+) School (DigiPen), (3+) Manor (The CEO's House), (3+) Repair Shop (Clone Hospital), (5+) Fun Park (Lightcycle Track), (5+) Tent City (The Ashheap)
Minion C: Action Figures, Ball-Jointed Doll, Descartes' Daughter, Maschinengeist, Scion (1-16)
Powers:
- $ Investigate vs. minion C: Confront 1 random true threat from the Clones pile.
- $ Terminate vs. minion C: Shuffle 1 new minion C archetype into a random nexus.
- $ Win vs. minion C: Sacrifice its archetype and true threat.
- $ Lose vs. minion C: Shuffle the true threat into the Clones pile.
- If the Clones pile is empty, win the mission.
Golems: Drone Missions
Special Delivery
Structures:
- Withstand the Hexcopters Wherever There's Trouble While Danger Remains. Use 6 minion A archetypes.
Nexuses:
- (1+) Main Street (Bellevue Residential Area), (1+) Mega Mart (Bellevue Square), (3+) Chapel (Rain City Church), (3+) Command Center (Sort Center), (4+) Bibliothèque (Bellevue Public Library), (6) Compound (The Locker)
Minion A: Hexcopter (1-6)
Powers:
- @ Damage: When ~ would sacrifice an examined gift from their nexus, they may sacrifice 1 matching gift and discard the examined gift instead.
From a Buick 6.0
Structures:
- Gather the Wardrivers Along the Trail As Things Get Strange. Build the clock out of 18 omens and 3 minion A archetypes, plus 1 minion A archetype per saint. Put the remaining minion A archetypes into a Negotiator pile.
Nexuses:
- (1+) Back Alley (Monster Road), (1+) Main Street (Downtown Renton), (1+) Repair Shop (Kaz's Kustoms), (3+) Rally (Stance Patrol Nights), (5+) Terminal (Underground Garage), (6) Nowhere (Unincorporated Suburbs)
Minion A: Negotiator (7-16)
Minion C: Wardriver (1-6)
Powers:
- When you draw an archetype from the clock, shuffle it into your nexus, then you may investigate.
- $ Win vs. Wardriver: You may go to Sanctify. If you cannot Sanctify, shuffle a minion A archetype from the Negotiator pile into your nexus.
Soul of an Old Machine
Structures:
- Duel Aleph At the Stronghold As the Hours Pass. Use a number of minion B archetypes equal to the number of saints + 2. Set the master archetype aside. Shuffle the minion B true threats into a Drones pile and set it by the mission.
Nexuses:
- (1+) Command Center (The Bitstsaron), (2+) Grid (The Pacific DC Intertie), (4+) Gangland (The Electronic Frontier), (6) Semantic Web (Cyberspace)
Master: Aleph
Minion B: Harvester IAV, Hexcopter, Negotiator, Wardriver (1-8)
Powers:
- When you confront a minion, confront 1 random true threat from the Drones pile. When no more minions remain in the nexus, shuffle the master archetype into the nexus.
- $ Lose vs. minion B: You may sacrifice 1 gift to sacrifice the minion's archetype.
- $ Terminate vs. Aleph: You may win the mission.
Golems: ZOne Missions
Augmented Unreality
Structures:
- Corner the Little Sister Wherever There's Trouble As Things Get Strange. Seed the master and minion A archetypes into the nexuses. Build the clock from 18 omens and 6 minion B archetypes.
Nexuses:
- (1+) Main Street (The Ave), (1+) Park (Volunteer Park), (1+) University (Red Square), (3+) Hospital (Group Health), (4+) Convention (AlephCon), (5+) Cemetery (Grand Army of the Republic Cemetery), (6) School (Garfield High)
Master: Little Sister
Minion A: ℵ1 (1-6)
Minion B: Little Sister (11-16)
Powers:
- $ Initiate vs. Little Sister: & Bury a total number of cards equal to the current Rampage; if this number is less than 0, $ may slot 1 new fleeting fragment instead.
The Turing Point
Structures:
- Cleanse the LANdemics Wherever There's Trouble As Things Get Strange. When seeding the master and minion A archetypes, recycle them instead of shuffling them. Build the clock out of 18 omens and 7 minion B archetypes.
Nexuses:
- (1+) Control Center (Seattle Internet Exchange), (1+) Grid (Terabyte Seattle), (1+) Semantic Web (Seattle Open Data Portal), (3+) Power Station (City Light), (4+) Hospital (nuSTART Internet Addiction Center), (5+) Clean Room (The White Space)
Master: LANdemic
Minion A: LANdemic (1-5)
Minion B: LANdemic (10-16)
Powers:
- $ Win vs. a gift: Choose 1: Draw the gift, or recycle it into your nexus deck and investigate again.
- $ Win vs. minion B: % May go to Sanctify.
- $ Lose vs. LANdemic: Examine 1 at each nexus; if any are gifts or omens, sacrifice them.
End User, License Agreement
Structures:
- Hunt the Mastermind At the Stronghold As the Hours Pass. Use a number of minion B archetypes equal to the number of saints + 2. Build a number of decks for the nexus Convention equal to half the saints rounded up.
Nexuses:
- (1+) Convention (Portland Oregon Expo)
Master: Mastermind
Minion B: ℵ1 (1-8)
Powers:
- $ Initiate vs. ℵ1: Roll 2 dice. On a result of 7, you may draw 1 new omen and go to Win; otherwise, if you roll doubles, % suffers Mind damage equal to the current Rampage and @ must add 1 mutation die to all checks during this confrontation.
The Book of the Physicians
Physicians: New Rules for This Chapter
- Unstashing: When you win a mission in this chapter, unstash every omen Comfort.
- And Pestilence Reigns: This is a new structure that goes at the end of Physician missions. Much of the rest of these new rules are described on that structure.
- Maladies: Maladies are the bio-engineered plagues that the Physicians are gifting to the world. Some true threats have "malady" as a keyword. Each mission lists 1 or more maladies that you display next to the archetypes, and the malady will describe the consequences.
- Symptoms: Symptoms are the manifestations of maladies. When you start a mission, put symptoms in a pile equal to the number of stashed Physician missions that have a malady in common with the current mission; the top card is considered displayed. If you lose vs. a malady, display 1 new symptom on the pile. While any symptoms are displayed, apply the powers of all displayed maladies and the top card of the symptoms pile. At Mission End, sacrifice all symptoms.
- Metastasis: Physician missions can die and be revived. When you lose a Physician mission, you stash that mission. When you win a Physician mission, you may unstash another Physician mission that shares a malady in common with the mission you won.
- Nexus mutations: In this chapter, mutations are frequent and surprisingly predictable. At the start of a mission, display 1 random mutation card next to each nexus. When you mutate, instead of drawing a random mutation, you use the mutation card displayed at your nexus; if you mutate vs. a master or a minion A, you add 1 more mutation die. You may always display 1 new symptom to trash the mutation dice.
Physicians: Chapter Structure
You may complete the first eight missions in any order. You must complete all of them to attempt the mission Encyclopaedia Apocalyptica.
Absent Friends
Structures:
- Gather Helpless Children Wherever There's Trouble As the Hours Pass And Pestilence Reigns.
Nexuses:
- (1+) School (Richland County District One), (1+) Shelter (White Rock Shelter), (1+) Tent City (The Camps), (2+) Meat Locker (Columbia Poultry Farms), (3+) Fun Park (South Carolina State Fair), (5+) Back Alley (Downtown Columbia)
Malady: Necrisis
Master: Research Assistant
Minion A: Sawbones (1-5)
Minion B: Helpless Child (11-16)
Powers:
- When you draw a minion B archetype, flip your nexus to Doom.
The Latest Strain
Structures:
- Cleanse the Phlebotomists Wherever There's Trouble As Things Get Strange And Pestilence Reigns. After seeding the minion A archetypes, shuffle 6 minion B archetypes into the clock.
Nexuses:
- (1+) Hospital (Mercy Hospital), (1+) Tent City (Isla Dorada Quarantine Tents), (1+) Terminal (Coral Gables Waterway), (3+) Stadium (Yellow Jacks Field), (5+) Festival (Samba Fiesta!)
Malady: Better Tomorrow Virus
Minion A: Phlebotomist (1-5)
Minion B: Hybridized Soldier (11-16)
Powers:
- $ Seal: Confront the true threat Better Tomorrow Virus.
Fables of the Reconstructions
Structures:
- Corner the Plastic Surgeon Wherever There's Trouble As the Hours Pass And Pestilence Reigns.
Nexuses:
- (1+) Hospital (Florida Medical Center), (1+) Manor (Second Life Residence Home), (1+) Operating Theater (Renu-U Surgical Center), (3+) Museum (Jupiter Inlet Lighthouse), (4+) Theatre (Juno Amphitheater), (5+) Cul de Sac (The Beach)
Malady: Zumps
Master: Plastic Surgeon
Minion A: Vivisectionist (1), EMT (11-14)
Powers:
- @ Confront vs. Plastic Surgeon: # Raise the cost of gifts by 1.
- $ Terminate vs. a master or minion: Display 1 new symptom, then exchange 1 gift in their hand or discard pile for 1 new gift of the same virtue.
Rejected Specimens
Structures:
- Withstand the Abominator Wherever There's Trouble While Danger Remains And Pestilence Reigns. Use a number of minion A archetypes equal to the number of saints, and an equal number of minion B archetypes.
Nexuses:
- (1+) Meat Locker (Smithsonian Cold Storage), (1+) Sewers (Washington Channel), (2+) Zoo (The National Zoo), (3+) Back Alley (Foggy Bottom), (4+) Precinct (MPDC HQ), (5+) Fun Park (The National Mall)
Malady: Zumps
Master: Abominator
Minion A: Nephilim Devourer (1-6)
Minion B: Zumps (11-16)
Powers:
- $ Avoid: You may display 1 new symptom to avoid.
The Hypervariable Region
Structures:
- Gather the Vital Fluids Along the Trail As The Hours Pass And Pestilence Reigns.
Nexuses:
- (1+) Clean Room (National Institutes of Health), (2+) Compound (Lockheed Martin), (3+) Main Street (Bethesda Row), (4+) Mega Mart (Bethesda Softworks), (5+) University (Uniformed Services University), (1+) Terminal (Immugene Dispensary)
Malady: Better Tomorrow Virus
Minion A: Research Assistant (1), Phlebotomist (2-6)
Minion C: Vital Fluid (11-16)
Powers:
- Mission Start: @ May display 2 new symptoms; if they do, # increase their Resist skill by 2 during this mission.
- @ Terminate vs. a minion: ~ Confront the true threat Better Tomorrow Virus.
The Hypocritic Oath
Structures:
- Act 1: Corner Dexter and Cynthia Wherever There's Trouble As the Hours Pass And Pestilence Reigns. Seed the master and the minion A archetypes into the nexuses.
- Act 2: Duel Uncle Fritz At the Stronghold As the Hours Pass And Pestilence Reigns. Shuffle the master, a number of minion B archetypes equal to the number of saints, and the threats set aside from Act 1 into the nexus House of Physicks.
Nexuses:
- Act 1: (1+) Hospital (Johns Hopkins Hospital), (1+) Operating Theater (Triage Wing), (2+) University (Johns Hopkins University), (3+) Meat Locker (Off-Campus Storage), (5+) School (Johns Hopkins School of Medicine)
- Act 2: (1+) House of Physicks (Bay View Asylum)
Malady: Necrisis
Master (Act 1): Dexter
Master (Act 2): Uncle Fritz
Minion A (Act 1): Polypagus (1-4)
Minion B (Act 2): Helpless Child (11-16)
Powers:
- $ Evaluate: Trash rerolled odd dice.
- @ Terminate vs. a minion: ~ Confront the true threat Necrisis.
- Act 1: If you would win the mission, set aside any threats remaining in nexuses, return all nexus decks to the box, and begin Act 2 instead.
- Act 2: Sacrifice Dexter; the true threat Uncle Fritz is now the master.
Out of Body Experiments
Structures:
- Hunt Master Putin Wherever There's Trouble As The Hours Pass And Pestilence Reigns.
Nexuses:
- (1+) House of Physicks (Khylsty Cell), (1+) Lot (The Wedge), (2+) Manor (Samovar House), (3+) Clean Room (Flagellation Chamber), (4+) University (Rochester Institute of Technology), (5+) Operating Theater (Den of Mystics)
Malady: Necrisis, The Spindles
Master: Master Putin
Minion A: Khlyst Ascetic (1-5)
Powers:
- $ Mutate vs. a Physician threat: Add 1 mutation die.
- $ Confront vs. a non-Physician non-true threat: Draw 1 new threat. If it is a Physician threat, confront it instead and sacrifice the original threat; otherwise, sacrifice the new threat.
A Better Tomorrow
Structures:
- Corner Doctor Stonewell Wherever There's Trouble As Things Get Strange And Pestilence Reigns. After seeding the master and minion A archetypes, shuffle 1 minion B archetype into each nexus. Shuffle 5 minion C archetypes into the clock.
Nexuses:
- (1+) Compound (Centers for Disease Control), (1+) Terminal (Hartsfield–Jackson Airport), (2+) Clean Room (Quarantine Zone 7), (3+) Precinct (Grady Detention Center), (4+) Factory (Coca-Cola Enterprises), (5+) University (Morehouse School of Medicine)
Malady: Better Tomorrow Virus
Master: Doctor Stonewell
Minion A: Hybridized Soldier (1-5)
Minion B: Vital Fluid (6-11)
Minion C: Phlebotomist (12-16)
Powers:
- Mission Start: Display a number of symptoms equal to the number of nexuses.
- @ Win vs. Vital Fluid: ~ Display its archetype at their nexus, then sacrifice 1 symptom.
Encyclopaedia Apocalyptica
Requirements: You must complete all other Physician missions to attempt this mission.
Structures:
- Cleanse the Physician Minions Wherever There's Trouble As Things Get Strange And Pestilence Reigns. Seed the minion A archetypes into the nexuses. Shuffle 6 minion C archetypes into the clock. Do not use the master archetype.
Nexuses:
- (1+) Clean Room (Biosafety Level 4 Laboratories), (1+) House of Physicks (Celsus's Residence), (3+) Operating Theater (Specter Headquarters), (4+) Meat Locker (CDC Storage), (5+) Hospital (North Druid Hills Hospital), (6) University (Emory University)
Malady: Better Tomorrow Virus, Necrisis, The Spindles, Zumps
Master: Celsus
Minion A: Homunculus Boss (1), Plastic Surgeon (2), Research Assistant (3), Vivisectionist (4), Abominator (5), EMT (6)
Minion C: Draw and confront 1 random malady (11-16).
Powers:
- $ Mutate vs. a threat: Add 1 mutation die.
- $ Seal: # Give their saint cards to ], then # give their hands to [, then # confront the novem Celsus. If more than half lose, display 1 new symptom and do not seal the nexus.
Storybook Change Log
Updates for the December 06, 2018 version of the storybook, as printed in the storybook's final page.
- Cover: Updated the font of "The Flesh Storybook" to match current font scheme.
- Page 8: Added clarification on how to use the Well in a mission when it is not a nexus.
- Page 9: Typo fix under "Gate of Hunger," changing "minion A" to "minion B".
- Page 10: Clarified under "Gate of Pestilence" that The Spindles is not a malady in this mission.
- Page 13: Typo fix under "Welcome Oblivion," changing "minion A" to "minion B".
- Page 15: Typo fix under "The Morrigan, Queens of the Phantom Sky," adding "of" in "sides of the."
- Page 21: Style fix under "Season Close" requirements to fragment names being bold italics.
- Page 33: Clarification under metastasis about what its purpose is.
- Page 34: Clarification under "Chapter Structure" by deleting "and/or stash" for redundancy.
- Page 36: Typo fix under "The Hypocritic Oath" Act 2 nexus list to House of Physicks.
- Page 38: Clarification under "Encyclopaedia Apocalyptica" by deleting "and/or stash" for redundancy.