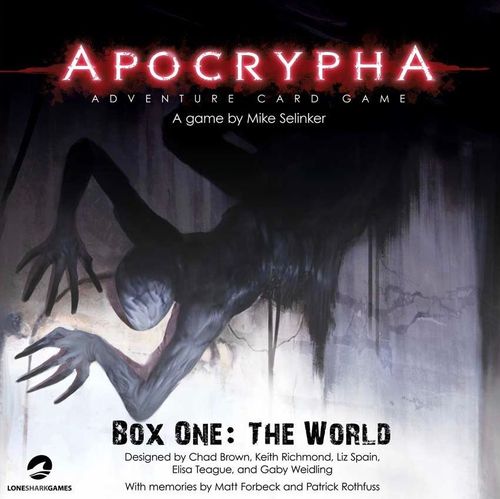
Apocrypha Adventure Card Game: Box One – The World
Apocrypha Adventure Card Game: Box One – The World Rulebook
Table of Contents
Table of Contents
The Object of the Game
In the Apocrypha Adventure Card Game, you work to thwart a modern apocalypse at the hands of nine powerful entities called the novem. Each of you is a saint with a halo of fragmented memories and a deck of cards that you can play. Throughout the many storybooks you can play in any order, your saints cooperate to investigate dark corners of the world, disrupting the plans of dark and troubling forces whose actions may doom us all. Masters and their minions will stand in your way, plotting schemes you must thwart before the doomsday clock runs out. Over a number of sessions, your saints improve their decks, gain powers through unlocking repressed and ancestral memories, and take on ever-evolving threats. And maybe, just maybe, stop the end of the world from coming. Today, anyway.
Players and Components
Number of Players
You can play Apocrypha as a cooperative card game against the game itself or play it as a roleplaying game with a guide. When playing in co-op mode, 1-6 players may play. When playing in guided mode, an additional player takes on the role of the guide for the mission.
The Boxes
This incarnation of Apocrypha is built out of a block of three boxes called the "Revelation Block." The first box is called The World, and contains the Base cards and a chapter called The Book of the Skinwalkers. The World contains:
- The Base cards—486 cards, generally with black borders: 7 player aids, 9 saints, 48 fleeting fragments, 40 deaths, 34 nexuses, 5 mutations, 60 omens, 44 Mind gifts, 44 Body gifts, 44 Soul gifts, 44 Rage gifts, 45 threats, 21 true threats, 9 missions, 13 structures, 3 master archetypes, and 16 minion archetypes
- The Book of the Skinwalkers—98 cards, generally with red borders: 1 saint, 3 nexuses, 4 mutations, 9 omens, 9 Mind gifts, 9 Body gifts, 10 Soul gifts, 10 Rage gifts, 15 threats, 17 true threats, and 11 missions and fragments
- 10 saint pawns and 6 plastic saint bases
- 4 red dice, 4 blue dice, 4 green dice, 4 purple dice, and 4 white dice
- A rulebook and a storybook for The Secrets of Candlepoint and The Book of the Skinwalkers
The two expansion boxes are called The Flesh and The Devil, each with the cards, pawns, and storybooks to play four more chapters. The Flesh contains the Deathless (white), the Fae (purple), the Golems (silver), and the Physicians (brown), while The Devil contains the Animus (green), the Damned (orange), the Dreamers (blue), and the Serpents (gold).
Other useful objects available separately for this game are the Apocrypha Soulbinder, which lets you arrange your saints' cards in haloes; the Apocrypha Playmat, which lets you display your cards on the table; and the Box of Hope and Box of Doom deck boxes, which let you hold your saint's cards.
Card Types
There are many types of cards in the game. These include saints that you play, fragments that you unlock, missions that you undertake, structures that guide your mission, nexuses that you investigate, omens that influence your efforts, gifts that you gain, threats that you confront, archetypes that represent important conflicts, mutations that change your investigations, and deaths that you suffer.
Regardless of type, cards have a few common features: a card number for each unique card, a chapter that tells you where it goes in the box, and a border matching its chapter. Black- and neutral-bordered cards go in the Base set, while those with different colored borders go in chapters named after factions in the world.
Saints A saint is the character you play. You can affect the game through your powers, four virtues (Body, Mind, Rage, and Soul), and skills (Charm, Conjure, Hack, Resist, Sense, Strike, and Study). A saint has a deck of gifts to play and is surrounded by a halo of fragments and deaths, built over multiple missions.
Fragments A fragment is a powerful repressed or ancestral memory gained as a reward for winning a mission. Black-bordered fragments represent fleeting short-term memories, while fragments with different borders represent enduring long-term memories.
Deaths A death is a vision of your demise. You get a death in your halo when you fade from the mission and can no longer use that slot for fragments. If all nine of your slots are filled with deaths, your saint is dead forever.
Missions A mission describes the unique setting, story, and method of play for the game you are about to play. This information is located within each chapter, on each mission card, and on each structure card. The storybook will give you The Lowdown, along with a setup and rules that are also on the mission card.
Structures A structure describes how part of a mission is set up or played. Since there is no canonical way to start, play, or end a mission, the goal, nexus, and clock structures will describe your mission.
Nexuses A nexus is a location you can investigate during a mission. Each nexus also has special rules for when you are there and how to guard and seal it. One side is oriented towards Hope and the other towards Doom. Each nexus also has a deck full of other card types: archetypes, gifts, omens, and threats.
Omens An omen is used to investigate and orient a nexus. A timer deck called a doomsday clock (or just "clock") is built out of omens. Omens are aligned to two sides: Hope and Doom. As the apocalyptic darkness encroaches on the world, Omens of Hope will gradually become harder and harder to find.
Gifts A gift is a resource that helps you win a mission. There are four types: Body, Mind, Rage, and Soul. On the bottom, a gift has chapter, skill, and trait keywords that may affect your powers. An Alpha gift is one that your saint can start with, represented by an icon in the upper right corner. An Enhanced gift is an altered version of a Base gift, represented by an icon.
Threats A threat is a hazard that comes out of a nexus and tries to harm or block you. Threats also have chapter, skill, and trait keywords that may affect your powers. A true threat represents a main threat in a mission; these include masters and minions, which change from mission to mission. The most powerful of these are the novem, the ultra-powerful entities whose actions may alter the world. Like gifts, chapters may have Enhanced threats that are altered versions of Base threats.
Archetypes An archetype is a placeholder for the masters and minions of the mission that are displayed by the mission cards instead of shuffled into the deck. Anything that happens to a true threat generally happens to its assigned archetype instead.
Mutations A mutation is a game-changing power that occurs when saints assist each other or when a card's power demands it, based on a power from a list on the mutation card.
Additional Components
There are also dice, pawns, and books that help you keep track of what you are doing in the game.
Dice Dice are rolled to make checks based on your saint's virtues and skills. There are five sets of four dice each in the game: Body dice are green, Mind dice are purple, Rage dice are red, Soul dice are blue, and bonus dice are white.
Pawns Pawns are used to represent your saint at a nexus.
Books The rulebook you are reading contains all the rules you need to play in both co-op and guided mode. Each chapter also has a storybook which describes its background and contains the unique rules needed to set up and play missions in that chapter.
The Golden Rules
If a card and the rules are ever in conflict, the card is considered to be correct. If cards conflict, then missions and structures beat mutations, mutations beat nexuses, nexuses beat saints and fragments, saints and fragments beat threats, and threats beat gifts and omens. Regardless of that hierarchy, "no" beats "yes," and "never" beats any other word. If an instruction is impossible, ignore the part of the instruction that is impossible.
In guided mode, if any part of the game and the guide's intention are ever in conflict, the guide's intention should be considered to be correct.
Playing Against the Game
Co-op mode is the method of play in which you work cooperatively with all players to win against the game, and none of you are the guide. At the end of these rules is a section on guided mode, which details what changes when one player acts as a guide and you play as a roleplaying game. You can switch back and forth between these modes using the same saints and cards.
Setting Up Co-Op Mode
Follow this process when setting up co-op mode. You'll need to choose your saints, prepare the mission, set up its structures, prepare the nexuses, and start the mission.
Choosing Your Saint
Each player creates a saint to represent them during the game.
- Choose a saint and place it on the table in front of you; the saint may be a new one from the box or one you have played before. You may also use a 9-card pocket sleeve to represent your halo, placing the saint in the center slot. If you are using an Apocrypha Soulbinder, you will find sleeves inside the binder.
- Find your saint's divider. If it has a deck already built, its cards should be behind it. (Despite each saint having a divider, you cannot build more than six saints at once, or you will run out of cards to play the game. If you want to build more, you can keep decklists.)
- If you gained any fragments and/or deaths on previous missions, slot them in any positions in a 3x3 halo around your saint. A slotted card must share at least one edge with your saint card or another slotted card. You may change this arrangement from mission to mission.
- Build your saint's deck if you do not have one. A new saint starts with a set of Alpha gifts as shown on the saint's divider; if any cards on that list are unavailable because they are in another saint's deck, draw random Alpha gifts of the appropriate virtue to replace them. At the start of any mission, your saint's deck contains:
- a number of Body gifts equal to your Body number.
- a number of Mind gifts equal to your Mind number.
- a number of Rage gifts equal to your Rage number.
- a number of Soul gifts equal to your Soul number.
- a number of omens equal to your Omen number drawn randomly from the box.
- any cards indicated by fragment powers in your halo.
- If you have a saint deck already, it must match the above pattern at the start of the mission.
Preparing the Mission
This section defines a general method of setting up a mission. As you follow these rules, note that the mission and structure cards often will overwrite sections of these rules.
- Choose a chapter from any box and open the storybook to that chapter. Find that chapter's divider; its back may have information that you will need to use during the chapter, which you track in pencil or erasable marker. Then, if you are choosing a new chapter to play, take out any cards from the box that are not Base cards, then place the cards from the additional chapter into the decks in the box. If you have just opened an expansion box, put any additional saints and nexuses from that box into the Base cards. (If you are playing with multiple chapters, put the cards from the selected chapters into the decks.)
- In the chapter's storybook, choose a mission from the chapter to play.
- Read the Lowdown in the storybook to familiarize yourself with the story, then display the cards you need to display. First, display the matching mission card and that mission's structure cards (cards for a mission are usually in bold italics in the storybooks). As you continue to set up, follow the rules on the structures used for the mission.
- Create the doomsday clock according to the mission's clock structure.
- Display the mission's true threat cards (listed as master and/or minions) by the mission card. Find and set aside the correct archetype cards for the masters and minions, which use rules on the goal structure. Minions are often grouped under A, B, and C to distinguish them from each other.
- Display the nexuses as stated on the mission's nexus list. Use only the nexuses specified for the number of saints playing this mission. For example, if a nexus is preceded by "(3+)", this means a game with three or more saints will include this nexus.
Preparing the Nexuses
- Display the nexuses with enough space between them for their decks; a nexus always enters play Doom side up. You can use Apocrypha Playmats to display these cards.
- Build the deck for each nexus according to the nexus structure. Each nexus's Doom side has a row of symbols showing its number of cards by type. Draw random cards of each type and put them facedown by each nexus.
- The goal structure may tell you to seed cards into nexuses. If so, draw a number of listed master and/or minion archetypes equal to the number of nexuses. If a master or minion type has multiple numbered archetypes listed, use as many as needed until you have at least one archetype for each true threat listed. Stop adding archetypes once there is one for each nexus unless told otherwise. For example, if the mission lists one master and many minions, and you have three nexuses, use one master archetype and the first two minion archetypes. If you must seed non-archetype cards, do so in the same manner.
- Shuffle the archetypes together, then deal them into the nexuses according to the mission's goal structure. If you are told to seed any other cards, do so.
- Shuffle each nexus.
Starting the Mission
- Arrange yourselves around the table in any order. Table position matters, so choose carefully. In this manner, you form a choir, a circular support system from saint to saint.
- Take your saints' pawns. The nexus structure will tell you where you can place your pawns.
- Each of you draws a hand of cards equal to your hand size from your deck.
- Play begins with whichever saint the choir chooses and the game proceeds clockwise.
Ophelia and Friends Set Up a Mission
You're playing the karmacologist Ophelia Willows, who has completed three missions. You slot your three fragments—The Fainting Spell, The Sallow Mistlight, and The Tale—in the center left, center bottom, and lower right slots of your halo. Your deck contains two Body gifts, three Mind gifts, two Rage gifts, and four Soul gifts, plus an additional Soul gift from The Tale. At the start of the mission, you add four random omens to your deck. Your two friends are playing Dr. Zeez and Frank Block, and build their saints in a similar manner.
The three of you have already played two missions in Candlepoint and another in Skinwalkers. You decide to go back to Candlepoint. You open The Secrets of Candlepoint storybook and choose the mission Christmas in Candlepoint. So, you remove all the red-bordered Skinwalkers cards and put them back in the Skinwalkers chapter.
After reading The Lowdown and learning about the dangers of the holiday season, you find and display Christmas in Candlepoint's mission card and the structures Corner, Wherever There's Trouble, and As the Hours Pass. The nexus list says "(1+) Chapel (Little Star Intercessional Chapel), (1+) Hospital (St. Pantaleon's Hospital), (1+) Main Street (Sprinkles), (3+) Manor (The Manger on Main), (4+) Fun Park (Christmasville), (5+) Lair (Blitzen Grotto)." Since you have three saints, you get the first four nexuses and ignore the Fun Park and Lair. Then, you use the true threat Gryla as the master and the Yule Cat and the Yule Lads as minion A. Since you have four nexuses, you set aside a master archetype card for Gryla, one minion archetype card labeled 1 to represent the Yule Cat, and two minion archetypes labeled 2 and 3 to represent the Yule Lads.
You now build the nexus decks for Chapel, Hospital, Main Street, and Manor. For the Chapel, you draw one Body gift, three Soul gifts, two threats, and two omens (the Chapel has no Mind or Rage gifts), and, without looking at them, you put them facedown on the Chapel. You also build the other nexuses following their deck lists. Because Corner tells you to seed the archetypes, you shuffle together the four archetype cards, then shuffle one into each nexus.
You build the doomsday clock according to the clock structure, As the Hours Pass. You get 24 random omens from the box and shuffle them together, putting the pile by the nexuses.
You sit with the players of Zeez on your left and Frank on your right. The structure Wherever There's Trouble says saints can start anywhere, so you place your Ophelia pawn at the Chapel. Frank joins you there, while Zeez heads to the Hospital. Looking at your hand sizes, you and Zeez draw six cards while Frank draws four. Looking at the size of the Yule Cat, the others decide that you get to go first. Merry friggin' Christmas.
Taking Turns
Each saint takes a turn. Go through the following steps in order on your turn; only you can do these things on your turn unless a card says otherwise.
The six main steps are:
- Start
- Support
- Investigate
- Sanctify
- Transfer
- End
You may play as many cards in each step as you like, but you may play each card or power your saint has only once per step. All cards have a timing that says what step they can be used on, corresponding to the bold terms in this section; you cannot do anything between steps, nor go back to a previous step except as noted below.
Start
In your Start step, your turn begins. The clock structure will describe how you start your turn. You will usually begin by drawing a card from the doomsday clock into your hand. When there are no cards in the clock at the start of your turn, you time out, and the mission ends.
Support
In your Support step, you can play cards that help you and your allies, such as by examining decks, healing saints, and so on.
Investigate
In your Investigate step, you investigate nexuses to find gifts, omens, and threats; you typically must play a card to investigate this way. If that card is an omen, it will have an orientation toward Hope or Doom; if the nexus's orientation is different than that of the omen, flip the nexus. The omen might also have conditions that affect the investigation, and these conditions end at the end of that Investigate step. An investigation might allow you another Investigate step, which you can do after you complete the first one; in the unusual case where you are given more than one extra investigation during the same Investigate step, the extras all combine into a single extra investigation.
When a power lets you investigate, flip the top card of the nexus deck. If it is an omen, draw it and flip the next card. When you flip a non-omen card, confront it, unless a power lets you avoid it. After the investigation is over, you may return to the Support or Investigate step if cards allow you to do so, unless you have already begun the Sanctify, Transfer, or End step.
Avoid: When a power lets you avoid an investigation, the investigation ends and the investigated card is shuffled back into the deck it came from.
Confront: To confront a card, you initiate, act, and terminate. When you must confront a new card, draw that card randomly from the box. The Confront step contains these steps:
- Initiate: In the Initiate step, you activate powers that happen before you act.
- Act: In the Act step, you deal with the card you're confronting, usually by attempting one or more checks to win vs. a gift or a threat (see Attempting a Check). If you fail one of those checks to win vs. a threat, you will suffer Damage (see Damage).
- Terminate: In the Terminate step, you resolve the confrontation, then end your investigation. The Terminate step contains one of these steps:
- Win: If you win vs. a gift, put it in your hand. If you win vs. a threat, sacrifice it. If a structure or any other card lets you seal your nexus after you win, you can go to the Sanctify step.
- Lose: If you lose vs. a gift, sacrifice it. If you lose vs. a threat, shuffle it into its nexus; if it didn't come from one, sacrifice it instead.
Sanctify
In your Sanctify step, you attempt to guard or seal your nexus, which often brings you closer to winning. You begin the Sanctify step when your nexus is empty on your turn or if another card asks you to do so (usually after terminating vs. a true threat that allows it); otherwise, you skip this step. If the steps Guard, Escape, and Seal occur, they must only do so in that order, but not all of them will occur every time you sanctify.
Guard: Guarding is the process of making sure a master can't escape to a particular nexus. When a saint terminates vs. a master, one saint at each other Hope nexus may attempt to fulfill the nexus's guard requirements to succeed at guarding; otherwise, skip this step. If a saint won vs. the master, that saint's nexus is guarded; otherwise, it is unguarded. After all nexuses are determined to be guarded or not, the master will attempt to escape.
Escape: Escaping is the process of the master trying to find a nexus to hide in. The master attempts to escape after any Guard step or Terminate step of any other confrontation vs. a master that tells you to go to the Sanctify step; otherwise, skip this step. The active saint sets the master archetype aside and the master attempts to escape (see Escaping). After this step, nexuses are no longer guarded.
Seal: Sealing is the process of removing a nexus and all its cards. If a card allows it or if your nexus is empty, you may attempt to seal the nexus; otherwise, skip this step. One saint at the nexus may attempt to fulfill the nexus's seal requirements to succeed at sealing; if a saint won vs. a master or the nexus is empty, that attempt is automatically successful. If you succeed, search the nexus for any master archetypes, and if you find any, set them aside. Sacrifice all other cards in the nexus. If you found any master archetypes, shuffle them together and put them back in the nexus so that the nexus only has the remaining masters; otherwise the nexus is empty, and therefore sealed. Sacrifice the nexus card and go to the Move step.
The master cannot escape to nexuses that are guarded, and you can only guard your nexus if it's Hope side up. A nexus on its Hope side has the same Guard and Seal requirement.
Transfer
In your Transfer step, you can move to another nexus or give a card to someone at your nexus. The Transfer step contains these steps:
Move: If you are at a nexus, you may move by putting your pawn at another nexus. In addition, any saint not at a nexus must move now even if it is not that saint's turn.
Give: If you did not move, you may give a card from your hand to another saint at your nexus.
End
In your End step, apply any End powers. Then you reset your hand. The End step contains these steps:
Reset: Discard any number of cards of your choice, then, if you still have too many cards, recycle any extra cards. Then, draw cards until you have cards equal to your hand size.
Pass: Your turn ends. The saint to the left will become the active saint and begin their Start step to take the next turn.
Special Steps
In addition, there are two steps that can enter the sequence at any time; they each create a temporary step which exists only for as long as it takes to resolve.
A Damage step occurs at any time anyone is assigned damage. If a threat or other card deals you damage and has a Damage power, that power only applies to damage from that card. A Play step occurs at any time anyone plays a power. Powers do not trigger themselves.
Sometimes a power will change the step you're in. If a power tells you to go to a step (for example, "go to End"), go to that step. However, if a power tells you to do an action that is the name of a step (for example, "move"), do it without changing your current step. Regardless, you may never investigate outside your Investigate step, nor sanctify outside a saint's Sanctify step.
If a power applies to an action that has the name of a step, it applies whenever you do that action. For example, a power with a timing of "Move" will activate whenever you move, and a power with a timing of "Reset" will apply whenever you reset your hand.
A card may tell you to copy a card, which will temporarily bring a copy of the card into the game. If it is a gift or threat, you must confront it, unless a power lets you avoid it. Unless you are told otherwise, once the copied card has been confronted, it ceases to exist. If you are told to confront a copy before resolving your current confrontation, suspend the current confrontation and resolve the new one, then return to your previous confrontation. A copied card cannot copy itself or any other card.
Ophelia and Friends Take a Turn
You're playing Ophelia, and it's your first turn of the mission. You're at the Chapel, and it's on the Doom side. Frank is also at the Chapel, and Dr. Zeez is at the Hospital. Zeez is on your left and Frank is on your right.
In your Start step, you draw the top card of the clock. It's the omen Righteous Anger, an omen of Hope that lets you investigate and add a bonus die vs. a threat. Moving on to your Support step, you discard Parasight to examine the top two cards of the Chapel and replace them in any order. The first card you flip over is the threat Strix. You also examine the card below that, which is the Rage gift Tail Gunner. You reload the cards atop the nexus deck, the Tail Gunner being on top.
In your Investigate step, you can choose among two omens in your hand: the Righteous Anger you just drew and Poverty, an omen of Doom that you had in your hand already. You want to hold onto your Righteous Anger, so you play Poverty to investigate, leaving the nexus on the Doom side and knowing it will trash your highest die vs. a gift.
You don't think you'll win vs. the Tail Gunner, so in your Avoid step you play the Rage gift Banhammer, which lets you reload it to avoid a confronted card. Normally you would shuffle an avoided card into its nexus, but since Tail Gunner is a gift, Banhammer says it lets you sacrifice the Tail Gunner and investigate again.
Using the investigation from Banhammer, you flip over the Strix. You feel confident you can't win vs. the Strix, so in your Initiate step, you ask Zeez to play the Soul gift Grifter. This lets Zeez recycle the Grifter to give you a card, in this case the Soul gift Wickety Wack Sack. Still in your Initiate step, you play it to slot both it and the Strix into your halo, leaving them there until your hand is empty.
You still have Righteous Anger, so you play it—and immediately regret it. You flip over the minion 3 archetype, which is one of the Yule Lads. You roll on the Yule Lads table in the Candlepoint chapter, getting a 4. That's Spoon-Licker, whose Initiate power is "Choose 1: Discard all but 1 card, or go to Lose." Discarding four of your five cards before battling Spoon-Licker sounds horrible, so you choose to lose the confrontation instead. In your Terminate step, you shuffle Spoon-Licker back into the Chapel.
Now you know Gryla isn't in the Chapel. So in your Move step, you move to the Manor. Maybe you'll find her there. Since you moved, you can't give a card to anyone, but there's no one else at the Manor anyway.
It's your End step, so you reset your hand, drawing back up to six cards. You pass the turn to Frank so he can look for trouble on Main Street.
Playing Cards
You play cards from your hand and halo. Playing a power on your saint counts as playing a card in your halo.
Powers on cards will tell you when they can be played, who they affect, and what they do; cards do what they say, and don't do what they don't say. A power's format is typically "Whose specific step or action - Your cost: What happens." For example, a Mind gift's power "Assemble - Sacrifice: Add 1 Mind die" can be played in any saint's Assemble step by sacrificing it to add a Mind die to their check. Here, "Assemble" is the Whose Step or Action, "Sacrifice" is the Your Cost, and "Add 1 Mind die" is the What Happens.
You can play as many cards as you want, but you cannot play a card in a situation that does not apply; for example, you cannot play a card that upgrades your Soul dice if you haven't rolled any Soul dice. Some powers impact other powers, usually when a card says it works in a special Play step.
Powers on your cards (typically your saint, gifts, omens, and fragments) are optional; you choose whether you activate them, unless they say you must do so, in which case you must do everything they say. Powers on all other cards are mandatory; you must activate them unless they say you may do so. A card with a power that works while slotted is only optional if a cost is listed before the colon or it says you may do it; otherwise, it is mandatory. If a card you choose to play has more than one power, you can choose only one; a card you must play will require you to activate all its powers. Some powers are contingent on a previous power, and will be so indicated by a "–" symbol at the start of the power.
If you're doing something with a card that isn't activating the power on that specific card, it doesn't count as playing it. For example, if a gift's power tells you to discard it to recycle three gifts, the discard power counts as playing the gift, but the recycled cards are not considered played.
Sometimes, a card may have more than one way for you to succeed or take a penalty. If the power says "Choose 1:" and presents you with options, you may only attempt one option. If the power says "otherwise," you may attempt the first part, and if you fail or cannot meet those requirements for any reason, you must do the second part; if you succeed at either part, you have fulfilled the requirement.
Positioning
Some cards affect you and your fellow saints based on their position in the saint's halo or the saint's position at the table. Powers can only be used to affect specific saints as stated on the cards, using an icon for each of the following:
| Who | Icon meaning |
|---|---|
| You | the "You" icon |
| One saint at your nexus that is not you | the "nexus companion" icon |
| The saint to your left | the "left" icon |
| The saint to your right | the "right" icon |
| Any one saint | the "any saint" icon |
| All saints in positions shown inside the circle | the "circle" icon |
| The active saint whose turn, step, or check it is | the "active saint" icon |
| One saint in a position defined by where the card is in your halo | the "halo position" icon |
Sometimes you will see these icons combined, such as an icon defining either you or a saint at your nexus, one defining both you and all saints at your nexus, or one defining all saints everywhere. No matter how many icons point to one saint, that saint is only considered to be affected once.
Table position is not necessarily permanent. If a card changes table position, the players must change places at the table. However, a change in table position does not change whose turn it is currently. For example, if you are taking a turn and a card causes you to exchange places with the saint to your left, you continue your turn and the turn order continues clockwise as usual, with the saint that is now on your right having to wait until the turn order comes all the way back around to take a turn.
A card might also change who you can affect. If a card says "You may not use powers to affect the saint to your left," then all your cards that would affect the saint to your left do not work that way until the card no longer has that effect on you.
A card might also rearrange the cards in your halo. If a card says "Exchange all the cards in your halo's left column with those in your halo's right column," do so immediately. You cannot rearrange them during the mission unless a card lets you do so.
Chapter Powers
Some powers are specific to a chapter, such as Lycanthropy in the Skinwalkers chapter. These powers only apply in the specified chapters.
Paying for Powers
Cards can be played by paying costs. Unless otherwise specified on the card, the player who owns the card always pays the cost; you are never required to pay a cost if it comes before a colon. Routine costs are listed below. In all cases, the word "deck" applies to your saint's deck unless the card specifies otherwise.
Some costs are part of a hierarchy, where cards can allow you to lower the cost (move to the previous cost, one down the list, if you can) or raise the cost (move to the next cost, one up the list, if you can). For example, a power that lowers a card's bury cost means the card is discarded instead.
- Sacrifice: Put it in the box.
- Bury: Put the card in the bury pile under your saint. At the Mission End, put it back in your deck.
- Discard: Put the card in the deck's discard pile.
- Recycle: Put the card at the bottom of the deck.
- Shuffle: Put the card into a deck and shuffle the deck.
- Reload: Put the card on top of the deck.
When raising or lowering costs, you may only change the cost of the card with the power you are affecting, not any other cards used in playing that card. The cost to be raised or lowered must be a cost to play the power, not any other costs in the power. If a cost is changed, but a power is dependent on the original cost, it retains its original cost for that purpose only. For example, when playing a gift that reads "Initiate vs. a threat - Recycle: Recycle any number of gifts. For each recycled gift including this one, decrease the target by 1," you could lower the recycle cost to play the card, but not the recycle cost on the other gifts. However, you'd still decrease the target by 1 for the gift you played, even though you lowered its cost to shuffle.
Other costs are not part of the hierarchy, and cannot be lowered or raised.
- Add: Take the card and put it in the hand or deck it needs to go to.
- Boost: Play the card to add another die of the same virtue and any appropriate skill dice on your check only. You may only boost once per check; this applies only to powers listed to the left of a gift's targets.
- Display: Put the card faceup.
- Draw: Take the top card from the deck. Unless otherwise specified, always draw from your deck.
- Examine: Peek at the next facedown card and put it back. A card that says "examine" and then a number means to examine that number of cards from your nexus, or wherever the card specifies.
- Exchange: Swap the card for another card.
- Flip: Turn the card over.
- Gain: Put the card in your halo or add the skill, powers, or other text noted on the card to your saint or the card specified.
- Give: Put the card in another saint's hand.
- Heal: Shuffle the card, chosen randomly from your discard pile, into your deck. A card that says "heal" and then a number means to heal that number of random cards, possibly of a specific virtue or keyword.
- Keep: Put the card into your hand instead of returning it.
- Return: Put the card back where it came from. If it returns to the box, this does not trigger sacrifice powers.
Sometimes you will be told to add a new card to a deck, your hand, or somewhere else. When this happens, search through the cards in the box to find the card you need, and if it is present, shuffle it into the deck or put it where it needs to go. If it is from a randomized section of the box (typically, fleeting fragments, gifts, non-true threats, and omens), shuffle the deck before drawing a random card of that type. If you're told to draw a new card and shuffle or otherwise put it into a deck facedown, don't look at it first.
Similarly, you may be told to draw a matching gift. This always refers to a virtue, and means virtue identical to the virtue of gift or check you just rolled, or whatever is specified.
If you are asked to draw, discard, or otherwise remove a card from your deck, and there isn't one there, you will fade (see Consequences). Examining, searching, and flipping do not count as removing a card.
Ophelia and Friends Play Some Cards
Later in the Christmas mission, things haven't gone as well as they did at the start. You're really beat up, with seven cards in your discard pile, two in your bury pile, and two in your hand. Given that you have only three cards left in your deck, you're perilously close to getting yourself a death. Thankfully, you know a friendly necrosurgeon. Well, a necrosurgeon, anyway.
Dr. Zeez begins the Support step by slotting the Soul gift Love Battery, letting Zeez lower the cost of gifts this turn. Now the doctor would recycle the Mind gift Prayer Wheel, healing two of your discarded cards. However, Zeez's saint power lowers the cost to heal, and the Love Battery also does that. So Zeez lowers the cost by two steps, reloading Prayer Wheel. You heal, picking two random cards from your discard pile and shuffling them into your deck.
That doesn't seem safe enough, so you sacrifice the fleeting fragment The Sallow Mistlight to draw a random buried card. A fragment isn't a gift, so the Soul Battery doesn't lower its cost. You draw your Worry Beads.
At the end of the turn, Zeez discards Love Battery from its slotted position, confident in keeping you biologically stable for at least a few more minutes.
Using Dice
Dice are used to determine success or failure, and sometimes for other purposes. You can never roll more dice of a color than are provided in the box (four of each virtue color and four white bonus dice), even if players have more dice than that. Generally, you keep three dice on a check, and the specified number of dice when it's not a check.
When you assemble dice, cards may require you to add or trash a number of dice. When you roll dice, you may be able or required to do one of the following actions as specified on the cards when you evaluate. If you need to do more than one, do them in this order.
- Roll: Roll the die.
- Reroll: Roll the die again.
- Explode: If you roll a specific number, roll one more die of the same virtue. Use a bonus die if you are already using all four dice of a single virtue.
- Upgrade: Turn the die to its next highest face (you cannot go above 6).
- Downgrade: Turn the die to its next lowest face (you cannot go below 1).
- Flip: Turn the die to its opposite face.
- Trash: Remove the die from this roll.
- Keep: Keep a specified number of dice or specific dice.
Only do each of these once for each time you manipulate dice unless otherwise specified. For example, if you have a power that says "Reroll 1s," and you reroll a 1, then get another 1, you're stuck with a 1.
Ophelia and Friends Roll Some Dice
Now that you've joined Dr. Zeez at the Hospital, you investigate and flip over minion 2, the archetype for the true threat Yule Lads. As you learned earlier, the Yule Lads card makes you roll two dice and add +1 to find out which lad you'll face. You roll a 6 on the dice, and add +1 to get a result of 7. After checking the Yule Lads chart in the storybook, you realize you are facing Door-Slammer. He forces you to flip any dice you roll in this confrontation.
You need to succeed at a Soul 13 check to win this confrontation. You have four Soul dice, plus one bonus die from your Conjure skill. That's pretty good, but this is an important check, so in the Assemble step, you recycle the Body gift Bruiser to add a Body die. As usual, you'll get to keep any three dice.
You roll a 2, a 3 (on the bonus die), three 4s, and a 6 (on the Body die). Now, normally that'd be just fine, as the three highest add up to 14. But you don't need to be able to see the future to know what's going to happen. If you let things stand, all those dice will flip, and you'll have 5, 4, 3, 3, 3, and 1. The top three add up to 12, which is no good.
So, you discard the Body gift Muscle Memory to reroll your Body die. Reroll comes before flip in the sequence, so you reroll it and get a 2. For once, a 2 is great! Now the flip happens, and the two 2s, 3, and three 4s becomes two 5s, 4, and three 3s. You get a 14, and slam the door on Door-Slammer.
Attempting a Check
Many times during a mission, you must attempt a check to succeed at what you are doing. There are several steps to attempt the check; these steps happen in order, though sometimes you will need to go back a number of steps when a card or power demands it.
Target: Any time you are asked to attempt a check, you will be told which virtue to use or given a choice of virtues. If the check is vs. a gift or threat, you can use any one virtue that has an assigned target number. During the Target step, you may set the virtue used for the roll only once, but keep in mind that later powers may change it. For example, if a threat has a Rage target and a Soul target, you may only choose one.
Assist: Saints can help saints with checks under certain circumstances. You may ask other saints for assistance, and may even assist yourself in some cases. (See Assisting Other Saints.) When you assist a saint, that saint may reroll one die for each point you have in the virtue during the Evaluate step. Those dice do not have to be in the virtue's color. Each assisting saint triggers a separate reroll step. For example, if you have Soul 3 and can assist in a saint's Soul check, the saint can reroll any three dice on that Soul check.
Mutate: If any saints assist, including yourself, or if anything else requires it, whatever you're attempting the check against will mutate. Draw a new mutation and use the side of the mutation depending on the check you are making; one side is used to win vs. threats, and the other side is used for all other cases. Roll a die on the mutation's chart for each saint that is assisting, minimum of 1. Use the lowest single roll and, if you can, apply the results to the check. In some special cases, the mutation may instruct you to do an action that cannot be done (for example, trash dice of a specific virtue when there are none); in this case, there is no effect. The check is now a mutated check of its virtue, and any effects that apply to mutated checks activate, even if there's no mutation effect. A confrontation can be mutated multiple times, such as if saints assist on multiple checks.
Assemble: The virtue you choose and the cards you play determine how many dice of what virtue you roll. You can never roll more than four dice of any virtue. If you need more than four dice of a color, add the difference in bonus dice to your roll; you can never roll more than four bonus dice. If a power changes your chosen target virtue to a different virtue, use your dice that match the new virtue instead. The target number stays the same. For example, you have three Soul dice and four Mind dice. If the original target was Soul 15, and a power tells you to use Mind instead, you exchange your three Soul dice for your four Mind dice. The target number is still 15.
You may be able to influence your check by using a skill. Skills are listed in a card's keywords. This means you may roll one skill's number of bonus dice during your check, if both you and the card you are confronting or playing have the skill keyword, or if a card says you may use the skill (for example, "you may Sense"). You may instead add a skill on your saint's card if a saint plays a gift that lists a skill matching one on your saint's card; you may only do so if the gift is already adding dice to your check. So if you have Charm 2 and Sense 1, and you play a Sense gift to add dice vs. a threat influenced by Charm only, you can choose two bonus dice for Charm or one bonus die for Sense, but not both.
Evaluate: Roll all of your dice, then perform any actions that manipulate your dice (see Using Dice), such as those that let you reroll. You may keep up to three dice; remove the rest. Add up the total value of the dice you kept. If the total is equal to or greater than the target, then you succeed at the check. If it is less than the target, then you fail; if you do so in a check to win vs. a threat you are confronting, you suffer damage equal to the difference between the result and the target (see Suffering Damage).
Assisting Other Saints
You can assist a saint's check of a particular virtue when your matching virtue points at that saint. When you assist, the assisted saint can reroll up to a number of dice equal to your number in the chosen virtue during the Evaluate step (see Assist under Attempting a Check).
When and who you can assist depends on the arrangement of your virtues around your card.
- You may use your top virtue to assist another saint at your nexus.
- You may use your left virtue to assist the saint to your left.
- You may use your right virtue to assist the saint to your right.
- You may use your bottom virtue to assist yourself.
For purposes of assisting, if there is only one other saint when you start, that saint is to your left and right. If you are the only saint when you start the game, you can assist yourself with all your virtues.
You may only assist a saint when the saint attempts a check of a virtue you can assist with; if anything forces the saint to change virtues, you still assist with the original virtue. For example, if you are at the same nexus as another saint who is attempting a Soul check, and your top virtue is Soul, you can assist that saint with a Soul check. If the saint to your left is attempting a Mind check, and your left virtue is Mind, you can assist that saint with a Mind check.
However, assisting has a cost: It adds a mutation (see Mutate under Attempting a Check).
Using Fragment Powers
Fragments have powers that work based on their placement in your halo, similarly to how table position affects which virtues you can use to assist a certain saint. When you slot a fragment into your halo, the halo-position icon refers to saints in the direction the fragment is slotted.
- A fragment in the top row of your halo can be used on another saint at your nexus.
- A fragment in the left column of your halo can be used on the saint to your left.
- A fragment in the right column of your halo can be used on the saint to your right.
- A fragment in the bottom row of your halo can be used on yourself.
For purposes of fragment powers, if there is only one other saint when you start, that saint is to your left and right. If you are the only saint when you start the game, any fragment in your halo can be used on you.
If a fragment power doesn't have a timing, you will need to be aware of it during all steps, as it may be used at any time during the mission.
Ophelia and Friends Attempt Some Checks
You, Zeez, and Frank are on Main Street, feeling pretty good about your chances. It's Frank's turn.
On his first investigation, Frank confronts the Rage gift Streetsweeper. This requires him to succeed at a Rage 9 or a Body 12 check. Frank has a Rage of 4 and a Body of 3, so he picks Rage. The Streetsweeper has the keyword Strike; Frank has the skill Strike 2. Thanks to Main Street's Hope power, he also adds one bonus die vs. a gift. So he rolls seven dice: four Rage dice and three bonus dice. He gets three 1s, two 2s, a 4, and a 6. He can only keep three dice, so he keeps a 2, 4, and 6. That is a total of 12 Rage, enough to succeed. He puts the Streetsweeper into his hand.
Unfortunately, on his next investigation, Frank gets in real trouble. He confronts the threat Gladhander, which requires a Mind 15 or Soul 12 check. Frank has three Mind dice and a paltry Soul die, neither of which sound appetizing on a probabilistic level. Frank needs a lot of help.
He decides (obviously) to try the Mind check, needing a 15 on three dice. Dr. Zeez has Mind as the top virtue, letting the doctor assist another saint at the same nexus. Things look dire, so Frank accepts Zeez's assistance, and following the mission power, Zeez gives Frank the Mind gift Gallowglasses and recycles a card of his own. Assisting causes a random mutation: Unseen. Zeez rolls on the mutation, getting a 1. That's really bad, because now Frank has to keep his lowest die. Frank discards the Gallowglasses to boost his check, getting one extra Mind die and one bonus die because both the gift and Frank have Sense. Rolling five dice is better than rolling three.
Frank rolls and gets a 1, a 3, a 4, and a 5 on the Mind dice, and a 3 on the bonus die. Dr. Zeez is assisting with a Mind of 4, meaning that Frank can reroll up to four dice. Certainly, he'll reroll the 1 and the 3s, but he wavers on the 4. Ultimately, he decides to keep it, rerolling three dice and getting two 2s and a 6. So he keeps the 6 and the 5, but has to keep the 2 over the 4. He gets a 13, failing the check by 2.
Frank suffers 2 points of Mind damage. In his hand are four cards: the Mind gift Scrapbook, and the Rage gifts Reaper, Streetsweeper, and Yankee Clipper. Because it's Mind damage, he must discard the Scrapbook first. Then he randomly chooses one of the three Rage gifts, losing his newly acquired Streetsweeper. At least he still has a trusty silver bat and an ancient blade at his side.
Consequences
All actions in the game have consequences. This is how you deal with those consequences and what happens when you end the mission.
Suffering Damage
Damage is how you get hurt, either by failing a check to win vs. a threat or being assigned damage by a card. When you suffer damage, a Damage step is created in which you suffer damage; if it's from a failed check to win vs. a threat, that damage is equal to the difference between the final result and the target. All damage is of a particular virtue; typically, it's the target virtue of the check you attempted. Powers that apply when you suffer damage happen immediately.
Then, powers may increase or decrease this damage. If you must both decrease and increase the same damage, increase it first.
Once all adjustment of damage has concluded, discard one gift of the appropriate virtue for each point of damage that remains. If you have discarded all the gifts of that virtue from your hand but still have damage remaining, you then randomly discard cards until you've accounted for all the damage. So if you fail a Soul check to win vs. a threat by 3 and you have two Soul gifts, a Rage gift, and an omen in hand, discard the two Soul gifts first, then a third card at random.
A card removed from your hand, deck, or halo as a result of damage is called a damaged card. Usually such a card is discarded, but powers may cause it to be removed in other ways. For example, a threat's power may tell you to "bury the damage," meaning any cards you would discard to damage are buried instead.
If you have discarded every card in your hand, ignore any damage that remains, though powers that apply to damage still apply. So if you would sacrifice a card from the clock if you suffer 5+ damage, but you only have three cards when you lose by 6, you still sacrifice the card from the clock.
Sometimes you may run out of cards in your hand, yet the game still wants you to suffer damage. Even if you have no cards in hand, powers that apply when you suffer damage still apply. For example, to guard or seal the nexus Lair, someone at the nexus must suffer damage equal to the number of saints at that nexus. If you have no cards in your hand, but there are two saints at the nexus with you, you may still suffer the damage to succeed at guarding or sealing the nexus.
Fading
If you are ever required to draw or otherwise remove a card from your deck and there are none, your saint fades. Display a death by your deck to show that you are fading. You play your turns if the mission continues, though you will not get additional deaths from that point.
If you lose the mission, at least one saint will slot a death; if you win, you might be able to avoid the death (see Ending a Mission).
Once your saint would slot a ninth death, your saint is dead forever; if this happens, sacrifice all your gifts, deaths, and fragments, and stash your saint card. You may not play a saint that is in the stashed card section of the box.
Confronting an Archetype
When you would confront a master or minion archetype in a nexus, use the corresponding true threat that is displayed by the mission card.
Each mission is full of obstacles known as minions. You will treat each minion group differently based on the rules on the mission and structure cards. Often, structures will give you the opportunity to put the minion in your hand or allow you to attempt to seal your nexus.
Most missions have at least one master, a major opponent for the saints to confront. Some structures allow a master to escape. In those cases, follow the rules in the next section.
Escaping
When you terminate vs. a master, it can attempt to escape to any unguarded nexus. If all nexuses are guarded, sacrifice the master archetype card; this often results in the end of the mission, so refer to the structure card to be sure.
If you lost vs. the master, draw a number of new threats equal to the number of unguarded nexuses minus the number of set-aside master archetypes, if any.
If you won vs. the master, draw a number of new omens equal to the number of unguarded nexuses minus the number of set-aside master archetypes, if any.
Shuffle the new pile. Seed one card from this pile into each unguarded nexus. You must now track down the master again.
Ophelia and Friends Deal with Consequences
It's last call on Main Street. There's one card—the master archetype—left in its deck. With the Chapel and Hospital removed from the game, there's only one other nexus, the Manor on its Doom side, with any cards in it. It's time to rid this town of the mother of all trolls: Gryla.
There's only one card left in the clock too, so you don't have any time to lose. You draw The Hookup from the clock. You've got three cards left in your deck and no cards in your hand. If you don't end the mission in this investigation, you'll have to reset your hand—which will make you fade from the mission. Frank, who has no cards in his hand or deck, is already fading from when he tried to draw a card from his empty deck, so he has a death displayed. Neither of you wants a death in your halo, so you have to make this count.
Looking down at Gryla's card, you decide you'll need Dr. Zeez's assistance with a Soul check, but the doctor's in the wrong position at the table to help you. So you sacrifice the fragment The Fainting Spell, and Zeez and Frank exchange table positions.
You sacrifice The Hookup, which flips the nexus to its Hope side. You flip over Gryla's master archetype.
Gryla has a Confront power that says you can give a saint at your nexus up to three cards from the top of your deck and reduce Gryla's target by that amount. This can happen any time during the Confront step, so in the Initiate step, you hastily give Frank all three of your cards. This reduces Gryla's Soul target from 17 to 14.
It's your Act step, and you want to attempt your Soul check vs. Gryla. Zeez declares an intention to assist, so you draw a random mutation from the box. The side used for a check to win vs. a threat is Fiery. Dr. Zeez rolls a die and gets a result of 5, which forces each assisting saint to recycle an Ally gift. However, Dr. Zeez happens to have no Ally gifts in hand, so this mutation does nothing and you will still get to reroll three dice.
The mission power says that whenever anyone assists vs. a threat, the assister must give the active saint a card, then recycle one of their own cards. Zeez gives you a Wolfram Cube, and recycles a Trauma Kit.
Your new Wolfram Cube can be recycled to add a Body die vs. a mutated card, so you do just that. Your total assembled dice are now four Soul dice, a Body die, and a bonus die. Your chances seem pretty good, especially with your mutation reroll.
You roll your dice, getting a 6, a 3, three 2s, and a 1, which totals to 12 on the three highest dice. But, you can reroll three dice, so you reroll two of the 2s and the 1, which become two 4s and a 2. You now have a total of 14 on the highest three dice, which is what you needed to win!
The mission has a Win power that says when you win vs. a true threat, you draw a new gift of any virtue. You pick Soul and draw a Keyhole Necklace at random from the box.
But you're still not done. Gryla is going to try to escape to the Manor. The Manor is on its Doom side, so Zeez discards the Soul gift Demon Key, burying the fragment The Cutting Room to flip the nexus to Hope. Now Zeez can guard the Manor. Its Guard requirement is to win vs. a new Relic gift of a random virtue. Zeez gets one die of each virtue and picks the Mind die at random, randomly drawing a Psychic Surgeon, which requires a Mind 16 or Soul 17 check to win. Zeez rolls four Mind dice and two bonus dice from the Resist skill, and gets—a 12. You're gonna lose the game and get a death at the end of your turn.
But wait! You look down at your hand and see there's still one card there, that Keyhole Necklace. This Soul gift lets you sacrifice it to add +6 to a check to win vs. an Ally gift, which is exactly what Psychic Surgeon is. You sacrifice it, putting yourself at zero cards in deck and hand, and putting Zeez's check over the top. Zeez gains the Psychic Surgeon and guards the nexus. Now, with Frank at the same nexus as you and able to bury a card to seal Main Street, you remove it and all of its cards. With nowhere to go, Gryla can't escape. You complete the mission and don't have to finish your turn. No death for you.
Ending a Mission
The goal structure will list the ways to end your mission. Doing so creates an immediate Mission End step, meaning the rest of the current turn doesn't happen.
If at any point you need to draw a card from the doomsday clock but none are there, you time out and the game immediately ends. Treat any slotted gifts or fragments as if they have reached the end of their powers. If any slotted gift would be sacrificed during an upcoming step or at the end of a mission, sacrifice it before the game ends; otherwise, put it back in your deck.
If you meet all the win conditions listed on the mission and structures, you win the mission. Display the fragment on the back of the mission, any special fragments given out by the mission, and a number of fleeting fragments equal to the number of saints. Starting with the saint that took the last turn and going to the left, each saint chooses one of these fragments and chooses whether to slot or sacrifice it. Any faded saint may choose to sacrifice the kept fragment to sacrifice a death that is not yet in their halo instead. Then, all other deaths are slotted. (If a mission describes more than one act, if you would win the mission in an act, go to the next act instead.)
If you meet the lose conditions on the mission and structures, you lose the mission. At least one saint will slot a death; all saints who faded will slot a death. If no saints faded, choose one saint to slot a death.
After dealing with deaths and fragments gained in the mission, any saint with more than eight total fragments and deaths must sacrifice fragments until that saint has no more than eight total fragments and deaths. Saints may also sacrifice any number of fragments between missions.
If there are any other actions that take place during Mission End, deal with them during this step.
Once you have completed a mission, put all cards in play back into the box, other than each saint and their gifts, fragments, and deaths. Any slotted cards that are not fragments or deaths are returned to the box.
Between Games
After each mission, reconstruct your deck. You may freely trade cards with any other saints, as long as all saints end up with decks that match the cards described by their virtues and fragments. If you cannot construct a valid deck from the cards your choir has available, for each card you are missing, draw 1 new matching Alpha gift.
You can always start a new saint and play that one instead of a saint you have already played. You can take your saint to other players' games as well—but consequences matter. If your saint gets killed in an away game, you cannot forget about it in your home game.
Ophelia and Friends End a Mission
You've just won Christmas in Candlepoint. Now it's time to celebrate.
The fragment on the back of the mission is The Abandoned House. You draw three new fleeting fragments—The Afternoon Tea, The Insider, and The Tech—and display all four fragments on the table. Since you ended the mission, you choose first, and take The Afternoon Tea. Since he is on your left, Frank picks next; he takes The Insider, and sacrifices it to get rid of the death he has in waiting. Zeez takes The Abandoned House, and The Tech is returned to the box. You put the cards from play, including all of your omens, back in the box, leaving only your saints, the fragments and deaths in your haloes, and the gifts in your deck.
Because you plan to play again tomorrow, you rebuild your decks. Between you, you've got enough Body, Rage, and Soul gifts to end up with as many as your virtues demand. Frank keeps the Streetsweeper, you keep Mme. Roux's Elixir, and Dr. Zeez keeps the Psychic Surgeon. Because you sacrificed some Rage and Soul gifts, you don't need to sacrifice any of them now.
However, as a choir you are short one Mind gift. So you draw a new Alpha Mind gift, getting Bones. You now have all your decks complete, and can begin the next mission. Happy Boxing Day!
Playing with a Guide
Once you're familiar with playing Apocrypha in co-op mode, you can play with a guide. This is a more traditional roleplaying experience, with one person curating the game for the rest of the players, who will have no idea what is coming their way.
When you guide an Apocrypha mission, you are not playing a saint. You are instead playing all the people and threats that the saints meet. Doing so has some challenges, but this section will help you create a smooth and thrilling experience for the other players.
How to Be a Guide
The biggest difference when you are guiding an Apocrypha game is that the game is no longer played out in the center of the table. You control the cards and story. You prepare your decks and written material in advance, and then keep it out of the saints' view. When cards would be randomly chosen or shuffled into decks, you decide which ones they are and what order they will be confronted.
In the roleplaying game, saints are the same as they are in co-op mode. They start with the same number of cards, and gain fragments and roll dice in the same way. The biggest difference when it comes to playing Apocrypha with a guide is the storytelling. The players describe where they want to go and what they want to do, as well as interact with the people and threats you portray during the mission. They are very likely to go "off-script," so have some options reserved for when they do.
You are responsible for setting up the mission. You can use a mission that already exists or make up your own. If you want to create a carriage chase across Russia in pursuit of a Cossack demon, you may do so, or you can use the mission cards to define the session for your players.
You can choose what is in every nexus. You are not limited to the nexuses that have cards and can easily write any nexuses that the game does not provide. It is not a given—it is not even likely—that there is a minion or a master in every nexus. The content in each nexus is only limited by your imagination and the story you want to tell.
Actions are much less restricted in a guided game as you can administer the actions of multiple saints at once. Two saints might be battling a jackal-headed demon, while a third tries to open the bottle that will imprison it.
You can build threats by adding mutations to cards. For example, a Vector threat might be too simple to make a meaningful opponent for multiple saints at once. So, you can take the Vector card and add one or more mutations: Mooncalved, Rock Solid, Swarming, and so on.
You can work with the player to grow the player's saint. You can ask the player what the saint wants to do in life and can provide a fragment that continues that progression. For example, if a saint wants to be a better doctor, you might hand out a fragment that improves the use of heal gifts.
After a mission, you can stop guiding, and the chapter can continue right from that point with the players (including you) battling against the game. Between missions, players can switch out the role of guide and steer the mission in various directions. Because there's always a default gameplay mode, players can experiment and experience all the ways to play.
Setting Up the Roleplaying Game
If you are the guide, follow these steps to prepare the game.
- Decide what chapter and mission you want to play. You can invent your own or use one from the box. If you write your own, make sure the format matches those in the box. You can also use one or more structure cards to influence how you set up the game.
- Choose any number of masters, minions, threats, and gifts from the box. You do not have to follow the rules of a particular mission. You may use cards from any chapter, however, keep in mind that you should not give out more gifts than a co-op mission might give out.
- Choose any number of nexus cards or create your own. You do not have to build nexus decks in the standard method. Put any number of the true threats, threats, mutations, and gifts in front of each nexus. You can place the true threats in any nexus you like. You can also include true gifts with those true threats; you do not have to shuffle them into decks.
- Write a story and descriptions of each of the nexuses, allies, threats, and anything else you want to describe to the players during the mission. You want to keep some secrets from the players, so do not write down everything you know about the mission. Just write enough that you can lead them on the course you want them to go.
- Choose or write fragments for your players. These should relate directly to the story you are weaving for them.
Mission Format
Your mission should have this format, expanded quite a bit from how it would appear in co-op mode.
- The Lowdown: The story of the mission and how you see it unfolding.
- Structures: Some existing structure cards or some of your own invention.
- Nexuses: Your choice of nexuses.
- Masters: Any masters your saints will confront, by nexus.
- Minions: Any minions your saints will confront, by nexus.
- Powers: Any additional powers that affect the mission throughout the game.
- Threats: Any minions your saints will confront, by nexus.
- Gifts: Any gifts your saints will confront, by nexus.
- Mutations: Any mutations that affect confrontations or checks, by nexus.
- Fragments: Any fragments the saints will be given during or after the mission.
After you plan that out, write down scene by scene any changes and outcomes you expect.
Starting the Mission
- Place the cards you selected in piles in the box lid, or behind a screen—somewhere the players cannot see. Orient nexuses toward Doom or Hope, as desired.
- Players create new saint decks or use ones from previous missions, as in co-op mode.
- Players arrange themselves in a choir around the table in any order they wish.
- Create a doomsday clock according to the structure.
- Each saint draws a hand of cards equal to the saint's hand size, and play begins.
Running the Mission
Start by immersing the saints in the mission. The saints each have roles, such as Bad Cop and Karmacologist. This indicates what they do during the course of their lives and gives you opportunities for involving them directly in the game. For example, a saint might be a Gentleman Burglar; you can start a mission on the 80th floor of a high-rise, and that saint has just diamond-cut a glass pane to get into the condominium of a movie starlet. If the starlet turns out to be a vampire, so be it.
You can begin a game with saints suffering memory loss. When you start the mission, you do not have to start at the beginning; saints can have completed part of the mission that they have forgotten. The fragments you hand out may reveal elements of the plot that the saints have repressed.
The mission develops in a series of visits to nexuses. Sometimes the nexuses must be sealed, though many missions won't require sealing nexuses.
Taking Turns
Saints can take turns in whatever order they want. If the saints split up—and they always do—then alternate quickly between groups until they come back together. You can create dramatic tension if events are happening at the same time. Remember, the setting is modern day, so saints are only a cell phone call away. If one group is attacked in the library while another tries to get the police to believe there are monsters in the library, the two events can complement each other in building the drama.
You can also introduce turns for saints, simply by handing a saint an omen from the clock and starting that saint's turn. This goes well with a sentence like "You hear a noise behind you." (This type of turn is particularly useful when a saint hasn't taken a turn for a while, perhaps triggered by the player looking at a cell phone for non-game reasons.)
The turn sequence is basically the same as in co-op mode, but with a few modifications:
- Start: Any number of saints can draw a card from the clock. Then one player who did so takes the turn, and all other players at the nexus can assist in the narrative. You may add a delay, drawing one or more cards from the clock (or in some cases adding them), to penalize dallying or move the story along.
- Support: This step is unchanged.
- Investigate: You can add mutations to any confrontation if you choose, regardless of whether saints assist.
- Seal: When guarding, if not all the nexuses have been revealed by the guide, those nexuses cannot be guarded.
- Transfer: Any saint at the active saint's nexus can move.
- End: If another saint decides to take a turn, the active saint's turn ends. When the active saint resets, any other saint may also reset, regardless of nexus. The guide can also call an end to the active saint's turn, and the active saint and everyone assisting that saint must reset.
Confrontations, Checks, and Damage
Confrontations and checks work the same as in co-op mode. However, you are not limited to the occasions when multiple saints are present to use mutations. You can use any mutations you like. A roleplaying game depends on variety, so feel free to invent your own mutations.
You can also have more than one type of opponent confront saints at once. Saints may choose opponents (or vice versa), then do their checks in any order.
When a saint loses vs. a threat, the saint suffers damage as normal. However, the threat does not get shuffled into the deck as if it retreated to the shadows; the active saint must reset at the end of that turn, and the threat may continue to confront or retreat, as you desire.
If nothing eventful happens in the time between scenes, the saints can all reset their decks. If a scene happens on the heels of another, however, there may not be time to rest.
Controlling Guided Mode
Guided mode is much more fluid than co-op mode, but you still need to be on top of card play and pacing. To guide your players successfully, do everything briskly and with purpose while still giving different players chances to shine. Here are some ways you can keep your game under control:
Controlling the clock: Pacing is king in guided mode. You can modify the pacing of the game by stacking the clock with omens of certain types (raising hope or dashing it, influencing certain types of checks, etc.), as well as adding threats and gifts directly to the clock to trigger when a certain number of turns have passed. Consider the ability of the choir to handle the number of nexuses and cards you've chosen; they must work through most (or even all) of those cards using the omens in their decks, the nexuses, and the clock. If they have more cards to confront than omens available, they are truly doomed.
Manipulating decks and hands: Control for the level of preparedness you want in your mission. It's appropriate to allow your saints to manipulate their hands and decks more than they'd normally have the ability to do. For example, if they have a month of downtime to prepare to assault a werewolf's fortress, you can let them search their decks for Argentines and Yankee Clippers to include in their starting hands. On the other hand, if the saints are surprised by the events, they might not even have a starting hand at all.
Describing mechanics: Apocrypha is not a meticulous simulation of reality and is intended to flow in a fun way that prompts spontaneous and sometimes surprising solutions to problems. If a saint confronts a Bomb, and another saint at the nexus has some Extra Razor Blades to confront it with, the saint should be encouraged to tell you how that works: snip the wire, jimmy the lock, intimidate the person holding it, or the like. The saints' skills matter here; a saint with Hack is more likely to MacGyver the Bomb with the Extra Razor Blades.
Mutating confrontations: In co-op mode, mutations change a confrontation in unexpected ways when saints assist, keeping assist a fun and unsafe mechanic. In guided mode, you may want to pick your mutations ahead of time and guarantee some number of rolls, rather than having a threat spontaneously burst into flame if a saint decides to assist in attacking it. This will also let your choir roleplay their willingness to assist or not in a manner that is true to their personalities.
Establishing scenes and dialogue: Atmosphere matters. When the saints enter a nexus, don't just rely on the image of the card to set the scene. Describe the location and let its inhabitants speak. A Fun Park isn't just a Fun Park; it's a specific place. For example, "Everything about Big Edie's Big Fun Park looks big—as big as a family-run amusement park can get. Edie and her indeterminate number of overall-clad offspring are keeping the carnival rides polished and running right. 'We ain't the kind of folks who like people who ask questions,' one of the more tooth-impaired spawn says."
Building to a conclusion: After beginning in a dramatic way, the most dramatic parts of a mission should come at the end. The saints are likely depleted of resources and faced with fewer options, but they are right at the edge of success or failure. Balance this part on a knife edge. If you need to increase targets or separate saints from each other, now is the time to do it. Make it so they really fear failure, and then see if they snatch victory from the jaws of defeat, or vice versa.
Ending the Mission
The game ends on or about the time the saints complete the goal of the mission or draw from the clock when there aren't any cards in it. Whether that means the saints win or lose is up to you.
At the end of the mission, if the saints won, give them one fragment each. You can use fragments from the box or write your own. You can also give out fragments at key dramatic moments during the game, altering the saints' powers and leading them in directions you desire. Return any slotted cards that are not deaths, fragments, gifts, or saints to the box.
You can download a fragment template at lonesharkgames.com/apocrypha.
Mission: Taking the Plunge
"Taking the Plunge" is a sample mission for a guided session for up to six saints. This mission corresponds with the similar mission in the Candlepoint chapter.
- The Lowdown: It's the new year and the Deathless are loose on Candlepoint. The choir tracked them to Candlepoint's abandoned Harlequin Hotel on the outskirts of County Road QQ. There, they found a girl named Nevada in the honeymoon suite, and lost their memories when the Deathless attacked the motel. When they awaken, the saints must face the Deathless, who try to destroy the motel with the saints in it. The authorities arrive at the scene and may arrest the saints to the local precinct, where a Grifter named Skeezix can get them an important weapon. Nevada's true form as a Snow Angel may be revealed in the woods, before chaos erupts at Squirrel Lake's Polar Bear Plunge as a Wendigo draws the hapless citizens under the frigid surface.
- Structures: Corner the Wendigo Along the Trail As the Hours Pass. Shuffle a number of minion A archetypes into the clock equal to the number of saints. Each time a Bystander is drawn from the clock, someone is eaten at the Lake. If the clock runs out, the Wendigo eats its fill and disappears.
- Nexuses: (1+) Motel (The Harlequin Hotel), (1+) Precinct (Candlepoint PD), (1+) Woods (The Oak Lair), (1+) Lake (Squirrel Lake)
- Master: Wendigo (Lake)
- Minions: Minion A: Bystander (1-6, Lake), Minion B: Helpless Child (7, Motel), Minion C: Snow Angel (8, Woods)
- Powers: At each nexus, sacrifice a card from the clock each time any saints suffer a delay. The delays are: If the saints get caught in the fire or on the roof of the Motel, detained by the authorities at the Precinct, bushwhacked in the Woods, or fail to follow the citizens into the Lake. You may penalize any other delay by sacrificing a card from the clock.
- Gifts: Mr. Bear (Motel), Grifter (Precinct), Switchblade (Precinct)
Nexus 1 (Motel): The Harlequin Hotel
The saints awaken in a large, very chilly motel room bathed in the flicker of the neon sign outside. The cheap wallpaper has burned away into ash just recently, but there is no flame or smoke. Tables and bookshelves have been knocked over to cover the windows, and a set of wooden double doors is braced closed with a mop handle. Somewhere in the distance is the faint ululation of a smoke alarm. Cowering behind one of the upended tables in the back corner of the room is an eight-year-old girl. There's another thud on the motel room door, and in an unnervingly calm manner, the little girl says, "They're coming. Please hold Mr. Bear for me."
If one is willing to take it, give a saint the Mr. Bear card. Draw the threat Gaunt, which breaks down the door and attacks a saint. If any saint assists, add the mutation Rock Solid. Trash 1 die in any check vs. the Gaunt; this comes from Nevada's psychic fear.
After the confrontation, the saints cannot seal the Motel, but can interact with the girl, whose name is Nevada Chan. Terrified, Nevada ran inside the abandoned motel when she saw something long-armed and dead-eyed outside. She locked herself in the room and has been keeping quiet since, but then the thing found her.
If the saints make it out of the honeymoon suite, they'll overlook the lobby, which has been beaten to hell. Due to an in-progress remodel, every room door has been leaned against the walls to be repainted and refitted with new locks. In the lobby are the corpses of two more creatures like the thing that just attacked the honeymoon suite. There is a crashing sound from the basement.
In the basement is the threat Thing in the Basement, angrily tearing the boiler room apart; if any saints assist, add the mutation Swarming. When a saint fails when Striking, the boiler explodes. All saints roll a die on the Fiery mutation, and apply the highest result. The motel then begins to burn. Apply a delay (sacrificing a card from the clock) unless the saints get out quickly. The only ways out are through the front door and up to the roof; by the former are the Authorities, ready to arrest the saints for setting the motel ablaze. If a saint can defeat the Authorities using Mind (Charm), the police might only take them in to hear their statements; otherwise, they're going in the back of the Black Maria.
Nexus 2 (Precinct): Candlepoint PD
At the station, the Authorities use the Swarming mutation, as they are staffed up for a major event in town: the Polar Bear Plunge at Squirrel Lake. The police are likely to fill out a lot of paperwork on the saints, and might even end up jailing them if they fail the Authorities' Mind (Charm) check by 4 or more. This causes a delay, sacrificing one or more cards from the clock unless the saints avoid all extra time in the Candlepoint PD station. The saints may also lose custody of Nevada to the Authorities, though they will very quickly lose track of her. No matter how many times the saints win vs. the Authorities, they cannot trigger its Win power except in the following way.
The saints may think getting detained is a disaster, but it has a very positive side effect: The saints will meet a local Grifter named Skeezix Jones in the detention room. "Skeeze," as the cops call him, has been brought in for shoplifting. However, he's not an ordinary thief; he can see monsters on the fringes of his vision. If a saint wins vs. the Grifter (possibly modified by the Fragile mutation), Skeezix may give up the information that he was pinched for stealing a unique Switchblade from the Wisco Pawnshop. If the saint wins by 2+, he might even reveal that it's downstairs in the evidence room. If the saint wins by more than 4+, he'll explain in hushed tones that it's a blade that is rumored to return transformed creatures to their normal forms. And then he'll laugh it off and blame the rum.
If the saints can get to the evidence locker in the basement and win vs. the Authorities using Mind (Study), they can trigger the Win power on Authorities and get the Switchblade.
Nexus 3 (Woods): The Oak Lair
If the saints lose track of Nevada, they can follow a trail of witnesses who saw her enter into the forest known locally as The Oak Lair; if they haven't, Nevada will try to lead them there. Following her is probably a mistake on the saints' part, and is certain to cause them a delay as above. If so, a saint will confront the threat Bushwhack; if any saints assist, add the mutation Terrifying. If a saint loses vs. Bushwhack, instead of a new random threat, they'll confront Nevada, or one of the little girls who looks much like her; if any saints assist, add the mutation Swarming. These are all Deathless called Snow Angels, and their goal is to lure victims to the Wendigo, who has them in his thrall.
If the saints win vs. the Snow Angel(s) here, Nevada won't appear at the nearby lake. Give the saint who defeated Nevada the new fragment The Playground.
Nexus 4 (Lake): Squirrel Lake
After a while, many of the citizens will head toward Squirrel Lake. There, hundreds of unbalanced Candlepointers prepare to leap off Bloodgroom Bridge into the frigid lake to raise money for the Snow Angels CHILLdrens Fund. The lakeside cabins are festooned with decorations celebrating the arrival of winter. Unless defeated in the Woods, Nevada is there being fawned over by the local Eisbär Club devotees. She hopes to see most of them eaten before suppertime.
As soon as there are less than eight cards in the clock (regardless of where the saints are) or whenever you are ready, the citizens rush into the lake where the Wendigo is waiting on the bottom. Because of so many people in the lake, the Wendigo can freeze and snatch up some of them before anyone on the surface knows what has happened. If the citizens jump into the lake, and the saints don't follow, kill one citizen below the surface and sacrifice a card from the clock each turn.
If at least one saint goes into the lake, the Wendigo will turn its attentions from the hapless citizenry to the much more satisfying saints. The Wendigo is tough under any circumstances, but confronting in the freezing water is much harder than on land; downgrade all Rage dice in checks vs. the Wendigo. If any saint assists, add the mutation Unseen. A saint must succeed at a Body (Resist) 10 check to take two consecutive turns underwater; if this check is failed and no other saint is available to take a turn, treat it as a delay.
If the saints win vs. the Wendigo, Nevada wanders into the Woods to join her tribe of Deathless, but will likely return to plague Candlepoint in the near future.
Glossary
Act: The step in which a saint attempts a check to win vs. a gift or a threat. Also, one part of a multi-part mission.
Active: Refers to the saint who is currently doing the current step being referred to.
Add: Increase the amount of cards in a hand or deck, or the number of dice a saint rolls.
Alpha: A symbol indicating gifts that a saint can include in their deck when building for the first time.
Archetype: A placeholder card for a master or minion that is shuffled into a nexus deck.
Assemble: The step in which a saint gets all the dice needed for the roll.
Assist: Help a saint with a check, allowing rerolls of certain dice.
Avoid: The step in which a saint can back out of a confrontation with a card, shuffling it back into its nexus.
Base: Refers to the set of typically black-bordered cards that are not part of any chapter.
Body Dice: Green dice representing physicality and toughness.
Bonus Dice: White dice representing skills and other bonuses.
Boost: Discard a card to add dice of the specified virtue to your check only.
Border: The colored edge of a card which indicates its chapter.
Build: Construct a deck for a nexus, saint, or other card.
Bury: Put a card in the bury pile under the saint. At the Mission End, put it back in the deck.
Card Number: A number used for sorting cards in the box.
Chapter: A section of the story that is read and played, represented by a word next to the card number.
Clock: The doomsday clock, typically a deck of 24 omens or other cards that act as a timer for the mission.
Confront: The step in which saints perform actions vs. gifts and threats by initiating, acting, and terminating.
Co-op: The game mode where all players play saints work together against the game.
Cost: The requirement to play a card. Some actions are in a hierarchy where their cost can be changed.
Damage: The step in which a saint takes damage, decreasing the number of cards in hand.
Damaged: Refers to a card that is discarded or removed from your hand, deck, or halo after suffering damage.
Death: A card given to a saint when the saint draws from their empty deck.
Deck: A set of facedown cards that saints can draw from.
Delay: A penalty where the guide sacrifices a card from the clock.
Discard: Put a card in a discard pile next to the deck.
Display: Put a card faceup on the table.
Doom: An omen or side of a nexus that is more negative than that of Hope.
Downgrade: Turn a die to its next lowest face.
Draw: Take a card, usually the top card of a deck, and put it in your hand.
End: The step in which a saint resets and passes the turn to the next saint.
Enduring: A type of fragment that represents a long-term memory and is not sacrificed when played.
Enhanced: A symbol on a chapter gift or threat indicating it has been altered from a Base card.
Escape: The step in which the master may attempt to hide among the nexuses.
Evaluate: The step in which a saint manipulates dice, keeps some, and gets a result.
Examine: Peek at a card, then return it.
Exchange: Swap one thing for another.
Explode: Roll an additional die of the same virtue if a die rolls a specific number.
Face: A side of a card or die. A card is facedown when its generic card back is showing, and faceup otherwise.
Fading: Being assigned a death after attempting to remove a card from an empty deck.
Fleeting: A type of fragment that represents a short-term memory and is sacrificed when played.
Flip: Turn a card or a die to its opposite side
Fragment: A lost memory that has a story, along with a special power.
Gain: Add cards or skills to your halo or saint.
Gift: A card that can be won and put in a saint's deck.
Give: The step in which a saint hands a card to another saint.
Guard: The step in which a saint attempts to prevent the master from escaping into another nexus.
Guide: In guided mode, the player who creates and narrates the mission for the saints.
Guided: The game mode where a guide runs the game for the saints.
Halo: A 3x3 array that shows a saint's saint card, fragments, and deaths.
Hand: A saint's cards in hand, as opposed to in a deck, buried, slotted, or otherwise not in hand.
Hand Size: The number of cards a saint has in hand at the start of the mission and at the end of the saint's Reset step.
Heal: Shuffle a card from a discard pile into its deck. Any healed cards are chosen at random.
Hope: An omen or side of a nexus that is more positive than that of Doom.
Influence: Use keywords that impact the result of the confrontation vs. gifts and threats.
Initiate: The step in which an action is taken before a check is made.
Investigate: The step in which a saint draws a card from the nexus deck to avoid or confront.
Investigation: A draw and possible confrontation of a card from a nexus deck.
Keyword: A word such as a chapter, skill, or trait that influences the investigation.
Keep: Retain a specified number of dice when evaluating, or a number of cards.
Left: To the immediate position clockwise around the table.
Lose: The step in which a saint loses vs. a gift or a threat.
Lowdown: The introduction to a mission which guides the plot.
Lower: Decrease the cost of playing a card.
Master: A major opponent in a mission.
Matching: Having the same virtue as another card, check, or die.
Mind Dice: Purple dice representing mental acuity and fortitude.
Minion: A major opponent in a mission, often subservient to the master.
Mission: The framework for the story being played.
Mission End: The instant the mission ends, after a condition specified on the mission or a structure is met.
Mission Power: A special rule for the mission.
Mission Start: The instant the mission starts, typically before the first saint starts their turn.
Move: The step in which a saint puts the saint's pawn at another nexus.
Mutate: Change the rules of the confrontation or check if any saints assist each other, including self-assisting.
Mutation: A change to the confrontation or check's original rules, often done as a result of saints assisting.
New: Refers to a gift, omen, or threat that is typically randomly drawn from the box.
Nexus: A location that saints can investigate.
Novem: The most powerful entities in the game, whose name is derived from the idea that there are nine of them.
Omen: A symbol of Hope or Doom that can cause and apply special powers to an investigation.
Pass: The step in which one saint's turn ends in preparation for the next saint's turn to begin.
Pawn: The physical representation of a saint at a nexus.
Pile: A stack of cards that has a purpose, such as a bury pile holding buried cards.
Play: The step in which a saint or card activates a power.
Position: A place where a saint or card is, usually dictating the direction saints can assist.
Power: A rule that is activated to impact the game.
Rage Dice: Red dice representing aggression and fury.
Raise: Increase the cost of playing a card.
Recycle: Put a card at the bottom of the deck.
Reload: Put a card on top of the deck.
Reroll: Roll a die again.
Reset: The step in which a saint draws, discards, and recycles cards to get to the saint's hand size.
Return: Put a card back where it came from and do not trigger sacrifice powers.
Right: To the immediate position counterclockwise around the table.
Roll: Toss a die to get a number.
Rulebook: Any book containing mostly rules.
Sacrifice: Put a card in the box.
Saint: The character that represents a saint.
Sanctify: The step in which saints can guard and seal nexuses, and the master may attempt to escape.
Seal: The step in which a saint may remove a nexus and its cards from the game.
Search: Look through every card in the deck without triggering any powers, then shuffle the deck.
Seed: Add a number of cards (usually archetypes, threats, or omens) to nexuses in an even, hidden way.
Shuffle: Put a card into a deck and mix the deck.
Skill: An ability that lets a saint roll one bonus die per point of the skill when a check is influenced by that skill.
Slot: Put a card into a space in a saint's halo; the space is also called a slot.
Soul Dice: Blue dice representing spiritual effort and talent.
Start: The step in which a saint starts a turn.
Stash: Put a card into the stashed cards divider instead of sacrificing it.
Step: A part of a turn where a specific set of actions can occur.
Storybook: Any book containing mostly story and mission descriptions.
Structure: A card that contributes to the framework for how a mission is set up and played.
Support: The step in which saints play cards that help themselves or their allies.
Take: Get a card from somewhere or someone.
Target: The virtue and number that tell saints how difficult the check is.
Terminate: The step in which a saint determines if they win or lose.
Threat: A hazard that may harm and prevent progress by the saints.
Time Out: Draw from an empty clock, ending a mission.
Timing: The step in which a card's power takes effect.
Transfer: The step in which a saint can move their pawn or give a card.
Trash: Remove a die from the roll.
True Threat: A major threat that can be represented by an archetype.
Turn: A saint's opportunity to control the game, before passing the turn to the next saint.
Unstash: Remove a card from the stash and put it back where it came from.
Upgrade: Turn a die to its next highest face.
Virtue: A quality of a saint. Saints have four virtues: Body, Mind, Rage, and Soul.
Win: The step in which a saint wins vs. a gift or a threat.
Quick Reference Guide
Steps
In Apocrypha, powers activate during specific steps. On each saint's turn, they will go through a series of turn steps, listed below. Whenever any saint attempts a check, that saint goes through a series of check steps. Additionally, the Play and Damage steps happen any time a power is activated or a saint takes damage, respectively.
Taking Turns
Each turn goes through the following steps in this order:
Start: Begin your turn. Draw a card from the doomsday clock.
Support: Help saints before and between investigations.
Investigate: Play powers to find gifts, omens, and threats in your nexus. When an investigation is completed, you may go to Support or Investigate again if a card allows you to.
- Avoid: Avoid confronting the investigated card. Shuffle it back into your nexus.
- Confront: You may Initiate, Act, and Terminate vs. investigated cards.
- Initiate: Activate powers that may help or hurt you in the Act step.
- Act: Deal with the card you are confronting, usually by attempting a check.
- Terminate: Resolve the confrontation by winning or losing.
Sanctify: You may attempt to Seal your nexus if it is empty, or a card (usually a mission or structure) allows you to. Otherwise, skip this step and the steps in it.
- Guard: If a master can attempt to escape, you may be able to guard your nexus.
- Escape: The master tries to escape.
- Seal: If allowed, you may attempt to seal your nexus.
Transfer: You may move or give a card.
- Move: You may put your pawn at another nexus.
- Give: If you do not move, you may give a card to another saint at your nexus.
End: Prepare to end your turn.
- Reset: Discard any number of cards of your choice, then, if you still have too many cards, recycle any extra. Draw cards until you have cards equal to your hand size.
- Pass: Your turn ends and the next saint starts their turn.
Attempting a Check
To Attempt a Check, go through these steps in order:
Target: Be assigned or choose a virtue with an assigned target number to beat. Assist: Accept help with the check. Mutate: If saints assist, draw a card to mutate the investigation. Assemble: Use the virtue, influences, and cards played to determine how many of which dice you roll. Evaluate: Perform any dice actions in this order: roll, reroll, explode, upgrade, downgrade, flip, trash, and keep. If you are confronting a threat and you fail the check to win, you suffer damage of the same virtue type.
Card Cost Hierarchy
- Sacrifice: Put back in the box.
- Bury: Put under your saint.
- Discard: Put in your discard pile.
- Recycle: Put under your deck.
- Shuffle: Shuffle into your deck.
- Reload: Put on top of your deck.
Other costs are not part of the hierarchy: add, boost, display, draw, examine, exchange, flip, gain, give, heal, keep, return, search, slot, stash, and take.
Symbols referenced on cards: Body, Mind, Rage, Soul, Omen, Threat, True Threat, Hand Size, Alpha, Enhanced (each shown as its own icon on the card).
Positioning
Powers can only affect specific saints as stated on the cards:
| Who | Icon meaning |
|---|---|
| You | the "You" icon |
| One saint at your nexus that is not you | the "nexus companion" icon |
| The saint to your left | the "left" icon |
| The saint to your right | the "right" icon |
| Any one saint | the "any saint" icon |
| All saints in positions shown inside the circle | the "circle" icon |
| The active saint whose turn, step, or check it is | the "active saint" icon |
| One saint in a position defined by where the card is in your halo | the "halo position" icon |
You may see these symbols combined, such as an icon defining either you or a saint at your nexus, one defining both you and all saints at your nexus, or one defining all saints.