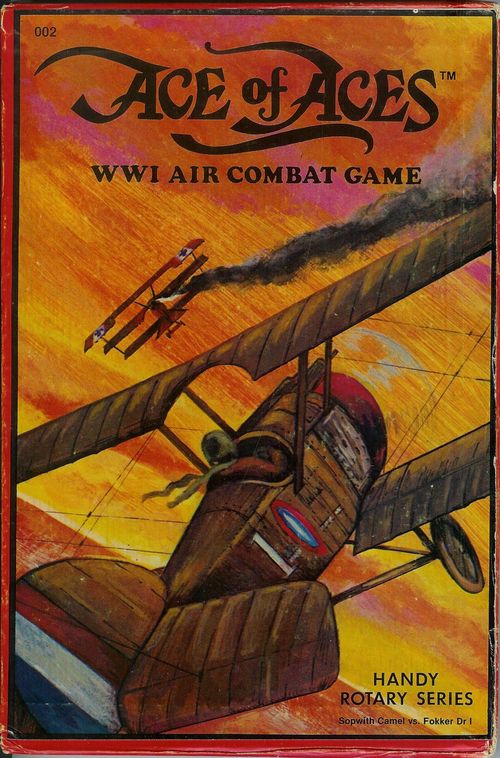
Ace of Aces: Handy Rotary Series
Ace of Aces: Handy Rotary Series Rulebook
Table of Contents
Table of Contents
Game Errata
(As printed on the last page of the booklet — corrections and clarifications to the base rules pamphlet.)
- The rules begin AFTER the photographs in the German book. The Basic game rules are interrupted by the game pictures.
- Under ACES in the Basic game, the sentence "points over 10 should be ignored" should read "points over 5..." Also note that aces give clues to other aces.
- All references in the Intermediate game rules to asterisks (
*) on the gun table should be toJ's. - Under CHOOSING PLANES in the Intermediate game, the on-line/out-of-service dates referred to are under the plane photographs at the beginning of each book.
- To begin the Intermediate and Advanced games when not using the optional rules, begin on page 170 at an altitude of 3000'.
- Under ALTITUDE in the Advanced game, the inclination arrows mentioned are missing. They are: Zoom, Climb, Level, Dive, Power Dive (five inclination states, from steepest climb to steepest dive).
- In same-altitude shots in the advanced game, planes may incline up (climb) or down (dive) while shooting.
- Insert into the advanced sequence of taking shots: players record amount of ammo to be expended, and note which square on the Damage Allocation Chart (DAC) they will use as initial point of aim.
- FOR ALL GAMES: if players are lost, and both search, roll one die to determine the number of turns elapsed before they find each other. Pilots may perform this many dive/climbs and straights (to clear jams, etc.) before beginning the battle.
- Under optional rule SNEAKING UP, to clarify: the first shot taken alerts the blind player that there is someone on his tail (note the sequence of play). The blind player can NOT deviate from his flight plan until AFTER he has been alerted in some way.
- Certain critical hits affect dive or climb. When playing the advanced game, these affect the Power Dive and Zoom abilities as well.
- Contrary to the rules statement, not all shot pages show the blazing guns, especially at long range. You shoot whenever the opponent appears directly in or above the windscreen.
Campaign Set-Up
Roll to determine each pilot's role and starting conditions before a campaign mission.
1) Duty Roster
Each player rolls separately:
| Roll | Result |
|---|---|
| 1 | Pilot #1 |
| 2 | Pilot #2 |
| 3 | Pilot #3 |
| 4 | Pilot #4 |
| 5 | Player's Choice |
| 6 | Enemy's Choice |
2) Ground Position
Roll once for the 1st roll (shared by both players), then each player takes the 2nd roll independently.
| 1st Roll | 2nd Roll: 1-2 | 2nd Roll: 3-4 | 2nd Roll: 5-6 |
|---|---|---|---|
| 1 | 4 East | 3 West | 12 West |
| 2 | 5 East | 2 West | 10 West |
| 3 | 7 East | 1 West | 8 West |
| 4 | 8 East | 1 East | 7 West |
| 5 | 10 East | 2 East | 5 West |
| 6 | 12 East | 3 East | 4 West |
3) Fuel
+1 if behind enemy lines. −1 if behind home lines. Then roll:
| Roll | Fuel |
|---|---|
| 1 | Full |
| 2 | 3/4 |
| 3 | 3/4 |
| 4 | 1/2 |
| 5 | 1/2 |
| 6 | 1/3 |
Archie Chart (anti-aircraft fire)
Roll twice: once against the Archie Chart to find the amount of damage, using the altitude band and a roll of 2-12 (columns are keyed by damage-area letters F/T/M/W/F/M/T/F as printed); then roll again on the Critical Hit tables below to find the area hit. Since all Archie hits go in one area, a roll of "C" is always a critical hit in that area.
| Altitude | 2 | 3 | 4 | 5 | 6 | 7 | 8 | 9 | 10 | 11 | 12 |
|---|---|---|---|---|---|---|---|---|---|---|---|
| 0-250' | 4 | 3 | 2 | 1 | 1 | 0 | 1 | 1 | 2C | 3C | 4C |
| 275-500' | 3 | 3 | 2 | 1 | 0 | 0 | 1 |
Starting Altitudes
1st roll is the same for both players; each player then takes the 2nd roll independently.
| 1st Roll | 2nd Roll: 1 | 2 | 3 | 4 | 5 | 6 |
|---|---|---|---|---|---|---|
| 1-2 | 500' | 750' | 1000' | 1500' | 1750' | 2000' |
| 3-4 | 2500' | 3000' | 3500' | 4000' | 4500' | 5000' |
| 5-6 | 5700' | 6400' | 7100' | 7800' | 8500' | 9200' |
Starting Page
Each player rolls independently for their own starting book page.
| Roll | 1 | 2 | 3 | 4 | 5 | 6 |
|---|---|---|---|---|---|---|
| 1 | 112 | 113 | 114 | 175 | 176 | 177 |
| 2 | 169 | 170 | 171 | 148 | 149 | 150 |
| 3 | 181 | 182 | 183 | 151 | 152 | 153 |
| 4 | 166 | 167 | 168 |
Gun Chart
Roll against the Gun Chart when firing, cross-indexed by ammo type (how much ammo you're expending on the shot) and by whether the gun is a single non-synchronized, single synchronized, or double synchronized gun.
Single Non-synchronized gun
| Ammo used | Roll 0 | 1 | 2 | 3 | 4 | 5 | 6 | Firing Condition (7) |
|---|---|---|---|---|---|---|---|---|
| 1 Pip | 0 | 0 | 0 | 1 | 1 | 1 | 2 | 2C |
| 2 Snap | 0 | 0 | 1 | 1 | 2 | 2 | 2C | 2C |
| 3 Squeeze | 0 | 1 | 1 | 2 |
Single Synchronized gun
| Ammo used | Roll 0 | 1 | 2 | 3 | 4 | 5 | 6 | Firing Condition (7) |
|---|---|---|---|---|---|---|---|---|
| 1 Pip | 0 | 0 | 1 | 1 | 2 | 2 | 2 | 2C |
| 2 Snap | 0 | 0 | 1 | 2 | 2 | 2 | 3C | 3C |
| 3 Squeeze | 1 | 1 | 2 | 2 |
Double Synchronized gun
| Ammo used | Roll 0 | 1 | 2 | 3 | 4 | 5 | 6 | Firing Condition (7) |
|---|---|---|---|---|---|---|---|---|
| 1 Pip | 1 | 1 | 2 | 2 | 2 | 3 | 3 | 3C |
| 2 Snap | 1 | 2 | 2 | 2 | 3 | 3 | 3C | 4C |
| 3 Squeeze | 2C | 2 | 2 | 3 |
Reading the Gun Chart
- Basic game: Close range = 2 pts, Medium range = 1 pt, Long range = 1/2 pt. (No gun chart used.)
- Intermediate game: use the gun chart above.
J= Jam. Must fly straight a number of turns equal to ammo expended before shooting again.C= choice of areas on deflected shot, otherwise no effect.- Die roll effects: +1 vs. slow target; +1 if firing an ace; −4 at long range; +1 if over 100' above; −2 at medium range; 0 at close range.
- Advanced game: "Slow Target" and "Above Shot" bonuses do not add to the die roll. The Damage Allocation Chart (DAC) is used to determine area hit instead.
J= as advanced game, but a die roll of "6" means guns are broken permanently.C= choice or critical — see Advanced game rules.
Altitude Effects (range)
- 0'-175' altitude difference: Close Range
- 200'-375' altitude difference: Medium Range
- 400'-675' altitude difference: Long Range
- No shots beyond 675' altitude difference.
Critical Hit Chart
Roll 2 dice under the proper damage area to find the critical hit result.
Wing
| Roll | Result |
|---|---|
| 2 | Cable Cut: do Straight and Stall maneuvers only. |
| 3 | Wings Cracking: in 5×"D" turns wings will collapse (see Wing 12). |
| 4 | Large Wing Holes: fall a minimum of 200' each turn. |
| 5 | Wing Holes: no climbing allowed. |
| 6 | Small Wing Holes: climb factor reduced 50'. |
| 7 | Aileron Stuck: stay in present turn mode (left, straight, or right) "D" times. After "D" times, aileron is unstuck. |
| 8 | Cable Loose: unable to perform Immelmann or Wingover Turns. |
| 9 | Fabric Flutter: fabric will tear if Power Diving (see Wing 10). |
| 10 | Fabric Tearing: fall 100'×"D" per turn. When altitude reaches 0 or below, "Crash Land" ("Force Land" if over aerodrome). |
| 11 | Wing Warp: fall 750' for "D" turns. After "D" turns, wings unwarp. |
Motor
| Roll | Result |
|---|---|
| 2 | Fire: plane explodes in 10 turns (see Motor 12). May change fire to flames (see Motor 11) after a roll of "6" while Sideslipping. |
| 3 | Motor Dies: glide, falling 200'/turn, doing no Fast or Fancy maneuvers. |
| 4 | Motor Skipping: no Fast, Climbing, or Power Diving. |
| 5 | Smoke: receive no clues; subtract one from all shot rolls. |
| 6 | Motor Hit: reduce plane's speed factor by 1. If plane's factor is now "0", plane may not go fast. |
| 7 | Oil Splash: do Straight Cruising "D" turns to wipe face. No shooting. |
| 8 | Motor Hit: see Motor 6. |
| 9 | Oil Pressure Falls: motor dies (see Motor 3) in 20 turns. |
| 10 | Motor Quits: motor dies (see Motor 3) but roll "6" each turn to start. |
| 11 | Flames: must do Sideslips or becomes fire (see Motor 2). Sideslip "D" turns and flames become smoke (see Motor 5). |
Fuselage (FSLG)
| Roll | Result |
|---|---|
| 2 | Control Cable Severed: roll die; on 1-3 may perform only Right maneuvers, 4-6 may perform only Left maneuvers. |
| 3 | Fuselage Crack: the fuselage will snap (see FSLG 12) on the next critical hit to the fuselage. |
| 4 | Right Side Damage: fuselage cracks (see FSLG 12) after any Left maneuver. |
| 5 | Gas Fire: see Motor 11. If flames become smoke, no effect to guns. |
| 6 | Controls Snag: do Stall "D" turns. |
| 7 | Near Miss to Pilot: panic — fly Straight one turn. (Aces are exempt.) |
| 8 | Fuel Tank Leak: tank empty (see Motor 3) in 10×"D" turns. Note that the tank will empty normally if the player has less fuel than rolled. |
| 9 | Controls Stick: may plot new maneuvers only on alternate turns. |
| 10 | Left Side Damage: fuselage cracks (see FSLG 12) after any Right maneuver. |
| 11 |
Tail
| Roll | Result |
|---|---|
| 2 | Tail Blown Off: Crash (see optional rules for Spins). |
| 3 | Elevator Bent: fall a minimum of 200'/turn. |
| 4 | Tail Loose: roll die after every Fancy maneuver. On a "6" tail falls off (see Tail 2). |
| 5 | Rudder Jam: fly Straight Cruising "D" turns. |
| 6 | Elevator Jam: fly in present inclination (climb, etc.) for "D" turns. |
| 7 | Momentary Disruption: do one Stall AND lose 300'. |
| 8 | Rudder Sticks: may plot new inclinations only on alternate turns. |
| 9 | Rudder Bent: fly in present turning mode (left, straight, right) for "D" turns. |
| 10 | Tail Loose: see Tail 4. |
| 11 | Elevator Bent: see Tail 3. |
| 12 |
Cockpit (CCPT)
Note that no regular damage goes into the Cockpit.
| Roll | Result |
|---|---|
| 2 | Pilot Killed: RIP. |
| 3 | Pilot Unconscious: Power Dive "D" turns, wake at end of last dive. |
| 4 | Gun Destroyed: double-synch fire as single-synch; others don't fire. |
| 5 | Altimeter Broke: opponent records your altitude/changes. You may not keep record of your altitude until within 500' of the ground. |
| 6 | Compass Broke: opponent records your location/changes. |
| 7 | Windscreen Crack: no clues. Panic fly Straight once (Aces exempt). |
| 8 | Observer Killed: if you have one, pilot panics, power dives next turn. Aces are exempt. |
| 9 | Pilot Faints: fly Straight Cruising "D" turns, falling 200'/turn. |
| 10 | Guns Destroyed: no more firing. |
| 11 | Pilot Wounded: must try to escape. Pilot faints (see CCPT 9) every "D" turns. |
Wheels
Note that no regular damage goes into Wheels.
| Roll | Result |
|---|---|
| 2-4 | Wheels Gone: "Crash" when attempting to land. |
| 5-8 | Wheels Loose: "Force Land" when attempting to land. |
| 9-12 | Wheels Hanging: "Crash Land" when attempting to land. |
Key
- "D" times: the number rolled on one die.
- "Crash": roll 5 or 6 to survive (pilot only).
- "Crash Land": roll 4-6 to survive (plane and pilot).
- "Force Land": roll 2-6 to survive (plane and pilot).
Damage Allocation Chart
Used in the Advanced game to translate a hit into a specific damage area, cross-referenced against the target's inclination and turn mode. The chart is a grid: rows are lettered bands (A, B, C, D...) and columns are numbered 1-8, split into an "Above 100'" section and a "Below" section. Each cell holds a damage-area letter:
- A — Wing
- B — Fuselage
- C — Tail
- D — Motor
- E — Cockpit/Wing
- F — Cockpit/Fuselage
- G — Wheel
- H — Tail/Fuselage
- K — Wing/Fuselage
- M — Wing/Motor
- O — Wing/Tail
The grid is read against the target's maneuver at the moment of the shot — each band of rows is labeled with the target's inclination and turn mode (Straight / Dive / Climb / Right / Left), and the shooter finds their point of aim in the appropriate band and column to read off the damage-area letter.
Rules for finding and shifting the point of aim:
- If the target does a Slow maneuver: do not change the initial Point of Aim.
- If the target does a Cruise maneuver: change the Point of Aim one square in each appropriate direction.
- If the target does a Fast maneuver: change the Point of Aim two squares.
Note: the initial point of aim may lie up to one square outside the diagram, such that a move in the proper direction would bring it into the squares.
Pilot's Log
A tracking sheet for recording a pilot's mission history. Fields include:
- Header: Pilot, Jasta/Squad, Nation, Date, Plane Make, Mission (F/B/T/R/A), Speed, Climb, Zoom, Dive, Power Dive, Ceiling, Hits (W/T/M/F), Fuel, Gun, Ammo.
- Per-turn columns: Altitude, Speed, Pg. A / Pg. B / Pg. C (book page reached, for cross-referencing multi-player games), Direction, Location.
- Side trackers: a compass rose (N/NE/E/SE/S/SW/W/NW) for heading, Fuel remaining, Critical Hits accumulated, Ammo remaining, and Accumulated Hits by area (W/T/M/F).
- Victory Points track: 1, 1.5, 2, 2.5, 3, 3.5, 4, 4.5, Ace — for marking a pilot's confirmed victories toward Ace status.
- Ace's Ability: a field for noting a pilot's special ace ability, once earned.
Pages A, B, and C on the log sheet are provided for multi-player games. Permission to copy this page by whatever method is granted, and players are strongly encouraged to do so, to facilitate play.