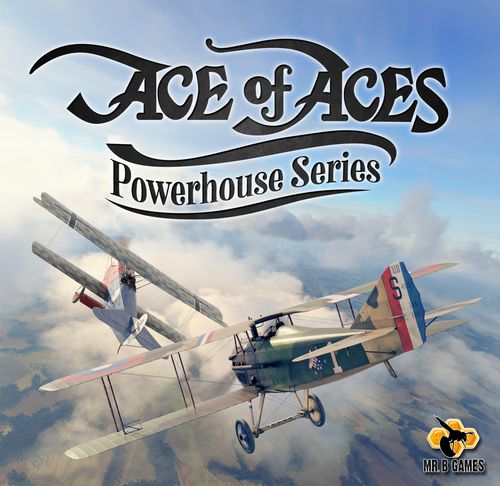
Ace of Aces: Powerhouse Series
Ace of Aces: Powerhouse Series Rulebook
Table of Contents
Table of Contents
Components
Each copy of Ace of Aces: Powerhouse includes:
- 1x SPAD XIII Dogfighting Book
- 1x Fokker D.VII Dogfighting Book
- 1x Chart Book
- 2x Dice
- 2x Ace Coins
- 30x Damage Tokens (2x 0s, 20x 1s, 6x 2s, 2x 3s)
- 8x Jam Tokens
- 2x Stall Tokens
- 2x Critical Tokens
- 30x Ammo Tokens (20x "1", 10x "2")
The Dogfighting Book
Each copy of Ace of Aces: Powerhouse includes two dogfighting books. These books have 223 pages that represent the various positions two planes can find themselves in.
Each page in the Ace of Aces dogfighting book presents a static image of a dogfight between two planes. Each page has common elements:
- Page Number — In the upper corner of each page is the current page number.
- Book — The icon tells you which book you are looking at. It shows either the Iron Cross for the German plane or the Royal Air Force Roundel for the Allied plane.
- Range — Next to the page number is the range you are from your opponent. This is either Short, Medium, or Long range. You can also tell by looking at the picture: at Short range the enemy plane will be very large, at Medium range, slightly smaller, and at Long range it will be smaller still.
- View — Your page will present the view from your cockpit; your view could be straight ahead, ahead to the left, ahead to the right, to the left, to the right, behind (astern) you, behind you to the right, or behind you to the left. The view is always centered on your opponent, and not the direction you are flying.
- Facing — The way the opposing aircraft is depicted tells you the direction that the aircraft is flying. There are eight possible directions: away to the left, away to the right, away straight ahead, to the right, to the left, toward to the right, toward to the left, and toward you. In addition, there are a few pages where the opposing plane isn't visible at all. This means the enemy is above or below you, or if you are on page 223, too far away.
- Maneuver Chart — Along the bottom edge of the page is a list of maneuvers you can make.
Tailing/Tailed: Some pages have the word Tailing or Tailed which signifies that you are tailing your opponent, or they are tailing you.
Firing or Shot: Some pages have the words Firing or Shot! Which signifies that you are firing at your opponent or being shot by them. Some pages have both. (You are flying directly at each other.)
Maneuver Chart
The Maneuver Chart lists every maneuver available at each of three speeds — Slow, Cruising, and Fast — each split into Left, Straight, and Right columns. Each maneuver has a letter code, an icon, and a page number:
- Maneuver Speed — Planes can be at three speeds, Slow, Cruising, or Fast. The speed determines which maneuvers are available. It also determines how far your plane will move in relation to the opposing plane.
- Maneuver Direction — Each Maneuver Speed has three directions as well, Left, Straight, or Right.
- Maneuver Code — This is a code representing the maneuver. You can use the code if you are using a written log that is used by older advanced rules. These original rules are in the back of the rulebook.
- Maneuver Icon — This is a visual representation of the maneuver listed.
- Page Reference — Also, each maneuver has an associated page number. This is the page you will call out to your opponent, who will refer to it when resolving the turn.
| Speed | Direction | Code | Page |
|---|---|---|---|
| Slow | Left (Weaving) | A | 48 |
| Slow | Left (Tight Bank) | B | 222 |
| Slow | Left (Sideslip) | C | 174 |
| Slow | Straight (Stall) | D | 1 |
| Slow | Straight (Sideslip) | E | 60 |
| Slow | Right (Tight Bank) | F | 2 |
| Slow |
The Maneuvers
The Slow Maneuvers are:
- Stalls (Straight): A stall is a maneuver performed by inclining your plane so that the wings no longer provide lateral lift. The plane then noses down, falling 100' or so until the wings begin to provide lift again. Stalling is not a condition related to the motor. The maneuver is used to cut forward momentum, allowing the enemy to fly into your gunsight.
- Weaving (Left and Right): Weaving is a combination of turning and slipping. In performing this maneuver, the plane makes a falling 'S' pattern. This maneuver allows the plane to swing to the side (out of the line of fire) yet continue to aim at forward-approaching aircraft.
- Tight Banks (Left and Right): The tight bank is performed by tipping one wing down. The lower the wing, the tighter the bank. At higher speeds the stress on the plane was too great to turn so sharply. It was through a series of these tight banks that most WWI pilots attempted to circle behind their opponents.
- Weaving Turns (Left and Right): Weaving allows the pilot of a pursued plane to move out of the line of fire.
- Turns (Left and Right): This is a straight flying maneuver with a bank at the end to change the plane's heading by 60 degrees. This maneuver is useful in conjunction with a follow-up tight bank next turn, to bring the plane around rapidly.
The Cruising Maneuvers are:
- Cruising Turns (Left and Right): Same as above but performed at a faster speed. Beware of shots from tailing planes!
- Wingover (Left and Right): This maneuver is performed by bringing the nose of the plane up as if you were going into a loop. At that point, you allow one of the wings to stall (lose lift) and the plane then falls off the loop in that direction. This maneuver is highly useful for making quick, tight turns of about 120 degrees.
- Forward Cruising: This is just straight flying, with no turning.
- Immelmann Turn: A complex maneuver performed by putting the plane into a diving or climbing half-loop. At the peak (or valley) of the loop, you do a half-roll to put the plane right-side up now pointing in the opposite direction. This is a good tactic to use to attack a pursuing plane. It works best at longer ranges. An upward and downward Immelmann performed in succession equals a loop.
- Sideslips (Left and Right): A level maneuver where the plane's ailerons and rudder are pushed in opposite directions. One wing tilts down, and the plane falls off to the side, losing altitude rapidly. The sideslip was used to drop quickly for forced landings without pointing the nose at the oncoming ground, and alternating left-right combinations ('falling leaf') were useful for extinguishing motor fires.
- Barrel Roll (Left and Right): A maneuver performed by rolling laterally to the left or right while moving at cruising speed. This 'hot-dog' maneuver was useful as an evasive action. The maneuver is highly difficult, so it is not possible to barrel-roll and shoot at the same time.
The Fast Maneuvers are:
- Fast Turn/Fast Forward: Normal flight maneuvers performed at high speed.
- Fast Banks (Left and Right): The plane banks 60 degrees to the side, then finishes out the move by flying straight. This is primarily a movement maneuver, but it is also useful for getting out of the line of fire quickly.
- Fast Straight Turn (Left and Right): This straight maneuver allows the pilot of a fast plane to snap his plane 60 degrees.
Standard Game
Setup
Each player chooses a dogfighting book that represents their plane. Each player takes Damage Tokens with a total value of 12.
Each player turns to page 170. You are ready to play!
Sequence of Play
- Choose Maneuver
- Reveal Maneuvers and cross reference result page
- Resolve Firing
Choose Maneuver
In the standard game, you can choose any maneuver on any turn. Each player silently chooses one maneuver from the maneuver chart at the bottom of the page. Let your opponent know when you are ready.
Reveal Maneuver
When both players are ready, tell your opponent the page reference for the maneuver you are performing. They will tell you a page reference to the maneuver they are performing as well.
Turn to the page number your opponent tells you to, and look at your maneuver on the new page (ignore any firing or tailing results on this page, only refer to the maneuver chart), then turn to the page that is listed for your maneuver. Your opponent will do the same, and you should both end up at the same page. This is called the End Page.
Tailing
If your final page says Tailed on it, then your opponent is tailing you. Before they choose their page for the next maneuver you must tell them whether your maneuver is a Left, Straight, or Right Maneuver.
Play Example: Tailing — Bob and Jacoby are on page 120, and Bob who is playing the Allies is tailing Jacoby who is playing the Germans. Jacoby chooses to do a Slow Weave Left which is a Straight maneuver, he tells Bob he is going Straight, but not that he is doing a Slow Weave Left, and then Bob chooses his maneuver, a Cruising Straight. Bob calls out page 107, and Jacoby calls out page 119, with an ending page of 91. Bob made the right call and deals 2 points of damage to Jacoby!
Page 223
If one player ends on page 223, they will see there is no maneuver chart. Go to the end page of your opponent, and continue to play.
Play Example: Page 223 — As above, Bob and Jacoby are on page 120, and Bob who is playing the Allies is tailing Jacoby, who is playing the Germans. Instead of a Slow Weave Left, Jacoby chooses to do a Fast Forward, he tells Bob he is going Straight because he is being tailed, and then Bob chooses his maneuver, a Fast Straight Turn Left. Bob calls out page 12, and Jacoby calls out page 223. Since Bob is on page 223, they will use Jacoby's ending page which is 153.
Lost!
If both players end up on page 223, they lose sight of each other. If both players wish to continue, both players go to page 170 and start anew with any damage remaining.
Losing Sight of the Enemy
Besides page 223, there are six other pages where the enemy aircraft isn't visible. Pages 187, 188, 198, 205, 209, and 213 represent the planes above or below each other. The direction of the picture is the direction the other plane is coming from.
Play Example: Losing Sight of the Enemy — The Allied book page 213 shows no plane, but the angle of the shot is the left rear angle, which means the German plane is flying from that direction and is below or above the Allied plane.
Firing
If the End Page has the word Firing or Shot! next to the page number, then you have successfully shot your opponent (Firing), or your opponent has shot you (Shot!). When you are firing, you deal damage equal to the value on the page (4 Short range, 2 Medium range, 1 Long range). Your opponent must discard that many Damage Tokens. If your opponent has no Damage Tokens left after discarding, you have shot them down!
Victory Check
If a player has no Damage Tokens left (their plane has taken 12 damage), they have lost.
Advanced Game
Components
- 40 Ammo (20 for each player)
- 8x Jam Tokens
- 2x Stall Tokens
The advanced game is played the same as the standard game with the following changes.
Setup
Add a bank of Jam Tokens. Give each player 20 Ammo (Tokens have either a 1 or 2 value).
Maneuver Restrictions
The Advanced game adds a few movement restrictions to better simulate the flight of WWI aircraft.
Stall Maneuvers: Stall maneuvers (maneuvers with a bar at the bottom of the icon — Stall, Weaving Left/Right, Turn Left/Right, Sideslip Left/Right) cannot be performed twice in a row. There are stall tokens you can use as a reminder that you performed a stall maneuver.
Difficult Maneuvers: Some maneuvers have a small "d" next to them, these are Difficult maneuvers (Weaving Left/Right, Wingover Left/Right, Immelmann, Sideslips Left/Right, Barrel Roll Right). Before performing one of these maneuvers you must have performed a Cruising or Fast Forward maneuver the previous turn.
The exception is Immelmann and Sideslips: if you performed either of these maneuvers you can repeat that maneuver again. You cannot perform an Immelmann, then a Sideslip or vice-versa.
Play Example: Difficult Maneuvers — Sean performs a Cruising Forward, and then performs an Immelmann (a Difficult Maneuver) his next maneuver can be another Immelmann or any other non-difficult maneuver.
Firing
In the Standard game, damage was done abstractly and determined by range. In the advanced game, you roll a die to vary the amount of damage dealt.
When you fire you may choose how long of a burst you want to shoot. The longer the burst the more damage you are likely to do, but the more Ammo Tokens you use. You may choose to use up to 6 Ammo Tokens.
To use 5 Ammo you must plot a Cruising or Fast Straight Forward next turn.
To use 6 Ammo your last maneuver must also have been a Cruising or Fast Straight Forward.
Choosing a Barrel Roll maneuver prevents you from firing, as the maneuver is very complicated.
After choosing the amount of Ammo Tokens you wish to use, roll a die. Cross-reference the Ammo Tokens used and the die roll, and looking at the range you will deal the listed amount of damage. If your opponent performed a slow maneuver this round add 1 to your roll.
Play Example: Firing — Sean squeezes a burst of 3 ammo, and rolls a 4, He is at Medium range so he deals 4 damage.
Some results have a J after the damage. This means your guns have jammed. You need to fly Forward (either Cruising or Fast) for two turns. These do not need to be performed consecutively, but your guns cannot be fired until you've flown Forward two times. You can use the Jam Tokens to keep track of the turns you use to clear the jam. Take two Jam Tokens from the bank, then each turn you move Forward return a token to the bank. When you have no tokens left your guns are cleared!
Play Example: Firing (Jammed) — Sean performs a Long 5 ammo blast and rolls a 1, he deals 3 damage, but his guns are jammed! He takes two Jam Tokens, and needs to perform a Forward Movement (he's too busy clearing the jam to fly the plane) for each Jam Token. After moving forward once, he doesn't want to risk another forward movement, and instead, he performs a Sideslip, that turn doesn't count as one of his two forward movements, but it doesn't reset the count of turns either; he still needs to perform 1 more forward movement. Hopefully, he can unjam his gun before his opponent lines up on him!
Firing Charts
Long Range
| Ammo Used \ Die Roll | 1 | 2 | 3 | 4 | 5 | 6 | 7 |
|---|---|---|---|---|---|---|---|
| 1 | 0 | 0 | 1 | 1 | 1 | 2 | 2 |
| 2 | 0 | 1 | 1 | 2 | 2 | 2 | 3 |
| 3 | 1 | 1 | 2 | 2 | 2 | 3 | 4 |
Medium Range
| Ammo Used \ Die Roll | 1 | 2 | 3 | 4 | 5 | 6 | 7 |
|---|---|---|---|---|---|---|---|
| 1 | 0 | 1 | 1 | 2 | 2 | 3 | 3 |
| 2 | 1 | 1 | 2 | 3 | 3 | 4 | 5 |
| 3 | 2 | 2 | 3 | 4 | 4 | 5 | 6 |
Short Range
| Ammo Used \ Die Roll | 1 | 2 | 3 | 4 | 5 | 6 | 7 |
|---|---|---|---|---|---|---|---|
| 1 | 1 | 2 | 2 | 2 | 3 | 3 | 4 |
| 2 | 2 | 3 | 4 | 4 | 5 | 5 | 6 |
| 3 | 3 | 4 | 5 | 5 | 6 | 7 | 7 |
J = Jammed.
Die Roll Modifier: If your opponent chose a Slow Maneuver, you add 1 to your roll when firing this turn.
Optional Rules
Damage Without Dice
Instead of using the Damage Tokens for tracking damage, you can use them to randomize damage. You'll need to use the ammo tokens to track damage, as they are not used in this optional rule. You need an opaque cup or bag for each pilot. In each bag/cup add:
- 2x Jam Tokens
- Damage Tokens: 1x 0, 10x 1s, 3x 2s, 1x 3s
- 1x Critical Token
When you shoot your opponent, draw from your bag the amount of tokens equal to the damage dealt in the standard game. Tokens are drawn one at a time, and each token is resolved, and returned to the cup before the next token is drawn. Each Damage Token drawn deals damage to your opponent equal to its value. After noting the damage from the drawn tokens, return the tokens to the bag/cup.
If a Critical Token is drawn, you have shot the engine, fuel tank, wing spar, or pilot, and the aircraft crashes immediately.
If a Jam Token is drawn, return the Jam token and immediately draw another token (this doesn't count as a normal draw); if another Jam Token is drawn, your guns have jammed. You should take an amount of unused Jam Tokens (not from the cup) equal to the amount of tokens that still need to be drawn +1, and you stop drawing additional tokens from the bag. If it is any other token, ignore it, and continue drawing tokens as normal, that shot has "missed."
Play Example: Damage Without Dice — Al fires at Dennis at Short range and draws 4 Tokens. He draws from the cup and draws one Damage Token. Dennis takes 1 damage, and the token is returned to the cup. Then he draws a Jam Token. He then returns the Jam Token to the cup and immediately draws another token. It is also a Jam Token, meaning Al has jammed his guns and he takes 3 Jam Tokens representing the draws he has remaining +1.
If you don't wish to play with the Critical Tokens, they can be removed from the mix. This eliminates a lucky shot win.
Starting Page
If you wish, you can randomly determine your start page by rolling two dice, and cross-referencing the dice on the table below:
| 2nd Die \ 1st Die | 1 | 2 | 3 | 4 | 5 | 6 |
|---|---|---|---|---|---|---|
| 1 | 112 | 113 | 114 | 175 | 176 | 177 |
| 2 | 169 | 170 | 171 | 148 | 149 | 150 |
| 3 | 181 | 182 | 183 | 151 | 152 | 153 |
| 4 | 166 | 167 | 168 |
Original Rules
Editor's Note (Ed Bryan, Mr. B Games): These are the original rules. I incorporated known errata and fixed some punctuation. I left the verbiage as written. I added a few notes if the physical components don't match in this version. The rules were repeated between the two books, the only differences were the list of aces and planes. I combined both sets of aces and planes into this one document. Enjoy! — Ed Bryan
Aces & Aircraft
German Aces
- Hauptmann Rudolf Berthold — 44 victories. Fokker DVII. Aggressive. Knew the capabilities of his aircraft and when to break an engagement.
- Oberleutnant Erich Loewenhardt — 53 victories. Fokker DVII. Had an aggressive competition with his friends for most victories. Died in a mid-air collision.
- Leutnant Josef Jacobs — 41 victories. Albatros DIII. Once fought to a draw the famed Guynemer, and Nungesser.
- Hauptmann Oswald Boelcke — 40 victories. Albatros DII (very similar to a DIII). The 1st German ace. Developer of fighter plane tactics. A master of maneuvering.
- Leutnant Fritz Rumey — 45 victories. Fokker DVII. Rumey was one of only a few non-commissioned officers to become an Ace.
- Leutnant Franz Büchner — 40 victories. Aggressive, fearless Ace, who on one day attacked and destroyed six Allied planes.
German Aircraft
- Albatros DIII — On line spring 1917 to spring 1918. Outstanding performer, steady, fast, but had a deadly weakness in high speed turns — wings collapse.
- Albatros DVA — On line fall 1917 – summer 1918. An improved DIII, more powerful, yet still weak in fast turns.
- Junkers DI — On line late 1918. Metal monoplane, powerful, exceptional, yet monoplanes were not popular.
- Pfalz DXII — On line Aug. 1918. Excellent aircraft, very strong, fast, maneuverable yet not up to the level of performance of the Fokker DVII.
- Fokker DVII — On line May 1918 to end. Considered by many experts on both sides to be the best fighter plane of the war.
Allied Aces
- Capitaine Georges Guynemer — French. 53 victories. Spad VII. Physically weak but a keen and alert combatant. Beloved by his countrymen, often flew alone.
- Lieutenant Charles Nungesser — French. 45 victories. Spad XIII. Called indestructible. Survived many crashes. Took on six Albatros in one day and shot two down.
- Major Raoul Lufbery — American. 17 victories. Spad VII. Incredibly brave, he would hold his plane in clear view of a trailing enemy, Immelman around and blaze away at his foe.
- Lieutenant "Billy" Bishop — Canadian Ace of Aces. 72 victories. Eager for combat, once attacked a German air base and shot down 4 planes in 6 minutes.
- Major "Mick" Mannock — British Ace of Aces. 73 victories. SE5A. Expert marksman and a deadly serious competitor, gave no quarter to his enemy.
- Major Francesco Baracca — Italian Ace of Aces. 36 victories. Spad VII. A skilled pilot who knew his Spad VII so well that he refused the new Spad XIII's when they were introduced.
Allied Aircraft
- Sopwith Dolphin — British. On line spring 1918 to the end. This powerful plane was not as popular because it lacked the maneuverability of the Snipe.
- SPAD VII — French. On line fall 1916 to summer 1917. A strong reliable engine mounted on a sturdy airframe, impressive performer, not as tricky as the rotaries yet highly maneuverable. Fast!
- SPAD XIII — French. On line spring 1917 to the end. Improved Spad VII, stronger, faster and maneuverable.
- SE5A — British. On line summer 1917 to the end. Outstanding fighter, superior to the slightly more maneuverable rotaries, fast, early ones had mechanical defects.
- Ansaldo Balilla — Italian. On line late 1918. Speedy, strong but slightly less maneuverable than the Spads.
Introduction
The two planes had been battling for nearly fifteen minutes, soaring and swooping like two gigantic birds of prey.
"That's what I am," thought Max, "a hawk of war."
He looked back over his left shoulder, where his opponent was going into a tight turn, to bring those damnable guns to bear on the tail of Max's plane.
"He thinks he has me now," thought Max. Little did the enemy know that he was up against Max Immelmann, creator of the Immelmann Turn, a man who knew how to bend strut, and fabric to his will.
Suddenly Max pulled his plane into a loop, rolling right-side up and flying straight into his startled opponent's face. Guns blazing at the enemy's motor, Max relaxed while watching the swirling column of smoke descend.
Ace of Aces is a radical departure from the standard 'boardgame' simulations you are probably quite familiar with. The game uses visual representation of two planes, in book form. In this way a game can be played virtually anywhere, even over the phone, and with as many players as you have books (and bookmarks!). We hope you enjoy Ace of Aces.
Beginner's Guide to Flying
Notes: This section contains no 'rules' per se. Rather it is designed to familiarize players with the concepts behind the stop-action picture book form of game playing. None of the many terms mentioned here need to be memorized. It is better just to LEAF THROUGH THE BOOK as you read this section, getting an idea of what the pictures mean. THIS WILL GREATLY FACILITATE FUTURE UNDERSTANDING.
If you have ever been in an airplane, you know that there is a strong illusion that you are remaining motionless and the rest of the world is moving. In the game, this is simulated with pictures representing the positions of another plane in relation to a static you. Your own relation to the ground is unimportant — it is the other aircraft's relation to you that matters.
Each picture has three major components. They are Range, Facing, and View.
Range
There are three possible ranges. Short range are large pictures indicating the other plane within 25-175' of you. Medium range are small pictures with details still visible, indicating the other plane at about 200-375'. Long range pictures are very tiny, and details are all but impossible to make out. These indicate the enemy out to about 675'. Beyond that planes are LOST to one another, and go to the lost "picture", page 223.
Facing
Facing refers to the way the other plane is pointing. There are seven possible Facings: Rear, Front, Rear Side Right, Rear Side Left, Front Side Right, Front Side Left, and Full Side.
The Tail facing of the enemy shows his tail and rudder assembly most clearly. The front shows motor and prop. The Rear and Front Side facing show the enemy turned 60 degrees from you, and the Full Side facing is directly from the left or right side.
View (From your cockpit)
View refers to what you, the pilot, see. On each page, there is one View. At the bottom of the page, the maneuver arrows point in the direction of forward motion. LOOK AT THE VIEW, IMAGINE WHICH WAY THE WINDSCREEN AND INSTRUMENT PANEL ARE POINTING EVEN IF YOU CAN'T SEE THEM. That is the direction of forward motion. That is the direction the maneuver arrows will move the plane. The Possible views are:
- Windscreen View: From this view, you are looking straight ahead over the windscreen. The direction of your forward motion is straight ahead. Therefore, all maneuvers (the arrows) originate from this point.
- Right Forward Wing View: From this view, you are looking forward, off to your right, through your right wing. Your windscreen is 60 degrees to the left of this view, therefore the forward motion of the aircraft is 60 degrees to the left.
- Left Forward Wing View: You are looking forward, off to your left, through your left wing. The windscreen is 60 degrees to the right, therefore forward motion is 60 degrees to the right.
- Right Wingtip View: You are looking to your right, straight down the line of the right wing. Your windscreen is 90 degrees to your left, therefore all forward motion is 90 degrees to your left.
- Left Wingtip View: You are looking to your left, straight down the line of the left wing. Your windscreen is 90 degrees to your right, therefore all forward motion is 90 degrees to your right.
- Right Tail View: You are looking behind your right shoulder at the right side of your tail structure. Your windscreen is 120 degrees to your left, therefore all forward motion is 120 degrees to your left.
- Left Tail View: You are looking behind your left shoulder at the left side of your tail structure. Your windscreen is 120 degrees to your right, therefore all forward motion is 120 degrees to your right.
- Tail View: You are looking directly behind you over the tail and rudder assembly. The windscreen is 180 degrees behind you, therefore all forward motion is 180 degrees behind you.
NOTE that Range, Facing, and View are all independent of one another. You can be looking out at your left Tail View at an enemy facing Front (he is shooting at you) at Short Range (he is blowing you to pieces).
Special Circumstances – Tailing and Shots
There are two combinations of views that yield special happening in the game. These are Tailing and Shots. You are usually tailing your opponent when he is in your Windscreen or Forward Wing Views, presenting his Rear facings. You are usually being Tailed when the enemy is in your Tail or Tail Side Views and is presenting his Front facings. Tailing is unaffected by range. Tailing represents the dogging of the enemy, and gives an advantage to the tailing player (see rules). For ease of play, all pages in your book where you are Tailing your opponent are marked with a small 'T' on the page.
Ed Note: This version says tailing or tailed on the page.
Shots occur when the enemy is within the windscreen of a Windscreen view, or when he is in Front Facing, shooting you. These are the only aspects where guns may be brought into play. NOTE: the blazing guns appear on all shot pages, to help players recognize shots.
Ed Note: This version also has a damage amount on the page. As well as a Firing Note.
The Maneuvers
World War 1 aircraft ranged the scale from slow and unmaneuverable to slow and very maneuverable. The difference lay in the rapidly changing technology of aeronautical design.
In this game, there are 25 possible maneuvers that a pilot can choose from. They are represented by arrows at the bottom of each game page. The maneuvers are divided into Slow, Cruising, and Fast speeds.
The Slow Maneuvers are:
- Stalls (straight): A stall is a maneuver performed by inclining your plane so that the wings no longer provide lateral lift. The plane then noses down, falling 100' or so until the wings begin to provide lift again. Stalling is not a condition related to the motor. The maneuver is used to cut forward momentum, allowing the enemy to fly into your gunsight. The stalls have bars below them to indicate a forced loss of altitude in the game (see rules).
- Weaving (Left and Right): Weaving is a combination of turning and slipping. In performing his maneuver, the plane makes a falling 'S' pattern. This maneuver allows the plane to swing to the side (out of the line of fire) yet continue to aim at forward-approaching aircraft. Weaving has a bar beneath it to indicate forced loss of altitude. This maneuver is marked with a 'D' to indicate it is a fancy maneuver (see rules).
- Tight Banks (Left and Right): The tight bank is performed by tipping one wing down. The lower the wing, the tighter the bank. At higher speeds the stress on the plane was too great to turn so sharply. It was through a series of these tight banks that most WWI pilots attempted to circle behind their opponents.
- Weaving Turns (left and right): Weaving allows the pilot of a pursued plane to move out of the line of fire.
- Turns (left and Right): This is a straight flying maneuver with a bank at the end to change the plane's heading by 60 degrees. This maneuver is useful in conjunction with a follow-up tight bank next turn, to bring the plane around rapidly.
The Cruising Maneuvers are:
- Cruising Turns (Left and Right): Same as above but performed at a faster speed. Beware of shots from tailing planes!
- Wingover (Left and Right): This maneuver is performed by bringing the nose of the plane up as if you were going into a loop. At that point, you allow one of the wings to stall (lose lift) and the plane then falls off the loop in that direction. This maneuver is highly useful for making quick, tight turns of about 120 degrees. This maneuver is marked with a 'D' to indicate it is a fancy maneuver (see rules).
- Straight Cruising: This is just straight flying, with no turning.
- Immelmann Turn: A complex maneuver performed by putting the plane into a diving or climbing half-loop. At the peak (or valley) of the loop, you do a half-roll to put the plane right-side up now pointing in the opposite direction. This is a good tactic to use to attack a pursuing plane. It works best at longer ranges. An upward and downward Immelmann performed in succession equals a loop. This maneuver is marked with a 'D' to indicate it is a fancy maneuver (see rules).
- Sideslips (Left and Right): A level maneuver where the plane's ailerons and rudder are pushed in opposite directions. One wing tilts down, and the plane falls off to the side, losing altitude rapidly. The sideslip was used to drop quickly for forced landings without pointing the nose at the oncoming ground, and alternating left-right combinations ('falling leaf') were useful for extinguishing motor fires. The Side slip has a bar beneath it to indicate mandatory altitude loss, and a 'D' to indicate a fancy maneuver (see rules).
- Barrel Roll (Left and Right): A maneuver performed by rolling laterally to the left or right while moving at cruising speed. This 'hot-dog' maneuver was useful as an evasive action. The maneuver is highly difficult, so it is not possible to barrel-roll and shoot at the same time. This maneuver is marked with a 'D' to indicate it is a fancy maneuver (see rules).
The Fast Maneuvers are:
- Fast Turn/Fast Straight: Normal flight maneuvers performed at high speed.
- Fast Banks (Left and Right): The plane banks 60 degrees to the side, then finishes out the move by flying straight. This is primarily a movement maneuver, but it is also useful for getting out of the line of fire quickly.
- Fast Straight Turn (Left and Right): This straight maneuver allows the pilot of a fast plane to snap his plane 60 degrees.
Introduction to the Rules
The rules are presented in as simple a manner as possible. In each 'game' new concepts are introduced and explained. Then the sequence of play is presented. Wherever references to new rules are made, a "(see below)" will follow. After the sequence of play, sections explaining in full each "see below" follow. Each section is numbered for easy reference.
Each game (basic/intermediate/advanced) is fully playable in and of itself. Each step adds realism (and complexity) to existing rules. It is possible to play basic maneuver with advanced fire, or advanced fire with intermediate maneuver, or whatever combination players find best suited to them.
Basic Game: Maneuver and Fire
Note: The rules proper begin here. It is handy to REFER BACK to the Beginner's Guide to Flying if problems occur.
Open the two books to page 170. You will see views of a SPADXIII's interior (in the Allied book), or a Fokker DVII's interior (in the German book). That is YOUR plane. The ENEMY plane is the one FLYING AROUND YOUR SPAD in the German book, FOKKER in the Allied. NOTE that the two pictures are not the same. This is because in one book 'you see him' and in the other 'he sees you' and the views are different. To move, look at the bottom of the page for the maneuvers. Each pilot selects a maneuver based on the arrow of this choice noting the number below it. NOTE: the arrows point in the direction of forward motion.
These numbers represent the MID-TURN page that your opponent will turn to. If the other plane were remaining stationary (stalling) you would end the turn on that page but since both planes move, both players must perform the routine. The following is a step-by-step sequence of play. Pay careful attention to the distinction between MID-TURN pages and END-TURN pages.
I. Sequence of Play
- Step 1: Each Pilot selects the maneuvers (arrow) he will do and records the arrow in the appropriate space in the pilot log sheet. He also notes the number below that arrow and records it. That number is the MID-TURN PAGE NUMBER!!!
- Step 2: Pilots take shots where applicable (see IV below).
- Step 3: Pilots call out to each other the number they have recorded (the MID-TURN page number).
- Step 4: Each pilot goes to the MID-TURN page his opponent has called out in step 3. CAUTION: DISREGARD THE PICTURE ON ALL MID-TURN PAGES.
- Step 5: Each pilot finds the originally selected maneuver (arrow) that he has recorded for this turn. Below that arrow is a new number. This number will be the same for both pilots and is the END-TURN PAGE NUMBER where both pilots will end the turn.
- Step 6: Pilot's turn to the END-TURN page, noting Tailing and Shots that occur on this page only.
- Step 7: Pilots give clues (see V below). Play returns to step 1 and proceeds until one pilot is shot down or escapes (see VI below).
NOTE: if a MID-TURN page is 223, read the instructions on that page for MID-TURN pages. IF the End-TURN page is 223, read the rules section on "GETTING LOST" (VI).
NOTE: If a page has maneuver arrows, but you cannot see the enemy aircraft, it means that he is directly above or below you. Continue flying and he will probably appear next move.
II. Example of Play
- Pilots are currently on END-TURN page 1. The Allied player gave a clue in step 7 of the last turn (he is being) of "left". The German selects 'slow left turn' and records the MID-TURN PAGE NUMBER below it (205). The Allied pilot selects 'fast left bank' (he had to do a left maneuver because of his clue) and records the MID-TURN PAGE NUMBER below it (203).
- Pilots check for shots. Nobody is in a windscreen, so there are no shots this turn. Play proceeds.
- When both pilots are ready, they tell each other the MID-TURN PAGE NUMBER they have recorded. Note that this is considered completely simultaneous for game purposes - it doesn't matter who goes first. Allied pilot says "GO TO PAGE 203" The German pilot says "OK, YOU GO TO PAGE 205" (NOTE that these are both MID-TURN page numbers obtained in step 1).
- Pilots now turn to the MID-TURN page they have been told. The Allied pilot turns to page 205 (the MID-TURN number the German pilot called,) and the German turns to page 203 (the MID-TURN number the Allied pilot called). Pilots DISREGARD the pictures on these MID-TURN pages.
- Players look under the maneuver they originally selected for that turn. The German pilot looks under 'slow left turn' and sees END-TURN page 96. The Allied pilot looks under "fast left bank" and sees the END-TURN page 96. NOTE: END-TURN pages will always be the same. Pilots should check with each other to make sure that they have not made any mistakes. If one pilot is told to go to MID-TURN page 223 he follows the instructions on that page by waiting for the other player to find the END-TURN PAGE. If both pilots tell each other to go to 223, they are LOST (see VI).
- Both Pilots go to page 96, the new END-TURN PAGE. They check for shots and tailing (see IV/V below), finding that the Allied pilot is being shot. EFFECTS ARE NOT TAKEN UNTIL STEP 2 OF THE NEXT TURN.
- Allied pilot still has the German on his tail, so he must give a clue. He chooses "right." in step one of the next turn, he must choose some sort of right maneuver.
III. Reminders
END-TURN PAGE NUMBERS ARE ALWAYS THE SAME IN BOTH BOOKS. MID-TURN PAGE NUMBERS ARE USUALLY NOT THE SAME IN BOTH BOOKS. ALWAYS BEGIN AND END THE TURN ON AN END-TURN PAGE NUMBER. REMEMBER TO DISREGARD THE PICTURES ON THE MID-TURN PAGES.
IV. Shooting in the Basic Game
Whenever a pilot begins step 2 with the opponent in his windscreen (see INTRODUCTION) he shoots, doing damage to his opponent. Note that it is entirely possible for both players to be shooting each other at the same time.
In the beginner's game, shots are handled in a highly abstract manner. Ammo is not taken into account.
In the beginner's game, each shot at close range is worth 2 points of damage. Each shot at medium range is worth 1 point of damage. Each shot at long range is worth ½ point of damage. Six or more points total destroys a plane (see VII. Winning).
If a plane is destroyed, its pilot is considered killed and the victor is awarded one victory point (see VIII. ACES).
V. Tailing in the Basic Game
Whenever a player ends his turn on a page with a "T" printed on it, he is Tailing his opponent. This means that he is following behind and has an increased ability to react to his opponent's move. It is NOT possible for both players to be tailing each other at the same time.
When a player is Tailing his opponent, he may demand a clue. The opponent must: Select his maneuver first, and give a clue consisting of one of the following three categories: LEFT, RIGHT, or STRAIGHT.
On each page, the maneuvers are listed according to speed (for use in later games) and within each speed category, the maneuvers are listed by direction. The player being tailed must tell his opponent in what direction the maneuver he has chosen goes. The tailing player then picks his own maneuver and play proceeds normally.
Ed Note: References to "T" are spelled out in this version. The page will say tailing or tailed as appropriate.
VI. Getting Lost (Escaping)
If a pilot feels he is in danger of being shot down, he may wish to escape the field of battle, especially if he has previous victories (see VIII Aces). In addition, both pilots might simultaneously make wide-sweeping maneuvers which carry them away from each other. In both cases these pilots might become LOST to one another.
The two planes are lost to each other if and only if the END-TURN PAGE that both pilots call out in step 5 is 223, or if the MID-TURN page for BOTH pilots was 223. Page 223 is a view of clouds that your opponent has disappeared behind.
When planes get LOST, each pilot has two options: he may SEARCH or he may ESCAPE.
If both pilots SEARCH, restart the battle on page 170. Damage is carried over since this is a continuation.
If both pilots ESCAPE, the game is over and a draw. A new game may be started, but planes are considered repaired, and different pilots may be substituted (if you are keeping statistics).
If one pilot ESCAPES but the other SEARCHES, the searching pilot is considered to have driven his enemy from the sky, and scores ½ a victory point (see VIII Aces). A new battle may be begun, but planes are considered repaired, and different pilots may be substituted. Remember, a pilot who fights and runs away will live to fight another day.
NOTE: pilots should WRITE DOWN and then simultaneously reveal whether they are SEARCHING or ESCAPING when the situation arises, to preserve secrecy.
VII. Winning the Basic Game
For the Beginner's game, 6 points of damage (see IV. SHOOTING) destroys an aircraft. The winning pilot scores 1 victory point. If planes destroy each other on the same move (head-on shot) the game is a draw. You score ½ victory point for driving your enemy from the sky (see above).
VIII. Aces
In World War I, especially on the German side, much emphasis was placed on how many victories (enemy planes shot down) a pilot had. Men with 5 (other numbers were used, but 5 is a good average) victories were called Aces. They were considered expert pilots and were usually excellent marksmen as well.
To reflect the building up of a pilot's victories, players should name the pilot in a battle. If he survives, he may be flown again with full victory credit being carried over. If he is killed, his career ends, and a new pilot must be substituted.
Pilots gain victory credit according to the number of victory points they have accrued in their name. Five victory points makes you an Ace. You get one victory point for shooting down an enemy aircraft, and ½ a victory point for driving them away (see VI. GETTING LOST).
NOTE: It is possible to drive your enemy away 10 times and become an Ace without ever scoring an actual kill. The only requirement is 5 victory points.
When a pilot becomes an Ace, he gains the following benefits: His close-range shot does 3 points of damage, a medium-range shots does 2 points and long-range shot does 1 point of damage. The Ace gets no defensive benefits; however, if the Ace is shot down he does not automatically die (he is such a good pilot that he might be able to save the wreckage).
Instead, roll a die. If it is a 5 or 6, the Ace survives with his record intact (his opponent still gets the one victory point). If the roll is 1-4, the Ace is dead.
NOTE: victory points beyond 5 have no bearing on the game except as statistics. The Ace gains no further benefits.
STOP!
Basic game rules end here. Play using just these rules until you have mastered the use of the books to generate END-TURN pages.
Intermediate Game: Altitude and Intermediate Fire
In this section, the all-important idea of Altitude is introduced. Altitude is a way of representing (on the pilot's log) the height of your plane relative to your enemy's., and to the ground.
In addition, the use of machine guns to destroy the enemy plane is slightly more detailed.
Each plane has numbers listed next to the words "climb" and "dive" (see Plane Statistics at the end of the rules). These numbers represent numbers of feet which the plane may increase or decrease its altitude (in units of 25) in one turn. This is the basic climb/dive number.
Each plane has a power dive and zoom climb number which are NOT used in the intermediate game.
Each plane has a "gun" column which tells what sort of gun(s) it is armed with. Next to that is the "ammo" number which is an abstract representation of how many rounds the gun may fire. Details follow in the appropriate section.
IX. Sequence of Play in the Intermediate Game
- Step 1: Each Pilot selects his maneuver and notes it and the number beneath it on the Pilot Log. Announcements are made of "DIVING" (see XI below) at this time where applicable.
- Step 2: Pilots take shots (see XII below) at this time.
- Step 3: Each pilot calls out the number he has noted down (the MID-TURN number).
- Step 4: Each pilot goes to the page his opponent has noted down (the MID-TURN page).
- Step 5: Each pilot finds the maneuver he did for that turn on the MID-TURN page and calls out the END-TURN number. These will be the same.
- Step 6: Pilots turn to the END-TURN page and note Tailing and Shots for the next turn. Pilots may request knowledge of the enemy's altitude at this time.
- Step 7: Pilots give clues where applicable.
During step 1 altitude may interfere with a player's choice of maneuver in the following manner:
X. Maneuvers with Bars
If a player chooses a STALLING MANEUVER: (any slow maneuver with a bar underneath the arrow) he must lose 100' of altitude in that turn. He must always end the turn exactly 100' lower than he started it.
If a player chooses a SIDESLIP, the bar has a special meaning. You must lose at least 100', but you may lose up to your maximum dive amount.
If a player chooses the IMMELMANN TURN, he must either climb his full climb ability or dive a number of feet equivalent to his climb ability. For example, a plane capable of climbing 125' must climb or dive exactly 125' when doing an IMMELMANN turn.
If a player chooses a WINGOVER he must remain level, losing or gaining no altitude at all.
XI. Diving and Pursuing
If a pilot plans to make a noticeably steep dive of 200 or more feet in one turn, he must announce out loud "DIVING." He may dive anywhere from 200 feet to his maximum, but not less than 200' once the announcement is made. If the enemy pilot, upon hearing this, also desires to dive 200' or more he may announce "PURSUING" and adjust his height record accordingly.
XII. Intermediate Game Shooting
In the intermediate game, shooting takes on far more importance in relation to maneuvers and altitude.
Each plane is rated for the type of gun and amount of ammo. The Gun Table cross indexes gun type with the amount of ammo expended to yield the amount of damage done to the enemy. In the Intermediate game, the shooter may withhold fire or fire a shot anywhere from 1 to 6 rounds long. The longer the shot is, the more damage done, but the more chance of jamming the guns and the longer the jam.
How to Shoot
- 2a. Defender announces "SLOW" (see XIII below) where applicable and attacker figures combat bonus, taking height and range to target into account (see XIV below).
- 2b. Attacker checks eligibility for BLAST or BLAZE (see XVI below) and announces type of shot, recording ammo loss (see XVII below).
- 2c. Attacker rolls die.
- 2d. Result is read, damage is scored (see XIX/XX). Check for critical hits and jams (see XXI/XXII below). In the case of a head-on shot, the other player may become the attacker and repeat steps 2a-2d. NOTE: only one shot per plane per turn.
XIII. Slow Bonus
If the defender's maneuver is in the SLOW category on the page, the attacker adds one to his die roll for damage.
XIV. Range to Target
Range affects the accuracy of a shot by affecting the combat die roll. A CLOSE range shot does not change the die roll. A MEDIUM range shot subtracts two (2) from the die roll. A LONG range shot subtracts four (4) from the die roll. ALL effects to the die roll are cumulative.
Altitude affects shooting, by increasing the range to the target. An altitude difference of up to 175' is considered CLOSE. An altitude difference of 200'-375' is MEDIUM. An altitude difference of 400'-675' is LONG. No shot may be taken at a plane which is more than 675' higher or lower than you.
NOTE: in those cases where the altitude differences and the RANGE PICTURE are in different categories, always use the longer one. Thus, if planes are 250' distant by altitude, on a page with a close range picture, the range is MEDIUM (250' difference). If, however, the planes are 50' apart in height on a page with a long range picture, the range is LONG.
NOTE: All of these effects are summarized on the Gun Chart which appears in one of the foldout sheets.
Ed Note: The gun chart, and all other charts are in the accompanying booklet. If the modified die roll is less than 0, treat the result as "miss." If the modified roll is over 7, treat the result as a 7.
HEIGHT ADVANTAGE: If the attacker is more than 100' above his opponent, he gets +1 to his die roll for damage (see XIX below).
XV. Barrel Rolls
As previously stated, a barrel roll is a difficult and tricky maneuver. There is so much going on during a barrel roll that a pilot who has plotted a barrel roll in step 1 of a turn may NOT SHOOT in step 2 of that turn.
XVI. Blast and Blaze Eligibility
The attacker may only use BLAST (5 ammo points) or BLAZE (6 ammo points) under special conditions. To use a BLAST, he must have plotted a STRAIGHT (fast or cruising) in step 1 of the turn. To BLAZE, the attacker must not only plot a straight for the upcoming turn (in step 1) but he must also have plotted a straight LAST turn. Only if both these conditions are met may the attacker BLAZE.
XVII. Ammo Restrictions
Each plane has listed with it a certain amount of ammunition for its guns. Each type of shot subtracts the amount of ammo listed next to it from this total. If a plane does not have enough ammo left to make a particular shot, he may not make it. When the ammo reaches zero, the guns are empty and may not be fired (EXCEPT: see XVIII below).
XVIII. Lewis Guns
Lewis guns were wing-mounted guns which were unsynchronized with the propellor and therefore mounted "out of the way." They were also used as tail guns in two-seaters. Their advantages were a swing-mount, as well as drum feed which made reloading in the air possible. Their disadvantages were low amounts of ammo and not as much firepower.
Some planes have numbers with slashes and parenthesis next to the ammo section, such as 20/8(3). This means that the plane has 1 regular gun with 20 ammo points., and a Lewis (non-synch) gun with three (3) drums of eight points each. Each gun may only fire by itself (they may not be fired together on the same turn). If the Lewis gun runs out of ammo, it may be reloaded by flying STRAIGHT CRUISING ONLY for two turns in a row. After that, the Lewis gun has eight more ammo points to use before becoming unloaded again. This can be done as many times as there are ammo drums (3).
The Lewis gun was mounted on an upward-tracking pivot in the single-seaters, which allowed the gun to fire straight up. On same space pages (pages 187,188,198,205,209,213) where no enemy plane is evident if your opponent is above you and you have a Lewis, you may fire normally (if the altitude difference is not greater than 675').
XIX. Gun Table Results
Roll the die. Find the proper table for the type of gun (single, double, Unsynch) and cross-index the die roll with the amount of ammo expended. Add any bonuses for "SLOW" or HEIGHT. The result is a number, possibly followed by a "C" or "J" (see XXI/XXII below). This is the total amount of damage done to the enemy plane.
XX. Damage Allocation
In the basic game the 'plane' was the only hit area. In the intermediate game, there are three separate hit areas. If any one of those areas reaches full damage capacity through enemy fire, the plane is destroyed. The three "hit areas" are FRONT, SIDE, and TAIL.
If a plane is shot head-on, all damage scored goes into the FRONT area. If a plane is shot directly from behind, all the damage goes into the TAIL area. If the shot is a deflected (FRONT SIDE or TAIL SIDE facing), ½ the damage goes into the SIDE category (round down) and the remainder goes in FRONT or TAIL, depending on which type of deflected shot it is.
XXI. Critical Hits
If the letter following the damage number roll on the gun chart is a "C", the result is a "critical" hit. This reflects an increased accuracy or some vital part of the ship being hit. In the intermediate game, critical (or "choice") hits play only a minor role. If the shot was a deflected shot, instead of dividing the damage between SIDE and FRONT/TAIL, the attacker gets his choice of which of the two areas to put all of the damage in. NOTE: Since all damage on a FRONT or TAIL shot goes into one area anyway, a "critical" result there has no additional effect.
XXII. Jamming Guns
If the character following the number obtained on the gun chart is a "j", the guns have jammed. Damage is still scored normally, but the guns may not fire on subsequent turns until the jam is cleared. A jam is cleared by FLYING STRAIGHT a number of turns (not necessarily in a row) equal to the AMOUNT OF AMMO that was expended when the jam occurred (for example, if the guns jam on a shot which expended 4 ammo, "BURST", the player would have to perform 4 straights (fast or cruising) at one time or another. On the fourth straight, the jam is cleared).
XXIII. Example of Shooting
- 2a. The players ended the previous turn on page 13. The German player will have a shot at the Allied player in the FRONT SIDE FACING. In step 1 of the next turn, the Allied player selected SLOW-STRAIGHT STALL, hoping the German would make a right turn to the right and fly out in front of his guns. Therefore, after the German has picked his maneuver, the Allied player must announce "slow," giving the German +1. The German then figures the rest of his bonuses. He is 200' above the Allied plane on a CLOSE range picture. He gets +1 for height (total +2 so far) but 200' difference is MEDIUM range (despite the close range picture). This subtracts 2 from the die for range differential. The cumulative effect, therefore, is an overall NO CHANGE to the die!
- 2b. The German player plotted a STRAIGHT CRUISING maneuver for the next turn; the maneuver he did to get himself the shot was an IMMELMANN. Checking his eligibility for BLAST and BLAZE he finds that he fulfills the requirements for BLAST (plotted STRAIGHT for the next turn) but not BLAZE (he did not do a STRAIGHT last turn). He has 4 ammo points and cannot do a BLAST anyway. He decides to use up all the ammo in one last shot, and calls "BURST."
- 2c. He rolls the die. It is a 2, unmodified overall.
- 2d. The German plane (DRVII) has double synchronized guns. On that chart, a roll of 2 on a BURST is a 3C J result. The C allows him to put all 3 damage points into either FRONT or SIDE. The Allied plane already has some damage in the side, so the German picks "SIDE". If the Allied player had been shot head-on, the 3 damage points would not have killed him, and the C would have no effect. The German received a J, meaning his guns jammed. If the German had not run out of ammo, he would have had to do 4 STRAIGHTS (cruising or fast) before he could fire again. The German can now try and escape because he has no more ammo, or go for a draw by getting the allied pilot to expend all of his ammo. (see XXVI below).
XXIV. Damage Capacity
In the intermediate game, plane statistics listed for Wing, Motor, Tail, and Fuselage are not used. Instead, they are modified to yield SIDE, FRONT and TAIL categories as follows:
The number of hits listed for Motor is translated directly into FRONT. The number of hits listed for Tail is translated directly into TAIL. The number of hits for Fuselage and Wings are taken together, and the average is translated into SIDE.
Ed Note: The planes now have an Intermediate game stats and advanced game stats.
XXV. Choosing Planes
The Plane Statistics appear at the end of the rules.
Ed Note: Plane Statistics are now in the Chart Book.
There are several different planes to choose from when preparing for a dogfight. When choosing match-ups, it is desirable to match planes which flew in the same historical periods. Note the "online" and "out of service" times to provide best matches.
At the top of the pilot log for the upcoming battle, pertinent statistics may be transferred from the Plane Statistics section. In the intermediate game, only GUN TYPE, AMMO, CLIMB, DIVE and CEILING are used. Area damage is transferred from MOTOR to FRONT, TAIL to TAIL and (WING + FUSELAGE)/2 to SIDE (see above rules).
Ed Note: Again the damage amounts are listed for both the Intermediate and Advanced games now.
XXVI. Winning the Intermediate Game
The game is won when one pilot destroys the other's plane, or when one pilot SEARCHES when the other pilot ESCAPES (see VII. WINNING THE BASIC GAME). If both players run out of ammo, the game is a draw.
XXVII. Aces
All Basic game Ace rules apply except where specifically modified.
The Ace's ATTACK BONUS changes to an automatic +1 to the die, cumulative with all other effects.
An Ace is able to FOOL his OPPONENT. Therefore, if the Ace is being Tailed (see V. TAILING) he does NOT have to give a clue.
Advanced Game: Advanced Maneuver and Advanced Fire
In this game, severe restrictions are placed on the plane's ability to maneuver. Speed variations are added (showing differences in motors and airframes) as well as power Dive and Zoom Climb. The gunfire system is refined to yield maximal realism.
XXVIII. Sequence of Play in the Advanced Game
- Step 1: Each pilot selects and records the maneuver he will do for the upcoming turn. He also records the MID-TURN page number below it.
- Step 2: Each pilot records the speed, inclination, and final altitude of his plane (see XXX / XXXI below). Announcements of "diving" and "POWER DIVING" (see XXXI below) as well as "pursuing" are made at this time.
- Step 3: Shots are taken.
- Step 4: Each pilot calls out his noted MID-TURN number.
- Step 5: Each pilot goes to the MID-TURN page his enemy has named.
- Step 6: Each pilot finds the maneuver he has recorded for this turn on the MID-TURN page, ignoring the picture on this page. Beneath that maneuver, he finds the END-TURN number.
- Step 7: Pilots check with each other to make sure the END-TURN numbers are the same, and turn to the END-TURN page.
- Step 8: Pilots may check enemy altitude, shooting and tailing for the next turn, giving clues where applicable.
During step 1, there are realistic restrictions placed on a pilot's ability to perform maneuvers. These restrictions are based on previous moves, so an expert pilot is not one who flies turn-to-turn, but one who anticipates, and sets himself up to get a good shot.
XXIX. Maneuvers with 'D's
All maneuvers with a 'D' are considered fancy (i.e., difficult) maneuvers. Usually, performing them takes a certain amount of preparation in getting up to speed, pointing the nose of the plane, etc. Therefore, to do a fancy maneuver, a pilot must have on his previous turn performed a STRAIGHT CRUISING or STRAIGHT FAST. If the previous move was not a STRAIGHT CRUISING or STRAIGHT FAST, the pilot may not do any maneuver with a 'D' on the current turn.
The EXCEPTIONS to the above rule are SIDESLIPS done successively called "falling leaf") and IMMELMANN TURNS (done successively called "loops"). These fancy maneuvers still must be preceded by a STRAIGHT CRUISING or STRAIGHT FAST to start but once they are begun, ANY NUMBER CAN BE DONE IN A ROW.
XXX. Speed
There are two speed numbers given next to "SPEED' on the Plane Statistics chart. The number to the right is speed above 7000' (speed decreases because the air is thinner). These numbers represent the number of FAST category maneuvers a pilot may do in a row. After that number is reached, the next maneuver may not be a FAST category maneuver. See below for ways to do extra FAST maneuvers.
NOTE: all other maneuver restrictions remain in effect (SLOW STALL and SIDESLIP require altitude loss, IMMELMANN requires altitude change).
XXXI. Inclination
The pilot's choice of how to change his altitude is also restricted in the advanced game. The basic restriction has to do with inclination (the way the nose of the plane is pointing).
| Zoom | Climb | Level | Dive | Power Dive |
|---|
Look at the inclination arrow illustrations. These show the symbols which should be entered in the appropriate spaces of the Pilot Log. The arrows indicate the direction the nose of the plane is pointing, i.e. zooming up, climbing up, level, diving, and power diving. A PLANE MAY NOT PERFORM AN ALTITUDE CHANGE WHOSE INCLINATION ARROW IS MORE THAN ONE STEP AWAY FROM THE ARROW ENTERED LAST TURN. The only EXCEPTION is that "level" flight may always be skipped if so desired; thus, a plane may DIVE one turn, and CLIMB the next.
Example — The pilot power dives one turn, having dived the last turn. Next turn he may remain where he is (power diving) or he may move 1 step in either direction, to normal diving, or zoom climbing. No other change is legal.
There are two SPECIAL CIRCUMSTANCES: A pilot who is currently climbing may continue climbing or revert to level flight, but may not revert to zoom climb. A pilot who zoom climbs one turn may continue zooming (see XXXII) or revert to CLIMB ONLY. Thus there is a ONE-WAY connection from power dive to zoom, and another one-way connection from zoom to climb.
If the maneuver performed loses altitude in some way (STALL, DIVING IMMELMANN, etc., the inclination arrow is DIVING.
Notes on Maneuver Limitations: Each page of the game book shows two rules: SLOW (No Power Dive) and FAST (No Climb). Only the SECOND rule is used in the advanced game. In the advanced game a pilot who power dives MUST GO FAST.
XXXII. Power Diving
Power dive is a method of diving with the motor pulling the plane down. A pilot may power dive after doing one dive of any kind (he must pass through dive mode because of the one-step inclination rule above). A pilot may only power dive a certain number of times in a row. Each plane has a power dive speed number listed next to the power dive amount for that plane. This is the maximum number of power dives that may be done in a row before a plane must revert to normal diving or zooming (see XXXIII below).
The advantages of a power dive are two-fold. One, a pilot may lose altitude up to his power dive number, allowing a much greater loss of altitude in one turn than is normally possible. Two, a pilot who powerdives MUST GO FAST. You will NOTE that many planes can do more power dives in a row than their speed number. This is obviated by the following: A PLANE WHICH DOES A POWER DIVE MUST GO FAST, BUT THE FAST MANEUVER DONE WHILE POWER DIVING DOES NOT COUNT AGAINST THE PLANE'S SPEED NUMBER. Thus, when a SPAD VII begins to power, it MUST do fast maneuvers, but these fasts are POWER DIVE FASTS and do not count against his speed number.
After power diving 5 times (his power dive speed) the SPAD VII may revert to normal diving, and use its normal speed factor to DO 3 MORE FAST MANEUVERS IN A ROW WHILE DIVING OR FLYING LEVEL. Thus a pilot may fly as many fast maneuvers in a row as he wishes, as long as he alternates SPEED FASTS with POWER DIVING FASTS - until he hits the ground.
NOTE: A pilot may power dive anywhere in his power dive range. If he dives less, it is just a regular dive.
XXXIII. Zooming
Zooming is a way of taking advantage of built-up momentum to GAIN altitude at a more rapid rate than is normally allowed. A maneuver done while ZOOMING MUST BE A FAST MANEUVER, but like Power Diving, this fast does NOT COUNT against the plane's speed factor.
A pilot may only zoom if he has power dived his MANUEVER NUMBER OF FEET IN THE IMMEDIATELY PRECEDING TURN.
Each plane has a zoom number which represents the number of feet of altitude which MUST be GAINED if the pilot wishes to continue zooming.
Each plane has a zoom speed number which represents the maximum number of zooms that may be done in a row before the plane MUST revert to REGULAR CLIMBING.
A pilot may not wish to continue zooming. He may cease zooming (and revert to normal climb) at any time. He MUST cease zooming when he has done as many zooms as his zoom speed allows.
A pilot may wish not to zoom at all. In this case, he must revert to regular diving from his Power Diving. He may not go from Power diving to normal climbing in one turn.
XXXIV. Example of a Single Plane in Flight
An SE 5A is flying at 6500'. He performed a cruising left turn last move while flying level.
The SE 5A's pilot wishes to do an Immelmann, but the Immelmann is a fancy maneuver and the SE 5A did not do a straight maneuver last turn. This turn, in preparation for the fancy, the SE 5A flies a cruising straight while climbing 75 feet, putting him at 6575'.
This turn the SE 5A does the Immelmann, having done its straight last turn as required. The SE 5A pilot wants to do an "outside" (diving) Immelmann - his inclination arrow is up but he can still dive because you are allowed to skip level inclination if you wish. He does the diving Immelmann, losing 100 feet (his climb rate). His inclination arrow becomes "diving" He is now at 6475'.
The turn the SE 5A dives his full amount 550'. He flies a fast straight. He is at 5925' he wants to zoom next turn, he chooses to power dive his full amount (you cannot follow a power dive with a zoom unless the power dive was at maximum). He loses 1100', now at 4275'. This power dive forces him to do a fast maneuver (he chooses straight).
This turn the SE 5A zoom climbs. He must gain exactly 225'. He does a right turn, which must be fast. He is at 4500'.
This turn the plane zooms again to 4725'. The pilot does a fast left bank. This is his fifth maneuver in a row (his speed is only 4) but remember, the Power Dive Fast and the Zoom Fasts didn't count against his speed. The SE 5A zooms two more turns bringing his altitude to 5175'.
This turn the plane may not zoom anymore (its zoom speed is used up). Instead, the pilot climbs up to 5275', a gain of only 100', his normal maximum. He wants to do a fast straight, but he may not do one because he is climbing. NOTE that next turn he may continue climbing or dive, but he may not zoom again until he power dives his maximum.
XXXV. Advanced Gunfire Rules
There are now additional steps to the gunfire routine, more hit areas and expanded critical hit results to yield maximal realism. Change the "how to shoot" sequence as follows:
- 3a. Attacker names type of shot and rolls the die to find out how much damage is done.
- 3b. Attacker selects point of aim on the Damage Allocation Chart (see XXXVIII below).
- 3c. Defender names his maneuver. Attacker moves his point of aim (see XXXVII below).
- 3d. Attacker lists all targets contained in a final point of aim and allocates damage (see XXXIX below).
- 3e. Attacker checks for gun jams and critical hits (see XXXX below). If the shot is head-on, the other player may become an attacker and the steps are repeated. One shot per plane per turn.
XXXVI. Determining Amount of Damage
In the advanced game, the +1 for HEIGHT and defender moving SLOW is NEGATED. The only time the die roll is modified is by an ACE, or for RANGE. Range is determined the same as in the intermediate game. Ammo restrictions and restrictions on the type of shots are the same.
XXXVII. Hit Area in the Advanced Game
There are now four different hit areas in each plane: Wing, Tail, Fuselage, and Motor. Each area has a damage capacity listed next to it in the Plane Statistics section. When any one area reaches full damage, the plane is destroyed.
XXXVIII. Using the Damage Allocation Chart (DAC)
To determine in which area of the plane the shot went, the attacker must first locate the picture on the DAC that corresponds to the TYPE of picture of the enemy seen in the game book. IF THE ATTACKER IS MORE THAN 100 FEET ABOVE OR BELOW HIS ENEMY, HE USES THE ALTITUDE PICTURE INSTEAD.
Important: in order to SHOOT, you must incline your plane TOWARD the enemy. If the enemy is ABOVE you, you must plot a CLIMB in step 1. If the enemy is BELOW you, you must plot a DIVE in step 1. If you are unable to incline your plane due to the "one step" restriction you MAY NOT shoot.
NOTE: Level is NOT an inclination for shot purposes. It is NOT considered part of the one-step restriction.
The pictures on DAC are divided into small squares. The attacker should choose his initial point of aim by pointing to one of the squares. This initial point will probably NOT be the final point of impact.
On the DAC there are rules for how to move the point of aim. Moving the point of aim is dependent solely on the DEFENDER'S maneuver. The attacker's maneuver has nothing to do with moving the point of aim. These rules are followed in respect to the defender's climb/dive, his speed, and his turning (right, left straight) to move the initial point of aim to the Final Point of Aim (FPA).
If the defender's maneuver and the attacker's choice of initial point of aim combine to yield an FPA which is empty or is off the diagram, the shot is a clean miss.
If the FPA contains a number that lists target areas, the Attacker begins to allocate the damage he rolled in step 3a.
XXXIX. Method for Allocating Damage
The attacker allocates damage rolled in step 3a to the FPA determined in step 3c.
Damage is allocated one "hit point" at a time to the different hit areas named on the DAC. If the FPA picture contains empty space, then "Empty" is considered to be one of the hit areas. If the FPA picture contains no empty space, then only the hit areas named are used. EXAMPLE: The GPA picture is listed as "wing", but there is empty space in the picture also. The two areas where hits are allocated are "Wing" and "Empty (Miss)".
Damage must be allocated one point at a time. The FIRST point ONLY MUST go into the "EMPTY" IF IT IS ONE OF THE AREAS. All remaining points are divided EVENLY into the remaining available areas. The odd hit may go in the area of the attacker's choice.
Example — The attacker gets 4 hits on a picture with "Wing", "Tail" and "Empty". The first hit must go into "Empty." The remaining hits are divided 1 in "Tail" and 1 in "Wing". The odd hit goes in the area of the attacker's choice (say, "Tail".) Final result: 1 shot wasted on empty space, 2 shots in the tail, one shot in the wing.
XL. "C" Results
Critical/Choice "C" results now have a much more devastating effect. If the maneuver the attacker plotted for the next turn is a CRUISING STRAIGHT or FAST STRAIGHT, the "C" result counts as "CHOICE." This allows the attacker to either give the defender a CRITICAL HIT (see XLI below) OR to put ALL DAMAGE SCORED into ANY ONE OF THE AVAILABLE AREAS.
Example — The attacker gets a 4C result, and has already plotted a straight for the next turn. He now has the option of either treating the FPA hit areas as hit normally, and giving the defender a CRITICAL HIT in any one of those areas, OR putting ALL FOUR HITS IN ONE AREA, say "Tail."
NOTE: Wheel and Cockpit are considered areas only for purposes of critical hits. The attacker need not and cannot allocate any normal damage to these two areas.
If the attacker did NOT plot a cruising straight or fast straight, it is the DEFENDER'S "choice": he may take a critical in the area of his choice (among those named by the GPA, not including "empty") or he may put all the hits into one area of his choice from among those named on the GPA, not including "empty".
XLI. Critical Hits
CRITICAL HITS are hits that strike some vital portion of the defending airplane, causing special damage. When the attacker gets a "C" while going into a STRAIGHT, he may choose to give the defender a critical hit in any one of the areas named on the FPA. When the attacker gets a "C" result without having plotted a STRAIGHT for the turn, the DEFENDER gets his CHOICE of taking a critical in one of the named hit areas (NO empty) OR putting all the damage scored in one area of HIS choosing.
The defender immediately rolls two dice and consults the critical hit chart for that area, noting all results (such as 'climb factor halved') on his pilot log. (The crippled plane might fly with a climb ability of 50' instead of 100'). Critical hits of the same type are cumulative where applicable (another "climb halved" on the above-mentioned plane would bring it down to 25' climb ability).
XLII. Jams
Jam effects are basically unchanged from the intermediate game rules, however, if a gun jams, the pilot must immediately roll one die. If the roll is a 6, the gun is so badly damaged that it cannot be fired for the remainder of the battle. This includes BOTH guns of a twin-synchronized set.
XLIII. Winning
Winning the advanced game is the same as the intermediate game. If both players run out of ammo, the game is a draw. A Victory point is scored for killing the enemy plane. ½ a point is scored for SEARCHING when the enemy ESCAPES ("clearing the skies").
XLIV. Aces
Players can still create Aces as in the intermediate game (5 victory points makes a particular character an Ace).
Ace effects are unchanged. IN ADDITION, the Ace DOES NOT NEED TO DO A STRAIGHT MANEUVER BEFORE DOING A FANCY maneuver, the way normal pilots do. HOWEVER, he still CANNOT DO TWO FANCYS IN A ROW.
XLV. Optional Rules for Added Realism and Complexity
STALLS: In reality, the stall maneuver did not cut all forward speed. Therefore no plane may do more than one straight stall (rule for Powerhouse only).
LOOPS: In reality, an outside loop was not possible with the planes available in WWI. Therefore, no plane may do a DIVING IMMELMANN followed immediately by a CLIMBING IMMELMANN. Any other combination of repeated IMMELMANNS is legal as per the special rule on repeated Immelmanns.
SPINS: A spin was a thing of dread for most pilots, usually ending in a crash. Some pilots (Aces) were able to control spins, and entered them voluntarily to fool their opponents into thinking they were shot down.
A spin occurs when the critical hit table says "crash". Instead of crashing instantly, the plane begins to spin toward the ground, giving the doomed pilot a slim chance for survival. In addition, any Ace may voluntarily go into a spin.
Spins are performed by losing 1500' every turn. The altitude mark is "level." the maneuver performed is a right weave maneuver. Once the spin starts, the pilot has no choice in his maneuvers: he must lose 1500' while doing a "right weave."
This will obviously bring the pilot into violent contact with the ground in short order. However, there is something the pilot can do while watching his whole life flash before his eyes. He can attempt to pull out of the spin by rolling a 5 or 6 on one die at the end of each turn. An ACE may pull out of the spin on a roll of 3,4,5, or 6.
NOTE: if the Ace or pilot is forced into a spin less than 1525' from the ground, this die roll will not help him, since it is taken after the move, and the plane has therefore already crashed.
PULLING OUT: If a pilot or Ace is lucky enough to pull out of a spin, he must come out at level inclination at cruising speed. No other combination is permitted on the turn you come out of a spin.
MULTI-PLAYER COMBATS: If a player owns more than one set of books, there is no reason why more than one pilot per side cannot fly together. In fact, this is more realistic since most pilots did not fly alone.
For multi-player battles, all planes on both sides begin on the same page. Thus one picture does for all. Soon though, individuals will want to do different maneuvers from their buddies; this will cause "splitting off" into several different pages of the book.
NOTE: you will be unaware of the positions of your buddies. Each enemy plane will be visible on a DIFFERENT page. This requires the use of bookmarks and multiple MID-TURN number entries on the pilot's log (space is provided for up to three enemy planes).
The procedure is actually quite simple. One pilot takes his turn (after ALL maneuvers have been recorded) by starting to each enemy pilot in turn the MID-TURN number that appears on that enemy's page for the one maneuver the pilot chose for that turn.
NOTE: The pilot MUST use the SAME maneuver on every page that has a bookmark. The second pilot on that side then performs the movement routine with all enemies HE can see (the enemy will be using the SAME maneuver on ALL pages that he has bookmarks on).
When all players on one side have gone, everyone should have moved and had all his visible opponents move.
In turn, pilots then take shots. If by chance a pilot has more than one shot, he MUST shoot at the CLOSEST enemy. If more than one plane is equidistant, the attacker chooses ONE of the enemy planes to fire at.
When multi-plane battles occurred in real life, more often than not planes would split off into many smaller battles. If two planes are lost to each other on an END-TURN page, those two planes will never find each other. Keep playing with those people you can see. If you are TOTALLY alone, you have lost sight of the battle and must fly home.
NOTE: Players may NOT communicate with their buddies to perform maneuvers together or to gang up on a particular plane. Once the battle starts, pilots are on their own.
OVERDIVE: If a pilot wishes to continue Power Diving after his power dive speed has been used up, he may try a risky maneuver known as OVER-DIVING. OVER-DIVING entails some risk of pulling the wings off the plane.
A pilot may do AS MANY OVER-DIVES as he WANTS. However at the end of each turn, he must roll the die. On a roll of 5 or 6, the plane goes out of control and goes into a spin.
XLVI. Campaign Rules
Players who wish to play campaigns may build rosters of pilots and planes available, and adjust those rosters as battles are won and lost. Thus it might become just as important to save a PLANE as to save a pilot. Some rules to consider in a campaign game:
FAMOUS ACES: The following are 6 famous Aces from each side of WWI. Each Ace has a picture, and below it special rules to use for that Ace in the campaign game.
Each player rolls one die at the beginning of the campaign game. The number rolled is the number of the FAMOUS ACE who has been assigned to his squadron.
German Famous Aces
- Oberleutnant Erich Loewenhardt — The third ranking German ace, Loewenhardt maintained an ongoing rivalry with Udet, especially after the death of Richtofen. Both were surprised when the command of J.G. 1 went to an outsider, Herman Goering. The rivalry continued until Loewnhardt's death in a collision in August 1918. +2 to hit, will never give up the chase.
- Leutnant Josef Jacobs — The 8th ranking German ace with 41 kills, Jacobs flew from 1914 until the end of the war. Shot down several times and almost captured, he always managed to escape. As of 1970, one of the five living holders of the 50 year crown to the Pour le Merit. He flew with Boelcke, Immelmann, Richtofen, and Voss. Never gives clues, avoids loops and rolls, +1 to his survival chances in crashes.
- Haputmann Oswald Boelcke — The first fighter ace, Boelcke was a mentor and later rival to Immelmann and Richtofen. Many of his early successes were attributable to his use of the Fokker E with its synchronized guns. In 1916 he organized the first Jagdstafel (hunter group) and perfected the first squadron tactics. This development was the beginning of the "Circuses" like that later commanded by the Red Baron. Boelcke did not see the full development of his ideas, for he was killed in October 1916 in a collision with another plane in his squadron. Communicates with other pilots on his side, moves aim point on DAC one less than called for.
- Leutnant Fritz Rumey — The firth ranking German ace, Remy was one of the few enlisted men to eventually become an ace. +1 on all shots.
- Leutnant Franz Buchner — Eleventh ranking German ace with 40 victories, Buchner fought in JGII at the battle of St. Mihiel. He was an aggressive, fearless ace who destroyed six Allied fliers on one day. He flew Fokker DVIIs. Always take Blast or Blaze if possible +1 to hit.
- Hauptman Rudolf Bertold — The sixth-ranking German ace with 44 victories, Bertold tempered his aggressive inclination. He knew the limitations and capabilities of his aircraft, and when to break off an engagement. Adds one to his chances of success on stress maneuvers (over dive, spin, etc.) Will break off after three critical hits on his plane.
Allied Famous Aces
- Major Edward "Mick" Mannock — The antithesis of the chivalric knights of the air, Mannock was a ruthless combatant who hated Germans and disclaimed the courtesies for which First World War air combat was famous. He was the top British ace with 73 kills, and was known as the best patrol leader of the war. He overcame the handicap of poor eyesight by long practice at shooting. He was killed in 1918 by German infantry fire. Loses Ace bonus at long range, will always try to hit pilot if possible. Communicates with others on his side.
- Major Francesco Baracca — Italian Ace of aces, Baracca was an Italian gentleman and ex-cavalryman. He shot down the first enemy plane destroyed by an Italian aviator while flying a Nieuport 17 on April 6, 1916. He later learned the capabilities of his Spad VII so well that he refused to change to the new Spad XIII when they were introduced. Killed by enemy ground fire in 1918. Ignores survival rolls for over dives and spins while flying the Spad VII.
- Lieutenant Charles Nungesser — A rash, almost self-destructive pilot. Nungesser painted his Nieuport 17 with normally ill-omened symbols. He practiced dangerous aerobatic stunts over his own and enemy territory. His body shattered in a series of air and auto crashes, Nungesser continued to fly though he had to be carried to the cockpit by two mechanics. He survived an ambush by six Albatros fighters, shooting down two before escaping. Though he failed in his rivalry with French ace Rene Fonck, scoring only 45 kills to Fonck's 75, he survived the war only to vanish attempting a trans-Atlantic flight in 1927. Called "Indestructible". Ignores pilot wounded results, adds 2 to his chance of surviving crashes.
- Capitaine Georges Guynemer — The popular hero of the Cigognes. When his squadron was transferred to Flanders in 1917, he was on the verge of nervous collapse. His own plane out of service, Guynemeer was forced to fly second line machines. Three times in one day he had to make forced landings when aircraft structures gave out. On Sept. 11, 1917, he and another pilot were lured into a trap. While attacking a German two-seater they were jumped from behind and above by three Albatros fighters. Guynemer disappeared and was reported shot down by the Germans. On the Starting Page Table, Guynemer may shift the second rolled number from 20 or 4 to 3, thus increasing his chances of "sneaking up." He may also subtract one from his shot die roll in order to get a critical hit.
PILOT ROSTERS: after rolling for his Famous Ace, the player completes his pilot roster with THREE normal flyers, each of whom should have a space to keep a record of his victories. As these flyers accrue victory points, they may become aces. They will never get additional special abilities like the Famous Aces.
PLANES: The campaign game begins in the fall of 1917 when the German Albatros DRIII came on-line. The German's start with DRIII's. The Allies start with SPAD VII's, 6 planes each. As German planes are destroyed, they are replaced with new DRV's. As Allied planes are destroyed, they are replaced with SPAD XIII's.
Ten missions end a season. At the end of the first ten battles, it is DEC. 1917. New planes are introduced. The pilot roster is maintained.
The Germans continue to take DVa's as replacements for destroyed planes.
Another 10 missions end the season. After 10 missions it is spring 1918. Pilot rosters are maintained, but new planes are available as replacements.
The Germans now take Fokker DVII's as replacements. The Allies continue to take SPAD XIII's.
Another 10 missions brings the war to late 1918. Pilot rosters are unchanged. Plane replacements remain the same.
After 10 additional missions (a total of 40 for the entire campaign) the war is over. Players total the victory points awarded to all pilots (LIVING or DEAD) throughout the campaign. The player with the highest total wins the WAR IN THE AIR.
NOTE: Although it was sometimes done, players may NOT deliberately crash a plane in order to get a superior replacement. A plane can only be destroyed by enemy fire of some kind.
GROUND LOCATION: For the campaign game, it is important to know where you are in relation to the ground in order to determine your location over the lines. In this series, a simple rule is included for determining movement over the ground. Later books will include a more detailed method.
After players have determined the initial compass direction (see below) one player takes over the duty of recording position. At the end of each turn, he adjusts the record as follows:
Each maneuver on each page of the Game Book has a number listed below the boxes. This is the number of clicks the plane's direction is changed by doing that maneuver. Obviously, if the plane is doing a right maneuver, the compass is changed that many clicks clockwise (to the right) and vice versa. EXAMPLE: A plane is heading NE. The pilot does a left WINGOVER. Below the row of the boxes is a small "3". The compass is changed three clicks to the left. The new heading of the plane is WEST.
To determine DISTANCE TRAVELED, the pilot finds the small number listed near the SPEED CLASS of the maneuver he performed that turn in the Game Book. All slow maneuvers have a 0 (zero), all cruising maneuvers have a 1 (one), and all fast maneuvers have a 2 (two). This is the number of SQUARES the plane has moved OVER THE GROUND. In the above example, the pilot did a cruising speed maneuver (the wingover) and so moved ONE square in the appropriate direction (WEST). If he started at 3 west, he is now at 4 west (and so is the other plane.)
Editor's Note: This next section is no longer on the pages as it over complicated the look of the base game. The numbers don't change from page to page, so here are the numbers with the maneuvers.
Compass clicks per maneuver, keyed to the maneuver-code letters in the Maneuver Chart above (a right maneuver turns the compass that many clicks clockwise, a left maneuver the same number counter-clockwise):
| Maneuver Code | A | B | C | D | E | F | G | H | I |
|---|---|---|---|---|---|---|---|---|---|
| Clicks (Slow) | 1 | 3 | 1 | 0 | 0 | 0 | 1 | 3 | 1 |
| Maneuver Code | J | K | L | M | N | O | P | Q | R | S |
|---|---|---|---|---|---|---|---|---|---|---|
| Clicks (Cruising) | 1 | 3 | 0 | 0 | 4 | 0 | 0 | 1 | 3 | 0 |
| Maneuver Code | T | U | V | W | X | Y | Z |
|---|---|---|---|---|---|---|---|
| Clicks (Fast) | 1 | 1 | 0 | 1 | 1 | 1 | 1 |
Below is a "map" of the battlefield. NOTE that a move to the east, northeast or southwest goes to the right of this map. A move to the west, northwest or southwest goes to the left. A move NORTH or SOUTH has NO EFFECT. All movement is expressed in terms of East/West. ALSO NOTE that pilots may not fly more than 15 east or west, or they run off the map. If this happens, the pilot who is on the wrong side of the lines is considered SHOT DOWN, but his enemy does NOT get credit for the kill.
Battlefield map (west 15 ... center ... east 15):
| 15 | 14 | 13 | 12 | 11 | 10 | 9 | 8 | 7 | 6 | 5 | 4 | 3 | 2 | 1 | 1 | 2 | 3 | 4 | 5 | 6 | 7 | 8 | 9 | 10 | 11 | 12 | 13 | 14 | 15 |
|---|
Field: A place where the pilot may land safely and his plane may not be strafed. The other still gets his ½ victory point for driving his enemy from the skies. The * indicates the actual position of the fields.
Archies: Artillery fire (See Chart Book).
T: Trench lines
GASOLINE: Planes only have a limited amount of fuel. Each plane has a "fuel" section in the Plane Statistics section. The number there represents the number of TURNS a plane may fly on a full tank. NOTE that planes need not have a full tank at the beginning of the game (see below).
When a plane runs out of gas, it glides. Glides are performed by diving 200' or more per turn (up to the DIVE maximum only — no POWER DIVE) while doing maneuvers that are NOT FAST and NOT FANCY.
LANDING: Planes may land (especially if they are damaged) in the middle of a battle. To land, a plane must be at 0' and moving straight one turn to be considered 'landed'. The opponent may strafe the plane (it plots 'stalls' every turn) only if it has not landed at a friendly airfield. He may not strafe the pilot, who is considered to have escaped.
ROOKIES: Rookies are new pilots who are not yet confident in their abilities.
A PILOT ROSTER starts with no rookies. When any pilot is killed (including a Famous Ace) that pilot's spot on the roster is filled with a rookie. A rookie remains a rookie until he flies a mission in which he fires at least one effective (scoring some damage) shot against his opponent. AFTER THE MISSION IS OVER, if the rookie is still alive, he is no longer a rookie. If the battle ends and somehow the rookie survived without firing an effective shot (the enemy ran out of ammo and then escaped, for instance), the rookie REMAINS a rookie.
Rookie EFFECTS are as follows: A pilot who is a rookie may only do ONE TYPE of fancy maneuver. Before his first flight, the rookie must be assigned ONE TYPE (say 'wingover') of maneuver with a dot below it that he learned in flight school. He may perform that fancy ONLY, subject to all other restrictions. NOTE that right and left variations do not matter - the above rookie could fly both right and left wingovers - but he could never do any other fancy until he is no longer a rookie. At that point, he may do all fancies like any other regular pilot.
In addition, a Rookie must always take the longest shot he can whenever he is able to shoot.
ARCHIE: "Archie" is the name for Anti-Aircraft fire. Anti-aircraft fire in WWI was not particularly effective unless the target was flying low. At that point, it became very effective, but was also known for shooting down friendly planes.
On those "map" locations marked "Archie", AA fire is taken at any and ALL planes flying below 2050' EACH MOVE. Just before shots are taken, each player rolls on the Archie table. See CAMPAIGN SET-UP SHEET for details.
Starting the Campaign Game
At the beginning of each campaign battle, several factors must be determined. First, each player rolls to determine which pilot will fly the mission. A die roll of 1-4 corresponds to the first through fourth pilot on the current roster. A roll of 5 allows the player to choose which pilot will fly the mission. A roll of 6 allows the enemy to choose which pilot will fly the mission.
Next, players choose which plane, of those available, the pilot will fly. NOTE that taking a better plane will improve your odds in the battle, but if it is destroyed, it might be replaced with an inferior plane.
Pilots next roll for the location of the battle, see CAMPAIGN SET-UP SHEET for details.
Pilots now roll for starting altitude. See CAMPAIGN SET-UP SHEET.
Players roll for available gasoline. If the pilot starts the battle behind enemy lines, he adds one to the die roll. If he starts the battle behind friendly lines he subtracts one from the die.
This result tells him what fraction of his gasoline he has. Round up, thus a DRVII with ¼ tank would have 23 turns before it ran out and had to glide.
Finally, players roll for the starting page. See CAMPAIGN SHEET. They both (all) turn to this page and begin.
SNEAKING UP (ATTACKING OUT OF THE SUN): On those initial pages where one plane is BEHIND the other, that pilot has a chance to SNEAK UP and deliver the quick kill to his opponent. NOTE: This may tend to bring about a quick and seemingly unfair end to the battle, but is highly realistic. Many kills were made without the other pilot ever knowing what happened.
The pilot who has the other "attacking out of the sun" behind him and is constrained in his choice of maneuvers: he MUST do a CRUISING STRAIGHT every turn. He cannot deviate from this, nor can he change his altitude. The plane that is doing the SNEAKING UP may do any maneuver and may change altitude freely within the rules restrictions. He may also fire his guns.
This "blind" effect lasts from turn to turn until any of the following occurs:
- The player SNEAKING UP accidentally puts his plane to the SIDE, or FRONT of his prey. At this point, he has been SPOTTED and the battle begins normally, with both players able to move freely.
- The player SNEAKING UP fires his guns. At that point his prey is alerted (if he is still alive) and the battle begins normally.
- At the end of each turn, the player who is being stalked may roll the die. If he gets a "6", he happened to look behind him and SPOTTED the enemy. The battle begins normally at that point.
Optional Rookie Sneaking Up Rule: Use the "sneaking up" rule for all positions except close range or directly ahead at medium range.
LOSING CREDIT: Often a pilot behind enemy lines would not get credit for a kill, because it went unobserved. To reflect this, give only ½ a victory point to a pilot who shoots down his opponent behind enemy lines (2 or beyond). You still score ½ point for clearing the skies.
That's all.
Original Rules Gun Chart
(Referenced by section XIX, Gun Table Results — used with the original Basic/Intermediate/Advanced rules above. Cross-index the die roll with the ammo expended, for the gun type carried by the plane.)
Single Non-Synchronized Gun
| Ammo Used \ Die Roll | 0 | 1 | 2 | 3 | 4 | 5 | 6 | 7 |
|---|---|---|---|---|---|---|---|---|
| 1 Pip | 0 | 0 | 0 | 1 | 1 | 1 | 2 | 2C |
| 2 Snap | 0 | 0 | 1 | 1 | 2 | 2 | 2C | 2C |
| 3 Squeeze | 0 | 1 | 1 | 2 |
Single Synchronized Gun
| Ammo Used \ Die Roll | 0 | 1 | 2 | 3 | 4 | 5 | 6 | 7 |
|---|---|---|---|---|---|---|---|---|
| 1 Pip | 0 | 0 | 1 | 1 | 1 | 2 | 2 | 2C |
| 2 Snap | 0 | 0 | 1 | 2 | 2 | 2 | 3C | 3C |
| 3 Squeeze | 1 | 1 | 2 | 2 |
Double Synchronized Gun
| Ammo Used \ Die Roll | 0 | 1 | 2 | 3 | 4 | 5 | 6 | 7 |
|---|---|---|---|---|---|---|---|---|
| 1 Pip | 1 | 1 | 2 | 2 | 2 | 3 | 3 | 3C |
| 2 Snap | 1 | 2 | 2 | 2 | 3 | 3 | 3C | 4C |
| 3 Squeeze | 2C | 2 | 2 | 3 |
Basic Game Damage: Close = 2 pts. Medium = 1 pt. Long = ½ pt.
Intermediate Game: use the Gun Chart above. J = Jam (must fly straight a number of turns equal to ammo expended before shooting again). C = Choice of areas if a deflected shot, otherwise no effect. Die roll modifiers: Slow Target +1, Ace Firing +1, Over 100' above +1, Close Range +0, Medium Range −2, Long Range −4.
Advanced Game: Slow Target and Above Shot do not add to the die roll. The Damage Allocation Charts are used to determine area hit. J = as the intermediate game, but also roll 1 die — on a "6" guns are permanently broken. C = Choice or Critical, see advanced rules (XL).
Altitude Effects: 0'-175' difference = Close Range. 200'-375' = Medium Range. 400'-675' = Long Range. 700' and up = No Shot Possible.
Critical Hit Charts
(Roll 2 dice under the proper area. "D" equals the result of one die roll. "Crash" — roll 5 or 6 to survive (pilot only). "Crash Land" — roll 4-6 to survive (pilot and plane). "Force Land" — roll 2-6 to survive (pilot and plane).)
Wing
| Roll | Result |
|---|---|
| 2 | Cable Cut: Do Straight and Stall maneuvers only. |
| 3 | Wings Cracking: In 5x"D" turns wings will collapse (see Wing Result 12). |
| 4 | Large Wing Holes: Fall minimum of 200' each turn. |
| 5 | Wing Holes: No climbing allowed. |
| 6 | Small Wing Holes: Climb factor reduced by 50'. |
| 7 | Aileron Stuck: Stay in present turn mode (left, straight, or right) "D" times. |
| 8 | Cable Loose: Unable to perform Immelmann or Wingover Turns. |
| 9 | Fabric Flutter: Fabric will tear if Power Diving (see Wing Result 10). |
| 10 | Fabric Tearing: Fall 100'x"D" per turn. When altitude reaches 0 or below, "Crash Land" ("Force Land" if over aerodrome). |
| 11 | Wing Warp: Fall 750' for "D" turns. After "D" turns, wings unwarp. |
Motor
| Roll | Result |
|---|---|
| 2 | Fire: Plane explodes in 10 turns (see Motor Result 12). May change fire to flames (see Motor result 11) after a roll of "6" while Sideslipping. |
| 3 | Motor Dies: Glide, falling 200'/turn, doing no Fast or Fancy maneuvers. |
| 4 | Motor Skipping: No Fast, Climbing or Power Diving. |
| 5 | Smoke: Receive no clues; subtract one from all shot rolls. |
| 6 | Motor Hit: Reduce plane's speed factor by 1. If plane's factor is now "0", plane may not go fast. |
| 7 | Oil Splash: Do Straight Cruising "D" Turns to wipe face. No shooting. |
| 8 | Motor Hit: Reduce plane's speed factor by 1. If plane's factor is now "0", plane may not go fast. |
| 9 | Oil Pressure Falls: Motor dies (see Motor Result 3) in 20 turns. |
| 10 | Motor Quits: Motor dies (see Motor Result 3) but roll each turn, on a "6" restart motor. |
| 11 |
Fuselage
| Roll | Result |
|---|---|
| 2 | Control Cable Severed: Roll a die; on a 1-3 may perform only Right Maneuvers, 4-6 may only perform Left maneuvers. |
| 3 | Fuselage Crack: The fuselage will snap (see Fuselage result 12) on the next critical hit to the fuselage. |
| 4 | Right Side Damage: Fuselage cracks (see Fuselage result 3) after any Left maneuver. |
| 5 | Gas Fire: (see Motor result 11). If flames become smoke, no effect to guns. |
| 6 | Controls Snag: Do Stall "D" turns. |
| 7 | Near Miss to Pilot: Panic fly Straight one turn. (Aces are exempt.) |
| 8 | Fuel Tank Leak: Tank empty (see Motor Result 3) in 10x"D" turns. NOTE that tank will empty normally if player has less fuel than rolled. |
| 9 | Controls Stick: May plot new maneuvers only on alternate turns. |
| 10 | Left Side Damage: Fuselage cracks (see Fuselage result 3) after any Right maneuver. |
| 11 |
Tail
| Roll | Result |
|---|---|
| 2 | Tail Blown Off: Crash (see optional rules for Spins). |
| 3 | Elevator Bent: Fall minimum of 200'/turn. |
| 4 | Tail Loose: Roll die after every Fancy maneuver. On a "6" tail falls off (see Tail result 2). |
| 5 | Rudder Jam: Fly Straight Cruising "D" turns. |
| 6 | Elevator Jam: Fly in present inclination (climb, etc.) for "D" turns. |
| 7 | Momentary Disruption: Do one Stall and lose 300'. |
| 8 | Rudder Sticks: May plot new inclinations only on alternate turns. |
| 9 | Rudder Bent: Fly in present turning mode (left, straight, right) for "D" Turns. |
| 10 | Tail Loose: (see Tail Result 4). |
| 11 | Elevator Bent: Fall minimum of 200'/turn. |
Cockpit
| Roll | Result |
|---|---|
| 2 | Pilot Killed: RIP. |
| 3 | Pilot Unconscious: Power dive "D" Turns, wake at end of last dive. |
| 4 | Gun Destroyed: Double-synch fire as single-synch, others don't fire. |
| 5 | Altimeter Broke: Opponent records your altitude/changes. You may not keep record of your altitude until within 500' of the ground. |
| 6 | Compass Broke: Opponent records your location/changes. |
| 7 | Windscreen Crack: No clues. Panic fly Straight once (Aces exempt). |
| 8 | Observer Killed: If you have one — Pilot panics, power dives next turn. Aces are exempt. |
| 9 | Pilot Faints: Fly Straight Cruising "D" turns falling 200' per turn. |
| 10 | Guns Destroyed: No more firing. |
| 11 | Pilot Wounded: Must try to escape. Pilot faints (see Cockpit result 9) every "D" Turns. |
Wheels
| Roll | Result |
|---|---|
| 2-4 | Wheels Gone: "Crash" when attempting to land. |
| 5-8 | Wheels Loose: "Force Land" when attempting to land. |
| 9-12 | Wheels Hanging: "Crash Land" when attempting to land. |
Plane Stats
| Plane Name | Albatros DIII | Albatros DVa | Junkers D1 | Pfalz DXII | Fokker DVII | Sopwith Dolphin | Spad VII | Spad XIII | SE 5a | Ansaldo Balilla |
|---|---|---|---|---|---|---|---|---|---|---|
| Nation | Germany | Germany | Germany | Germany | Germany | Britain | Allies | Allies | Britain | Italy |
| Climb | 75' | 100' | 100' | 125' | 125' | 125' | 75' |
("Speed" lists two numbers: the number of FAST maneuvers a pilot may do in a row at or below 7000' / above 7000' — see rule XXX.)
Damage Allocation Charts
Source note: these grids are reproduced from the Chart Book's printed cell contents (letter codes) and the "Defender Maneuver" / "POA Direction" columns beside each grid. The original booklet also draws hand-sketched circles/loops across groups of cells to show how the Point of Aim slides between them as the defender's maneuver is applied; those groupings are visual aids for the same movement rule stated in prose under rule XXXVIII-XXXIX and the "Point Of Aim Adjustment" box below, so no rule content is lost by omitting the freehand loops themselves.
Legend: A = Wing. B = Fuselage. C = Tail. D = Motor. E = Cockpit/Wing. F = Cockpit/Fuselage. G = Wheel. H = Tail/Fuselage. K = Wing/Fuselage. M = Wing/Motor. O = Wing/Tail.
Point of Aim Adjustment for Defender Speed: Slow — no adjustment at all. Cruise — change point of aim 1 square in the appropriate direction. Fast — change point of aim 2 squares in the appropriate direction. The Initial Point of Aim may lie up to one square outside the grid, such that a move in the proper direction would bring it into the grid.
Away to the Right
| Row | 1 | 2 | 3 | 4 | 5 | 6 | 7 | Defender Maneuver | POA Direction |
|---|---|---|---|---|---|---|---|---|---|
| a | A | Straight | Left | ||||||
| b | A | E | K | M | A | Dive | Up and Left | ||
| c |
Away to the Left
| Row | 1 | 2 | 3 | 4 | 5 | 6 | 7 | Defender Maneuver | POA Direction |
|---|---|---|---|---|---|---|---|---|---|
| a | A | Straight | Right | ||||||
| b | A | M | K | E | A | Dive | Up and Right | ||
| c | A |
Towards to the Left
| Row | 1 | 2 | 3 | 4 | 5 | 6 | 7 | Defender Maneuver | POA Direction |
|---|---|---|---|---|---|---|---|---|---|
| a | A | A | A | A | A | A | Straight | Right | |
| b | A | D | F | B | Dive | Up and Right | |||
| c |
Towards to the Right
| Row | 1 | 2 | 3 | 4 | 5 | 6 | 7 | Defender Maneuver | POA Direction |
|---|---|---|---|---|---|---|---|---|---|
| a | A | A | A | A | A | Straight | Left | ||
| b | B | F | D | A | Dive | Up and Left | |||
| c | O |
Facing Towards
| Row | 1 | 2 | 3 | 4 | 5 | 6 | 7 | 8 | Defender Maneuver | POA Direction |
|---|---|---|---|---|---|---|---|---|---|---|
| a | A | A | A | A | E | A | A | A | Straight | None |
| b | A | A | A | D | D | A | A | Dive |
Facing Away
| Row | 1 | 2 | 3 | 4 | 5 | 6 | 7 | 8 | 9 | Defender Maneuver | POA Direction |
|---|---|---|---|---|---|---|---|---|---|---|---|
| a | A | A | A | A | E | A | A | A | A | Straight | None |
| b | A | A | A | A | B | A | A |
Above or Below 100'
| Row | 1 | 2 | 3 | 4 | 5 | 6 | 7 | 8 | Defender Maneuver | POA Direction |
|---|---|---|---|---|---|---|---|---|---|---|
| a | D | D | Straight | Down | ||||||
| b | A | A | A | K | K | A | A | A | Dive |
Duty Roster, Ground Position, Fuel, Archie Chart, Starting Altitude (Campaign Set-Up Sheet)
(Referenced by the Campaign Rules, section XLVI, for "Starting the Campaign Game.")
Duty Roster
| Roll | Result |
|---|---|
| 1 | Pilot #1 |
| 2 | Pilot #2 |
| 3 | Pilot #3 |
| 4 | Pilot #4 |
| 5 | Player's Choice |
| 6 | Enemy's Choice |
Ground Position — 1st roll is the same for both players; each player takes the 2nd roll independently.
| 1st Roll | 2nd Roll: 1-2 | 2nd Roll: 3-4 | 2nd Roll: 5-6 |
|---|---|---|---|
| 1 | 4E | 3W | 12W |
| 2 | 5E | 2W | 10W |
| 3 | 7E | 1W | 8W |
| 4 | 8E | 1E | 7W |
| 5 | 10E | 2E | 5W |
| 6 | 12E | 3E | 4W |
Fuel — +1 if behind enemy lines, −1 if behind home lines, then roll:
| Roll | Result |
|---|---|
| 1 | Full |
| 2 | 3/4 |
| 3 | 3/4 |
| 4 | 1/2 |
| 5 | 1/2 |
| 6 | 1/3 |
Archie Chart — Roll twice: once to find amount of damage, then to find the area hit. Since all hits go in one area, a "C" is always a critical hit in that area.
| Altitude | 2 | 3 | 4 | 5 | 6 | 7 | 8 | 9 | 10 | 11 | 12 |
|---|---|---|---|---|---|---|---|---|---|---|---|
| 0-250' | 4 | 3 | 2 | 1 | 1 | 0 | 1 | 1 | 2C | 3C | 4C |
| 275-500' | 3 | 3 | 2 | 1 | 0 | 0 | 1 |
Starting Altitude — 1st roll is the same for both players. Each player takes the 2nd roll independently.
| 1st Roll | 2nd Roll: 1 | 2 | 3 | 4 | 5 | 6 |
|---|---|---|---|---|---|---|
| 1-2 | 500' | 750' | 1000' | 1500' | 1750' | 2000' |
| 3-4 | 2500' | 3000' | 3500' | 4000' | 4500' | 5000' |
| 5-6 | 5700' | 6400' | 7100' | 7800' | 8500' | 9200' |
Pilot's Log
A tracking sheet for recording a pilot's mission history. Header fields: Pilot, Jasta/Squad, Nation, Date, Plane Make, Mission (F/B/T/R/A), Speed (___/F), Climb, Zoom (/Z), Dive, Power Dive (/___P), Ceiling. Hits Advanced: Wing, Tail, Motor, Fuselage. Hits Intermediate: Front, Side, Tail. Fuel, Gun, Ammo.
Per-turn columns (30 turn rows provided): Turn, Speed, Maneuver, Opponent 1 Page, Opponent 2 Page, Opponent 3 Page (for multi-player battles), Altitude, Inclination, Direction, Location.
Side trackers: Fuel remaining, Ammo remaining, Accumulated Hits by area (W/T/M/F/F/S/T — Wing/Tail/Motor/Fuselage/Front/Side/Tail, covering both the intermediate and advanced hit-area sets), Ace Ability (free text for a pilot's special ability once earned), and a Victory Points tracker.