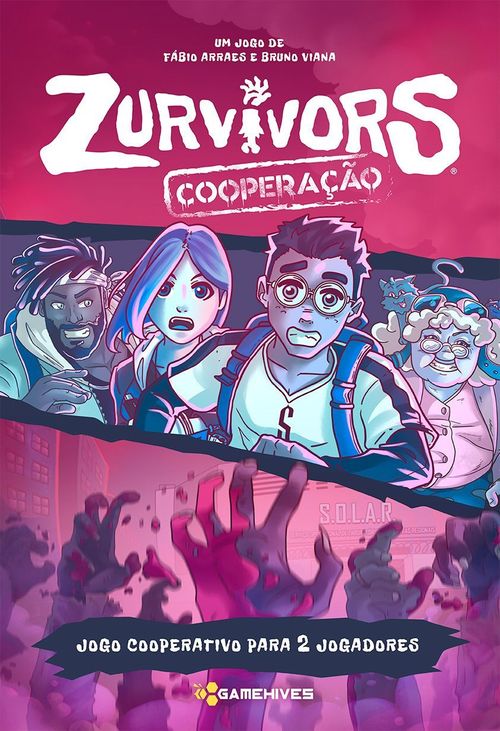
Zurvivors Cooperação
Zurvivors Cooperação Rulebook
Table of Contents
Table of Contents
Components
- 24 Evidence, Weapon and Item Tokens
- 4 Survivor Cards
- 4 Survivor Meeples
- 1 First Player Marker
- 10 City Cards
- 1 Starting Card
- 1 Motorcycle Card
- 1 Zombie Horde Card
- 6 Damage Tokens
- 24 Item Cards (12 Common, 9 Uncommon, 3 Rare)
- 2 Action Cards
- 2 Zombie Action Cards
- 2 Big Boss Cards
- 1 Big Boss Meeple
Goal: Both players must take their Survivor Meeples to the Motorcycle Card, with all of the Evidence Tokens kept in their Backpacks, before the Zombie Horde Card reaches one of them.
Game Setup
- To set up the city, place the Starting Card in the center of the table and place the Survivor Meeples on it.
- Shuffle the City Cards. Place 3 of them in line, face down, to the left of the Starting Card and 3 to the right of it. Place 1 Evidence Token on each card to the right of the Starting Card. The remaining City Cards must be returned to the game box.
- Place the Zombie Horde Card and the Motorcycle Card on each extremity of the city.
- Separate the Weapon Tokens and the Item Tokens according to their rarity and place them next to the City Cards, where the players can reach them. The tokens are divided into Common Items, Uncommon Items, Rare Item and Weapons.
- To set up their playing area, each player must get 1 Action Card, 1 Zombie Action Card, and the chosen Survivor Card. Each player must decide which side of the Survivor Card will be used in the game and leave that side face up. IMPORTANT: the side with the chosen Ability cannot be changed during the game.
- Shuffle the Item Cards and hand 8 of them to each player. Place the 8 remaining Item Cards next to the Zombie Horde Card. This is the Zombies' Draw Deck.
- Give the First Player Marker to the player who has seen a zombie more recently. Now the game can begin!
Gameplay
Zurvivors Cooperation is played over a few rounds, always respecting the priority of the first player.
A round is comprised of:
- Each player must play an Item Card from their hand, face down, in their playing area, next to their Survivor Card. Both players must reveal the played Item Card simultaneously and then reveal 1 card from the Zombies' Draw Deck.
- Check if any Zombie Action has been activated.
- Each player may: Perform 1 Action, Exchange as many items as they wish, and/or use their Survivor's Ability. See more details below.
- Each player must give the Item Cards in their hand to the other player and then start a new turn.
The Round ends at the end of the last turn, when players have no more Item Cards in hand to play.
SHHHHHHHHHHH!... Although this is a cooperative game, players must never talk about their strategy. The game is based on synchronicity and observation.
Setup for the New Round
- Shuffle all the Item Cards and hand 8 of them to each player; the remaining 8 cards will form the Zombies' Draw Deck.
- Give the First Player Marker to the other player.
- Survivor Cards whose Abilities were used in the last round return to their starting position (vertical).
Playing Item Cards
Players can perform their Survivors' Actions – shown on the Action Card – by playing Item Cards. So, it is very important to choose the Item Card wisely.
Every turn, each player must play 1 Item Card face down in their playing area. Then, both players reveal their played cards simultaneously.
TIP: Play the Item Cards as in the example below to make it easier to see them.
(The manual shows an example layout of played Item Cards beside the Action Card.)
Each item has its rarity, i.e. it's easier or harder to find them among the Item Cards. This may be used as a strategy during the game. The rarities are:
- Common Items (12 Cards)
- Uncommon Items (9 Cards)
- Rare Item (3 Cards) *
* This Item is a wild card, and it can be considered as any other Item, except a Weapon.
Activating Zombie Actions
These actions may prevent Survivors' Actions and even move the Zombie Horde Card forward toward them.
After each player reveals the Item Card they played, 1 card must be revealed from the Zombies' Draw Deck.
Players must add up all the symbols in the red area of each of the 3 revealed Cards and check on the Zombie Action Card if there is any activation.
IMPORTANT: Only 1 Zombie Action may be activated in each turn. The actions are activated in the order of priority shown on the Zombie Action Card (1 is highest). Thus, if there are symbols to activate Actions 2 and 4, for example, consider only the activation of Action 2.
In the example in the manual, Alice has revealed Item Card B, Davi has revealed Item Card C, and the Zombies' Draw Deck has revealed Item Card D. According to the Zombie Action Card, the 4 symbols (zombie) have activated Action 3, and players are now prohibited from collecting Evidence Tokens and from copying the Action performed by the First player during this turn.
Zombie Action Card (as printed, rows 1 to 4 in priority order):
| Row | Activation symbols in the red area (as shown) | Effect icons on the card (crossed-out = prohibited) |
|---|---|---|
| 1 | Two zombie symbols and two blood-drop symbols | Crossed-out card-with-arrow-and-figure icon; crossed-out Motorcycle |
| 2 | Two footprint symbols and two lightning symbols | Crossed-out card-with-arrow-and-figure icon; crossed-out blue token; crossed-out card-with-figure icon |
| 3 | Four symbols, shown as a mixed streak of footprint, lightning, blood-drop and zombie symbols marked "x4" | Crossed-out Evidence Token; crossed-out "figure equals disc" copy icon (the text confirms: no collecting Evidence Tokens and no copying the First player's Action) |
| 4 | Footprint, lightning, blood-drop and zombie symbols | A hazard (warning) sign, not crossed; a crossed-out card icon |
Row 1, 2 and 4 effects are described as their icons appear; the rulebook text does not name them, and the names are not given in the PDF.
Activating Survivors' Actions
These Actions are used so that Survivors can get Item or Weapon Tokens, collect Evidence Tokens, and move forward on the City Cards.
When a player has enough Items (on cards and/or tokens) to complete a combination on the Action Card, that player must discard all of the used items and perform the chosen action for their Survivor.
IMPORTANT: A player may only perform one action in each turn.
NOTE: For easy reference, there is a description of each Action on the back of the Action Card.
In the example, in order to perform Action A, Sarah needed to discard her Item Card "Laptop Computer", her "First Aid Kit" as a wild card – replacing the "Energy Drink" – and the Item Token "Drone". For her action, Sarah was able to get any Item or Weapon Token. Thus, she decided to get Weapon Token "Dynamite".
Action Card (as printed, rows 1 to 6):
| Row | Items required (as shown) | Action icon |
|---|---|---|
| 1 | Rope and Laptop Computer | Evidence Token (white disc with yellow and black edge) |
| 2 | Energy Drink, a yellow-and-pink item, and Compass | Card-with-curved-arrow-and-figure |
| 3 | Yellow-and-pink item and Rare Item | Figure equals a grey disc (copy the Action performed by the First player) |
| 4 | Rope and Drone | Card with blue dot and figure |
| 5 | Yellow-and-pink item and Compass | Blue-dot card with arrow to a card with figure |
| 6 | Energy Drink, Laptop Computer and Drone | Blue circle (any Item or Weapon Token) |
Evidence Tokens
These are the most important Tokens in the whole game. All of these tokens must be collected with an action from the Action Card and kept in the Survivors' Backpacks.
Each Evidence Token occupies 1 slot in the Survivor's Backpack. The occupied slot will remain unavailable for the remainder of the game.
IMPORTANT: Evidence Tokens may not be removed from a Survivor's Backpack for any reason.
Item Tokens
Just like Item Cards, Item Tokens are used to complete combinations on the Action Card.
It is possible to keep up to 3 Item Tokens on a Survivor's Backpack, and if they are not used, they can be kept for later use in other rounds. When used to perform an Action, the Item Token must be discarded.
IMPORTANT: When a player gets a 4th Item Token, they can discard a token from the Backpack for space, except for an Evidence Token.
Weapon Tokens
Weapon Tokens are used to prevent the Zombie Horde from reaching the Survivors.
If a Survivor has Weapon Tokens (either "Dynamite" or "Lighter" + "Molotov Cocktail") in their Backpack when the Zombie Horde Card reaches them, that player may discard those tokens immediately to prevent the encounter. The Zombie Horde Card then returns to its previous position.
IMPORTANT: Weapon Tokens "Lighter" + "Molotov Cocktail" may be shared between Survivors if they are on the same City Card.
In the example, Davi is about to be reached by the Zombie Horde Card, as it was activated by the Zombie Action Card. Since Davi keeps 3 Weapon Tokens in his Backpack – 1 "Dynamite", 1 "Molotov Cocktail" and 1 "Lighter" – he can choose which Weapon Tokens he wants to discard, either the Dynamite or the Molotov Cocktail with the Lighter, to prevent the encounter with the Zombie Horde Card, forcing the card back.
Make an Exchange
During their turn, a player may discard 2 played Item Cards of the same type to get 1 Token of the same Item.
IMPORTANT: This action may be performed as many times as a player wishes.
Use an Ability
During their turn, in order to use their Survivor's Ability, a player must turn the Survivor Card 90 degrees sideways, indicating that the Ability has been used, and then apply the effect described on the card.
IMPORTANT: This Action may only be used once per round, and it will be available to use again at the beginning of each round.
Move the Motorcycle
When either player takes their Survivor Meeple to the Motorcycle Card, starting on the following round, that player may discard from their played Item Cards and/or Item Tokens in their Backpack, the Items shown on the Motorcycle Card to move it 1 City Card, along with the Survivor Meeple on it.
IMPORTANT: This action may be performed once each turn.
In the example, Sarah has discarded the necessary Items to move the Motorcycle Card 1 City Card toward Alice.
End of the Game
The game ends immediately in victory when both players manage to take their Survivor Meeples to the Motorcycle Card with all of the Evidence Tokens kept in their Backpack.
The game ends immediately in defeat when the Zombie Horde Card reaches at least one Survivor Meeple.
Questions about the rules? The publisher's rules video with subtitles in English and FAQ are available at faq.gamehives.com.br.
Variant: Big Boss
The scientists Dr. Kátia and Dr. Takashi have been infected by experiments 0030-B and 0259-A, have suffered a mutation, and are now on the loose in the city!
Goal: In order to win the game, besides the basic game's goal, players will have to defeat one of these monsters!
Setup:
- Choose either one of the Big Bosses. Place that card next to the Motorcycle Card with the "movement" side face up.
- Place the Big Boss Meeple on the Zombie Horde Card and the 6 Damage Tokens next to the Item Tokens.
Activating the Big Boss during the game:
After revealing the 3 Item Cards to activate the Zombie Action, if the Big Boss activation symbols (marked A on the Big Boss Card; read from the card art as two blood-drop symbols) or more are revealed, the Big Boss Meeple will move 1 City Card ahead, toward the Survivors.
Every time the Big Boss reaches the Survivors, each player reached must discard the Item shown on the Big Boss Card if they have it, whether as a played Item Card or an Item Token kept in the Backpack. Then, the Big Boss Meeple returns to the Zombie Horde Card, to restart its movement later.
If the Big Boss discards at least one Item from the Survivors, place a Damage Token with the star-shaped side face up on the Big Boss Card. Otherwise, place a Damage Token with the striped side face up on it.
Setup for the Big Boss Confrontation:
When the Survivors reach the Motorcycle Card with all the Evidence Tokens, the final confrontation against the Big Boss starts. Follow these steps:
- Return the Item and Weapon Tokens to the pool.
- Shuffle all the Item Cards, hand 8 of them to each player and form the Big Boss' Draw Pile with the 8 remaining cards.
- Flip the Big Boss Card to the "confrontation" side.
- Place the Damage Tokens acquired during the game on their corresponding sides.
Confronting the Big Boss:
- Reveal 1 Item Card from the Big Boss' Draw Deck.
- In silence, each player must play an Item Card face down. Then, both players must reveal their played cards simultaneously.
- Repeat steps 1 and 2 until there are no more Item Cards to play.
To deal damage to the Big Boss, at least one of the players must play a card with the same Item on the card revealed from the Big Boss' Draw Deck. However, if the Big Boss' revealed Item Card is any of the items shown on the Big Boss Card (the confrontation side), both players must play the card with the same item.
If the Survivors deal damage to the Big Boss, place the 3 Item Cards revealed this turn to the right of the Big Boss Card. If the Survivors don't deal damage to Big Boss, then it automatically deals damage to the Survivors. When this happens, place the 3 Item Cards revealed this turn to the left of the Big Boss Card.
IMPORTANT: Players may use the Rare Item (the wild card) in place of any other item during the confrontation.
When there are no more Item Cards to play, add up the cards from both stacks to the corresponding Damage Tokens, and finally, compare the Damage.
Worked example printed in the rulebook: 9 Damage from Cards + 2 Damage from Tokens = 11 Damage to the Survivors; 15 Damage from Cards + 1 Damage from Token = 16 Damage to the Big Boss.
If more Damage has been dealt to the Big Boss, then it is considered defeated and the game ends in victory; otherwise, the game ends in defeat. If there is a tie, shuffle the cards and restart the confrontation.
Gradual Difficulty
It is possible to change the game difficulty by adding or removing components during the standard setup (see Game Setup) – consider that as Difficulty Level 3.
The rulebook shows, in a diagram, which components must be used to play each Difficulty Level from 1 to 8. The diagram depicts City and Zombie Action set-ups for each level; the exact per-level component list is shown only pictorially.
IMPORTANT: For Difficulty Levels 7 and 8, start placing the Evidence Tokens from the Starting Card.