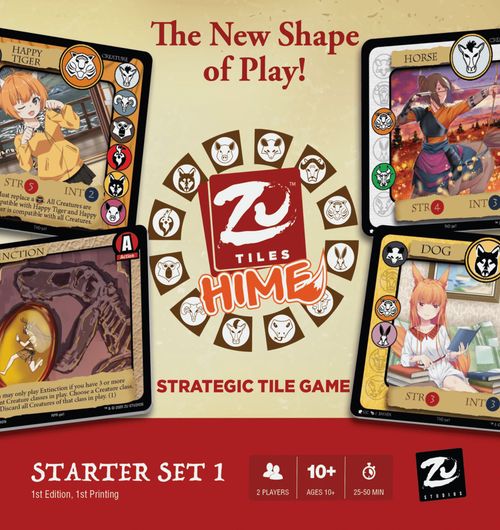
ZU Tiles: Hime – Starter Set 1
ZU Tiles: Hime – Starter Set 1 Rulebook
Table of Contents
Table of Contents
- Components and Tiles
- Setup
- The Tile Types of ZU Tiles: Hime
- Turn Structure
- Placing Tiles and Neighbors
- Scoring
- Basic Action Stack
- Battle
- Tiles Placed On or Under Another Tile
- Rulings and Special Cases
- Icons and Words Are Interchangeable
- A Battle Doesn't Always Have a Winner
- Allies
- Tile Text vs. Rulebook
- Players May Only Replace Tiles They Control
- Placeholder Tiles
- Strength of 0 (Zero)
- STR and INT Values in the Discard Pile
- End of Turn Effects
- If a Creature You Control Loses a Battle to an Item or Obstacle You Control
- 3 and 4 Player Games
- Customized Deck Construction
- Paying Costs
- Rounding Numbers
- Deck Reference Lists
Components and Tiles
The Anatomy of a ZU Tile
The tile diagram on the rulebook's page 3 labels the following parts of a ZU tile:
- Tile Icon: graphically identifies the type of tile, i.e. Creature Class, Item, Obstacle, Action, etc.
- Tile Name
- Compatibility Icons: identify which creatures the tile is compatible with.
- Tile Type
- Strength Value (STR)
- Intelligence Value (INT)
- Tile Code: on the bottom of the tile.
- Tile Description: either a description of what a tile can do or instructions on what a player can do. Sometimes this has a number at the end called the "Maximum Tile Number" (see Maximum Tile Number under Customized Deck Construction).
Players, Tiles, Playing Area and Winning
- Players: 2 Players (for 3 and 4 player games see the section below).
- Tiles: This Starter Set has 2 decks: a Dragon, Snake, Rooster (DSR) deck and a Rat, Ox, Monkey (ROM) deck. Each deck has 40 tiles. One deck can be found under the Action placeholder tiles when the box is first opened. The other deck can be found under the Reaction placeholder tiles when the box is first opened. If the tiles ever get mixed up you can easily separate them by looking at the Tile Code on the bottom of the tile (see The Anatomy of a ZU Tile). All tiles with "DSR" go in one deck. All tiles with "ROM" go in the other. For your convenience reference deck lists can also be found on the last page of this rulebook.
- Playing Area: Any flat surface you could play a typical tabletop game on. A 66 cm x 66 cm (26" x 26") playing area should suffice.
- To Win: The first player in a 2-player game to earn 12 points wins the game (see 3 and 4 Player Games for games with more than 2 players). If a player needs to draw a tile, but they cannot do so because they are out of tiles, they immediately lose the game.
Setup
After setting aside the 2 Action and 2 Reaction placeholder tiles, each player randomizes the tiles in their deck face down. They then make 5 Draw Stacks of tiles directly in front of them, face down. Each Draw Stack must have 8 tiles in it.
Each player then draws 5 tiles. Each tile can be drawn from any of their Draw Stacks. After each player has drawn their 5 tiles they should check their starting hand. Each player should have at least 1 Dragon, Snake, Rooster, Rat, Ox, or Monkey in their starting hand. If they do not have one of those tiles in their starting hand they should reshuffle their tiles, make 5 new Draw Stacks and draw again.
For a 2-player game the playing area should look similar to the layout shown in the rulebook diagram. The diagram labels three areas:
- Draw Stacks: the stacks where a player draws their tiles from.
- Point Pile: the pile that tiles are placed onto to represent the player's points.
- Discard Pile: the pile that tiles are placed onto after being used or discarded.
The Tile Types of ZU Tiles: Hime
1. Creatures
ZU Tiles: Hime is loosely based on the 12 creatures of the Chinese Zodiac and it is those creatures that are at the core of the game.
However, with this particular Starter Set we will be focusing only on 6 of the 12 creatures. One deck will consist of Dragon, Snake, and Rooster. The other deck will consist of Rat, Ox, and Monkey.
Deck 1: Dragon, Snake, Rooster. Deck 2: Rat, Ox, Monkey.
GAME NOTE: You may not attack or capture creatures you control. If ever something causes a player to capture a creature they control, place that creature in their Discard Pile instead.
2. Actions and Reactions
There are Action, Reaction, and Action/Reaction tiles. These tiles allow you to affect the game through Basic Action Stacks (see Basic Action Stack) and Battle Action Stacks (see Battle).
3. Items and Obstacles
Items are generally tiles with special abilities. Obstacles are tiles generally used to block spaces and/or represent danger.
GAME NOTES:
- Items and Obstacles may not be declared an Attacker or be used as an Ally in a Battle.
- Items and Obstacles may be attacked by their controller.
- Any Creature neighboring an Item or Obstacle can ally in its defense.
- If an Item or Obstacle loses in a Battle it is discarded.
Turn Structure
During a player's turn they can do any, some, or all of the following optional actions one time and in any order they choose:
- Place a tile with STR and INT into the playing area (an example could be a Creature, Item, or Obstacle).
- Start a Basic Action Stack (see Basic Action Stack).
- Start a second Basic Action Stack.
- Start a Battle (see Battle Action Stack).
- Discard 2 tiles to draw 1 new tile.
After a player completes all the actions they want for their turn, they must draw a tile from one of their Draw Stacks in front of them. If the player took no actions on their turn they may draw one additional tile. That ends their turn and begins the next player's turn.
GAME NOTES: Spaces: New, empty spaces are immediately created on all sides of a tile after a tile is either put into play or when a tile has moved into a space. Spaces do not exist unless they are in a Neighbor position to, or under, a tile currently in the playing area (see Time Out: Neighbors). Tiles that are moving into a new space immediately create new Neighboring spaces around them as they move.
Placing Tiles and Neighbors
To play a tile, take it from your hand and place it face up in the playing area. Only tiles with Strength (STR) and Intelligence (INT) values, that are not an Action, Reaction, or Action/Reaction tile, may be placed directly into the playing area. The first tile played starts the game and should be placed in the very center of the playing area. Make sure that when placing tiles in the playing area, they always face the player who placed the tile. After the first tile is played, each subsequent tile must be placed in a NEIGHBORING space to another tile (see Time Out: Neighbors).
GAME NOTES:
- Creatures do NOT have to be compatible in order to be placed next to each other in the playing area.
- Compatibility is only checked when COMPLETING A SQUARE (see Time Out: Compatible Creatures).
TIME OUT: NEIGHBORS. Tiles that touch side-by-side are Neighbors. The rulebook's examples show that a Tiger and a Pig are Neighbors, a Tiger and a Ram are NOT Neighbors, and only the Ram and the Rabbit are Neighbors to the Tiger.
Scoring
There are 2 primary ways to score points in ZU Tiles: Hime.
- Complete a square of compatible Creatures.
- Win a Battle against an opponent's Creature and capture it (see How To Battle).
Completing a Square of Compatible Creatures
If you are the player who places the final tile in a way that creates a square of 4 Creatures (which can include Creatures your opponent controls) you have "completed a square". Next, check to see if you had "completed a square of compatible Creatures" (see Time Out: Compatible Creatures). Then, if you have indeed completed a square where all the Creatures in the square are compatible with their Neighbors in the square, remove all the tiles in the square from the playing area and place those tiles in your Point Pile. Score 1 point for each tile placed in your Point Pile this way.
TIME OUT: COMPATIBLE CREATURES. If a Compatibility Icon (one of the smaller Creature Icons located on the left or right of a Creature tile) matches the Tile Icon (the larger Creature Icon with a gold ring at the top of a Creature tile) of a Neighboring tile, then those two tiles are compatible. If a 4 tile square is ever formed where each tile in the square is compatible with its Neighbors in the square, then a Compatible Square has been formed.
Strategy spotlight: Action tiles can allow you to "move" existing tiles to help complete a scoring square or to "flee" a battle.
Basic Action Stack
A Basic Action Stack is a stack of tiles separate from the tiles in the playing area. A Basic Action Stack is the method by which players can use their Action, Reaction, and/or Action/Reaction tiles.
A Basic Action Stack starts with the player whose turn it is deciding they would like to play an Action Tile (that they have in their hand). That player then takes that Action Tile and lays it face up off to the side of the playing area. That action starts a Basic Action Stack.
Then, the opponent may react to the Action Tile being played by adding a Reaction Tile, if they have one, physically on top of the Basic Action Stack.
GAME NOTES: Some Action, Reaction, and Action/Reaction tiles have a STR and INT value. Those tiles must be put into play by way of an Action Stack. They may not be placed directly into the playing area as one of the actions a player can do on their turn.
Example: Isaac and Kenny are playing a game. On Isaac's turn he wants to play one of his Action Tiles. He places the Action Tile he wants to play from his hand, face up, and off to the side of the playing area. Kenny can now place a Reaction Tile face up and directly on top of Isaac's Action Tile. Isaac can then place a Reaction Tile on top of Kenny's Reaction Tile. And so on and so on. The Basic Action Stack then continues to grow this way until both players no longer can or want to add any more Reaction Tiles to the Basic Action Stack.
Then, working from the top tile down, one after the other, each player performs the instructions on the tile they placed on the Basic Action Stack.
If for some reason the instructions on a tile cannot be completed, the tile is simply placed in the Discard Pile of the person who played it.
After the instructions on a tile are completed the tile is placed into the Discard Pile of the player who played it.
Battle
Battle Action Stack
A Battle Action Stack is very similar to a Basic Action Stack. It allows players to use Reaction and/or Action/Reaction tiles to either help or hinder a Battle that is about to take place. In order to start a Battle (see How To Battle) a player must choose a Creature they control in the playing area. That creature is the Attacker. Then they must name a tile neighboring the Attacker that is not a Creature they control. That tile is the Defender.
Then the attacking player must choose ANY tile in their hand and place it FACE DOWN, off to the side of the playing area.
That face down tile represents a Battle Action Tile that works exactly like a regular Action Tile. This means that after the Battle Action Tile is placed down, a Battle Action Stack is created. Next, Reaction Tiles can be added face up on the stack just like they would be with a Basic Action Stack.
Then, from there, everything progresses exactly the same as a Basic Action Stack, except that when the Battle Action Tile is reached at the bottom of the stack, it is discarded and there is a comparison between the STR and INT of the attacking tile (or team) and defending tile (or team).
Strategy spotlight: Engaging in battle allows you to clear spaces on the "grid" so that you can place a compatible creature in that space that would benefit your scoring square. It also gets you a point!
TIME OUT. One way to score points is to capture a Creature, or Creatures, controlled by your opponent(s). You can also cause Items and Obstacles to be discarded from the playing area by defeating them in Battle.
How To Battle
- Choose a Creature you control (the Attacker) and select a tile NEIGHBORING the Attacker that is not a Creature you control (the Defender).
- Start and complete a "Battle Action Stack" (see Battle Action Stack).
- Then, once the Battle Action Tile is reached at the bottom of the Battle Action Stack and is discarded (and if the Attacker and Defender are still Neighbors), compare the STR and INT values of both tiles.
- If either tile has BOTH greater STR AND INT than the other tile, it wins the Battle and the defeated Creature, along with any allies, is captured. Otherwise the Battle is a draw.
- The player who won the Battle places the captured Creature, along with any allies, into their Point Pile. When a Creature is in a Point Pile it is worth 1 point. If an Item or Obstacle is defeated, it is discarded.
Example: If a Pig and a Rabbit battled, the Pig would win. This is because the Pig is BOTH stronger (3 vs 1) AND smarter (4 vs 3) than the Rabbit.
Allies
After the Attacker and Defender are chosen, but before the Battle Action Tile is placed down, both players have the option to identify Allies from Creatures they control (and in a multi-player game they may ask for Allies from other players). Allies can only be identified or chosen from tiles neighboring the Defender. Once the Battle Action Tile is placed down all Allies are locked into the Battle on their chosen side.
- First the defending player may identify Allies to help their tile in Battle. Then the attacking player may identify Allies to help their tile in Battle.
- If during the resolution of the Battle Action Stack a Creature is moved to a space neighboring the Defender, the controller of the moved Creature may decide if that Creature will join the Battle, and which side it will join on, when the Battle Action Tile is reached.
- If a tile has any Allies, it simply adds the STR and INT values of those Allies to its own when a Battle takes place. If a tile that has Allies is defeated, then all Allies of the defeated tile are captured.
Example (Allies diagram): The rulebook's example is shown with creature icons rather than names, so its creatures are not transcribed here. Its printed text reads: "If the [icon] is attacked by the [icon], the [icon] can not help and become an Ally to the [icon]. This is because the [icon] is not a Neighbor to the [icon]."
Tiles Placed On or Under Another Tile
If a tile is placed on or under another tile, it is considered "attached" to the tile it was placed on or under. If something causes a tile to move, then all tiles "attached" to it move as well. If a tile leaves the playing area or is considered "out of play", any tiles attached to it that did not cause the "out of play" effect are immediately discarded.
Rulings and Special Cases
Icons and Words Are Interchangeable
ICONS AND WORDS THAT DESCRIBE ICONS ARE INTERCHANGEABLE. The word "Obstacle", for instance, is always interchangeable with the Obstacle icon.
A Battle Doesn't Always Have a Winner
If the Attacker and Defender are no longer neighbors when the Battle Action Tile is reached, the Battle does not take place. However the Battle Action Tile is still discarded.
Allies
If a tile that is an Ally is no longer a Neighbor to the Defender when the Battle Action Tile is reached, then that tile can no longer be an Ally in the Battle.
Tile Text vs. Rulebook
If it ever seems like a tile description is contradicting the rulebook, proceed with the tile description. Some tiles are designed to be exceptions to the rules outlined in the rulebook.
Players May Only Replace Tiles They Control
Some tiles say they must replace another tile to be put into play. Players may only replace tiles they control with a tile from their hand. When replacing tiles, all tiles that were attached to the tile being replaced are now attached to the new tile. Tiles that have been replaced are put into the Discard Pile of the player who started the game with the tile in their deck.
Placeholder Tiles
The game comes with 4 placeholder tiles (2 Action, 2 Reaction). These tiles are used as placeholders for when a tile in the playing area allows you to do an Action or Reaction. Use these tiles to represent those effects on a Basic Action Stack or a Battle Action Stack.
Strength of 0 (Zero)
If any tile's STR ever reaches 0, immediately place it in the Discard Pile of the player who started the game with the tile in their deck.
STR and INT Values in the Discard Pile
When a tile has STR and INT values, and is in the Discard Pile, those values are considered 0 while in the Discard Pile.
End of Turn Effects
If there are multiple end of turn effects that would somehow interfere with each other, the order in which they are resolved lies in the order that they were created; with the first end of turn effect resolving first, second one created resolving second, and so on.
If a Creature You Control Loses a Battle to an Item or Obstacle You Control
The Creature and any attacking allies are discarded.
3 and 4 Player Games
For 3 and 4 player games the playing area should be a square. Player 1 and 2 would sit across from each other on two sides of the square. Player 3 would choose a remaining open side. And Player 4 would choose the last remaining open side.
Play begins with the youngest player and rotates clockwise.
In a 3 player game the first player to get to 10 points wins.
In a 4 player game the first player to get to 9 points wins.
If a player needs to draw a tile but they cannot do so because they are out of tiles, they immediately lose the game. Those that lose the game must immediately discard their entire hand and place all tiles they control in the playing area into their Discard Pile. For the remainder of the game if a player who has lost ever receives control of a tile in the playing area it is immediately placed into their Discard Pile.
Customized Deck Construction
Customized deck construction for ZU Tiles is meant to be as free and open as possible. Here are the very limited rules.
- A deck must consist of at least 5 tiles.
- No maximum deck size.
- Whatever the deck size, before play, the deck must be randomized and divided into 5 Draw Stacks.
- Before play begins no Draw Stack can have a greater than 1 tile difference from any other Draw Stack created out of the same deck.
- Some tiles have a "Maximum Tile Number" in their Tile Description. If a total of that number, or more, of same-named tiles, starting the game from the same deck and in greater number than the lowest Maximum Tile Number on any one of them, ever end up in any player's Point and/or Discard Pile, the player playing the deck those tiles originated from may not win the game and immediately loses the game.
Paying Costs
Some tiles say they "cost" something in order to play. That generally means putting something in the Discard Pile.
Example: If something costs 1 point to play, then you would take a tile representing 1 point from your Point Pile and place it in your Discard Pile.
Rounding Numbers
Unless explicitly stated otherwise, rounding is always done to the nearest whole number using the general rules of rounding (0, 1, 2, 3, 4 round down and 5, 6, 7, 8, 9 round up).
Deck Reference Lists
The rulebook's last page lists the two Starter Set 2 decks only. Set 1 deck lists are not printed in this document.
Rat, Ox, Monkey Deck (40 tiles): 8 Rat; 7 Monkey; 7 Ox; 2 Banana Barrage; 2 Monkey Swing; 2 Pull; 2 Sewer System; 1 Contagion; 1 Impervious; 1 Leader of the Pack; 1 Mind Control; 1 Mosey On; 1 Revive; 1 Sapphire Monkey Totem; 1 Stampede; 1 Taunt; 1 Biased Judgement.
Dragon, Snake, Rooster Deck (40 tiles): 8 Rooster; 7 Snake; 6 Dragon; 2 Explosive Egg; 2 Golden Egg; 2 Time Alone; 1 Constrict; 1 Crow Blast; 1 Diamond Rooster Totem; 1 Dragon's Hoard; 1 Egg Pelt; 1 Happy Rooster; 1 Hypnotic Glare; 1 Rattle; 1 Reversal of Fortune; 1 Revive; 1 Slither; 1 Upset Whelp; 1 Wingspan.