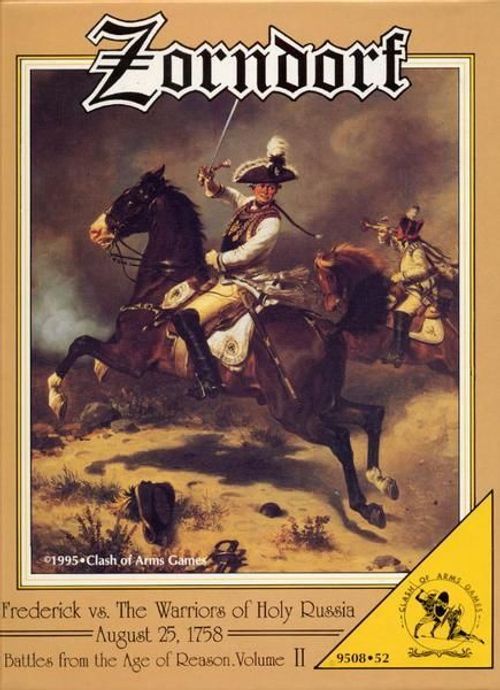
Zorndorf
Zorndorf Rulebook
Table of Contents
Table of Contents
- PART 1: ZORNDORF REVISED RULES AND SCENARIOS
- PART 2: BAR THIRD EDITION STANDARD (SERIES) RULES
- PART 3: ERRATA, CLARIFICATIONS AND CHARTS
- 3A. BAR v3.0 Errata, Clarifications & Questions
- 6.2 Regimental Integrity (clarification)
- 7.3 Army/Wing Leader LOC (clarification)
- 8.1d March Column (addition)
- 8.1e Square (addition)
- 8.3 Formation Change Prerequisites (addition)
- 8.4i General Order Changes (addition)
- 8.6 Artillery Formation Changes (addition)
- 8.7 Non-clear Terrain Formation Change (clarification)
- 10.1d Stacking (clarification)
- 10.6d Stacking Order (clarification)
- 3A. BAR v3.0 Errata, Clarifications & Questions
PART 1: ZORNDORF REVISED RULES AND SCENARIOS
1. Game Information
1.1 Introduction
A. 'The Battle of Zorndorf: Frederick vs. The Warriors of Holy Russia' is Clash of Arms' second game of the 'Battles from the Age of Reason' (BAR) series of games. It was released in 1995 along with the second edition BAR rules. In 2012 the third edition of the BAR rules was released and in 2013 update counters for Zorndorf were included as part of the 'BAR Primer'. These two improvements to the BAR series begged for a further update of Zorndorf. This rules book then is intended to update this BAR classic to the latest BAR standards for rules, charts and displays. Because ownership of the original Zorndorf game is necessary for the use of these rules, the historical commentary found in the original rules is not included here.
B. The revised Zorndorf rules and charts are based on the Third Edition BAR rules as well as the update counters found in the 'BAR Primer'. In other words, players must have those Third Edition BAR rules and the 'BAR Primer' to use these updated Zorndorf rules.
C. Unless specified otherwise, all rules references in this booklet are to the BAR Third Edition Series Rules.
1.2 Charts and Tables
This update of Zorndorf contains game-specific charts and tables that differ in some ways from the original charts. The charts contain the same information, just in a different format. It is hoped that players will find these innovations more user-friendly. The charts are found in a separate file available from the BAR website.
1.2a Loss Charts
A. Players may record losses to units by using the black and white SP loss markers and placing them under the unit, or by using the army 'Loss Charts.' The loss charts contain all the information found on the counters, so that if the loss charts are used, you need not refer to the back sides of the counters. A descriptive explanation of the information on the loss charts is found on the final page of these rules.
B. To use the loss charts, mark off the highest numbered box by each unit that takes losses. In addition to marking the loss to the unit, for each infantry or cavalry loss sustained, mark off one box on the correct nationality's 'Army Loss Record.' For each artillery loss, mark off two boxes on the 'Army Loss Record.' For any leader losses, mark off a number of boxes equal to the leader's loss value.
C. If the losses recorded on the 'Army Loss Record' plus the number of currently routed SPs reach one of the loss levels listed in grey, then that army must make an Army Morale roll on the next :00 turn, per Series Rule 23.0. After a player rolls on his army's 'Current Loss Level' table, there is a track on which to make a note of the time rolled and the result. This will help keep track of which 'Current Loss Level' columns have already been used and the effects.
1.2b Terrain Effects Chart
The 'Terrain Effects Chart' (TEC) differs from the original chart in that it includes separate columns for costs when in Line or Column formations. It also includes the maximum stacking values for each terrain type (in parentheses).
1.2c Orders of Battle
A. Revised 'Orders of Battle' (OOB) for each of the armies at Zorndorf are included with the Zorndorf charts. The coloring on the OOBs only serves to differentiate the Wings and Commands of the armies; it is not related to any coloring on the counters.
B. As an alternative to the standard BAR method of turning over leaders when a Command has completed its move, the OOBs may be used for marking which Commands/Wings are Finished. Place a 'FINISHED' marker in the Wing Leader's box, and it shows that the entire Wing has been activated; place a 'FINISHED' marker in a Command Leader's box to show his Command has been activated. Independent units can be marked as 'FINISHED' on the map or on the OOBs.
1.2d Turn Record Track
The revised 'Turn Record Track' is used to record both the passage of time (Game-Turns) as well as progress along the End Turn track. It has separate spaces for each 20 minute turn, which makes it easy to place wounded leaders or reinforcements so that they arrive on the correct turn. Zorndorf uses older markers so it does not have the 'GAME TURN' and 'END TURN' markers used with the Third Edition BAR rules. Place Zorndorf's 'MINUTES' marker on the correct time (in place of the 'GAME TURN' marker) and place Zorndorf's 'HOUR' marker on the '0' box of the 'Turn Record Track' (in place of the 'END TURN' marker). The 'Turn Record Track' also lists the End Turn Numbers for each of the scenarios.
1.2e Special Results Charts
The 'Special Results' charts are different for each side. Take care to use the correct column for Russians or Prussians. The 'Special Results' charts contain abbreviated information on the results. For full explanations of the Special Results, see section 6 of these Zorndorf rules.
1.2f Fire Combat Multiples & Ranges Chart
This chart shows the Fire Multiples for each type of unit for each hex in its range, and also the artillery minimum ranges used for Opportunity Fire and multiple artillery units firing.
1.2g Morale and Disorder Check Charts
The 'Morale Check' and 'Disorder Check' charts are found alongside the 'Special Results' charts for Morale and Disorder Checks. The 'Special Results' charts contain general comments about the results. A description of how to use the Morale and Disorder Check Special Results is found in Zorndorf rules section 6.9.
1.2h Formation Change Diagram
The 'Formation Change Diagrams' chart shows the formation change costs for both armies. When using this chart, simply find the proper diagram for the type of unit and the formation change desired. Orient the diagram appropriately to the unit's facing, and use the proper costs for the nationality involved. For cavalry, only the 3 hex diagrams are shown, but directions are given on how to use the diagrams for smaller formations.
1.2i Formation, Fire Arc, ZOC, etc. Diagrams
A. This chart shows the various formations and their Front, Flank and Rear facings. It also shows Zones of Control and the firing arc for each formation. The arrows on the chart show the allowed formation changes between the various formations, so that players can easily discern which changes are permitted.
B. At the bottom of the page is the 'Single Hex Facing Change Cost' diagram which shows facing change costs. This diagram is BAR-generic so it includes information that does not apply to Zorndorf. The two diagrams on the right of the facing change cost area will be those used most in Zorndorf. The diagram on the far left is used for units in Attack Column. The diagram on the near left will not be used in Zorndorf.
2. General Special Rules
2.1 "00" Initiative Rolls
Whenever players roll "00" for their Initiative rolls, instead of ignoring the roll (per the normal BAR rules) it is a 'Fermor' special result. See Zorndorf rule 6.2a for details.
2.2 Cavalry Capabilities
2.2a SCM Costs
The 'Terrain Effects Chart' lists the SCM costs to enter each of the game's terrain types and which of those terrain types require charging cavalry to make a Movement Actions Disorder Check (A) at the end of its charge movement (see 13.3f).
2.2b SCM Prohibitions
Special Cavalry Movement (SCM) is prohibited into or across the following terrain types: Marsh hexes, Pond hexes and hexsides, and Walled Church/Farm hexes. SCM can originate in Marsh hexes and the cavalry can exit Marsh hexes using SCM. The target of a cavalry Charge/Countercharge/Opportunity Charge can be in a Marsh hex. A Countercharge/Op Charge cannot be triggered if it would require the cavalry to enter or cross terrain prohibited to SCM.
2.2c Cavalry Types
Cavalry units with a Movement Allowance of 6 are medium or heavy cavalry (aka 'Cavalry'). Cavalry units with a Movement Allowance of 7 are Light Cavalry.
2.2d Pursuit
A. When a stack composed solely of Light Cavalry units rolls for Pursuit Points, one (+1) is added to the dieroll.
B. A leader that is stacked with cavalry units that are all subordinate to him (i.e. below him in the chain of command) can be used to affect Pursuit dierolls. A Command Leader adds two (+2), and an Army/Wing Leader adds one (+1) to the Pursuit dieroll. If multiple leaders are present only one can be used to modify the Pursuit.
C. These dieroll bonuses are cumulative and are added before any halving for being Disordered.
D. No matter what the cavalry Pursuit modifiers (as listed above) a '0' Pursuit dieroll is still treated as a zero and mandates a 'Pursuit Special Result'--roll the die again to determine the exact nature of the Special Result.
2.3 Leader Casualties and Replacements
2.3a Army, Wing, and Special Leader Replacements
Except as noted in Zorndorf rule 4.3a, Army and Special Leaders do not have replacements. There are no replacements for Wing Leaders for any reason.
2.3b Command Leader Replacements
A. For Command Leaders, players have two options for replacing those lost leaders. The first option is to use the generic Prussian and Russian leader replacement counters found on the Zorndorf counter sheet. There are 8 Prussian and 9 Russian 'replacement' leaders. The leaders with a '10' movement allowance are used to replace cavalry Command Leaders and the leaders with an '8' Movement Allowance are used to replace infantry Command Leaders. Russian Leader 'i' is only used to replace a Leader from the Observation Corps (see Zorndorf rule 3.4). Randomly pick a replacement counter of the appropriate type and nationality to replace the missing leader and use the replacement counter until the missing leader returns (if ever) per Series Rule 21.5. If players own "Prague: The Empty Triumph", they can also use the Prussian Command Leader replacement counters from that game.
B. Alternately, players can use the standard BAR black and white leader loss counters (labeled A or B) for lost leaders. (The 'A' and 'B' leader loss counters were not part of the generic counters found in the original Zorndorf game. They can be pirated from another BAR game or a sheet of the generic black and white BAR counters can be purchased from Clash of Arms Games.) Prussian leaders are replaced with the A counters and Russian leaders with the B counters. (As a reminder, this information is included on the army 'Loss Charts.') When the appropriate counter is picked, apply the modifiers listed on that counter to the original leader's values. The EM line modifies the original leader's ER Bonus modifier (this cannot go higher than 0). The IR line modifies the original leader's Initiative rating (this cannot be less than 0). The CM line modifies the original leader's CV Bonus modifier (this cannot be less than 0). Record these modified values wherever convenient and return the leader loss counter to the other counters, or keep the Leader Loss counter with the affected Leader as a reference.
2.3c Leader Losses
Every leader has a value which affects Army Morale when that leader is killed. This value is found on the army 'Loss Charts.' Whenever a leader is killed, mark off the appropriate number of boxes on the 'Army Loss Record' track. If a generic replacement leader is killed, use the value of the leader that was being replaced, minus 2, for the army loss result. With this rule, players get proper credit for killing off the replacement leaders.
2.4 Artillery Special Leaders
2.4a Description
Moller (Prussian) and Rothelier (Russian) are artillery Special Leaders. They are activated along with any Command in the same way as Wing/Army Leaders are activated (6.6a).
2.4b Capabilities
These leaders allow the owning player to combine multiple artillery stacks within the leader's Command Range into one Fire Combat against a single target that is beyond their minimum artillery range. This ability overrides the 12.2i artillery fire restriction. The circled number on each leader's reverse side shows the maximum number of stacks that that Leader can combine into one Fire Strength.
2.4c Restrictions
A. The Special Leader must be 'In Command' (see below) to use his Special Artillery ability and it can only be used when the leader is activated. Therefore it can only be used once per Game Turn. Moller and Rothelier are 'In Command' only when an LOC is traced to them from their respective Army Leaders (either directly or via a Wing Leader's extension) or from an activated Wing Leader who is 'In Command' via Initiative. Command Leaders cannot place them 'In Command.' They cannot use Leader Initiative (7.4) to place themselves 'In Command'; they have no Initiative Ratings. When 'Out of Command' they move normally but cannot use their Special Artillery ability or place artillery units 'In Command.'
B. When activated and 'In Command,' Moller or Rothelier can place any number of activated artillery units within his Command Range 'In Command.' The number of artillery units he can place 'In Command' is not limited by the number of artillery stacks to which he can apply his special artillery ability. All standard LOC rules apply to his Command Range except for Regimental Integrity (6.2) and Road hexes (7.3b). He cannot place any non-artillery units 'In Command' even if he is stacked with them. He cannot be used to attach combat units to a Command (6.4). When stacked with a multi-hex formation, the hex he occupies must be specified.
C. When stacked with Disordered artillery units, Moller and Rothelier can be used for automatic Disorder Recovery (18.6b) but only if the hex contains artillery only.
3. Russian Special Rules
3.1 Russian Unit Characteristics
3.1a Unit Types
The Russian army contains the following unit types. (The abbreviations in parentheses are used on the Order of Battle (OOB) and the army 'Loss Charts'.)
- Infantry: Dismounted Dragoons (DD), Grenadiers (Gren), Musketeers (Mus)
- Cavalry: Dragoons (Drag), Kurassiers (Kur), Mounted Grenadiers (MG)
- Light Cavalry: Cossacks (Cos), Hussars (Hus)
- Artillery: 6 lb, 8 lb, 12 lb, Howitzers (H), Shuvalovs (S), Unicorns (U)
3.1b Infantry
Russian infantry are in 3 ranks for the 'Infantry Line SP Chart.'
3.1c Cavalry
Russian cavalry have a Charge Range of 2 hexes. They may Retreat Before Close Combat when attacked by infantry. Unless otherwise noted in these rules, all references to "cavalry" also include light cavalry. Hussars may Retreat Before Close Combat when attacked by any unit other than light cavalry.
3.1d Cossacks
A. Cossacks may not stack with any cavalry units except the other unit of their regiment (unit 1a with 1b, 5a with 5b, etc.). They may join other cavalry units in a Close Combat, but may not stack with them at any time, including Advance After Combat or Pursuit.
B. Cossacks are always In Command and do not have to be in an LOC or roll for unit Initiative.
C. Cossacks may Retreat Before Close Combat when attacked by any type of unit.
3.1e Artillery
All Russian artillery may fire and prolonge (FP) except the 12 lb guns which may only Prolonge (P). The howitzer fire combat rules (12.6d) apply to the Howitzers and Unicorns.
3.1f Light Baggage
A. The Russian player has eight light baggage (wagons) counters which represent the numerous wagons and draft animals of this portion of the Russian army train. The front of the counter represents its normal "Mobile" status while the back of the counter represents its "Looted" status. All baggage counters begin the game set up on the Mobile side.
B. These counters are not combat units and have no formation or facing, SPs or morale. They do not affect Close Combat. A Baggage hex does not count for a Supported Line. They may be fired at (see below) with no target modifiers. They do not affect a Leader's LOC but they do block LOS.
C. A baggage counter in Mobile status may be activated like any Independent unit. It is always In Command and can move one hex per Game Turn or two hexes if it begins and ends its move on a road. If it is moving on a road it may enter any terrain type (the road negates any non-Clear terrain) but if it is moving off road it may only enter Clear hexes and cross clear hexsides. Only two baggage counters may cross the same bridge hexside in the same turn.
D. A Mobile baggage counter may not end its move stacked with any other unit. It cannot move through another Baggage unit. It may move through a non-Routed, non-Baggage Russian unit but in doing so it will cause that unit to make a Pass Through Disorder Check (A).
E. A baggage counter is flipped to its Looted side when any of these five conditions apply:
- i. At the end of any movement segment it is adjacent to any Routed or Disordered unit.
- ii. Any Routed or Disordered unit passes through its hex.
- iii. Any Prussian unit moves through it.
- iv. It is subject to Fire Combat and the result is anything but 'No Effect'.
- v. SCM movement is performed through its hex.
F. A Routed stack that enters the hex of a Looted baggage counter will lose 1 SP from its largest unit.
G. A Looted baggage counter cannot be activated and remains in its hex until the next Army Morale Check phase. When that phase is reached all Looted baggage counters are counted against Russian Army Morale (see Zorndorf rule 3.6 i) and then are removed from the map.
H. A Baggage counter (Looted or Mobile) turns its hex into non-clear "terrain" as noted on the TEC. When any unit (Russian or Prussian) moves into its hex, add the "Baggage" line costs of the TEC to all movement or SCM costs of the terrain in the hex. Note also that a Baggage hex has its own stacking values.
3.2 Russian Command Structure
The Russian Army has 1 Army Leader, 1 Special Leader, 3 Wing Leaders, and 14 Command Leaders. Command Leaders that are lost in battle are replaced per Zorndorf rule 2.3b. There are no replacements for Wing or Special Leaders. If the Army Leader is lost, see Zorndorf rule 3.3a (below).
3.3 Russian Army and Special Leaders
3.3a Graf Fermor
A. Fermor is the Russian Army Leader with a Wing Activation Number (WAN) of 8 and a Command Rating of +2.
B. There is no replacement for Fermor. If Fermor becomes a casualty, or if he leaves the map (see Zorndorf rule 6.2a) the following rules apply:
- i. The Army Decapitation rule (21.6) is not used. Instead the Russian player rolls for Initiative with a WAN of 9 and a Command Rating of +0.
- ii. The Russian army breaks down into three Detachments (see BAR rule 24.0). These Detachments are Saltykov's Wing, Galitzin's Wing, and Browne's Wing. The Commands of Demiku and Gaugreben are not part of these Detachments so their Leaders must roll for Initiative as for any Leader that is outside of the Army Leader's Command Range. Independent units are activated normally. This Detachment command structure comes into effect the instant Fermor is lost and will continue functioning in this way until Fermor returns (if ever).
- iii. Russian army morale is affected per Zorndorf rule 3.6 D.
3.3b GM Rothelier
Rothelier is a Russian artillery Special Leader. Zorndorf rule 2.4 details his special abilities. Rothelier has no replacement.
3.4 Observation Corps
A. The Observation Corps consists of all the units of Browne's Wing as well as the two GR independent grenadier battalions. The Observation Corps units are easily noted by the black "breeches" on the bottom half of the counters. Also, the OOB has each Observation Corps unit marked with an asterisk.
B. Observation Corps units may stack with each other but they may not stack with any non-Observation Corps infantry units. They may stack with artillery.
C. The two Independent Observation Corps grenadier units as well as Wing Leader Browne may only be activated along with a Command of the Observation Corps. Non-Observation Corps Independent units and any eligible Leaders may be activated along with an Observation Corps activation.
D. Observation Corps units use different Fire Multiples than regular Russian infantry. See the 'Fire Combat Multiples and Ranges' chart for these values.
3.5 Tenacious Russians
Repeated playings of Zorndorf have found that the Russians in the game do not perform with the tenacity that they did historically. The following rules seek to rectify this situation.
A. When defending in Close Combat, Russian Infantry units and any Artillery units that they are stacked with are affected as follows:
- i. Their ER is modified by -10 for all Morale Checks that occur during the Close Combat Segment--Morale Checks B and G.
- ii. +2 is added to their printed Combat Value (CV) before any modifications.
- iii. A defender result of '1R' or '2R' is treated as follows:
- a. The '1' or '2' SP loss is applied.
- b. If the unit is not 'Shaken' or 'Disordered' it becomes 'Disordered'
- c. If the unit is 'Shaken' but not 'Disordered' or vice-versa, it becomes 'Shaken/Disordered'.
- d. If the unit is 'Shaken/Disordered' it 'Routs,' i.e. the original result is applied.
- e. All other defender results are applied normally.
- iv. When infantry and artillery defenders are stacked, and a '1R' or '2R' defender combat result is modified (per iii above) the whole stack is affected by the modified result.
B. In addition to the Morale modifiers already listed for Close Combat, Russian Infantry units and any Artillery units that they are stacked with have their ERs modified by -10 for the following Morale Checks: Fire Combat Results (A), Friendly Unit Retreats (F), Rally (I).
3.6 Russian Army Morale Modifiers
During any Army Morale Check Phase (at the start of any :00 turn), if any of the following conditions exist, the Russian Army Morale will be modified accordingly:
- i. For each Baggage counter looted, Russian army morale is permanently modified by +2.
- ii. If there is a non-Routed Prussian unit in any hex of Quartschen, modify the Russian army morale by +10. This modifier will continue to be in effect until the next Army Morale Check Phase, at which time it is checked for again.
- iii. If Fermor is not on the map (for any reason) the Russians suffer a +10 army morale modifier. This ceases as soon as he returns to the map.
3.7 Leontyev or Leontiev?
The Russian player has a Brg Leontyev (L) and a GM Leontiev (LE). Take care when setting up a scenario that the correct Leader is used.
4. Prussian Special Rules
4.1 Prussian Unit Characteristics
4.1a Unit Types
The Prussian army contains the following unit types. (The abbreviations in parentheses are used on the Order of Battle (OOB) and the army 'Loss Charts.')
- Infantry: Fusiliers (Fus), Grenadiers (Gren), Musketeers (Mus)
- Cavalry: Dragoons (Drag), Guard (GCv), Karabiniers (Krb), Kurassiers (Kur)
- Light Cavalry: Hussars (Hus)
- Artillery: 12lb, 24 lb, 7 lb Howitzer
4.1b Infantry
A. Prussian infantry are in 3 ranks for the 'Infantry Line SP Chart.' All Prussian Grenadier battalions have a special marching ability because of their high drill proficiency. These units may move obliquely without paying the extra MP costs of rule 11.3. In addition, when Rapid Marching, these Grenadier units do not use the +5 modifier for a Disorder Check (A).
B. Wied (WIE) Fusilier Option. These two battalions did not take part in the battle because they were assigned to bolster the Kustrin garrison (which, as it turned out, was never in any danger). If both players agree these units can be added to any Prussian setup within GM Diericke's Command Range.
C. The Prussian infantry regiments of Furst Moritz (FRM), Bevern (BEV), Kalckstein (KAL), AltKreysen (AKR), and Wied (WIE) are 'brittle' units. In addition to all other normal modifiers, once they lose their second SP, they have a +10 ER modifier for all further Morale Checks (of all types). Their 'brittle' status is noted by the green ER on the back of the counter and is also notated on the 'Prussian Army Loss Chart.'
D. As counter errata, note that the two KUR battalions should be named "Kurszell" (not Kurtzell) and the second battalion should be listed at Fusiliers (not Musketeers).
4.1c Cavalry
A. Prussian cavalry have a Charge Range of 4 hexes. They may Retreat Before Close Combat when attacked by infantry. Unless otherwise noted, all references to "cavalry" also include light cavalry. Hussars (light cavalry) may Retreat Before Close Combat when attacked by any unit other than light cavalry.
B. Prussian cavalry that is in Attack Column (only) and that is engaged in Close Combat will use the CV modifiers for 'hexes charged' for all rounds of Close Combat, not just the first round. Example: A Prussian hussar unit in Attack Column countercharges one hex. It will use the +1 'hexes charged' CV modifier for every round of Close Combat.
4.1d Artillery
Prussian 7lb Howitzer units and 12 lb artillery units numbered 1-6 may fire and prolonge (FP). Prussian 12 lb artillery units numbered 7-11 may prolonge (P) only. The howitzer fire combat rules (12.6d) apply to the Prussian howitzers. The 12 lb guns marked FP are captured Austrian pieces or the new style Prussian 12 lb guns. The 12 lb guns marked P are older Prussian 12 lb guns.
4.2 Prussian Command Structure
The Prussian Army has 1 Army Leader, 2 Special Leaders, 5 Wing Leaders, and 13 Command Leaders. If Command Leaders are lost in battle, they are replaced per Zorndorf rule 2.3b. There are no replacements for Prussian Wing or Special Leaders. If the Prussian Army Leader is lost, he is replaced per Zorndorf rule 4.3a (below).
4.3 Prussian Army and Special Leaders
4.3a King Frederick II
King Frederick II of Prussia is the Prussian Army Leader. He has a Command Rating of +5 and a Wing Activation Number of 5. If Frederick becomes a casualty, he is replaced as Army Leader by Fürst Moritz. If Moritz becomes a casualty as the Army Leader, he is replaced as Army Leader by the nearest Wing Leader. (In this situation the Wing Leader is not replaced once he becomes Army Leader.) Anyone other than Frederick who operates as Army Leader has a Command Rating of +1 and a WAN of 9.
4.3b Fürst Moritz
A. Fürst Moritz is a Special Leader who can be used by the Prussian player as a de facto Army Leader. Once per turn he may be used for tracing Army Leader LOC and enacting any allowed activations--just like an Army Leader. Therefore Moritz' LOC can be traced to a Wing Leader (for a Wing Activation) or to a Command Leader. He may also be used to activate artillery Special Leader Moller.
B. Moritz must not have already been activated this turn and must pass a Leader Initiative roll. If he fails the dieroll, there is no effect (return to the initiative determination phase) other than he is considered as Activated for the rest of the turn. If he passes, he is activated and an LOC is traced from him using his Command Range, to the Command or Wing Leader that is being activated just as though Moritz were the Army Leader.
C. There is no replacement for Fürst Moritz.
4.3c Oberst von Moller
Moller is a Prussian artillery Special Leader. Zorndorf rule 2.4 details his special abilities. Moller has no replacement.
4.4 Prussian Army Morale Modifiers
During any Army Morale Check Phase (at the start of any :00 turn), if any of the following conditions exist, the Prussian Army Morale will be modified accordingly:
- i. If there is a non-Routed, non-Cossack Russian unit in any hex of Wilkersdorf, modify the Prussian army morale by +10. This modifier will continue to be in effect until the next Army Morale Check Phase, at which time it is checked for again.
- ii. If Frederick is not on the map (for any reason) the Prussians suffer a +15 army morale modifier. This ceases as soon as he returns to the map.
4.5 Prinz von Preußen Regiments (PVP)
The Prussian player has two regiments marked 'PVP', each with two counters. One is an infantry regiment (1+2 PVP). The other is a cavalry regiment (PVP a+b). Take care to use the correct counters when setting up a scenario.
5. Terrain Notes
5.1 General Notes
Section 5 is mostly for reference, but it should be read through at least once as there are some terrain-specific rules detailed here. The 'Terrain Effects Chart' (TEC) shows the costs for each terrain type for different unit types in differing formations. Take care that you use the correct column for a unit's type/formation. Also note that the stacking limits are included in the TEC. The numbers in parentheses show the maximum stacking allowed (in SPs) for each unit type/formation. Other notes listed on the TEC are fully explained in this section.
5.2 Hexes
5.2a Clear Hexes
Clear terrain is basic, open terrain--grassy fields. Clear terrain does not block Line of Sight and is not affecting terrain for a Disorder Check (A) or for Series Rule 8.7.
5.2b Marsh Hexes
Marsh terrain is permanently wet and soggy ground. It adversely affects the Combat Values of attackers attacking out of it or defenders defending in it. Cavalry SCM is not allowed through a marsh hex. Marsh does not affect Line of Sight. It is non-clear terrain for a Disorder Check (A) and for Series Rule 8.7. All marsh CV modifiers are doubled for cavalry.
5.2c Pond Hexes
Any hex that is over 50% covered with water is a Pond hex. Pond hexes are prohibited for all game activity. They do not block LOS.
5.2d Village Hexes
These small farming communities were of light construction; the buildings primarily of wood and thatch, were widely separated from each other. Many of the building were just for farm usage and not inhabited. They offered little interference to maneuver and little defensive benefit. They did tend to slow units down that attempted to pass through them too quickly. Village hexes block Line of Sight. Village is non-clear terrain for Movement Disorder Checks (A) and for Series Rule 8.7.
5.2e Walled Church/Farm Hexes
Walled Farms and Walled Churches can be very defensible positions when properly manned. Hexes W1213, W4723, C6122, and E6119 are the only Walled Church/Walled Farm hexes on the Zorndorf map. These hexes give a +8 CV benefit for defenders unless any of the attackers are in Attack Column in which case the CV benefit is only +4. Artillery and Cavalry may only enter or exit a Walled Church/Farm hex along a road and they must be using Road Movement. They cannot end their move in a Walled Church/Farm hex. Infantry that enters a Walled Church/Farm hex must go to General Order unless using Road Movement. Walled Church/Farm hexes are non-clear terrain and block Line of Sight. Cavalry may not engage in Close Combat with a unit in Walled Church/Farm.
5.2f Woods Hexes
Woods hexes block Line of Sight and are non-clear terrain for a Disorder Check (A) and for Series Rule 8.7. A hex is a Woods hex only if it is fully covered by tree symbols. Hexes that contain only 1 or 2 tree symbols are not Woods.
5.2i Road Hexes
When following a Road in Road Column (Road Movement), the cost is 1/2 MP per hex. Roads do not alter the Line of Sight properties of the other terrain in the hex. Note that the bridges drawn on the map are just extensions of the roads and are considered roads. If a unit is not using Road Movement, ignore the road and use the other terrain in the hex.
5.3 Hexsides
Note: If fire is traced into a target hex, exactly along a vertex to the hexpoint where a modifying hexside ends, the target still gets the benefit of the modifying hexside.
5.3a Slope & Gentle Slope Hexsides
Slopes and Gentle Slopes run along a hexside and look similar except that Slopes have a darker coloration. The movement cost for these types of hexsides is the same whether moving up or down the slope. If an attacker is attacking up slope, it faces an adverse CV modifier of -1 for Gentle Slope or -2 for Slope (see the TEC). Gentle Slope and Slope hexsides are not affecting terrain for a Disorder Check (A) or for Series Rule 8.7. Slopes will block Line of Sight unless the target is in a hex adjacent to the slope, or the firing unit is on a higher elevation than the defender (see Series Rule 12.6). The green lines radiating from the Slope hexsides are decorative only and have no effect on the game.
5.3b Precipice Hexsides
Precipice hexsides have darker and fuller markings than Slope hexsides. Movement is prohibited across them. Precipice effects on LOS are the same as for Slopes.
5.3c Stream Hexsides
These smaller water obstacles are a lesser hindrance to movement. Streams are found as part of the Zabern Grund, Galgen Grund, Oder Doppel Grund, and Langer Grund. They are thin and light blue in color with no dark outline. Streams do not block LOS but they are affecting terrain for Movement Actions Disorder Checks (A) and for Series Rule 8.7.
5.3d Creek Hexsides
Creek hexsides are a more serious obstacle to movement than Streams. They are thicker than streams with a dark border on their edge. Creeks are only found as part of the Hofe Bruch as well as the hexsides that flow through Quartschen into the Mietzel. Creeks do not block LOS but they are affecting terrain for Movement Actions Disorder Checks (A) and for Series Rule 8.7.
5.3e Pond and River Hexsides
Ponds are the water bodies that straddle a hexside which are not connected to a stream or creek. Examples are the hexsides around W5810, C6129, and E2605. River hexsides are only found as part of the hexes of the Mietzel from W1021 to W2434 as well as the hexsides that surround the "island" centered on W1320. Movement across Pond/River hexsides is prohibited. They do not block LOS.
5.4 Line Of Sight
A. The Zorndorf map has five elevation levels from 0 to 4. Level 0 is only found around the Mietzel on the West map. The elevation contour denoting level 1 has only dots. The elevation contour for level 2 has a dash alternating with two dots. The elevation contour for level 3 has single dashes and dots alternating. The elevation contour for level 4 has only dashes. Thus hex W1723 is level 0, hex W1824 is level 1, hex W1924 is level 2, hex W2025 is level 3, and hex W2326 is level 4.
B. Line Of Sight (LOS) in Zorndorf is quite forgiving since most of the terrain is open ground and is quite flat. An example of a blocked LOS would be fire from C3716 to C3216 since there is a hill in the way.
C. Woods, Village, and Walled Church/Farm hexes block Line of Sight; LOS can be traced into but not through them. Slopes and Precipices can block LOS--see Zorndorf rules 5.3a and 5.3b.
6. Special Results Notes
6.1 General Notes
Section 6 does not need to be read as "rules." This section is a reference for use when Special Results are rolled. The various 'Special Results' tables contain abbreviated descriptions of the results, but the full explanations of those results are given in this section. Because of this, players should read these notes for each result until such time as they become familiar enough with them to be able to use the abbreviated descriptions.
6.2 Initiative Special Results
6.2a Fermor
A. Whenever a '00' Initiative result is rolled, instead of ignoring it per BAR rule 4.0 B, it is a 'Fermor' Special Result.
B. When the 'Fermor' Special Result is rolled, if Fermor is currently on the map and within 10 hexes of a non-Routed Prussian unit, he is immediately removed--he has fled the battlefield. Once this happens, Zorndorf rule 3.3a B is applied to the Russian army.
C. If Fermor is off map from having fled via a previous 'Fermor' Special Result and this result is rolled, he immediately returns to the map. Note that if Fermor is off map from being killed or wounded the 'Fermor' Special Result does not bring him back to the map.
6.2b Army Leader Lapse
For the rest of the Game Turn, the affected Army Leader may not trace his LOC--even to his own hex. In effect, all leaders will have to roll for Initiative. He may not use his Command Rating to modify the Initiative dice roll or (although his WAN is still used for any potential Wing Activations). This result is to be applied only to whoever is the current, acting Army Leader.
6.2c Command Confusion
A. The player who did not roll this Special Result picks an unactivated Command of the player who did roll this Special Result. The affected player must roll two Leader Initiative rolls for the affected Command Leader. If he fails both rolls, the Command is marked as Finished and may not be activated. If he passes one roll, the Command is activated with 1/2 of its MPs (retain fractions but quarter [round down] the MPs for units that are Disordered or Out of Command) but no Rapid March is allowed, nor may it initiate any Close Combats, attach units or activate independents. If he passes both rolls, the Command is activated without penalty.
B. If all of the combat units of the chosen Command are outside of the Command Range of their leader, or if the Command does not have a Leader on the map, do not roll for Initiative--they are automatically considered as Finished.
C. This Special Result is applicable once the End Turn has been reached, but any movement is subject to the End Turn limitations found in Series Rules 6.7 and 6.8.
6.2d Free Combat Segment
Pick one Command and any independent units that are stacked with a unit or leader of the Command for either a Fire Combat or a Close Combat Segment. If the units involved have not yet been activated, they are still not considered so. If there are mixed stacks with units from multiple Commands, only the units of the Command chosen may fire or attack, and only if they are the top units. Artillery Leaders can be chosen for this Special Result and can combine the fire of artillery units per Zorndorf rule 2.4b. This event may only be applied once per turn per Command or unit. Mark the affected Command with any marker to show that it has already "used" this event for this turn. Remove all such markers during the Rally Segment.
6.2e Special Rally
Pick any one Command and perform a Disorder Recovery Phase and then a Rally Phase for all units of the Command that are within the Command Range of their Leader. If units of the Command are stacked with units of other Commands (or Independent units), this event still applies and the whole stack receives the benefit. If the Command has not yet been activated, it is still not considered so. This event may be applied as many times per turn as rolled for any given units.
6.2f Leader Initiative
A. Pick one Command, any attached units, and any independent units that are stacked with a unit or leader of the Command for a possible free Movement Segment (only).
B. All affected units must be within the chosen Command Leader's Command Range, and the leader must make an Initiative roll and pass it. If he does pass, he is 'In Command' and all affected units get a free Movement Segment. If he does not pass the Initiative roll there is no event.
C. If the Command (or independents) has not yet been activated, it is still not considered so. If the Command (or independents) has been activated, this is an extra move.
D. This event may only be successfully applied once per turn to any given units--failed attempts do not count against this. Mark the affected leader with any convenient counter to show that he has already received this Special Result. Remove all such mnemonic markers during the Rally Segment.
E. This result is applicable once the End Turn has been reached, but any movement is subject to the End Turn limitations found in Series Rules 6.7 and 6.8.
6.2g Hasty Orders
The other player picks one of your Commands which has not yet been activated. This Command then proceeds with a normal activation and is marked as Finished when it is done. Independents may only be activated as part of this activation if they are stacked with a unit of the Command. If the activated Command Leader is stacked with units of another Command he may attach them. This event is applicable once the End Turn has been reached, but any movement is subject to the End Turn limitations found in Series Rules 6.7 and 6.8.
6.3 Infantry Fire Special Results
This table is used for infantry's regular fire and Opportunity Fire but not for Defensive Fire. For rerolls, retain all originally calculated modifiers and rolls of 00-09 are not Special Results.
6.3a Leader Losses
A diceroll of 00, 02, 04, 06, 08 causes a possible leader casualty check, which is made using the 'Leader Loss Table' before the Special Result is applied.
6.3b Free Fire
Reroll two times. Apply the first roll's result before making the second roll. The firing units are Disordered after all firing; an already Disordered unit is marked 'SHAKEN/DISORDER.'
6.3c Full Volley
Double the total Fire Strength and reroll.
6.3d Battalion Guns
Reroll and add 1 SP loss to any SP loss or any 'R' or 'D' result.
6.3e Smoke and Dust
Reroll the dice and subtract 10 from the result for each hex of range. Example: a fire from 2 hexes would subtract 20.
6.3f Ammo Low
Halve (rounded) the Fire Strength and reroll.
6.3g Ammo Exhausted
Fire has 'No Effect' and the firing unit is Disordered; an already Disordered unit is marked 'SHAKEN/DISORDER.'
6.4 Artillery Fire Special Results
This table is used for artillery's regular fire and Opportunity Fire but not for Defensive Fire. For rerolls, retain all originally calculated modifiers and rolls of 00-09 are not Special Results.
7.4a Leader Losses
(Numbered "7.4a" in the printed booklet; evidently a misprint for 6.4a.)
A diceroll of 00, 02, 04, 06, 08 causes a possible leader casualty check, which is made using the 'Leader Loss Table' before the Special Result is applied.
6.4b Rapid Fire
Reroll two times; apply the first roll before making the second.
6.4c Accurate Fire
Shift the odds column one to the right and reroll.
6.4d Caisson Explosion
Reroll the combat. Whatever the rerolled result (even a 'No Effect' result) if the target hex or any adjacent hex contains an artillery unit, the artillery loses 1 SP. This extra 1 SP artillery loss result is not halved per rule 12.9f. If there are multiple eligible artillery units, randomly determine which one is affected. A Morale Check (A) is made for any stack that loses an artillery SP from this Result even if the rerolled diceroll is not even.
6.4e Wild Fire
A unit or stack, enemy or friendly, adjacent to the original target stack becomes the new target. If there are several adjacent and eligible units or stacks, determine the new target randomly. If there is no adjacent unit or stack, or the new target is outside the range or facing of the firing unit, treat the result as 'No Effect.' A unit that is out of LOS can be the new target. Use the odds and modifiers originally calculated and reroll the Fire Combat, applying the result to the new target.
6.4f Smoke and Dust
Reroll the dice and subtract 10 from the result for each hex of range. Example: a fire from 4 hexes would subtract 40.
6.4g Ammo Low
Halve (round) the Fire Strength and reroll.
6.4h Ammo Exhausted
The fire has no effect and the artillery unit limbers. Displace the artillery unit one hex to the rear (or as many hexes as necessary to avoid illegal stacking) in Limbered formation.
6.5 Defensive Fire Special Results
For rerolls, retain all originally calculated modifiers and rolls of 00-09 are not Special Results.
6.5a Leader Losses
A diceroll of 00, 02, 04, 06, 08 causes a possible leader casualty check, which is made using the 'Leader Loss Table' before the Special Result is applied.
6.5b Whites Of Their Eyes
Defenders hold their fire until the last possible moment. Shift the calculated odds one column to the right and reroll.
6.5c Battalion Guns
Reroll and add 1 SP loss to any SP loss or 'D' result.
6.5d Premature Fire
Impatient defenders fire too soon. Halve (rounded) the Fire Strength of all firing units, recalculate the odds, and reroll.
6.5e Smoke and Dust
The defender's aim is obscured. Defensive Fire is cancelled.
6.6 Leader Loss Special Results
Leader Loss Special Results are applied whenever any even numbered (00, 02, 04, 06, 08) Special Result is rolled for Fire Combat, Defensive Fire, or Artillery Fire. Subtract 1 from the Leader Loss rolls if any of the firing units are artillery at 1-3 hex range. Do not apply this -1 bonus to the 'Fate' result nor to the 'wounded' roll. Leader Losses for Close Combat use a different format as found in the 'Close Combat Special Results.'
6.6a Fate
Pick any enemy Leader. Roll one die for that Leader: 0 = Killed, 1 = Wounded, 2-9 = No Result.
6.6b The Lucky Shot
Randomly pick any enemy Leader within range and in Line of Sight of the firing units. ('Randomly' means that the Leaders that can potentially be affected should be identified and then a die rolled to determine which leader is affected.) Roll a die for that Leader: 0-3 = Killed, 4-7 = Wounded, 8-9 = No Result.
6.6c In the Line of Fire
Roll one die separately for each enemy Leader in or adjacent to the target hex: 0-2 = Killed, 3-5 = Wounded, 6-9 = No Result.
6.6d Braving Enemy Fire
Roll one die separately for each enemy Leader in the target hex: 0-2 = Killed, 3-5 = Wounded, 6-9 = No Result.
6.6e Wounded Results
If a 'Wounded' result is obtained, roll another die for the duration of the wound. The number of turns that the Leader is lost is equal to half the die roll (rounded). Place the wounded Leader the number of turns indicated forward on the 'Turn Record Track.' A roll of '0' means that the leader's wounds are tended on the field and he does not leave the battle but he is still considered as wounded for Series Rule 21.4c.
6.7 Pursuit Special Results
Note: A Pursuit Special Result re-roll of '0' is a roll of 0 PPs.
6.7a Blood Lust
Re-roll for Pursuit Points and the routed units suffer 2 SPs lost for each hex of pursuit. Voluntary Recall is allowed.
6.7b Out of Control
Re-roll for Pursuit Points and multiply the result by 1.5 (rounded). No voluntary Recall is allowed for the length of the pursuit. If the unit is Disordered, halve the calculated Pursuit Points (rounded). Even if the pursuing cavalry eliminates its opponent, it will still engage in pursuit to its full extent in a straight line from where the last enemy SP was eliminated--the pursuers are bent on vanquishing every enemy soldier.
6.7c Hesitation
Re-roll for Pursuit Points and halve (round down) the result (quarter if unit is Disordered). Voluntary Recall is allowed.
6.7d No Pursuit
There is no Pursuit but the involved units must still make a Recall Disorder Check (F).
6.8 Close Combat Special Results
When a Close Combat Special Result is rolled, consult the 'Close Combat Special Results' table and use the protocol as set forth in Series Rule 14.8.
6.9 Morale and Disorder Check Special Results
6.9a The Tables
First, identify the check required (Disorder or Morale) and the letter designation (A, B, H, etc.) of the Disorder or Morale Check. Next, cross-index the dice roll with the results listed for that letter designation. Some of the rolls produce a numbered hierarchy of results. When this is the case, always check to see if result #1 applies first. If result #1 does not apply, then use result #2. If result #2 does not apply, use result #3. Whatever modifier is listed for any re-roll, that is the only modifier that is used for the re-roll--ignore all previously calculated modifiers. Note that some Morale results, marked with an asterisk (*), can cause leader losses. This possible leader loss is different from any other leader loss in the game and is explained below the 'Morale Check Special Results' table.
6.9b Shaken/Disorder
When a result states that a unit becomes 'Shaken/Disordered' its new morale/organizational state is applied to its existing state as follows: A Disordered or non-Disordered unit in Good morale becomes 'Shaken/Disordered.' A Disordered or non-Disordered unit with Shaken morale Routs.
7. Scenarios
7.0 Introduction to the Scenarios
7.0a Overview
A. There are 5 scenarios in Zorndorf. The first two are primarily learning scenarios that use only one map and a reduced number of units. Scenario 3 is the full battle scenario using all the maps and units. Scenario 4 is the same full battle scenario as number 3 but it is only played on two maps. Scenario 5 is a full battle scenario using all maps and units but it has an earlier start time than scenario 3 and features the Prussian army entering the map area.
B. Before beginning any scenario the game pieces should be sorted by side and type (markers, combat units and leaders). Using the 'Orders of Battle' the units of each side should be sorted by Wing/Command or Independent unit type. This will make scenario setup much easier.
7.0b Format
The scenarios are presented in the following format:
- 7.# Brief summary of the scenario
- 7.#a Special Rules
- 7.#b Russian Setup
- 7.#c Prussian Setup
- 7.#d Victory Conditions
7.0c Setup
A. Set up all units according to the setup instructions for the scenario. The specific units are listed, and then their setup hex or setup instructions is listed (in parentheses). The setup hex has a letter (W: West, C: Center, or E: East) indicating which map to set up on, followed by the hex number. If the setup has two hex numbers, the unit sets up in both hexes in an extended formation (example: C2520-2521). A direction to set up units "on or south of the W37xx hexrow" means that the units can set up on or south of the line of hexes on the West map that begins with the number '37', such as 3701, 3702, 3703, etc.
B. Individual infantry battalions of a regiment are indicated by a number in front of the regiment name. Example: "3 1M" shows that the setup is for the 3rd battalion of the 1M regiment. Individual parts of a cavalry regiment are indicated by a letter after the regiment name. Example: "PVP a" shows that the setup is for the 'a' unit of the PVP regiment. Artillery batteries are indicated by a number after the type of guns. Example: "6 lb #1-#3" shows that the setup includes batteries 1, 2, and 3 of the 6 pound guns. Make sure to set up the correct counter(s) when such are noted.
C. Setup parameters for Army Leaders and Special Leaders are indicated in each scenario. Command Leaders and Wing Leaders are set up within 2 hexes of any unit of their Command or Wing. The counter abbreviation for each leader is indicated in [brackets].
D. The Russian side sets up first in all scenarios. Russian troops are set up facing south unless they have an 'se' or 'sw' notation after their setup hex. In these cases the Russian units set up facing southeast (se) or southwest (sw). Except where noted, all Russian units set up in Line.
E. Prussian troops are set up facing north unless they have an 'ne' notation after their setup hex. In this instance the Prussian units set up facing northeast (ne). Except where noted, all Prussian units set up in Line.
F. In all scenarios the line of retreat for any units will first of all be locally away from the enemy, but ultimately Russian units will flee towards the north map edge and Prussian units will flee towards the south map edge.
7.1 Scenario 1: Introductory Morning Battle
This introductory scenario is a scaled down version of the Prussian morning attack on the Russian right wing as King Frederick planned it--that is, it does not represent what actually happened at Zorndorf. It uses mostly infantry with a few artillery units, but no cavalry. It is a good tool for learning the basic movement and combat mechanics of the BAR system.
7.1a Special Rules
A. Scenario 1 starts at 11:00 and its last turn is the 12:40 turn. End Turn Numbers are not used in this scenario.
B. Only the West map is used but with certain boundaries. Use the area that is bounded on the west by the Zabern-Grund, on the north and east by the Galgen-Grund (stream hexsides and Marsh hexes), on the east by the map edge from W3101 to W4602, and on the south by the 46xx hexrow. All boundaries given are inclusive.
C. The Russian MUR and SHL musketeer regiments begin the battle outside the allowed play area. When their Command is activated they must either remain in place (without moving) or attempt to enter the area of play. Until they actually enter the area of play they are ignored for all combat and victory purposes.
D. Neither side has their Army Leader set up as part of this scenario. Nevertheless each side makes their Initiative die rolls with Army Leader CR modifiers of +2 for the Russians and +5 for the Prussians, even though the Army Leaders are not present.
E. Russian Wing Leaders are not set up in this scenario. Therefore the Russian player may not enact a Wing Activation. The Prussian player does have two Wing Leaders and can make a Wing Activation based on a WAN of 5.
F. All Leaders are considered as "In Command" at all times; players will not have to roll for Leader Initiative.
G. Do not use Initiative Special Results or the Army Morale rules.
H. Any unit that exits the limited play area (for any reason) is considered as eliminated.
7.1b Russian Setup
Russian Commands
Brg Uvarov's Command [U]
- 1 SHL (W2702 se), 2 SHL (W2803-2903 se)
- 1 CHE (W2905-3006 se), 2 CHE (W3106 se)
Brg Pr. Liumbomirski's Command [LI]
- 1 ROS (W3207 se), 2 ROS (W3307 se)
- 1 3GR (W3308-3309), 2 3GR (W3310-3311)
GM Panin's Command [P]
- 1 1GR (W3412-3413), 2 1GR (W3414)
- 1 STP (W3113), 2 STP (W3214-3215)
Brg Sievers' Command [S]
- 1 MUR (W2110 se), 2 MUR (W2211 se)
- 1 RYA (W2412 se), 2 RYA (W2512 se)
Brg Leontyev's Command [L]
- 1 VOR (W2614 se), 2 VOR (W2714-2815 se)
- 1 NOV (W2915 se), 2 NOV (W3016-3116 se)
Independent Units
- 5 CGR (W3008-3108 se), 6 CGR (W3012-3013)
- 12 lb #1, 8 lb #2, 6 lb #3 (set up unlimbered within 2 hexes of any Russian infantry unit excluding the SHL and MUR units)
7.1c Prussian Setup
Set up all units of Manteuffel's Infantry Wing on or between hexrows W38xx and W40xx.
Set up all units of Kanitz' Infantry Wing on or south of hexrow W43xx.
12 lb guns #1-#2 and Howitzer #3 (set up unlimbered on or south of hexrow W38xx)
7.1d Victory Conditions
Russia: If, at the end of any game turn, there are no nonrouted Prussian infantry units within the play area, the Russian player automatically wins
Prussia: If, at the end of any game turn, there are fewer than 50 nonrouted Russian infantry SPs within the play area the Prussians automatically win.
Draw: If neither side has won by the end of the last game turn the battle is a draw.
7.2 Scenario 2: Full Morning Battle
Scenario 2 is a representation of what actually happened in the Prussian morning attack at Zorndorf. It is a short scenario but it uses more units and map area than scenario 1 and includes cavalry.
7.2a Special Rules
A. Scenario 2 starts at 11:00 and its last turn is the 1:20 turn. The entire West map is used without any restrictions. End Turn Numbers are not used in this scenario.
B. The Prussian player has possible reinforcements in the form of some or all of Kanitz' Infantry Wing. See the Prussian setup instructions for rules on how to handle these reinforcements.
C. Neither side has their Army Leader set up as part of this scenario. Nevertheless each side makes their Initiative die rolls with Army Leader CR modifiers of +2 for the Russians and +5 for the Prussians, though the Army Leaders are not present.
D. Russian Wing Leaders are not set up in this scenario. Therefore the Russian player may not enact a Wing Activation. The Prussian player does have Wing Leaders and can make Wing Activations based on a WAN of 5.
E. All Leaders are considered as "In Command" at all times; players will not have to roll for Leader Initiative.
F. Do not use Initiative Special Results or the Army Morale rules.
7.2b Russian Setup
Russian Commands
Brg Uvarov's Command [U]
- 1 SHL (W2702 se), 2 SHL (W2803-2903 se)
- 1 CHE (W2905-3006 se), 2 CHE (W3106 se)
Brg Pr. Liumbomirski's Command [LI]
- 1 ROS (W3207 se), 2 ROS (W3307 se)
- 1 3GR (W3308-3309), 2 3GR (W3310-3311)
GM Panin's Command [P]
- 1 1GR (W3412-3413), 2 1GR (W3414)
- 1 STP (W3113), 2 STP (W3214-3215)
GM Diez' Command [DI]
- 1 4GR (W2003-2004), 2 4GR (W2005-2006)
- 1 SMO (W2007), 2 SMO (W2008-2009)
Brg Sievers' Command [S]
- 1 MUR (W2110 se), 2 MUR (W2211 se)
- 1 RYA (W2412 se), 2 RYA (W2512 se)
Brg Leontyev's Command [L]
- 1 VOR (W2614 se), 2 VOR (W2714-2815 se)
- 1 NOV (W2915 se), 2 NOV (W3016-3116 se)
Brg Gaugreben's Cavalry Command [G]
- TOB (W2908 sw), NVT a (2809 sw), NVT b (W2709 sw)
- KAR a (W2610 sw), KAR b (W2510 sw)
Independent Units
- 1 COS a (W2519 sw), 1 COS b (W2420 sw)
- 2 COS a (W2124), 2 COS b (W2125)
- SER (W2215-2315 se), Dmtd (W2807)
- 4 CGR (W2604-2704 se), 5 CGR (W3008-3108 se)
- 6 CGR (W3012-3013)
Baggage and Artillery
- Eight Baggage counters (W1711, W1712, W1811, W1812, W1910, W1911, W2010, W2011)
- 12 lb #1, 8 lb #2, 6 lb #3 (set up unlimbered within 2 hexes of any Russian infantry unit)
7.2c Prussian Setup
Manteuffel's Infantry Wing [MAN]
- Set up all units of Manteuffel's Infantry Wing on or between hexrows W38xx and W40xx, east of the Zabern-Grund.
GLt Seydlitz' Cavalry Wing [SEY]
- GM Lentulus' Command [L]
- GDC (W5915-5816 ne)
- GEN a (W5817-5717 ne), GEN b (W5618-5518 ne)
- SEY a (W5419 ne), SEY b (W5320 ne)
- GM Malachowski's Command [MA]
- MAL a (W5120 ne), MAL b (W5021 ne), MAL c (W4921 ne)
- ZIE a (W4722-4623 ne), ZIE b (W4523-4424 ne), ZIE c (W4324-4225 ne)
GLt Marschall's Cavalry Command [MR]
- (set up on any hexes of W6301-6306 and/or W6402-6406)
Artillery
- 12 lb #1-#2, Howitzer #3 (set up unlimbered on or south of hexrow W38xx and east of the Zabern-Grund)
GLt Kanitz' Infantry Wing [KAN]
A. All, some, or none of Kanitz' Infantry Wing may enter play as reinforcements. There are three options (listed below) for these potential reinforcements. If they enter play, they will enter from the east edge of the map anywhere between W4202 and W5901 (inclusive).
B. Starting with the first game turn, any time the Prussian player is eligible to activate a Command he can attempt a Kanitz reinforcement option instead of activating a Command. To do so, the Prussian player selects one of the three options and then rolls a die (comparing the dieroll to the option's trigger number) to see if he succeeds in gaining the reinforcements. If he rolls the trigger number or higher, the reinforcing units are activated and enter the game immediately as reinforcements. If he rolls lower than the trigger number there is no effect and the players roll again for Initiative.
C. From the 11:20 game turn onward the Prussian player subtracts one from his dieroll for any reinforcement entry attempt.
D. A reinforcement attempt may be made only once per turn. Once one of the reinforcement options is successful the Prussian player may never again roll for, or enter, reinforcements.
E. The reinforcement options are:
- i. GM Rautter's Command enters on a dieroll of 5 or greater.
- ii. The Commands of GM Rautter and GM Flemming as well as GLt Kanitz enter on a dieroll of 6 or greater
- iii. Kanitz' entire Wing enters on a dieroll of 7 or greater.
7.2d Victory Conditions
Russia: If, at the end of any game turn, there are no nonrouted Prussian infantry units, the Russian player automatically wins.
Prussia: If, at the end of any game turn, there are no nonrouted Russian infantry units west of the Galgen-Grund the Prussians automatically win.
Minor Victory: If neither side has won an automatic victory by the end of the last game turn: The Russians win a minor victory if the Prussians have lost more SPs and 5 or more wagon units have exited the north map edge through hex W1015. The Prussians win a minor victory if the Russians have lost more SPs and the Prussians have looted 4 or more wagons.
Draw: If neither side meets any of the conditions above the game is a draw.
7.3 Scenario 3: The Battle of Zorndorf
Scenario 3 is the full Battle of Zorndorf. The Prussian army has successfully maneuvered to the rear of the original Russian position, forcing the Russians to reverse their facing. The armies are now opposing each other for a climactic confrontation. This scenario will take many hours to play.
7.3a Special Rules
A. Scenario 3 starts at 9:00 AM and its last turn is the 9:40 PM turn. The End Turn Number is 11. All three maps are used.
B. The Russians set Zorndorf on fire early on the morning of August 25th. The fire cannot be put out and it burns for the entire game. The following effects apply to any Zorndorf Village hex:
- i. All MP costs are doubled.
- ii. LOS cannot be traced through any hex adjacent to a Zorndorf Village hex (from the effects of smoke).
- iii. Roads in Zorndorf do not negate the Village terrain for Movement or tracing LOC; the roads are of no effect.
- iv. The Morale Check ER modifier for a burning Village hex changes from the normal +5 to a -5.
- v. There is no Close Combat CV bonus for a defender in a burning Village hex.
7.3b Russian Setup
Graf Fermor [FER], GM Rothelier [ROT] (set up stacked with any Russian infantry or artillery unit)
Observation Corps - GeCh Browne [BRO]
Brg Thiessenhausen's Command [T]
- 1 4M (C2012-2013), 2 4M (C2014-2015), 3 4M (C2016-2017)
- 1 5M (C2018-2019), 2 5M (C2020-2021), 3 5M (C2022-2023)
Brg Fast's Command [F]
- 1 1M (C2508-2509), 2 1M (C2510-2511), 3 1M (C2512-2513)
- 1 3M (C2514-2515), 2 3M (C2516-2517), 3 3M (C2518-2519)
GLt Saltykov's Wing [SAL]
GM Gr. Dolguruki's Command [D]
- 1 BUT (C2520-2521), 2 BUT (C2522-2523)
- 1 SUZ (C2524-2525), 2 SUZ (C2526-2527)
GM Leontiev's Command [LE]
- 1 KEG (C2528-2529), 2 KEG (C2530-2531)
- 1 LAD (C2533-C2634 se), 2 LAD (W2701 se)
Brg Uvarov's Command [U]
- 1 SHL (W2702 se), 2 SHL (W2803-2903 se)
- 1 CHE (W2905-3006 se), 2 CHE (W3106 se)
Brg Pr. Liumbomirski's Command [LI]
- 1 ROS (W3207 se), 2 ROS (W3307 se)
- 1 3GR (W3308-3309), 2 3GR (W3310-3311)
GM Panin's Command [P]
- 1 1GR (W3412-3413), 2 1GR (W3414)
- 1 STP (W3113), 2 STP (W3214-3215)
GLt Galitzin's Wing [GAL]
GM Manteuffel's Command [M]
- 1 2GR (C2024-2025), 2 2GR (C2026-2027)
- 1 NEV (C2028-2029), 2 NEV (C2030-2031)
Brg Kokoschkin's Command [K]
- 1 KAZ (C2032), 2 KAZ (C2033)
- 1 TRO (C2034), 2 TRO (W2002)
GM Diez' Command [DI]
- 1 4GR (W2003-2004), 2 4GR (W2005-2006)
- 1 SMO (W2007), 2 SMO (W2008-2009)
Brg Sievers' Command [S]
- 1 MUR (W2110 se), 2 MUR (W2211 se)
- 1 RYA (W2412 se), 2 RYA (W2512 se)
Brg Leontyev's Command [L]
- 1 VOR (W2614 se), 2 VOR (W2714-2815 se)
- 1 NOV (W2915 se), 2 NOV (W3016-3116 se)
GM Demiku's Cavalry Command [DE]
- HOR a (E1626-1627), HOR b (E1628-1629)
- GRU (E1630-1631), MOL (E1632-1633), ARK (E1634)
- KAZ a (C1602), KAZ b (C1603)
- 3 a (C1604), 3 b (C1605)
- OIM a (C1606), OIM b (C1607)
Brg Gaugreben's Cavalry Command [G]
- TOB (W2908 sw), NVT a (2809 sw), NVT b (W2709 sw)
- KAR a (W2610 sw), KAR b (W2510 sw)
Independent Cavalry Units
- SER (W2215-2315 se)
- 1 COS a (W2519 sw), 1 COS b (W2420 sw)
- 2 COS a (W2124), 2 COS b (W2125)
- 3 COS a (E2113), 3 COS b (E2114)
- 4 COS a (E2710 sw), 4 COS b (E2611 sw)
- 5 COS a (E1618), 5 COS b (E1619)
- 6 COS a (E1620), 6 COS b (E1621)
Independent Infantry Units
- 1 GR (C2309-2310), 2 GR (C2211-2212)
- 1 CGR (C2317-2318), 2 CGR (C2323-2324)
- 3 CGR (C2331-2332), 4 CGR (W2604-2704 se)
- 5 CGR (W3008-3108 se), 6 CGR (W3012-3013)
- Dmtd (W2807)
Baggage and Artillery
- Eight Baggage counters (W2208, W2209, W2307, W2308, W2406, W2407, W2408, W2506)
- 6 lb #1-#3, 8 lb #1-#3, 12 lb #1-#2, Shuvalov #1-#5, Howitzer (set up unlimbered within 2 hexes of any Russian infantry unit)
- Unicorn #1-#4 (set up unlimbered within 2 hexes of any Observation Corps unit)
7.3c Prussian Setup
King Frederick II [KFII], GdI Furst Moritz [FRM], Oberst Moller [MOL] (with any Prussian unit)
GLt Schorlemer's Cavalry Wing [SCH]
GM Bredow's Command [BE]
- NOR a (E5731-5732), NOR b (E5733)
- LKR a (C5701-5702), LKR b (C5703-5704)
GM Zieten's Command [Z]
- PVP a (C5705), PVP b (C5706)
- MGF a (C5708), MGF b (C5709)
GLt Dohna's Infantry Wing [DOH]
GM Gablenz' Command [G]
- 1 AKR (C5812), 2 AKR (C5912-5913)
- 1 SER (C5917-5918), 2 SER (C5921-5922)
GM Braunschweig's Command [BR]
- WED (C5712), 1 FOR (5714), 2 FOR (C5715)
- 1 PVP (C5717), 2 PVP (C5718)
GM Bülow's Command [B]
- 1 KAL (C5720), 2 KAL (C5721)
- 1 ASE (C5723), 2 ASE (C5724)
- 1 LEH (C5726), 2 LEH (C5727)
GLt Kanitz' Infantry Wing [KAN]
GM Flemming's Command [F]
- 1 BUL (C5928-5929), 2 BUL (C5930-5931)
- 1 KUR (W5901-5902), 2 KUR (W5905-5906)
- 1 FRM (W5907-5908), 2 FRM (W5809)
GM Diericke's Command [D]
- 1 BEV (C5729), 2 BEV (C5730)
- 1 DOH (C5732), 2 DOH (C5733)
GM Rautter's Command [R]
- 1 BEL (W5702), 2 BEL (W5703)
- RES (W5705), ROH (W5707), 1 RAU (W5708)
GLt Manteuffel's Infantry Wing [MAN]
GM Kahlden's Command [KA]
- KRE (C5531), KLE (C5532), PET (W5501), A-B (W5502)
GM Kurszell's Command [K]
- LOS (W5504), BUR (W5505)
- 1 KAN (W5507), 2 KAN (W5508)
GLt Marschall's Cavalry Command [MR]
- SCH a (C6131-6132), SCH b (C6133), SCH c (W6101-6102)
- PLE a (W6104), PLE b (W6105)
- A-P a (W6205), A-P b (W6206)
GLt Seydlitz' Cavalry Wing [SEY]
GM Lentulus' Command [L]
- GDC (W5915-5816 ne)
- GEN a (W5817-5717 ne), GEN b (W5618-5518 ne)
- SEY a (W5419 ne), SEY b (W5320 ne)
GM Malachowski's Command [MA]
- MAL a (W5120 ne), MAL b (W5021 ne), MAL c (W4921 ne)
- ZIE a (W4722-4623 ne), ZIE b (W4523-4424 ne), ZIE c (W4324-4225 ne)
Independent Units
Cavalry
- RUE a (E5932-5933), RUE b (C5901-5902)
- CZE a (W6213-6113 ne), CZE b (W6014-5914 ne)
Artillery
- Howitzer #1-#7, 12 lb #1-#11, 24 lb (set up limbered or unlimbered within 10 hexes of any Prussian infantry unit)
7.3d Victory Conditions
Russia: If, during an Army Morale Check Phase, Prussian Army Morale reaches +40 the Russians win an automatic victory.
Prussia: If, during an Army Morale Check Phase, Russian Army Morale reaches +50 the Prussians win an automatic victory.
(See Zorndorf rules 3.6 and 4.4 for various modifiers that affect each side's Army Morale.)
If neither side achieves an automatic victory by the end of the game the battle is a Russian minor victory.
7.4 Scenario 4: The Battle of Zorndorf (condensed)
Scenario 4 is the same as scenario 3 except that it is played on only two maps, making it ideal for the space-challenged. Since this is a full battle scenario it will take many hours to play.
7.4a Special Rules
A. Scenario 4 starts at 9:00 AM and its last turn is the 9:40 PM turn. The End Turn Number is 11. Only the West and Center maps are used.
B. The Russians set Zorndorf on fire early on the morning of August 25th. The fire cannot be put out and it burns for the entire game. The following effects apply to any Zorndorf Village hex:
- i. All MP costs are doubled.
- ii. LOS cannot be traced through any hex adjacent to a Zorndorf Village hex (from the effects of smoke).
- iii. Roads in Zorndorf do not negate the Village terrain for Movement or tracing LOC; the roads are of no effect.
- iv. The Morale Check ER modifier for a burning Village hex changes from the normal +5 to a -5.
- v. There is no Close Combat CV bonus for a defender is a burning Village hex.
C. Prussian Army Morale is modified by +10 if, during an Army Morale Phase, there is a non-Routed, non-Cossack, Russian unit within 10 hexes of C6401. This modifier will continue to be in effect until the next Army Morale Check Phase, at which time it is checked for again.
7.4b Russian Setup
Graf Fermor [FER], GM Rothelier [ROT] (set up stacked with any Russian infantry or artillery unit)
Observation Corps - GeCh Browne [BRO]
Brg Thiessenhausen's Command [T]
- 1 4M (C2012-2013), 2 4M (C2014-2015), 3 4M (C2016-2017)
- 1 5M (C2018-2019), 2 5M (C2020-2021), 3 5M (C2022-2023)
Brg Fast's Command [F]
- 1 1M (C2508-2509), 2 1M (C2510-2511), 3 1M (C2512-2513)
- 1 3M (C2514-2515), 2 3M (C2516-2517), 3 3M (C2518-2519)
GLt Saltykov's Wing [SAL]
GM Gr. Dolguruki's Command [D]
- 1 BUT (C2520-2521), 2 BUT (C2522-2523)
- 1 SUZ (C2524-2525), 2 SUZ (C2526-2527)
GM Leontiev's Command [LE]
- 1 KEG (C2528-2529), 2 KEG (C2530-2531)
- 1 LAD (C2533-C2634 se), 2 LAD (W2701 se)
Brg Uvarov's Command [U]
- 1 SHL (W2702 se), 2 SHL (W2803-2903 se)
- 1 CHE (W2905-3006 se), 2 CHE (W3106 se)
Brg Pr. Liumbomirski's Command [LI]
- 1 ROS (W3207 se), 2 ROS (W3307 se)
- 1 3GR (W3308-3309), 2 3GR (W3310-3311)
GM Panin's Command [P]
- 1 1GR (W3412-3413), 2 1GR (W3414)
- 1 STP (W3113), 2 STP (W3214-3215)
GLt Galitzin's Wing [GAL]
GM Manteuffel's Command [M]
- 1 2GR (C2024-2025), 2 2GR (C2026-2027)
- 1 NEV (C2028-2029), 2 NEV (C2030-2031)
Brg Kokoschkin's Command [K]
- 1 KAZ (C2032), 2 KAZ (C2033)
- 1 TRO (C2034), 2 TRO (W2002)
GM Diez' Command [DI]
- 1 4GR (W2003-2004), 2 4GR (W2005-2006)
- 1 SMO (W2007), 2 SMO (W2008-2009)
Brg Sievers' Command [S]
- 1 MUR (W2110 se), 2 MUR (W2211 se)
- 1 RYA (W2412 se), 2 RYA (W2512 se)
Brg Leontyev's Command [L]
- 1 VOR (W2614 se), 2 VOR (W2714-2815 se)
- 1 NOV (W2915 se), 2 NOV (W3016-3116 se)
GM Demiku's Cavalry Command [DE]
- ARK (C1601), KAZ a (C1602), KAZ b (C1603)
- 3 a (C1604), 3 b (C1605)
- OIM a (C1606), OIM b (C1607)
- HOR a+b, GRU, and MOL will enter as reinforcements. They may enter the Center map from its east edge between C1001 and C1901 (inclusive). They will enter the map the first time that Demiku's Command is activated.
Brg Gaugreben's Cavalry Command [G]
- TOB (W2908 sw), NVT a (2809 sw), NVT b (W2709 sw)
- KAR a (W2610 sw), KAR b (W2510 sw)
Independent Cavalry Units
- SER (W2215-2315 se)
- 1 COS a (W2519 sw), 1 COS b (W2420 sw)
- 2 COS a (W2124), 2 COS b (W2125)
- 3 COS a+b, 4 COS a+b, 5 COS a+b, and 6 COS a+b may enter the Center map any time from the 9:20 turn onwards. They will arrive as reinforcements on the east edge of the Center map between hexes C1001 and C2901 (inclusive). Since they are Independent units they may be activated for entry when any Command is activated.
Independent Infantry Units
- 1 GR (C2309-2310), 2 GR (C2211-2212)
- 1 CGR (C2317-2318), 2 CGR (C2323-2324)
- 3 CGR (C2331-2332), 4 CGR (W2604-2704 se)
- 5 CGR (W3008-3108 se), 6 CGR (W3012-3013)
- Dmtd (W2807)
Baggage and Artillery
- Eight Baggage counters (W2208, W2209, W2307, W2308, W2406, W2407, W2408, W2506)
- 6 lb #1-#3, 8 lb #1-#3, 12 lb #1-#2, Shuvalov #1-#5, Howitzer (set up unlimbered within 2 hexes of any Russian infantry unit)
- Unicorn #1-#4 (set up unlimbered within 2 hexes of any Observation Corps unit)
7.4c Prussian Setup
King Frederick II [KFII], GdI Furst Moritz [FRM], Oberst Moller [MOL] (with any Prussian unit)
GLt Schorlemer's Cavalry Wing [SCH]
GM Bredow's Command [BE]
- NOR a (C5701), NOR b (C5702)
- LKR a (C5703), LKR b (C5704)
GM Zieten's Command [Z]
- PVP a (C5705), PVP b (C5706)
- MGF a (C5708), MGF b (C5709)
GLt Dohna's Infantry Wing [DOH]
GM Gablenz' Command [G]
- 1 AKR (C5812), 2 AKR (C5912-5913)
- 1 SER (C5917-5918), 2 SER (C5921-5922)
GM Braunschweig's Command [BR]
- WED (C5712), 1 FOR (5714), 2 FOR (C5715)
- 1 PVP (C5717), 2 PVP (C5718)
GM Bülow's Command [B]
- 1 KAL (C5720), 2 KAL (C5721)
- 1 ASE (C5723), 2 ASE (C5724)
- 1 LEH (C5726), 2 LEH (C5727)
GLt Kanitz' Infantry Wing [KAN]
GM Flemming's Command [F]
- 1 BUL (C5928-5929), 2 BUL (C5930-5931)
- 1 KUR (W5901-5902), 2 KUR (W5905-5906)
- 1 FRM (W5907-5908), 2 FRM (W5809)
GM Diericke's Command [D]
- 1 BEV (C5729), 2 BEV (C5730)
- 1 DOH (C5732), 2 DOH (C5733)
GM Rautter's Command [R]
- 1 BEL (W5702), 2 BEL (W5703)
- RES (W5705), ROH (W5707), 1 RAU (W5708)
GLt Manteuffel's Infantry Wing [MAN]
GM Kahlden's Command [KA]
- KRE (C5531), KLE (C5532), PET (W5501), A-B (W5502)
GM Kurszell's Command [K]
- LOS (W5504), BUR (W5505)
- 1 KAN (W5507), 2 KAN (W5508)
GLt Marschall's Cavalry Command [MR]
- SCH a (C6131-6132), SCH b (C6133), SCH c (W6101-6102)
- PLE a (W6104), PLE b (W6105)
- A-P a (W6205), A-P b (W6206)
GLt Seydlitz' Cavalry Wing [SEY]
GM Lentulus' Command [L]
- GDC (W5915-5816 ne)
- GEN a (W5817-5717 ne), GEN b (W5618-5518 ne)
- SEY a (W5419 ne), SEY b (W5320 ne)
GM Malachowski's Command [MA]
- MAL a (W5120 ne), MAL b (W5021 ne), MAL c (W4921 ne)
- ZIE a (W4722-4623 ne), ZIE b (W4523-4424 ne), ZIE c (W4324-4225 ne)
Independent Units
Cavalry
- RUE a (C5901), RUE b (C5902)
- CZE a (W6213-6113 ne), CZE b (W6014-5914 ne)
Artillery
- Howitzer #1-#7, 12 lb #1-#11, 24 lb (set up limbered or unlimbered within 10 hexes of any Prussian infantry unit)
7.4d Victory Conditions
Russia: If, during an Army Morale Check Phase, Prussian Army Morale reaches +40 the Russians win an automatic victory.
Prussia: If, during an Army Morale Check Phase, Russian Army Morale reaches +50 the Prussians win an automatic victory.
(See Zorndorf rules 3.6 and 4.4 for various modifiers that affect each side's Army Morale.)
If neither side achieves an automatic victory by the end of the game the battle is a Russian minor victory.
7.5 Scenario 5: The Prussians are Coming!
Scenario 5 takes the Battle of Zorndorf back to an earlier start time. In this scenario the Russians are finally aware that they are being outflanked by the Prussians but have not yet reacted. The Prussians meanwhile have not even entered the map yet. Since this is a full battle scenario with an earlier start time, it will take quite a bit longer to play. The reward is that each player is free to concoct their own plan of battle.
7.5a Special Rules
A. Scenario 5 starts at 6:00 AM and its last turn is the 9:40 PM turn. The End Turn Number is 11. All three maps are used.
B. Zorndorf is not burning, but if a Russian Cossack or Hussar unit spends its entire movement allowance in any Zorndorf hex before any of the hexes is occupied by a Prussian unit, then Zorndorf is considered to be set afire and Zorndorf rule 7.4a B applies. Once any Prussian unit enters Zorndorf, if the Village has not yet been set afire, it cannot be set afire for the rest of the game. The Russian player can set fire to any Village on any map in the same way and with the same results as the rules for Zorndorf. Place an "F" (Finished) marker in any Village that is on fire. The "F" stands for fire.
C. All Russian units set up in Line facing north unless their setup hex is marked with an 'nw' (northwest) or 'ne' (northeast) notation. In these instances the units face in the indicated direction.
7.5b Russian Setup
Graf Fermor [FER], GM Rothelier [ROT] (set up stacked with any Russian infantry or artillery unit)
Observation Corps - GeCh Browne [BRO]
Brg Thiessenhausen's Command [T]
- 1 4M (C2012-2013), 2 4M (C2014-2015), 3 4M (C2016-2017)
- 1 5M (C2018-2019), 2 5M (C2020-2021), 3 5M (C2022-2023)
Brg Fast's Command [F]
- 1 1M (C2508-2509), 2 1M (C2510-2511), 3 1M (C2512-2513)
- 1 3M (C2514-2515), 2 3M (C2516-2517), 3 3M (C2518-2519)
GLt Saltykov's Wing [SAL]
GM Gr. Dolguruki's Command [D]
- 1 BUT (C2520-2521), 2 BUT (C2522-2523)
- 1 SUZ (C2524-2525), 2 SUZ (C2526-2527)
GM Leontiev's Command [LE]
- 1 KEG (C2528-2529), 2 KEG (C2530-2531)
- 1 LAD (C2533-C2634 nw), 2 LAD (W2701 nw)
Brg Uvarov's Command [U]
- 1 SHL (W2702 nw), 2 SHL (W2803-2903 nw)
- 1 CHE (W2905-3006 nw), 2 CHE (W3106 nw)
Brg Pr. Liumbomirski's Command [LI]
- 1 ROS (W3207 nw), 2 ROS (W3307 nw)
- 1 3GR (W3308-3309), 2 3GR (W3310-3311)
GM Panin's Command [P]
- 1 1GR (W3412-3413), 2 1GR (W3414)
- 1 STP (W3113), 2 STP (W3214-3215)
GLt Galitzin's Wing [GAL]
GM Manteuffel's Command [M]
- 1 2GR (C2024-2025), 2 2GR (C2026-2027)
- 1 NEV (C2028-2029), 2 NEV (C2030-2031)
Brg Kokoschkin's Command [K]
- 1 KAZ (C2032), 2 KAZ (C2033)
- 1 TRO (C2034), 2 TRO (W2002)
GM Diez' Command [DI]
- 1 4GR (W2003-2004), 2 4GR (W2005-2006)
- 1 SMO (W2007), 2 SMO (W2008-2009)
Brg Sievers' Command [S]
- 1 MUR (W2110 nw), 2 MUR (W2211 nw)
- 1 RYA (W2412 nw), 2 RYA (W2512 nw)
Brg Leontyev's Command [L]
- 1 VOR (W2614 nw), 2 VOR (W2714-2815 nw)
- 1 NOV (W2915 nw), 2 NOV (W3016-3116 nw)
GM Demiku's Cavalry Command [DE]
- HOR a (E1626-1627), HOR b (E1628-1629)
- GRU (E1630-1631), MOL (E1632-1633), ARK (E1634)
- KAZ a (C1602), KAZ b (C1603)
- 3 a (C1604), 3 b (C1605)
- OIM a (C1606), OIM b (C1607)
Brg Gaugreben's Cavalry Command [G]
- TOB (W2908 ne), NVT a (2809 ne), NVT b (W2709 ne)
- KAR a (W2610 ne), KAR b (W2510 ne)
Independent Cavalry Units
- SER, 1 COS a+b, 2 COS a+b (anywhere on the West or Center maps)
- 3 COS a (E2113), 3 COS b (E2114)
- 4 COS a (E2710 ne), 4 COS b (E2611 ne)
- 5 COS a (E1618), 5 COS b (E1619)
- 6 COS a (E1620), 6 COS b (E1621)
Independent Infantry Units
- 1 GR (C2309-2310), 2 GR (C2211-2212)
- 1 CGR (C2317-2318), 2 CGR (C2323-2324)
- 3 CGR (C2331-2332), 4 CGR (W2604-2704 se)
- 5 CGR (W3008-3108 nw), 6 CGR (W3012-3013)
- Dmtd (W2807)
Baggage and Artillery
- Eight Baggage counters (W2208, W2209, W2307, W2308, W2406, W2407, W2408, W2506)
- 6 lb #1-#3, 8 lb #1-#3, 12 lb #1-#2, Shuvalov #1-#5, Howitzer (set up on or between any 18xx to 22xx hex, unlimbered, facing north, and within 2 hexes of any Russian infantry unit)
- Unicorn #1-#4 (set up on or between any 18xx to 22xx hex, unlimbered, facing north, and within 2 hexes of any Observation Corps unit)
7.5c Prussian Setup
Beginning with the first turn, all units enter as reinforcements on the east edge of the East map (see BAR rule 22.0).
7.5d Victory Conditions
Russia: If, during an Army Morale Check Phase, Prussian Army Morale reaches +40 the Russians win an automatic victory.
Prussia: If, during an Army Morale Check Phase, Russian Army Morale reaches +50 the Prussians win an automatic victory.
(See Zorndorf rules 3.6 and 4.4 for various modifiers that affect each side's Army Morale.)
If neither side achieves an automatic victory by the end of the game the battle is a Russian minor victory.
Unit Key and Loss Chart Explanation
Loss Chart Explanation
Each row of the army Loss Charts gives, left to right (examples from the booklet):
- Army Leader: Command Range (8), counter abbreviation (KFII), ER Bonus (-15), CV Bonus (+1), Command Rating (+5), Replacement Type (*), full name (King Frederick II), Wing Activation Number (5), Army Loss Value (20).
- Wing Leader: Command Range (5), counter abbreviation (GAL), ER Bonus (-3), CV Bonus (+1), Initiative Rating (5), Replacement Type (-), full name (GLt Galitzin), Army Loss Value (10).
- Command Leader: Command Range (3), counter abbreviation (GAL / L), ER Bonus (-4), CV Bonus (+1), Initiative Rating (5), Replacement Type (B), full name (Brg Leontyev), Army Loss Value (5).
- Combat Unit: counter abbreviation (2 VOR / L), ER (25), CV (+1), unit type (Mus), and Loss Boxes (1 2 3 4 5; 50% in grey).
- Artillery Unit: Prolonge Capability (P), counter abbreviation (12 lb / 10), ER (21), CV (+0), unit type (12 lb), and Loss Boxes (1 2 3 4).
Counter Explanation
- Army Leader Frederick II of Prussia (KFII): Front: This unit has an '8' Command Range and an '8' Movement Allowance. Back: The +5 is his Command Rating. He also has a -15 ER Bonus and a +1 CV Bonus.
- Wing Leader Galitzin (GAL): Front: This unit has a '5' Command Range and an '8' Movement Allowance. Back: The Initiative Rating of '5' is in yellow to show that this is a Wing Leader. He also has a -3 ER Bonus and a +1 CV Bonus.
- Command Leader Leontyev (L): Front: This unit has a '3' Command Range and an '8' Movement Allowance. The 'GAL' shows that he is part of Galitzin's Wing. Back: The Initiative Rating of '5' is in green to show that this is a Command Leader. He also has a -4 ER Bonus and a +1 CV Bonus.
- 2nd bn of Voronehz (VOR) Musketeers: Front: This unit has 5 SPs, and a Movement Allowance of 4. The 'L' shows it belongs to Leontyev's Command. Back: This unit has a 25 ER and a +1 Combat Value (CV).
- 12 lb Artillery unit #10: Front: This unit has 4 SPs, and a Movement Allowance of 3. Back: This unit has a 21 Effectiveness Rating (ER) and has 4 SPs. It may Prolonge 'P' only.
Counter Minutiae
- Russian units have a green back to the counter. Prussian units have a blue back to the counter.
- The rough size of a unit is indicated by the dots on the top front of a counter. Single dots are companies, two dots are battalions, and three dots are regiments. This has no bearing on game play.
- Generic Counters: The generic black and white game play counters are as found in later BAR games. Owners of the original Zorndorf game will have most of the same counters, just with a different look. Markers show a unit's Order and/or Morale status; specific formations (including the 'extension' arrow used to show an extended formation); Strength Point losses (numbered markers); Close Combat markers; the 'F' marker used to mark units as Finished; and the 'Out of Command' marker.
PART 2: BAR THIRD EDITION STANDARD (SERIES) RULES
Source note for Part 2: English rendering, by the transcriber, of an amateur French translation (by Joffrey Ceriani) of the Battles from the Age of Reason (BAR) Third Edition standard rules, which the French translator describes as version 3.2 of the rules (incorporating the known errata and clarifications since the original Third Edition publication, with the Disorder and Morale tables moved to the individual game charts). The translator omitted the printed rulebook's graphics and tables, saying the translation is for players who already own the original rules. Some abbreviations are kept in English to match the counters and charts (LOC, CR, WAN, SP, ER, CV, OOC, MA, SCM, ZOC and similar). Example dice rolls and wording are rendered from the French and may differ from the publisher's official English text; the official Third Edition rules are the authority if wording differs. Rule numbers are kept as in the French document. Where this booklet's Part 1 refers to "Series Rule x.x", it means the numbered rules below.
Introduction
This is the Third Edition of the Standard Rules for Battles from the Age of Reason (BAR). The game series was intended to portray tactical combat during the period from 1740 to 1783. The Standard Rules cover the generic concepts needed to play each game, while the Battle Rules specific to each game box provide the information covering the particular conditions appropriate to that battle.
The main design of BAR accurately simulates battalion/regimental maneuver and combat in the mid to late eighteenth century. In this period of rigid linear tactics, maneuver was restricted by tactical doctrine which, in turn, was defined by the limited effectiveness of weapons. Players familiar with Napoleonic wargames should keep in mind that there are many important differences between the two periods. An effort has been made not to turn tactics into rules and to allow players to discover which formations suit which circumstances in this period. We take it for granted that players are familiar to some extent with the period simulated.
This version of the Third Edition BAR rules incorporates all known errata and clarifications discovered since the original publication of the Third Edition BAR rules in 'Fontenoy'. In addition, this revision has a new cover and better graphics for rules illustrations. It is assumed that all players who own this rules set also own one of the games published with the Third Edition BAR rules; therefore the Disorder and Morale tables originally included with the Third Edition rules were removed and were included with the tables in all the new BAR game boxes. Because of these new tables, and with the replacement of the Disorder and Morale tables and a few minor changes in wording, these rules may be considered version 3.2 of BAR. The corrections, clarifications and rewordings made to the rules of previous editions are not noted in this text, to limit clutter.
These rules are very thorough, and nevertheless, BAR being such a rich interactive system, situations not covered by a "rule" will inevitably arise. We understand that these rules are not perfect, which is why, if you are puzzled by a rule or a situation, you should contact the publisher or visit the BAR game support site, and they will be glad to provide answers to questions and explanations of their decisions. Your questions and comments may help improve the accuracy and playability of this simulation.
There is a great deal of help available for learning and/or playing the BAR series of games. Games can be bought on the Clash of Arms site. Questions, answers and the BAR community are available on the Consimworld BAR forum. Many additional resources are available on the BAR website. For a detailed learning tool for the BAR game system, refer to the BAR 'Primer'.
1.0 Game Components
Each game component is described in the Battle Rules booklet. If components are missing or damaged, contact Clash of Arms Games for replacement parts.
1.1 The Rules
1.1a Two rules booklets are provided with each BAR game box. The Standard Rules booklet (the game rules) describes the rules that apply to all BAR games, while the Battle Rules booklet provides the special rules for the particular details of the battle in the game box. The Battle Rules always supersede any corresponding or contradicting Standard rule. The Battle Rules booklet also provides the scenario data needed to play parts of the battle, or to change history via "what if" scenarios, as well as historical notes on the battle.
1.1b Both rules booklets are organized by section. Each important rule concept (e.g. Movement) is the subject of a section and each topic in that section (e.g. Movement Restrictions, Movement Allowances, Terrain Effects on Movement, etc.) is noted by a subsection. At times it is necessary to refer to a case that appears in a different section; this is done by citing the section numbers.
1.1c The Disorder and Morale checks mentioned throughout these rules are found on their respective tables, which are included in each game. Each check mentioned in the rules is accompanied by a letter that corresponds to the appropriate situation. For example, the terrain effects on movement rules refer to 'Disorder Check (A)'. The letter (A) refers to the corresponding item A of the table. Likewise, a 'Morale Check (I)' refers to the type of Morale Check that is made during the Rally Phase--case I on the 'Morale Check Summary table.'
1.2 The Battle Rules
1.2a As already noted, each game contains a set of Battle Rules which give all the rules and scenarios specific to that battle.
1.2b Each BAR game box also contains an 'Order of Battle' for that game, the 'Terrain Effects Chart', the 'Loss Charts', the 'End Turn Track', the 'Close Combat Results Table', etc.--all the charts mentioned in these rules. These are included in the Battle Rules booklet, or separately on sheets.
1.3 The Game Maps
1.3a The maps provided in the game represent the actual terrain on which the battle was fought. The 'Terrain Effects Chart' (TEC) explains the symbols used on the maps in terms of real physical features. The hexagonal grid superimposed on the map regulates the movement and placement of the game counters. The real terrain has been drawn to conform to this grid. Consequently some minor distortions between the game maps and the real maps of the battlefield are unavoidable.
1.3b Some BAR game boxes have several maps in the box, each of which is coded to help position them relative to each other. For example, a box that has three maps might have its maps labelled 'WEST', 'CENTER' and 'EAST'. The maps of a game are not all used for every scenario of the game. The large Battle scenario, on the other hand, usually uses all the maps.
1.3c The hexagons created by the grid are called hexes. Each hex is composed of six hexsides (the straight lines that form the hex), and six hexpoints (the vertices where two hexsides meet). The hexside is shared between adjacent hexes while the hexpoint is specific to the hex considered. Each hex is identified by a printed four-digit number. A particular hex in a multi-map game is referred to by preceding its number with the first letter of the map code. For example, 'W2119' refers to hex 2119 on the 'WEST' map. Hex numbers are used mainly for the initial placement of given units in scenario instructions.
1.4 The Game Counters
Some of the game pieces ('counters') are used to represent the combat units and leaders who took part in the battle. Other counters are 'informational' markers which are used as combat unit strength point "recorders" and as mnemonic aids to indicate unit organization states, morale and formation. Other markers are used as reminders of various different game functions that will be described later in the rules. Carefully cut out all the game counters using a sharp knife, or punch them out and trim the rough corners with nail clippers. Refer to the Battle Rules for the definitions of the game's combat units, leaders and markers.
1.5 The Dice
1.5a Two ten-sided dice are provided with the game. Many game functions require a result from 00 to 99. For each such roll one die is designated as the tens and the other as the units. A '0' is always treated as a zero and not as a ten.
1.5b The following calculation methods are used in the rules to determine the rounding of fractions. Each calculation will specify the method to be used.
- 'Rounded': add 0.5 to the fraction, keep the whole units and drop any resulting fraction.
- 'Drop fraction': no rounding, keep the whole units and drop the fraction.
- 'Retain fractions': the fraction is kept.
Examples: Rounded: 2.5 is rounded to 3; 2.7 is rounded to 3 (3.2); 2.2 is rounded to 2 (2.7). Drop fraction: 12.9 becomes 12. Retain fractions: 6.5 stays 6.5.
2.0 Game Scale
Each hex represents 100 yards of real terrain from one hexside to the opposite. (Translator's note: throughout this translation the terms "hex, hexside, multihex, hexpoint" refer to the hexagon, its side, a multi-hexagon formation and its vertex.) Each game turn represents 20 minutes. Each infantry unit strength point represents 100 men; each cavalry strength point represents 50 men and their horses. Each artillery strength point represents 2 guns of similar type or size.
3.0 General Course of Play
Each Game Turn is composed of a series of steps called the Sequence of Play, which defines who can do what and when during a Game Turn. At certain times in the game both players perform actions simultaneously while at other times the sequence is carried out by only one player, who is called the active player, and his units are called the active units. His opponent is called the reactive player and his units are called the reactive units. Unlike many other games, the actual order in which the players perform their maneuver and combat actions is not fixed, but will be determined by the players through an Initiative phase. Also, unlike other games, it will not necessarily be the case that all of one side's units move and fight before the other player can do likewise; rather, in most cases a Game Turn will be interactive between the players, alternating movement and combat as they activate their brigades.
Each Game Turn begins with a dice roll by both players, modified by the CR (Command Rating) of their Army Leader, for Initiative. The highest modified roll wins the initiative and that player may activate one of his previously unactivated brigades or force his opponent to activate one of his. A brigade can be activated only once per Game Turn. Independent units (as defined in the game's Battle Rules) may be activated once per game turn and only as part of the activation of a friendly brigade. Activated units perform, in this order: Command Control, Fire, Movement and Close Combat. Actions performed by the active player's units may trigger Opportunity Fire and Opportunity Charges by the reactive player's units. When a brigade's activation is complete the players roll again for initiative and brigade activation. Once all brigades have been activated, all Routed and Shaken units make rally attempts. This ends the game turn.
4.0 Sequence of Play
A. Army Morale Check Phase (23.0)
This check is performed only on the first turn (':00' turn) of each hour. Each player determines his current loss total by counting his eliminated Strength Points, his eliminated Leaders and the SP value currently Routed. The total is compared to his army's 'Current Loss Level table' and he rolls a die to see whether there is a change to his army morale modifier.
B. Initiative Determination Phase (6.1)
-
Both players roll a D10:
- a) If one or the other (but not both) rolls a '0', consult the 'Initiative Special Results' on the table found in each game box and follow the instructions;
- b) If no '0' result is rolled, each player adds the CR of his Army Leader--the CR may be reduced if the Army Leader used it to modify his army morale (23.2b) or if he was moved this turn (see 6.1).
If the sum of the unmodified die results is greater than the End Turn value (found in the game's Battle Rules), move the 'END TURN' marker one box down (i.e. closer to the End box), following the numbered boxes of the 'Turn Track.' When the END TURN marker reaches the box marked 'End', the End Turn rules (6.7) take effect for the rest of that Game Turn. Otherwise, continue the game turn normally. (Older BAR games use a different format for the 'Turn Track.' In those games, an 'HOUR' marker is moved down the 'Turn Track' instead of the END TURN marker).
If both players roll a '0' or if there is a tie after adding the Army Leaders' CRs, both dice are re-rolled.
-
The player with the highest modified result (1.b) wins the Initiative and may choose either to:
- Activate a friendly brigade that has not yet been activated this game turn, OR:
- Require the opposing player to activate one of his unactivated brigades.
If the initiative winner rolls an unmodified die roll at least double the loser's unmodified roll, and his unmodified roll also equals or exceeds the Wing Activation Number (WAN) of his Army Leader, the player with the initiative has the opportunity to perform a Wing Activation (6.5).
Note: If a player has no brigade to activate, the other player automatically activates one of his unactivated brigades. However, it is essential that both players continue to roll the dice so that End Turn and limited activations (6.7 & 6.8) or Initiative Special Results (6.9) can be triggered.
C. Brigade Activation Phase (6.3)
The active player chooses one of his unactivated brigades.
If the replacement leader of the activated brigade is available, he is placed on the map at this time. Any off-map replacement leader may be placed on the map at this time (see 21.5).
-
Command Control Phase (7.0):
The active player identifies all unactivated independent units and off-brigade Leaders (6.6) that will be activated with the activated brigade. He also identifies which unactivated combat units of a different brigade will be activated by attachment (6.4) to the activated brigade.
The active player traces a Line of Command (LOC) from his Army Leader to the Brigade Leader just activated. This LOC (its distance) can be extended by a wing leader placed in the hierarchy between the brigade leader and the army leader. If a LOC exists from the army leader to the brigade leader, the brigade leader is 'In Command.' If no LOC exists, the active player rolls the die for that brigade leader using his Initiative rating. If the brigade leader succeeds, he is 'In Command'; if he fails, he is marked 'OUT OF COMMAND' ('OOC' marker). Combat units of an activated brigade that are outside the command range of the brigade leader or that are not stacked with an off-brigade leader are also marked OOC. Activated independent units that are outside the command range of the activated brigade leader or of any other 'In Command' off-brigade leader and that fail their unit initiative die roll are also marked OOC.
-
Disorder Recovery (18.6):
Remove the 'DISORDER' markers from activated units that are stacked with any friendly leader. An activated disordered unit not stacked with a leader makes a Disorder Check (G). If it succeeds, remove the 'DISORDER' marker. If it fails, it remains disordered. A unit marked 'SHAKEN/DISORDER' may still attempt disorder recovery, but it remains shaken even if it removes the disorder.
-
Fire Phase (12.0):
Activated combat units that are capable of firing and that have an enemy unit in range and line of sight may perform a fire.
-
Movement Phase (11.0):
Units in voluntary rout (19.10) are designated before any other units are moved. Unit separations and reformations (8.5) are performed before the parent unit or component units have moved.
Activated units perform formation changes, facing changes and movement. Out of Command units and disordered units have their movement points halved (rounded). Movement actions (such as formation or facing changes) that are performed within range of enemy units may trigger Opportunity Fire or Opportunity Charges.
D. Rally Phase (19.5)
Each player rolls a D10. The player who gets the highest result performs the following rally steps in the order given for all his Shaken and Routed units. When that player's checks are complete the other player makes his Rally checks.
- Make a Morale Check (I) for each Shaken stack or unit. If the unit fails, it remains shaken. If it succeeds, it returns to good morale (its 'shaken' marker is removed). A shaken/disordered unit that succeeds in its morale check remains disordered, but with good morale.
- Make a Morale Check (I) for each Routed unit. If the unit fails it retreats and may lose additional Strength Points. If it succeeds, it becomes shaken and disordered.
E. Maintenance Phase
- Remove all 'FINISHED' markers from the map and flip the leaders that were activated back to the front side of the counter.
- Return the END TURN marker to the '0' box and advance the GAME TURN marker to the next turn. (For older BAR games, replace the 'HOUR' marker on the current hour box and advance the 'MINUTE' marker to the next '20 minutes' section. If the MINUTE marker is at :00 advance the HOUR marker to the next hour box.)
Note: All game turns begin with the END TURN marker on the '0' box of the 'Turn Track'.
5.0 Armies, Brigades & Leaders
The fundamental element of each army is the unit, either a combat unit or a leader unit. Each combat unit belongs to a brigade or is an independent unit. A leader unit is either an army leader, a wing leader, a brigade leader, or a special leader. Each brigade is initially composed of one or more combat units and a brigade leader. All combat units of a brigade are subordinate to its brigade leader. Combat units of another brigade may be temporarily attached to a different brigade.
An army has an Army Leader and at least two brigades. Depending on its structure, an army may be divided into at least two wings. (The term 'wing' traditionally refers to the right and left wing of an army but here it refers to any division of an army above the brigade level, i.e. it can correspond to a 'vanguard', a 'center' and/or a 'Reserve wing' in addition to the 'left' and the 'right'.) A wing is composed of a wing leader and at least two subordinate brigades. It is possible for an army to have a brigade subordinate to a wing and a brigade subordinate directly to the army leader. An army may have one, several, or no special leaders. Independent units do not belong to any brigade, but can only be activated when a brigade is activated. Army, wing and special leaders are collectively called "off-brigade leaders".
The hierarchical structure and military organization of each side is shown on the Order of Battle chart found in the game's Battle Rules or on a separate sheet.
(Note on terminology: in Part 1 of this document, brigades are called "Commands" and brigade leaders "Command Leaders", which is the term used in the Zorndorf booklet; the French translation uses "brigade".)
6.0 Initiative & Activation
An army moves and fights by activating its brigades. The player who wins the initiative (the initiative player) determines which side will activate a brigade. In general, brigades are activated one at a time but from time to time the initiative player will have the option of activating a wing.
6.1 Initiative Determination
6.1a Each player rolls a D10 and adds the CR (Command Rating) of his army leader to the result. The side with the highest modified die result is the winner of the initiative and has the choice between:
- a) Activating one of his own brigades, or
- b) Requiring his opponent to activate one of his.
In either case the activated player chooses which brigade to activate.
6.1b The CR of an army leader is reduced by 2 if he was moved earlier in this game turn (i.e. the army leader counter has been flipped to its 'Finished' side), and his CR is also reduced when it was used to modify the die roll of the army morale check at the start of the hour (see 23.2b). A modified CR can never be less than zero. (Place a Strength Point marker, equal to the amount of the reduction of an army leader's CR, under the leader's counter as a reminder.)
6.1c If the unmodified sum of each side's die rolls exceeds the End Turn value (given in the game's Battle Rules), move the 'END TURN' marker down one box of the numbered boxes on the 'Turn Track' of the current turn. If the marker reaches the 'End' box before all brigades have been activated, End Turn is triggered (see 6.7). A tie between the 2 modified die rolls requires the dice to be re-rolled (after applying the CRs of the two army leaders as modifiers). Any initiative die roll that exceeds the End Turn value moves the 'END TURN' marker down one box on the 'Turn Track', even rolls that cause a tie or an initiative special result.
6.1d If the (unmodified) initiative roll of only one of the two players is a '0', consult the 'initiative special results' table (found in the tables of the Battle Rules) instead of following the normal brigade activation process (see 6.9). The special result will indicate whether a side activates a brigade after the special result has been carried out, or whether a new initiative die roll must be made.
6.1e Since a brigade can only be activated once per game turn, the situation can arise where only one side has brigades left to activate. In that case, both players must still make their normal initiative roll in order to create the possibility of advancing the 'END TURN' marker (affecting the remaining unactivated brigades of one side), and to allow initiative special results to be triggered.
Example: Player A's army leader has CR +2 and player B has +1. Player A rolls a '4' and adds '2' for a total of '6'. B rolls '4' and adds his '+1' for a total of '5'. Player A has the initiative. The unmodified sum of the rolls is '8' and if the End Turn value is '7' or less, the 'END TURN' marker is moved down one box on the turn track.
6.2 Regimental Integrity
6.2a Most infantry and cavalry regiments are composed of at least two units, all of which have the same regimental designation on their counters.
Note: The units that form an infantry regiment are battalions, whereas the units that form a cavalry regiment are usually 2-3 squadrons.
6.2b Whether for attachments (6.4), for tracing lines of command (7.1), or for automatic command (7.5), adjacent units of the same regiment are considered a single unit regardless of their facing, their formation or their 'Disorder' or 'Shaken' status. However, a routed unit of a regiment does not take part in regimental integrity.
6.2c A unit can be stacked only with unit(s) belonging to the same regiment to continue to benefit from regimental integrity. When units of different regiments are stacked together none of them is entitled to regimental integrity. An independent unit does not prevent the eligibility for regimental integrity of the unit(s) stacked with it.
Example: A brigade leader is stacked with two units, one of regiment A and one of regiment B. A second unit of regiment A is adjacent to the stack of leader + units. Regiment A is not entitled to regimental integrity because the unit stacked with the leader is also stacked with a unit of another regiment. If the unit of regiment B were not present or if it were an independent unit, then regimental integrity would apply to both units of regiment A.
6.3 Brigade Activation
6.3a Activating a brigade allows its combat units and leader to move and fight. Independent units and off-brigade leaders may be activated with a brigade even though they do not belong to a brigade. Brigades may be activated only once per game turn. Only previously unactivated units are entitled to activation.
6.3b Once activated, units move and fight in the order set out in phase (C) Brigade Activation, of the game turn sequence. All steps in this phase must be completed before another brigade may be activated (Exception: Wing Activation 6.5). Activated units are not required to move and fight; they may do nothing but will still be considered to have been activated for the game turn.
6.3c Activating a brigade activates all units of that brigade except those already activated by attachment (see 6.4) to another brigade. A unit of an activated brigade may not be left unactivated for the purpose of a later attachment to another brigade.
6.3d When a brigade's activation phase is finished, flip the counter of its leader and of all off-brigade leaders activated with that brigade--back side up (finished)--and place 'FINISHED' markers on the independent units and on the units that were attached to the brigade, as a reminder that they were activated this Game Turn. (Translator's note: the two sides of each counter are called front and back, and it is assumed that the game starts with the front side up; which means that artillery begins limbered unless otherwise provided in the scenarios or illustrated examples.)
6.3e Routed units may not be activated.
Example: Player A has won the initiative and decided to activate one of his brigades. On his 'Order of Battle' he sees that he has 6 brigades, his army leader, two wing leaders and 4 independent units. Of this total, 4 brigades, 3 independent units and 1 wing leader have already been activated this Game Turn. He chooses one of the two remaining unactivated brigades, the independent unit and the wing leader for activation. This wing leader is stacked with two combat units of the other unactivated brigade and he decides to attach them to this activation. The next time player A activates a brigade, he will activate the last brigade minus the two combat units that he had activated by attachment.
6.4 Attachment
6.4a An unactivated combat unit of a brigade may be activated as a temporary member of another brigade provided the unit is stacked with a leader who is also activated. The combat unit is said to be 'attached' to the activated brigade. The leader may be the leader of the activated brigade or an off-brigade leader activated at the same time as the activated brigade.
6.4b Attachment can occur as part of a simple brigade activation or a wing activation (6.5). If attachment is used with the wing activation, the attached units must come from an unactivated brigade that does not belong to the activated wing.
6.4c When all the units of a regiment are stacked together and/or in the adjacent hex, the entire regiment may be attached provided there is a leader stacked with one of them and if all units meet the conditions of regimental integrity (6.2).
Example: An infantry regiment A has 3 units (battalions A-1, A-2 and A-3) that belong to brigade X. When brigade Y is activated, a wing leader stacked with A-1 is also activated, A-1 may be attached to brigade Y. A-2 is adjacent to A-1 and A-3 is adjacent to A-2. Provided that A-2 and A-3 both satisfy the conditions of regimental integrity, each or both of them may be attached to the activation of brigade Y.
6.4d Attachment lasts only for the duration of the activation phase and the unit may not be activated again even if its parent brigade is activated later in the game turn. Place 'FINISHED' markers on the attached units when the activation is finished.
6.5 Wing Activation
A wing activation allows the player who has the initiative to activate any or all of the unactivated brigades of a wing under the coordination of its wing leader.
6.5a A wing activation is permitted if the initiative roll of the initiative winner fulfils both of the following conditions:
- His unmodified initiative die roll must be equal to or greater than the 'Wing Activation Number' (WAN) of his army leader, and
- His unmodified initiative die roll must be at least double that of his opponent.
6.5b The wing leader chosen for activation must not have been activated before, i.e. he must not be flipped to his 'FINISHED' side. The wing leader must be 'In Command' by having a Line of Command (LOC) from his Army Leader (7.3) or by having passed a leader initiative roll (7.4b)--an initiative roll that consists of placing himself under command.
6.5c Activating a wing allows the activation of each of its unactivated brigades whose brigade leaders can have a LOC to their wing leader. If a wing leader cannot trace a LOC to one of his brigades, it cannot be activated as part of a wing activation, although it may be activated separately later. Also, the fact that a brigade is within the command range of its wing leader does not imply that it must necessarily be activated with the rest of the wing--it is the player's option to activate it or not.
6.5d The brigades taking part in a wing activation are activated together and carry out the brigade activation phase simultaneously, i.e. all brigades fire in the fire phase, all units move in the movement phase, etc., as if they formed a single brigade. Unactivated combat units of a brigade that is not part of the wing activation may be attached (6.4) to any of the activated brigades.
6.5e Wing activation is completely optional and may only be used by the initiative player--who won the initiative. The other player may never choose, nor be forced, to activate a wing. (Translator's note: the player who won the initiative can only require the other player to activate a brigade (6.1a b).)
6.6 Independent Units & Leaders
6.6a Independent units and off-brigade leaders may be activated only with a brigade. They may not be activated alone. If a player has activated all his brigades and unactivated leaders and independent units remain, he can no longer activate them until the next game turn. (Exception: the special leaders in some BAR game boxes may be exempted from this rule.)
6.6b Like other units, off-brigade leaders may be activated only once per game turn and are flipped to the 'FINISHED' side of the counter when their activation is complete. The only time an off-brigade leader may use up his movement points or attach units (6.4) to a brigade is when he is activated.
6.6c A 'FINISHED' army leader may still be used to trace a LOC to leaders and to independent units. 'FINISHED' wing leaders who are in command may still be used to trace a LOC to other brigade leaders and special leaders and to independent units but they may no longer be used for wing activation. Special leader activation is defined in the Battle Rules of each game.
6.6d Independent units and off-brigade leaders may be activated at any time during the command control phase, i.e. they need not all have been declared at the start of the phase. After the command control phase no additional independent units and off-brigade leaders may be activated with that brigade.
6.6e Independent units and off-brigade leaders may be activated as part of a wing activation.
6.6f Some game boxes have special leaders that affect specific units of an army. For example, a special leader for artillery would improve the capabilities of an army's artillery units. Special leaders must be activated to be used. Some are activated with a friendly brigade, like an army/wing leader, while certain others may be activated alone as a brigade leader would be. A game's Battle Rules will define all the capabilities and mechanics of a special leader.
6.7 End Turn
6.7a Each time the players roll their initiative die, the unmodified sum of the dice is added up. This sum is compared to the End Turn value (End Turn Number, or ETN), given in the game's Battle Rules. If the sum is greater than the ETN, the 'END TURN' marker is moved down one box on the 'Turn Track' of that turn. When the 'END TURN' marker reaches the 'End' box, the end of turn conditions apply for the rest of the current game turn.
6.7b When end of turn has been triggered, limited activations (6.8) apply to all remaining unactivated brigades as well as to independent units and off-brigade leaders belonging to both sides.
6.7c If both sides have unactivated brigades when the end of turn conditions have been reached, an initiative roll is still made to determine which player activates a brigade with limited activation or to trigger a possible initiative special result.
6.7d If only one of the two players has unactivated brigades when the end of turn conditions have been reached, an initiative roll is still made to trigger a possible initiative special result.
Example: The ETN of a scenario is '12' and for the current turn there are six boxes in the turn track table (boxes 1 to 5 and the 6th box which is the END box). The 'END TURN' marker is already on box 5, so if a total of 13 or more is obtained on the initiative rolls, it will cause the end of the turn. Player A has no more brigades to activate but player B has three. Both players roll their initiative die, but as player A has no more brigades to activate, B must activate one of his. The total obtained is '11' so end of turn does not occur. The next initiative dice total a '15' and so the limited activation rules apply to B's two remaining brigades.
6.8 Limited Activation
6.8a Limited activation allows unactivated brigades, independent units and off-brigade leaders to have the opportunity to move after end of turn has been triggered. A limited activation has the same phases as a normal activation (command control, disorder recovery, fire, etc.) except that the movement phase is restricted to units in road column formation as described below in 6.8b. All other phases are performed normally. Retreat, advance after combat and cavalry charge/countercharge movements are still permitted.
6.8b A combat unit in road column may move only if:
- It begins and remains in road column formation (see 8.1f) throughout the activation; and
- It occupies only contiguous road hexes as defined by the game's Battle Rules; i.e. it uses road movement (11.2c).
6.8c Unactivated leaders have no special movement restrictions during a limited activation. Off-brigade leaders and independent units must still be activated with a brigade.
6.9 Initiative Special Results
6.9a When one (and only one) player rolls a '0' on his initiative roll, an initiative special result occurs. The details for determining them are found on the 'Initiative Special Results' table of each battle. Do not re-roll the die to resolve the special result--use the die of the player who did not roll zero on his original (unmodified) die and apply the special result to the player who did not roll zero. Some special results will allow the player to override the standard rules for activation.
6.9b Some game boxes may have special results when both players roll a '0' on their initiative roll (i.e. they roll '0' and '0'). (Translator's note: specified in the Battle Rules.)
6.9c Some games will limit the number of initiative special results allowed in a Game Turn. When a '0' is rolled after that limit has been reached, treat the die result normally, i.e. add the army leader's CR and the highest total wins the initiative.
7.0 Command Control
Combat units, brigade leaders, wing leaders and special leaders must be 'In Command' to use their full movement, to fight and to use their command ability. Army leaders are always 'In Command.' A brigade/wing/special leader is 'In Command' when a line of command (LOC) can be traced to him from the army leader. A brigade leader can trace a LOC to the army leader through an 'In Command' wing leader. (Translator's note: the latter acting as a relay.) A brigade leader allows his subordinate combat units to be 'In Command' by tracing a LOC to each of them. When a wing activation is performed, the wing leader allows his subordinate brigade leaders to be 'In Command' by tracing a LOC to each of them. An independent unit is 'In Command' when a LOC can be traced from an activated brigade leader or from any in-command off-brigade leader, whether activated or not. Brigade/wing leaders and independent combat units that cannot trace a LOC may attempt to place themselves in command by rolling an initiative die (see 7.4). Special leaders may use this initiative roll to place themselves in command if allowed by the game's Battle Rules.
7.1 Command Range
Each leader has a command range (see the counter description in the Battle Rules), which determines the maximum distance to which he can trace a LOC to a combat unit or another leader. How this command range is traced depends on the type of leader, the terrain and the units through which the LOC passes. A LOC may not be traced into or through terrain that is impassable to leaders (listed in the game's 'Terrain Effects' table). A LOC may not be traced into or through a hex occupied by an enemy unit. A LOC may not be traced into or through an Enemy Zone of Control (EZOC, 9.1) that is not also occupied by a non-routed friendly combat unit. If a leader is in a hex that is also in an EZOC, his LOC may be traced out of that hex. A leader's full command range applies to each LOC traced. (Translator's note: it is not a pool of LOC points to be divided between each LOC to be traced.)
7.2 Brigade Leader LOC
7.2a A Brigade Leader uses his command range to trace a LOC to each combat unit of his own brigade and to any independent unit he wants to command. There is no limit to the number of combat units a brigade leader can command provided that they are all subordinate to him or are independent units. There is no limit to the number of LOCs that can be traced from a brigade leader to the various units being commanded.
7.2b The LOC is traced from the leader to the unit. The leader's hex is not counted but the combat unit's hex is counted. Each hex between the leader and the unit counts as 1 point of leader command range regardless of the terrain of the hex, except that a LOC may not be traced through terrain that is impassable to the brigade leader (per the game's 'Terrain Effects' table). Tracing a LOC from an occupied friendly hex to an adjacent occupied friendly hex costs 1/2 point provided that both units are activated and neither is routed. Each hex occupied by a combat unit that is not activated or by a routed unit (even if it belongs to the same brigade) counts as 2 points of command range. A hex containing a stack of activated and unactivated units counts as 1 point of command range.
7.2c Units with regimental integrity (6.2) are treated as a single unit and tracing the LOC between these units costs nothing as long as they are adjacent to each other.
7.2d Under these conditions, a brigade leader stacked with a multi-hex formation (such as a two-hex line) or with any unit to which regimental integrity applies, is considered to be present in each hex occupied by that multi-hex formation (or the multi-unit regiment) and not necessarily in a specific hex. Thus a LOC may be traced from any hex of a multi-hex formation that is stacked with a leader, or from any unit of a multi-unit regiment that had regimental integrity, that is stacked with a leader.
Example: The brigade leader (Sc), who commands 3 regiments (AMS, FOR, and PVP), has a command range of 4 hexes and all units are in command. The numbers show how command range is traced to each unit. The two battalions of AMS have regimental integrity and are treated as a single unit. If unit PVP 1 is routed then unit FOR 2 will be 'Out of Command'.
7.2e When a LOC cannot be traced to an activated combat unit, it is marked 'OUT OF COMMAND' and the penalties listed in 7.6d are applied.
7.3 Army Leader & Wing Leader LOC
7.3a An army leader's LOC is used to place brigade leaders, wing leaders, special leaders and independent units under his command. A wing leader's LOC is used to place brigade leaders, special leaders and independent units under his command.
7.3b Each hex of an army/wing leader's command range counts as 1 point for the purpose of tracing a LOC regardless of the terrain of the hex, except road hexes (as defined in the game's Battle Rules) which count as 1/2 point. To benefit from the road advantage the trace must go from a road hex to a contiguous road hex.
Note: Brigade leaders do not benefit from roads in tracing their LOCs. See the game's Battle Rules for the effects of roads on the LOC cost of a special leader.
7.3c The LOC of an in-command wing leader can only be traced to a subordinate brigade leader, a special leader or an independent unit. A wing leader may be used in this way as many times as desired in a game turn (according to his number of subordinate brigade leaders) but only one wing leader may be used in a LOC; i.e. a LOC from a wing leader to another wing leader is not valid.
7.3d The activation status of an army or wing leader is not taken into account in order to trace the LOC from the army/wing leader to a brigade leader, a special leader or an independent unit. A wing leader need only be in command to use his LOC to command eligible brigades and units.
7.3e Unlike brigade leaders, army leaders and wing leaders must occupy a specific hex when they are stacked with a multi-hex formation. The Battle Rules define hex placement for special leaders.
Example: As army leader A has a command range of 8 and W is a wing leader with a command range of 6, brigade leader C will be in command by tracing a LOC from A (the dotted line) to W (W being in command), and then using W's LOC to reach C. In this case, if W were not present, C would not be in command by means of a LOC and would be forced to roll a brigade leader initiative die (7.4) to be activated. If the army leader had a command range of 10, he would be able to trace a LOC directly to leader C. The dashed line shows this hypothetical line of command to C combining road and non-road hexes. X and Y (only) count as 1/2 each per 7.3b.
7.4 Leader & Unit Initiative
7.4a A brigade leader who cannot trace a LOC to his army leader or to an in-command wing leader may use his ER (Effectiveness Rating) to try to place himself in command. To do so, the player rolls a die and compares the result to the brigade leader's ER. If this result is equal to or less than the leader's ER value, he is in command and functions normally. If the result is greater, the brigade leader is out of command. A brigade leader may not use the leader initiative roll to take part in a wing activation.
7.4b A wing leader who attempts a wing activation and who cannot trace a LOC to his army leader may make a leader initiative die roll to be in command, as is done for a brigade leader. If he succeeds, the wing activation is performed. If he fails, the wing leader does nothing, he is flipped to his 'FINISHED' side and the player's activation is over. The sequence of play returns to phase (B) initiative determination. All subordinate brigades are unaffected and may be activated later in the game turn if they are entitled to be.
7.4c An activated independent unit that cannot trace a LOC to an activated brigade leader, a special leader, an army leader, or a wing leader may make a unit initiative roll to try to be in command. Roll two dice, designating one for the tens and the other for the units. If the result is equal to or greater than its Effectiveness Rating (ER) the unit is in command. On any other result, the unit is out of command. (This is not a disorder check or a morale check!) A stack of independent units uses the ER of the top unit for the entire stack instead of rolling the dice for each unit.
Note: Independent units may have two chances to be in command. For example, an independent unit is activated with a brigade and the brigade leader has no LOC to his army leader. If the brigade leader succeeds in his leader initiative attempt the independent unit is in command if it can trace a LOC to the leader. However, if the leader fails his attempt to be in command, the independent unit may still make a unit initiative attempt--its second chance!
7.4d Leader initiative for special leaders is specified in the game's Battle Rules.
7.5 Automatically In Command
7.5a A combat unit belonging to an activated brigade that cannot trace a LOC from its brigade leader is automatically in command when it is stacked with its wing leader or the army leader. The army or wing leader need not be activated to do this and the wing leader need not be in command (he does not use his LOC). A wing leader may do this only for units of a subordinate brigade.
7.5b Regimental integrity (6.2) applies to rule 7.5a only if the unit of a single regiment is stacked with the leader, i.e. if two units of two different regiments are stacked with the leader, regimental integrity is not allowed even if another unit of one of those regiments is adjacent to the stack.
7.5c Attached units are always in command because of this rule and the attachment requirements (6.4).
7.6 Command Effects
7.6a The command status of each leader and each activated combat unit is determined during the command control phase. Check the status of all leaders before checking that of the combat units.
The conditions under which units are marked 'OUT OF COMMAND' are:
- Wing leader: a LOC cannot be traced to him from his army leader (7.3) and he failed his leader initiative roll (7.4b).
- Brigade leader: a LOC cannot be traced to his wing leader or the army leader (7.3) and he failed his leader initiative roll (7.4a).
- A combat unit belonging to a brigade: a LOC cannot be traced to it from its brigade leader and it is not stacked with its wing leader or the army leader (7.5). A combat unit is not out of command just because its brigade leader is out of command.
- An independent unit: a LOC cannot be traced to it from an activated brigade leader, a special leader, or any army or wing leader, and the unit failed its unit initiative roll (7.4c).
7.6b An out-of-command wing leader may not be used for a wing activation.
7.6c When a brigade leader is out of command, each activated combat unit that can trace its LOC to its brigade leader applies the following movement restrictions:
- It may not perform a rapid march.
- It may not enter an Enemy Zone of Control (EZOC) unless it begins its movement phase already adjacent to that EZOC and has sufficient movement points to enter the hex. This one-hex move into an EZOC is the only action it can perform in its movement phase.
- A unit that begins its movement phase already in an EZOC may make a facing change or a formation change or leave a hex of that EZOC. In all cases the unit must have sufficient movement points (MPs) to perform the desired action and may not perform any other action in the movement phase. The unit may choose not to change its facing or its formation and to leave the EZOC.
7.6d An out-of-command combat unit (whether an independent unit or a unit that is part of a brigade but is outside the command range of its brigade leader) is penalized as follows:
- Its printed movement points are halved (rounded). It may change from its formation to square and vice versa.
- All the movement restrictions of 7.6c apply to the unit.
- It may not initiate a Close Combat attack in the friendly close combat phase (13.0). (It may, however, initiate an opportunity charge or a countercharge if circumstances arise.)
7.6e The conditions and effects of 'Out of Command' status for special leaders are defined in the game's Battle Rules.
7.6f The effects of command control last only for the duration of that command activation phase and no longer. 'Out of Command' effects are cumulative with all disorder effects except for the movement points of a combat unit that is both out of command and disordered; in that case they are only halved, not quartered. Being 'Out of Command' has no effect on a player's units' ability to react and they may perform opportunity fire, a defense reaction, an opportunity charge or a countercharge.
8.0 Formations
General: Each type of formation is characterized by the number of hexes it occupies, its facing, the number of Strength Points (SPs) it can contain and how it moves and fights. All infantry and cavalry units must be in one of the following formations at all times:
- LINE
- HOOK (crochet)
- SQUARE
- ATTACK COLUMN
- MARCH COLUMN
- SKIRMISH
- ROAD COLUMN
- GENERAL ORDER
- ROUTED
Involuntary formations: rout and general order are involuntary formations. Certain terrain types will force certain unit types into general order formation. Routed units automatically adopt the routed formation.
Artillery units: Artillery is limbered or unlimbered. Limbered artillery units may also be placed in road column formation.
Multi-hex formations: Units in certain formations must occupy more than one hex depending on the number of SPs involved. These are called multi-hex formations. Apart from road column, creating a multi-hex formation is always optional for the player owning the units, i.e. even if a formation has enough SPs to make a multi-hex formation, a player is not required to form that formation if he feels it is not advantageous. A formation that is defined as a single-hex formation occupies one hex.
Terrain: A terrain type in a hex may prohibit certain formations from being formed there. A terrain type in a hex or along a hexside may prohibit a formation type from entering the hex or crossing the hexside. Terrain also restricts the number of SPs that may be present and/or that must occupy the hexes of a formation. The 'Terrain Effects' table lists the formation SP limits for each terrain type.
8.1 Formation Details
Formations are illustrated on the various diagrams of the game such as the Formation Change diagram, the BAR formations, Fire Arc, ZOC & facing change diagram. Formation change costs may differ for each army and for each battle.
8.1a Line
Allowed for: infantry and cavalry. Size: single or multi-hex.
Infantry may form a line in 1 hex or in 2 hexes if there are enough stacked SPs to fill the minimum SPs required per hex. These requirements are found on the Infantry Line SP chart and may differ from one army to another depending on the number of ranks it uses to form a line. When the number of SPs in the formation exceeds the required minimum, the extra SPs in each hex must be distributed as equally as possible, without fractions, beginning with the hex on the right of the formation. (As illustrated in the Infantry Line SP chart provided in each game box.)
Cavalry may form a line of 2 or 3 hexes as long as there are at least 4 SPs per hex. The remaining SPs must be distributed as equally as possible beginning with the right side of the line.
A multi-hex line may be shown by using 'arrow' extension counters or by placing the unit counter straddling 2 hexes. Example: 12 cavalry SPs occupy up to 3 hexes and 8 SPs up to 2 hexes. 9 SPs in line over 2 hexes would have 5 SPs in the right hex and 4 SPs in the left hex. 14 SPs of line over 3 hexes would have in each hex (beginning with the far right hex): 5 SPs, 5 SPs, and 4 SPs.
Movement: The Movement Allowance (MA) for a unit in line equals the value on the counter. A stack composed of units in line with different MA values uses the lowest value. Whenever a multi-hex line moves different parts of itself in different terrain types, it pays the highest terrain cost. A line may extend and contract its length during movement (see 11.5).
8.1b Hook (Crochet)
Allowed for: Infantry. Size: Single or multi-hex formation.
Only infantry in line may form a hook formation, which allows the unit to increase its front by one additional hex at the front and side of the counter (right or left). All the conditions and restrictions that apply to a line also apply to the hook formation.
Movement: The MA for a unit in hook equals the value printed on the counter. A stack composed of several units in hook with different MA values uses the lowest value. A hook formation may move only into the front hexes marked 'MV' as shown on the BAR formation diagrams.
Whenever a multi-hex hook moves different parts of its formation in different terrain types, it pays the highest terrain cost. When infantry is in hook, all hex and hexside terrain costs are increased by 1. The hook has a limited ability to extend and contract its length during movement (see 11.5).
8.1c Attack Column
Allowed for: Infantry and cavalry. Size: A single-hex formation.
Movement: The MA for a unit in attack column equals the value printed on the counter. A stack composed of several units in attack column with different MA values uses the lowest value.
8.1d March Column
Allowed for: Infantry and cavalry. Size: Single or multi-hex, occupying 1 or 2 hexes for infantry and up to 3 hexes for cavalry.
March column resembles line, except that it has a different facing. The minimum SP requirement for a multi-hex march column is the same as for line. An infantry stack uses the Infantry Line SP chart to determine whether its SP total allows a multi-hex march column. A cavalry march column must have at least 4 SPs per march column hex. A march column may be shown on the map by placing the unit counter in the 'head' hex of the column and extension arrow counters in each following hex or by placing the unit counter straddling 2 hexes.
Movement: The MA for a unit in march column equals the value printed on the counter. A stack of units in march column that has units with different MA values uses the lowest value. Whenever a multi-hex march column moves (even to change facing, see 9.4a) and different parts of the column enter different terrain types, only the hex with the highest terrain cost must be paid; whichever part of the column occupies that terrain. However, hexside movement costs are paid by each part of the column that follows the head, i.e. the hexside cost is paid by each column hex crossing it.
8.1e Square
Allowed for: Infantry (An artillery unit cannot form a square, but it may stack in a hex with an infantry unit that is in square.) Size: A single-hex formation. There must be at least 3 infantry SPs in a hex to maintain a square.
Movement: A square can perform only one of the following actions in its movement phase:
- Move into an adjacent clear hex across a clear hexside.
- Change to line or march column.
To perform either of these actions, the square must not be disordered.
8.1f Road Column
Allowed for: Infantry, cavalry and artillery (see 8.1i and 10.4) Size: Single or multi-hex formation. A maximum of 4 SPs per hex may be in a road column formation. In a multi-hex road column, each hex of the column must have 4 SPs and any remaining SPs (1, 2 or 3) must be in the last rear hex of the column. Units in road column are laid out on the map in the same way as a march column but a 'ROAD COLUMN' marker is placed on the unit and extension 'arrow' counters are placed in each extension hex (if necessary). A road column may take as great a length as necessary to respect the 4 SPs per hex constraint. Generally, a road column can be formed by only one unit because of the 4 SP per hex limit. To place multiple units in one hex in road column, see road column stacking (10.11).
Facing: A road column has one front hex and one rear hex. Its number of flank hexes depends on its length. Each multi-hex road column has a 'column head' which is the first hex of the column and the one that creates the front hex of the formation for facing and ZOC. A multi-hex road column always has a 'column head' with four SPs and the last hex must have at least one SP. In a single-hex road column, the 'column head' and the last tail hex occupy the same hex.
Movement: The MA of a unit in road column equals the value printed on the counter. The road column need not be formed on a road and is not required to move only on road hexes. It may move off road as much as desired. A road column need not end its movement in a straight line; there may be as many bends as desired. However, when such a formation must turn during its move, each preceding part of the column must turn in the same hex as the one in which the column head turned.
8.1g Skirmish
Allowed for: Units with skirmish capability & skirmish-only units. (Translator's note: the term is not translated throughout this document because it is found in the game's multiple calculation and check tables.) Size: A single-hex formation. Movement: The MA equals the value printed on the unit's counter.
If a BAR game box includes units with skirmish capability and/or skirmish-only units, the Battle Rules identify these units and present their characteristics in detail. Skirmish-only units cannot change formation, except to rout, and when they rally, they must be placed in skirmish formation.
- Units with skirmish capability may adopt any formation that is legal for their unit type, infantry or cavalry, including skirmish formation. Artillery units may never use skirmish formation.
Throughout these rules, the term 'skirmisher' refers to an infantry or cavalry unit that is in skirmish formation.
8.1h General Order
Allowed for: infantry Size: A single-hex formation. Movement: A unit in general order may perform only one of the following actions in its movement phase:
- Move into an adjacent hex. If the hex entered does not require general order formation the unit automatically changes its formation (see 8.1i), otherwise it remains in general order; or
- Make a facing change in any direction (see 9.3b).
Being disordered and/or 'Out of Command' does not affect a unit's ability to perform either of these actions.
8.1i Limbered Artillery
Limbered artillery is the formation that corresponds to an infantry/cavalry march column. The terms 'limbered' and 'march column' may be applied to artillery interchangeably. Size: Occupies a single hex unless it is in road column, in which case there must be only 1 SP per hex (see 10.4g). Movement: The MA equals the value printed on the unit's counter.
8.1j Unlimbered Artillery
Size: A single-hex formation. Movement: Movement is only by prolonge (see Artillery Prolonge Movement 11.6).
8.2 When to Change Formation
8.2a In the movement phase, units change formation voluntarily by expending MPs (Movement Points). A formation change costs a unit some or all of its MPs. A unit may change its formation any number of times during its movement phase provided it has enough MPs for each change. MP expenditures due to formation changes are always based on the unit's MA for the current movement phase.
8.2b The exception to the above occurs when an infantry unit moves into a terrain type that makes it automatically change to general order. This happens regardless of the MPs already expended in the movement phase and it ends the unit's movement.
8.2c In the fire and close combat phases, units change their formation both voluntarily and involuntarily. During defender reaction, units may change their formation, with certain restrictions, in reaction to enemy cavalry movement. These formation changes are voluntary and do not expend MPs, but require the unit to make a Disorder Check (D). Combat results may involuntarily change a unit to rout and a unit in square may involuntarily revert to line.
8.2d In the rally phase, a unit that succeeds in its rally automatically changes formation from rout to any other single-hex formation valid for its type (8.4k).
8.3 Formation Change Prerequisites
8.3a The BAR formation diagrams show the various links between formations. When two formation types are connected by an arrowed line, a formation change can take place between them. If they are not connected then the formation must first be changed to an intermediate formation that is connected.
8.3b Skirmish and general order can be formed from any formation, but only for units eligible for these skirmish and general order formations.
8.3c Artillery may unlimber only from march column; artillery must be in march column (i.e. limbered) to form a road column.
8.3d An extension, contraction or realignment done in conjunction with a formation change (such as a 2-hex march column that changes to a one-hex line) is considered part of the formation change (i.e. it is a different concept from rule 11.5a).
8.4 Formation Change
Sections 8.4 and 8.6 detail the permissible formation changes and the method for performing most of them under certain circumstances. Section 8.7 details a different procedure used for certain formation changes (those marked with an asterisk '*'), depending on whether the hex or hexside occupied or crossed by the unit(s) at the start, at the end, or during the formation change is non-clear terrain (the Battle Rules define non-clear terrain types).
8.4a Road Column to March Column * (infantry & cavalry)
There are four requirements for changing from road column to march column:
- The new march column must be formed in a straight line according to the march column formation diagram.
- The new march column must be formed in hexes already occupied by the road column, but the march column need not occupy all the original hexes of the road column.
- The column head of the new march column must be in the same hex as the column head of the road column.
- The new march column may not be longer than the road column.
The length of a march column may not exceed 2 hexes for infantry, and 3 hexes for cavalry. The length of the march column may be the same length as or shorter than the road column.
Formation change cost: The basic formation change cost from road column to march column is 1 Movement Point (MP) for each hex of difference between the road column and the march column, with a minimum of 1 MP.
Since a road column is not restricted to being in a straight line, there is a special formation change cost for 'twisted' road columns that change to march column: each hex of road column that is not aligned with the head of the march column (i.e. that is not in the same row of hexes as the column head) will cost 2 MPs instead of 1.
Example: A 9-SP cavalry road column occupies hexes A, B and C with two hexes of 4 SPs and one hex of 1 SP. The unit changes to march column and occupies the 2 hexes A and B. This change costs 2 MPs because hex C is not in the extension of column head A. If the unit had changed its formation to occupy only hex A, the cost would have been 3 MPs (2 for hex C and 1 for hex B). If the unit had originally occupied hexes A, B and D the cost to form a 2-hex march column in A and B would have been 1 MP, or 2 MPs if the march column occupied only hex A at the end of the change.
8.4b March Column to Road Column * (infantry & cavalry)
A march column changes to road column by placing a 'ROAD COLUMN' marker on the unit if it is a single-hex road column. If it is a multi-hex road column place the marker in the last hex of the formation, and 'arrow' markers on the other parts of the formation showing the column head hex, or place the 'ROAD COLUMN' marker on the column head and use extension arrow counters in each following hex. A unit in march column is required to increase the number of hexes it occupies when it changes to road column in order to satisfy the 4 SP stacking per hex restriction (see 8.1f). The formation change cost is: 1 MP plus 1 MP for each hex of difference in length between the march column and the road column.
Example: A 4-SP march column changes to road column simply by placing the 'ROAD COLUMN' marker on the unit and expending 1 MP. A 12-SP cavalry unit in march column over 3 hexes changes to road column over 3 hexes by placing a 'ROAD COLUMN' marker on the unit and expending 1 MP. If that same cavalry unit in march column occupies only 1 hex, the change to road column over 3 hexes requires it to extend its length by 2 hexes (by placing the two extension arrow counters to match the stacking limits of the road column). The MP cost will be: 1 for the initial change plus 2 additional MPs--the difference in length between march column and road column--for a total of 3 MPs.
8.4c March Column to Line (and vice versa) * (Infantry & Cavalry)
Since the front of the column faces a hexside and the front of the line faces a hexpoint, this formation change involves a facing change and vice versa. The cost of this reorientation is included in the cost of the formation change. The length of the formation may also be changed simultaneously with the formation change, i.e. the resulting formation may be longer or shorter than the starting formation. To do so, first make the formation change and then extend or retract the desired hexes. This change in length is part of the formation change and is not considered an 'extension' or a 'contraction' under rule 11.5.
The cost to change from march column to line and vice versa is shown on the formation change diagrams in the sheets of each game. To use these diagrams, select the appropriate formation change diagram and the new facing desired by the unit on the map. The number shown is the MP cost for the desired formation change.
The formation change cost is the cost shown on the formation change diagram plus 1 MP for each hex of difference in length between the two formations, if any.
Example: A 1-hex cavalry march column changes to a 3-hex line by turning right. The formation change cost would be 3 (the cost of making a facing change to the right), plus 2 (the difference in length) for a total of 5 MPs.
8.4d March Column to Attack Column * (Infantry & Cavalry)
Attack column is formed from a single-hex march column by changing the facing of the march column toward one of the two hexpoints adjacent to the front hexside of the march column. An 'ATTACK COLUMN' marker is placed on the formation. (To avoid confusion with a line formation.)
An attack column formed from a multi-hex march column is formed in the head hex of the march column and has an additional formation change cost as noted below.
The formation change cost is 1 MP plus 1 MP for each hex of difference in length between the two formations, if any.
8.4e Attack Column to March Column * (Infantry & Cavalry)
To change from attack column to a one-hex march column, change the 'column head' of the march column to face one or the other hexside adjacent to the front hexpoint of the attack column.
To change from attack column to a multi-hex march column, the 'column head' must face one or the other hexside adjacent to the front hexpoint of the attack column and must be the hex occupied by the attack column.
The MP cost of the formation change is: 1 MP plus 1 MP for each hex of difference in length between the two formations, if any.
8.4f March Column or Line to Square (Infantry)
When forming a square from a march column, the square is placed in the column head hex. When forming a square from a 2-hex line, the square may be placed in either hex of the line. Disordered units cannot form a square, but 'Out of Command' units and units in an EZOC (Enemy Zone Of Control) can form a square.
The MP cost of the formation change is: the unit's entire MA (Movement Allowance).
8.4g Square to March Column or Line (Infantry)
When forming a 1- or 2-hex march column from the square, the column head must be the hex occupied by the square and it may be oriented in any direction. When forming a line from a square, the line may be oriented in any direction. A 2-hex line formed from a square must have one of its hexes identical to the one originally occupied by the square.
The MP cost of the formation change is: the unit's entire MA.
If a square formation falls below the minimum of 3 SPs, it immediately changes to a single-hex line formation (facing at the choice of the player owning the unit) and it suffers automatic disorder. If it is already disordered, it becomes shaken/disordered.
8.4h Changes to Skirmish (Infantry & Cavalry)
Skirmish capability: A unit with skirmish capability may change from its skirmish formation to any other single-hex formation valid for its unit type. The new formation may be oriented in any direction.
A unit with skirmish capability may change to skirmish from any single-hex formation by placing a 'SKIRMISH' marker on the unit. The newly formed skirmish unit may be oriented in any direction.
The MP cost of the formation change is: 1 MP.
Skirmish-only: These units may only be in skirmish formation except when routed; and must revert to skirmish when they rally. There is no MP cost for this.
8.4i Changes to General Order (Infantry)
A unit is required to change to general order when it enters a hex for which the terrain type requires general order (Exception: units in rout or skirmish formation do not change to general order). These terrain types are listed on each game's terrain effects chart. This is the only occasion on which a unit changes to general order. The unit's movement ends when it changes to general order regardless of its remaining MPs.
If one hex of a multi-hex infantry formation enters terrain that would require a change to general order, the entire unit must adopt general order.
Changing from general order to another formation requires the unit to enter a hex that does not require general order. The unit must begin its movement phase adjacent to that hex and it performs its formation change in that hex (Exception: Advance after combat of a unit in general order, 15.2). This change ends the movement phase for that unit. A general order formation must change to any single-hex formation and any facing that is valid for the terrain in the hex it is entering.
The MP cost of the formation change is: the unit's remaining MA.
Example: The hex with buildings requires general order. ANG could move to A and remain in general order or move to B or C and change to a single-hex formation and face in any direction. COR could move to D, E, or F, adopting a single-hex formation and a facing in any direction. It would take two activations for any unit to occupy G--one to change facing and one to move.
8.4j Hook to Line (Infantry)
A unit in hook formation may only change its formation back to line and a unit must be in line formation to adopt a hook formation. The cost to change from one to the other is 1 MP. Only one end of the line may go to 'hook'. A single-hex or multi-hex line may change to hook but the line/hook cannot change its length with this change.
The MP cost of the formation change is: 1 MP.
8.4k Non-Routed Formation to Rout Formation (and vice versa) (Inf & Cav)
Units that rout immediately change to rout formation, before they retreat. If it was a multi-hex formation, the formation reduces to one of the hexes it occupied before the rout (see also 19.7e). A routed unit that rallies adopts any single-hex formation that is valid for its unit type, i.e. no multi-hex line, march column, or road column. A rallied unit may adopt any facing valid for its new formation.
8.5 Unit Breakdown & Reformation
The Battle Rules of each game box identify the units that can break down into smaller component units. The capabilities of component units are also defined in the Battle Rules. A unit that can break down is called a 'parent' unit and it will have at least two component units. Component units have the same identification as their parent unit printed on their counters. Component units of the same parent may combine to re-form the parent unit. The parent unit and its components can never be on the game map at the same time. Breakdown and reformation are formation changes and may trigger opportunity fire (12.8) and opportunity charge (17.0).
8.5a Breakdown: In its movement phase an activated parent unit may break down into component units if it:
- Is in command
- Is not disordered or routed (it may be shaken)
- Is not stacked with another combat unit
- Is not in an Enemy Zone of Control (EZOC, see 9.1)
- Is in line or march column (single-hex or multi-hex)
- Has not expended any of its MPs in this movement phase
- Has more than 50% of its printed SPs remaining.
The parent unit is removed and the component units are placed (stacked) in the hex of the parent unit with the same facing/formation. If the components are skirmisher units and their stack exceeds the skirmisher SP stacking limit per hex, they have until the end of the movement phase to correct the excess. If this is not possible the breakdown is not allowed.
The total SP value of the component units must equal the current value of the parent, distributed as equally as possible. If the parent unit has suffered losses, e.g. if a parent unit with an original SP value of 6 SP has suffered 2 SP losses, only 4 SPs worth of component units will be placed on the map. Partial breakdowns of parent units are not allowed.
Parent unit breakdown costs the component units no MPs, so after being placed on the map the component units may expend their full MPs.
8.5b Reformation: In their movement phase, all activated components of the same parent may re-form the parent unit if:
- they are in command.
- they are not disordered or routed (they may be shaken).
- they are stacked (i.e. they must have the same facing and the same formation) in the same hex (Exception: see skirmisher unit reformation below).
- they are in line or march column (single-hex or multi-hex), (Exception: see skirmisher unit reformation below).
- they are not stacked with a combat unit that is not a component of their parent unit.
- they are not in an EZOC.
- they have not yet expended any of their MPs this turn.
- The sum of their current SPs is greater than 50% of the SP value printed on the parent counter.
Roll 2 D10, one designating the units and the other the tens, for all the component units together, i.e. a single roll in total, not a roll for each unit. If the result is equal to or greater than the worst Effectiveness Rating (ER) (thus the highest value) of all the units involved, remove the component units and place the parent unit in their hex with the facing/formation of the components. The parent's SP value must equal the total current value of the components. After being re-formed the parent unit may use its full MPs in the movement phase, i.e. it pays no MP cost for this reformation.
If the attempt fails, there is no effect, except that another reformation attempt may not be made in this movement phase. The component units may continue to use their full MPs in the current movement phase.
8.5c Skirmisher Unit Reformation: Use the same requirements as for regular reformation in 8.5b except that point (4) does not apply since components can only be in skirmish and the following is substituted for point (3): 3) All skirmisher units must begin the movement phase adjacent to a common hex which must not be occupied except by one of the skirmisher units reforming. The common hex may not be in an EZOC, must be a terrain type permitted for line or march column and with a legal SP stacking limit per hex for the reformed parent unit. Use the same procedure as for regular reformation and, if successful, all the component skirmisher units are removed and the parent unit is placed in the common hex with an SP value equal to the total SPs of the component units. The reformed parent unit may be in line or march column and may have any desired facing. A failed attempt is treated as a failed reformation (8.5b).
Example: Three skirmisher units try to re-form. Their individual ERs are '31', '32' and '33'. If the die roll is between '33' and '99' the reformation attempt succeeds. The attempt fails if the die roll is between '00' and '32'.
8.6 Artillery Formation Changes *
8.6a Changing from the 'limbered' state to the 'unlimbered' state is considered a formation change. In addition, an activated artillery unit that fired in the fire phase may not limber in the following movement phase. See artillery prolonge movement (11.6) for the movement capabilities of unlimbered artillery.
8.6b Artillery that limbers or unlimbers in a hex not occupied by other units may face in any direction at no additional cost. Artillery that unlimbers in an occupied hex must conform to the facing of the unit already present in that hex. Artillery that limbers in a hex occupied by infantry may face in any direction and must leave the hex. Artillery that limbers in a hex with other limbered artillery may face in any direction if it intends to leave the hex but must conform to their facing if it decides to remain in the hex (see stacked artillery 10.4). This formation change costs: 2 MP.
8.6c Changing limbered artillery to or from road column is done in the same way as changing infantry or cavalry march column to road column (see 8.4a and 8.4b).
8.6d If a limbered artillery unit is too large to make a formation change to road column (such as a 4-SP unit that has 3 MA), it may nevertheless make this formation change but it will cost it all its MPs. This change cannot be made if the unit is disordered, but it can be made when the unit is out of command, in an EZOC, or in non-clear terrain.
8.7 Formation Change in Non-Clear Terrain
If a unit performs any formation change marked with an asterisk (*) in sections 8.4 and 8.6 and occupies or crosses a hex/hexside that is considered non-clear terrain, this is the only thing it will be able to do in its movement phase--all the MPs the unit expends (its total MPs) constitute its entire movement. However, movement points are still calculated (including +1 for an EZOC and all extension/contraction costs--see 8.3d) and if the cost requires a rapid march, then the corresponding modifier for check (A) will be applied after the formation change. To make a formation change in non-clear terrain, a unit must not have expended MPs before the change and may not be disordered.
9.0 Orientation
All combat unit counters have a specific facing, i.e. the way they are oriented on the map. The hexes surrounding the unit are defined as front, flank or rear depending on the formation type. The BAR formation diagrams show these different hex types for each formation.
9.1 Zone of Control (ZOC)
All non-routed combat units exert a zone of control (ZOC) in their front hex (see the BAR formation diagrams). A unit may perform fire and a close combat attack only through its front hex. A unit may be fired upon and engaged in close combat from any side.
Enemy ZOCs (EZOC) cost friendly units 1 additional MP to enter. Facing/formation changes in an EZOC cost a unit 1 additional MP. Friendly units do not cancel the effects of an EZOC (see 11.9 for the effects of EZOCs on movement).
A facing/formation change that requires all of a unit's MPs may always be made in an EZOC, but only if the unit performs no other action that uses MPs during the movement phase.
9.2 When Facing Changes May Occur
Some facing changes occur automatically during a formation change and these formation changes include the facing change costs. Units may also change their facing independently of a formation change at any time during the movement phase by expending MPs. A unit may make as many facing changes during a movement phase as it has the required MPs for. If a unit lacks the MPs needed to completely perform a facing change, it may not make that change.
All facing changes may trigger opportunity fire/charge.
9.3 Single-Hex Formation Facing Change
9.3a The facing change costs for single-hex formations (except general order) are shown on the BAR formation diagrams.
9.3b General order: A unit in general order may only make one facing change, but in any direction of its choice, in its movement phase. The change consumes the unit's entire MA for that movement phase.
9.3c Attack column: An attack column that changes its facing at any time during its movement must make a Disorder Check (B) before making the facing change. If it fails, it does not make the facing change, it ends up disordered and its movement is over. A failed facing change attempt does not trigger opportunity fire or charge.
If a failed attack column facing change forces it to end its movement stacked with non-moving units and they cannot form a valid stack, the attack column routs and the non-moving unit must make a Morale Check (F). See illegal stacks (10.13).
9.4 Multi-Hex Formation Facing Change
A facing change for a multi-hex march column or a line requires movement of part of the formation and all movement costs and terrain prohibitions must be taken into account with the facing change cost.
Except for the road column formation, multi-hex formations that make facing changes must end their movement phase in a straight line, i.e. without gaps or bends. (Translator's note: the formation must be rectilinear.) A unit cannot make a facing change if it lacks the MPs needed to end the movement phase in a straight line.
9.4a March/road column: A facing change of a multi-hex march/road column is performed by turning the column head by the desired number of hexsides (paying the appropriate facing change cost listed in the single-hex facing change cost diagram) and advancing one hex, paying the appropriate terrain movement cost. Each hex of the column behind the column head advances and turns once it reaches the same hex in which the column head turned. The march/road column pays only the facing change cost for the column head hex but not for the following hexes of the column.
Example: A 2-hex march column changes its facing by combining the facing change in hex B with a move into hex C. The total cost is the cost of making a 1-hexside facing change in B plus the terrain value of C.
Note: A road column does not pay for any facing changes when it moves from a road hex (as defined by the game's Battle Rules) to another contiguous road hex and all hexes occupied by the unit are contiguous road hexes, i.e. all the unit's hexes advance along the same road.
9.4b Line: A multi-hex line changes its facing by wheeling around one of its end hexes, i.e. the last hex on either side moves while the other side remains fixed and serves as the pivot.
The costs of this wheel are calculated as follows: a) Pay the appropriate facing change cost as listed in the single-hex facing change cost diagram. (Translator's note: it is the pivot hex that defines the number of hexpoints for the facing change.) b) Plus 1 MP for each hex entered by the end hex of the line. c) Plus the MP cost for each non-clear terrain hex entered and each hexside crossed (any terrain that triggers a Disorder Check (A) applies here too because the wheel is a form of movement (see 11.2d)). The line's pivot, the non-moving hex, is not added to the terrain costs.
Example: A 12-SP cavalry line stacked over 3 hexes (hex A-B) wheels 1 hexpoint to hex A-C. Assuming that all hexes between the start and end position are Clear terrain, the MP cost would be 3 MPs (1 for the one-hexpoint pivot in hex A and 1 for each of the 2 hexes moved by the end of the line opposite the pivot). If hexside D is a slope the cost will be 4 MPs to make this wheel (one additional MP for the slope hexside).
9.5 Artillery Facing Changes
An unlimbered artillery unit may change its facing to face each of the 6 vertices of its hex during the movement phase, but only if it did not fire in the preceding fire phase. It may not, in the same movement phase, change its facing and move by prolonge (11.6).
Facing changes of limbered artillery in march column follow the same rules as infantry in march column, and limbered artillery in road column follows the rules of infantry in road column (9.4a).
9.6 Reversing Direction (Front)
9.6a Road/march/attack columns and lines (not hooks) are allowed to reverse their direction of march, i.e. they may reverse their facing by 180 degrees. The unit must not be disordered and may not use rapid march (11.4). If a unit reverses its direction, this is the only action it can perform in its movement phase, i.e. it must not have expended other movement points before reversing its direction and may not expend any afterward.
9.6b Multi-hex march/road columns reverse their direction by swapping the last hex and the column head hex. Multi-hex lines and single-hex formations simply change their facing by 180 degrees. Limbered artillery reverses direction like a column and unlimbered artillery like a line. Reversing direction is not affected by any terrain.
9.6c A road column that reverses its direction has its strength points automatically redistributed along its length to make the formation valid (8.1f). (Translator's note: so that the last hex has the remainder of the SPs after distribution.)
9.7 Hook Facing
(Printed as a second "9.6" in the French translation; numbered 9.7 in its table of contents.)
A hook formation cannot change its facing. It must first revert to line to change its facing and possibly return to hook afterwards.
10.0 Stacking
When a unit enters a hex containing a friendly unit, it has the option of ending its movement in that hex and forming a stack (or contributing to an existing stack) or it may continue its movement and leave the hex. There is no additional movement point (MP) cost to enter or leave an occupied hex. However, the moving unit must satisfy the stacking requirements relating to its unit type in order to legally stack with the non-moving units. It may be necessary for the moving unit to expend additional MPs in the occupied hex to satisfy these stacking requirements (e.g. a moving unit might have to make a facing or formation change).
Stacking requirements apply only at the end of a unit's movement. A moving unit is not subject to the stacking requirements either to enter or to leave an occupied hex in the same movement phase although a movement Disorder Check (A) may be required at the end of its movement (see Interpenetration 10.7).
10.1 General Stacking Restrictions
10.1a A unit may not enter an occupied hex if it lacks the MPs needed to form a valid stack to end its movement in the hex and also if it lacks MPs to leave the hex.
Example: A unit wants to expend its last MP to enter an occupied hex but to satisfy stacking needs it requires an additional MP to make a facing change. As it cannot end its movement in the hex and lacks the MPs to go into an adjacent hex, the unit cannot enter the occupied hex.
10.1b Opposing units may never occupy the same hex. This is the only stacking restriction that applies at all times during a unit's movement.
10.1c The SP (Strength Point) stacking limits per hex given in the terrain effects chart (TEC) may not be exceeded when a unit ends its movement, although they may be exceeded as long as the unit is still moving. The stacking limits included in the TEC of each game box define how terrain and formations limit the number of SPs that can be stacked in a single hex.
10.1d All units in a stack must have the same facing (the exception: unlimbered artillery stacked with a square formation) and must occupy the same hex (or the same hexes in the case of multi-hex formations).
10.1e All units in a stack must be in the same formation. Infantry and artillery stacks must be in compatible formations.
10.1f Routed and non-routed units may not stack together.
(Illustration in the original: examples of illegal stacking. The units in the figure are not in the same formation and/or do not all occupy the same hex.)
10.2 Cavalry Stacking
10.2a A cavalry unit may not stack in a hex with artillery or infantry units.
10.2b A cavalry unit may stack in a hex with another cavalry unit only if it ends its movement with the same facing/formation as the non-moving unit and occupies all the same hex(es).
10.3 Infantry Stacking
10.3a An infantry unit may not stack with a cavalry unit.
10.3b An infantry unit may stack with other infantry and/or an artillery unit.
10.3c An infantry unit may stack with an infantry unit only if it ends its movement with the same facing/formation as the non-moving infantry unit and occupies all the same hex(es).
10.3d An infantry unit may stack in a hex occupied by an unlimbered artillery unit only if the infantry ends its movement in line, hook, attack column or square. Moving infantry in line, hook or attack column must have the same facing as the non-moving unlimbered artillery in the hex in which it stacks.
10.3e An infantry unit may stack in a hex occupied by a limbered artillery unit only if the infantry ends its movement in march column and with the same facing as the limbered artillery.
10.4 Artillery Stacking
10.4a An artillery unit may not stack with cavalry; it may only stack with infantry and/or other artillery units.
10.4b Limbered artillery may stack only with other limbered artillery and/or infantry in march column and must have the same facing as the non-moving units.
10.4c (The French translation has no separate 10.4c label; the following text appears between 10.4b and 10.4d.) Limbered artillery may enter a hex containing infantry in line, hook, attack column or square but may end its movement only if it has enough MPs left to unlimber in that hex. Unlimbered artillery may only stack (when it unlimbers in a hex or when it enters a hex using prolonge movement) with other unlimbered artillery and/or infantry in line, hook, attack column or square. Unlimbered artillery that enters or unlimbers must have the same facing as the unlimbered artillery, line, hook or attack column that is not moving and is present in the hex. Unlimbered artillery stacked with a square may face in any direction.
10.4d An unlimbered artillery unit that is stacked with a multi-hex line/hook formation is not placed on any particular hex of the formation--it is placed just above or below the infantry counter. When unlimbered artillery is stacked with a square, it must be the top unit of the stack (see stacking order 10.6).
10.4e If multi-hex line/hook infantry containing unlimbered artillery leaves the hex (whether by movement, contraction, losses, etc.), the unlimbered artillery is placed in any of the original hexes of the multi-hex formation.
10.4f Artillery may limber in a hex containing infantry, but must have enough MPs to leave the hex.
10.4g Each artillery SP (limbered and unlimbered) equals 4 SPs in the following circumstances: a) When stacked with infantry to determine the stacking limit b) When in road column c) To determine the target size modifier when firing.
10.4h When stacks of infantry and artillery are required to make disorder and morale checks, the ER of the top infantry unit is always used for these checks.
10.5 Stacked Leaders
10.5a There is no limit to the number of friendly leaders that may be stacked in a single hex but only one of them will affect all the combat units with which he is stacked.
10.5b A leader may stack with any type of friendly unit. Leaders do not affect stacking limits and they do not affect the facing/formation requirements for stacking either. Leaders may move and stack with each other. They need not be stacked with a combat unit.
10.6 Stacking Order
10.6a In a stack of combat units (especially for an artillery and infantry stack), the arrangement of the unit counters in the stack is important for determining disorder/morale checks (see 18.1 and 19.1), as well as fire strength and losses.
10.6b In a stack consisting only of infantry, the SPs of the top unit are those used for fire. If there are more SPs that can fire than are contained in the top unit, the next SPs are taken from the unit below and so on until the number of SPs eligible for fire is reached.
10.6c When a stack is required to lose SPs due to fire, the top unit in the stack takes the losses first (exception: stacked infantry and artillery 12.9g). If the top unit loses all its SPs (eliminating it), any remaining SP losses are applied to the next unit and so on, until all the losses have been distributed or until all the units in the stack have been eliminated.
10.6d When artillery is stacked with a square, it must be the top unit of the stack. Artillery stacked with a square affects the square's fire capability (see 12.4d).
10.6e When artillery is stacked with infantry in line, hook or attack column, the artillery unit must be on the top or on the bottom of the stack. It may not be placed between the infantry units in the stack. If at least two artillery units are stacked with the infantry, the artillery units may be placed at the top and bottom of the stack, or all on top, or all on the bottom. The position of the artillery in a stack determines whether or not it can fire (see 12.4b).
10.6f During their movement phase the units of an activated brigade may voluntarily change their stacking order before expending MPs and also once their movement is complete. Once a stack begins to expend MPs, it may not voluntarily change its stacking order until it stops moving.
10.6g In the end of pursuit step (16.2c), cavalry stacks that have pursued may voluntarily reorder their stacking.
10.6h Units need not be in command to change stacking order. It costs no MPs and is not considered a facing or formation change. It is permitted to mix active and inactive units in a stack. Changing stacking order does not trigger opportunity fire or charge, does not cause disorder checks and is not considered an interpenetration situation (10.7).
10.6j Stacking order changes involuntarily if a stack designated for a close combat attack contains inactive units and/or artillery. Inactive units and artillery are automatically moved to the bottom of the stack (see 13.1c).
10.7 Interpenetration
10.7a During a unit's movement, interpenetration can occur only when it enters and leaves a friendly occupied hex. An interpenetration takes place in a hex between a non-moving unit or stack and a moving unit or stack if any of the cases listed below occurs:
- The units were of different types.
- The units had different facings.
- The units had different formations.
- The units were of the same type with the same facing/formation but the hex's stacking limit for that type was exceeded.
- The units are in different organization states, i.e. in Order and in Disorder.
- A non-routed unit passes through the hex of a routed unit. (The reverse case, when a routed unit passes through a non-routed unit, requires a morale check (F)--see rule 20.2b.)
At the end of the moving unit's movement phase, a Disorder Check (A) is required for both the moved unit and for any stationary unit/stack that was interpenetrated.
10.7b Each of the following situations is not considered an interpenetration and does not require a disorder check:
- When an infantry unit in line enters and leaves a hex containing another infantry unit in line regardless of facings provided it did not change facing in the occupied hex.
- When a skirmisher unit (infantry or cavalry) enters and leaves a friendly occupied hex; the type of the non-moving unit, its formation or its facing, etc. are disregarded.
- When a unit performs retreat movement through a friendly occupied hex. The non-moving unit is required to make a morale check (F) when the retreat movement is finished (see 20.2b). This is also the case when an illegal stacking situation occurs in a hex (see 10.13d) and causes the moving unit to rout.
- When a unit ends its movement creating a permitted stack in a hex, regardless of the facing/formation it had before entering the hex.
- When a stack separates (see 10.8) even if the moving unit changes facing/formation before leaving the stack's hex.
10.7c The Disorder Check table contains a list of several interpenetration cases that cause movement action disorder checks (A) and examples for each case. Note that the examples are not necessarily all included and there may be other variants of certain cases.
10.8 Stack Separation
10.8a A stack may be separated (unstacking) during the movement phase by having one or more of the units perform a formation change, a facing change or just a move while other units in the stack remain stationary. When the separating unit (or stack) has completed its movement, the remaining units are free to perform their movement phase.
10.8b At the end of a cavalry pursuit, the cavalry stack must separate if it exceeds the SP stacking limit (see end of pursuit 16.2c).
10.8c A stack is allowed to separate by leaving units behind during its movement but any unit that was moved at least one hex with a stack and that is left on the stack's path has its movement phase ended.
10.8d A multi-hex line or march column that separates is required to adjust its length if enough SPs leave the original stack. This adjustment takes place automatically at the instant the moving unit(s) leave the hex of the original stack. This automatic contraction costs no MP to any unit.
Example: Two 4-SP infantry units make up a 2-hex line. One unit moves while the other remains stationary. If a 2-hex line requires at least 5 SPs then each unit will adapt automatically and immediately change from 2 hexes to 1 hex.
10.8e A stack is considered 'separated' not only at the moment when part of it leaves the stack's hex, but also at the instant when part of the stack changes its facing and/or formation while still in the same hex. This is important to determine when opportunity fire (12.8) and opportunity charge (17.0) may be triggered.
10.9 Different Brigades
Units of different brigades may stack together. Independent units may stack with a unit belonging to a brigade and also with other independent units. When units of different brigades are stacked it is important to note that a separation would be necessary for the units of an active brigade during a stack's movement, unless there is a leader in the stack who can attach the other units to the active brigade.
10.10 Morale / Organization
When units in different morale/organization states end a movement phase stacked, the entire stack is assumed to have the worst morale/organization state in the stack. For example, when shaken and non-shaken units are stacked at the end of a movement phase, the entire stack is shaken, even if the previously non-shaken units have not yet been activated. If a stack separates later in a movement phase, the activated units will have the same morale and organization state as the stack.
10.11 Road Column Unit Stacking
10.11a Because of the stacking limit of 4 SP per hex, different units in road column cannot stack (see road column 8.1f). There are two exceptions to this:
- In a single hex, a stack of units in road column may be formed by units if the stack contains no more than 4 SPs. Example: A single-hex road column could be formed by four 1-SP units, two 2-SP units, or one 3-SP unit and three 1-SP units.
- A multi-hex road column stack may be formed if all units belong to the same regiment. The units are stacked in the 'column head' (first) hex and the length of the column is determined by the total number of SPs of the stack. Such a stack cannot be formed in road column if the cost to do so (see 8.4b) exceeds the stack's basic (printed) MA. Example: A single-hex march column made up of two 6-SP infantry battalions belonging to the same regiment can change its formation into a stack to create a 3-hex multi-unit road column, which will cost 3 MPs. If the two units belonged to different regiments, they would have to unstack and form two separate 2-hex road columns. A march column made up of 3 infantry units of 6 SP belonging to the same regiment cannot change its formation to road column because the cost to do so would be 5 MPs and their basic (printed) MA is 4. (Translator's note: 18 SPs to distribute as 4-4-4-4-2 SP per hex, i.e. 4 MP for the difference in changing from march column to road column, +1 for the cost of the change, i.e. 5 MP whereas the MA is 4.)
10.11b SP losses from fire and close combat suffered by a multi-unit multi-hex road column are always applied according to the SP loss rules (fire results (12.9) and close combat (14.2)) regardless of the road column hex attacked. Disorder and morale checks are always made using the top unit in the stack regardless of the road column hex that triggered them.
10.12 Stack Facing/Formation Changes
10.12a During the movement phase, a stack of activated units may make formation or facing changes as a single unit (i.e. it need not make individual unit formation/facing changes), provided it begins its movement as a stack and the units all do the same thing, or, in the case of infantry/artillery stacks, that the formation/facing changes are compatible.
10.12b Units of a stack that make a formation/facing change are not required to end their movement stacked, i.e. after the formation/facing change, some units may continue moving while others in the stack end their movement.
10.12c A mixed infantry/artillery stack can make a stack formation/facing change only when the artillery and infantry formations are compatible (see stacked artillery 10.4).
Example: An unlimbered artillery unit stacked with an infantry unit in line can make an entire-stack formation change to limber the artillery and put the infantry in march column, or the artillery unlimbered and the infantry in square. If the artillery limbers while the infantry forms square, the artillery must leave the hex.
10.13 Illegal Stacks
10.13a An illegal stack occurs when a unit ends its movement in a friendly occupied hex and exceeds the general stacking limit and/or the limit for its unit type. An illegal stack can only occur involuntarily because a unit cannot enter an occupied hex if it lacks the MPs required to satisfy stacking needs or continue its movement to leave the hex.
10.13b An illegal stack occurs in the following cases:
- When an attack column fails its facing change (9.3c) in an occupied hex and the resulting stack does not comply with the stacking rules. The moving attack column is routed and the non-moving unit must make a Friendly Unit Retreat morale check (F).
- When a unit's movement is stopped in an occupied hex as a result of a disorder check due to opportunity fire (18.2d), or the combat result of an opportunity charge (17.3d), or when a skirmisher unit fails its EZOC entry roll (11.9c) and the resulting stack does not satisfy the stacking rules. The moving unit is routed and the non-moving unit must make a Friendly Unit Retreat morale check (F), unless the unit that routs is a skirmisher unit (see 20.2b).
- At the end of a cavalry pursuit, when the pursuing cavalry stack does not satisfy the stacking rules. The pursuing cavalry stack is automatically separated and occupies an adjacent hex (see the end of pursuit step 16.2c).
10.13c When the rout retreat is applied to the moving units of an illegal stack the non-moving units are considered to be passed through by the units in rout retreat, causing a morale check (F) unless the routed unit is a Skirmisher unit (see 20.2b No. 1).
10.13d An interpenetration does not occur and there is no movement action disorder check (A) to make when a moving unit enters an occupied hex and the unit routs because of an illegal stacking situation.
11.0 Movement
In a brigade's movement phase, the active player may move all, some or none of the units belonging to that brigade, together with any off-brigade leaders or attached independent combat units that are activated with that brigade.
A unit moves as many hexes as desired, limited by the number of movement points (MPs) available in its movement allowance (MA) for a movement phase. A unit's unmodified MA equals the number printed on its counter (see the counter designation in the game rules).
A unit's MA is modified:
- When a unit is disordered or out of command its MA is halved (rounded). The MA of a unit that is disordered and out of command is not divided by four, but only halved.
- When a unit uses rapid march (11.4) its MA is increased by 50% (drop fraction).
The reactive player's units do not move during the active player's movement phase (Exception: opportunity charge 17.0). The only combat that can occur during the movement phase is opportunity fire (12.8) and opportunity charge, both of which are initiated by the non-active side.
11.1 Movement Procedure
11.1a Move each unit individually or as a stack, counting the MPs expended from hex to adjacent hex. A unit can only move into one of its front hexes (the exception: line retreat movement 11.7 and skirmisher retreat movement 11.8). It can change its direction only by first making a facing change (including the wheel movement for line formations). Units move one hex at a time, paying each time the movement cost for the terrain entered and/or the hexside crossed.
11.1b Units that move in a stack must begin their movement phase stacked. When a stack moves, a unit in the stack may end its movement while the rest of the stack continues to move. A unit left along the way may not resume its movement later in the movement phase. A unit may not join a stack while the stack is moving, i.e. a stack may not pick up units along its path. A stack may end its movement in an occupied hex only if it can legally stack with the non-moving unit and create a new stack.
11.1c Each unit expends MPs for each hex entered or hexside crossed according to the terrain effects chart (TEC). Units also expend MPs when they change facing or formation during their movement phase.
11.1d MAs are completely independent of one another and a unit's MP expenditures do not affect other units. Unused MPs may not be transferred from one unit to another or saved for a future movement phase.
11.1e Retreat, charge or countercharge movement, opportunity charge movement, retreat before combat, advance after combat, pursuit movement and exploitation cost no MPs. (See also special cavalry movement (11.10).)
11.2 Terrain Effects
11.2a The terrain effects chart (TEC) lists for each terrain hex and hexside the MP costs for a unit to enter those hexes or cross the hexsides. A unit may not enter or cross a terrain type if it does not have enough MPs left to pay the cost. Units may not enter or cross prohibited terrain or leave the map.
11.2b Each terrain hex type has a base cost. Each hexside type has a cost that is added to the cost of the hex being entered after its crossing.
11.2c Road movement costs are separate from all other terrain costs and are listed separately on the TEC. a) When a unit in road column moves from a road hex to a contiguous road hex, it uses road movement. When using road movement, all hex AND hexside terrain costs are ignored. b) A unit in road column that does not use road movement (it moves in road column, but off the road), must pay for all terrain types.
11.2d Certain terrain types noted on the TEC may trigger a movement action Disorder Check (A) when entered: a) When one of these terrain types is involved, if a unit enters the hex and ends its movement there, no disorder check is triggered. If a unit enters a hex and expends additional movement points, it must make a Disorder Check (A) at the end of its movement. This disorder check is not triggered when a unit begins its movement in a hex with this terrain type and leaves that hex. b) If a hexside type is involved, the check is not triggered if the unit expends no more movement points after crossing the hexside, but if the unit expends further MPs, a Disorder Check (A) will be required at the end of its movement.
If it fails its disorder check, the unit is disordered in the hex in which it ended its movement and not back in the hex/hexside that triggered the check.
11.2e If several terrains trigger a Disorder Check (A) during a unit's movement, only one check is made at the end of the movement and each triggering hex or hexside contributes a +5 modifier to the Effectiveness Rating (ER) for the disorder check (see movement phase disorder checks 18.2).
11.2f All terrain movement costs are increased by 1 for units in hook.
11.2g Units in attack column, march column and road column formation use different movement costs from units in line. See the TEC for the specific column-formation movement costs for each terrain type. (In older BAR games these costs are represented by the numbers in parentheses on the TEC.)
11.3 Oblique Movement
11.3a Infantry in line or attack column advances straight ahead by alternating its movement from left to right (or vice versa), without changing facing. There is no additional movement cost for straight-ahead marching other than the normal terrain costs.
11.3b Infantry in line or attack column may perform oblique movement without alternating its movement from one hex to the other from left to right but all terrain and crossing costs are increased by 1. A unit may make oblique movement as long as it wants until it has expended its movement allowance.
11.3c A unit may combine straight and oblique movements during its movement.
11.3d Cavalry in line or attack column as well as skirmishers may perform oblique movement without penalty.
Example: An infantry unit in line, with 4 MPs, moves straight ahead starting first with its left front hex, then the right, then the left and finally its right front hex. It could have started by moving into the right front hex first, then left, then right and finishing on left. If it had started its movement by entering its right front hex and then moving again into its right front hex, it would have made an oblique movement and would therefore pay one additional MP for doing so.
11.4 Rapid March
11.4a Infantry or cavalry in line, attack column, road column or march column may increase its printed Movement Allowance (MA) by 50% (drop fraction) by declaring a rapid march when the unit is activated. At the completion of the unit's movement, it makes a movement action Disorder Check (A) with a +5 modifier to its ER for the rapid march in addition to any other modifiers.
Example: An infantry unit with 4 MA would have 6 MPs. A cavalry unit of 7 MA would have 10 MPs.
11.4b Units in the following situations cannot use rapid march:
- A unit that is disordered.
- A unit in skirmish, square, hook or general order.
- Artillery units and leader units.
- A unit in line that made a backward movement (11.7).
- A unit that reversed direction (9.6).
- A unit that is marked 'Out of Command'.
- A unit belonging to a brigade whose brigade leader is marked 'Out of Command', if the unit is not stacked with its wing/army leader (see Automatically In Command (7.5)).
11.4c Rapid march and oblique movement can be combined.
11.5 Formation Extension & Contraction
11.5a A non-disordered unit in line, march column or hook may voluntarily extend and contract its length during the movement phase. It does so as part of movement and not as part of a formation change, nor as part of a multi-hex formation separation. To extend, the unit must have enough SPs to meet the minimum SP requirements per hex to occupy the additional hex.
11.5b Movement of one hex to the front is interrupted when a formation extends or contracts. It does not take place while the unit moves but between two moves, therefore on a specific hex and not between two hexes. During a movement phase, a formation may make as many extensions and contractions as desired provided it has the necessary MPs.
11.5c For extension or contraction, each new hex of a line costs 1 MP in addition to the terrain and hexside costs where the extension/contraction took place. The hex added or removed may be on either side of the original hex occupied.
11.5d For each hex of movement made by the column head of a march column, the formation may increase its length by one hex and there is no additional MP cost for this extension. The new hex is always added at the rear of the march column and normal movement costs are applied. A march column contracts by bringing its tail hex into the front hex, paying only the terrain cost to enter that hex.
11.5e A single-hex hook formation may extend into its flank hex opposite the side of the hook and a multi-hex hook can only contract by bringing its flank hex onto its hook hex. This is the same procedure as for a line formation except that all terrain costs are increased by +1. The hex permitted for extension and contraction is shown on the hook formation diagram on the BAR formations sheet.
Example: An infantry unit with a right hook marker could extend onto its left flank (in clear terrain) for 3 MPs: 1 for the extension, 1 for the Clear terrain, +1 for the hook surcharge.
11.5f Terrain types that would trigger a movement action Disorder Check (A) (as described in 11.2d) that are entered and/or crossed by the extension or contraction do not trigger a disorder check if the unit stops its movement immediately after completing the extension/contraction. If it continues to expend MPs it will have to make a movement action Disorder Check (A) at the end of its movement.
11.5g The distribution of a unit's SPs is adjusted immediately and automatically as soon as an extension/contraction occurs.
11.5h Extensions and contractions that occur during the movement phase may trigger opportunity fire or charge.
11.5i Unit contraction may also occur automatically outside the movement phase. These contractions are not movement and do not cause modifiers or disorder checks. They do not trigger opportunity fire or charges. They occur even if the unit is disordered. Involuntary contraction occurs in the following situations:
- Cavalry melee round following the first melee round (14.5)
- Pursuit initiation (16.2a)
- Losses from fire (12.9) and close combat (14.2).
11.6 Artillery Prolonge Movement
A non-disordered unlimbered artillery unit with a 'P' (prolonge) indicator on the unlimbered side of the counter may move only one hex if it did not fire in the previous fire phase. A unit with an 'FP' (fire and prolonge) may move one hex even if it fired in the previous fire phase. Both types of prolonge movement are permitted only into one of the unit's front hexes or one of its rear hexes and the unit must maintain its original facing. Limbered movement and prolonge movement cannot be combined in the same movement phase. Prolonge movement is not permitted into a hex that would be prohibited to artillery by normal movement. Prolonge movement is not permitted into an EZOC unless it is already occupied by friendly infantry and/or artillery. Artillery may move by prolonge out of EZOCs but the action may trigger enemy opportunity fire or charge.
11.7 Backward Movement
11.7a A non-disordered infantry/cavalry unit in line formation (not hook) may make a backward movement by moving one hex into its rear hex(es) without changing its facing. The terrain costs of the hex into which it moves backward and/or the hexside crossed are increased by 1. A unit may make this backward move while in general order if the hex moved into requires general order formation. A unit may move backward as many times as it has enough MPs.
11.7b A unit may not use backward movement in the movement phase during which a rapid march (11.4) was declared. Extension, contraction (11.5) and oblique movement (11.3) cannot be used as part of a backward movement. Apart from these conditions, all other types of movement, including formation and facing changes, may be used in the same movement phase in which a backward movement was used.
11.7c At the end of its movement, if a unit used backward movement, a movement action Disorder Check (A) will be required with all modifiers incurred during movement.
11.7d Units may move backward out of an EZOC but the action may trigger enemy opportunity fire or charge. A unit cannot move backward into an EZOC.
Example: In its movement phase an infantry unit with 4 MPs performs two backward moves, both in clear terrain (1 MP for the terrain cost), expending its entire movement allowance (2 for each of the two clear hexes). On completion of movement it must make a Disorder Check (A). It cannot rapid march to have more MPs.
11.8 Skirmisher Backward Movement
11.8a A non-routed skirmisher infantry or cavalry unit may perform a backward movement by moving one hex into any of its flank hexes without changing its facing. The terrain or hexside costs of the hex moved into are increased by 0.5 (1/2). A unit may do this as many times as it has enough MPs. (Translator's note: remember, skirmishers have no rear hex.)
11.8b A skirmisher unit that moves backward makes no Disorder Check (A). Units may move backward out of an EZOC but the action may trigger enemy opportunity fire or charge. A skirmisher unit cannot move backward into an EZOC.
11.9 Effects of EZOC on Movement
11.9a Infantry & Cavalry: Infantry and cavalry expend 1 additional MP to enter an EZOC, even when moving from EZOC to EZOC. This cost also applies to any facing/formation change that is performed by a unit when all or part of the unit is in an EZOC. There is no additional cost to leave an EZOC. Friendly units do not cancel the effects of the EZOC. (Exception: actions requiring all the MPs printed on the counter may be undertaken in an EZOC provided the unit performs no other action in that movement phase.)
11.9b Artillery: An artillery unit must be unlimbered to enter an EZOC (using prolonge movement) and that hex must already be occupied by friendly infantry and/or an artillery unit. Limbered artillery that begins its movement phase in an EZOC does not unlimber and must leave the hex if possible, regardless of the presence of other friendly units.
11.9c Skirmisher: With the payment of 1 additional MP, a skirmisher unit must also make a test by rolling a die before it can enter an EZOC. Roll 2 D10, one designating the units and the other the tens. If the result is equal to or higher than its ER, the unit may enter the EZOC. If the result is lower it fails, it cannot enter the EZOC and its movement ends immediately. (Note: This is not a disorder/morale check!) An illegal stack (10.13b) may occur if the unit's movement ends in an occupied hex. A die roll is not necessary for a skirmisher unit to leave an EZOC.
11.10 Special Cavalry Movement (SCM)
11.10a Cavalry units move one or more hexes when they perform an opportunity charge (17.0) in the enemy movement phase, and also during a regular charge (13.3), a countercharge (13.5), a pursuit or an exploitation (16.2) during the close combat phase. All these cavalry movements are collectively called Special Cavalry Movement (SCM) and none of them is considered movement as defined in the movement section of the rules, i.e. they do not expend MP. SCM costs must be paid for all types of charge as well as pursuit and exploitation. If a unit cannot pay the SCM costs for a charge, it cannot perform that charge.
11.10b Opportunity charge and countercharge are limited to the movement of a single hex so the hex entered cannot be worth more than 1 in SCM cost. Regular charges and pursuit/exploitation may cover one or more hexes and in doing so, must expend pursuit and charge points, similarly to MPs, but using SCM costs. Refer to the Battle Rules or the TEC SCM costs for SCM restrictions and terrain effects (see also 16.2).
12.0 Fire
Regular fire occurs during the fire phase of an activated brigade, during the movement phase as opportunity fire (12.8) and during the close combat phase as defensive fire (13.10). During the fire phase, the active player may fire with any activated infantry and artillery unit against any enemy units in range. During the movement phase, units that perform any movement actions (movement, facing or formation change) within range of enemy infantry and/or within the minimum fire range of enemy artillery may be targeted by opportunity fire. During the close combat phase, units adjacent to enemy attacking units may fire on them with defensive fire.
In addition to the Fire Results Table, there are other tables used for Fire:
A. Infantry Line SP Table: This table is based on the number of ranks that a nation historically used for its infantry in line. (The number of ranks a nation used is found in the Battle Rules.) It shows the number of Strength Points (SPs) that can fire from a hex for infantry units in line and also gives the conditions for being able to form a line over 2 hexes.
B. Formation Fire Table: This table lists all infantry formations and artillery formations that have a fire capability, the number of Strength Points that these formations can use in fire and any SP modifiers.
C. Fire Modifiers: This table lists all the modifiers that can affect fire or its resolution. There are modifiers that potentially affect the number of firing SPs, the Fire multipliers, the fire die roll and the SP losses due to fire.
The fire multipliers and ranges are found on a table provided with each BAR game booklet. It shows the fire ranges and the multipliers for each range, for each unit type. (Older BAR games present this information in a format where the multipliers are shown as a series of ranges for artillery; and for infantry, the first number is the multiplier for a one-hex range and the second, in parentheses, for a 2-hex range.)
12.1 Fire Procedure
-
The firing player identifies all infantry units or artillery units that fire on the same target unit (or stack). Cavalry, limbered artillery and certain infantry formation types cannot fire. A unit must have a line of sight to the hex of the target unit (or at least one of the hexes of a unit in multi-hex formation).
-
Use the formation fire table to find the total firing SPs from the hex and the multiplier and range table according to the unit type and target range. If necessary, apply terrain and formation modifiers to the multiplier. Calculate the total fire strength of the hex by applying the modified fire multiplier. If there are different units of different types in the firing hex, the fire strength of the hex is the sum of the calculated fire strength of each type.
Example 1: A one-hex Prussian line of 5 SPs (a 1-SP grenadier unit on top and a 4-SP fusilier unit) can fire with a maximum of 4 SPs. The grenadier unit fires with its 1 SP and the fusilier can fire with 3 of its 4 SPs. The grenadier's fire multiplier is x5 and x3 at 1 and 2 range respectively. The fusilier's multipliers are x3 and x2. The grenadier's fire strength is 5 (1 SP x 5) at 1 hex range and 3 (1 SP x 3) at 2 hexes. The fusilier's fire strength is 9 (3 SPs x 3) at a one-hex range and 6 (3 SPs x 2) at a 2-hex range. At a one-hex range the fire strength of the stack is 14 (5+9) and at a 2-hex range the fire strength is 9 (3+6).
Example 2: A 2-SP Prussian 12-pounder artillery unit fires on a target 8 hexes away. Fire at a range of 8 hexes has a multiplier of x3. Its fire strength is 6 (3x2).
-
Find the fire defense value of the terrain occupied by the target unit on the TEC. If a multi-hex target unit occupies several terrain types, use the hex closest to the firer to which it can have a LOS (Line Of Sight). If several terrain types are eligible under the same conditions, use the terrain most favorable to the defender. Divide the total fire strength by this defense value and express this result as a strength ratio (rounded in favor of the defender).
-
On the fire results table, find the column of the final ratio. For a ratio greater than 5:1, use the 5:1 column, but for each whole ratio above 5:1, add +10 to the die roll. Thus a 7:1 will be resolved with +20 to the die in the 5:1 column. Fire cannot be made at a ratio lower than 1:3.
-
Roll 2 D10, one designating the units and the other designating the tens. This die roll result may be subject to fire die roll modifiers. Take the column corresponding to the ratio, and cross it with the row corresponding to the die roll result. The result to apply is found in the first column on the left of the 'Fire Results' table if it is a regular fire, or in the last column on the right if it is an opportunity or defensive fire.
-
If the unmodified die roll is an even number and at least one SP is lost, the target unit(s) must make a Morale Check (A).
12.2 Fire Restrictions
12.2a Only infantry in line, hook, square, attack column, general order and skirmish can perform fire. Unlimbered artillery can perform fire. Cavalry, limbered artillery, leaders and routed units cannot fire. Units in march/road column also cannot fire.
12.2b Units are allowed to fire only into or through their front hex against enemy combat units. The front hex(es) of a formation is shown on the BAR formation diagrams, etc. with the game sheets. The target unit (or stack) must be in range of the firing unit.
12.2c No unit may be targeted more than twice per fire phase: once by infantry fire and once by artillery fire. No unit may fire more than once in a fire phase (Exception: squares and 2-hex lines, see below).
12.2d All infantry units firing on the same unit combine their fire strengths into a single fire resolution. All artillery units firing on the same unit combine their fire strengths into a single fire resolution subject to the artillery fire restrictions (12.2i).
12.2e Infantry and artillery cannot combine their fire strengths to fire on the same target unit during the fire phase or for opportunity fire. (They combine their strengths in defensive fire during close combat resolution (see 13.10).) When a unit is subject to both infantry fire and artillery fire, the firing player decides which fire to resolve first and applies the results before resolving the second fire.
12.2f All SPs of the same type (infantry or artillery) firing from a single hex must fire on the same target unit, i.e. they cannot be split between several targets. (Exception: square formation 12.2g). When infantry and artillery fire from the same hex, they may fire on the same or on different target units.
Example: 4 infantry SPs firing from a single hex cannot fire 2 SPs on one hex and 2 SPs on another hex. A stack of 2 artillery SPs and 2 infantry SPs can fire all its SPs on the same unit in two separate attacks--one by artillery and one by infantry--or on two different units--one attacked by infantry and the other by artillery.
12.2g A square divides its fire among three non-adjacent hexes. Treat each targeted hex as a separate fire using 1/3 of the unit's total SPs up to a maximum of 4 SPs per targeted unit hex (2 SPs if disordered). This means a maximum of 12 SPs (6 if disordered) can fire from a square with 4 SPs (2 if disordered) firing at each of the three non-adjacent units. (See the square fire strength distribution diagram on the fire table.)
12.2h A 2-hex line may divide its fire against 2 hexes, i.e. each hex of the line may fire separately on different units or be combined against the same target unit provided the single target unit is in range and in line of sight (LOS) of each hex of the multi-hex infantry.
12.2i Artillery fire: Artillery units in different hexes that fire on the same target unit must combine their fire strengths into a single attack if all the distances that separate them from the target are less than or equal to the minimum artillery range (see the fire multipliers and ranges table). Artillery units in different hexes cannot combine their fire strengths against the same target unit if the distance between the artillery and the target is greater than the minimum artillery range.
12.3 Fire Strength
12.3a Fire strength is based on the number of firing SPs, the unit type, the formation type and the nationality. The maximum number of SPs that can fire from a hex depends on the unit's formation, its organization state and its nationality. These limits are found on charts A, B and C of the fire table. Being disordered (see 18.5) halves the number of SPs (rounded) that can fire from a hex. A partial LOS (12.6f) halves (rounded) the number of SPs that can fire per hex. A disordered unit with a partial LOS has its firing SPs divided by four (rounded).
12.3b It is possible that the total number of SPs that can fire from a stack comes from several unit types. When this is the case, the actual fire strength of each SP type is calculated separately and each fire strength total is added to obtain the final fire strength for that attack.
12.3c When a square or a 2-hex line fires on two different units, the number of SPs allocated to each attack can be obtained by any combination of SPs that are eligible for fire as long as no SP is used more than once and the total number of firing SPs does not exceed the unit(s) fire limit given on the Infantry Line SP table.
12.3d The fire strength of an infantry hook formation is distributed differently from a line. See the hook fire strength distribution diagram on the fire table.
12.4 Infantry/Artillery Stacks
12.4a When stacked with an infantry formation, the position of the artillery in the stack determines whether or not it can fire.
12.4b To fire from an infantry stack, the artillery SPs must be on top of the stack (10.6e). If, after counting all the artillery SPs, the maximum SPs of the formation that can fire has not been reached, the remaining SPs may be taken from the infantry unit(s) stacked directly under the artillery. In such cases, the infantry is used from top to bottom. Infantry fire and artillery fire are always resolved separately unless they are performing defensive fire (13.10).
12.4c Artillery SPs are counted normally (i.e. the 1-for-4 ratio is not applied) to determine the number of SPs that can fire from a hex. A maximum of 4 artillery SPs can fire from a hex. This applies even when stacked with infantry in attack column.
Example: A 2-hex infantry line consisting of 10 infantry SPs (one of 7 SPs and one of 3 SPs) is stacked with 2 artillery SPs on top. The maximum number of SPs that can fire from each line hex is 4 which means that a total of 8 SPs can fire from this stack. A total of 2 artillery SPs (the top unit) and 6 infantry SPs (the next unit in the stack) can fire in any combination. If the line fires at two different hexes, one fire attack could have 1 artillery SP and 4 infantry SPs and the other 1 artillery SP and 2 infantry SPs, or any other combination as long as the maximum of 8 stacked SPs is not exceeded. If the stack is disordered, the maximum per hex is 2 SPs or 4 SPs for the entire stack.
12.4d Artillery stacked with a square is not subject to the square's fire strength distribution. Instead, the artillery is treated as if it alone occupied the hex. The square distributes its SPs normally (i.e. it ignores the artillery), however, the infantry SPs allocated to a hex to target a unit that is shared with the artillery's front hex cannot fire.
Example: The artillery is stacked with an infantry square so that its front hexes are X1 and Y1. The square is a 6-SP unit and chooses to distribute its SPs on hexes Y, 2 SPs for each Y hex. The infantry SPs allocated to Y1 cannot fire because Y1 is also one of the artillery's front hexes. If there were 12 infantry SPs in the square, only 8 could fire instead of the normal 12 because of the artillery blocking one hex (X1 or Y1).
12.4e Artillery firing from a multi-hex line/hook formation uses any hex to determine its fire arc, line of sight and range to the target unit's hex. Each time it fires, it may change the starting hex for its fire and is not restricted to always firing from a particular hex just because it chose one once.
12.4f Artillery firing from a hook formation (multi-hex or single-hex) may fire through any front hex except those marked as prohibited to artillery fire by the designation 'NA' on the hook fire strength distribution diagram.
12.5 Target Unit Size
12.5a Targets are whole units and not portions of units spread over hexes. The size of a unit (or a stack) is based on its current number of SPs--not its original ones. For determining target unit size, artillery SPs are calculated at a ratio of 4 to 1 (e.g. a 2-SP artillery unit counts as 8 SPs for its unit size when it is targeted); cavalry SPs are calculated at a ratio of 2 to 1 (e.g. a 6-SP cavalry unit counts as 12 SPs for its size if targeted); and infantry at a ratio of 1 to 1.
12.5b The size of a targeted multi-hex infantry unit (or stack) corresponds to its total infantry SPs divided by the number of hexes it occupies (rounded). This is the size counting for the entire multi-hex unit (stack) regardless of the part targeted.
12.5c The size of a multi-hex artillery and infantry stack corresponds to its total infantry SPs divided by two (rounded) plus the artillery SPs (at the 4-to-1 ratio). (Translator's note: one artillery SP is worth 4 SPs for the size calculation.) Artillery SPs are never divided between hexes. This is the size counting for the entire multi-hex stack regardless of the part targeted.
Example: A 2-hex line contains 7 infantry SPs and 3 artillery SPs. Only its left hex is within firing range of an enemy. The size of the stack is 16. 7 infantry SPs divided by 2, rounded up = 4, plus 12 artillery SPs (3 x 4).
12.5d The size of a targeted multi-hex cavalry unit (or stack) corresponds to its total SPs times 2, divided (rounded) by the number of hexes it occupies (1, 2, or 3). This is the size counting for the entire multi-hex unit (stack) regardless of the part targeted.
Example: A 3-hex cavalry line contains 17 SPs. Its target size is 11.3 so 11 SPs (17x2=34/3=11.3). Only its right hex is within firing range of an enemy and under the SP distribution rules for line formation would actually contain 6 SPs (12 in the case of a size calculation). Nevertheless, a target size of 11 SP is still used.
12.5e The target unit size, as determined in 12.5a-d, determines whether there are modifications to the fire die roll (see the fire modifiers table on the fire table).
12.5f Skirmishers are targets that are not subject to target unit size modifiers. All fire die rolls against skirmishers are modified by -10.
12.6 Line of Sight
12.6a A unit must be able to see its target to fire, i.e. it must have a line of sight (LOS) to its target. The LOS is traced from the firing unit through its front hex to the target unit. The LOS may be blocked by terrain and by enemy or friendly combat units (Exception: Howitzers 12.6d). Leaders alone in a hex do not block LOS. If it is blocked, the unit may not fire on the target unit. Certain terrain types can block LOS; these terrain types are listed in the Battle Rules or on the TEC.
12.6b LOS may be traced into a hex containing a blocking unit or terrain but not through it. A unit always has a LOS into an adjacent hex regardless of any intervening hexside.
12.6c If tracing a LOS involves hexes of different elevations, the obstructing terrain or unit that is closer to or equidistant from the lower hex will block the LOS. Terrain or units that are closer to the higher hex do not block the LOS. The hex that is at the same level as or higher than the higher unit is considered an obstacle.
12.6d Howitzers: The artillery unit type designated as 'howitzer' in the game's Battle Rules may ignore friendly units for the purpose of tracing LOS provided the friendly unit in between is closer to the firing howitzer than to the target unit. A howitzer unit firing over friendly units has its firing SPs halved (rounded). Howitzers stacked with infantry must always be on top to fire.
12.6e Enfilade fire: When a LOS crosses a flank hex of the target unit (but not along a flank hexside), the firing unit takes the target in enfilade. Enfilade fire increases the fire multiplier by 1 (12.7b).
Example: The fire of units B and C is not enfilade on SBR because their fire does not cross its flank hex. Unit A and the artillery unit make enfilade fire on SBR.
12.6f Partial LOS: A LOS is not blocked when it passes exactly along the side of a hex that would block the LOS. However, the SPs that can fire along that hex are halved (rounded).
12.7 Fire Multiplier Modifications
12.7a A unit's fire multiplier or fire strength may be modified (without rounding) when the line of sight passes into or through certain terrain types (see each game's TEC for these details).
12.7b A unit's fire multiplier is increased by 1 when it fires in enfilade on a target unit (12.6e).
12.7c A unit's fire multiplier is decreased by 1 when it is in general order formation.
12.8 Opportunity Fire
Opportunity fire is a form of fire that is performed by reacting units only during the movement phase and does not occur at any other time in the Game Turn. It is triggered when an active unit changes facing/formation or leaves a hex that is within fire range of an infantry unit or within the minimum range zone of an artillery unit. Formation changes from or to general order, although involuntary, can still trigger opportunity fire.
12.8a Any non-routed unit with fire capability may react by performing opportunity fire following the normal fire rules. Opportunity fire is voluntary.
12.8b A unit may perform opportunity fire as many times as the occasion arises, on the same or on different enemy units in a movement phase. When several units are entitled to fire on the same enemy unit, their fire strengths are added and only one fire is resolved as in the normal fire rules, although infantry and artillery still fire separately. Opportunity fire of artillery units present in different hexes and firing on the same target unit must combine their fire strengths into one opportunity fire (see 12.2i). Opportunity fire uses the results found on the right side of the fire results table.
12.8c Opportunity fire triggered by a facing/formation change is resolved after the facing/formation change is completed using the formation and aspect of the target unit that are in favor of the firing unit(s), i.e. the firing player chooses between the original facing/formation and the new facing/formation of the target unit. All facing/formation changes that a unit performs in a hex trigger only one infantry opportunity fire and only one artillery opportunity fire. Opportunity fire is triggered even if it is caused by only part of a multi-hex formation.
12.8d Opportunity fire triggered by a unit leaving a hex is resolved before the unit leaves the hex, i.e. the range is calculated to the hex it is going to leave and not the one it is going to enter.
12.8e A unit may be targeted any number of times by opportunity fire in its movement phase. However, opportunity fire can only be triggered twice per hex--once for any facing/formation change in the hex and once on leaving the hex.
12.8f When a moving unit triggers opportunity fire in a hex already occupied by other non-moving units, all modifiers in favor of the firer are used. This means that the total number of SPs in the hex is used for the target unit size and not only those of the moving unit(s). Likewise the firer will use the facing and formation of any unit in the hex in its favor.
12.9 Fire Results
12.9a SP losses (from 1 to 6) are applied by placing a strength point marker equal to the total SP losses under the unit that suffered the loss. At the same time, players may use the 'Loss tables' to record unit losses.
12.9b SP losses due to fire are applied on an incremental basis, starting with the top unit of a stack. No unit may take a loss until the top unit is completely eliminated (Exception: mixed infantry and artillery, see 12.9g).
12.9c When SP losses from opportunity fire are applied during movement to a hex occupied by a non-moving unit the moving unit is considered the top unit, i.e. it always takes SP losses before the non-moving unit. The stacking order of the moving units and non-moving units cannot be changed (see 10.6f).
12.9d When the unmodified (natural) fire die roll is an even number and at least one SP loss was obtained, a morale check (A) is required for the target unit with its Effectiveness Rating (ER) which may be modified by the SP loss result of the fire. If, after all modifications, the unit (stack) loses 2 or 3 actual SPs, add 10 to the testing unit's ER; if the unit (stack) loses 4 or more actual SPs, add 20 to the testing unit's ER. Routed units and units in road column do not make this morale check (see 12.9h and 19.1f).
12.9e If an SP loss comes from opportunity fire or defensive fire, the target unit must make a disorder check (C or E). This disorder check occurs before any morale check, if necessary.
12.9f SP losses for unlimbered artillery are halved (drop fraction) when it is targeted exclusively by artillery at a range greater than the minimum range (see the fire multipliers and ranges tables for the artillery minimum range).
Example: An artillery unit targeted at 4 hexes range by artillery with a minimum range of 3 hexes that suffers a result of 3 SP losses, loses 1 SP (3 divided by 2 equals 1.5, dropping the 0.5).
12.9g When artillery is stacked on infantry, fire losses are distributed between the artillery and the infantry with the infantry always taking the first SP loss and the artillery the second (halved, if 12.9f applies), the infantry takes the third, etc.
Example: An artillery/infantry stack (artillery on top) receives 3 SP losses from fire. The infantry loses the first and the third SP and the artillery receives the second (halved if 12.9f applies). The total infantry loss is 2 SP and the artillery loses 1 SP (or nothing if 12.9f applies). If the result had been a '4', the infantry loss would be 2 SPs (1 for the first and for the third loss) and the artillery would have suffered 2 SPs (1 for the second and fourth loss) or only 1 SP of loss for artillery if 12.9f is applied. Rounding is calculated after the distribution of the fire losses.
12.9h Fire results can also be modified by these factors: i. An SP loss result against a unit in march/road/attack column or in square is multiplied (increased) by 1.5 (rounded). ii. A unit in road column that suffers an SP loss result automatically routs in addition to the SP losses. iii. A routed unit that suffers an SP loss result automatically performs a rout retreat (20.2) and if it must make a morale check (A), instead of the check, it loses another (additional) SP (19.1f).
12.9i An 'R' result applies only to the regular fire phase and gives the target unit the option to return fire (12.10), if possible. A 'D' result applies only following opportunity fire or defensive fire and requires the target unit to make a disorder check (C or E).
12.9j SP losses may automatically contract a multi-hex formation (11.5) or change a square to line (8.4g).
12.9k When a fire triggers multiple results, apply these results in the following order: 1) SP loss, 2) disorder check, 3) morale check.
12.10 Return Fire
A target unit that takes the option of returning fire (the 'R' result) must be able to perform fire and have at least one of the units of the original fire in its LOS and in range. If there were several original firers, return fire is performed against the nearest hex and if there are several units at equal distance, the player reacting to the initial fire chooses the one he wants. Return fire is performed exactly like regular fire; however, it cannot provoke return fire and any 'R' is treated as 'No Effect.' After the completion of return fire, the active player continues his fire phase.
12.11 Fire Special Results
An unmodified (natural) fire die roll of 00 to 09 is a special result found on the fire special results table. There are separate tables for infantry, artillery and defensive fire. Do not re-roll the dice to determine the result; use directly the number of the original fire die roll. Some of these results require a check on the leader loss table and this check is made before any other part of the special result is performed. Some results require the fire die roll to be re-rolled, and in this case a second roll of 00 to 09 is treated as a normal die roll, not a special result.
Note: There is no special result specific to opportunity fire; instead, opportunity fire always uses the regular (non-defensive) fire special results table, for infantry or for artillery. Any defensive fire, even if it combines infantry and artillery fire, uses the defensive fire special results table.
13.0 Close Combat
Close combat covers all the different types of combat that occur within 100 yards of a combat unit (fire, melee, or just a loss of morale). Close combat is initiated by units of an activated brigade, by independent units and by attached units. Morale plays an important role in the resolution of close combat. Close combat results are usually decisive and costly.
Procedure:
-
Attacker designations (13.1): All eligible active units that will initiate close combat must be designated at this time. (Use 'CLOSE COMBAT' markers as reminders.) No additional attackers may be added after this step has been completed. Enemy units defending against these close combats are not designated at this time.
-
Attacker morale check (13.2): Make a morale check (B) for each of the designated attacking units (or stacks). If a unit (or stack) fails this check, it is shaken and does not attack.
-
Cavalry charge movement (13.3), defender reaction (13.4), & countercharge movement (13.5): Each attacking cavalry unit (or stack) that charges must attempt to perform its charge movement up to the maximum of its charge range.
During charge movement, eligible reacting units may attempt a formation or facing change in reaction to the charge. The reaction option is decided hex by hex before the charging enemy cavalry unit moves into the next hex in its charge movement. When a formation or facing change is performed in reaction, a disorder check (D) is required.
Reacting cavalry that has not attempted a facing/formation change may attempt a one-hex countercharge movement to intercept the charging cavalry when it comes into range.
-
Individual combat designations (13.6): Each close combat is designated by specifically identifying the attacking units and the defending units. Each enemy unit in a Zone of Control (ZOC) of an attacking unit must be engaged in an attack. All combats are defined before any of them is resolved.
-
Close combat resolution: Each attack is completely resolved before another combat begins. They are resolved in the order desired by the attacking player.
a) Defender morale (13.7) & retreat before combat (13.9): Defenders make a morale check (B). Defenders in good morale that fail become shaken and defenders in shaken state that fail, rout. Defending unit types that have the option to withdraw before close combat (these types are defined in the Battle Rules), do so now instead of making the defender morale check. Reacting cavalry that attempted a countercharge movement (13.5) does not make a defender morale check.
b) Defensive fire (13.10): Reacting units (even those that are not the targets of a close combat attack) that have an attacking unit in one of their front hexes and that have a fire capability may make defensive fire on that attacking unit. Units that attempted reactions (13.4) may not make defensive fire. Defensive fire results are applied immediately.
c) Attack resolution (13.11): The "Attacker to Defender" Strength Point (SP) ratio is determined and each player rolls 1 D10 separately, modifying the result according to the list of applicable modifiers. The result is found on the close combat results table and applied. Advance after combat and cavalry pursuits are then resolved.
If there are other attacks to resolve, return to step 5a, otherwise the close combat phase is over.
13.1 Attacker Designation
13.1a Only activated and in-command units are entitled to initiate close combat attacks (Exception: a unit's command status is not taken into account for a close combat resulting from a successful opportunity charge (17.0)). Artillery, routed or shaken units and leaders are not entitled to initiate close combat. An attacking infantry unit or stack must have at least one enemy unit in its ZOC. Disordered cavalry may initiate close combat only if it is already adjacent to the enemy it will attack, i.e. it may not use charge movement. Infantry stacked with artillery may initiate close combat.
13.1b Only units in line, attack column and general order may initiate close combat. Units in square, skirmish, march/road column and hook formations may not initiate close combat.
13.1c Initiating close combat is voluntary. However, if a unit in a stack initiates close combat, all activated units in the stack must take part, except artillery units. Inactive units stacked with activated units may not take part in the close combat. Place the artillery and inactive units under the activated attacking units (see stacking order 10.6).
13.1d A non-disordered cavalry unit that is not in an Enemy Zone of Control (EZOC) and that has no enemy units in its front hex may initiate close combat against an enemy unit that is not in its ZOC, i.e. against a non-adjacent enemy unit, by charging it. There must be at least one enemy unit that meets all the following conditions:
- It is within the cavalry's charge range (see below).
- It is not separated from the cavalry by terrain or units that would block its charge movement.
- It must be in the cavalry's line of sight (LOS).
(The LOS requirement applies only at the time of attacker designation (13.1). During charge movement (below), any enemy unit that can be contacted by the charging cavalry may become the target of that cavalry.)
13.1e Cavalry charge range is the maximum number of Special Cavalry Movement (SCM, 11.10, 13.3a) that a cavalry unit can use to make contact and position itself to have an enemy unit in its ZOC to engage in close combat. Charge movement ranges are listed in the Battle Rules and may differ for cavalry types and nationalities. To help define the area covered by a cavalry unit's charge movement range and the enemy units entitled to reaction/countercharge, place two 'CHARGE' markers on the map.
Examples (figures in the original): On the left, a 3-hex cavalry line stack with a charge range of 2 hexes and the hexes it covers in yellow. On the right, a cavalry unit B in attack column or a 1-hex line with a charge range of 3 hexes and the hexes it covers in white.
13.1f Usually each clear hex equals one hex of a unit's charge range but certain terrain types may cost more than one hex of this range (see the game's terrain effects chart in the 'SCM Cost' column). At the time of attacker designation (13.1), these additional range costs must be considered to determine a cavalry unit's ability to contact a defender.
Example: Units A, B and C are activated and in command. Unit A can initiate close combat because enemy unit 1 is in A's front hex. Infantry unit B cannot because units 1 and 2 are outside B's front hex. Cavalry unit C has a charge range of 3 hexes traced by the two 'CHARGE' markers. Enemy units 2 and 3 are within charge range allowing C to initiate close combat. C may engage unit 3 by passing to the right of unit 2. If C had no LOS to 2 or 3 it could not initiate close combat.
13.2 Attacker Morale Checks
13.2a A morale check (B) is made for each unit (or stack) that attempts to initiate close combat. If it passes the check it will attack. If it fails, it cannot attack and will be shaken. Remove its 'CLOSE COMBAT' marker.
13.2b Cavalry that must use charge movement to reach a defender and that fails its attacker morale check, does not move and is shaken. Remove its 'CLOSE COMBAT' marker and 'CHARGE' marker.
13.2c For a stack, only the Effectiveness Rating (ER) of the highest non-artillery unit is used for the morale check. If it fails no unit in the stack may attack. If it passes, all activated non-artillery units will attack.
13.3 Cavalry Charge Movement
13.3a Charge movement is a type of special cavalry movement (SCM, 11.10) that does not expend movement points. The unit (or stack) traces a path, hex by hex, from its starting hex to a hex adjacent to an enemy unit as if it were performing a move. The charge movement of the unit (or stack) must be completed before the next charge movement is begun. Charge movement for a stack with different charge ranges is limited to the unit with the shortest range in the stack. Cavalry may attack a unit already adjacent in close combat and in so doing it is considered to charge (and receives all cavalry bonuses) even though it does not use charge movement as such.
13.3b Charge movement may not be used to enter or cross terrain prohibited to cavalry charge movement (see the game's terrain effects chart). It is not possible to enter (or charge through) an occupied hex, friendly or enemy. It is not possible to move outside the region traced by its 'CHARGE' markers, although the target may be outside and adjacent to this region.
13.3c Cavalry stacks may not separate during charge movement and may not change facing or formation except that a line formation may contract (only) at the rate of one hex per hex of charge movement. This contraction may occur either before the unit leaves a hex or after it has entered a hex, but it may not occur once it enters an EZOC. The area delimited by the 'CHARGE' markers is not modified if the cavalry contracts.
13.3d Charge movement ends immediately when the cavalry enters an EZOC or has arrived in the countercharge EZOC of enemy cavalry. A cavalry charge need not stop simply because there is an enemy unit in its ZOC; it may continue its charge movement.
13.3e If the active player designated a cavalry unit to initiate close combat and misjudged the cavalry charge so that it does not end with an enemy unit in its ZOC or is not in the EZOC of a unit that countercharged it, the cavalry goes back to the hex from which it began its charge and is marked 'DISORDER/SHAKEN'. Any facing/formation change reactions by the defender made in response to the aborted charge remain in effect.
13.3f Crossing or traversing certain terrain types (as identified in the game's Battle Rules) will require the charging cavalry to expend more than one hex of charge range (see 13.1f) and may also require it to make a movement action Disorder Check (A) at the end of its charge movement (see 11.2d). These terrain types and their costs are listed in the SCM cost column of the game's terrain effects chart.
Example: The game's terrain effects chart indicates that a village hex costs cavalry 2 hexes of its charge range and causes a disorder check (A) if the charging cavalry enters and leaves. A cavalry unit with a charge range of 4 hexes moves into a clear hex (cost 1 hex of its charge range), then advances 1 hex into a village hex (cost 2 hexes of its charge range) and finally advances 1 more hex into clear terrain (cost of its last hex of charge range). It will have to make a disorder check (A) before its close combat is resolved.
13.3g Charge movement does not trigger enemy opportunity fire or opportunity charge but it may trigger enemy countercharge movement (13.5).
13.4 Defender Reaction
13.4a Before each hex traversed by enemy charging cavalry (or stack), (including the first hex), all enemy combat units that are within charge range of the cavalry have the option to make a formation or facing change (but not both), in reaction to the charge. The units of a reacting infantry/artillery stack may make the same type of reaction or one unit type may react and the other type not react (as long as the final result remains a valid stack), but they may not make, one a facing change and the other a formation change. A reacting unit or stack must not be routed or disordered nor in an EZOC. It must be able to trace a LOS toward the charging cavalry at the time it tries to react. A unit is not required to be in command to react.
13.4b A reaction formation or facing change must be made according to the normal Facing/Formation/Stacking rules for a unit in its current formation. It may make 1 formation change or 1 facing change but a formation change includes any facing changes that would normally be part of it. Stacks may not separate.
13.4c Any movement into or out of a reacting unit's hex (such as the wheel of a multi-hex line or the expansion or contraction) is not permitted during a reaction facing/formation change. This means that some formation changes are prohibited, such as changing a multi-hex line to square.
13.4d Although it may be possible for a unit to be contacted by several enemy charging units, it may make only one reaction facing/formation change per close combat phase.
13.4e After the reaction is performed, the unit (stack) must make a disorder check (D) with its ER modified by the normal MP cost for that change multiplied by 10. This calculation gives the ER modifier to apply. The types of facing/formation changes that are the only action a unit can do or those that require the whole movement allowance (MA) of a unit, such as reversing direction, forming square, an artillery facing change, etc., automatically incur a +40 modifier to ER. If the unit fails the check, it still performs the facing/formation change, but it is disordered.
Example: A unit in line makes a reaction facing change that would normally cost it 2 MPs. After making the change the unit makes a disorder check with its Effectiveness Rating (ER) modified by +20 (2 MPs times 10). A unit making a formation change from march column to square would make a disorder check with its ER modified by +40 because this change from march column to square requires the whole of its MA.
13.4f Reactions do not trigger opportunity fire or charges.
Example: Cavalry unit A has a charge range of 3 hexes as shown by the 'CHARGE' markers. Enemy units 1, 2 and 3 all meet the prerequisite to make a reaction formation or facing change because they are all liable to be reached by the charge. Unit 2, in a 2-hex line, cannot change its facing by a wheel in 'X' because this would require movement. Unit 3, in a 2-hex line, would like to form square but cannot because this would require the movement of one of the two hexes into a single-hex formation. Unit 1, in a two-hex march column, changes its formation to a 2-hex line (which would normally cost 1 MP), making a facing change toward the enemy cavalry unit. The unit must make a disorder check (D) with a +10 modifier to its ER after it has changed its formation and facing.
13.5 Countercharge Movement
13.5a A reacting cavalry unit (stack) has the option to make a one-hex countercharge movement forward when a charge by an active cavalry unit moves into a hex that is two hexes away from the reacting unit and in its frontal arc; marked with an 'X' on the diagram where LEI is the reacting unit.
13.5b Countercharge movement is special cavalry movement (SCM, 11.10), not regular movement. A cavalry unit performing a countercharge movement must not be shaken, routed, or disordered. It must not be in an EZOC, it must be in line or attack column and must not have performed a defender reaction facing/formation change in the same close combat phase.
13.5c Before it has moved one hex in countercharge, the reacting cavalry unit makes a morale check (C). a) If it fails, it stays in place and is shaken. The active charging unit continues its charge movement. b) If it passes, it must advance one hex into its front hex(es), adjacent to the active charging cavalry and the charge movement of the active cavalry is immediately stopped. This morale check counts as its defender morale check (B) at the start of close combat resolution.
13.5d The countercharging unit must pay SCM costs for its charge hex. It may not enter or cross terrain prohibited to SCM (see the game's TEC) or enter a hex containing other units.
13.6 Individual Combat Designations
13.6a All units still held to make a close combat attack must attack ALL enemy units in their ZOCs that are not already attacked by other friendly units. Each attack must be clearly designated. (Exception: Countercharge movement (13.5) and the cavalry defense option (13.8) may result in situations in which an engaged attacker will have no enemy unit in its front hex, but will have a defender in its flank hex or rear hex. In these cases the attacker must still carry out its attack even if the defender is not in its ZOC!)
Example: In diagram no. 1, cavalry unit Q intends to order a move through hex 'a' and 'b' and attack infantry unit X. Cavalry unit Y successfully countercharges unit Q and will charge into hex 'c' after Q enters hex 'a'. In diagram no. 2, unit Q's charge is stopped in hex 'a' and Q must attack unit Y even if Y is not in Q's front hex.
13.6b Attacking units from different hexes may combine to attack a single defending hex in a single close combat provided there is no other unattacked defender in the attackers' ZOC. An attacking stack that is adjacent to several defending hexes cannot be split to make separate close combats--all defending hexes must be attacked in one close combat.
13.6c Infantry and cavalry may be designated to attack the same unit.
13.6d A unit may attack or be attacked only once in the close combat phase of any activated brigade. A unit may be attacked several times in a Game Turn.
13.7 Defender Morale Check
13.7a The first individual step in a close combat is to perform a morale check (B) for each defending unit (or stack), except units that will withdraw before close combat (13.9), as well as cavalry units that attempted a countercharge movement (13.5, they have already tested), and routed units (13.7d). A defender in good morale that fails is shaken and will be able to fight. A shaken defender that fails, routs and makes a retreat movement (20.2).
13.7b A mixed artillery and infantry stack uses the top infantry unit for the morale check. Only stacks composed solely of artillery use the top artillery unit for the check.
13.7c Defending units that are able to retreat before combat do so at this time. At the end of their retreat movement each unit makes a morale check (D) (see 13.9, 20.1).
13.7d A defender that is already routed does not make a morale check, but loses 1 SP and routs again by making a retreat movement (19.1f).
13.7e If the defender's hex is vacated, the attacker must advance at least one unit that attacked into it by making an advance after combat (15.0). If there are several defending hexes, all must be vacated to allow the attacker to make an advance after combat. Cavalry that advanced may pursue.
13.8 Cavalry Defense Option
13.8a When a reacting cavalry unit has an attacking unit in its ZOC, but is not itself attacked by any unit (i.e. the reacting cavalry is in a flank or rear hex of an attacker), the reacting player has the option to include the cavalry in the close combat being engaged by the unit in its ZOC. This decision must be made before any other defender in the close combat makes its morale check (B). If it is to be included in the close combat, the cavalry makes a defender morale check (B) and is treated like all other defending units.
13.8b The reacting cavalry must not be shaken but may be disordered. It must be in line or attack column. It may be in the EZOC of an inactive enemy unit. It must not be completely separated from the attacking unit by a hexside prohibited to special cavalry movement. The terrain occupied by the attacker must be a terrain type into which cavalry can charge. Refer to the game's terrain effects chart for these prohibitions.
13.8c If the defending cavalry is included in a close combat and the original defender in the attacker's ZOC leaves its hex (i.e. it retreats before combat (13.9) or makes a rout retreat), the attacker may not enter the vacated hex, but must instead carry out the close combat against the defending cavalry unit even if there is no enemy unit in its ZOC. (This is the situation described in the exception under 13.6a.)
13.8d If the close combat eliminates or routs all the defending units, only a hex vacated by a defender who was in the attacker's front is eligible for the attacker's advance after combat (15.0), not the one occupied by the cavalry that chose the defense option.
13.8e Even if the reacting player declines the cavalry defense option and isolates his cavalry from the combat, the attacker still suffers the flank or rear (enfilade) CV modifier (13.11c).
Examples: Situation 1--Unit A attacks X. Units B and C belong to other brigades and are not involved in the combat. The defending player has the option to include cavalry unit Y as an additional defender to unit X because Y is cavalry that is not attacked and is in A's flank hex. If unit X retreats before the combat is resolved, A will not advance, but will stay in place to carry out the combat against Y. Situation 2--Units A and C belong to the same brigade and both attack unit X. The defending player has the option to include Y and if he does so, this will force the attacking player to make two combats instead of one--C against X and A against Y. Situation 3--Units A, B and C belong to the same brigade. Units A and C attack X in one combat and B attacks Y in a second combat. The defending player does not have the cavalry defense option because Y is attacked.
13.9 Retreat Before Close Combat
13.9a Defending units that are able to retreat before close combat may withdraw, rather than fight. The units that have this capability are listed in the Battle Rules. A unit that has countercharged cannot retreat before close combat. If a close combat involves defenders in several hexes, some defenders may attempt to retreat and others may remain to fight but any retreat applies to an entire stack, not to individual units in a stack. The procedure is dealt with in the section 'Retreat Before Close Combat' (20.1). If all defenders retreat, the attacker must advance into the vacated hex by means of an advance after combat (15.0), but may not pursue (16.1b) and may not initiate another close combat.
13.9b Non-skirmisher units that are able to retreat before close combat must not be disordered to do so.
13.9c Units that retreat before a close combat do not make a defender morale check (B). They make a morale check (D) at the end of their retreat movement.
13.10 Defensive Fire
13.10a A reacting unit that has fire capability and that has not performed a reaction facing/formation change may perform defensive fire against a unit (or stack) that attacks in its ZOC. A reacting unit that is designated as the object of the close combat may only make defensive fire on the units that attack it. Reacting units that are not designated as the objects of a close combat, but that have attacking units in their ZOCs may make defensive fire against all attackers in their ZOCs.
13.10b Defensive fire is performed in the same way as regular fire except that artillery and infantry combine their fire strengths when they fire on the same target unit, and that defensive fire uses the results found on the right side of the fire results table.
13.10c A unit may perform defensive fire only once in a close combat phase with the exception of a 2-hex line and a square. A 2-hex line may fire with each of its hexes on different attacking units or it may combine its fire on a single unit. A square may fire on up to three different attacking hexes (12.2g, 12.4d).
13.10d If attacked by several stacks, a single defending hex may fire on only one of them (at the defender's choice). If there are several reacting stacks eligible for defensive fire against an attacking stack on a single hex, all reacting stacks combine their defensive fire against the attacking stack.
13.10e The results of defensive fire require the target to make a disorder check (E) after any SP loss or on a 'D' result (12.9e). It may also cause a morale check (A) for a target unit that has suffered SP losses per 12.9d. In all cases, the close combat must still be carried out even if the attacker becomes disordered or shaken. If a morale check routs all attackers, the resolution of the close combat ends. If several attacking stacks take part in a close combat against one hex and one of the stacks routs, the others must continue the attack.
13.10f If a multi-hex attacker is reduced to a single hex because of SP losses from defensive fire, the single hex to be occupied by the attacker must be the one adjacent to the greatest number of defending hexes declared at the start.
13.10g When cavalry is the target of defensive fire, add +10 to the fire die roll. When infantry is the target, add +20 to the defensive fire die roll. Add these modifiers to the die in addition to other modifiers for the roll.
13.11 Combat Resolution Procedure
-
SP strength ratio: Each player determines the total SPs of his units involved in the combat (see 13.11a). Compare the two totals to determine a strength ratio, rounded in favor of the defender. Find the ratio column on the close combat results table. (Translator's note: the attacker's SP total is divided by the defender's SP total.)
-
Combat Value (CV): For each unit (stack) involved in the combat determine its CV (see 13.11b) and apply all modifiers (see 13.11c). If there are multiple stacks per side, the final CV of each side is the average of the CVs of each stack.
-
Die roll: Each player rolls a D10 and modifies the result by his CV. A modified roll may have a result of zero or be negative. An unmodified roll of '0' by either player causes a close combat special result (14.8). Subtract the defender's modified die roll from the attacker's modified die roll. The difference obtained is cross-indexed with the appropriate ratio column and the result is applied.
For each whole ratio above 6:1 the attacker adds 1 to his die roll. For each whole ratio below 1:3 the defender adds 1 to his die roll. Thus, a ratio of 8:1 would add +2 to the attacker's die while a ratio of 1:4 would add +1 to the defender's die.
13.11a Strength Points (SPs): Each player totals the SPs of all his units involved in the close combat. Non-activated units stacked with activated attacking units are not counted. Artillery units that are stacked with attacking or defending infantry units are not counted. When artillery units defend alone without being stacked with infantry, each artillery unit has an SP value of 1 per unit regardless of the size of its current strength.
The number of SPs of a unit or stack that contribute to a combat is determined as follows:
- All SPs for each hex of the unit that is adjacent to an enemy unit (for single-hex formations this will correspond to all the SPs in the unit or stack).
- Halve (rounded) the SPs for each of the unit's hexes that is not adjacent to any enemy unit involved in the combat and that is adjacent to a flank hex of an enemy unit involved in the combat (this occurs when a multi-hex formation extends beyond an enemy unit). The SPs in a hex are not counted if they are not adjacent to the enemy unit, nor to one of its flank hexes.
- The SPs calculated from (1) and (2) are the unit's total SPs for the combat. If the unit is disordered this total is halved (rounded).
Examples: In example no. 1, the 4-SP COR unit in a single-hex formation uses all its SPs. The 8-SP MDC unit over 2 hexes would use the 4 SPs of the right side but only half (2 SPs) of its left hex because it is not adjacent to the engaged enemy unit, but because it is adjacent to the enemy flank hex 'F'. In example no. 2, the cavalry stack could use only 7 of its 13 SPs: 5 SPs of its right side which is adjacent to the enemy and 2 SPs from the middle hex which is adjacent to the enemy's right flank. The 4 SPs in the cavalry's left hex do not contribute to any combat.
13.11b Combat Value (CV): Each unit (stack) involved in the combat determines its CV as follows: a) For column/square/skirmish/general order formations, use the combat value (also called "Combat bonus" or "close combat level" in older games), of the top unit in the stack regardless of the number or types of units in the stack or the SPs in each unit. For formations that allow stacking with artillery (such as square), use the first top unit that is not artillery. b) For line/hook formation, use the average CV (rounded) of the units contributing up to 4 SPs per hex (excluding artillery) of the line/hook. c) Artillery alone defending in a hex has a CV of 0.
Example: A 2-hex line stack is composed of three units: the top unit has 5 SPs and +3 CV, the middle unit has 4 SPs and +2 CV and the bottom unit has 1 SP and a +4 CV. Since there are two line hexes, only the first units contributing the 8 SPs (4x2) required will be retained to calculate the average CV. The sum of the SPs of the first 2 units, (5 SP + 4 SP), is enough to contribute the 8 SPs required. These units have a CV of +3 and +2 for an average combat value of 2.5 or 3. The +4 CV of the bottom unit of the stack is not used.
13.11c CV Modifiers: The following list details all the modifiers that can be applied to a CV on one or both sides. The SP loss modifier is always applied first. All other modifiers are cumulative and their total is added to the CV printed on the counter (or to the printed CV halved if the SP loss modifier is applied). The net result can give a CV equal to '0' or negative.
-
SP losses: A unit's printed CV is halved (rounded) if its current SP losses are 50% or more of its printed SP value.
-
Shaken morale: the CV of a shaken unit is modified by -5.
-
Formations: In addition to the following list, other modifiers by formation type may be given in the Battle Rules.
- Infantry in line defending against cavalry in the second and following rounds of combat (14.5): Defending infantry +2
- Square against cavalry: square +5
- Square against infantry: square -5
- Skirmisher defending in:
- clear terrain against infantry: Skirmisher -4
- non-clear terrain against infantry: Skirmisher -2
- clear terrain against cavalry: Skirmisher -6
- non-clear terrain against cavalry: Skirmisher -2
- Defender in road/march column or limbered artillery: Defender -4
When an attack column is in the front hex of a line, the attack column is always considered to be flanked (see #5 flanking, below).
-
Cavalry: Only cavalry attacking or defending receives the following modifiers if at least one of its close combat opponents is in its ZOC; if the enemy is on the flank of the cavalry or its rear hex neither of the two cavalry CV modifiers will apply. Cavalry type: heavy or medium cavalry +2; light cavalry +1 (A stack containing both cavalry types uses the modifier of the type with the most SPs in the stack. If there is a tie in SPs of each type, use the +2 modifier.) Charge/countercharge movement: +1 per hex moved Note: All cavalry modifiers are ignored for the combat rounds following the first contact (14.5).
-
Flanking: When the flank or rear hex of a defender is in the attacker's ZOC, the attacker makes a "flank attack". When the flank or rear of an attacker is in the ZOC of a defender, the defender makes a "flank attack". Regardless of the number of enemy flank or rear hexes occupied, the CV of the flanking unit is modified by +3.
Example: Units B and C attack unit A. The +3 enfilade modifier to CV applies to unit C because it occupies A's left flank hex 'F'. The +3 enfilade modifier also applies to unit B because it occupies A's rear hex 'R'. However, only one +3 enfilade modifier is applied to B's attack even though it occupies two of A's three rear hexes. If B were in A's front hex 'A' (and C in A's left flank hex) only C would receive the +3 enfilade modifier to its CV; B would not.
When a friendly unit (the defender or the attacker) is flanked by an enemy unit (a stack) that does not take part in the combat (it may take part in another combat or in no combat), the friendly unit modifies the enemy's CV by -3 regardless of the number of flank or rear hexes occupied. This occurs when an enemy unit is in the flank or rear hex of a friendly unit and faces the friendly unit.
Example: Unit A attacks unit B. Unit C is not part of the combat. Unit A is in C's front hex and C also occupies A's flank hex. Unit A suffers an enfilade modifier of -3 to its CV. If unit C faced toward hexes x-x the modifier would not apply because A would not be in C's front hex.
Note: Flanking modifiers are ignored for combat rounds following the first melee round (14.5).
-
Terrain: A unit's CV is modified by the terrain from which the attack departs, and that in which the defender is located and by the hexside between the attacker and the defender. When several terrain types apply in a combat, the effects on CV are cumulative. If a defender is on different terrain types in the attacker's front hexes, use the terrain type that is most favorable to the defender.
-
Leaders: A leader stacked with attacking or defending units may add his CV bonus (also called "Combat bonus" or "Close Combat bonus" in older games), to the CV of that stack. Only one leader per stack may be used and when several leaders are in a stack the player owning the stack chooses the leader to use. A player is not required to use a leader to modify a close combat's CV.
Example: If there are two attacking stacks each with a leader, each leader applies his CV bonus to his stack. If there is only one stack with two leaders the player who owns the stack chooses which of the two leaders applies his bonus to the stack.
Example of CV modifiers: A 6-SP infantry unit with a printed CV of +2 has lost 3 SPs, is flanked, is in a woods hex and is stacked with a leader. Its CV is halved to +1 because of SP losses. It has a modifier of -3 because of enfilade which brings its CV to -2. The woods terrain and the leader's CV bonus each bring a modifier of +1. The cumulative total of modifiers is -1 (+2 plus -3) which are added to the printed CV (+1) for a final CV of 0 (+1 plus -1).
(Translator's rendering note: the French text of this example is internally inconsistent about which figures are added; it is reproduced as the French translation states it.)
14.0 Close Combat Results
14.1 Close Combat Results Table
14.1a The difference between the attacker's and the defender's modified die roll produces the result for the close combat. The defender's modified die roll is always subtracted from the attacker's (attacker's die - defender's die), and the difference is found on the side columns of the close combat results table. The row of the table corresponding to this difference is cross-indexed with the column of the committed SPs ratio and the result read at the intersection of this row and this column is applied before continuing the resolution of the following combats.
14.1b Close combat results:
The attacker's result is on the left under column 'A' and the defender's result is on the right under column 'D'. In Fontenoy these results are separated by a "/".
- '#' - Strength Points lost (see 14.2)
- 'D' - Disorder (see 14.3)
- 'M' - Morale check (see 14.4)
- 'R' - Rout (see 14.6)
- 'S' - Surrender (see 14.7) (Translator's note: S for surrender.)
- '-' - no effect
14.2 Strength Point Losses '#' (SP)
14.2a When SP loss results are combined with 'D', 'M' or 'R', the SP losses are always applied first. If both sides suffer SP losses, they are applied one by one between each side starting with the attacker. If one side is eliminated, the surviving side ignores all remaining losses and other results, even an automatic rout result.
14.2b Each side distributes its SP losses as equally as possible among the non-artillery units that took part, starting with the involved unit having the greatest number of SPs. If several units are eligible to take a single SP loss, the player owning the units chooses the unit.
Note: Fire losses are applied to a stack from top to bottom. Close combat results are applied according to unit size regardless of its position in the stack.
14.2c The defender's SP losses must be inflicted on non-artillery units first and then on artillery units. The attacker's SP losses are never inflicted on artillery or inactive units, even if the SP losses completely eliminate the attacking units. If the SP losses completely eliminate the attacking units, all artillery and inactive units in the attacker's hex must make a morale check (E).
Example: A stack composed of an activated infantry unit (1 SP), an artillery unit and an inactive infantry unit, initiates a close combat against a 2-SP infantry unit. The result is '1D/2R'. The activated attacking infantry is eliminated and the defender suffers no losses (per rule 14.2a). The inactive infantry unit makes a morale check (E) for the stack.
14.2d The size of a multi-hex formation is never adjusted following SP losses until the close combat is completely resolved.
14.3 'D' Disorder Result
14.3a Certain results require the units of the winning side to be disordered. This is not a disorder check, but automatic disorder. If the unit is already disordered it becomes shaken/disordered. Artillery and inactive units in the attacker's hex are not disordered if all the attacking infantry stacked with them advances after combat (15.0).
14.3b A moving unit immediately stops its movement if it becomes disordered as a result of an opportunity charge combat result (17.0).
14.4 'M' Morale Check Result
14.4a An 'M' result requires both sides to make a morale check (G). The attacker tests first, the defender second. If a side involves several stacks, each stack makes an individual morale check; some stacks may fail and rout while others remain in place. The defender uses the top non-artillery unit in a mixed infantry/artillery stack.
14.4b If no attacker passes the morale check (G) the defender is victorious and does not make a morale check. If at least one attacker passes the morale check, the defender makes his morale check. If no defender passes, the attackers are victorious. If at least one defender passes, the combat continues with a new round and each side re-rolls the die using the same modifiers, apart from the modifiers that do not apply to the second and following rounds. (See combat continuation 14.5)
14.4c A stack that fails its morale check loses 1 SP (per rule 14.2b) and routs regardless of its current morale state, i.e. a unit in good morale goes directly to rout without passing through the "shaken" state.
14.4d A die roll of 00-09 for a morale check (G) does not trigger a morale check special result; treat it as a normal numerical result.
Example: Two units in different hexes attack a defender in a single hex and receive an 'M' combat result. Each attacking unit makes a morale check (G). The first attacker fails: it loses 1 SP and routs. The second attacker passes and this requires the defender to make a morale check. If the defender fails, he loses 1 SP and routs. If he passes, the combat continues between the two surviving units.
14.5 Subsequent Combat Rounds
14.5a If both sides passed the morale check of the 'M' result, the close combat ratio is recalculated using the surviving units and the modifiers are re-applied but not all of the modifiers used for the first resolution will be applied to subsequent combat rounds. The modifiers that are not applied to subsequent combat rounds are set out in the list of CV modifiers (13.11c).
14.5b A cavalry unit (or stack) attacking or defending in line involved in subsequent combat rounds that occupies a hex that is not adjacent to the enemy unit will automatically contract one hex per combat round until all hexes of the line are adjacent to the enemy's hex. At the start of the second round and each later round the farthest hex of the line formation that is not adjacent to the engaged enemy unit is removed, i.e. the line becomes shorter and its SPs are redistributed over its other hexes. The SPs removed from that hex are fully counted in calculating the ratio of the next combat round. If any stacking or formation and terrain restrictions prevent this contraction, the contraction will not occur. This contraction does not trigger opportunity fire or opportunity charge.
Example: 17 SPs of cavalry in a 3-hex line attack a single-hex infantry stack. The cavalry can commit only 9 SPs to the combat (6 + 3) while the hex containing 5 SP does not contribute to the combat. The initial combat ends on an 'M' result and assuming both sides pass the morale check, the combat continues. The cavalry line contracts one hex to the right and the SPs are distributed as shown. There are now 13 SPs (9 + 4) for the combat. If the combat continues to a third round, there will be the 17 SPs in one hex.
14.5c After the SP strength ratio and CV modifiers have been resolved and the dice rolled, the new result is applied. If the result is another 'M', the morale check result procedure (14.4) is repeated and a further combat is fought, if necessary. There is no limit to the number of 'M' results and combat rounds that can occur before one side finally wins the close combat.
14.5d At the end of a combat that lasted at least 2 rounds, after the results have been applied but before pursuit, all surviving cavalry units that are not already disordered automatically become disordered. Cavalry units that are already disordered ignore this additional disorder. This rule does not apply at the end of a single-round combat. In such cases the cavalry is not automatically disordered at the end of the combat.
14.6 'R' Rout Result
14.6a A rout result requires all affected units to automatically adopt rout formation and make a rout retreat (see 20.2). If the hex of the routed attacker contains artillery and/or inactive units these units must make a morale check (E). Defending artillery that routs is directly eliminated.
14.6b Except as noted for artillery, the only SPs lost with a '#R' close combat result are those indicated by the number of SP losses of the result. The rout result as a "combat result" causes no additional SP losses. (Note: This rout result is different, see 14.4c when units fail a morale check (G).)
14.7 Surrender 'S'
A unit that surrenders is immediately eliminated from the game regardless of the number of SPs it has left. Advance after combat (15.0) is mandatory for the attacking infantry and cavalry and for the defending cavalry that eliminated the attackers in its ZOC. Defending infantry does not advance after combat if the attacker surrenders.
14.8 Close Combat Special Results
14.8a When either player rolls a '0' on the close combat die, a close combat special result occurs and the normal close combat result is ignored. Consult the table of close combat special results using the 00-09 die rolls the players rolled, to resolve the combat. The SP losses of the special result appear in the same format as standard close combat results and are applied as described below.
14.8b A close combat special result is resolved by combining SP losses, the possibility of leader loss and a morale check (G). Use the following steps, in the order listed, to resolve the result:
- Apply SP losses per 14.2a.
- For any result with an asterisk, check whether the leader who contributed to the combat by adding his CV is present to see if he is wounded as a result of the combat: roll the die and on a roll of 0 to 3 the leader is eliminated (killed--see 21.4d), on a roll of 4 to 9, there is no effect.
- Rank each stack of both sides according to the ER of the top unit of the stacks, adjusted by the morale check (G) modifiers. (A mixed infantry/artillery stack uses the top infantry unit.) The stack with the worst ER is ranked first and the stack with the best ER (thus the lowest ER value), is ranked last. An opposing stack with an ER equal to the rank of the attacker's stack ranks before the defender's stack. Friendly stacks of equal rank are ranked one before or after the other, at the choice of the player controlling them.
- Each stack then makes a morale check (G) in the order of this ranking, starting with the worst stack (highest ER), and so on to the last. A stack that fails the check loses 1 SP and routs. If it passes, the next stack in the ranking order tests and so on until all stacks have tested their morale.
- If all stacks of one side fail their check and the other side still has untested stacks, the combat ends and the remaining morale checks are ignored.
- If both sides have stacks that passed their morale checks, then the combat is continued for a new round. The die roll may again trigger another close combat special result.
14.8c A die roll of 00-09 for the morale check (G) does not trigger a morale check special result, it is treated as a normal 00-09.
Example: In a close combat between two attacking stacks and one defending stack, the players roll a '0' and a '3', which gives a '2/2*' on the special results table. Each side loses 2 SPs and the "" requires a check to be made for the leader for the defender but no leader is present, so this "" is ignored. Next all three stacks are ranked in ER order. One attacking stack has an ER of 27 and the other an ER of 23 but as it lost half its SPs, this adds 10 to its ER, giving a final ER of 33 for this stack. The defending stack has an ER of 30. The attacker's stack with 33 ER tests first, followed by the defender's stack with 30 and then the attacker's stack with 27. The 33 stack fails its check, loses 1 SP and routs. The remaining attacker's and defender's stacks pass their checks and the combat will continue. If the defender's stack had failed its check, the surviving attacker's stack would not have had to test its morale.
15.0 Advance After Combat
15.1 Vacated Hex
15.1a When defending units leave the attacker's front hex as a result of the combat, or of the defender's failed morale check (B), or of a retreat before close combat, at least one attacking unit must advance to occupy the vacated front hex. If a defender was in the attacker's flank hex there is no advance after combat into that flank hex (see 13.6a [Exception] and 13.8d). If the attacker is composed of infantry and cavalry, the cavalry advances. Artillery and inactive units that are stacked with the attackers never advance after combat.
15.1b If, as a result of close combat, the attacking units leave the front hex of a defending cavalry in line or attack column, at least one defending cavalry unit must advance to occupy the front hex vacated by the attacker. Defending cavalry that is attacked only through its flank/rear hex or that is not in line or attack column does not advance after combat. Defending infantry and artillery never advance after combat.
15.1c When there are several vacated hexes, the advancing units are not required to occupy each vacated hex but at least one hex per enemy stack that attacked must be occupied. If there are not enough units to make the advance, the advancing player decides which hex will be occupied and which will not. The number of units that advance is at the choice of the player owning them but at least one of them must advance and have taken part in the attacker's close combat morale check (B) and, for the defender's advancing cavalry, the advancing unit must have taken part in the defender's morale check (B) or the countercharge morale check (C).
15.1d A stack in a single-hex formation may advance into any of the adjacent hexes left by a multi-hex formation. A single-hex formation stack that can separate may occupy the different hexes if the player owning it wishes. A single-hex formation that advances may not extend to occupy the multiple hexes left by a defeated opponent.
15.1e A multi-hex line may take the option to advance with the width of its entire line provided that at least one adjacent evacuated hex of the losing stack is occupied by the advancing line. This option allows a multi-hex formation to contract, at no cost, provided that the number of stacked SPs is permitted.
15.1f Advancing units must comply with the facing, formation and stacking rules. They may not change their formation unless required by the terrain type of the vacated hex.
15.1g Advancing units may freely change their facing in any direction after moving into the vacated hex but only if that hex is not in an EZOC. In addition, advancing cavalry may not voluntarily change its facing if the defeated enemy unit survived the combat and retreated, in other words, if there is a possibility of pursuit. (Exception: Cavalry that pursues an enemy is required to change its facing as part of the pursuit procedure even if it is in an EZOC. The direction of this facing change is determined by the direction taken by the retreating unit (see 16.2a.2).)
15.1h No advance after combat or cavalry pursuit (see 16.0) occurs until the current combat is completely resolved. Thus, in a combat with several defending hexes, if the units of one of the defending hexes fail their morale check and rout while the units of the other hex hold in place, the attacker neither advances nor pursues until the combat has been resolved.
15.1i Advance after combat does not trigger opportunity fire or opportunity charge.
15.2 General Order Formation Advance After Combat
A unit in general order formation that advances after combat into a hex in which the terrain does not require general order formation remains in general order and a 'GENERAL ORDER' marker is placed on it. The unit is in general order for as long as it keeps this marker. The unit cannot leave that hex in a later activation unless it first spends all its MPs to leave general order formation; at which time the marker will be removed (8.1h, 8.4i).
16.0 Cavalry Pursuit
Cavalry that advances after combat may pursue the retreating enemy unit. Cavalry pursuit expends pursuit points (PPs) to follow the retreating unit with pursuit movement until: a) the PPs are used up, or b) the retreating enemy is eliminated, or c) terrain or other units block the cavalry's path, or d) the cavalry is successfully recalled.
When pursuit movement ends, the cavalry makes a recall disorder check (F) if it has not already been recalled. A free move allows the remaining PPs to be spent for additional movement and/or facing changes.
16.1 Pursuit Prerequisites & Conditions
16.1a Non-shaken attacking or defending cavalry units that advanced into a vacated enemy hex will automatically pursue the retreating enemy units. This includes cavalry that countercharged (13.5) and opportunity charges (17.0).
16.1b There is no pursuit in the following situations:
- The advancing cavalry is shaken.
- All defeated enemy units were eliminated in the close combat.
- The enemy hex was vacated following a retreat before close combat, even if the enemy unit routs because it failed its morale check at the end of its retreat.
- The cavalry unit that, after advancing into the vacated hex, has a non-routed enemy unit in its ZOC.
- The cavalry that advances after combat is recalled before any pursuit is undertaken.
Note: If the hex into which the cavalry advanced after the close combat is in an enemy zone of control (EZOC) the cavalry may continue the pursuit.
16.1c Pursuit occurs after all advances from an individual close combat have been completed. If several stacks advanced after the close combat, pursuit is fully resolved for each stack before starting the pursuit of another stack. When there are several stacks with possible pursuit, the player owning them determines their order of pursuit. Pursuit is not a "movement" and does not trigger opportunity charges or fire.
16.2 Pursuit Procedure
16.2a Pursuit step
-
The pursuing player rolls a die and the result obtained is the number of pursuit points (PPs) the cavalry will have available to perform pursuit movement and any free movement. A leader stacked with the cavalry may modify the PP die roll (see the game's Battle Rules). If the pursuing cavalry is disordered, the PPs are halved (rounded) after all modifications have been applied. If an unmodified '0' is rolled on the die, the die is re-rolled and the new result obtained is consulted on the pursuit special results table.
-
If the cavalry is in a line over several hexes it is reduced to a single hex in one of the hexes it occupied. Units in attack column stay in that formation. The cavalry unit must face with one of its front hexes toward the first hex of the enemy's retreat path and if this is not the case, its facing is immediately changed so that it does. This required facing change remains possible if the cavalry is in an EZOC. This is an exception to 15.1g. This contraction and facing change are not part of movement; they are automatic. The stacking requirements are waived until the end of the pursuit.
-
When several stacks retreated from a close combat, the cavalry must pursue the stack that vacated the hex into which the attacking cavalry advanced after combat.
16.2b Performing the pursuit steps
Pursuit consists of the movement and facing changes that the cavalry performs by expending its PPs. There are two types of movement--pursuit movement and free movement. Pursuit movement is used as long as the cavalry is able to enter a hex of the retreat path and is not recalled. Free movement is used after pursuit movement and allows the cavalry to expend the remaining PPs.
Movement cost: Pursuit and free movement are special cavalry movements (SCM, 11.10). Both types have the same costs to enter a hex or cross a hexside. These costs are listed in the SCM cost column on the Terrain Effects chart. The cost is the same regardless of the cavalry's formation, in line or attack column. The pursuing stack cannot separate during pursuit movement or free movement.
Retreat path: The pursuing cavalry must follow the exact path of the retreat of the withdrawing unit until pursuit movement is completed. The retreat path is the string of hexes that the retreating unit crossed, including the hex it currently occupies. Each of these hexes is called a retreat path hex. When the cavalry enters a retreat path hex, it must immediately (it is not an option) be oriented toward any front hex (at the player's choice) that lies on the next hex of the retreat path. This facing change costs no PPs.
End of pursuit movement: Pursuit movement ends when one of the following conditions occurs:
-
No more PPs or EZOC When the cavalry has used its last PP or enters an EZOC, pursuit movement stops and if no recall has been attempted, a recall disorder check (F) is made. (Having no more PPs is not the same as being unable to spend them.) If there has already been a failed recall attempt, a second recall disorder check does not have to be made. There is no free movement and the pursuit procedure continues to the end of pursuit step (16.2c). (This condition takes priority over cases 2 and 3 below, if it occurs simultaneously with any of them.)
-
Elimination of retreating unit A retreating unit (stack) is eliminated when one of the following occurs: a. For each retreat path hex entered (not for each PP expended) by the pursuing cavalry, the withdrawing unit loses 1 Strength Point. If this makes the unit lose its last SP, it is eliminated. b. When the pursuing cavalry enters a retreat path hex occupied by the retreating unit, the retreating unit is eliminated and the pursuing cavalry unit keeps the facing it had on entering the hex. In all cases pursuit movement ends. If no recall has already been attempted, a recall disorder check (F) is made. Any unspent PPs may be used for exploitation; otherwise, the procedure continues to the end of pursuit step (16.2c). Any leaders that retreated with an eliminated unit (stack) are also eliminated (21.4e).
-
Retreat path blocked The retreat path is blocked for the pursuing cavalry if one of these conditions is met:
- It cannot enter a hex or cross a hexside that is prohibited to SCM movement (see the game's 'Terrain Effects chart').
- It cannot enter a hex if it has not enough PPs.
- It cannot enter a hex if a non-routed enemy unit is in the cavalry's ZOC. If the retreating unit is in a Front hex and a non-routed unit occupies the other Front hex, the retreat path is blocked. A blocked retreat path ends pursuit movement and if no recall has been attempted a recall disorder check (F) is made. Any remaining PPs may be used for exploitation; otherwise, the procedure passes to the end of pursuit step (16.2c).
- Cavalry recall (see cavalry recall 16.3) Recall attempts occur in the following circumstances: a. An attempt may be made at any time before or during pursuit movement before any of the conditions that stop the pursuit above occur. A successful recall ends pursuit movement. If the recall fails the pursuit movement continues and no recall disorder check (F) will be made at the end of the pursuit. b. At the end of pursuit movement a recall disorder check (F) is made automatically if no recall has yet been attempted.
Exploitation If pursuit movement ends by conditions 2, 3 or 4 and if the cavalry still has PPs remaining, then exploitation is possible. At least 1 PP must have been expended on pursuit movement and there must be at least 1 PP remaining. If the pursuing player successfully recalled his cavalry before all PPs were used up, there is no exploitation, regardless of the number of PPs available. A unit (stack) that fails its recall disorder check (F) may still use exploitation.
A cavalry unit performs exploitation by expending any remaining PPs to move into a Front hex and/or change its facing. The cavalry is not required to expend all its available PPs or even to spend any.
Exploitation restrictions During exploitation the pursuing unit (or stack) may make a maximum of 2 facing changes. Each facing change may be made in any direction for a cost of 1 PP regardless of the number of hexpoints. A hex cannot be vacated if an enemy unit (routed or not) occupies any of the Front hexes of the pursuing unit. A facing change must be made before the hex can be vacated. The unit cannot enter a hex or cross a hexside that is normally prohibited to cavalry in line or attack column. It cannot enter a hex if it has not enough PPs. It cannot enter a friendly occupied hex.
End of exploitation Any of the following events immediately ends the exploitation of the pursuing cavalry:
- It enters an EZOC.
- It has no more PPs.
- It cannot make a valid move.
- The player simply declares that the exploitation is over.
16.2c End of pursuit step
After pursuit movement and once any exploitation is complete, the cavalry stack is marked 'disordered' if it failed its recall disorder check (F). It also checks for SP excess and if the SP stacking limit is exceeded the stack is separated and the new stack so formed is placed in a vacant hex adjacent to the original stack in the following order of priority: Rear, Flank and Front. The stacking order of the units may be freely changed. The new stack must have the same facing, the same formation and the same organization state as the original stack. The new stack may not be placed in an EZOC, in prohibited terrain, in an already occupied hex or in terrain separated from the original stack by a prohibited hexside.
Note: If it is impossible to separate the stack because of the facing of the original stack then the facing of the stack must be modified to make the separation possible.
Example: An attacking cavalry unit charges a 3-SP infantry unit and receives a '1D/1R' result. The infantry loses 1 SP and routs, which makes it retreat 4 hexes and the cavalry loses 1 SP and is disordered. The cavalry advances after combat into the vacated hex. There is no enemy unit in its ZOC so it rolls a die for 7 PPs, but being disordered, the 7 PPs are halved and rounded up to 4. It uses two PPs to advance along the retreat path, eliminating the 2 remaining SPs of the routed infantry, and ending its pursuit movement. It passes its recall disorder check and still has 2 PPs which it can use to change its facing and move 1 more hex where it ends the pursuit disordered.
16.3 Cavalry Recall
16.3a Only one recall attempt may be made per stack per pursuit. The pursuing player has the option of making an attempt before or during pursuit movement. If no attempt has already been made, the pursuing cavalry will automatically try to be recalled when pursuit movement ends (before any exploitation).
16.3b If a unit or stack fails a recall disorder check (F) before or during pursuit movement, pursuit movement continues unless condition 1, 2, or 3 of the 'end of pursuit movement' (16.2b) is met. Because of the failed recall disorder check, the unit(s) will be marked as 'DISORDERED' (or 'SHAKEN/DISORDERED' if already disordered) during the 'end of pursuit' phase (16.2c). Otherwise, the pursuit is not affected by a failed recall disorder check (F); and any remaining PPs are not halved for the pursuit or exploitation since the disorder will be marked only after any exploitation is completed.
16.3c The pursuing player makes a recall disorder check (F) and compares the result to the modified Effectiveness Rating (ER) of the top cavalry unit (at the top of a stack). A die roll between 00 and 09 causes a 'Disorder Check Special Result'.
17.0 Opportunity Charge
The opportunity charge (Op. Charge) is a form of Close Combat that occurs (only) during the movement phase when an active unit performs any type of movement, formation and/or facing change, within 2 hexes of a reacting cavalry unit. An opportunity charge is not mandatory.
The conditions that trigger opportunity fire (12.8c-d) also trigger the opportunity charge. When active units trigger opportunity fire or opportunity charge, the order of their resolution is determined by the reacting player. The opportunity charge is a Special Cavalry Movement (SCM 11.10), not a regular movement and does not expend MPs. It does not trigger opportunity fire or charge.
17.1 Who May Charge
17.1a A reacting cavalry unit in line or attack column that is not in an EZOC may declare an opportunity charge. A routed or Shaken unit cannot make an opportunity charge. A disordered unit may make an opportunity charge only when the triggering unit is in one of its front hexes, i.e. it cannot make an opportunity charge on a unit that is two hexes away.
17.1b Reacting cavalry may not make an opportunity charge against an enemy unit two hexes away if it has another enemy unit(s) in any of its Front hexes. The cavalry unit may make an opportunity charge on a triggering enemy unit that is already in one of its Front hexes, even if there is another non-moving enemy unit in another Front hex.
Note: If the reacting unit has an enemy unit in each of its Front hexes and one of them triggers an opportunity charge, all the enemy units will be engaged in a Close Combat, not only the one that triggered the opportunity charge (see 13.6a).
17.1c Any cavalry stack may make an opportunity charge on a moving enemy unit but each charge is resolved separately. Part of a stack cannot attempt the opportunity charge--the entire stack must make the attempt or not.
17.1d No cavalry unit may attempt an opportunity charge more than once in a movement phase against the same enemy.
17.1e A unit's ability to perform an opportunity charge is not affected by command control. Even if a unit was determined earlier in the Game Turn to be 'Out of Command', it may still make an opportunity charge.
17.2 Opportunity Charge Procedure
17.2a The charging unit performs a Morale Check (H) and if it passes, it performs its charge movement (like a countercharge movement, see 13.5) and the resulting Close Combat resolution. If the unit that triggered the charge is adjacent to the charging unit then no movement is required. If there is a hex between the active unit and the reacting cavalry, the cavalry must advance one hex (no facing/formation changes or stack separations are allowed). The hex(es) entered must be unoccupied. If the charging unit fails the Morale Check (H) it is Shaken and cannot charge.
17.2b The opportunity charge is a Special Cavalry Movement (SCM, 11.10), not a regular movement. Each hex entered or hexside crossed must be of a type permitted for SCM movement (see the game's TEC), and the unit must be able to pay the SCM cost. If the charging cavalry cannot reach the triggering enemy unit, the charge is cancelled and the reacting cavalry is automatically Shaken.
17.2c The active player's units may not make facing/formation changes, Countercharge, Retreat Before Close Combat, or use the Cavalry Defense Option in reaction to the opportunity charge.
17.2d When a separating stack triggers an opportunity charge, the charging player has the option to: a) Resolve the Close Combat against the original stack, i.e. the units are in a single stack before the triggering movement (facing or formation change), and the Close Combat is resolved as set out in 17.3a. b) Resolve the Close Combat against the stack after the separation, i.e. the units are reorganized between the moving units and the non-moving units. The Close Combat is resolved as set out in 17.3b. The charging player must make his choice before the Close Combat procedure has begun. If several opportunity charges are caused by a single movement (17.1c), every opportunity charge must be resolved using the same option, 17.3a or 17.3b.
17.3 Opportunity Charge Close Combat
17.3a When the opportunity charge is performed against an active stack that does not contain moving AND non-moving units (that is, all units move) it is resolved as a regular Close Combat except that the process runs as follows:
- Individual Combat Designation (13.6): Remember that all enemy units, even if they have not been activated, that are in the front of a unit making an opportunity charge must be attacked.
- Defender Morale Check (B) (the active player's unit) (13.7).
- Defensive Fire (13.10).
- Combat Resolution (13.11).
17.3b When the defender's hex contains non-moving AND moving units (those that triggered the opportunity charge), the Close Combat order used is as listed in 17.3a, but the defender's SP and CV are determined as follows:
- The top moving unit is used for the Defender Morale Check (B) (the active player's unit), and for any 'M' result obtained in the Close Combat & Special Result (G). If the only moving unit is an artillery stacked with a non-moving infantry unit, the ER of the non-moving infantry is used for the Morale Checks. The SP total is that of the entire stack--both moving and non-moving units. (Exception: artillery stacked with infantry--see 13.11a).
- Only the CV value of the moving unit is used and all CV modifiers are based only on the moving unit, even if it is only artillery. All aspects of the non-moving unit are ignored to determine the defender's final CV value. As with normal Close Combat, one defending leader (moving or not) per stack may add his CV bonus to the defender's final CV value.
- Only the non-moving units perform Defensive Fire (13.10) if they are eligible to fire. Moving units do not perform defensive fire.
- The Close Combat result is applied to the entire active stack, to the moving and non-moving units. For subsequent melee rounds, the SP number and CV are determined according to points 1 and 2 above.
17.3c If the active unit wins the combat and has enough MPs left, it may continue its movement and may trigger further opportunity charges. If it suffered a Disorder result, its movement is over.
17.3d When an active stack composed of moving and non-moving units receives a Disorder Close Combat result (ending the movement of the moving units) and a valid stack cannot be formed, all the units that were moving are Routed and the non-moving units must make a Morale check (F) (see Illegal stacks (10.13)).
17.3e Active cavalry that wins the combat and that was attacked through a Front hex is required to advance after combat (see 15.1a) and to carry out the pursuit procedure (16.2) if it is not shaken. If it is recalled (16.3) before using Pursuit Points and if it has not suffered a disorder result, it may continue its movement by expending any remaining Movement Points (MPs). If it was not recalled (or fails its recall check), it performs the pursuit and any remaining MPs are ignored. Active cavalry that won the combat and does not advance after combat (i.e. was not attacked through a Front hex) may continue to move per point 17.3c.
17.3f If during its movement the active unit triggered a Movement Action Disorder Check (A), it is still required to make that disorder check when its movement is finished (before any Pursuit) unless it was Routed or eliminated by the opportunity charge combat.
18.0 Organization States
All units, except Leaders, skirmishers and Routed units are either in order or disordered. Units in order function normally. Disordered units are marked with a 'DISORDER' marker and have their movement and Combat capability penalized. A unit's organization state has nothing in common with its Morale state (see 19.0) so a unit may be In Order and Shaken or Disordered with good morale.
18.1 Disorder Checks
18.1a During the movement and combat phases, a unit or stack may be required to make a disorder check which is made by rolling two D10 (one designating the tens and the other designating the units; remember that the '0' of the die is zero and not ten). The result is compared to the unit's Effectiveness Rating (ER) and if the result is lower than the ER, the unit is disordered.
A die roll of 00-09 is a Special Result found on the 'Disorder Check Special Results' sheet. (Exception: A Disorder Recovery Check (G) never triggers a Special Result.) If the Special Result requires a second die roll, a new 00-09 result is not treated as a Special Result. When a Special Result Disorder Check is rolled, ignore all previous ER modifier calculations and use only the modifier listed in the Special Result table.
The type of Disorder Check and the circumstances apply to the ER modifiers of the testing unit, not to the die roll result.
18.1b The following events cause a Disorder Check:
- A. Movement actions (see 18.2b)
- B. Attack column making a facing change (9.3c)
- C. 'D' result of an opportunity fire or the SP loss (12.9e & i)
- D. Defender's close combat reactions (13.4e)
- E. 'D' result of defensive fire or the SP loss (12.9e & i, 13.10e)
- F. Cavalry recall (16.3)
- G. Disorder recovery (18.6) (return to order)
18.2 Movement Phase Disorder Checks
18.2a Disorder Checks (A), (B) and (C) are all triggered during the movement phase. A Disorder Check (A) may be triggered during Cavalry Charge movement (13.3f), part of the Close Combat phase. A Disorder check (A) is made once, at the end of a unit's movement. Disorder checks (B) may occur at several times during a unit's movement.
18.2b A Movement Actions Disorder Check (A) may occur as a result of normal Movement (11.0) and Cavalry Charge Movement (13.3), but is never caused by Opportunity Charge, Countercharge, Pursuit, Rout or exploitation. A unit is required to make a Movement Actions Disorder Check (A) upon completion of its movement if it performed one or more of the following actions during its movement:
- Formation changes in non-clear terrain (8.7)
- Interpenetration (10.7)
- Movement in non-clear terrain (11.2d)
- Rapid march movement (11.4)
- Backward movement (11.7)
Only one disorder check (A) is made regardless of the number of these actions that were performed during the unit's movement. The ER modifier for each action performed is accumulated and added to the total ER modifiers that will be applied to the Disorder Check (A). If the unit routs before making the disorder check (A) the check is ignored.
Example: An activated unit uses Rapid march (+5), moves into a village hex (+5) and passes through another unit (+10), makes a disorder check (A) upon completion of its movement with a modifier to its ER of +20. As it is also stacked with a leader with an ER bonus of -5, the final modifier is reduced to +15.
18.2c An Attack Column that makes a facing change makes a disorder check (B) immediately before the unit's facing change. If the check fails, the unit's movement is finished, the facing change is not made and the unit is disordered (or Shaken/Disordered if it was already disordered). If the unit passes the check, the facing change is made and if it has Movement Points left, it may continue its movement.
18.2d When Opportunity Fire causes an SP loss or a 'D' result, the moving unit is required to immediately make a disorder check (C) after all SP losses have been removed and before any other Morale check that might be required following the SP losses. If the unit fails the disorder check, it is disordered (or Shaken/Disordered if it was already disordered) and it ends its movement in that hex--it successfully completes any facing/formation change, but no longer leaves the hex--if it had planned to. If the unit passes and has MPs left, it may continue its movement.
18.2e If a disorder check (B) or (C) is made in a hex occupied by a moving unit and a non-moving unit, the check applies only to the moving unit. If the moving unit fails the check, ending its movement stacked with a non-moving unit and they cannot form a valid stack (10.13), the moving unit automatically routs and the non-moving unit must make a morale check (F).
18.2f In certain circumstances, a unit is required to make several disorder checks in the same hex. When disorder checks (B) and (C) are triggered in a hex, they are resolved in the order in which they were triggered. Each check uses only the ER modifiers that are listed for it. Disorder check (A) is always resolved last when several checks are required, in the last hex into which the unit moved.
18.2g Non-moving units that are required to make disorder checks must do so at the end of the moving unit's movement.
18.3 Automatic Disorder
The following describe the circumstances in which a unit is automatically disordered without a disorder check being made:
- A square falls below the minimum of 3 Strength Points (SP) (8.4g).
- 'D' results in Close Combat (14.3).
- Cavalry units that make a second and subsequent melee round in a Close Combat--the disorder is applied at the end of the Close Combat. (This disorder is ignored if the cavalry began the Close Combat 'disordered' (see 14.5d).)
- A non-skirmisher unit that retreats before Close Combat in, or through non-clear terrain (20.1e).
- A unit B that is passed through by another retreating unit, fails its 'Friendly Unit Retreats' Morale check (F).
18.4 Skirmishers
Skirmisher units are exempt from all disorder checks and are never disordered. When routed skirmishers rally (see 19.5b), they are Shaken, and not Disordered/Shaken.
18.5 Effects of Disorder
18.5a A unit's movement allowance is halved (rounded). The maximum number of SPs that can fire per hex is halved (rounded). Current SPs are halved (rounded) for Close Combat ratio calculations. ER is increased by 5 for all disorder checks unless specified otherwise. Pursuing cavalry has its pursuit points halved (rounded).
Example: A disordered 9-SP infantry unit in a 4-rank line over 2 hexes would be able to fire with 2 SPs from each hex instead of 3 and 4 from each hex. A disordered stack of three 10-SP infantry in line over two hexes would be able to fire 2 SPs from each hex instead of 4 from each.
18.5b A Disordered unit cannot perform any of the following actions:
- Square movement or formation change to square (8.1e)
- Unit breakdown & reformation (8.5a, b)
- Formation changes in non-clear terrain (8.7)
- Reversing direction (9.6a)
- Rapid march (11.4)
- Voluntary extension and contraction of a line or march column (11.5).
- Artillery prolonge movement (11.6)
- Backward movement of the line (11.7)
- Cavalry charge on non-adjacent enemy units (13.1a, 17.1)
- Defender reactions (13.4)
- Countercharge movement (13.5)
- Retreat of a non-skirmisher unit before close combat (13.9b)
18.5c A disordered unit that suffers a second disorder becomes Shaken/Disordered. A Shaken/Disordered unit that is disordered again suffers no further effect.
18.5d A moving unit that suffers a disorder result from opportunity fire or from an opportunity charge must stop its movement.
18.5e When a disordered unit enters and leaves a hex occupied by a non-disordered unit, an interpenetration (10.7) occurs and both the moving and non-moving units must make a Movement Actions disorder check (A).
18.6 Disorder Recovery (Return to Order)
18.6a A Disordered unit may return to an 'in order' state when it is activated. The disorder recovery attempt is made in the disorder recovery phase of the Brigade Activation Phase. No unit may attempt a disorder recovery (or attempt to recover from disorder) more than once in a game turn although certain BAR game boxes may have Initiative Special Results that could allow it.
18.6b An activated disordered unit (or stack) that is stacked with a leader automatically recovers to good order.
18.6c An activated Disordered unit that is not stacked with a leader recovers by making a disorder recovery check (G). If it passes, the unit returns to its 'in order' state. If it fails, it remains disordered with no further effects.
18.6d A disorder recovery die roll result of 00-09 is not a Special Result. Treat it as a normal numerical result.
18.7 Stacking & Disorder
18.7a When a stack makes a Disorder check, the ER of the topmost non-artillery unit of the stack is used. If that unit fails, the entire stack is disordered. If the stack consists only of artillery units, the top artillery unit is used.
18.7b When a disordered stack separates, each unit is disordered.
18.7c When a disordered unit stacks with a unit in order, the entire stack formed is disordered. Likewise when a unit in order stacks with a disordered unit to form a stack, the stack is entirely disordered.
19.0 Morale States
All units, except leaders and artillery, are in one of three Morale states: Good, Shaken or Routed. Artillery has a Good or Shaken state. Leaders have no Morale State. Shaken units are marked with a 'SHAKEN' marker. Routed units are marked with a 'ROUT' marker or they may be flipped over to show that they are routed. A Shaken unit may be in order or disordered.
19.1 Morale Checks
19.1a During a Game Turn a unit or stack may be required to make a morale check which is made by rolling two D10 (one designating the tens and the other designating the units; remember that the '0' is a zero, and not a '10'). The result is compared to the unit's Effectiveness Rating (ER). If the result is lower than the ER, the unit fails the morale check. The type of the morale check and the circumstances determine the modifiers that will be applied to the ER of the unit making the check, and not to the die roll result.
A die roll between 00 and 09 is a Special Result whose effects are listed on the 'Morale Check Special Results' table. If the special result requires another morale roll, a new 00 to 09 is not treated as a second Special Result. When a second morale check roll from a special result is rolled, ignore the calculation of the modifiers to the ER of the previous roll and use only the modifiers listed in the Special Result. (Exception: Morale Checks (G) that are made for Close Combat 'M' Results & Close Combat special results, as well as Rally Morale Checks (I) never trigger Special Results.)
19.1b The following situations require a Morale Check:
- A. At least one SP loss from fire, if the unmodified (natural) die roll is even (12.9d)
- B. Pre-close combat Morale Check for attacker and defender (13.2a, 13.7a, 13.8)
- C. Cavalry countercharge movement (13.5c)
- D. Retreat before close combat (13.9c, 20.1a)
- E. Attacker's inactive units stacked with eliminated attacking units (14.2c, 14.6a)
- F. Retreat through friendly units (10.13, 20.1c, 20.2b, d)
- G. 'M' result in Close Combat (14.4) and close combat special results (14.8)
- H. Opportunity charge (17.2a)
- I. Rally (19.5)
- J. Voluntary rout (19.10c)
19.1c All failed Morale Checks (except Rally) change a unit's Morale state. A unit with Good morale becomes Shaken--place a 'SHAKEN' marker on the unit. A Shaken infantry/cavalry unit becomes 'routed'--place a 'ROUT' marker on the unit--and the unit must make a rout retreat (20.2). A Shaken artillery unit that fails is eliminated--artillery is never routed.
Exception 1: A failed morale check for an 'M' close combat result (G) requires the unit to be directly routed regardless of its current morale state, although artillery is always eliminated. Exception 2: The failed morale check of a retreated-through friendly unit (F) causes a unit with Good morale to become Shaken and Disordered--place a 'SHAKEN/DISORDER' marker on the unit. A unit already Disordered becomes Shaken and Disordered with no further effect. Skirmisher units are only Shaken (see 18.4). A unit already Shaken is routed.
19.1d In addition to a change of morale state, certain failed morale checks prevent the unit from performing the action that required the check. For example, a failed attacker morale check for Close Combat prevents the unit from attacking in addition to changing to the 'Shaken' morale state.
19.1e A passed morale check does not affect the unit's morale and allows the action for which the check was required to be performed (as in the Opportunity Charge (17.2)) or improves the unit's morale state (as for a Rally (19.5)).
19.1f Routed units do not make morale checks, apart from Rally attempts (19.5). If a situation requires a unit already routed to make a morale check A or B, instead of making the check, the unit automatically loses 1 SP and makes a rout retreat (20.2). If a situation requires a routed unit to make a morale check (F), it routs instead (19.7f).
19.2 Opportunity Fire Morale Check
19.2a Opportunity Fire that causes an SP loss and whose unmodified (natural) die roll is even (12.9d) may require the active unit to make a morale check (A), which must be made after the disorder check (C) that would also be required by the fire result. If the unit fails the check, it is Shaken or if it is already Shaken, it routs. If it does not rout and has passed its disorder check (C), it may continue its movement.
19.2b If, following opportunity fire, a morale check (A) is made in a hex occupied by a moving unit and a non-moving unit, the check applies only to the moving unit. If the moving unit fails the check and routs while stacked with the non-moving unit, the non-moving unit must make a morale check (F).
19.3 Automatic Rout
The following are the circumstances in which a unit is automatically routed without a morale check being made:
- When an invalid stack is created because of a failed facing change of an attack column (9.3c) the moving units rout.
- When a unit's movement is stopped because of opportunity fire (18.2e) or an opportunity charge (17.3d) in a hex containing non-moving units and an invalid stack is created, the moving units rout.
- When a unit in road column suffers SP losses from fire (12.9h).
- An 'R' result in Close Combat (14.6a).
- When a unit Routs voluntarily (19.10).
19.4 Morale & Stacking
19.4a Apart from the Rally of routed units (19.5), when a stack of units makes a morale check, the ER of the top unit in the stack is used. If that unit fails, the entire stack is Shaken or Routed. If a stack is a mixed artillery and infantry stack, the top infantry unit is used for the check. If a stack is composed only of artillery, the top artillery unit is used.
19.4b When a stack of Shaken units separates, each unit is Shaken.
19.4c When a Shaken unit stacks with a unit with Good morale, the stack is considered Shaken. Likewise if a unit with good morale stacks with a stack of shaken units, the whole stack is Shaken.
19.4d When a Shaken unit enters and leaves a hex occupied by a non-shaken unit, an interpenetration (10.7) occurs and both the moving and non-moving units must make a Movement Actions disorder check (A).
19.5 Rally
19.5a During the Rally Phase all Shaken units are required to try to regain a Good morale state. Each Shaken unit (or stack) makes a morale check (I) with the appropriate modifiers applied to the unit's ER. If it passes, the unit returns to the good morale state; if it fails, it remains Shaken.
19.5b After all Shaken units have made their check, each routed unit is required to try to improve its morale from Rout to Shaken by making a morale check (I) with the appropriate modifiers but each unit in a routed stack tests individually--not only the top unit. If it passes, remove the 'ROUT' marker and place a 'DISORDER/SHAKEN' marker on the unit. (Exception: Rallied skirmishers become only Shaken. Routed units with skirmish capability that rally are assumed to be in Skirmish formation and are therefore also only Shaken.)
19.5c If a unit fails its rally attempt and the die roll result is lower than the printed ER, the unit loses 1 SP in addition to the Rout retreat (20.2).
Example: A Routed unit with a printed ER of 32 tries to rally. The ER modifier for 'Routed' is (+15), its ER is adjusted to 47. On a die roll result of '31' or less it fails, losing 1 SP and making a Rout retreat. On a result between '32' and '46' it still fails, but only makes the Rout retreat.
19.5d When several units in a stack fail their rally, they retreat together as a single stack.
19.5e A Routed unit that rallies adopts any single-hex formation that is permitted for its unit type. A rallied unit may adopt any facing valid for its new formation.
19.5f The die roll result of a rally morale check (I) between 00 and 09 is not a Special Result. Treat it as a normal numerical result.
19.6 Effects of Being Shaken
19.6a A Shaken unit moves and fires normally. It may make facing/formation changes during a defensive reaction.
19.6b Add +10 to the ER of a Shaken unit for Morale Checks.
19.6c A Shaken unit in a Close Combat modifies its CV by -5.
19.6d A Shaken unit cannot perform any of the following actions:
- Initiate Close Combat (13.1)
- Make countercharge movement (13.5)
- Choose the cavalry defense option (13.8)
- Make a cavalry pursuit (16.2)
- Make an opportunity charge (17.1)
19.7 Effects of Rout
19.7a A routed unit cannot fire and cannot initiate Close Combat.
19.7b A routed unit cannot be activated. It does not move in the movement phase. It can only move for a rout retreat.
19.7c A routed unit that is attacked in a Close Combat loses 1 Strength Point (SP) and makes a rout retreat at the time of testing its defender morale (B); instead of making the check. (See also 19.1f)
19.7d During rout retreat, if no vacant hex is available, a routed unit will continue to retreat until it reaches a vacant hex. A routed unit may retreat into an EZOC, but automatically loses 1 SP for each EZOC hex it enters. If it is surrounded by enemy units or impassable terrain, a routed unit loses 1 SP for each hex into which it is unable to retreat. For a retreating stack, any additional SP losses for EZOCs and prohibited hexes are not assigned to each unit, but are assigned to any individual unit in the stack (at the choice of the player owning the units) (See also 20.2d)
19.7e The formation change of routed units is immediate, before they retreat. If a multi-hex formation routs, the unit occupies any of the hexes occupied before the rout unless the rout involves a potential pursuit. In that case, the hex chosen must be the one into which a potential pursuer can advance after combat.
19.7f Routed units that must rout again or be interpenetrated by a unit in rout retreat, will make a rout retreat instead of making a morale check (F).
19.8 General Morale Check Modifiers
The following conditions modify a unit's ER up or down by the number listed and are used by all Morale Checks where that condition applies. See the 'Morale Check Summary' table for the conditions that apply to a type of Morale check.
a) Current losses If the unit's SPs are 50% or less of its printed SP value: +10
b) Current Order/Morale: If the unit's current Order/Morale is:
- Shaken: +10
- Disordered: +5
- Disordered & Shaken: +15
c) Current formation If the unit's current formation is:
- March/road column, General Order: +5
- Square: -10
- Attack column: -5
d) Leader presence: A leader stacked with the unit modifies its ER by the leader's ER bonus.
e) Flanked: If there is a non-routed enemy unit in any of the Flank or rear hexes of the unit making the check, apply a single +10 modifier to ER regardless of the number of enemy units present in those hexes. The enemy unit need not perform an action that causes the Morale Check--its mere presence is enough.
f) Line support: A Line/Hook formation is considered 'supported' when each of its Flank hexes contains:
- a friendly unit that is neither routed nor Shaken
- a hex of non-clear terrain (a hexside does not count) In all other circumstances, the Line/Hook is not considered supported. When it is supported, its ER is modified by -10.
g) Army morale: the value of the Army Morale modifier can change in the game and depends on an army's SP losses, leader losses and currently routed units (see Army Morale 23.0). The current Army Morale modifier is applied to the ER of each unit for all Morale Checks modified by Army Morale.
h) Terrain effects: See the 'Terrain Effects' table for any modifiers applicable because of terrain. Apply all ER modifiers when several terrain types affect the unit or stack that must make a check. When a multi-hex formation occupies several terrain types, use the ER modifier least advantageous to the unit.
19.9 Specific Morale Check Modifiers
The following conditions increase a unit's ER by the values listed and are used only for certain specific morale checks. These apply in addition to any of the general modifiers in 19.8.
a) Morale check (A): Fire result (12.9d) When the unmodified (natural) fire die roll is even and the unit suffers a loss of:
- 2 or 3 actual SPs lost: +10
- 4 actual SPs or more lost: +20
b) Morale check (A): Fire result (12.9d) When the unit is targeted through a flank and/or rear hex: +5
c) Morale check (B): pre-close combat (13.7) If a non-cavalry defender is attacked by cavalry, the defender must add +5 to its ER.
d) Morale check (I): Rally attempt (19.5) If the Rally attempt is made in an EZOC: +10, and +15 for routed units attempting to rally.
e) Morale check (J): Voluntary Rout (19.10d) If a unit that is eligible for Voluntary Rout is passed through by a Voluntary routing unit: +10
19.10 Voluntary Rout
In certain circumstances it may be desirable for a unit to save its skin rather than stand and be surely destroyed in a combat. This rule allows infantry and cavalry to voluntarily rout, but at the risk of causing other activated units to do likewise.
19.10a In a brigade's movement phase, before any unit has moved, the player owning the brigade declares all activated infantry and cavalry units that will voluntarily rout instead of moving. Artillery units cannot voluntarily rout. Only activated units, including independent units and attached units, within command range of the activated brigade leader may voluntarily rout. 'In Command' independent units that used Unit Initiative (7.4) and units that are 'Automatically In Command' (7.5) cannot voluntarily rout. A Brigade Leader may be 'Out of Command' and the units in his Command Range (7.6c) may still voluntarily rout. A unit may voluntarily rout regardless of its organization and morale state except that it must not already be routed.
19.10b If a unit in an infantry/cavalry stack voluntarily routs, the entire stack must rout. Stacks cannot be separated on this occasion. If the infantry in a mixed artillery/infantry stack voluntarily routs, the artillery remains unchanged in the hex. If the artillery unit is stacked with a 2-hex Line, it is placed in either vacated hex. As the artillery is not routed, it is not eliminated as would normally be the case in a rout of an entire mixed artillery/infantry stack.
19.10c Infantry/cavalry units that voluntarily rout perform their Rout Retreat before the other movements of activated units. They are treated like Routed units until they are rallied (19.5). When all Rout Retreat movements are completed, all non-routed activated units, including artillery, must make a Morale check (J). The units' Brigade command status is not reevaluated at that time, even if the activated Brigade Leader retreated with the routed units. In other words, any unit that was entitled to Voluntary Rout, but did not do so must make a morale check (J).
19.10d When a unit that does not retreat and that meets the conditions set out in 19.10c is passed through by a voluntary rout retreat of the same Brigade, the stationary unit does not make a friendly unit retreat morale check (F). Instead, it makes a Voluntary Rout morale check (J) AND it has a +10 modifier for units making a Morale check (J) if the voluntarily routed units pass through it.
19.10e Units not meeting the conditions set out in 19.10c that are passed through by units performing a voluntary rout must make a morale check (F), and not a morale check (J). Such units do not suffer the +10 ER modifier listed in 19.10d, since it is only used for a Morale Check (J).
20.0 Retreats
20.1 Retreat Before Close Combat
In general, the following units have the ability to retreat Before a Close Combat:
- Light infantry attacked only by (non-light) infantry units.
- Skirmisher infantry that are attacked only by infantry units.
- Cavalry that is attacked only by infantry units.
- Light cavalry that is attacked only by anything other than other light cavalry units.
- Skirmisher cavalry that are attacked by any units. Remember, skirmishers cannot initiate Close Combat attacks.
20.1a A unit that makes a Retreat Before Close Combat moves one or two hexes (at the choice of the retreating player) away from the enemy units that are designated to attack it and when the retreat is completed, the unit makes a Morale check (D). This Morale Check replaces the Defender's Morale Check in Close Combat (B) for the retreating unit.
20.1b Movement points are not expended and terrain has no effect except that terrain normally prohibited to the retreating unit's type and formation remains prohibited. A unit cannot retreat into a hex occupied by an enemy. A unit cannot retreat before Close Combat into an EZOC. EZOCs are not negated by friendly units.
20.1c Skirmishers may retreat through a hex occupied by friendly units, with no effect on either unit. Non-skirmisher units that retreat through a friendly occupied hex cause the non-moving unit to make a morale check (F) at the end of the retreat movement. A unit cannot end its retreat in a friendly occupied hex. If no free hex is available then the unit cannot retreat.
20.1d Units must end their retreat in the same formation, with the same facing and occupying the same number of hexes as the starting position before the retreat. Non-skirmisher units cannot retreat into or through a hex that would cause a formation change.
20.1e A Disordered unit cannot retreat Before a Close Combat. A non-skirmisher unit that retreats into or through any non-clear terrain is automatically Disordered at the end of the retreat movement but before the morale check (D) is made.
20.1f Retreating Before Close Combat is not movement and does not trigger Opportunity Charges or Fire.
20.2 Rout Retreat
20.2a Routed infantry retreats 4 hexes. Routed cavalry retreats 6 hexes. This retreat movement does not use movement points and terrain has no effect except that a retreating unit cannot enter or cross prohibited terrain. A hex cannot be entered more than once by the same retreating unit.
20.2b A unit cannot make a rout retreat into a hex occupied by an enemy. A unit may make a rout retreat into an EZOC but it loses 1 SP for each EZOC hex entered; EZOCs are not negated by friendly units. A unit may make a rout retreat through non-routed friendly units but these non-moving units must make a Morale check (F) as soon as the routed unit has completed its retreat. A routed unit automatically makes a rout retreat when another routed unit passes through it even if it has already made its rout retreat this game turn.
Exception 1: Routed skirmishers may retreat through a friendly non-routed unit without causing a morale check (F) (but non-routed skirmishers that are passed through by a routed non-skirmisher unit are required to make a morale check (F)).
Exception 2: A unit performing a Voluntary Rout (19.10) does not trigger a Morale Check (F) when its rout retreat passes through a unit of the same Brigade but it triggers a Voluntary Rout morale check (J). See 19.10c-d.
20.2c A unit or stack cannot end Rout Retreat movement stacked with any other routed or non-routed units. Units that begin a Rout Retreat stacked must remain stacked together, i.e. the stack cannot separate during the rout retreat. A routed stack will separate only in the rally phase when some units in the stack fail their Rally and again make a rout retreat (see 19.5).
20.2d A unit that cannot retreat the full distance because of enemy-occupied hexes or prohibited terrain hexes, or the map edge, loses 1 SP for each hex not retreated. If a unit cannot complete its Rout Retreat because of the presence of friendly units, it moves through the occupied hex and continues its rout retreat until it has reached an eligible hex. The units it passed through must make a morale check (F) when the retreat is completed.
20.2e An artillery unit, limbered or unlimbered, never makes a rout retreat. Instead, it is eliminated.
20.2f Rout retreat is not movement and does not trigger Opportunity Fire or Charge.
20.2g Direction of Retreat: The withdrawal of units must be made in as straight a line as the hex grid permits, in this order of priority:
- away from the enemy units that caused the retreat and
- toward the rear of their own army. A friendly occupied hex may be entered and must not be avoided if entering that hex allows the unit to move away from the enemy.
21.0 Leaders
21.1 Movement & Stacking
21.1a Leader units move like other unit types, but have their own terrain costs. Leaders are not required to end their movement stacked with friendly units. They do not count toward the stacking limit. They cannot enter EZOCs unless they are stacked with a friendly unit.
21.1b A friendly leader in a hex without friendly combat units does not block the movement of enemy units. Instead, the leader is moved to an adjacent hex that is not in an EZOC or an EZOC hex occupied by an enemy unit. If no available hex meets these conditions, the leader is eliminated.
21.1c During the movement phase, a leader may only move when he is Activated or when he is displaced by a moving enemy unit. During the Close Combat phase a leader automatically moves when he is stacked with retreating/routed units or cavalry in pursuit and in all these cases he must move with the combat units with which he is stacked.
21.1d A leader is not marked 'Finished' (already activated) when he is displaced by moving enemy units or when he is moved with friendly units in advance after combat, retreat or pursuit. A leader is only marked 'Finished' at the conclusion of his Activation.
21.2 Effects on Combat
21.2a A leader has no effect on Fire unless otherwise specified in the scenario rules such as a Special Leader with fire capability. A leader unit alone in a hex does not block the line of sight of a combat unit. A combat unit may fire through a hex that contains a leader unit, friendly or enemy.
21.2b In each Close Combat, only one leader per attacking and defending stack may contribute to the combat with his CV bonus. If several leaders are present in a stack the player who owns them chooses the one he wants to use for his bonus. The leader contributing to the combat with his bonus need not be activated and need not be a hierarchical superior of the units in the combat. Whether or not to use the leader's bonus in a Close Combat is always an option at the choice of the player owning him.
21.2c A leader stacked with a retreating unit (a Rout Retreat or a Retreat Before Close Combat) must retreat with the unit for the full length of the retreat. In situations where part of a stack routs and the other part stays in place, (such as illegal stacks and Rallied units), the player owning the stack has the option to keep a leader with either group of units. If all the units of a stack advance after combat, a leader stacked with them must advance with those units. A leader who is stacked with cavalry at the start of the pursuit must remain with the cavalry for the full length of the pursuit.
21.3 Effects on Disorder/Morale Checks
A leader stacked with a unit making a disorder check or a morale check modifies the unit's Effectiveness Rating with the value of his ER bonus. Only one leader may be used per stack and if several leaders are present, the player owning them chooses the one he wants to use. Disordered units stacked with a leader during their Disorder Recovery phase recover automatically. The leader affecting the disorder check or morale check need not be activated and need not be a hierarchical superior of the units making the check.
21.4 Leader Loss
21.4a Leaders may be eliminated or wounded by Fire or close combat Special Results, or a morale check special result, or by elimination of friendly units and by enemy movement (see 21.1b).
21.4b According to the Special Result of a Fire, a leader may be eliminated (killed) or wounded (temporarily removed). An eliminated leader is immediately removed from the map and cannot return to the game. The point value of an eliminated (not wounded) leader (indicated on the army 'Loss Charts' next to his name) is added to his army's 'loss table' (23.1).
21.4c A wounded leader is removed from the map and the player owning him rolls a die to determine the length of his absence. The duration is generally a number of turns equal to the die roll halved (rounded)--see the 'Leader Loss Table' and the description in the Battle Rules. A leader may be wounded only once per game. When a leader is wounded, note it on the loss sheet next to his name. The second time a leader must be wounded, he is directly eliminated.
21.4d A leader who becomes wounded because of a Close Combat Special Result (14.8) or a Morale Check Special Result (19.1a) is eliminated. He takes no wound. Each leader whose CV bonus contributed to a stack involved in a Close Combat must be tested. A leader whose CV bonus was not used, even if he is the only leader in the stack, does not make a wound check.
21.4e If all the combat units with which a leader is stacked are eliminated because of a Close Combat result or the inability to complete a retreat or an enemy cavalry pursuit, the leader is also eliminated.
21.4f A leader is not eliminated if all the units with which he is stacked are eliminated because of a fire result. However, Fire Special Results may affect leaders. In the Rally Phase (19.5), a leader is not eliminated if he is stacked with a combat unit that fails to rally and loses its last Strength Point.
21.5 Leader Replacement
21.5a When a leader is wounded, a replacement leader takes over his role as brigade leader, usually with lower leadership ability. Replacements take the form of a named replacement leader or a 'replacement leader' marker.
21.5b A named leader replacement may be either a leader unit that already started the game with a command responsibility (e.g. a brigade leader), or a leader who is not yet placed on the map until needed for a replacement. Leader replacement markers are placed under the affected leader and are used to modify the printed values of that leader. How leader replacements are handled in a game is set out in detail in the specific Battle Rules of the game.
21.5c Leader replacement occurs at the start of a player's Brigade Activation Phase, after he has chosen a Brigade, but before the Command Control phase. A Brigade Leader may only be replaced when his Brigade is activated, including Limited Activations. Replacement of an off-brigade leader is done with any friendly brigade activation.
21.5d Wounded leaders who return to play do so at the same point in the Activation Phase of the Brigade whose leader they replace. A Brigade Leader returns to play when his Brigade is activated and off-brigade Leaders return when any friendly Brigade is activated. When a wounded leader returns, his replacement is removed or resumes his former command role.
21.5e A named leader replacement or a Brigade Leader return is placed on any activated non-routed combat unit of his brigade. If all the units of a leader's Brigade are routed the leader does not return until one of them is rallied. The return or replacement of a named off-brigade leader is placed on any non-routed friendly combat unit.
21.6 Army/Wing Leader Decapitation
21.6a If a side loses its starting Army Leader and all his replacements, the opposing side automatically wins the Initiative for as long as his side has an Army Leader. The initiative die roll must still be made to see if the END TURN marker advances on the 'End Turn Track' and for Initiative Special Results. The side without an Army Leader cannot have Wing Activations and each activated Brigade Leader must make a Leader Initiative roll.
21.6b If both sides have lost their starting Army Leaders and all their replacements, the Initiative die roll is still made and the unmodified results determine who has the Initiative.
21.6c If a Wing Leader position is temporarily or permanently vacant, Wing Activations are not possible for the brigades belonging to that Wing.
21.7 Leaders Without Command
(Printed as a second "21.6" in the French translation.) When all the subordinate units of a Wing or Brigade Leader have been eliminated, the leader is removed from the game. No Army Morale Loss points are awarded for the removal of the leader.
22.0 Reinforcements
22.1 General
All units that arrive on the map during the course of a game are reinforcements. The scenario being played will designate the specific units, the Game Turn, the place and any special conditions for the arrival of reinforcements.
22.2 Entire Brigade
If an entire Brigade arrives as a reinforcement on the same Game Turn and same place, the Brigade is activated as a Brigade 'already on the map' would be activated. It is assumed that the Brigade Leader and all his combat units making up his 'Brigade' are in command for their arrival Game Turn only. Independent units may be activated normally with the Brigade. Units of another Brigade cannot be attached to a reinforcing Brigade until its Brigade Leader is on the map. Reinforcing Brigade units do not benefit from a fire phase, only a Close Combat and Movement phase.
22.3 Partial Brigade
If the reinforcements are a portion of a Brigade that is already present on the map, then the reinforcing units arrive and are 'In Command' when the 'on map' portion of the Brigade is activated.
22.4 Entry Hex
Reinforcements arrive on the designated map edge hex and they pay the terrain costs to enter that hex. They must observe stacking and formation requirements. All reinforcements enter the map with their full Movement Allowance, but if multiple stacks enter at the same hex the second stack must pay 2 times the terrain cost of the hex it enters on the map, the third stack pays 3 times the terrain cost, etc. A map edge hex cannot be used as an entry hex if it is also in an EZOC.
23.0 Army Morale
Army Morale reflects all losses: combat losses, the current number of routed units and lost leaders.
23.1 Current Loss Total
23.1a At the start of the Game Turn on the hour ('0:00') before the first initiative roll, each player calculates his Current Loss TOTAL (CLT) by adding together the strength points (SP) lost, the number of SPs currently routed and the elimination value of leaders. The values for eliminated/routed leaders lost are listed on the game's 'Army Loss Chart.'
23.1b Each army's Current Loss Level table, found in the Rules of each game, is used to determine whether its CLT causes an increase in its Army Morale modifier. Each column on the Current Loss Level table is headed by the value '# +' which is the minimum CLT to be reached to be used for that column.
23.1c If an army's CLT is lower than the lowest level on the 'Current Loss Level' table, there is no change to the starting Army Morale modifier and no Army Morale check is made. If the army's CLT is above the level of a column, that column will be used for the Army Morale Check procedure (see below). After the value of a loss column has been reached and tested, it is not used again. No re-test is made based on that same column and no account is taken of the number of Army Morale checks that occur during a game in which an army's CLT remains in that column. One must wait until the value of the next column is reached to perform a new army morale check. Exception: See 23.1d and the Initiative Special Results of some game boxes.
23.1d Once the CLT applies to the highest (far right) column of the 'Current Loss Level' table, that column is used every time an Army Morale check is made.
23.1e The column of the 'Current Loss Level' table that is used can never be less (i.e. to the left) than the one that was used for a previous Army Morale Check even if the army's CLT has fallen back (because of the rally of routed units).
Example: an army's 'Current Loss Level' table has three columns for its CLT: 50+, 75+ and 100+. At the second hour of the battle the army's total SP lost/routed is 45. As this is less than the 50+ column, no check is made. At the start of the third hour the total losses have increased to 55 and the player makes a check using the 50+ column. At the fourth hour the total is 70 but as the 50+ column has already been used, no check is made. At the fifth hour the total losses are at 110 and a check must be made using the 100+ column (skipping the 75+ column) and thereafter, the player will have to use the 100+ column each hour.
23.2 Army Morale Check Procedure
23.2a The affected player rolls a die and compares it to the appropriate Loss Column on the 'Current Loss Level' table. He then finds the number in the left column "Army Morale Result" that corresponds to his die roll. The result in this column indicates the Morale Modifier to apply. An 'O' means no change and a '+ #' is the amount that is immediately added to the player's current Morale Modifier. The new Morale Modifier value is used for each Morale Check where applicable.
23.2b Before rolling the die, a player may spend Command Rating (CR) points of his Army Leader to reduce the die result. Part of the Army Leader's printed CR may be used as long as the CR is not reduced below 2; i.e. an expenditure that would reduce the Army Leader's CR to 1 or 0 is not permitted. Thus an Army Leader with a starting CR of 1 or 2 cannot modify the Army Morale die roll. The reduced CR is used for any initiative roll (6.1) for the rest of the hour. At the start of the next hour the Army Leader's CR returns to its original value. Place a Strength Point loss marker equal to the amount subtracted from an Army Leader's CR under his counter as a reminder.
23.2c The Army Morale modifier never decreases unless specifically indicated in a game's Battle Rules. All armies begin the game with an Army Morale modifier of '0'.
Example: In the Army Morale Check Phase, a player's CLT is 103. Looking at his Morale Table he sees that at +100 his Morale modifier will increase by 10 on a roll of '9', by 5 on a roll of '6' to '8' and is unchanged on a '5' or less. He can make sure of avoiding a +10 result by spending 1 point of his army leader's CR of +3. This decreases his Army Leader's CR to +2 for the rest of the hour. (Remember, each Game Turn in which the Army Leader moves, his CR is reduced by 2 (to 0 in this example) for the rest of the Game Turn.) The CR returns to +3 at the start of the next hour.
24.0 Detachments
If specified in a game's Battle Rules or in a scenario, a player may detach part of his army to operate outside the control of the Army Leader.
24.1 Detachment Structure
24.1a The Brigades and units that make up a Detachment are set out in detail in the Battle Rules. A detachment will have at least one Detachment Leader (usually a Wing Leader or a Special Leader) and a Brigade. The Detachment Leader functions as the Army Leader for the Detachment to which he is assigned.
24.1b The Detachment Leader does not trace a Line of Command (LOC) to the Army Leader, since he acts as an Army Leader for his Detachment. Like an Army Leader, he traces a LOC to the other Leaders of his Detachment using the Army Leader LOC rules of section 7.3b. Also, like an Army Leader, a Detachment Leader is automatically 'In Command' and can likewise place all subordinate leaders in command status (subject to the normal LOC rules of course).
24.1c For Brigades that belong to a Detachment, the relationship between the Brigade Leader and his combat units is unchanged.
24.1d Units belonging to the Main army and units belonging to a Detachment cannot be stacked.
24.2 Detachment Activation
24.2a Brigades and independent units assigned to a Detachment cannot be activated by the Army Leader unless the Detachment rejoins the Main army (see Reintegration below). The Detachment Leader cannot activate Brigades and independent units belonging to the Main army. Independent units of a Detachment are always activated as part of the activation of a Brigade.
24.2b As soon as a Brigade belonging to a Detachment has been activated, if the next activation by that player is not for another Brigade of that Detachment, then all the other Brigades of that Detachment can only perform Limited Activations (6.8) for the rest of the Game Turn. Brigades of the Main army are not subject to this restriction and may be activated at any time.
Example: Detachment 1 has three Brigades: A, B and C. Detachment 2 has two Brigades: D and E. The Main army has six Brigades. The player activates Brigade A. On his next activation he wants to choose one of the Main army Brigades, but if he does so Brigades B and C can only make Limited Activations for the rest of the Game Turn; he could activate only the remaining Main army Brigades and the Brigades of Detachment 2. He chooses to activate Brigade B but on his next activation circumstances require him to activate Brigade D of Detachment 2. This means Brigade C can only make a Limited Activation. As the situation becomes critical he must activate one of his Main army Brigades, which means Brigade E can only make a Limited Activation.
24.3 Reintegration
24.3a A Detachment may rejoin the Main army during any Rally Phase as long as the Army Leader can trace a LOC to the Detachment Leader. Reintegration is voluntary and is not necessarily carried out because a LOC exists between the two leaders.
24.3b Individual Brigades cannot be exchanged between the Main army and a Detachment unless a game's Battle Rules specifically permit it.
24.3c When reintegration occurs, the Detachment Leader regains his normal status and the Detachment's Brigades resume their normal position in the army structure.
24.3d Once a Detachment has rejoined the Main army it cannot be created again unless the Battle Rules permit it.
(The French translation ends with a one-page summary of the Sequence of Play that repeats Section 4 above with page references to the printed rulebook; it is not repeated here.)
PART 3: ERRATA, CLARIFICATIONS AND CHARTS
Source note for Part 3: Part 3A is the English text of the "BAR v3.0 Errata, Clarifications & Questions" document (including its v3.2 and v3.3 clarification sections) from the BAR series website. It is an official series document (the v3.0 rules first appeared in 'Fontenoy' in 2012; v3.2 with 'Prague'; v3.3 with 'Mollwitz/Chotusitz'). Because Part 2 is rendered from a v3.2-era French translation, some of these entries may already be reflected in the Part 2 wording; where the two differ, this errata text governs. The v3.2 and v3.3 sections repeat entries that already appear in the v3.0 section and are therefore not reproduced a second time. The Clash of Arms second-edition errata of 1996 is reproduced in Part 3B for historical completeness only.
3A. BAR v3.0 Errata, Clarifications & Questions
The BAR v3.0 rules first appeared with 'Fontenoy' in 2012. Most of these entries are official changes that were made in the way of clarifications. There are a handful of actual errata issues which were corrected in all later versions of the BAR rules.
6.2 Regimental Integrity (clarification)
Units in Skirmish formation are not eligible for Regimental Integrity.
7.3 Army/Wing Leader LOC (clarification)
Add the following rule and bump up the letters of the succeeding 7.3 rules (7.3c becomes 7.3d, 7.3d becomes 7.3e, etc.):
7.3c A Wing Leader is 'In Command' if LOC can be traced to him from the Army Leader (7.3a) or if the Wing Leader successfully rolls for Initiative in the context of a Wing Activation (7.4b). A Wing Leader must be 'In Command' to trace LOC.
8.1d March Column (addition)
In the 'Size' paragraph, change the last sentence to read: Cavalry in a multi-hex March Col must have at least 4 SPs per March Col hex.
8.1e Square (addition)
Add the following sentence: A unit in Square may not move adjacent to any enemy unit.
8.3 Formation Change Prerequisites (addition)
Add the following rule:
8.3d An extension, contraction, or realignment done in conjunction with a formation change (such as a 2 hex MC to a 1 hex Line) is considered part of the formation change (i.e. it is not the same concept as found in rule 11.5a).
8.4i General Order Changes (addition)
Units in Skirmish formation do not adopt General Order.
8.6 Artillery Formation Changes (addition)
Add the following rule:
8.6d If an artillery unit is too large to make a formation change from Limbered to Road Col (such as a 4 SP unit that has a 3 MA), it can make the formation change but it will cost All its MPs. This change cannot be made if the unit is Disordered, but it can be made when OOC, in an EZOC, or in non-clear terrain.
8.7 Non-clear Terrain Formation Change (clarification)
Clarification: If a unit making any of the formation changes marked by an asterisk (*) in sections 8.4 and 8.6 occupies or crosses any hexes/hexsides that are non-clear terrain, that is the only thing that it can do in its Movement Phase--all the MPs that the unit expends (its 'total' MPs) will constitute its entire move. However, movement points are still calculated (including +1 for an EZOC and any extension/contraction costs--see 8.3d), and if the cost requires a Rapid March then that modifier is applied to the Disorder Check (A) which is made after the formation change. To make a non-clear formation change, a unit cannot have expended any MPs prior to the change and cannot be Disordered.
Rule 8.7 is meant as a penalty, not an enabler.
10.1d Stacking (clarification)
Add the portion of this rule in italics: All the units in a stack must have the same facing (exception: Unlimbered artillery stacked with a Square formation) and occupy all the same hex(es).
10.6d Stacking Order (clarification)
Change the first sentence to read: When artillery is stacked with infantry in March Col or with a Square, it must be the top unit in the stack.
10.10 Morale/Organization (clarification)
When units in different morale/organization states end any Segment stacked, the entire stack assumes the worst morale/organization state in that stack. This takes place as the final event of any Segment. If the stack splits up, all units keep the same morale/organization state of the stack. Example: Unit A Rapid Marches and ends its move in a hex with unit B which is Shaken. Unit A fails its Disorder Check (A) and becomes Disordered. As the final event of the Movement Segment, Unit A takes on the Shaken status of B and unit B takes the Disordered status of unit A. Both units will end up Shaken/Disordered.
11.2d Terrain Effects (clarification)
For subcases a and b, the concept is that a unit must cease using any Movement Points in order to receive the benefit of the rule. Change the rule to read:
a) When a hex feature is involved, if a unit enters the hex and ends its movement there, no Disorder Check is triggered. If it enters the hex and expends any more Movement Points it must make a Disorder Check (A) at the completion of its movement. This Disorder Check is not triggered when a unit begins its movement in a hex with this type of terrain and exits that hex.
b) If a hexside feature is involved, the check is not triggered if the unit does not expend any more Movement Points after crossing the hexside, but if the unit does expend more MPs, a Disorder Check (A) is required at the end of its movement.
11.10 Special Cavalry Movement (clarification)
All cavalry charges of all types are subject to SCM costs. Opportunity Charges and Counter Charges have a 1 hex charge range so they can only be done through hexes that have a 1 SCM cost.
12.1 Fire Combat Odds (question)
Q: Can a Fire Combat be made at odds below 1:3? A: No. The 1:3 column must be reached with the fire in order to resolve a Fire Combat.
12.8c Opportunity Fire (clarification)
Add this sentence to this rules section: Normal Fire Combat results will be assessed based on the formation/facing that was fired at.
13.3 Cavalry Charge Movement (clarification)
A regular Charge can be declared against an adjacent hex--there is no requirement to actually move in order for cavalry to initiate a Close Combat. When doing so, the cavalry is considered to be charging (and receives all the cavalry bonuses) even though it is not using Charge Movement.
13.3c Cavalry Charge Movement (question)
Q: Does the charge contraction rule of section 13.3c apply also to counter charge? A: Yes, and Opportunity Charge too. The principles of section 13.3 generally apply to all types of charges unless they are specifically overruled for Op Charges or Counter Charges.
13.4 Defender Reaction (question)
Q: I have an infantry unit stacked with 2 artillery units, with the artillery units on top. This hex is being charged by cavalry in the rear. As a defender reaction, could this entire stack do an about-face Facing Change? Alternatively, if the infantry forms Square for its Defender Reaction, can the artillery units change facing, or do they remain facing in their current direction?
A: A stack making a defender reaction may make a formation change OR a facing change. (Although sometimes a facing change is inherent in a formation change.) All units in the stack must do the same thing. Your entire stack can make the about face facing change together (which will add +40 to the Disorder Check). OR, the infantry unit can make a Formation Change to Square. Artillery can stack with Square but it does not actually form Square. Therefore if the infantry forms Square the artillery would retain its original facing since it cannot do a facing change in the same reaction that the infantry does a formation change. The formation change to Square will also have the +40 Disorder Check modifier.
13.8d Defending Cavalry Option (errata)
Change 13.8d to read: If the Close Combat eliminates or Routs all the defending units, only a hex vacated by a defender that was in the attacker's Front is eligible for Advance After Combat (15.0), not the one occupied by the "Defending Cavalry Option" cavalry.
13.9a Retreat Before Close Combat (question)
Q: If a heavy cavalry unit is counter-charged by a light cavalry unit, can that counter-charging light cavalry unit then retreat before close combat? A: No. By virtue of counter-charging they have committed themselves to the combat.
13.11c CV Modifiers (clarification)
- SP Losses: The rare BAR units that have printed CV values which are negative are unaffected by this modifier.
13.11c CV Modifiers (clarification)
Change the first and last bullets of point 3 as follows:
- Infantry Line/Hook defending against only cavalry in second and subsequent refight (14.5): Infantry Defender +2
- When an Attack Col is in a Hook/Line's Front hexes the Attack Col is always considered to be Enfiladed....
All of point 5 of rule 13.11c has been reworded as follows:
- Enfilade: A Close Combat enfilade occurs when a unit is in the Flank or Rear hex of an enemy unit and the enemy unit is in its ZOC. There are two types of enfilade: active and passive.
Active: An active enfilade occurs when a participant in a Close Combat is enfilading another participant of the same Close Combat. A unit that has an active enfilade receives a +3 CV modifier for the first round of Close Combat (only). Regardless of the number of enemy Flank/Rear hexes occupied by an enfilading unit, that unit's CV is only modified by +3.
Example: Units B and C are attacking unit A. The +3 CV Enfilade modifier applies to unit C because it occupies A's left Flank (F) hex and A is in its ZOC. The +3 Enfilade modifier also applies to unit B because it occupies A's Rear (R) hexes and A is in its ZOC. However, only one +3 Enfilade modifier is applied to B's attack even though it occupies two of A's three Rear hexes
Passive: A passive enfilade occurs when a friendly unit (defender or attacker) is enfiladed by an enemy unit that is not participating in the combat--it may be participating in another combat or no combat at all. A unit suffering a passive enfilade modifies its CV by -3 for the first round of Close Combat (only) regardless of how many of its Flank/Rear hexes are occupied.
Example: Unit A is attacking unit Z. Unit B is not part of the combat. Unit Z is in B's ZOC and B also occupies Z's Flank hex. Unit Z suffers a -3 CV passive Enfilade modifier. If unit B were facing hexes c-d the modifier would not apply because Z would not be in B's ZOC.
If a side has both an active and a passive enfilade on a single enemy unit it may only use the active enfilade modifier. Example: If there was an attacking unit in hex c, it would receive the +3 active CV modifier and unit Z would not be afflicted with the -3 passive CV modifier caused by unit B.
13.11c Close Combat Modifiers (question)
Q: When infantry in Square is defending against cavalry and infantry units attacking it together, does the defending infantry get the +5 CV modifier (for square against cavalry) and the -5 CV modifier (for square against infantry) or only one of them? A: In this very unusual situation, both modifiers would be used so they would cancel each other out.
14.5b Refighting Combats (clarification)
Change the start of rule 14.5b to read: 14.5b An attacking or defending cavalry unit (or stack) in Line involved in a refight...
The wording of rule 14.5b seems to contradict the illustration with regard to when a unit contraction should stop contracting. The illustration is correct. Remove the wording "or its Flank hex" from the second sentence of rule 14.5b.
15.1 Advance After Combat (clarification)
As a clarification, alter these portions of rule 15.1 to read as follows:
15.1c When there are multiple vacated hexes the advancing units are not required to occupy every vacated hex. The number of units that advance is up to the owning player but at least one must advance and that one must be the unit that was used for the Close Combat Morale Check (B) for the attacker and, for advancing defender cavalry, the one that made the Defender Morale Check (B) or Countercharge Morale Check (C). However, an advancing stack must split to occupy different hexes if it defeated multiple stacks; at least one hex vacated by each enemy stack must be occupied. If there are not enough advancing units to do so, the advancing player decides which hexes will be occupied and which will not. An advancing unit or stack may not expand to occupy the hexes vacated by a multi-hex unit.
15.1d A stack in a single hex formation may advance into any of the adjacent hexes vacated by a multi-hex formation.
15.1g Advancing units may freely change facing in any direction after moving into the vacated hex but only if that hex is not in an EZOC. (Exception: Cavalry that can pursue a routing enemy is required to change facing as part of the advance/pursuit procedure even if it is in an EZOC. The direction of this facing change is determined by the direction taken by the routing unit (see 16.2a.2). Advancing cavalry may not voluntarily change facing away from a defeated enemy unit if that unit survived the combat and rout retreated; cavalry must always change facing towards the hex that the routing unit retreated through and, if possible, must face a hexpoint that allows for Pursuit.)
15.1a Vacated Hexes (errata)
Change the second sentence of 15.1a to read: If a defender was in the attacker's Flank hex there is no advance after combat into that Flank hex (see 13.6a [exception], and 13.8d).
16.1b Pursuit Requirements (clarification)
Change the fourth bullet of 16.1b to read:
- The advancing cavalry unit has a non-Routed enemy unit in its Zone of Control (ZOC) after advancing into the vacated hex. This determination is made after any facing change (see 15.1g).
16.2a Pursuit Procedure (clarification)
As a clarification, change point 3 to read: 3. When multiple stacks have retreated from one Close Combat all cavalry units must pursue the stack whose vacated hex they entered when they Advanced After Combat (see 15.1d).
17.0 Opportunity Charge (question)
Q: Can a unit Op Charge if it is in an EZOC? A: No. Op Charge is a 'charge' so it is limited by the strictures of rule 13.1d.
17.1a Opportunity Charge (clarification)
As a clarification, change this rule to read: A reactive cavalry unit that is in the ZOC of an activated unit may Op Charge that activated unit so long as the reactive cavalry is not in the ZOC of any other enemy unit.
17.3 Op.Charge Close Combat (clarification)
Sections 17.3a and 17.3b have been reworded to make them clearer.
17.3a In an Op. Charge, the charging units are the attackers and the units of the active player are the defenders. Only non-moving units of the active player can perform Defensive Fire (13.10) if eligible to do so. Moving units do not perform Defensive Fire. Op. Charge is resolved as a regular Close Combat except that the sequence is as follows:
- Individual Combat Designation (13.6). Remember that all enemy units, even if they were not activated, that are in the Op.Charging unit's Front hexes must be attacked.
- Defender (active player's unit) Morale Check (B) (13.7).
- Defensive Fire (if applicable) (13.10).
- Combat Resolution (13.11).
17.3b If all defending units are moving, determine Close Combat values normally. If the defending units consist of both non-moving and moving units (the ones that triggered the Op.Charge) the defenders' Close Combat values are determined as follows:
- The top moving unit's ER is used for the Defender Morale Check (B) and for any 'M' Close Combat & Special Result Morale Check (G). If the only moving unit is artillery stacked with a non-moving infantry unit, the non-moving infantry's ER is used for the Morale Checks. The SP total is that of all defenders--both moving and non-moving units (exception: artillery stacked with infantry--see 13.11a).
- Only the moving unit's CV value is used and all CV modifiers are based on the moving unit only, even if it is only artillery. All aspects of any non-moving units are ignored for determining the defender's final CV value. As with normal Close Combat one defending leader (moving or not) per stack can contribute his CV Bonus to the defender's final CV value.
- The Close Combat result is applied to all moving and non-moving units equally. For refights, Close Combat values are determined by 1 and 2 above.
19.1f Morale Checks (addition)
Change the second sentence of 19.1f to read: If a situation requires an already Routed unit to make a Morale Check A or B, instead of making the Morale Check the unit automatically loses 1 SP and Rout Retreats (20.2).
19.1f Morale Checks (question)
Q: When comparing 12.9d and 19.1f, I do not understand how routed units are affected (or not) by Morale Checks. A: Routed units do not roll for a Morale Check. If they are placed in a position where they would have to make a Morale Check A or B, they instead lose 1 SP and rout retreat. See also the revision of rule 19.1f (above).
19.7 Rout Effects (clarification)
For thoroughness and clarity add the following rule: 19.7f Routed units that are routed through or retreated through by another unit will rout retreat (20.2b).
19.7e Rout Retreat Collapse (addition)
Change the last sentence of 19.7e to read: If in a multi-hex formation, they collapse into any one of the hexes they occupied before Routing except that if the rout involves potential pursuit, the hex collapsed into must be one that a potential pursuer can advance after combat into.
19.8 Morale Check General Modifiers (clarification)
Change the first sentence of rule f to read: f) Supported Line: A Line/Hook formation is 'supported' when each of its Flank hexes (or, for a Hook, its Flank hex and the outermost Rear hex adjacent to the Hook) contains either:
19.9 Morale Check Specific Modifiers (addition)
Add the following rule to 19.9: Morale Check (B): Pre-Close Combat. If a non-cavalry defender is being attacked by cavalry, the defender must add +5 to its ER.
20.2 Rout Retreats (clarification)
Alter the wording of rule 20.2c as follows: A routing unit or stack cannot end its Rout Retreat movement in a hex with any other units, routed or unrouted. Units that begin a Rout Retreat stacked together must remain stacked; i.e. the stack cannot split while Rout Retreating. A Routed stack will only split in the Rally Phase if some of the units in the stack Rally while others fail to Rally and Rout Retreat again (see 19.5d).
21.1b Leaders (clarification)
The wording of this rule has been changed for greater clarity. A friendly leader in a hex with no friendly combat units does not block the movement of enemy units. Before the enemy unit actually enters the leader's hex, the leader is displaced to an adjacent hex that is not in an EZOC or occupied by an enemy unit. If no such hex is available, the leader is eliminated.
21.1c Leaders (clarification)
During the Movement Segment a leader may only move when it is Activated or when it is displaced by a moving enemy unit. All leaders automatically move when they are stacked with retreating/routing, or advancing/pursuing units, and in these cases they must move with the combat units with which they are stacked. (Rule 21.2c has some exceptions for leaders with certain unusual routing and advancing stacks.) When stacked with charging units, it is the leader's option to move with them in the charge or not.
24.1c Detachment Structure (errata)
Delete the final sentence: "He traces his LOC..."
Close Combat Example 2 (p. 43) (errata)
Change the parenthetical reference in the first sentence of "A's Attack" to read as follows: (the top 12-6 unit will lose both SPs).
Morale Check Summary Chart (p. 47) (errata)
For the Morale Check (J), the italicized note should read that "a +10 modifier applies to the Morale Check." The -10 listed is incorrect. Morale Check 'H' should have a -5 modifier for a unit in Attack Column. Morale Check 'C' should have a +10 modifier for being Outflanked.
Sequence of Play (p. 48) (errata)
The page number references listed on the sequence of play on the back cover of the rule book are incorrect. The rules references are all correct.
3B. Clash of Arms Second Edition Errata (1996)
Original document title: "Age of Reason Series (2nd edition Kolin, Zorndorf and Leuthen) (as of Sept. 1st 1996)". These entries refer to the second edition BAR rules and the original Zorndorf box rules and are superseded in part by the Third Edition rules and the revised Zorndorf booklet in Part 1; they are included only because the revised booklet does not otherwise restate them. Only the general and Zorndorf entries are reproduced.
'rounding' (clarification): Unless otherwise indicated, the term 'rounded' always refers to the rounding method of adding .5 to the fraction and then dropping any remaining fraction. For example, 2.5 is rounded to 3; 2.7 is rounded to 3 (3.2); 2.2 is rounded to 2 (2.7).
Zorndorf: Corrections & Clarifications:
- Furst Moritz: Ignore the references to any specific Wing Leaders. In Zorndorf, Moritz can act in this special capacity for any Wing Leader on a roll of 8 or less.
- Scenario 4: The set up instructions should refer to Scenario 3, not Scenario 1.
- Special Initiative Results: For the Russians, a roll of 5-8 should read "SPECIAL LIMITED ACTIVATION". For the Prussians, a roll of 9 should read "MANEUVER ACTIVATION."
- Optional Units: Wied's Fusilier Regiment (WIE 6-4x2) had been left by Frederick to bolster the Custrin Garrison. Since the city was in no real danger he could have included the two battalions in the force he took to Zorndorf. If both players agree this regiment can be added to the Prussian Army as shown on its Order of Battle diagram.
- Special Marching Ability: Ignore the last sentence. There are no modifiers for the Rapid March Disorder Check in the 2nd edition rules.
- Roster Sheets: The Leader Casualty values were omitted. They are: Frederick (30), Fermor (20), Moritz (15), Moller (10), Rothelier (10), Wing Leaders (10), Command Leaders (5). The SP Loss/Routed values are the same as for Kolin: each infantry/cavalry SP = 1; each artillery SP = 2. On the Prussian Roster Sheet the lines for Command Leaders Kahlden and Kurszell are switched.
3C. Zorndorf Charts (from the revised charts file)
The Zorndorf charts file (Clash of Arms Games, copyright 2014, by Mathew Hinkle) is a 15-page set of reference charts. Charts that consist of text and numbers are transcribed below. The graphical pages (Formation Change Diagrams, BAR Formation / Fire Arc / ZOC / Facing Change Cost Diagrams, the Turn Record Track artwork and the two Order of Battle diagrams) have no usable text layer and are not reproduced; the Order of Battle information is available in the scenario setups in Part 1 and in the Loss Charts below.
Zorndorf Special Results
Initiative Special Results (rolled on the "00" Initiative result and as described in Zorndorf rule 6.2)
| Result | Russian | Prussian | Description |
|---|---|---|---|
| Fermor | 00 | 00 | Fermor flees or returns to map (see Zorndorf rule 6.2a). |
| Army Leader Lapse | 1-2 | 1 | The Army Leader may not trace his LOC or use his Command Rating. |
| Command Confusion | 3-4 | 2 | Other player picks one of your Commands which may be Finished. Initiative required. |
| Free Combat Segment | 5 | 3-4 | Pick one Command (and possible independents) for a Fire Combat or CC Segment. |
| Special Rally | 6-7 | 5-6 | Pick a Command and perform a free Disorder Recovery Phase and Rally Phase. |
| Leader Initiative | 8 |
Infantry Fire Special Results (* see Leader Loss Table)
| Result | Russian | Prussian | Description |
|---|---|---|---|
| Free Fire | 0*, 1, 2* | 0*, 1 | Roll two times and the firing units are Disordered. |
| Full Volley | - | 2*, 3 | Double the Fire Strength and reroll. |
| Battalion Guns | 3, 4* | 4*, 5 | Reroll and add 1 SP loss to any SP loss or any 'R/D' result. |
| Smoke and Dust | 5, 6* | 6*, 7 | Reroll but subtract 10 from the roll for each hex of the range. |
| Ammo Low | 7, 8* | 8* | Halve (rounded) the Fire Strength and reroll. |
| Ammo Exhausted | 9 | 9 |
Artillery Fire Special Results (* see Leader Loss Table)
| Result | Russian | Prussian | Description |
|---|---|---|---|
| Rapid Fire | 0* | 0*, 1 | Reroll two times. |
| Accurate Fire | 1 | 2*, 3 | Shift the odds column 1 to the right and re-roll. |
| Caisson Explosion | 2* | 4* | Reroll and if target or an adjacent hex includes artillery, +1 SP loss to the artillery. |
| Wild Fire | 3 | 5 | A stack adjacent to the target becomes the new target. |
| Smoke and Dust | 4*, 5 | 6*, 7 | Reroll but subtract 10 from the roll for each hex of the range. |
| Ammo Low | 6*, 7, 8* | 8* |
Defensive Fire Special Results (* see Leader Loss Table)
| Result | Russian | Prussian | Description |
|---|---|---|---|
| Whites of Their Eyes | 0*, 1, 2* | 0*, 1, 2*, 3 | Shift the odds column 1 to the right and reroll. |
| Battalion Guns | 3, 4* | 4*, 5 | Reroll and add 1 to any SP loss or 'D' result. |
| Premature Fire | 5, 6*, 7 | 6*, 7 | Halve the Fire Strength (rounded) and reroll. |
| Smoke and Dust | 8*, 9 | 8*, 9 | Defensive Fire is cancelled. |
Leader Loss Table (from any Fire Combat roll of: 00, 02, 04, 06, 08)
| Result | Roll | Description |
|---|---|---|
| Fate | 0 | Pick any enemy leader. 0 = Killed, 1 = Wounded**, 2-9 = no effect. |
| The Lucky Shot | 1-2 | Randomly pick any enemy leader in range and LOS of firing units*. 0-3 = Killed, 4-7 = Wounded**, 8-9 = no effect |
| In the Line of Fire | 3-6 | Roll for each enemy leader in or adjacent to the target hex*. 0-2 = Killed, 3-5 = Wounded**, 6-9 = no effect |
| Braving Enemy Fire | 7-9 | Roll for each enemy leader in the target hex*. 0-2 = Killed, 3-5 = Wounded**, 6-9 = no effect |
* Subtract 1 from roll if firer is Artillery at 1-3 range. ** Wounded Duration is equal to a single die roll, halved and rounded.
Pursuit Special Results (Re-roll of '0' is 0 Pursuit Points)
| Result | Roll | Description |
|---|---|---|
| Blood Lust | 0-2 | Reroll. Routed units lose 2 SPs per hex of Pursuit. |
| Out of Control | 3-4 | Reroll and multiply by 1.5. No Recall is possible. |
| Hesitation | 5-7 | Reroll and halve Pursuit Points (round down). |
| No Pursuit | 8-9 | No Pursuit. Make a Recall Disorder Check (F). |
Close Combat Special Results (resolve by: 1) Apply SP losses. 2) * Roll for Leader Loss for leader(s) who gave the CV bonus to the units: 0-3 KIA, 4-9 no effect. 3) Rank all stacks by ER using Morale Check (G) modifiers. 4) Each stack makes a Morale Check (G) in rank order, worst to best. 5) If a Morale Check is failed, the failing stack loses 1 SP and routs. 6) If units are left to fight on both sides, re-fight the Close Combat. Certain CC modifiers do not apply to refights.)
| Roll | Attacker | Defender |
|---|---|---|
| 0 | 1M | 3* M |
| 1 | 2* M | 2* M |
| 2 | 2M | 3* M |
| 3 | 2M | 2* M |
| 4 | 2M | 3* M |
| 5 | 3* M | 2M |
| 6 | 2* M | 2* M |
| 7 | 3* M | 3M |
| 8 | 2M |
Battles from the Age of Reason - Close Combat Card
Close Combat Results Table. Each cell is shown as Attacker result / Defender result ("A / D"), cross-indexing the Modified Dice Roll (attacker's modified roll minus defender's modified roll) with the odds column. Key: 1,2,3 = Strength Points lost (14.2); D = Disorder (14.3); M = Morale Check (14.4) and possible Refight (14.5); R = Rout (14.6); S = Surrender (14.7); - = No Effect. The odds columns correspond to the quotient (attacker SPs divided by defender SPs) of .33, .5, .66, 1.0, 1.5, 2.0, 3.0, 4.0, 5.0 and 6.0 respectively.
| Mod. Dice Roll | 1:3 | 1:2 | 1:1.5 | 1:1 | 1.5:1 | 2:1 | 3:1 | 4:1 | 5:1 | 6:1 |
|---|---|---|---|---|---|---|---|---|---|---|
| 10+ | 1D / 1R | 1 / 2R | 1 / 3R | 1 / 3R | - / 3R | - / 3R | - / S | - / S | - / S | - / S |
| 9 | 1D / 1R | 1D / 2R | 1D / 2R | 1D / 2R | 1 / 3R | - / 3R | - / 3R | - / S |
Close Combat (CC) Sequence: 1. Attacker Designation (13.1). 2. Attacker Morale Check (13.2). 3. Charge Movement (13.3), Defender Reaction (13.4), & Countercharge Movement (13.5). 4. Combat Designation (13.6). 5. Individual Combat Resolution: a. Defender Morale Check (13.7) & Retreat Before CC (13.9); b. Defensive Fire (13.10); c. CC Resolution (13.11); d. CC Results (14.0); e. Advance After Combat (15.0); f. Cavalry Pursuit (16.0).
Close Combat Resolution Procedure (13.11)
- Find the SP Odds Ratio
- a. Total the attacking SPs but do not include any non-activated units or artillery that is stacked with attacking units.
- b. Total the defending SPs but do not include any artillery unless the artillery is alone in a hex in which case the value is 1 SP per artillery unit.
- c. Halve (rounded) the SPs of any stacks that are Disordered.
- d. Halve (rounded) the SPs of any hexes of an involved unit that are not adjacent to an enemy unit but that are adjacent to that unit's Flank. (13.11a)
- e. Divide the attacker's SPs by the defender's SPs. This will result in a 'Quotient' number. Find the odds column that is less than or equal to the calculated Quotient (see the 'Q' line on the 'Close Combat Results Table'). This is the odds column to use for the Close Combat.
- Calculate each side's Combat Value (CV)
- a. For stacks in March Column, Road Column, Attack Column, Skirmish, Square, or General Order use the CV of the top non-artillery unit.
- b. For stacks in Line or Hook, use the average CV (rounded) of the units that contribute the top 4 non-artillery SPs for each hex.
- c. Artillery stacked alone has a 0 CV.
- d. Adjust each stack's CV by the Close Combat modifiers listed below.
- e. If a side has multiple stacks, calculate each hex's CV separately and then average (rounded) the CV of all contributing hexes.
- Close Combat Resolution
- a. Each player rolls a 10 sided die and adds their final CV to their roll. If either player rolls a '0', use the 'Close Combat Special Results' chart.
- b. In addition, for each full odds ratio over 6:1, the attacker adds 1 to his roll. For each full odds ratio below 1:3, the defender adds 1 to his roll.
- c. The defender's modified roll is subtracted from the attacker's modified roll and the resulting number (Mod. Dice Roll) is cross-indexed with the odds column determined in step 1 to find a Close Combat result. The 'A' (left side) result applies to the attacker. The 'D' (right side) result applies to the defender.
Close Combat Modifiers (13.11c)
- Losses: If a unit has 50%+ SP losses, its printed CV is halved (rounded).
- Morale: Shaken and Routed units may not initiate Close Combat. Shaken Morale is -5 to the unit's CV. Routed units lose 1 SP and rout retreat if they are required to make a Defender Morale Check (B).
- Formations: Only Line, Attack Column and General Order may initiate Close Combat. March Column, Road Column, Limbered Artillery: -4 to CV. Line: +2 to CV for Infantry in Line that is defending against cavalry in refights (any Close Combat round after the first). Square: +5 to CV vs. cavalry and -5 to CV vs. infantry. Skirmish: -6 CV when in Clear terrain vs. cavalry; -4 CV when in Clear terrain vs. infantry; -2 CV when in non-Clear terrain.
- Cavalry*: Cavalry modifiers only apply when the opponent is in the cavalry's ZOC. +1 to CV of Light Cavalry, +2 to CV of medium/heavy cavalry. +1 to CV per hex of charge/countercharge movement.
- Enfilade*: +3 to the CV of an enfilading unit. -3 to the CV of a unit that is being enfiladed by an enemy unit when the enemy unit is not part of the Close Combat. When Attack Column is in the Front hex of a unit in Line, the Attack Column unit is enfiladed.
- Terrain: See each game's 'Terrain Effects Chart.' All effects are cumulative.
- Leaders: Each side may add the CV Bonus of any one leader per stack that is participating in the Close Combat.
* Cavalry and enfilade modifiers only apply for the first round of Close Combat; they do not apply for refights.
Battles from the Age of Reason - Fire Combat Card
Fire Combat Results. Cross-reference the modified dice roll with the odds column. For fire in the Fire Combat Phase use the results shown in the first column ("Result"). For Opportunity or Defensive Fire use the results shown in the last column ("Op. Fire & Defensive Fire"). A 'Special Result' happens only on a natural roll of 00-09. The odds columns correspond to the quotient (Fire Strength divided by the Fire Defense Value) of .33, .5, .66, 1.0, 1.5, 2.0, 2.5, 3.0, 4.0 and 5.0 respectively.
| Result (Fire Combat Phase) | Result (Op. / Defensive Fire) | 1:3 | 1:2 | 1:1.5 | 1:1 | 1.5:1 | 2:1 | 2.5:1 | 3:1 | 4:1 | 5:1 |
|---|---|---|---|---|---|---|---|---|---|---|---|
| Special Result | Special Result | Natural 00-09 | Natural 00-09 | Natural 00-09 | Natural 00-09 | Natural 00-09 | Natural 00-09 | Natural 00-09 | Natural 00-09 | Natural 00-09 | Natural 00-09 |
| - | - | 00-89 | 00-79 | 00-64 | 00-49 |
Fire Combat Resolution Procedure
- Determine the Fire Strength by multiplying the number of SPs firing by their Fire Multiple. The number of SPs firing is determined using charts A and B. The number of SPs firing and Fire Multiples can all be modified (see chart C). The final Fire Strength may be modified by terrain.
- Divide the firing units' Fire Strength by the Fire Defense Value of the target hex. This will result in a 'Quotient' number. Find the odds column that is less than or equal to the calculated Quotient. The final odds column may be modified by terrain, or the optional enfilade rules.
- Roll the dice and add any Fire Combat Diceroll Modifiers (chart C). The final diceroll may be modified by terrain, or the optional artillery height rules.
- Cross-reference the modified dice roll with the correct set of results: For fire in the Fire Combat Phase use the results shown on the left side. For Opportunity or Defensive Fire use results shown on the right side.
- Apply the results in the order listed: SP loss first, then any 'D' result, then any possible 'M' result. (A leader loss comes before any D or M result is rolled for.)
- A 'Special Result' will only happen on a natural roll of 00-09 (12.11).
- An 'R' result means the target may return fire (12.10).
- A number result is the number of SPs lost. This number may be modified by the SP Loss Modifiers listed in chart C.
- A 'D' result is a Disorder Check (C) for Opportunity Fire, or a Disorder Check (E) for Defensive Fire.
- An 'M' result is a Morale Check (A) for all types of fire (12.9d). Only use this 'M' result if the natural roll was even. If, after all modifications to SP losses (see SP Loss Modifiers on chart C), 2-3 SPs are lost, add 10 to the target's ER for this Morale Check. If 4 or more SPs are lost add 20.
A. Infantry Line SP Chart
| SPs | 3 ranks | 4 ranks |
|---|---|---|
| 1-4 | s: 1-4, f: 1-4 | s: 1-4, f: 1-4 |
| 5 | s: 2/3, f: 2/3 | s: 5, f: 4 |
| 6 | s: 3/3, f: 3/3 | s: 6, f: 4 |
| 7 | s: 3/4, f: 3/4 | s: 3/4, f: 2/3 |
| 8 | s: 4/4, f: 4/4 | s: 4/4, f: 3/3 |
| 9 | s: 4/5, f: 4/4 | s: 4/5, f: 3/4 |
| 10 | s: 5/5, f: 4/4 | s: 5/5, f: 4/4 |
Cross index a unit's SPs with the ranks that the unit's army uses, to show the stacking and firing parameters of an infantry unit (or stack) in Line. Stacking is shown after the letter 's' and the number of SPs that can fire is shown after the letter 'f'. When the number of SPs, cross-indexed with the number of ranks, results in a grey box, the unit can form a 2 hex Line. (The grey shading is not reproduced here.) For a 2 hex Line, the number on the left shows the number of SPs that can stack/fire in the left hex and the number on the right shows the number of SPs that can stack/fire in the right hex. Up to 4 SPs can always fire from a single hex Line.
B. Fire Formation Chart
| Formation | Maximum SPs firing |
|---|---|
| Artillery | 4 |
| Attack Column | 1 |
| General Order | 3 |
| Hook | See Diagram E |
| Line | 4 (see also chart A) |
| Skirmish | 3 |
| Square | See Diagram D |
C. Fire Combat Modifiers
SPs Firing Modifiers:
- Partial LOS: SPs halved (rounded) [12.6f]
- Disordered: SPs halved (rounded) [12.3a]
- Howitzer Fire (12.6d): SPs halved (rounded)
- Any combination of the above: SPs quartered
Fire Multiple Modifiers:
- General Order: -1
- Target enfiladed: +1
Fire Combat Diceroll Modifiers:
- Each full odds ratio over 5:1: +10
- Defensive Fire vs. Cavalry: +10 (13.10g)
- Defensive Fire vs. Infantry: +20 (13.10g)
Target Size (12.5):
- Skirmisher: -10
- 1-3 SPs: -5
- 4-7 SPs: 0
- 8-11 SPs: +10
- 12-15 SPs: +15
- 16-19 SPs: +20
- 20-27 SPs: +25
- 28+ SPs: +30
- For target size, count each artillery SP as 4 SPs, and each cavalry SP as 2 SPs.
SP Loss Modifiers (12.9h):
- Target in Column, Limbered or Square: SP losses x1.5 (rounded)
- Target in Road Column or Routed*: Target routs. *Routed may lose 1 more SP (19.1f).
- Artillery fires beyond its minimum range at unlimbered artillery: SP losses halved (drop fractions) [12.9f]
D. Square Fire Strength Distribution (12.2g): A unit in Square formation can fire up to 4 SPs (2 SPs if Disordered) into each of the three X hexes or each of the three Y hexes but it may not fire into any combination of X and Y hexes. A minimum of 3 SPs is required to form Square--1 and 2 SP units cannot form Square. (The X/Y hex diagram is not reproduced.)
E. Hook Fire Strength Distribution (12.3d): The diagrams show, for each front hex of a Hook, the percentage or number of firing SPs that may fire into that hex ('NA' means that artillery stacked with the Hook cannot fire into that hex). Two Hex Hook/Line: this diagram is used for a two hex Line with a Hook. This formation combines firing facets of Line and Hook. The dark grey hex uses a normal Line firing pattern and can fire into the hexes with dark grey dots. The light grey hex uses the 'Hook Only' firing pattern and can fire into the hexes with the light grey dots. The single number shows the total SPs firing into each hex for the example unit (8 SPs, 4 ranks) and the #/# designation shows the SPs firing into each hex from the left and right firing hexes of the example unit. Hook Only: this diagram is used for a single hex Hook. % is the percent of eligible SPs (rounded) that can fire into a hex. The single number shows the total SPs firing into each hex for the unit in this example (which has 7 SPs and is in 3 ranks). (The numeric values on the hex diagrams are graphical and are not reproduced.)
Battles from the Age of Reason - Disorder Check Summary Chart
A. Movement Actions (18.2) The Movement Disorder Check can be triggered by any of these issues:
- Non-Clear Terrain Formation Change (8.7)*
- Non-Clear Terrain Movement (11.2d)
- Pass Through Movement [see box below] (10.7)
- Rapid March Movement (11.4)*
- Line Back Up Movement (11.7)* (*These actions cannot be undertaken if the stack is already Disordered.) When: At the end of the unit's movement (for both the unit moving and any units moved through). Pass: No Effect. Fail: Disordered ER Modifiers: +5 for each hex/hexside of triggering terrain; +5 if the stack used Rapid March; +10 for each 'Pass Through' hex (10.7); +5 if the stack is Disordered; -? Apply any Leader Modifier. Note: When multiple events trigger the Movement Disorder Check (e.g. 'Pass Through' and 'Rapid March') all the ER modifiers that were accumulated during the unit's movement are applied when the check is made.
B. Attack Column Facing Change (9.3c) When: Just prior to the facing change. Pass: No effect on the unit. Fail: The facing change is not made, the unit ends its movement and is Disordered. ER Modifiers: +5 if the stack is Disordered; -? Apply any Leader Modifier.
C. Opportunity Fire Result (12.9e,i; 18.2d) When: After the 'D' result or after the SP loss Fire Result is applied. Pass: No effect on the unit. Fail: The moving unit ceases movement and is Disordered. ER Modifiers: +5 if the stack is Disordered; -? Apply any Leader Modifier.
D. Close Combat Defender Reaction (13.4e)* When: After the reaction is completed. Pass: The reaction is completed with no other effect. Fail: The reaction is completed but the unit is Disordered. ER Modifiers: +10 for each MP expended for the Facing/Formation change or +40 if the unit's entire movement allowance is expended; -? Apply any Leader Modifier. (*This action cannot be undertaken if the stack is already Disordered.)
E. Defensive Fire Result (12.9e,i; 13.10e) When: After the 'D' result or after the SP loss Fire Result is applied. Pass: No effect on the unit. Fail: The unit is Disordered. ER Modifiers: +5 if the stack is Disordered; -? Apply any Leader Modifier.
F. Cavalry Recall (16.3) When: Before, during or at the end of Pursuit Movement. Pass: Ends Pursuit Movement if the attempt is made during Pursuit. Fail: If the retreated unit is not eliminated, Pursuit Movement must continue as far as possible. The pursuing unit is Disordered or Shaken/Disordered at the end of the Pursuit. ER Modifiers: +5 for each PP expended; +10 if in an EZOC; +5 if the stack is Disordered; -? Apply any Leader Modifier.
G. Disorder Recovery (18.6) No Special Results on 00-09 dicerolls. When: In the Disorder Recovery Segment. Pass: Remove the Disorder Marker from the unit (stack). Shaken/Disordered units remain Shaken. Fail: The unit remains Disordered. ER Modifiers: +10 if the unit making the check is in an EZOC; +5 if the stack is Disordered. Automatic recovery if a Leader is present.
Pass Through Examples (10.7)
- Different Types of Units:
- A cavalry unit in Line enters and exits a hex containing an infantry Line that is also stacked with unlimbered artillery.
- An infantry unit in March Col enters and exits a hex containing a cavalry unit in March Col.
- A cavalry unit in Road Col enters and exits a hex containing a Limbered artillery unit in Road Col.
- Different Facings:
- A cavalry unit in March Col is facing north and another cavalry unit in March Col enters and exits the hex facing northeast.
- A cavalry unit in Line is facing north and another cavalry unit in Line enters the hex also facing north, but changes facing to the northeast and then exits the hex.
- Different Formations: An infantry unit in Line enters and exits a hex containing an infantry unit in March Col.
- SPs Limit/Hex Exceeded: A 9 SP infantry Line enters and exits a hex containing a 6 SP infantry Line and 2 artillery SPs (counted as 8 SPs for stacking).
- Ordered & Disordered: A cavalry Attack Col in Good Order enters and exits a hex containing a Disordered cavalry Attack Col.
- Routed & non-Routed: A non-Routed unit moves through a Routed unit.
Disorder Effects (18.5)
- Movement: Movement allowance halved (rounded) (11.0); No Rapid March (11.4); No Line Backup Movement (11.7); No Square Movement (8.1e); No Artillery Prolonge movement (11.6); Cannot reverse direction (9.6a); Can cause a 'Pass Through' for a Disorder Check (A) (10.7).
- Formations: No non-Clear terrain formation changes (8.7); Line/March Col cannot voluntarily expand/contract (11.5); No Square formation change (8.1e); Unit breakdown/reform not allowed (8.5a,b).
- Combat: SPs firing per hex is halved (rounded) (12.3); Close Combat SPs are halved (rounded) (13.11a); No Defender Reactions (13.4); No non-Skirmisher Retreat Before Close Combat (13.9).
- Cavalry Charge: Cavalry cannot Countercharge (13.5); Cavalry cannot charge non-adjacent enemy units (13.1a, 17.1a); Cavalry Pursuit Points are halved (rounded) (16.2a).
- General Disorder Effects: If stacked with an ordered unit, the entire stack is Disordered (10.10); A second Disorder result makes the unit Shaken/Disordered (18.5c); Add +5 to the ER of the stack for all Disorder Checks (18.5a).
Zorndorf Disorder Check Special Results
Rolled on a natural 00-09 of a Disorder Check. Notes: ER = Effectiveness Rating. SP = Strength Points. Modifiers listed for the Special Results are the only ones used for the re-roll. Where results are numbered, apply result 1) if it applies, otherwise result 2) (rule 6.9a).
A. Movement Action
- Russian 00-02 / Prussian 00: The unit is 'Shaken/Disordered.'
- Russian 03-05 / Prussian 01-03: Re-roll with double all the original check's '+' ER modifiers (if any).
- Russian 06-08 / Prussian 04-06: 1) If the unit's printed ER is 26+, re-roll the check with a +10 ER modifier. 2) Re-roll with no ER modifier.
- Russian 09 / Prussian 07-09: 1) If the unit's printed ER is 36+, re-roll the check with a +5 ER modifier. 2) Re-roll with a -5 ER modifier.
B. Attack Column Facing Change
- Russian 00-02 / Prussian 00: The unit is 'Shaken/Disordered.'
- Russian 03-05 / Prussian 01-02: Re-roll the check with a +15 ER modifier.
- Russian 06-08 / Prussian 03-06: 1) If the unit's printed ER is 26+, re-roll the check with a +10 ER modifier. 2) Re-roll with no ER modifier.
- Russian 09 / Prussian 07-09: 1) If the unit's printed ER is 36+, re-roll the check with a +5 ER modifier. 2) Re-roll with a -5 ER modifier.
C. Opportunity Fire Result
- Russian 00-02 / Prussian 00: 1) If the unit is in an Enemy Zone of Control it is 'Shaken/Disordered.' 2) Re-roll with a +15 ER modifier.
- Russian 03-06 / Prussian 01-03: 1) If an SP loss accompanies the Disorder Check, re-roll with a +20 ER modifier. 2) Re-roll with a +10 ER modifier.
- Russian 07-08 / Prussian 04-06: 1) If the unit is stacked with a leader, the check is passed. 2) Re-roll with a +5 ER modifier.
- Russian 09 / Prussian 07-09: Re-roll the check with a -10 ER modifier.
D. Close Combat Defender Reaction
- Russian 00-02 / Prussian 00: Reaction fails: The unit keeps its original facing/formation and is Disordered.
- Russian 03-05 / Prussian 01-02: Reaction succeeds but the unit is 'Shaken/Disordered.'
- Russian 06-08 / Prussian 03-06: 1) If the unit is stacked with a leader, double the leader's ER Bonus and re-roll. 2) Re-roll with a +5 ER modifier.
- Russian 09 / Prussian 07-09: Re-roll the check with a -10 ER modifier.
E. Defensive Fire Result
- Russian 00-02 / Prussian 00: The unit is 'Shaken/Disordered.'
- Russian 03-06 / Prussian 01-03: 1) If the check was caused by an SP loss, re-roll with a +20 ER modifier. 2) Re-roll with a +10 ER modifier.
- Russian 07-08 / Prussian 04-06: 1) If any of the Defensive Fire was from artillery, re-roll with a +15 ER modifier. 2) Re-roll with a +5 ER modifier.
- Russian 09 / Prussian 07-09: 1) If the unit's printed ER is 36+, re-roll the check with +5 ER modifier. 2) Re-roll with a -5 ER modifier.
F. Recall
- Russian 00-01 / Prussian 00: Recall fails. Once the Pursuit is finished, mark the unit as Disordered and roll the die again, eliminating SPs from the pursuing unit equal to 1/2 (rounded) the die roll.
- Russian 02-03 / Prussian 01-02: 1) If stacked with a leader, the Recall succeeds, but the pursuing unit loses SPs equal to 1/2 (rounded) the number of Pursuit Points used. 2) If not stacked with a leader, the result is the same as 1) but the unit is also Disordered.
- Russian 04-07 / Prussian 03-06: 1) If the unit is stacked with a leader, double the leader's ER Bonus and re-roll. 2) Re-roll with a +5 ER modifier.
- Russian 08-09 / Prussian 07-09: 1) If the pursuing unit expended 5 or fewer Pursuit Points, the check is passed. 2) Re-roll with a -5 ER modifier.
G. Disorder Recovery
- No Special Results. Treat a roll of 00-09 as a plain roll of that number, modifying it with all appropriate modifiers.
Battles from the Age of Reason - Morale Check Summary Chart
Procedure:
- Determine the type of Morale Check required.
- In the table at the bottom of the page, follow the correct Morale Check column to determine the applicable modifiers.
- Apply the modifiers to the unit's ER. For mixed stacks, use the ER of the top non-Artillery unit.
- Roll for the Morale Check.
- Check the explanations below for the results.
A. Fire Combat Result (12.9d, 12.9h, 19.1f, 19.2) When: On an unmodified die roll that is even and that causes at least 1 SP of losses, the affected unit must roll a Morale Check. An already routed defender does not make a Morale Check but instead loses one extra SP and Routs. For actual Fire Combat losses of 2 or 3 SPs, add +10 to the unit's ER. For actual Fire Combat losses of 4 or more SPs add +20 to the unit's ER. Pass: No effect. Fail: A Good Morale unit becomes Shaken. A Shaken Morale unit Routs. An already Shaken Artillery unit is eliminated.
B. Pre-Close Combat (13.2a, 13.7a, 13.8a, 17.3a, 19.1f) When: Per the Close Combat phases, attackers and then defenders must check their Morale. In both cases, a separate roll is made for every stack. An already routed defender does not make a Check but instead loses one SP and Routs. Pass: No effect. Close Combat continues. Fail: An attacker that fails is Shaken and does not move nor participate in the Close Combat. A defender that fails receives a Shaken marker and continues the Close Combat in that Morale state. An already-Shaken defender Routs.
C. Countercharge Movement (13.5c) When: A stack attempting to Countercharge must pass a Morale Check in order to continue with the Countercharge. Pass: The Countercharge can be successfully undertaken. Move the Countercharging stack adjacent to the charging Cavalry. Fail: The Countercharging Cavalry remains in place and becomes Shaken.
D. Retreat Before Close Combat (13.9c, 20.1a) When: After units Retreat Before Close Combat, roll a Morale Check for the retreating units. Pass: No effect. Fail: The units are Shaken. An already Shaken stack Routs.
E. Eliminated or Routed Attackers (14.2c, 14.6a) When: Activated attacking units are eliminated in a hex or rout as a result of Close Combat. Roll a Morale Check for any unactivated units or artillery in the affected hex. Pass: No effect. Fail: The remaining units become Shaken. Any already Shaken units Rout.
F. Friendly Unit Retreats (10.13c, 17.3d, 20.1c, 20.2d) A) When: A non-Skirmish unit retreats before Close Combat, and it retreats through a friendly stack--roll for the non-retreating friendly stack. B) When: Units Rout Retreat. Roll a Morale Check for any units that the routing units were stacked with or pass through. If the stack moved through was already Routed, do not roll; it also performs a Rout retreat. Pass: The stack retains its current Morale state. Fail: A Good Morale unit becomes Shaken and Disordered. (If a unit was already Disordered it also becomes Shaken/Disordered.) A Shaken unit Routs.
G. "M" Close Combat Result & Close Combat Special Results (14.4, 14.8) No Special Results on 00-09 dicerolls. When: Units subject to the "M" result from either a Close Combat or a Close Combat Special Result must roll a Morale Check. Each stack rolls separately. Pass: Stack is unaffected. Refight the Combat if stacks from both sides pass. Fail: Stack loses 1 SP and Routs.
H. Opportunity Charge (17.2a) When: A stack that is attempting to Opportunity Charge currently activated units must first make a Morale Check to see if it can undertake the Op. Charge. Pass: Execute the Opportunity Charge. Fail: The Op. Charge is not made, and the stack attempting it becomes Shaken.
I. Rally Attempt (19.5) Rally attempts do not trigger Special Results on 00-09 dicerolls. When: In the Rally Phase, roll first for all Shaken units, then roll for all Routed units. Shaken units roll as a stack, but Routed units roll individually. Pass: Shaken units return to good morale. Routed units become Shaken/Disordered and may assume any legal single hex Formation and Facing. Fail: A Shaken unit remains Shaken. A Routed unit Rout Retreats and may lose SPs (see rule 19.5c).
J. Voluntary Rout (19.10c,d) A) When: Roll for any units of a Command that have not voluntarily routed when other units of that Command have done so (19.10c). B) When: Independent units voluntarily Rout, roll for units of the activated Command that did not voluntarily Rout if the Independent unit was within the Command Leader's Command Range (19.10c). For both A and B, if the checking unit was retreated through by a voluntarily routing unit, a +10 ER modifier applies to the unit's Morale Check (19.10d). Pass: No effect. Fail: A Good Morale unit becomes Shaken. A Shaken Morale unit Routs.
Shaken Effects (19.6): if stacked with non-Shaken unit, the entire stack is Shaken (10.10); may not initiate Close Combat (13.1a); no Defending Cavalry option (13.8b); modify CV by -5 (13.11c); cannot Countercharge (13.5b); cannot Pursue (16.1b); cannot Opportunity Charge (17.1a); ER +10 for Morale Checks (19.6b).
Routed Effects (19.7): not counted for Regimental Integrity (6.2); cannot be Activated (6.3); counts as 2 for Command Leader LOC (7.2); may not Breakdown or Reform (8.5a,b); may not perform Fire Combat (12.2a); Fire Combat SP loss = automatic rout retreat + possible extra SP loss (12.9h); may not initiate Close Combat (13.1a); loses 1 SP and rout retreats if defending in Close Combat (13.7d, 19.7c); no Defender Reactions (13.4a); no Charge/Countercharge (13.1a, 13.5b); no Opportunity Charge (17.1a); eliminated if pursuing cavalry enters its hex (16.2b); Artillery that routs is eliminated (14.6a); Effectiveness Rating +15 for Rally (19.9); Units or stacks that Rout will retreat 4 hexes (Inf) or 6 hexes (Cav) (20.2a).
Morale Check modifiers by condition (columns are the Morale Check types A to J). "+ or - number" = apply modifier. No = Not Allowed. NE = No Effect. Rout = Unit routs. X = Not possible.
| Condition | A | B | C | D | E | F | G | H | I | J |
|---|---|---|---|---|---|---|---|---|---|---|
| 50% SP Losses | +10 | +10 | +10 | +10 | +10 | +10 | +10 | +10 | +10 | +10 |
| Disordered | +5 | +5 | No | No | +5 | +5 | +5 | +5 | +5 |
(The first four rows are grouped under "Unit State" and the remaining rows under "Formation" (General Order to Supported Line/Hook) and "Defense Aspect" (Non-Cavalry attacked by Cavalry to Leader Modifier) in the printed chart.)
Zorndorf Morale Check Special Results
Rolled on a natural 00-09 of a Morale Check. Notes: ER = Effectiveness Rating. EZOC = Enemy Zone of Control. Modifiers listed for the Special Results are the only ones used for the re-roll. Where results are numbered, apply result 1) if it applies, otherwise result 2), then 3) (rule 6.9a). * Make a leader casualty check (after the re-roll, if one is required) as follows: roll one die and on a 0-1 result the leader is eliminated (see Series Rule 21.4d), on a 2-9 result there is no effect. Subtract 1 from this die roll if the leader is within LOS and range of any enemy infantry units. (The asterisk appears on the leader results of check types A and B.)
A. Fire Combat Result
- 00 (both): 1) If artillery fire contributed to the Fire Combat result the unit Routs. 2) The unit is 'Shaken/Disordered.'
- Russian 01 / Prussian 01-02: 1) If the unit is in an EZOC it is 'Shaken/Disordered.' 2) Re-roll with a +20 ER modifier.
- Russian 02-05 / Prussian 03-05: 1) If caused by Opportunity Fire, re-roll with a +10 ER modifier. 2) If caused by Defensive Fire, re-roll with a +20 ER modifier. 3) Re-roll with a +15 ER modifier.
- 06-09 (both): 1) If the unit is stacked with a leader* the check is passed. 2) Re-roll with a +10 ER modifier.
B. Pre-Close Combat
- 00 (both): The unit is 'Shaken/Disordered.'
- Russian 01 / Prussian 01-02: 1) If the unit is attacking and in an EZOC, re-roll with a +20 ER modifier. 2) Re-roll with a +15 ER modifier.
- Russian 02-05 / Prussian 03-05: 1) If the unit is stacked with a leader*, re-roll with a -15 ER modifier. 2) Re-roll with a +10 ER modifier.
- 06-09 (both): 1) If the unit is stacked with a leader* the check is passed. 2) Re-roll with a +5 ER modifier.
C. Countercharge Movement
- Russian 00-01 / Prussian 00: The unit is 'Shaken/Disordered.'
- Russian 02-03 / Prussian 01-02: 1) If the unit is stacked with its Command Leader, re-roll with a +10 ER modifier. 2) Re-roll with a +20 ER modifier.
- Russian 04-06 / Prussian 03-05: 1) If the unit is stacked with a leader the check is passed. 2) Re-roll with a +15 ER modifier.
- Russian 07-09 / Prussian 06-09: 1) If the unit is stacked with a leader the check is passed. 2) If the charge movement would result in the unit not ending the move in any EZOC, the check is passed. 3) Re-roll with a +10 ER modifier.
D. Retreat Before Close Combat
- Russian 00-01 / Prussian 00-01: The unit retreats an additional 2 hexes and is 'Shaken/Disordered.'
- 02-04 (both): 1) If the unit is a skirmisher or light infantry, re-roll with a +10 ER modifier. 2) Re-roll with a +20 ER modifier.
- 05-06 (both): 1) If the unit retreated 1 hex, re-roll with a +10 ER modifier. 2) Re-roll with a +20 ER modifier.
- 07-09 (both): 1) If the unit is stacked with/adjacent to a leader the check is passed. 2) Re-roll with a +5 ER modifier.
E. Eliminated or Routed Attackers
- 00 (both): The unit Routs (artillery is eliminated).
- Russian 01 / Prussian 01-02: 1) If caused by attacker elimination, re-roll with a +20 ER modifier. 2) Re-roll with a +10 ER modifier.
- Russian 02-05 / Prussian 03-05: 1) If the unit is artillery, re-roll with a +10 ER modifier. 2) Re-roll with a +5 ER modifier.
- 06-09 (both): 1) If the unit is stacked with/adjacent to a leader the check is passed. 2) Re-roll with no ER modifier.
F. Friendly Unit Retreats
- 00 (both): 1) If the unit is retreated through by cavalry it is 'Shaken/Disordered.' 2) Re-roll with a +20 ER modifier.
- Russian 01 / Prussian 01-02: 1) If the unit's modified ER is 25+ it is 'Shaken/Disordered.' 2) Re-roll with a +15 ER modifier.
- Russian 02-05 / Prussian 03-05: 1) If the unit's modified ER is 35+ it is 'Shaken/Disordered.' 2) Re-roll with a +10 ER modifier.
- 06-09 (both): 1) If the unit is stacked with/adjacent to a leader the check is passed. 2) Re-roll with a +5 ER modifier.
G. All Close Combat 'M' Results
- No Special Results: Treat a roll of 00-09 as a plain roll of that number, modifying it with all appropriate modifiers.
H. Opportunity Charge
- Russian 00-01 / Prussian 00: The unit is 'Shaken/Disordered.'
- Russian 02-03 / Prussian 01-02: 1) If the unit is stacked with its Command Leader, re-roll with a +10 ER modifier. 2) Re-roll with a +20 ER modifier.
- Russian 04-06 / Prussian 03-05: 1) If the unit is stacked with a leader the check is passed. 2) Re-roll with a +15 ER modifier.
- Russian 07-09 / Prussian 06-09: 1) If the unit is stacked with a leader the check is passed. 2) If the Op. Charge movement would result in the unit not ending the move in any EZOC, the check is passed. 3) Re-roll with a +10 ER modifier.
I. All Rally Attempts
- No Special Results: Treat a roll of 00-09 as a plain roll of that number, modifying it with all appropriate modifiers.
J. Voluntary Rout
- 00 (both): 1) If the unit is in an EZOC it is 'Shaken/Disordered.' 2) Re-roll with a +20 ER modifier.
- 01 (both): 1) If the unit's modified ER is 25+ it is 'Shaken/Disordered.' 2) Re-roll with a +15 ER modifier.
- 02-05 (both): 1) If the unit's modified ER is 35+ it is 'Shaken/Disordered.' 2) Re-roll with a +10 ER modifier.
- 06-09 (both): 1) If the unit is stacked with/adjacent to a leader the check is passed. 2) Re-roll with a +5 ER modifier.
Zorndorf Terrain Effects and Fire Multiples Charts
Terrain Effects Chart (TEC). Cross index the type of unit and its formation with the terrain. The number listed is the cost to move into the hex or through the hexside. Movement Point fractions are retained (not rounded). The number in parentheses is the maximum stacking value for that type of unit/formation in that terrain. The stacking values listed for infantry and cavalry in column are for March Column and Attack Column and for Infantry in Square (which can only be formed in Clear or Stream terrain). Road Column uses different Stacking rules (see Series Rules 8.1f & 10.11). The example hexes shown in the original chart beside each terrain name (such as W2914 for Clear) are omitted below.
Column headings: Infantry Line | Infantry March, Road & Attack Column | Cavalry Line | Cavalry March, Road & Attack Column | Artillery | Leaders | SCM Costs | Fire Defense Value | Close Combat Modifiers | Morale Check Modifiers.
| Terrain | Inf. Line | Inf. Column | Cav. Line | Cav. Column | Artillery | Leaders | SCM Cost | Fire Defense | CC Modifier | Morale Modifier |
|---|---|---|---|---|---|---|---|---|---|---|
| Baggage *† | +1 (12) | +1 (24) | +1 (12) | +1 (12) | +1 (6) | +1/2 | +1* | OT | OT | OT |
| Clear | 1 (16) | 1/2 (32) | 1 (18) | 1/2 (18) | 1 (8) | 1/2 | 1 | 10 |
TEC Notes and Abbreviations:
- A = Attacker, D = Defender, P = Prohibited. GO = General Order, AC = Attack Column. OT = use Other Terrain in the hex.
- Movement Costs: All = The unit must use all its printed MPs to enter the hex or cross the hexside. It may not be Disordered to do so.
- Close Combat Modifier: +8D Line, +4D AC: If the attacker is in Line, the defender adds +8 to its CV; if in AC the defender adds +4.
- 'Up' Modifiers: -1A up, -2A up: The attacker's CV is only modified if it is attacking up an adjacent slope.
-
- Affecting (non-clear) terrain for Disorder Checks and for Series Rules 8.7 and 18.2b (for the SCM column).
- ** Double the CV modifier for cavalry.
- † May block Line of Sight (LOS).
- Elevation Levels: the map has elevation levels 1 to 4 (see Zorndorf rule 5.4); the contour illustrations are not reproduced.
Zorndorf Fire Combat Multiples and Ranges. Artillery multiples marked with an asterisk (*) are printed in bold in the original chart; they are the Minimum Fire ranges (used for Opportunity Fire and for combining multiple artillery units firing, see 12.2i). Infantry multiples are given for ranges 1 and 2.
Infantry
| Nation | Unit | Range 1 | Range 2 |
|---|---|---|---|
| Russian | Grenadier | x4 | x2 |
| Russian | Musketeer | x3 | x2 |
| Russian | Observation Grenadier | x3 | x1 |
| Russian | Observation Musketeer | x2 | x1 |
| Prussian | Grenadier | x5 | x3 |
| Prussian | Musketeer | x4 | x2 |
| Prussian |
Artillery (range in hexes across the top)
| Nation | Unit | 1 | 2 | 3 | 4 | 5 | 6 | 7 | 8 | 9 | 10 | 11 | 12 | 13 | 14 | 15 | 16 |
|---|---|---|---|---|---|---|---|---|---|---|---|---|---|---|---|---|---|
| Russian | Shuvalov Howitzer | x6* | x6* | x6* | x5 | x5 | x5 | x4 | x4 |
Zorndorf Turn Record Track
The Turn Record Track has separate spaces for each 20-minute turn from 6:00 through 9:40 (hour columns 6:00, 7:00, 8:00, 9:00, 10:00, 11:00, 12:00, 1:00, 2:00, 3:00, 4:00, 5:00, 6:00, 7:00, 8:00, 9:00; each hour has :00, :20 and :40 turn spaces), with an End Turn track numbered 0 to 12 below each hour. When using the Zorndorf markers, place the 'Minutes' marker on the specific game-turn time and use the 'Hour' marker to move down the End Turn track. (The "End" box positions are graphical and are not reproduced; the per-scenario End Turn numbers are in the table below.)
| Scenario | ET Number | First Turn | Last Turn | Maps Used |
|---|---|---|---|---|
| 1 | Not used | 11:00 AM | 12:40 PM | W |
| 2 | Not used | 11:00 AM | 1:20 PM | W |
| 3 | 11 | 9:00 AM | 9:40 PM | W, C, E |
| 4 | 11 | 9:00 AM | 9:40 PM | W, C |
| 5 | 11 | 6:00 AM | 9:40 PM | W, C, E |
Loss Charts for the Russian Army at Zorndorf
Transcribed from the Zorndorf charts file. In each Loss Chart, "SPs (loss boxes)" is the highest numbered loss box printed for the unit (its Strength Points; the 50% loss level is shown in grey on the original chart and is not reproduced). The Army Leader and Wing Leader lines show the leader's Command Range in parentheses in the original; the number in parentheses after an Army Leader's name is his Wing Activation Number (WAN). For the Army Leader the Rating column is his Command Rating (the signed value); for other leaders it is the Initiative Rating shown on the counter's back (for Army Leaders the Initiative rating is not used). The Replacement Type letter refers to the A or B leader loss counters (Zorndorf rule 2.3b). Unit abbreviations are in the form "battalion/part, regiment / Command".
Army and Special Leaders
| Leader | Counter | Command Range | ER Bonus | CV Bonus | Rating (Command Rating for Army Leaders; Initiative Rating otherwise) | Replacement Type | Army Loss Value |
|---|---|---|---|---|---|---|---|
| Graf Fermor (8) | FER | 5 | -8 | +1 | +2 | - | 20 |
| GM Rothelier | ROT | 2 | - | - | - | - | 10 |
Galitzin’s Infantry Wing
| Leader | Counter | Command Range | ER Bonus | CV Bonus | Rating (Command Rating for Army Leaders; Initiative Rating otherwise) | Replacement Type | Army Loss Value |
|---|---|---|---|---|---|---|---|
| GLt Galitzin | GAL | 5 | -3 | +1 | 5 | - | 10 |
| GM Manteuffel | GAL / M | 3 | -6 | +1 | 6 | B | 5 |
| Unit | ER | CV | Type | SPs (loss boxes) | Prolonge Capability |
|---|---|---|---|---|---|
| 1 2GR / M | 19 | +2 | Gren | 6 | |
| 2 2GR / M | 19 | +2 | Gren | 6 | |
| 1 NEV / M | 23 | +1 | Mus | 5 | |
| 2 NEV / M | 24 | +1 | Mus | 5 |
| Leader | Counter | Command Range | ER Bonus | CV Bonus | Rating (Command Rating for Army Leaders; Initiative Rating otherwise) | Replacement Type | Army Loss Value |
|---|---|---|---|---|---|---|---|
| Brg Kokoschkin | GAL / K | 3 | -6 | +1 | 6 | B | 5 |
| Unit | ER | CV | Type | SPs (loss boxes) | Prolonge Capability |
|---|---|---|---|---|---|
| 1 KAZ / K | 22 | +1 | Mus | 4 | |
| 2 KAZ / K | 23 | +1 | Mus | 4 | |
| 1 TRO / K | 23 | +1 | Mus | 4 | |
| 2 TRO / K | 22 | +1 | Mus | 4 |
| Leader | Counter | Command Range | ER Bonus | CV Bonus | Rating (Command Rating for Army Leaders; Initiative Rating otherwise) | Replacement Type | Army Loss Value |
|---|---|---|---|---|---|---|---|
| GM Diez | GAL / DI | 3 | -3 | +0 | 4 | B | 5 |
| Unit | ER | CV | Type | SPs (loss boxes) | Prolonge Capability |
|---|---|---|---|---|---|
| 1 4GR / DI | 20 | +2 | Gren | 5 | |
| 2 4GR / DI | 21 | +2 | Gren | 5 | |
| 1 SMO / DI | 26 | +1 | Mus | 4 | |
| 2 SMO / DI | 25 | +1 | Mus | 5 |
| Leader | Counter | Command Range | ER Bonus | CV Bonus | Rating (Command Rating for Army Leaders; Initiative Rating otherwise) | Replacement Type | Army Loss Value |
|---|---|---|---|---|---|---|---|
| Brg Sievers | GAL / S | 3 | -5 | +1 | 5 | B | 5 |
| Unit | ER | CV | Type | SPs (loss boxes) | Prolonge Capability |
|---|---|---|---|---|---|
| 1 MUR / S | 21 | +1 | Mus | 4 | |
| 2 MUR / S | 21 | +1 | Mus | 4 | |
| 1 RYA / S | 31 | +1 | Mus | 4 | |
| 2 RYA / S | 32 | +1 | Mus | 4 |
| Leader | Counter | Command Range | ER Bonus | CV Bonus | Rating (Command Rating for Army Leaders; Initiative Rating otherwise) | Replacement Type | Army Loss Value |
|---|---|---|---|---|---|---|---|
| Brg Leontyev | GAL / L | 3 | -4 | +1 | 5 | B | 5 |
| Unit | ER | CV | Type | SPs (loss boxes) | Prolonge Capability |
|---|---|---|---|---|---|
| 1 NOV / L | 28 | +1 | Mus | 4 | |
| 2 NOV / L | 28 | +1 | Mus | 5 | |
| 1 VOR / L | 25 | +1 | Mus | 5 | |
| 2 VOR / L | 25 | +1 | Mus | 5 |
Demiku’s Cavalry Command
| Leader | Counter | Command Range | ER Bonus | CV Bonus | Rating (Command Rating for Army Leaders; Initiative Rating otherwise) | Replacement Type | Army Loss Value |
|---|---|---|---|---|---|---|---|
| GM Demiku | DE | 4 | -6 | +2 | 6 | B | 5 |
| Unit | ER | CV | Type | SPs (loss boxes) | Prolonge Capability |
|---|---|---|---|---|---|
| 3 a / DE | 28 | +3 | Kur | 5 | |
| 3 b / DE | 28 | +3 | Kur | 5 | |
| ARK / DE | 30 | +3 | Drag | 5 | |
| GRU / DE | 40 | +1 | Hus | 8 | |
| HOR a / DE |
Gaugreben’s Cavalry Command
| Leader | Counter | Command Range | ER Bonus | CV Bonus | Rating (Command Rating for Army Leaders; Initiative Rating otherwise) | Replacement Type | Army Loss Value |
|---|---|---|---|---|---|---|---|
| Brg Gaugreben | G | 3 | -5 | +1 | 6 | B | 5 |
| Unit | ER | CV | Type | SPs (loss boxes) | Prolonge Capability |
|---|---|---|---|---|---|
| KAR a / G | 28 | +4 | MG | 5 | |
| KAR b / G | 29 | +4 | MG | 4 | |
| NVT a / G | 35 | +2 | Kur | 5 | |
| NVT b / G | 36 | +6 | Kur | 4 | |
| TOB / G |
Saltykov’s Infantry Wing
| Leader | Counter | Command Range | ER Bonus | CV Bonus | Rating (Command Rating for Army Leaders; Initiative Rating otherwise) | Replacement Type | Army Loss Value |
|---|---|---|---|---|---|---|---|
| GLt Saltykov | SAL | 5 | -5 | +2 | 6 | - | 10 |
| GM Gr. Dolgoruki | SAL / D | 3 | -4 | +1 | 3 | B | 5 |
| Unit | ER | CV | Type | SPs (loss boxes) | Prolonge Capability |
|---|---|---|---|---|---|
| 1 BUT / D | 28 | +1 | Mus | 5 | |
| 2 BUT / D | 27 | +1 | Mus | 5 | |
| 1 SUZ / D | 24 | +1 | Mus | 5 | |
| 2 SUZ / D | 25 | +1 | Mus | 5 |
| Leader | Counter | Command Range | ER Bonus | CV Bonus | Rating (Command Rating for Army Leaders; Initiative Rating otherwise) | Replacement Type | Army Loss Value |
|---|---|---|---|---|---|---|---|
| GM Leontiev | SAL / LE | 3 | -5 | +1 | 4 | B | 5 |
| Unit | ER | CV | Type | SPs (loss boxes) | Prolonge Capability |
|---|---|---|---|---|---|
| 1 KEG / LE | 33 | +1 | Mus | 5 | |
| 2 KEG / LE | 34 | +1 | Mus | 5 | |
| 1 LAD / LE | 20 | +1 | Mus | 5 | |
| 2 LAD / LE | 20 | +1 | Mus | 4 |
| Leader | Counter | Command Range | ER Bonus | CV Bonus | Rating (Command Rating for Army Leaders; Initiative Rating otherwise) | Replacement Type | Army Loss Value |
|---|---|---|---|---|---|---|---|
| Brg Uvarov | SAL / U | 3 | -4 | +0 | 3 | B | 5 |
| Unit | ER | CV | Type | SPs (loss boxes) | Prolonge Capability |
|---|---|---|---|---|---|
| 1 CHE / U | 20 | +1 | Mus | 5 | |
| 2 CHE / U | 20 | +1 | Mus | 4 | |
| 1 SHL / U | 24 | +1 | Mus | 5 | |
| 2 SHL / U | 24 | +1 | Mus | 5 |
| Leader | Counter | Command Range | ER Bonus | CV Bonus | Rating (Command Rating for Army Leaders; Initiative Rating otherwise) | Replacement Type | Army Loss Value |
|---|---|---|---|---|---|---|---|
| Brg Pr. Liumbomirski | SAL / LI | 3 | -6 | +1 | 5 | B | 5 |
| Unit | ER | CV | Type | SPs (loss boxes) | Prolonge Capability |
|---|---|---|---|---|---|
| 1 3GR / LI | 16 | +3 | Gren | 6 | |
| 2 3GR / LI | 17 | +3 | Gren | 6 | |
| 1 ROS / LI | 29 | +1 | Mus | 4 | |
| 2 ROS / LI | 29 | +1 | Mus | 4 |
| Leader | Counter | Command Range | ER Bonus | CV Bonus | Rating (Command Rating for Army Leaders; Initiative Rating otherwise) | Replacement Type | Army Loss Value |
|---|---|---|---|---|---|---|---|
| GM Panin | SAL / P | 3 | -4 | +1 | 4 | B | 5 |
| Unit | ER | CV | Type | SPs (loss boxes) | Prolonge Capability |
|---|---|---|---|---|---|
| 1 1GR / P | 15 | +3 | Gren | 7 | |
| 2 1GR / P | 15 | +3 | Gren | 6 | |
| 1 STP / P | 34 | +1 | Mus | 4 | |
| 2 STP / P | 35 | +1 | Mus | 5 |
Independent Cavalry
| Unit | ER | CV | Type | SPs (loss boxes) | Prolonge Capability |
|---|---|---|---|---|---|
| COS 1a | 42 | +2 | Cos | 5 | |
| COS 1b | 42 | +2 | Cos | 5 | |
| COS 2a | 43 | +2 | Cos | 5 | |
| COS 2b | 43 | +2 | Cos | 5 | |
| COS 3a |
Observation Corps
| Leader | Counter | Command Range | ER Bonus | CV Bonus | Rating (Command Rating for Army Leaders; Initiative Rating otherwise) | Replacement Type | Army Loss Value |
|---|---|---|---|---|---|---|---|
| GeCh Browne | BRO | 5 | -5 | +2 | 6 | - | 10 |
| Brg Thiessenhausen | BRO / T | 2 | -5 | +1 | 5 | B | 5 |
| Unit | ER | CV | Type | SPs (loss boxes) | Prolonge Capability |
|---|---|---|---|---|---|
| 1 4M / T | 37 | +1 | Mus | 9 | |
| 2 4M / T | 40 | +1 | Mus | 9 | |
| 3 4M / T | 40 | +1 | Mus | 9 | |
| 1 5M / T | 38 | +1 | Mus | 9 | |
| 2 5M / T |
| Leader | Counter | Command Range | ER Bonus | CV Bonus | Rating (Command Rating for Army Leaders; Initiative Rating otherwise) | Replacement Type | Army Loss Value |
|---|---|---|---|---|---|---|---|
| Brg Fast | BRO / F | 2 | -3 | +1 | 4 | B | 5 |
| Unit | ER | CV | Type | SPs (loss boxes) | Prolonge Capability |
|---|---|---|---|---|---|
| 1 1M / F | 40 | +1 | Mus | 8 | |
| 2 1M / F | 41 | +1 | Mus | 8 | |
| 3 1M / F | 41 | +1 | Mus | 8 | |
| 1 3M / F | 39 | +1 | Mus | 9 | |
| 2 3M / F |
Independent Infantry
| Unit | ER | CV | Type | SPs (loss boxes) | Prolonge Capability |
|---|---|---|---|---|---|
| 1 GR* | 30 | +2 | Gren | 9 | |
| 2 GR* | 31 | +2 | Gren | 9 | |
| 1 CGR | 24 | +2 | Gren | 5 | |
| 2 CGR | 20 | +2 | Gren | 5 | |
| 3 CGR |
Artillery
| Unit | ER | CV | Type | SPs (loss boxes) | Prolonge Capability |
|---|---|---|---|---|---|
| 6 lb / 1 | 15 | +0 | 6 lb | 2 | FP |
| 6 lb / 2 | 15 | +0 | 6 lb | 2 | FP |
| 6 lb / 3 | 15 | +0 | 6 lb | 2 | FP |
| 8 lb / 1 | 15 | +0 | 8 lb | 2 | FP |
| 8 lb / 2 |
Current Army Morale Result Modifier: +2 per looted Baggage counter; +10 if Fermor is not on the map; +10 if a Prussian unit is in Quartschen. For instructions on how to use these Army Loss charts, see the Prussian Loss Charts. The chart also contains the eight Light Baggage counters (each with a "Looted" box worth +2) and the "Army Loss Record" with boxes marked 25, 50, 75, 100, 125, 150, 175, 200, 225, 250, 275 and 300 Losses, plus an 'Army Morale Result' record with columns for Army Current Loss Level, Game Turn rolled for, Army Morale Result and Total Army Morale.
Russian Current Loss Level table (cross-index the Army's current loss total with a die roll):
| Army Morale Result | 50 | 100 | 150 | 200 | 250 | 300 |
|---|---|---|---|---|---|---|
| 0 | 0-6 | 0-4 | 0-2 | 0 | - | - |
| +3 | 7-9 | 5-8 | 3-5 | 1-3 | 0-2 | 0 |
| +5 | - | 9 | 6-7 | 4-5 | 3-4 | 1-2 |
| +7 | - | - | 8 |
Loss Charts for the Prussian Army at Zorndorf
Army and Special Leaders
| Leader | Counter | Command Range | ER Bonus | CV Bonus | Rating (Command Rating for Army Leaders; Initiative Rating otherwise) | Replacement Type | Army Loss Value |
|---|---|---|---|---|---|---|---|
| King Frederick II (5) | KFII | 8 | -15 | +1 | +5 | * | 30 |
| GdI Furst Moritz (9) | FRM | 5 | -10 | +1 | 8 | - | 15 |
| Oberst von Moller | MOL | 2 | - | - | - |
Dohna’s Infantry Wing
| Leader | Counter | Command Range | ER Bonus | CV Bonus | Rating (Command Rating for Army Leaders; Initiative Rating otherwise) | Replacement Type | Army Loss Value |
|---|---|---|---|---|---|---|---|
| GLt Dohna | DOH | 5 | -6 | +1 | 7 | - | 10 |
| GM Gablenz | DOH / G | 4 | -5 | +1 | 5 | A | 5 |
| Unit | ER | CV | Type | SPs (loss boxes) | Prolonge Capability |
|---|---|---|---|---|---|
| 1 AKR / G | 28 | +3 | Fus | 7 | |
| 2 AKR / G | 29 | +3 | Fus | 7 | |
| 1 SER / G | 24 | +4 | Fus | 7 | |
| 2 SER / G | 24 | +4 | Fus | 7 |
| Leader | Counter | Command Range | ER Bonus | CV Bonus | Rating (Command Rating for Army Leaders; Initiative Rating otherwise) | Replacement Type | Army Loss Value |
|---|---|---|---|---|---|---|---|
| GM Braunschweig | DOH / BR | 4 | -5 | +0 | 5 | A | 5 |
| Unit | ER | CV | Type | SPs (loss boxes) | Prolonge Capability |
|---|---|---|---|---|---|
| 1 FOR / BR | 22 | +4 | Mus | 6 | |
| 2 FOR / BR | 22 | +4 | Mus | 6 | |
| 1 PVP / BR | 21 | +5 | Mus | 6 | |
| 2 PVP / BR | 22 | +5 | Mus | 6 | |
| WED / BR |
| Leader | Counter | Command Range | ER Bonus | CV Bonus | Rating (Command Rating for Army Leaders; Initiative Rating otherwise) | Replacement Type | Army Loss Value |
|---|---|---|---|---|---|---|---|
| GM Bulow | DOH / B | 4 | -7 | +1 | 6 | A | 5 |
| Unit | ER | CV | Type | SPs (loss boxes) | Prolonge Capability |
|---|---|---|---|---|---|
| 1 ASE / B | 23 | +5 | Mus | 6 | |
| 2 ASE / B | 22 | +5 | Mus | 6 | |
| 1 KAL / B | 25 | +4 | Mus | 6 | |
| 2 KAL / B | 25 | +4 | Mus | 6 | |
| 1 LEH / B |
Kanitz’ Infantry Wing
| Leader | Counter | Command Range | ER Bonus | CV Bonus | Rating (Command Rating for Army Leaders; Initiative Rating otherwise) | Replacement Type | Army Loss Value |
|---|---|---|---|---|---|---|---|
| GLt Kanitz | KAN | 5 | -8 | +1 | 6 | - | 10 |
| GM Flemming | KAN / F | 4 | -5 | +0 | 6 | A | 5 |
| Unit | ER | CV | Type | SPs (loss boxes) | Prolonge Capability |
|---|---|---|---|---|---|
| 1 BUL / F | 25 | +5 | Fus | 7 | |
| 2 BUL / F | 24 | +5 | Fus | 7 | |
| 1 FRM / F | 25 | +4 | Mus | 7 | |
| 2 FRM / F | 26 | +4 | Mus | 7 | |
| 1 KUR / F |
| Leader | Counter | Command Range | ER Bonus | CV Bonus | Rating (Command Rating for Army Leaders; Initiative Rating otherwise) | Replacement Type | Army Loss Value |
|---|---|---|---|---|---|---|---|
| GM Diericke | KAN / D | 4 | -5 | +0 | 5 | A | 5 |
| Unit | ER | CV | Type | SPs (loss boxes) | Prolonge Capability |
|---|---|---|---|---|---|
| 1 BEV / D | 23 | +4 | Mus | 7 | |
| 2 BEV / D | 24 | +4 | Mus | 7 | |
| 1 DOH / D | 25 | +4 | Mus | 7 | |
| 2 DOH / D | 25 | +4 | Mus | 7 | |
| 1 WIE* / D |
| Leader | Counter | Command Range | ER Bonus | CV Bonus | Rating (Command Rating for Army Leaders; Initiative Rating otherwise) | Replacement Type | Army Loss Value |
|---|---|---|---|---|---|---|---|
| GM Rautter | KAN / R | 4 | -6 | +1 | 7 | A | 5 |
| Unit | ER | CV | Type | SPs (loss boxes) | Prolonge Capability |
|---|---|---|---|---|---|
| 1 BEL / R | 31 | +3 | Mus | 7 | |
| 2 BEL / R | 32 | +3 | Mus | 7 | |
| 1 RAU / R | 30 | +3 | Mus | 7 | |
| RES / R | 20 | +6 | Gren | 7 | |
| ROH / R |
Manteuffel’s Infantry Wing
| Leader | Counter | Command Range | ER Bonus | CV Bonus | Rating (Command Rating for Army Leaders; Initiative Rating otherwise) | Replacement Type | Army Loss Value |
|---|---|---|---|---|---|---|---|
| GLt Manteuffel | MAN | 5 | -6 | +1 | 6 | - | 10 |
| GM Kahlden | MAN / KA | 4 | -6 | +1 | 5 | A | 5 |
| Unit | ER | CV | Type | SPs (loss boxes) | Prolonge Capability |
|---|---|---|---|---|---|
| A-B / KA | 21 | +6 | Gren | 5 | |
| KLE / KA | 20 | +6 | Gren | 7 | |
| KRE / KA | 20 | +5 | Gren | 5 | |
| PET / KA | 19 | +6 | Gren | 7 |
| Leader | Counter | Command Range | ER Bonus | CV Bonus | Rating (Command Rating for Army Leaders; Initiative Rating otherwise) | Replacement Type | Army Loss Value |
|---|---|---|---|---|---|---|---|
| GM Kurszell | MAN / K | 4 | -7 | +1 | 6 | A | 5 |
| Unit | ER | CV | Type | SPs (loss boxes) | Prolonge Capability |
|---|---|---|---|---|---|
| BUR / K | 19 | +6 | Gren | 7 | |
| 1 KAN / K | 25 | +4 | Mus | 7 | |
| 2 KAN / K | 26 | +4 | Mus | 7 | |
| LOS / K | 20 | +6 | Gren | 7 |
Seydlitz’ Cavalry Wing
| Leader | Counter | Command Range | ER Bonus | CV Bonus | Rating (Command Rating for Army Leaders; Initiative Rating otherwise) | Replacement Type | Army Loss Value |
|---|---|---|---|---|---|---|---|
| GLt Seydlitz | SEY | 5 | -12 | +2 | 8 | - | 10 |
| GM Lentulus | SEY / L | 4 | -6 | +1 | 5 | A | 5 |
| Unit | ER | CV | Type | SPs (loss boxes) | Prolonge Capability |
|---|---|---|---|---|---|
| GDC / L | 12 | +6 | GCv | 7 | |
| GEN a / L | 18 | +7 | GCv | 7 | |
| GEN b / L | 18 | +7 | GCv | 7 | |
| SEY a / L | 20 | +7 | Kur | 7 | |
| SEY b / L |
| Leader | Counter | Command Range | ER Bonus | CV Bonus | Rating (Command Rating for Army Leaders; Initiative Rating otherwise) | Replacement Type | Army Loss Value |
|---|---|---|---|---|---|---|---|
| GM Malachowski | SEY / MA | 4 | -5 | +1 | 6 | A | 5 |
| Unit | ER | CV | Type | SPs (loss boxes) | Prolonge Capability |
|---|---|---|---|---|---|
| MAL a / MA | 18 | +5 | Hus | 7 | |
| MAL b / MA | 18 | +5 | Hus | 7 | |
| MAL c / MA | 19 | +5 | Hus | 6 | |
| ZIE a / MA | 15 | +6 | Hus | 7 | |
| ZIE b / MA |
Schorlemer’s Cavalry Wing
| Leader | Counter | Command Range | ER Bonus | CV Bonus | Rating (Command Rating for Army Leaders; Initiative Rating otherwise) | Replacement Type | Army Loss Value |
|---|---|---|---|---|---|---|---|
| GLt Schorlemer | SCH | 5 | -8 | +1 | 6 | - | 10 |
| GM Bredow | SCH / BE | 4 | -5 | +1 | 5 | A | 5 |
| Unit | ER | CV | Type | SPs (loss boxes) | Prolonge Capability |
|---|---|---|---|---|---|
| LKR a / BE | 15 | +6 | Krb | 7 | |
| LKR b / BE | 15 | +6 | Krb | 7 | |
| NOR a / BE | 22 | +5 | Drag | 7 | |
| NOR b / BE | 23 | +5 | Drag | 7 |
| Leader | Counter | Command Range | ER Bonus | CV Bonus | Rating (Command Rating for Army Leaders; Initiative Rating otherwise) | Replacement Type | Army Loss Value |
|---|---|---|---|---|---|---|---|
| GM Zieten | SCH / Z | 4 | -7 | +1 | 6 | A | 5 |
| Unit | ER | CV | Type | SPs (loss boxes) | Prolonge Capability |
|---|---|---|---|---|---|
| MGF a / Z | 22 | +5 | Kur | 6 | |
| MGF b / Z | 22 | +5 | Kur | 6 | |
| PVP a / Z | 24 | +4 | Kur | 6 | |
| PVP b / Z | 25 | +4 | Kur | 5 |
Marschall’s Cavalry Command
| Leader | Counter | Command Range | ER Bonus | CV Bonus | Rating (Command Rating for Army Leaders; Initiative Rating otherwise) | Replacement Type | Army Loss Value |
|---|---|---|---|---|---|---|---|
| GLt Marschall | MR | 4 | -3 | +0 | 4 | A | 5 |
| Unit | ER | CV | Type | SPs (loss boxes) | Prolonge Capability |
|---|---|---|---|---|---|
| A-P a / MR | 25 | +5 | Drag | 6 | |
| A-P b / MR | 26 | +5 | Drag | 5 | |
| PLE a / MR | 24 | +6 | Drag | 6 | |
| PLE b / MR | 24 | +6 | Drag | 6 | |
| SCH a / MR |
Independent Cavalry Units
| Unit | ER | CV | Type | SPs (loss boxes) | Prolonge Capability |
|---|---|---|---|---|---|
| CZE a | 23 | +6 | Drag | 7 | |
| CZE b | 23 | +6 | Drag | 7 | |
| RUE a | 18 | +6 | Hus | 7 | |
| RUE b | 18 | +6 | Hus | 7 |
Artillery
| Unit | ER | CV | Type | SPs (loss boxes) | Prolonge Capability |
|---|---|---|---|---|---|
| 7 lb How / 1 | 21 | +0 | Howitzer | 2 | FP |
| 7 lb How / 2 | 21 | +0 | Howitzer | 2 | FP |
| 7 lb How / 3 | 21 | +0 | Howitzer | 2 | FP |
| 7 lb How / 4 | 21 | +0 | Howitzer | 2 | FP |
The black bars on some of the Infantry units indicate that they are 'brittle' units (see Zorndorf rule 4.1b C). Units marked * (WIE) are optional units (see Zorndorf rule 4.1b B).
Current Army Morale Result Modifier (Zorndorf rule 4.4): +15 if Frederick is not on the map; +10 if a non-Cossack Russian unit is in Wilkersdorf.
How to use the 'Army Loss Record':
- Mark 1 loss box per SP of Infantry or Cavalry lost.
- Mark 2 loss boxes per SP of Artillery lost.
- Mark Leader losses per the loss value of a Leader.
- When a loss level in dark grey is reached, a roll is required on the 'Current Loss Level' table on the next :00 turn.
How to use the 'Current Loss Level' table: When determining the 'Current Loss Level' for Army Morale rolls, add the number of losses in the 'Army Loss Record' to the number of currently routed SPs. Cross index this total with a die roll to find the 'Army Morale Result.' The Army Leader may modify the die roll on this table per Series Rule 23.2b.
How to use the 'Army Morale Result' record: When each 'Current Loss Level' is reached, and then rolled for, record the Loss Level, the Game Turn of the roll, and the result. The results are cumulative with each other and this total is recorded in the 'Total Army Morale' column.
The Army Loss Record has boxes marked 25, 50, 75, 100, 125, 150, 175 and 200 Losses.
Prussian Current Loss Level table:
| Army Morale Result | 75 | 100 | 125 | 150 | 175 | 200 |
|---|---|---|---|---|---|---|
| 0 | 0-6 | 0-4 | 0-2 | 0 | - | - |
| +3 | 7-9 | 5-8 | 3-5 | 1-3 | 0-2 | 0 |
| +5 | - | 9 | 6-7 | 4-5 | 3-4 | 1-2 |
| +7 | - | - | 8 |
Permission is granted to photocopy the loss chart pages for personal use only (from the original charts).