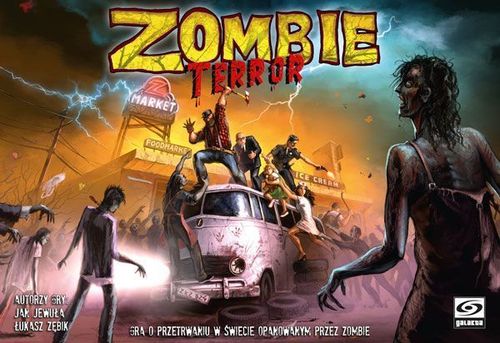
Zombie Terror
Zombie Terror Rulebook
Table of Contents
Table of Contents
Game Overview
Zombie Terror is an asymmetrical board game for 2 players, rich with the B-class movie genre. During the game, one player leads a group of survivors, who are trying to find their place in the world after the zombie apocalypse. The other player controls a horde of brain-thirsty zombies looking for new victims. The monsters follow their animal instincts and their prey has the human scent!
Goal of the Game
The player who manages to fulfill goals set for his side of the conflict will win the game. Humans must cross the parking lot full of zombies and escape using a van parked on the other side. At the same time, zombies must corner the survivors and bite them thus infecting them with the virus that changes reasonable people into mindless monsters.
Box Contents
Inside your Zombie Terror box you should find the following game components:
-
Double-sided Board (Side A and Side B)
-
Rulebook
-
Scenario Sheet
-
20 Wooden Zombie Markers
-
6 Wooden Human Markers
-
40 Zombie and 12 Human Stickers
-
12 Special Cards (6 for humans and 6 for zombies)
-
2 Escape Car Tokens
-
17 Double-sided Obstacle Tokens (2 buses, 4 large, 11 small)
-
18 Double-sided Scenario Tokens
-
2 Double-sided Manhole Tokens
-
1 Double-sided Dog Token
-
2 Double-sided Special Zombie Tokens
-
1 Terror Marker
-
6 Ammo Tokens
-
2 Reference Sheets
Preparation of Wooden Markers
Before your first game, you should prepare the wooden markers using the stickers as shown below:
Each human marker should have stickers showing the same character on both sides.
Each zombie marker should have stickers showing a zombie in a different color on each side.
Game Rules
Important: Below you can find basic game rules. Advanced game rules as well as game variants can be found at the end of this rulebook.
Game Setup
Before your first game, you should carefully remove 2 reference sheets and the tokens shown below from their frames. For the time being, return all remaining game components to the box - they will be used in the advanced game variant.
Place the board in the middle of the table with the A side face-up. The other side of the board is used in the advanced game variant.
Then, players choose (randomly or not) their sides (zombies or humans) and resolve steps 1-7 as described below.
Once players have finished the game setup, they may start the game.
- The Zombie Player takes all zombie markers (except the special zombie tokens) and places them in front of himself with one color face-up. They form the zombie pool.
- The Human Player takes all human markers and places them in front of himself with the "healthy" side face-up (so that the wound icon is not visible).
- Each player takes all 6 special cards of his group and shuffles them thoroughly. Next, each player draws 4 cards (see "Special Cards", page 11) into his hand and keeps them secret from his rival. The remaining cards should be returned to the box without looking at them.
- The Human Player places all his markers on any empty spaces in the first row on his half of the board (i.e. the half showing the supermarket).
- The Zombie Player places 10 zombie markers on the board. He places 5 of them on any empty spaces on the half of the board showing the escape car and 5 of them on the half of the board showing the supermarket (the halves are marked with 2 traffic cones surrounded by yellow circles on the illustration of the game board). Zombie markers cannot be placed adjacent to other zombie markers nor to human markers.
- Each player takes 1 reference sheet of his group. The Zombie Player places the terror marker in front of himself.
- Finally, the Human Player places 4 ammo tokens and 1 briefcase / car keys token (with the briefcase side face-up) in front of himself.
Adjacent Markers
Markers are considered adjacent if they are placed on spaces that share an edge. Markers located on spaces that share only a corner are not considered adjacent.
Obstacles
All objects printed on the A side of the board that are not surrounded by a white frame of a board space are considered obstacles. Obstacles block movement of markers (i.e. no marker may enter or pass through an obstacle), line of shooting and zombie line of sight.
The space containing the manhole is not an obstacle. That is why it is surrounded by a white frame of a board space.
Human Marker Overview
- Character's Illustration
- Number of Victory Points (VP)
- Wound Icon
The human marker is shown on its "Healthy" side and its "Wounded" side. The Wounded side carries the wound icon (3).
Playing the Game
Zombie Terror is played in a series of rounds. Each round is divided into the Human Player Turn and the Zombie Player Turn. The Human Player starts each round by resolving his turn and after him the Zombie Player resolves his turn. After the Zombie Player Turn the current round ends and a new one starts.
Human Player Turn
During his turn, the Human Player may activate any number of human markers. Each human has 3 Action Points (AP) that can be spent to move, push or perform a personal action. When the player activates a marker, he must end its activation before he can activate another marker. The player does not have to spend all AP available to a given human, but any unspent AP are lost.
Common Actions
All actions available to each human are described below:
-
Move (Cost: 1 AP): A given human moves to an adjacent, empty space (vertically or horizontally, moving diagonally is forbidden). A space is considered empty if it contains no human or zombie marker and no obstacle.
If a given human escapes from the board, the Human Player places his marker on his reference sheet in order to mark the VP gained (see "Escaping from the Board", page 7).
-
Push (Cost: the cost of movement): A given human moves to an adjacent space containing a zombie (vertically or horizontally, moving diagonally is forbidden) and as a result of this movement he pushes a given zombie to another space in the direction of movement. The space, to which a given zombie is pushed, must be empty. Only one zombie marker / token can be pushed when resolving a single action (i.e. a "queue" of zombies cannot be pushed).
Personal Actions and Abilities
Humans have a number of unique actions and abilities, which can be used during the game. They are described below:
- Steve Foster - the Banker: When the Banker is bitten by a zombie for the first time, he protects himself with his briefcase. Instead of suffering a wound, he must return the briefcase token to the box. Using this ability is free (costs 0 AP).
- Norman Brady - the Logger: The Logger may eliminate an adjacent zombie. This zombie cannot be facing him. Any zombie eliminated this way is returned to the zombie pool.
- Lucy O'Connor - the Kid: Once per turn, the Kid may move diagonally. Using this ability costs no additional AP, only the normal number of AP required to move. Important: The Kid can never push zombies.
- John Cofe - the Mechanic: Once per turn, the Mechanic can push an adjacent human using the normal rules for pushing zombies. Using this ability costs no additional AP, only the normal number of AP required to move.
- Miranda Bailey - the Nurse: The Nurse may spend 1 AP to heal herself or any other adjacent human. The marker of the healed human should be turned over to its "healthy" side. The Nurse may heal any number of humans per turn (up to the number of her available AP).
- Frank Kowalsky - the Cop: The Cop may spend 1 AP and discard 1 ammo token to make a shot, thus eliminating 1 zombie. The zombie being the target of this ability must be in the Cop's line of shooting i.e. the Cop must be able to trace (horizontally or vertically) a straight, uninterrupted line from his marker to the targeted zombie. This line can be of any length (the shot has unlimited range), but it is blocked by human and zombie markers and obstacles. The targeted zombie is eliminated and returned to the zombie pool. The Cop cannot shoot at humans. For each shot taken during the Human Player Turn, the Zombie Player spawns 1 additional zombie on the board (see "Spawning Phase", page 9). The Cop may shoot any number of times per turn (up to the number of his available AP and ammo tokens). Important: Playing the "Sawed-off Shotgun" special card uses no ammo (see "Special Cards", page 11).
Once the Human Player decides that he no longer wants to activate human markers, he ends his turn. Then, the game progresses to the Zombie Player Turn and the Zombie Player may perform his actions.
Example of Shooting
The Cop cannot take a shot at Zombie #1 (the obstacle blocks his line of shooting) nor at Zombie #2 (the Nurse marker blocks his line of shooting). However, he can shoot at Zombie #3 and eliminate it.
Example of Human Player Turn
- The Nurse spends 2 AP to move 2 spaces. The third, unspent AP is lost. Then, the Nurse's activation ends.
- The Cop spends 1 AP to move 1 space. Then, he uses his personal action, which enables him to spend 1 AP to take a shot and eliminate 1 zombie. The Cop's last AP is spent to move to the next space. Finally, his activation ends.
- The Logger spends 2 AP to move 2 spaces towards a zombie. His last AP is spent for his personal action, which allows him to eliminate a zombie. Then, the Logger's activation ends.
- The Banker spends all his available AP to move. Each time he moves, he pushes a zombie to an adjacent, empty space in the direction of his movement. Then, the Banker's activation ends.
- The Mechanic spends 2 AP to move and thanks to his personal ability he pushes the Kid to an adjacent, empty space in the direction of his movement. The third, unspent AP is lost. Then, the Mechanic's activation ends.
- The Human Player decides not to activate the Kid and his turn ends.
Escaping from the Board
If a human resolves a move, after which he is on one of the three escape car spaces (surrounded by a green frame) in the last row of spaces on the board or on the escape car token (when playing on the B side of the board), it is considered that this human has managed to escape. His marker should be immediately placed on the Human Player reference sheet. At the end of the game, for each human that escaped from the board this way, the Human Player gains VP equal to the number of stars shown on a given human marker.
The effects of the "Sewers" special card allow a human to escape through a space containing a manhole. Such spaces can be occupied both by humans and zombies.
Once a human escapes, his marker cannot be placed back on the board and he is effectively considered out of the game.
Zombie Player Turn
Each Zombie Player Turn is divided into 3 or 4 phases:
- * Zombie Terror Phase (see page 10)
-
- Movement Phase
-
- Spawning Phase
-
- Clean-up Phase
1) Movement Phase
During his turn, the Zombie Player must activate the number of zombies equal to the number of humans activated during this round plus 1. The player must end activating one zombie before he can start activating another zombie.
If there are less zombies on the board than the number of humans activated during a given round, the Zombie Player must activate all available zombies.
Example: During the Human Player turn, Stevie activated 3 out of 5 humans still on the board. During the Zombie Player Turn, Johnny should activate 4 zombies (3+1), but because he only has 3 zombie markers available, he activates all of them.
Each zombie has 2 AP that may be spent to move and / or turn.
Move (Cost: 1 AP): A given zombie moves to an adjacent, empty space in the direction it is currently facing (i.e. to the space in front of it, with the front of a zombie marker indicated by its straight edge). Additionally, there are some restrictions to the zombie movement (see "Moving Zombies" on the next page). Zombies treat the escape car spaces (surrounded by a green frame) as obstacles.
Turn (Cost: 1 AP): A given zombie turns 90 degrees in any direction. A zombie may only perform this action once per turn.
Bite (Cost: 0 AP): A zombie that is adjacent to a human and is currently facing this human bites this human. After a zombie bites a human, its activation immediately ends (any unspent AP are lost).
A zombie must spend all its available AP (if able). It must be moved and / or turned so that after spending its first AP it can spend another AP or bite a human. If there is no such option, then and only then this zombie does not have to spend all its AP, but any unspent AP are lost.
Forced AP Spending
The illustration above shows the following situation: the zombie cannot start its activation by turning, because it would not be able to move anymore thus violating the rule that forces a zombie to spend all its available AP. Therefore, the zombie moves first and turns later.
Biting
If, at any moment of the Zombie Player Turn, a zombie is on a space adjacent to a human and it is also facing that human (i.e. its front is next to the human marker), such zombie must bite the human. If a human is bitten for the first time, its marker should be turned over to the "wounded" side. If a wounded human is bitten again, such human dies and turns into a zombie at the end of the round (see "Humans Turning into Zombies", page 10). However, until then a given human is still considered a target of forced movements by zombies.
If, during one turn, a healthy human is bitten more than once, he or she dies and turns into a zombie at the end of the round. However, until then a given human is still considered a target of forced movements by zombies.
At the end of each zombie activation the Zombie Player turns over the zombie marker to the other side (making sure that he does not change its facing). This way, he knows that a given zombie has already been activated this round.
Moving Zombies
Zombies are driven by an insatiable hunger for human flesh. That is why their movement is strongly dependant on whether there is any potential prey in their line of sight.
At the beginning of his turn, the Zombie Player must resolve the so called forced movement:
I. First, the Zombie Player must activate each zombie that is adjacent to a human and is facing that human. Such zombie bites a given human without moving and ends its activation. If more than one zombie meets this condition, the Zombie Player chooses the order of biting.
II. Then, the Zombie Player must move each zombie that has a human in its line of sight (see "Zombie Line of Sight" on the previous page). Such zombie must move towards a human in its line of sight and bite this human if it can reach a space that is adjacent to this human as part of its movement. During forced movements, zombies cannot turn. If more than one zombie meets this condition, the Zombie Player chooses the order of activation and movement. Important: As the situation on the board is constantly changing, during the Zombie Player Turn players should carefully check after each activation whether there are any new forced movements on the board that must be resolved first by the Zombie Player. When the currently moving zombie blocks line of sight of another zombie and such zombie no longer sees a human, this zombie is relieved from making a forced movement, and vice versa - if the Zombie Player moves a zombie and such movement opens line of sight of a different zombie to a human, then he must activate such zombie and perform a forced movement with it (still observing the current limit of activated zombies). If a zombie moves 1 space, thus finding a human in its line of sight, it must keep moving towards a given human. Important: The number of activated zombies is always equal to the "number of activated humans + 1". It does not matter if there are more zombies on the board that must perform a forced movement.
III. Once the Zombie Player has resolved all forced movements, he keeps activating additional zombies until the number of activated zombies (no matter if they were forced to move or not) is equal to the number of humans activated this round plus 1 (the Zombie Player can never exceed this number unless a card effect allows him to do so). Then, the Zombie Player proceeds to the Spawning Phase.
Zombie Line of Sight
A zombie has a human in its line of sight if it is able to trace (horizontally or vertically) a straight, uninterrupted line from the front of its marker to this human. This line can be up to 4 spaces long (so zombies can "see" up to 4 spaces ahead), but it is blocked by human and zombie markers and obstacles.
Important: A manhole does not block zombie line of sight.
Zombie #1 does not have the Cop in its line of sight because the Cop is more than 4 spaces away from this zombie. Zombie #2 does not have the Cop in its line of sight because it is blocked by an obstacle. Zombie #3 does not have the Kid in its line of sight because it is blocked by Zombie #4. Zombie #5 has the Nurse in its line of sight. Zombie #6 has the Nurse in its line of sight, but not the Kid (the Nurse's marker blocks its line of sight).
Example of Forced Movements
- Zombie #1 must be activated first. He does not move and bites the Logger for 0 AP. Then, its activation ends.
- Zombies that have targets in their line of sight must be activated next. In this case, Zombie #2 and Zombie #3 meet this condition. The Zombie Player chooses the order of their activation. They must be moved towards a human in their line of sight. Although there are humans within their movement range that could be potentially bitten (the Mechanic and the Banker), they cannot do it because they already have other targets in their line of sight and those targets determine the direction of their movement. First, the Zombie Player moves Zombie #2 towards the Nurse and ends its activation. Next, Zombie #3 is activated. It moves, reaches the Cop and bites him, spending 0 AP. Finally, its activation ends.
- Zombie #3 that bit the Cop no longer blocks line of sight of Zombie #4 - this zombie can now see the Banker. It moves and bites the Banker for 0 AP, thus ending its activation. The Banker has just suffered the second wound and as he no longer has the briefcase token, at the end of the current round he will turn into a zombie!
- The Kid is spared a wound because Zombie #4 was forced to move towards the Banker.
2) Spawning Phase
During the second phase of his turn, the Zombie Player spawns (i.e. places) new zombie markers on certain spaces of the board, such as along marked edges of the board and some spaces adjacent to buses and the guard booth. A space where a zombie marker may be spawned is called a valid space.
Valid Spaces
Valid spaces are spaces of the board, where the Zombie Player may spawn (place) new zombies at the end of his turn. Valid spaces are surrounded by a red frame. They can be found along the edges of the board, as well as next to bus exits and the door to the guard booth.
Some cards or advanced rules may create new valid spaces on the board. A space containing a manhole may become a valid space as a result of some card effects and advanced rules.
Example of Spawning Zombies
The Zombie Player starts spawning zombie markers on valid spaces of the board. The humans are on both halves of the board, so the Zombie Player spawns 1 zombie marker on each half. The Banker blocks one valid space adjacent to a bus.
The Zombie Player chooses to spawn a zombie on a space adjacent to the Banker. Additionally, he decides which direction this zombie will face.
As to the other half of the board, a zombie is spawned on the valid space adjacent to the guard booth.
The Cop took a shot during the Human Player Turn. Therefore the Zombie Player may spawn one more zombie marker on a valid space on any half of the board.
During the game, effects of special cards can create new valid spaces on the board. Spawned zombies should be placed on empty valid spaces. The Zombie Player chooses the direction each spawned zombie will face.
The Zombie Player spawns 1 zombie on each half of the board containing at least 1 human (including a dead human that will turn into a zombie during the Clean-up Phase). If humans eliminated any zombies by shooting either thanks to the Cop's personal action or by playing the "Sawed-off Shotgun" special card (see "Special Cards", page 11), then for each shot taken the Zombie Player spawns 1 additional zombie on any valid space on the board. The Zombie Player decides about the order of spawning zombies (it does not matter whether a given zombie is being spawned according to the normal rules, as a result of shooting or as part of effects of some special card).
Important: If a zombie was eliminated thanks to the personal action of the Logger or after playing the "Courage" special card, no additional zombie markers are spawned.
If the zombie pool is empty (see "Zombie Terror Phase" on the right), instead of spawning a new zombie, the Zombie Player takes any zombie marker from the board and places it on any valid space on the same half of the board, where he was supposed to spawn a new zombie. The player must repeat this as many times as there are zombies to spawn during a given round.
3) Clean-up Phase
Humans Turning into Zombies
If, during a given round, a human was bitten and turned into a zombie, during the Clean-up Phase his marker should be replaced with a zombie marker. As usual, the Zombie Player chooses the facing of the new zombie. If the zombie pool is empty, the Zombie Player replaces the human marker with a zombie marker taken from any space of the board. The human marker should be returned to the box.
Zombie Check
At the end of his turn, the Zombie Player checks if all zombie markers are placed with the same side face-up. If not, he turns them over so that the side of the same color is visible.
Zombie Terror Phase
If, at any point of the game, the Zombie Player spawns on the board the last zombie marker from the zombie pool (including the moment when a human has turned into a zombie), the Zombie Terror Phase is added to his turn. The Zombie Player places the terror marker on the space of the terror track marked with number 5. From now on at the beginning of his turn the Zombie Player moves the terror marker one space to the left along the terror track. He keeps doing it no matter if there are any zombie markers in the zombie pool or if any return to this pool by any means. Once the terror marker moves off the terror track, the game ends immediately and the Zombie Player wins.
After the Zombie Player Turn ends, a new round starts. The players keep repeating their turns as described above until one of them meets the winning conditions.
Special Cards
During his turn, each player may play any number of special cards from his hand. Playing a card is not considered an activation of a character, on which a given card was played. During an activation of a character, a given player may play any number of special cards, resolve their effects and continue the same activation. Playing cards and performing actions with a character can happen alternately.
Ending the Game
One group wins immediately if any winning condition described below is met.
Human Player wins if:
- Humans worth at least 5 VP escape from the board.
Zombie Player wins if:
- Humans worth less than 5 VP escape from the board and all the other humans are turned into zombies.
- The Human Player has no possibility to gain 5 VP required to win.
- At the beginning of the Zombie Player Turn, during the Zombie Terror Phase, the terror marker moves off the terror track.
Game Variant: Advanced Rules
In this game variant players place by themselves all obstacles on the board.
Game Setup
Before the normal game setup, players must prepare the board. In order to do this they should turn over the board to the B side. The small escape car token (the one covering 3 spaces), bus tokens, a manhole token and a guard booth token should be placed on the same spots as in the basic game, using the diagram from page 4.
Next, each player takes the following game components:
The Zombie Player: any 1 large obstacle token, any 3 small obstacle tokens.
The Human Player: any 1 large obstacle token, any 2 small obstacle tokens.
(Important: In this game variant there can be only 1 manhole and 1 guard booth on the board).
Starting from the Zombie Player, players alternately place 1 obstacle token at their disposal, beginning from large obstacles. The placement is started and finished by the Zombie Player.
Obstacle Placement Rules
Tokens placed on the board must be placed on empty spaces and they cannot be placed next to the edges of the board. Additionally, they cannot be adjacent horizontally, vertically or diagonally to other tokens.
Exception: Obstacle tokens can be placed adjacent to the manhole token.
The rest of the game setup is the identical as in the basic game.
Obstacles - Tokens
There are no obstacles printed on the B side of the board - they are replaced with the tokens that players place during the game setup. Obstacle tokens block marker movement, line of shooting and zombie line of sight.
A manhole token is not an obstacle token.
Additional Game Components
In the box there are many additional game components unused in the game variants and scenarios from the rulebook and the scenario sheet. Soon, new scenarios will become available that will require some of the remaining game components. Those components may also be used to create your own game variants and scenarios. Thanks to this, Zombie Terror offers almost limitless opportunities for gameplay!
Additional scenarios are available on the official web page http://galakta.pl/zombie-terror/
Game Variant: Free Board Setup
In this game variant players place by themselves all objects on the board. The objects include: obstacle tokens, the small escape car token, bus tokens, a manhole token and a guard booth token.
Game Setup
Before the normal game setup, players must prepare the board. In order to do this they should turn over the board to the B side. Next, each player takes the following game components:
The Zombie Player: The small escape car token, 1 bus token, 1 guard booth token, any 1 large obstacle token, any 2 small obstacle tokens;
The Human Player: 1 bus token, 1 manhole token, any 1 large obstacle token, any 3 small obstacle tokens.
(Important: In this game variant there can be only 1 manhole and 1 guard booth on the board).
Starting from the Zombie Player, players alternately place 1 object at their disposal in the following order:
- The escape car token
- Bus tokens
- The manhole token
- The guard booth token
- Large obstacle tokens
- Small obstacle tokens
The placement is started by the Zombie Player and finished by the Human Player.
Placing the Escape Car Token
The escape car token should be placed on any 3 spaces of the last row of the board (on the half without the supermarket).
Placing the Manhole and the Guard Booth Tokens
Both of those tokens should be placed on the half of the board with the escape car token.
Object Placement Rules
Tokens placed on the board must be placed on empty spaces and they cannot be placed next to the edges of the board. Additionally, they cannot be adjacent horizontally, vertically or diagonally with other tokens nor with the escape car token.
Exception: The manhole token can be placed on any empty space (including a space adjacent to another object or a space next to the board edge). Other objects can be placed adjacent to the manhole token.
The rest of the game setup is identical as in the basic game.