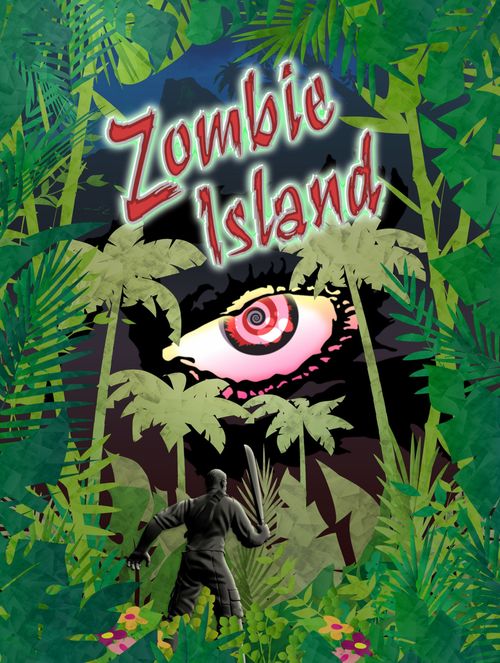
Zombie Island
Zombie Island Rulebook
Table of Contents
Table of Contents
- Components
- Note
- Scenario 1: Welcome to Voodoo Island
- Turn Sequence
- Machete Tiles
- Zombie Master's Turn
- Check for Zombie Control
- Game End (Scenario 1)
- Sample Game
- Scenario 1S: Welcome to Voodoo Island (Solo)
- Game End (Scenario 1S)
- Scenario 2: Not Deserted After All
- Game End (Scenario 2)
- Scenario 2S: Not Deserted After All (Solo)
- Game End (Scenario 2S)
- Strategy Tips
- The 'Not Another Zombie' Game System (NAZ)
Components
Base set:
- 22 island tiles
- 4 zombie tiles
- 1 beach tile
- 4 machete tiles
- 6 control tiles
- 3 explorers
- 4 zombies
Extra components for future expansions:
- 3 beach tiles
- 2 machete tiles
Note
The first scenario teaches the game rules and core mechanics that all other scenarios are based on.
Scenario 1: Welcome to Voodoo Island
2 players - single Explorer vs. Zombies.
One player takes on the role of the Explorer and attempts to place all the island tiles then return to the beach to win the game. The second player is the Zombie Master who tries to stop this by controlling the zombies discovered on the island to trap the Explorer.
Setup: Island Tiles
- Turn all 22 island tiles facedown and randomly divide them into 4 stacks with the following number of tiles in each one: 4, 5, 6, 7.
- Turn the 4 zombie tiles facedown and randomly add 1 to each stack. Shuffle each stack separately. These are your 4 draw piles.
| Stack 1 | Stack 2 | Stack 3 | Stack 4 |
|---|---|---|---|
| 4 island tiles | 5 island tiles | 6 island tiles | 7 island tiles |
| 1 zombie tile | 1 zombie tile | 1 zombie tile | 1 zombie tile |
In game: the Explorer must progress from the smallest stack to the largest stack, drawing all the tiles in one stack before starting on the next stack.
Setup: Machete Tiles
- Do not use the two straight-hedge machete tiles (reserved for future expansions).
- Shuffle the 4 remaining machete tiles and keep them facedown nearby.
In game: each time a zombie tile is revealed, the Explorer gains a random machete tile.
Setup: Explorer
- Only one beach tile and one Explorer are required for this scenario.
- Place a beach tile face-up on the table and start the Explorer on the shoreline space.
In game: the Explorer must return to this shoreline space to leave the island.
Turn Sequence
The Explorer plays first and players alternate turns during the game. However, the zombie player will not get his/her first turn until after the first zombie tile is put into play.
Explorer's Turn
Actions must be taken in this order:
- Move to a new space. If you move, placing a tile is optional.
- Place a new island tile. If you do not move, you must place a tile.
1. Moving the Explorer
- The Explorer can move through any number of empty spaces in a straight line, including diagonally. (No tile limit.)
- The Explorer cannot move through jungle spaces, and cannot move through a zombie.
(The booklet's example shows an Explorer with 13 possible moves.)
2. Placing an Island Tile
The Explorer must be next to an unexplored area. He cannot take this action while standing in the middle space of a tile.
- Choose where to place the new tile BEFORE revealing it.
- Draw the top tile from the current stack.
- Reveal the tile and put it in the pre-determined location.
- You may rotate the tile before placing it.
(The booklet's example shows Area 1 and Area 2 next to the Explorer. An Explorer at position 1 can only place a new tile in Area 1. An Explorer at position 2 can only place a new tile in Area 2. An Explorer at position 3 can choose between Area 1 and Area 2. An Explorer at position X cannot reveal a new tile.)
Island Connectivity Rule
Each new island tile must be placed in a manner that allows movement into it from at least one previously placed tile. It does not have to be accessed from the Explorer's current tile, as long as there is some way to get to it.
(The booklet's example shows the Explorer has placed a new tile he can access via other tiles.)
Tile Placement Restrictions
- The shoreline space is considered one big space that spans the bottom of the beach tile. The Explorer on the shoreline can explore both sides of the beach tile without moving.
- Island tiles cannot be placed directly below the shoreline.
- An island tile cannot be placed diagonally from a corner if there is only a diagonal connection.
When a Zombie Tile Is Revealed
- The Explorer places the zombie tile just like any other island tile.
- The Explorer draws a machete tile and keeps it secret from the other player until used on a later turn.
- A new zombie appears in the middle space of the tile (marked Z). Place this zombie on its side to indicate it is not active yet.
In game: if this is the first zombie in play, the Zombie Master starts taking turns now after the Explorer's current turn.
Machete Tiles
Machete tiles re-arrange a 2 x 2 area in play to block zombies or aid in escape.
- Only one machete tile may be played during the Explorer's move.
- The machete tile must be placed somewhere along the path that the Explorer is moving. It's OK if the Explorer ends up on an open space on the machete tile after moving.
- A machete tile cannot be placed on top of a zombie.
- A machete tile can span multiple island tiles or other machete tiles.
- A machete tile cannot overhang another tile (island or machete).
(The booklet's example shows the Explorer has played a machete tile to slow down the zombie. The zombie must stop at least once on a machete tile.)
Zombie Master's Turn
Actions must be taken in this order:
- Move all active zombies - at least 1 space (if possible).
- Activate a new zombie - stand it up & it moves next turn.
Zombie Movement
- A zombie can move a maximum of 3 spaces in a straight line, including diagonally.
- Zombies cannot move through jungle spaces, and not through each other.
- A zombie can only enter into ONE new tile during a move - this includes machete tiles.
- All zombies are moved at the same time. It's up to the Zombie Master to decide in what order.
- Zombies never enter the shoreline space (they avoid water!).
(The booklet's example shows a zombie with 11 possible moves, but it cannot move to space X - even though X is within 3 spaces - because it is two tiles away.)
Check for Zombie Control
You must catch the Explorer before you lose control of the zombies. Otherwise, the Explorer will be able to return to the shoreline unimpeded.
In game: after the last island tile is placed, the Zombie Master draws one Control tile each turn before moving all active zombies.
Using the Control Tiles
- Start with all 6 tiles (5 Under Control, 1 Lost Control).
- Shuffle them into a face-down draw pile.
- When you hit the Lost Control tile, remove a zombie and one 'Under Control' tile from the game.
- Shuffle all the remaining Control tiles into a new face-down draw pile.
- Do this each time you lose control and until all zombies are gone.
Control Tile Results
- Under Control: All zombies are safe!
- Lost Control: Remove 1 zombie and 1 Under Control tile from the game.
Game End (Scenario 1)
Play continues until one player is declared the winner.
The Explorer wins if:
- he/she places all the island tiles and returns to the shoreline without getting caught by a zombie, OR
- all the zombies are removed through loss of control and this allows the Explorer to complete the mission unimpeded.
The Zombie Master wins if:
- one of the zombies in play lands on the Explorer, OR
- the Explorer moves into a zombie, OR
- the Explorer cannot move, OR
- the Explorer is not able to reveal all the island tiles, OR
- the Explorer returns to the shoreline before completing the mission.
The Zombie Master wins any stalemate situation created by the players.
The number of machete tiles determines the difficulty level of the game. Try not to use all 4 machete tiles. Winning the game without using any machete tiles is the highest accomplishment!
Sample Game
(in progress)
Opening moves: The Explorer uncovered a zombie by the beach early on which has been following him. Now he has just discovered a second one. One of those 2 machete tiles is going to be needed!
After the zombie move: The Explorer has played a machete tile, moved and revealed a new island tile. All is not lost yet. But there are still 15 island tiles and 2 more zombies to deal with. And the beach is getting further away!
(The sample game is shown in the booklet as a series of board photographs, which are not reproduced here.)
Scenario 1S: Welcome to Voodoo Island (Solo)
SOLO player - single Explorer vs. Zombies.
This is the solo variant for Scenario 1: Welcome to Voodoo Island. The rules are the same except that the player moves the zombies using an AI algorithm - aka their "Zombie Intelligence" or ZI.
- Set up the island tiles & the Explorer the same way.
- It's up to you if you include machete tiles - no tiles is harder!
- The Control tiles are also optional.
In game: when it comes time to move the zombies, use these ZI rules:
Zombie Intelligence Rules
Rule #1 - The Stationary Target
- Zombies do not have the intelligence to coordinate their movements as a group to corral a moving target. Zombies assume that an Explorer is not going to move before they get to him/her.
Rule #2 - The Least Amount of Effort
- Zombies take the quickest route to the Explorer. This is measured in the number of moves it would take to reach the target, not the number of spaces in between the zombie and the Explorer. This also means that a zombie will move less than 3 spaces if this does not increase the number of moves required to reach the Explorer.
Rule #3 - The Law of One
- The zombie that is closest moves first, then the next closest moves etc. Since zombies cannot pass through each other, they may end up blocking each other.
Rule #4 - The Lurch
- Lurching diagonally is more natural for a zombie. If diagonal movement is just as quick as another move, the zombie will always move diagonally.
Rule #5 - The Last Resort
- If you can't determine which way the zombie would go, flip a coin or use any method you like to determine a random outcome.
Game End (Scenario 1S)
Since the solo player always plays as the Explorer, winning means placing all the island tiles and returning to the shoreline without getting caught by a zombie.
The solo player loses if:
- one of the zombies in play lands on the Explorer, OR
- the Explorer moves into a zombie, OR
- the Explorer cannot move, OR
- the Explorer is not able to reveal all the island tiles, OR
- the Explorer returns to the shoreline before completing the mission, OR
- the solo player finds themselves in a stalemate situation.
Scenario 2: Not Deserted After All
3 or 4 players - MULTIPLE Explorers vs. Zombies.
This time around, you've got help! 2 or 3 players cooperate as Explorers to discover the island. Another player becomes the Zombie Master and attempts to stop them with the zombies.
This variant of Scenario 1 includes new rules for sharing tiles and coordinating multiple Explorers. All the Explorers must return safely to the beach or the Zombie Master wins.
- Set up the island tiles and machete tiles same as Scenario 1.
- Start all the Explorers on the shoreline space of the beach tile.
In game: the basic game rules are the same as for Scenario 1 except that the Explorers play as a group/side when it's their turn.
Multiple Explorers' Turn
Actions must be taken in this order:
- Explorers who are moving are moved at the same time.
- If your Explorer moves, you do not have to place a tile.
- Explorers who are drawing tiles to place, draw them in any order.
- You may exchange your tile with another Explorer if you are placing tiles in new areas that will border on each other.
(The booklet's example shows Explorer 3 can swap tiles with Explorer 1 or Explorer 2. Explorers 1 and 2 cannot swap with each other, because Area 1 does not border on Area 2.)
Movement Restrictions
- An Explorer who returns to the shoreline space is deemed safe but cannot re-enter the game.
- An Explorer cannot pass through the shoreline space without leaving the game.
Tile Placement Restrictions
- Each Explorer player is responsible for placing their own tile.
- A machete tile gained from placing a zombie tile belongs to that player and can only be used by that player.
Game End (Scenario 2)
Play continues until one side is declared the winner.
The Explorers win if:
- they place all the island tiles and they all return to the shoreline without getting caught by a zombie, OR
- all the zombies are removed through loss of control and this allows the Explorers to complete the mission unimpeded.
The Zombie Master wins if:
- one of the zombies in play lands on any Explorer, OR
- any Explorer moves into a zombie, OR
- any Explorer cannot move, OR
- the Explorers are not able to reveal all the island tiles, OR
- all the Explorers return to the shoreline before completing the mission.
The Zombie Master wins any stalemate situation created by the players.
Scenario 2S: Not Deserted After All (Solo)
SOLO player - MULTIPLE Explorers vs. Zombies.
A combination of Scenarios 1S and 2: You control 2 or 3 Explorers attempting to reveal the entire island. All the Explorers must return safely or else the zombies win.
- Use the same setup as Scenario 1S.
- Start all the Explorers on the shoreline space of the beach tile.
- Use the multiple Explorer rules from Scenario 2.
- Apply Zombie Intelligence to each zombie individually to determine which Explorer is the zombie's target.
Game End (Scenario 2S)
Since the solo player always plays as the Explorers, winning means placing all the island tiles and returning all the Explorers to the shoreline without getting caught by a zombie.
The solo player loses if:
- one of the zombies in play lands on any Explorer, OR
- any Explorer moves into a zombie, OR
- any Explorer cannot move, OR
- the Explorers are not able to reveal all the island tiles, OR
- all the Explorers return to the shoreline before completing the mission, OR
- the solo player finds themselves in a stalemate situation.
Strategy Tips
The booklet marks this section "do not read these Strategy TIPS!" - it is printed as optional advice.
- The density of the jungle is fairly evenly distributed amongst the tiles. If you see a lot of jungle early on, there will be less later & vice versa.
- Keep track of how many tiles are left in a stack if you haven't come across the zombie start tile. There is only one per stack. Be prepared to place it in an advantageous location when it does show up.
- Try to create long and straight open spaces, especially diagonally, so that the Explorer can make big moves to avoid the zombies.
- When playing solo, use the ZI rules to your advantage. You can pre-determine where a zombie is going based on your own movement and manipulate their pursuit accordingly.
The 'Not Another Zombie' Game System (NAZ)
Zombie Island is the first game to be based on the NAZ system. It's an introduction to the core mechanics that future scenarios and expansions will extend.
It really is the tip of the iceberg: the next expansion will feature the Zombie Master himself as a game piece with more power than the zombies he controls. And the additional tiles will come into play. Expect new scenarios that require the Explorers to run a gauntlet across the island, search for buried treasure, travel to nearby islands, survive volcanos or find the secret caves.
It's all possible with the 'Not Another Zombie' system.
If you are a smart game designer, we would love to hear your ideas for future expansions. The sky's the limit! Follow the QR code in the booklet to the publisher's website to get more information on how to get involved.
Enjoy your time on the Island!