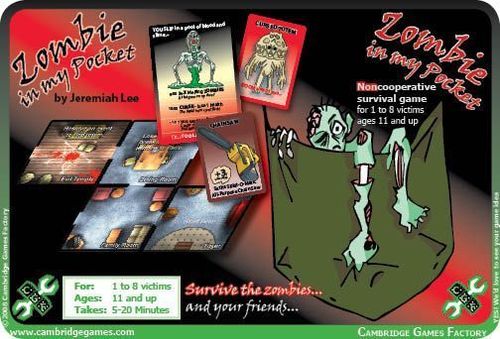
Zombie in My Pocket (2010)
Zombie in My Pocket (2010) Rulebook
Table of Contents
Table of Contents
Contents
9 event cards • 9 item cards • 8 fight decision cards • 8 flee decision cards • 1 black pawn • 8 black dice • 8 indoor tiles • 8 outdoor tiles • 1 red glass stone • 4 black fuel chips • 1 cursed totem card with red card stand • 1 group leader card with black card stand • 1 rule book
Story
The dead walk the earth. You and a group of strangers have joined together to end the curse by destroying the cursed artifact that started it all. You must search the house for the cursed totem, take it outside to be buried in the graveyard, and read aloud the evil etching -- all before the clock strikes midnight.
As you step into the house, the front door slams shut behind you! Then it occurs to you that your own life matters more than the lives of these strangers...
Quick Overview
Explore the house and yard according the whim of the current leader, fighting zombies as you go. To end the curse, you must find the Cursed Totem in the Evil Temple somewhere inside the house. Then you must find the Dining Room where you can break through a window to the Patio and explore the yard. Somewhere outside in the yard is the Graveyard, where you can bury the totem. The Evil Etching that will seal the grave closed is scrawled somewhere inside the house, and again somewhere in the yard. You must have at least one of the etched tiles face up on the table to win.
Winning and Losing
To end the curse and win the game, you must both (a) find & bury the totem and (b) reveal at least one of the two tiles with etchings. Do these tasks in either order.
If you go through the event deck 3 full times, the clock strikes midnight and all is lost. You also lose the game if everyone in your party dies (reaches 0 health). If some players win the game after others have died, the players who died are still considered to have lost.
There are no noble deaths during a zombie infestation, only messy ones.
Scoring
Your first priority is to survive and end the curse. However, amongst the survivors some players are still better off than others.
If some or all of the players survive and defeat the curse, they win...
- Each survivor scores 3 game points
- The player with the most health instead scores 4 game points. If there is a tie, all tied players score 4.
- All players who died score 0 game points.
If all of the players die before ending the curse, or if they run out of time, they lose...
- The player who died last scores 1 game point. If several players died at the same time, they each get 1 game point.
- Players who died earlier score 0 game points.
Setup
- Give each player a black die to represent health. In a 1 player game, start with your full 6 health. In larger games, each player has starting health as indicated in the Doom Table. Each player's maximum health is always 6.
- Give each player 1 fight and 1 flee decision card.
- Place the foyer tile face up in the center of the table, with the black pawn on it.
- Shuffle the other 7 indoor tiles and place them face down in a stack. You'll be using these tiles first, as you explore the house.
- Set aside the Patio tile. Shuffle the other 7 outdoor tiles, and place them face down in a separate stack. Put the Patio tile on top, so that it will be the first one drawn. You'll use these tiles later, once you start exploring the yard.
- Put the Group Leader card into the black card stand, and give it to the tallest player. Put the Cursed Totem card into the red card stand, but set it aside for now.
- Put the red glass stone at 9pm on the Doom Track. Stack the 4 black fuel chips on the playmat.
Group Leader
The players move around the house and yard as a group, as indicated by the black pawn. The group leader is a rotating role -- the current leader makes all decisions for the group outside of combat. After each turn, the role of group leader passes clockwise (left), skipping dead players.
The group leader picks one task for the group to spend the turn doing:
- cower: Each living player gains 1 health. The top event card is discarded for no effect. No player can ever have more than 6 health.
- explore: Move to an adjacent tile or move to a blank spot and lay down a new tile. Either way, resolve an event (see Resolving an Event).
- room action: If the current room provides a special action, the leader can opt to spend the entire turn performing that action (see Appendix: Special Tiles). Room actions are not applied automatically as you enter the room -- they require an extra turn by the next leader to trigger the room effect.
Exploring
Choose a direction to exit the current tile. If there is no tile there, draw a tile from the appropriate stack and put it there. Orient the new tile however you wish, so long as it does not block the way you came into the tile.
Inside, you can only walk through doors, and you always discover more indoor tiles. Outside, you cannot walk through hedges, and you always discover more outdoor tiles.
To get from the inside to the outside, you must find the Dining Room. If you are in the dining room, then you can break through the window to discover an outdoor tile. The first outdoor tile will always be the Patio. When the window is first broken, the group leader picks someone to take 1 damage. Ouch.
If you have not yet found the Evil Temple and recovered the Cursed Totem, you probably don't want to go outside yet...
After moving, always resolve an event (see Resolving an Event), whether you explored, backtracked, or broke the dining room window.
Zombie Doors
Sometimes after placing some of the tiles, there won't be any exits, and it won't be possible to put down all of the house tiles. As long as there are house tiles remaining and nowhere to place them, the group leader can choose to spend the turn bashing down a wall. He does so with the help of someone else's head.
To bash down a wall: (1) Select a wall in the current room that has a blank space on the other side. (2) Choose a player to take 1 damage. (3) Create a permanent door through the chosen wall. (4) Move the group through the new door, placing a new house tile and resolving an event as normal.
Resolving an Event
To resolve an event, discard the top card of the event deck. Obey the instructions on the event card for the current time (as recorded on the Doom Track).
If the event deck runs out, reshuffle the discard pile. Every time you do this, advance the red glass stone by 1 hour on the Doom Track.
There are 4 types of events: blessing, curse, item, and zombie encounters....
Blessing
Each living player gains 1 health. No one can go above 6 health.
Curse
Each living player loses 1 health. If your group has found the cursed totem, then only the player holding the totem is harmed by the curse.
If your health drops to 0, you die and are out of the game -- pick a living player to get all your items (including the cursed totem, if you had it).
Item
When you sense an item, the group leader decides between 2 options:
(a) Do nothing -- get no item, but waste no time.
(b) Search for an item. Discard another card from the top of the event deck -- ignore everything it says except for the item at the bottom -- take a copy of that item card, and give it to the group leader.
For example, it's 11pm and you draw...
| Rake | Chain Saw |
|---|---|
| YOU SLIP in a pool of blood and slime... | YOU SMELL the gentle odor of rotting flesh... |
| 9:00 3+X Melting ZOMBIES — Is that gum on my shoe? | 9:00 CURSE - lose 1 health — You vomit. A lot. |
| 10:00 CURSE - lose 1 health — The liquid burns your flesh! | 10:00 You sense a bloody ITEM — Group leader may discard another event to find the item pictured there. |
| 11:00 You sense a slimy ITEM — Leader may discard event to find item pictured there. | 11:00 2+X Skeletal ZOMBIES — Do I look fat in this flesh? |
| 12:00 TOO LATE... | 12:00 TOO LATE... |
(Item card pictured with the example: Seth's Splat-O-Matic All-Purpose Chain Saw -- +3 when fueled.)
If you find an item that your group already has, then the group leader instead chooses any one unclaimed item.
When you discover the Chain Saw or the Gasoline, put 2 black poker chips on it to represent fuel. Keep these cards even if you use up all their fuel.
At any time, players can give away items to willing recipients.
Zombie Encounter
You are attacked by the specified number of zombies, plus extra Zombies as indicated by the Doom Table. Dead players still count for the purposes of reading the Doom Table.
Each player secretly chooses one of their decision cards -- "fight" or "flee". Choices are all revealed simultaneously.
- If everyone fled, everyone loses 1 health. The group moves to an adjacent face-up tile, as decided by the group leader.
- If anyone fights, everyone who fled gains 1 health. The group remains where it was, even if all the fighters die!
- If anyone fights, count up the total combat value of all the fighters. In clockwise order from the leader, each fighting player declares which items they are using. Each fighter has a base combat of 1, plus any bonuses provided by their weapons. You may use any number of items.
Players who fled do not participate in combat -- they never take damage and do not contribute to the group's combat score. The exception is that a player with the golf club who flees still contributes 1 point to the group's combat rating.
Compare the group's combat value to the number of zombies.
# Zombies - Group's Combat = Damage
If the damage is 0 or less, then nothing happens. You never gain health from combat.
If the damage is 1 or higher, divide the damage as evenly as possible amongst the players. If it does not divide evenly, the group leader decides who takes more and who takes less, but it must still be divided as evenly as possible. It is ok to assign more damage to a player than her current health.
For example, suppose a group of 4 players takes 6 damage. Two players will take 1 damage each and 2 players will take 2 damage each -- at the leader's discretion.
If your health drops to 0 or less, you die and are out of the game. Pick a living player to get all your items.
Appendix: Special Tiles
Evil Temple -- The group leader can decide to spend the entire turn attempting to find the cursed totem. Resolve an event. If it is a zombie encounter and the group flees or if all fighting players die, then nothing happens -- If some players survive by fleeing while other fight and die, then the group doesn't get the totem. If any fighting player survives, or if the event is not a zombie encounter, then you have found the cursed totem! The leader picks someone to get the cursed totem card. From this point on, only the bearer of the totem is harmed by curses -- everyone else is safe. At any time, the totem can be given away to a willing recipient. If the totem bearer dies, she picks any surviving player to get the totem along with all of her items.
Graveyard -- If anyone has the Cursed Totem, the leader can spend the entire turn attempting to bury the totem. Resolve an event. If it is a zombie encounter and the group flees or if all fighting players die, then nothing happens. If any fighting player survives, or if the event is not a zombie encounter, then you have buried the totem. If either of the Evil Etching tiles (Bathroom / Gazebo) is face up on the table, then you win! Otherwise, discard the totem card and go looking for an etching.
Dining Room -- The group leader can decide to move the group through the window, indicated by the white arrow. The first time the group moves through the window each game, the leader picks 1 player to take 1 damage for breaking the glass. After breaking the glass, you still need to resolve an event, as part of moving to a new tile. The first tile discovered outside the window is always the Patio.
Storage Closet / Garage -- The group leader may decide to spend the entire turn searching for an item. Discard an event. The leader gets the item shown on that card, but the card is otherwise ignored. Each of these rooms may only be used once per game.
Bathroom / Gazebo -- These rooms each display an evil etching. In order to win the game, you will have to discover at least one of these tiles. To discover an etching, it merely needs to be face up somewhere on the table -- you do not need to do anything special while in that room. As soon as the totem is buried in the graveyard and at least one etching is face up on the table, you win!
Kitchen / Garden -- If the group cowers at one of these locations, each player recovers 2 health instead of 1. No player can ever go over 6 health.
Appendix: Clarifications
The adjectives on event cards describing items, zombies, blessings, and curses have no game meaning. 4 flaming Zombies are no different than 4 crawling Zombies. A rusty item is no different than a pulsating item.
If you are standing on the graveyard and there is only one event left in the deck, then the leader must attempt to bury the totem. If there are only two events left, then the leader must cower or attempt to bury the totem. You may not intentionally throw the game at the last moment for a better relative point score.
Each player can wield all the weapons she has, adding together all of their combat values. Desperate times call for desperate measures.
You may drink or give away the Concoction at any time, even after discovering that you must lose health from an event or combat result.
If one player has the candelabra and another player has either oil or gasoline, then they can still team up to discard the oil/gas to automatically win a combat (as described on the candelabra card). However, this can only be done if both players chose to fight and both agree to ignite the oil/gas. Keep the candelabra in case you later find more flammables...